最新资讯
这里汇集了我们最具洞察力和吸引力的博客内容,并整齐地组织成系列,方便您阅读。每个系列都专注于一个独特的主题或话题,提供深入的探讨。- Senior Testing Developer Interview Questions: Advanced Topics and AnswersSenior testing developer interview questions on flaky tests, mocking, coverage, and E2E architecture, with worked answers and real, sourced examples throughout.标签作者GreatFrontEnd Team13 分钟阅读Sep 11, 2026

Senior testing developer interview questions do not ask whether you know what a unit test is. They ask whether you can make the judgment calls that keep a test suite fast, reliable, and worth trusting as a codebase grows, the kind of calls that only show up after you've owned a suite that started slow, flaky, or both. This guide covers 8 of those questions, each with a worked answer grounded in real, named sources rather than folklore.
What separates senior from mid-level testing candidates
A mid-level candidate can write a correct test. A senior candidate can explain why the suite is shaped the way it is, what tradeoff a specific testing tool or pattern makes, and how they'd fix a suite that has degraded, not just how they'd write one new test correctly. The questions below are deliberately architecture and judgment questions, not "how do you test a button click" questions, because that's where the actual seniority signal lives.
Question 1: Testing pyramid or testing trophy, and which do you actually apply?
How to approach it
Both models exist for the same reason: full end to end coverage is slow and expensive, so you need a strategy for where most of your tests should live. The traditional testing pyramid puts unit tests at the base, on the assumption that most tests should be small, fast, and isolated. Kent C. Dodds' testing trophy reshapes that model for frontend work specifically: static analysis (linting, TypeScript) at the base, then unit, then integration as the largest layer, then a thin layer of end to end tests at the top.
Dodds' argument for shifting weight toward integration tests is about the confidence a test actually buys you: "Integration tests strike a great balance on the trade-offs between confidence and speed/expense. This is why it's advisable to spend most (not all, mind you) of your effort there." His illustration of where unit-only coverage fails: "It doesn't matter if your component
<A />renders component<B />with propscanddif component<B />actually breaks if propeis not supplied." A unit test of<A />in isolation can pass while the actual integration is broken.A strong senior answer does not recite either shape as a fixed rule. It states when you'd deviate: a shared component library, where a component's prop contract is the actual product, benefits from more unit-level coverage of that contract than a typical product feature does, because the "integration" that matters for a library is every consuming team's usage, which you can't integration-test directly. A senior candidate should be able to name that counterexample unprompted, not just describe the trophy shape.
Question 2: What actually causes flaky tests, and how do you fix a suite that has become unreliable, not just individual flaky tests?
How to approach it
Individually diagnosing one flaky test is a debugging skill. Fixing a suite where flakiness has become normalized is an engineering-culture problem, and that distinction is what a senior answer should lead with. The Google Testing Blog's 2016 account of flaky tests at Google describes mitigation strategies worth naming specifically, and they have held up as standard practice since: marking known-flaky tests so a single flaky result doesn't block an unrelated change, automatically rerunning a failure to confirm it before treating it as real, and improving test isolation so one test's side effects can't leak into another.
The recurring root causes worth naming by type, not just "timing issues": fixed sleep-based waits instead of waiting on a real condition, shared mutable state between tests that pass in isolation but fail when run together, uncontrolled external dependencies (a real network call, a real clock, real randomness), environment drift between a developer's machine and CI, test order dependence, and race conditions around asynchronous UI state or element availability.
The senior-level answer to "how do you fix a suite" is a process, not a single tool: quarantine known offenders so they stop eroding trust in the whole suite, instrument failures well enough to tell real regressions from flakiness, and treat rising flakiness as a metric to track, not an occasional annoyance to work around case by case.
Question 3: How do you decide what not to test, specifically how do you avoid testing implementation details?
How to approach it
Testing Library's own guiding principle states this directly: "The more your tests resemble the way your software is used, the more confidence they can give you." Its query utilities are built to "deal with DOM nodes rather than component instances," specifically to discourage tests from coupling to a component's internal structure rather than its observable behavior.
The senior framing is about the actual cost this avoids: a test coupled to implementation can break on a refactor that changes internals while leaving user-facing behavior identical, and a suite that fails for reasons unrelated to real defects tends to train a team to distrust it and start skipping or deleting failing tests instead of investigating them. A concrete example worth giving: testing that a component's internal state variable changed, versus testing that the text the user would actually see updated on screen. The second survives a refactor that changes how that state is stored; the first does not.
Question 4: How do you mock network requests in tests, and what breaks when you mock at the wrong layer?
How to approach it
Mock Service Worker (MSW) takes a different approach than patching
fetchor an HTTP client library directly: it intercepts requests "at the network level," which its own docs describe as avoiding "patchingfetchand meddling with your application's integrity." Worth knowing that the mechanism differs by environment, since this is a detail an interviewer can probe: in the browser MSW uses the Service Worker API, while in Node, where most unit and integration tests actually run, it works by "patching native request-issuing modules, likehttpandhttps." Either way the interception happens at the network boundary rather than inside your application code, so the same mock definitions work across unit tests, Storybook, and even a live demo, what MSW's docs call treating mocking as "a standalone layer" rather than a per-test-file concern.Contrast that with
jest.mock('axios')-style module mocking: it works, and it's simpler to set up for a single test file, but it replaces the HTTP client's implementation. You can still assert that Axios was called with the expected URL, method, headers, or options, but the test is coupled to Axios's API and doesn't exercise the request through the same network boundary your application uses in production. MSW lets the application construct and issue the request normally, then intercepts it at a lower layer.Question 5: Playwright or Cypress for end to end tests at scale, and what's the real architectural difference?
How to approach it
This is a real architecture question, not a feature-checklist question, and the axis that actually matters is how each tool is built, not which one has more integrations. Playwright runs out of process and controls the browser over a protocol connection, which is how it supports Chromium, Firefox, and WebKit "with a single API" and can control multiple tabs, windows, and origins natively. Cypress's own documentation states the opposite tradeoff plainly, and it documents two separate limitations that are worth keeping distinct. On origins, Cypress commands normally operate within a single origin. When a test navigates to another origin, interactions on that origin need to be wrapped in
cy.origin(). On browser instances, Cypress "does not support controlling more than 1 open browser at a time." Multiple tabs are a third, different case: the docs note you can test multiple tabs using the@cypress/puppeteerplugin, so that one has a supported workaround while the single-browser-instance limit does not.Neither of these is a bug in Cypress, they're consequences of Cypress running inside the browser's own run loop, which is exactly what gives it its real-time, in-browser debugging experience. The senior-level answer names the actual tradeoff rather than declaring a winner. Playwright's architecture makes multiple pages, browser contexts, and simultaneous browser sessions natural, and its test runner provides parallel workers and sharding out of the box. Cypress also supports cross-browser testing and large-scale CI parallelization, but cross-origin and multi-tab workflows require more explicit handling, and Cypress cannot control more than one browser instance at a time. A team may still prefer Cypress for its in-browser debugging experience; the right choice depends on which of those capabilities the suite actually needs.
Question 6: What does code coverage actually tell you, and what's wrong with treating it as a target?
How to approach it
Martin Fowler's writing on test coverage draws a sharp line: "Test coverage is a useful tool for finding untested parts of a codebase. Test coverage is of little use as a numeric statement of how good your tests are." He quotes Brian Marick on why a mandated target changes behavior: "I expect a high level of coverage. Sometimes managers require one. There's a subtle difference." Fowler's own view on what healthy coverage looks like, without being a target: "If you are testing thoughtfully and well, I would expect a coverage percentage in the upper 80s or 90s," and he is explicitly suspicious of a mandated 100% figure.
The senior framing: coverage as a diagnostic, a map of what's untested, is genuinely useful. Coverage as a target a team is measured against tends to produce tests written to execute a line rather than tests written to verify behavior, since the metric can be satisfied without the underlying goal being met. A senior candidate should be able to describe what they'd actually look at instead: whether the team ships regressions in areas that were supposedly covered, and whether engineers feel safe changing code without fear, neither of which a coverage percentage alone can tell you.
Question 7: When is visual regression testing worth its cost, and what makes it flaky?
How to approach it
Visual regression tooling catches a category of bug that behavior-focused tests are poorly suited to detect: an unintended visual change where the underlying markup and logic are technically correct, so assertions about behavior still pass. The cost is real too. Font rendering, anti-aliasing, and animation timing can all differ subtly between a developer's machine and a CI runner, which is why teams running visual regression tests typically pin a specific browser, operating system, and font set for that layer specifically, rather than running it wherever the rest of the suite happens to run.
The conditional judgment a senior candidate should make explicit: visual regression testing earns its cost on design-system and component-library work, where an unintended visual change is the actual production risk being guarded against. It's a weaker investment for a full-page product test suite, where behavioral coverage of what the page does typically matters more than pixel-level fidelity, and the added CI time and false-positive rate cost more than the bugs it catches there.
Question 8: How do you keep CI feedback fast as an end to end suite grows?
How to approach it
This question tests whether a candidate treats CI runtime as an owned metric or an accident. Building on the flaky-test mitigation from Question 2, quarantining known-unreliable tests keeps them from blocking every run while they're being fixed. Beyond that, the standard, uncontroversial levers are sharding the suite across parallel workers so wall-clock time doesn't scale linearly with test count, and structuring the pipeline so the fast unit and integration layers run on every push while the slower end to end layer gates a merge or runs on a schedule instead.
The senior signal here isn't naming a specific vendor or tool. It's treating suite runtime itself as something the team is accountable for, the same way they'd be accountable for a production performance regression, rather than letting it silently grow until a 10 minute suite becomes a 45 minute one and nobody owns fixing it.
Common mistakes and red flags at the senior level
- Reciting the pyramid or trophy shape as dogma instead of explaining when you'd deviate from it. A senior engineer should have a real counterexample ready, not just the diagram.
- Treating 100% coverage as a goal rather than recognizing it as a warning sign of tests written to satisfy a metric rather than verify behavior.
- Not distinguishing a single flaky test from a systemically unreliable suite. These need different fixes, and conflating them is a sign of someone who has debugged individual tests but never owned suite health.
- Picking an E2E tool based on feature checklists rather than being able to explain the actual architectural tradeoff (in-browser versus out-of-process) that produces those feature differences.
- Testing implementation details (internal state, private methods) and calling it thorough coverage, when it actually makes the suite more fragile to refactors, not less.
Frequently asked questions
Do I need to have used every tool mentioned here (Playwright, Cypress, MSW) to answer well? No. What matters is being able to reason about the tradeoffs even for tools you haven't used day to day, since the architecture behind Playwright's multi-browser support or Cypress's single-origin default is documented and reasoned about even without hands-on experience with both.
Is unit testing becoming less important given the emphasis on integration tests in the testing trophy? No, and a senior answer should resist that framing. The trophy shifts where most effort goes, it doesn't remove unit tests, especially for isolated logic (a pure function, a reducer, a validation rule) where a unit test is the fastest and most precise way to verify correctness.
What's a realistic answer if I've never had to fix a genuinely flaky CI suite? Describe the mechanisms (isolation, controlling nondeterminism, quarantine, rerun-to-confirm) and reason through how you'd apply them, rather than inventing a specific incident you didn't actually experience. An interviewer testing for judgment can usually tell the difference between reasoned-through and rehearsed.
How to prepare
Work through GreatFrontEnd's frontend testing interview questions for freshers first if the fundamentals, what a unit versus integration versus end to end test actually is, aren't already solid, since a senior round assumes that level isn't in question. From there, the highest-value practice is picking a real suite you've worked in and being able to state, out loud, the actual tradeoff behind its shape, its tool choices, and its flaky-test history, since that's the register these questions are asked in. The architectural tradeoff reasoning here carries over directly to other senior-level questions in this series, GreatFrontEnd's guides on senior CSS, senior GraphQL, and senior Node.js interview questions apply the same judgment-first pattern in different technical domains.
Conclusion
Senior testing developer interview questions test whether you can reason about tradeoffs, not whether you can name a testing library. Explaining when the testing trophy's default shape doesn't apply, diagnosing systemic flakiness rather than one flaky test, knowing why MSW mocks at a different layer than
jest.mock, and treating coverage as a diagnostic rather than a target are the actual differentiators. What separates a senior answer from a mid-level one is having actually owned the consequences of these decisions, not just being able to describe them. - How Long Does It Take to Become a Frontend Developer?A realistic, data-backed timeline for how long to learn frontend development, comparing bootcamp and self-taught pace with a stage-by-stage time budget.标签作者GreatFrontEnd Team11 分钟阅读Sep 10, 2026

Search for this question and you will find answers ranging from a few weeks to two years, often on the same page. If you're trying to figure out how long to learn frontend development, the honest answer is that it depends on three variables, not one number: how many hours a week you can put in, whether you follow a structured program or teach yourself, and what "become a frontend developer" actually means to you, writing your first component or being ready to interview for a job.
This article does not invent a single answer, because the data does not support one. Instead, it lays out what the two most common paths actually cost in time, using real bootcamp outcomes data and a large self-taught learner survey, then breaks the work itself into stages so you can build your own estimate instead of trusting someone else's.
The real answer: it depends on pace, format, and your target
Three variables drive the estimate more than anything else.
Pace. Someone studying 20 hours a week will get through the same material several times faster than someone studying 5 hours a week around a full-time job. This sounds obvious, but most timeline claims you'll find online quietly assume a specific pace without saying so, which is why a "3 month" claim and an "8 month" claim can both be true for different people covering similar ground.
Format. A structured, paid program compresses the timeline by making every decision for you, what to learn, in what order, with a deadline attached. Self-directed learning removes that structure, which is cheaper but adds time spent figuring out what to learn next, correcting course when you pick the wrong resource, and staying motivated without an external deadline.
Target. "Frontend developer" is not one skill level. Being able to build a static page with HTML and CSS is a real milestone, reachable in weeks. Being able to build a production React application with TypeScript, tests, and accessible markup, the level most junior job postings actually expect, is a different and much larger milestone. Most of the wildly different timeline claims you'll see online are actually answering different versions of this question without saying so.
Bootcamp timelines: the fastest, structured path
Coding bootcamps sell speed, and the data backs that up, within limits. According to Course Report, which compiles outcomes data reported by participating bootcamp providers each year, the average bootcamp runs about 14 weeks, roughly three and a half months, though individual programs range from 6 to 28 weeks depending on depth and pacing.
The format matters as much as the headline number:
- Full-time immersive programs run 2 to 7 months elapsed, typically 40 or more hours a week.
- Part-time programs run 6 to 9 months elapsed, structured as 6 to 15 hours a week in class plus another 10 to 15 hours a week of outside work, closer to 20 to 30 hours a week total once you add it up.
One trend worth noting: bootcamp length has been growing, not shrinking. Course Report's own historical data shows the average program grew from just under 11 weeks in 2015 to just over 15 weeks in 2019. As the field matured, providers extended programs rather than compressing them further, which is a signal that the earlier, shorter timelines were probably too optimistic about what a beginner can absorb.
Treat Course Report's figures as self-reported survey data, not as an independently audited dataset. Its graduate outcomes surveys collect responses directly from bootcamp graduates, so the results still deserve the same read-with-context treatment as any self-reported industry survey.
Self-taught timelines: slower, free, and highly pace-dependent
Most aspiring frontend developers do not attend a bootcamp. One of the largest datasets on people learning to code outside traditional CS programs is freeCodeCamp's 2021 New Coder Survey, with more than 18,000 respondents. Two numbers from it matter here.
First, the median self-taught learner in that survey studies 8 hours a week. That is roughly a third of what a full-time bootcamp student puts in, which is the single biggest reason self-taught timelines run longer, not a difference in ability or resources.
Second, among respondents who had been coding for under 5 years, the median time they had already spent coding was 3 months, with an average of 9.5 months (the average is pulled higher by a smaller group who had been at it much longer). It's worth being precise about what this number does and does not say: it measures how long these learners had already been coding at the moment they took the survey, not a measured time to job readiness. A meaningful share of self-taught learners are still mid-journey at the 3 to 9 month mark, which is informative about pace even though it isn't a finish-line measurement.
The same survey found that at least 45% of respondents were already working in some capacity while learning, showing that a large share of learners are fitting this in around an existing job or other responsibilities, which is exactly why the 8 hour a week median matters more than any single "time to become a developer" headline.
A stage-by-stage time budget to learn frontend development
Rather than trust a single number from either path, it helps to break the actual work of learning frontend development into stages and estimate each one. GreatFrontEnd's roadmap for becoming a frontend developer lays out the order in detail; this section focuses on the time each stage tends to take, not the curriculum itself. Bootcamps sequence their own curricula in roughly this same order for a reason: fundamentals first, then a framework, then production skills, because each stage depends on the one before it holding up.
Stage 1: Web fundamentals. HTML as structure, CSS as a layout system (box model, flexbox, grid, responsive design), and JavaScript deep enough to build interactive pages (values, scope, closures, events, promises, fetch). This is the foundation everything else sits on, and rushing it tends to cost more time later, in the form of bugs and confusion that trace back to a shaky fundamental. GreatFrontEnd's JavaScript learning guide covers this stage in depth.
Stage 2: Building without a framework. A handful of small projects in plain HTML, CSS, and JavaScript, before reaching for React. This stage is often skipped, which tends to show up later as a developer who can use React but cannot explain what React is actually doing underneath it.
Stage 3: A framework, typically React, plus TypeScript. GreatFrontEnd's React learning guide and TypeScript learning guide cover this ground. This is usually the longest single stage for a self-taught learner, since it introduces a large surface area (components, state, hooks, a type system) on top of fundamentals that may still be settling in.
Stage 4: Production skills and a portfolio. Testing, accessibility, performance, and enough real projects to show a hiring manager actual working code, not just tutorial completions. This stage has no fixed length. It expands or contracts based on how much feedback you get and how honestly you assess whether a project is actually portfolio-quality or just finished.
A bootcamp compresses all four stages into its fixed schedule, with instructors and a cohort keeping pace consistent. Self-taught learners move through the same four stages at whatever pace their available hours allow, which is why the freeCodeCamp data above shows such a wide spread.
What the data doesn't tell you about learning frontend development: the job search
Every timeline discussed so far covers skill-building, not the job search itself. This research deliberately does not state a specific job-search-duration number. Several sources claim precise figures (a specific number of months, a specific application count), but none trace to a named, checkable study, they read as plausible-sounding numbers on marketing pages rather than actual research, which is exactly the kind of unsourced claim worth being skeptical of. What can be stated with a real source behind it: a Stanford Digital Economy Lab study, analyzing large-scale US payroll data, found that employment among workers aged 22 to 25 in highly AI-exposed occupations was roughly 19% below where it would have been if it had kept pace with similarly aged workers in less AI-exposed occupations. That is a real, sourced signal that the entry-level market has gotten harder, not a reason to skip learning frontend development, but a reason to expect the job search itself to be a separate and possibly longer stage than the skill-building timelines above.
So how long does it actually take?
Putting the pieces together: a full-time bootcamp path, for someone who can commit 40 or more hours a week for three to seven months, is the fastest structured route to junior-developer-level skills, though it comes at real financial cost and doesn't include the job search afterward. A part-time bootcamp, at 20 to 30 hours a week combined, runs 6 to 9 months for the same destination. Self-taught is harder to put a number on, and it's worth being clear that no study measured this directly. What you can do is the arithmetic. An average full-time bootcamp is roughly 14 weeks at 40 or more hours a week, which is somewhere around 560 hours of structured study. Covering that same ground at freeCodeCamp's median self-taught pace of 8 hours a week would take about 70 weeks, so well over a year. Treat that as a rough order of magnitude rather than a target: it assumes your self-directed hours are as well spent as a structured curriculum's, which is exactly the thing that varies most between learners, depending on how efficiently you sequence the four stages above and how much time you lose to trial and error.
None of these numbers is a promise. They are the best available real data on pace and format, which is a more useful starting point than a single invented number. The honest answer to how long to learn frontend development is a range shaped by your own hours per week, not a fixed date on a calendar. If you want a faster path than pure self-teaching without a bootcamp's cost, the highest-leverage move is treating stage 4, production skills and a real portfolio, with the same seriousness a bootcamp forces on you, since that stage is where self-taught timelines tend to expand the most.
A hybrid approach is also common in practice, though it wasn't the subject of a dedicated study found in this research: use free or low-cost self-taught resources for stages 1 through 3, then pay for a shorter, focused bootcamp or cohort program specifically for stage 4, production skills and portfolio review, where structured feedback matters most and self-teaching tends to stall. This isn't a finding from Course Report or freeCodeCamp's surveys, it's a reasonable inference from what each path is actually good at: self-teaching is cheap for content you can absorb alone, and a paid program earns its cost most clearly when you need a second pair of eyes on your work.
Frequently asked questions
Can I become a frontend developer in 3 months? Only at a fast, focused pace, close to full-time hours, and only if "become a frontend developer" means reaching junior-level fundamentals rather than a fully portfolio-ready, job-search-ready state. Course Report's data puts the average full-time bootcamp in the 2 to 7 month range for that level, so 3 months sits at the faster end but is not unusual for an intensive, full-time program.
Is self-taught slower than a bootcamp? Usually, mainly because of hours per week rather than any difference in what self-taught learners are capable of. freeCodeCamp's survey median of 8 hours a week for self-taught learners is roughly a third of a full-time bootcamp's pace, so the same material naturally takes proportionally longer.
Does the timeline include getting a job, or just learning the skills? The stage-by-stage estimates above cover skill-building only. The job search is a separate, highly variable stage, and this article deliberately avoids stating a specific duration for it since no credible, checkable source with an actual figure was found in this research.
What if I already know some HTML and CSS? Subtract time from stage 1 proportionally, but be honest about the gap between "I can write HTML and CSS" and "I understand the box model, the cascade, and responsive layout well enough to build a real interface." The second is closer to what stage 1 actually requires.
Does it matter what age I start at? Not in any way the data found here can speak to directly, but it's worth knowing that freeCodeCamp's 2021 survey put the median age of self-taught new coders at 25, and 45% of respondents were already working in some capacity while learning. Learners with existing jobs and responsibilities are not an edge case in this population, which is part of why the realistic weekly-hours figure sits at 8 rather than something closer to full-time.
Is a computer science degree required first? No path described in this article assumes one. Neither self-taught learning nor a coding bootcamp requires a computer science degree, and the stage-by-stage skills above, HTML, CSS, JavaScript, a framework, and production skills, can all be learned without one.
- Senior Redux Developer Interview Questions: Advanced Topics and AnswersSenior Redux developer interview questions and answers: Redux Toolkit internals, memoized selectors, RTK Query trade-offs, and when Redux is overkill标签作者GreatFrontEnd Team14 分钟阅读Sep 9, 2026

Senior Redux developer interview questions rarely test whether you can write an action creator or explain what a reducer is. At senior level, the questions shift to internals and judgment: how Redux Toolkit's "mutating" syntax actually produces immutable state, how memoized selectors avoid unnecessary re-renders, when RTK Query is the right data-fetching layer and when it is not, and when Redux itself is the wrong tool for the state you are managing. The questions below focus on that layer, with a worked answer for each.
What separates senior from mid-level Redux candidates
A mid-level candidate can write a slice, dispatch an action, and connect a component to the store. A senior candidate is expected to reason about what is actually happening underneath Redux Toolkit's ergonomic API, make a real call on RTK Query versus a separate data-fetching library, diagnose why a connected component keeps re-rendering, and know when reaching for Redux at all is the wrong decision for a given piece of state.
Question 1: What specific bugs does hand-written Redux invite that Redux Toolkit is designed to eliminate?
How to approach it
Naming "boilerplate" is the mid-level version of this answer. The senior-level version names the actual bug classes. A hand-written reducer that does
state.user.address.city = action.payloadinstead of returning a new object mutates the existing state. That can prevent reference-based change detection from seeing that anything changed, causing stale UI, and it can corrupt historical state used for Redux DevTools time-travel debugging. Redux Toolkit'sconfigureStoreincludes development-time immutability checks that can catch these mutations, but relying on those checks is not a substitute for writing reducers correctly. Hand-written action-type string literals ('user/UPDATE_ADDRESS') are also easy to mistype when the dispatching code and reducer refer to them independently. TypeScript or shared constants can reduce that risk, butcreateSliceavoids the manual synchronization entirely by generating matching action creators and action type strings from the slice definition.Redux Toolkit's
createSlicecloses both gaps structurally: it bakes in Immer so "mutating" syntax produces a real, correctly immutable update, and it derives the action type from the slice name and reducer key, removing the manual string entirely. The official Redux documentation is explicit that this is now how to use Redux, not an optional convenience layer over a more fundamental hand-written approach. A candidate who still writes a hand-rolled reducer for a take-home or whiteboard exercise, without at least naming why an interviewer might expect Redux Toolkit instead, is signaling outdated knowledge of the ecosystem rather than fundamentals mastery.Question 2: How does
createSlicelet you write "mutating" code that stays immutable?How to approach it
createSlicewraps every reducer function with Immer, a library the Redux Toolkit documentation describes as a non-negotiable part of how it works, not an optional add-on.Inside aconst todosSlice = createSlice({name: 'todos',initialState: { items: [] },reducers: {addTodo(state, action) {// looks like a direct mutation, Immer makes it produce a new objectstate.items.push({ id: action.payload.id, text: action.payload.text, done: false });},toggleTodo(state, action) {const todo = state.items.find(t => t.id === action.payload.id);if (todo) todo.done = !todo.done;},},});createSlicereducer,state.items.push(newItem)looks like a direct mutation, but Immer intercepts it: it wraps the incoming state in a Proxy, records every operation performed against that proxy, and produces a new, structurally-shared immutable state object as the actual return value. The original state object is never touched.The trap in this question is a candidate who explains what Immer does without connecting it to why it matters: Redux's core guarantee, that reducers are pure functions and state is never mutated in place, is what makes time-travel debugging,
React.memo, and reference-equality checks in selectors all work correctly. Immer is what lets you get that guarantee while writing code that reads like ordinary imperative JavaScript instead of manual spread operators three levels deep.Question 3: How do memoized selectors work, and what changed in the current version of Reselect?
How to approach it
A selector built with
createSelectorfrom Reselect only recomputes its result when at least one of its input selectors returns a new value, comparing by reference:const selectItems = state => state.todos.items;const selectShowDone = state => state.todos.showDone;const selectVisibleTodos = createSelector([selectItems, selectShowDone],(items, showDone) => items.filter(todo => showDone || !todo.done),);selectVisibleTodosonly re-runs thefilterwhenitemsorshowDoneactually change, reference-wise, not on every render. This matters because deriving a filtered or sorted list directly inside a component on every render produces a new array reference every time, which defeats reference-equality checks further down the tree and can force unnecessary re-renders in child components even when the underlying data has not changed.Reselect 5 changed the default memoization strategy from the old single-entry
lruMemoizebehavior toweakMapMemoize. The practical difference is important when one selector instance is called with many different arguments, such as a selector reused across a list with different item IDs: the old default cache size of one would constantly evict previous results and recompute when arguments alternated.weakMapMemoizebuilds a cache tree keyed by argument identity, using WeakMap entries for object and function arguments and regular Map entries for primitive arguments. This gives it an effectively large cache without a fixedmaxSize, although selectors called with an unbounded number of distinct primitive values can also grow that cache over time. A senior answer should understand both why the new default avoids single-entry cache thrashing and the memory trade-off that comes with it.Question 4: When do you reach for RTK Query versus a separate data-fetching library or a saga?
How to approach it
RTK Query is the Redux team's recommended default for data fetching and caching in Redux applications. It handles request caching, subscription deduplication, cache lifetimes, invalidation through tags, and other server-state concerns inside Redux; when using its React integration, it can also generate hooks for each endpoint. For other async logic, thunks remain appropriate for moderate async work or logic that needs
dispatchandgetState, while Redux Toolkit's listener middleware is the current recommended approach for reacting to actions or state changes and implementing longer-running async workflows. Redux-Saga is still usable, but the Redux documentation now recommends reaching for it only when listener middleware does not adequately cover the use case.RTK Query is not the only reasonable server-state solution. If an application is not using Redux, introducing Redux solely to use RTK Query usually adds unnecessary infrastructure, and a dedicated server-state library such as TanStack Query may be the more direct choice. In an existing Redux application, RTK Query is the Redux team's recommended default for data fetching, but an application that already uses another server-state library does not need to migrate simply because Redux is also present. The senior-level distinction is separating server-state caching from client-state management and choosing the tool based on the application's existing architecture and requirements.
Question 5: Why does normalizing state shape matter, and when do you skip it?
How to approach it
Normalizing means storing entities in a flat, keyed structure, commonly
{ ids: [], entities: {} }, rather than nesting related data inside arrays of objects. The concrete problem it solves: if a post object appears both in a list view and a detail view, and it is stored as a full nested copy in two different places in the store, updating one copy does not update the other, and now the UI can show two different versions of the same post depending on which state branch a component reads from.A normalized shape keeps exactly one copy of each entity, referenced by ID from wherever it is needed, so an update to that entity is visible everywhere it is used. Redux Toolkit's
createEntityAdaptergenerates much of the boilerplate for this pattern: an{ ids, entities }state shape, reusable CRUD reducers, and memoized selectors. If you provide asortComparer, the adapter also keeps theidsarray sorted according to that comparison; without one, no particular ordering is guaranteed. The trade-off worth naming: normalization adds a layer of indirection, components now select an ID and then look up the entity, which is real overhead for state that is genuinely never duplicated or updated from multiple places, a small, single-owner settings object does not need this treatment.Question 6: How does the Redux middleware chain actually work?
How to approach it
Middleware sits between
dispatchand the reducer, and each middleware is a function that receives the store'sdispatchandgetState, and returns a function that wraps the next middleware in the chain, which itself wraps a function that receives the action:Callingconst loggerMiddleware = storeAPI => next => action => {console.log('dispatching', action);const result = next(action);console.log('next state', storeAPI.getState());return result;};next(action)passes the current action to the next middleware in the chain and eventually toward the reducer. CallingstoreAPI.dispatch(action)starts a dispatch from the beginning of the middleware chain again, which is useful when middleware needs to dispatch a new action of its own. Redux-thunk works because the thunk middleware itself sits in that chain: when it receives a function instead of a normal action object, it intercepts that value and invokes it withdispatchandgetStaterather than forwarding it to the reducer.The concrete case for writing custom middleware is cross-cutting behavior that needs to see every action: logging every dispatched action and the resulting state diff, sending specific actions to an analytics pipeline, or persisting specific slices of state to storage after certain actions complete. A senior answer can describe the
store => next => action => {}shape from memory and explain whynext(action)anddispatch(action)inside a middleware are not interchangeable, not just that middleware "runs code around dispatch."Question 7: When is Redux the wrong choice, and what would you reach for instead?
How to approach it
Redux earns its overhead when state is genuinely shared across many distant parts of the component tree, needs to be inspected or time-traveled during debugging, or benefits from a single, centralized source of truth with strict update rules. For state that is local to a small subtree, form input state, a toggle, a single component's loading flag, React's own
useStateoruseReduceris simpler and adds no dependency.For state that sits between those two extremes, shared across a few components but not the whole app, lighter libraries such as Zustand or Jotai have grown as commonly cited alternatives specifically because they need less setup ceremony than a full Redux store. The State of React 2025 survey reports Redux Toolkit still used by 54% of respondents, and describes Zustand as "gaining ground fast" against Redux's long-standing position as the most widespread state management solution, a signal that Redux is not losing its existing usage so much as newer projects are increasingly choosing something lighter for state that does not need Redux's full feature set. The senior-level answer states the actual criteria, cross-tree sharing, devtools and time-travel needs, team familiarity, rather than treating Redux as either mandatory or obsolete.
Question 8: How do you diagnose and fix a Redux-connected component re-rendering too often?
How to approach it
The most common cause is a
useSelectorcall that returns a new object or array reference on every render:An inline// re-renders on every dispatch, filter() returns a new array reference each timeconst visibleTodos = useSelector(state => state.todos.items.filter(t => !t.done));// fixed: memoized selector only returns a new reference when items or done state changesconst visibleTodos = useSelector(selectVisibleTodos);state => state.items.filter(...)recomputes and returns a new reference every time regardless of whether the underlying data changed, anduseSelector's default reference-equality check treats every one of those as a change, forcing a re-render. The fix is either selecting primitive values individually in separateuseSelectorcalls, or wrapping the derived selector increateSelector, as shown in Question 3, so it only returns a new reference when its actual inputs change.In practice, use React DevTools' Profiler to identify which components are actually re-rendering and how often, then use Redux DevTools to correlate those renders with dispatched actions and state changes. React-Redux also performs development-time selector stability checks and can warn when a selector returns a different reference for the same inputs. A senior diagnostic path is therefore: confirm the unnecessary render, inspect the selector result and its references, correlate it with the Redux action and state change, and then memoize or narrow the selection only where needed.
Common mistakes and red flags at the senior level
Writing a hand-rolled reducer without Immer or
createSlicefor a fresh take-home, without at least naming why the interviewer might expect Redux Toolkit instead, is a stale-knowledge signal. Explaining Immer's Proxy mechanism without connecting it to why immutability matters for Redux specifically is the shallow version of that answer. Reaching for RTK Query automatically just because a project already uses Redux, without asking whether server-state caching is actually the concern, and treating Redux as either mandatory for all shared state or dismissing it as obsolete, are both red flags at this level.Frequently asked questions
Do I need to know Redux-Saga for a senior Redux interview? It helps to recognize the pattern and understand why existing applications use it for complex async orchestration and cancellation. For modern Redux code, RTK Query is the recommended default for data fetching, thunks handle moderate async logic, and listener middleware is the recommended starting point for reactive or long-running workflows. A senior candidate should therefore know what sagas solve and when an existing architecture may still justify them, rather than treating saga as the default modern async solution.
Is Redux Toolkit the same thing as Redux? Redux Toolkit is the officially recommended way to write Redux logic, built on top of the Redux core library. When an interviewer asks about "Redux" at senior level, the expected frame of reference is Redux Toolkit, not the older hand-written pattern.
Is Redux being replaced by Zustand? No single library has replaced Redux outright. Reported usage shows lighter alternatives growing faster among newer projects, while Redux Toolkit's own usage has stayed roughly stable, which reads more as a diversifying market for state management than one library displacing another.
How current does my Reselect knowledge need to be? Knowing that
weakMapMemoizeis the current default, and specifically why it fixes the shared-selector-across-a-list problem, matters more than memorizing every option Reselect'screateSelectornow accepts.How to prepare
Work through the mechanics above against a real store: build a slice with
createSlice, watch what Immer produces via Redux DevTools' state diff, and deliberately write an inlineuseSelectorthat returns a new array each render to see the extra re-renders happen, then fix it withcreateSelector. Practicing the diagnostic questions, why is this component re-rendering, when would you normalize this data, by actually causing and fixing the problem is worth more than reading about the mechanism, since a senior round is more likely to hand you a slow component and ask you to find the cause than to ask you to define memoization.If you are also preparing broader state-management or data-layer rounds, GreatFrontEnd's GraphQL interview questions guide covers the equivalent caching and normalization reasoning on the server-data side, and the trade-off judgment carries over even though the specific APIs differ.
Conclusion
Senior Redux developer interview questions test whether you understand what Redux Toolkit and its ecosystem are actually doing, not whether you can write a reducer by hand. Immer's role in
createSlice, memoized selectors and what changed in Reselect, RTK Query versus a dedicated fetching library, and the judgment to know when Redux is not the right tool are the actual differentiators. What separates a senior answer is connecting each mechanism to a concrete re-render or state-consistency problem it solves, rather than describing it as an abstract feature. - Senior REST API Developer Interview Questions: Advanced Topics and AnswersSenior REST API developer interview questions and answers: idempotency keys, versioning trade-offs, RFC 9457 errors, rate limiting, and real API design decisions.标签作者GreatFrontEnd Team14 分钟阅读Sep 8, 2026
Senior REST API developer interview questions rarely test whether you can name the HTTP verbs or explain what a status code is. At senior level, the questions shift to design judgment: how you version an API without breaking every existing client, what actually makes a request safe to retry, how you structure an error response so a caller can act on it programmatically, and when REST is the wrong choice entirely. The questions below focus on that design-judgment layer, with a worked answer for each.
What separates senior from mid-level REST API candidates
A mid-level candidate can build CRUD endpoints, return the right status codes, and explain what idempotent means in the dictionary sense. A senior candidate is expected to make real trade-off calls, URI versioning versus header versioning, cursor pagination versus offset, when to add HATEOAS versus when it is not worth the complexity, and to know which parts of "REST best practice" are settled convention versus still-evolving standards.
Question 1: How do you make a POST request safe to retry after a network failure?
How to approach it
The scenario: a client sends a payment or order-creation request, the server processes it successfully, but the network drops before the response reaches the client. The client, seeing no response, retries. Without protection, that retry creates a second charge or a second order.
This is where idempotency actually matters in production, not as a dictionary definition. PUT and DELETE are idempotent by the HTTP spec: calling them multiple times with the same input produces the same end state as calling them once. POST is not, by definition, each call is generally treated as creating a new resource or triggering a new action. PATCH's idempotency depends entirely on how it is implemented, a PATCH that sets a field to an absolute value is idempotent, one that increments a counter is not. Knowing this classification is table stakes. The senior-level answer is what you do about the POST case specifically: the established pattern, popularized by Stripe, is an idempotency key: the client generates a unique key per logical operation and sends it in a header, the server stores the key alongside the result of the first request once processing begins, and subsequent retries with the same key return that stored result instead of executing the operation again. Depending on the implementation, this can include failed responses as well as successful ones, which prevents a retry from accidentally performing the side effect twice.
If the network drops the response and the client retries with the samePOST /v1/charges HTTP/1.1Host: api.example.comIdempotency-Key: 8f14e45f-ceea-4d7a-9c3f-2a4b1e3d5c6aContent-Type: application/json{ "amount": 2000, "currency": "usd", "customer": "cus_9s6XKzkNRiz8i3" }Idempotency-Key, the server recognizes the key, skips reprocessing, and returns the original response instead of creating a second charge. This pattern has also been discussed by the IETF through draft-ietf-httpapi-idempotency-key-header, which proposed a standardized Idempotency-Key header field. As of this guide's publication, that Internet-Draft has expired without becoming a finalized RFC, so candidates should treat idempotency keys as an established industry pattern rather than a standardized HTTP header defined by a final RFC.Question 2: How do you version a REST API, and what are the real trade-offs?
How to approach it
There is no single correct answer here, which is exactly why it is a senior-level question. URI versioning (
/v1/users,/v2/users) remains a common pragmatic choice for public APIs because it is simple to route, easy for a client to pin, and visible directly in the URL. Twilio is one example of an API that includes version information in its request paths, while GitHub takes a different approach and versions its REST API through theX-GitHub-Api-Versionrequest header. Header or media-type versioning (anAcceptheader naming a version) keeps URLs stable but is harder for a client to discover and test from a browser, and adds a routing layer that has to inspect headers rather than the path. Stripe uses date-based API versions, with accounts pinned to a particular API version unless a request explicitly overrides it. Its current versioning model also groups versions into named major releases, allowing backwards-compatible changes within a release while reserving breaking changes for new major releases.A fourth option, increasingly discussed for internal APIs, is not versioning at all: designing every change to be strictly additive (new optional fields, new endpoints) so existing clients never break, and reserving versioning for genuinely breaking changes. The senior-level answer names the trade-off explicitly: URI versioning is simplest to reason about but forces a visible major-version jump for every breaking change, header versioning is more flexible but less discoverable, and an additive-only strategy minimizes version churn but requires real discipline about what counts as a breaking change.
Question 3: Why do almost no production APIs implement HATEOAS despite it being part of REST's original definition?
How to approach it
HATEOAS, hypermedia as the engine of application state, is the top level of the Richardson Maturity Model: a response includes links describing what the client can do next, so the client does not need to hardcode URL structures. It is level 3 of 3, sitting above using proper HTTP verbs (level 2) and having distinct resource URIs at all (level 1). Being able to define it is the mid-level version of this answer.
The senior-level answer is naming the actual cost that makes teams skip it: adding hypermedia links generally increases payload size and client complexity without a proportional benefit for most internal or mobile-first APIs, where the client and server are usually deployed and versioned together anyway, so the coupling HATEOAS is designed to avoid was never really a problem for them. HATEOAS is asked about specifically to check whether a candidate understands REST's original design intent, and a strong answer states both halves: what it actually is and why most real systems do not implement it, rather than either dismissing it as irrelevant trivia or treating it as something every REST API should have.
Question 4: How should a REST API structure its error responses?
How to approach it
Returning a bare string message or an inconsistent shape per endpoint is the most common mistake here. The current standard is RFC 9457, "Problem Details for HTTP APIs," which supersedes RFC 7807. It defines a common set of members that problem responses can use:
typeidentifies the problem type,titlegives a short human-readable summary,statuscan repeat the HTTP status code,detaildescribes this particular occurrence, andinstancecan identify the specific problem occurrence. These members are not all mandatory; for example, omittingtypegives it the default valueabout:blank.The response uses the{"type": "https://api.example.com/errors/insufficient-funds","title": "Insufficient Funds","status": 400,"detail": "Account balance of 30 is not sufficient to cover the charge of 50.","instance": "/v1/charges/ch_1a2b3c","balance": 30,"requested": 50}application/problem+jsonmedia type so clients know that the body follows the Problem Details format. The HTTP status code still carries the response's HTTP semantics, while the problem document provides structured, machine-readable details about the error. Note the extrabalanceandrequestedfields, RFC 9457 explicitly allows extension members beyond the core five, which is what makes this format useful for a specific error rather than just a generic wrapper.The senior-level point is not memorizing the field names, it is explaining why a structured, machine-parseable error format matters: a client integrating against the API can branch on
typeprogrammatically instead of pattern-matching a message string that might change wording between releases.Question 5: How do you implement rate limiting for a public API, and what does the client see?
How to approach it
The mechanism most commonly discussed is the token bucket: each client has a bucket that refills at a fixed rate, and a request is allowed if a token is available, rejected otherwise. A sliding window log or counter is the alternative, trading a small amount of memory overhead for smoother enforcement at the boundary between windows, since a fixed window can allow a burst of nearly double the limit right at the window edge.
On the wire, a rate-limited request returns
429 Too Many Requestswith aRetry-Afterheader telling the client how long to wait, a stable, long-established convention:TheHTTP/1.1 429 Too Many RequestsRetry-After: 30RateLimit-Policy: "default";q=100;w=60RateLimit: "default";r=0;t=30Content-Type: application/problem+json{ "type": "https://api.example.com/errors/rate-limited", "title": "Too Many Requests", "status": 429 }RateLimitandRateLimit-Policyheaders above come from the active IETF draft-ietf-httpapi-ratelimit-headers, which is working toward standardized rate-limit metadata that clients can use to understand quota policy and remaining capacity. It is still an Internet-Draft rather than a finalized RFC as of this guide's publication. This differs from the proposed Idempotency-Key specification discussed earlier, whose Internet-Draft has expired.Question 6: How do you handle authentication and authorization in a REST API?
How to approach it
For a public or third-party-facing API, OAuth 2.0 is the framework most commonly reached for, and the senior-level distinction is knowing which grant type fits which client. The authorization code flow (with PKCE for public clients like mobile or single-page apps) is for a user delegating access to a third-party application. The client credentials flow is for service-to-service access with no user in the loop. Naming the resource owner password credentials grant as a good modern choice is a red flag. It requires the client to handle the user's credentials directly, and current OAuth security guidance says the grant must not be used. Existing legacy systems may still contain it, but it should not be selected when designing a new OAuth integration.
The second half of this question is how token state is validated. A self-contained token such as a signed JWT can often be validated locally by the resource server without contacting the authorization server on every request, which reduces lookup overhead but makes immediate revocation harder unless additional server-side state or checks are introduced. Opaque tokens are commonly validated against centralized token state or through token introspection, which makes revocation easier to enforce but can introduce lookup overhead, although those results may also be cached. A senior answer states this trade-off rather than treating JWT as a strictly superior default, and separately addresses refresh token rotation: issuing a new refresh token on every use and invalidating the previous one, so reuse of an older token can signal theft and trigger revocation of the token family.
Question 7: How do you design pagination for a large, growing REST resource?
How to approach it
Offset-based pagination (
?page=3&limit=20or?offset=40&limit=20) is simple but breaks under concurrent writes, an item inserted before the current offset shifts every subsequent page, producing duplicates or skipped items depending on the direction of the shift. Cursor-based pagination can avoid this offset-shift problem when the cursor is based on a stable, deterministic ordering. Instead of paging from a numeric position that moves as rows are inserted or removed, the next request continues relative to a specific item or ordering value, at the cost of not naturally supporting a direct jump to an arbitrary page number.A cursor-based response typically returns the cursor for the next page alongside the data, rather than expecting the client to compute it:
For discoverability, the{"data": [{ "id": "post_881" }, { "id": "post_880" }],"next_cursor": "eyJpZCI6InBvc3RfODgwIn0="}Linkheader defined in RFC 8288 lets a response advertiserel="next"andrel="prev"URLs directly:so a well-behaved client does not need to construct pagination URLs by hand, it follows the link the server provided. The senior-level answer picks based on the actual access pattern: a frequently updated feed is usually better served by cursor or keyset pagination when stable traversal matters, while a rarely changing, admin-facing table where jumping to page 7 genuinely matters can reasonably use offset.Link: <https://api.example.com/posts?cursor=eyJpZCI6InBvc3RfODgwIn0%3D>; rel="next"Question 8: When would you choose REST over GraphQL or gRPC for a new API?
How to approach it
Current guidance across API design teams has converged on a hybrid-by-default answer rather than declaring one winner. REST remains the pragmatic default for public and partner-facing APIs, its tooling, caching behavior, and the fact that nearly every developer already understands HTTP semantics make it the lowest-friction choice for external consumers who do not control both ends of the integration. GraphQL earns its complexity as an aggregation layer in front of multiple services when a frontend genuinely needs to shape its own queries and avoid over-fetching or under-fetching across many resource types. gRPC is often a strong choice for internal service-to-service calls where both ends are controlled, thanks to schema-first Protobuf contracts, generated clients, compact binary serialization, and streaming support. Native gRPC is not directly exposed through standard browser networking APIs in the same way as it is to backend clients, although browser applications can communicate with gRPC services through gRPC-Web or similar gateways.
The trap in this question is presenting it as one-size-fits-all. A senior answer names the actual constraint each format solves and explains why a system frequently runs all three at different layers rather than standardizing on one.
Common mistakes and red flags at the senior level
Presenting HATEOAS as something every REST API should implement, without weighing the actual payload and complexity cost, is a common miss. Citing either proposal as a finalized RFC is a precision mistake: the RateLimit headers are still being developed through an active IETF Internet-Draft, while the proposed Idempotency-Key Internet-Draft has expired without becoming a final RFC. Treating JWT as strictly better than an opaque token without naming the revocation trade-off, and recommending the OAuth resource owner password grant for a normal third-party integration, are both red flags at this level.
Frequently asked questions
Is RFC 7807 still the correct RFC to cite for API error format? RFC 7807 has been superseded by RFC 9457, which carries the same core field structure. Citing the newer number is the more current, precise answer, though the content is materially unchanged.
Do I need to implement idempotency keys for every POST endpoint? No. It matters most for operations with a real cost of duplication, payments, order creation, anything triggering a side effect that should not happen twice. A read-only or freely repeatable POST does not need one.
Is GraphQL replacing REST for public APIs? No, and current guidance treats this as a settled non-question. REST remains the dominant choice for public, partner-facing APIs specifically because of its caching and tooling ecosystem; GraphQL is more commonly an internal aggregation layer than a public API replacement.
How current does my knowledge of these IETF efforts need to be for an interview? Knowing their current status matters more than memorizing draft revision numbers: the standardized RateLimit headers are still being developed through an active IETF Internet-Draft, while the proposed Idempotency-Key draft has expired without becoming a final RFC. The idempotency-key pattern itself remains widely used in production APIs.
How to prepare
Work through the mechanics above with a real scenario attached: given a public API serving both a mobile app and third-party integrators, how would you version it, and what would change if it only served an internal team. Practicing the design-trade-off questions, versioning, pagination, rate limiting, by actually writing out the response shapes is worth more than reading about the concepts, since a senior interviewer is more likely to hand you a scenario and ask you to design the response than to ask you to define a term.
If you are also preparing GraphQL-specific rounds, GreatFrontEnd's GraphQL interview questions guide covers the equivalent data-layer fundamentals, and the versioning and pagination trade-off reasoning here carries over directly.
Conclusion
Senior REST API developer interview questions test whether you can make real design trade-offs, not whether you can recite HTTP verbs. Idempotency and retry safety, versioning strategy, structured error responses, rate limiting, and the judgment to pick REST, GraphQL, or gRPC for the right layer are the actual differentiators. What separates a senior answer is naming the trade-off explicitly and knowing which parts of current REST practice are settled convention versus still-evolving standards.
- Front End Jobs with Good Salary in India: Where to Target in 2026Which frontend jobs in India actually pay well: product companies, GCCs, and IT services compared, with real company data and how to target each type.作者GreatFrontEnd Team11 分钟阅读Sep 7, 2026

If you already know roughly what frontend developers earn in India, the harder question is where to actually apply. Front end jobs with good salary in India are not evenly spread across the market. They cluster in a handful of employer types, and the type of company you target changes your ceiling more than the city you work from or the framework on your resume.
This guide does not repeat the salary bands by experience level. GreatFrontEnd's frontend salary guide already covers that in detail, along with city-by-city breakdowns and how to read a CTC offer. What follows here is narrower: which kinds of companies to target, what genuinely differs between them, and how a few named companies actually pay for frontend roles right now.
The real axis is employer type, not company size
It is tempting to sort companies by brand recognition or headcount, but that is not what predicts frontend pay. A large, well-known enterprise can still pay services-tier rates for a frontend role if frontend is not core to what the company sells. A ten-person, well-funded startup can outpay a household-name enterprise for the right hire if the product depends on the interface working well.
The distinction that actually holds up is whether frontend is a valued, product-differentiating function at that company, not how big or famous the company is. Three employer types cover most of the market: IT services firms, Indian product and consumer-internet companies, and Global Capability Centres (GCCs) of multinational companies. Each treats frontend differently, and that difference is where the pay gap comes from.
IT services firms: the widest entry point, the lowest ceiling
Companies like TCS, Infosys, and Wipro post by far the largest volume of frontend and "web developer" openings in India. For a first job, this is often the most accessible on-ramp, and it is a reasonable place to start if your goal is to get hired quickly and build experience.
The tradeoff is that frontend is rarely a named, standalone track here. Postings frequently bundle it into a generic "web developer" or "full stack" requisition, working across whatever the client project needs rather than a dedicated design-system or product-frontend role. Multiple salary-aggregator sources (recrew.ai, omnivoo.com, upgrad.com) converge on the same directional pattern: IT services pay commonly runs meaningfully below product companies and GCCs at the same experience level, often cited in the 25 to 35 percent range. These are aggregator estimates rather than a single disclosed survey, so treat the specific percentage as directional, not a guarantee for any individual offer.
Indian product companies: frontend becomes a named, valued track
At consumer-internet and product companies built in India, such as Flipkart, Swiggy, and Razorpay, frontend is usually its own hiring track rather than a subset of generic web development. That distinction is not cosmetic. When a company's revenue depends on checkout completion, activation flows, or day-to-day app usage, frontend quality is directly tied to what the business earns, and hiring reflects that.
Practically, this means a narrower hiring bar (data structures and algorithms, machine coding, and system design rounds are typical for these roles) and a role definition that is closer to "own this surface" than "implement this ticket." It also means real, checkable compensation data exists for some of these companies through self-reported platforms.
On Levels.fyi, the Frontend Software Engineer track at Razorpay shows self-reported total compensation in roughly the 2.6 to 4.3 million rupee per year range, with a reported median close to 2.9 million. At Flipkart, the same title at the SDE2 to SDE3 band shows a reported range of roughly 4.0 to 5.4 million rupees per year, with a reported median close to 3.8 million. Both figures come from a small number of self-reported data points rather than a large-sample survey, so read them as a directional signal for what this tier of company can pay at these levels, not a guaranteed number for any specific offer. Levels.fyi did not have frontend-specific submissions for every well-known Indian product company at the time of writing, so a company's absence from this list does not mean it pays less, only that no one has reported a number yet.
GCCs: multinational compensation and structured career ladders
Global Capability Centres, the India-based engineering arms of multinational companies such as Walmart Global Tech, Atlassian, Adobe, ServiceNow, and Target India, are the third major target. These operate as genuine product engineering teams, not outsourced support, and frontend roles here often carry structured, level-based career ladders that mirror the company's global engineering organization.
GCC roles often come with structured leveling and compensation bands, and many multinational employers combine base salary with bonuses and RSUs. Compared with private-startup ESOPs, equity in a public multinational can be easier to value and more liquid, but stock can still make up a meaningful share of total compensation. The tradeoff for a candidate is that some GCC frontend roles compete globally for the same requisition, meaning the bar can be as demanding as applying directly to the company's headquarters office.
Where the premium concentrates within a company
Employer type is the first filter, but within any product company or GCC, not every frontend team pays or scopes work the same way. Design-system teams, platform and developer-tooling teams, and performance-focused teams are commonly cited by the same salary-aggregator sources as carrying a premium over a generic feature team, because the work has outsized leverage across the whole product rather than a single flow. GreatFrontEnd's salary guide already covers how skills such as UI architecture, design systems, accessibility, performance, and broader frontend ownership can affect compensation, so this article will focus instead on where those skills tend to be valued. The practical takeaway for targeting is simpler: when you have a choice between two open roles at the same company, the one on a design-system, platform, or performance team is usually the better bet on pay and scope, not just interest.
This is different from evaluating companies purely on brand strength. GreatFrontEnd's comparison of Meta, Google, Microsoft, ByteDance, and Netflix looks at project quality and culture at global big-tech employers specifically. That comparison does not cover India-based product companies, GCCs, or IT services, and it is not built around employer type as the axis, which is why it is a useful companion read rather than a substitute for the targeting question this guide answers.
How to actually find these roles
Each employer type surfaces differently, and searching all three the same way wastes time.
IT services openings are the easiest to find and the least worth optimizing your search for: they dominate general job boards like Naukri and Indeed by sheer volume, so a broad keyword search will surface far more of these than anything else. If this is your target, apply broadly and prioritize roles that name a specific frontend stack in the description over ones that say only "web developer."
Indian product companies rarely need to advertise widely, since they get enough inbound interest through their own careers pages and referrals. The more reliable approach is to go directly to the careers page of the specific companies you want (Flipkart, Swiggy, Razorpay, and similarly sized product companies all list frontend-specific openings there, not just generic engineering roles), and to treat a referral from someone already on a frontend or platform team as meaningfully more effective than a cold application through the general pipeline, a pattern that shows up broadly in hiring but is especially pronounced here given application volume.
GCC roles can be easy to overlook because job titles and employer branding vary across companies. Walmart's India engineering organization, for example, is commonly branded as Walmart Global Tech, while companies such as Atlassian, Adobe, ServiceNow, and Target list India roles through their broader careers infrastructure. The most reliable approach is to search the company's official careers site directly and filter for India or specific engineering hubs such as Bengaluru and Hyderabad, rather than relying only on generic job-board searches.
Matching your profile to the right target
If you are early in your career and need experience fast, an IT services firm or a smaller Indian product company is usually the realistic starting point, since the hiring bar is lower and the volume of openings is higher. If you already have a couple of years of frontend-specific experience and can pass a machine coding and system design round, an Indian product company is where the named frontend track and the associated pay step tend to appear. If you value predictable, structured compensation and are comfortable with a global-standard interview bar, a GCC is worth targeting directly rather than treating it as a fallback from a product-company application.
None of this replaces reading the actual offer. GreatFrontEnd's salary guide is the right place to check whether a specific CTC number reflects a strong offer once you have one in hand, since a higher headline number with a large variable component can be a weaker offer than it first appears.
A note on timing and market conditions
None of this is static. Aggregator-reported comp bands shift as hiring demand moves, and a GCC that was expanding aggressively last year can freeze headcount the next, just as a fast-growing product company can slow its hiring after a funding round closes. The employer-type framework in this guide is meant to tell you where to look and how to compare offers once you have them, not to predict which specific company is hiring this quarter. Check a company's own careers page and recent funding or expansion news before assuming last year's hiring pace still applies, particularly for GCCs, where India headcount decisions are often made independently of what the parent company's global hiring looks like.
This also means the three-tier split is a starting map, not a permanent ranking. A services firm that wins a large, frontend-heavy client contract can temporarily offer product-company-style pay and scope for that engagement. A product company going through a slow growth period can pull back on frontend hiring even while GCCs in the same city keep expanding. Treat the categories in this guide as the lens for evaluating any specific opening you find, not a fixed league table of which companies are worth applying to this year.
Frequently asked questions
Do GCCs pay better than Indian product companies for frontend roles?
Based on aggregator-reported data, the two bands overlap significantly, and GCCs can pay at or above product-company levels for equivalent experience. The more reliable differentiator is not which category pays a higher headline number, but the shape of the offer: GCCs typically weight fixed salary more heavily, while a product company's offer may lean more on equity or variable pay.
Is it worth taking an IT services job to build a portfolio before targeting a product company?
For many candidates this is a reasonable path, particularly if a services role is the fastest way to get hands-on production experience. The tradeoff is that a generic "web developer" requisition may not build the specific frontend depth, design systems, performance work, complex state management, that product-company and GCC interviews test for, so it helps to seek out frontend-specific work within a services role where possible.
Do design-system or platform teams always pay more than product feature teams?
Not always, and this varies by company. What the research above shows is a commonly cited pattern, not a guarantee. Confirm the actual banding for a specific team during the interview process rather than assuming it from the team's function alone.
Where to start
Finding front end jobs with good salary in India comes down to matching your search method to the employer type you are actually targeting, not applying the same way everywhere and hoping the pay works out. The fastest way to find out what a specific company or team actually pays is to interview there, and the fastest way to be ready for that interview is to practice the rounds these companies actually run. GreatFrontEnd's front end interview questions cover the coding, system design, and quiz formats that Indian product companies and GCCs use to screen frontend candidates, with reference solutions written by ex-FAANG engineers.
- Senior GraphQL Developer Interview Questions: Advanced Topics and AnswersSenior GraphQL developer interview questions and answers: DataLoader internals, Apollo Federation, pagination trade-offs, and real API-abuse protection.标签作者GreatFrontEnd Team13 分钟阅读Sep 4, 2026
Senior GraphQL developer interview questions rarely test whether you can write a query or explain what a resolver is. GreatFrontEnd's own GraphQL interview questions guide already covers that ground in depth, schema fundamentals, operations, client caching, error handling, and a first pass at the N+1 problem, and is explicitly scoped to intermediate-level prep. At senior level, the questions shift to architecture: how a DataLoader batch function actually works and where it breaks if you get it wrong, how a federated graph composes across teams, and how you protect a public API from queries that were never meant to be sent. The questions below focus on that architectural layer, with a worked answer for each.
What separates senior from mid-level GraphQL candidates
A mid-level candidate can write a schema, resolve a query, and name the N+1 problem. A senior candidate is expected to actually implement the fix, reason about how a graph composes across multiple teams and services, and make real trade-off calls, cursor versus offset pagination, federation versus schema stitching, how much query-abuse protection a given API actually needs, rather than name the concepts in the abstract.
Question 1: How does DataLoader actually solve the N+1 problem, and where does it break if you misuse it?
How to approach it
The N+1 problem: resolving a list of items triggers one query for the list, then one additional query per item to resolve a nested field, N extra round trips for N items. DataLoader fixes this by batching: within a single event-loop tick, it collects every key requested through
.load(), then calls your batch function once with the full array of keys.const userLoader = new DataLoader(async (userIds) => {const users = await db.users.findByIds(userIds);// must return values in the SAME order as the input keysreturn userIds.map(id => users.find(u => u.id === id));});// resolvers can call this per-item, and it still only fires one queryconst user = await userLoader.load(post.authorId);The batch function's contract is strict: it takes an array of keys and must return a Promise resolving to an array of values in the exact same order, missing that ordering constraint is a real, specific bug, not a style nitpick.
The constraint most sources understate: a DataLoader instance should typically be scoped to a single request, especially when loaded data depends on authentication or authorization. Its cache is simple in-memory memoization with no built-in per-user isolation, so reusing the same loader across users can expose cached values across request boundaries unless the cache scope and invalidation are deliberately designed for that use case. In most GraphQL servers, creating loaders in the request context is therefore the safest default.
Question 2: How does Apollo Federation compose a supergraph, and what do
@keyand@externalactually do?How to approach it
A federated graph is built from independently deployed subgraphs that contribute parts of a shared schema. Those subgraph schemas are composed into a supergraph schema, which the router consumes to build query plans and execute client operations across the relevant subgraphs. Clients still query the router as if they were talking to a single GraphQL API.
# in the Users subgraphtype User @key(fields: "id") {id: ID!email: String!}# in the Reviews subgraph, contributing fields to Usertype User @key(fields: "id") {id: ID!reviews: [Review!]!}@key(fields: "id")declares a set of fields that can identify an entity, allowing the router to move between representations of the same logical object across subgraphs. In Federation 2, multiple subgraphs can contribute fields to the same entity without one subgraph being its single owner.@externalis used when a subgraph references a field that it does not normally resolve itself, commonly as part of directives such as@requiresor@provides. At query time, the router builds a query plan and can pass entity representations between subgraphs through the federation_entitiesmechanism to fetch the fields required by the client's operation.The senior-level judgment question isn't reciting the directives, it's knowing when this architecture is actually worth its complexity. Federation is most valuable when independently deployed services or teams own different parts of a graph and need to evolve them independently. A small single-service API usually doesn't justify the additional operational complexity of composition, a router, and multiple subgraphs, although team count alone isn't the deciding factor.
Question 3: When would you still reach for schema stitching instead of Federation?
How to approach it
Schema stitching and Federation solve similar high-level problems, combining multiple GraphQL schemas behind one API, but they use different composition models. Apollo recommends Federation within its ecosystem, while modern schema stitching from GraphQL Tools remains actively maintained and supports capabilities such as merged types, query planning, schema transforms, and directive-based configuration.
Stitching can still be a strong choice when you need to combine GraphQL APIs you don't control, apply significant gateway-level schema transforms, integrate third-party schemas, or avoid coupling the architecture to Federation conventions. Federation is often a natural fit when independently owned subgraphs can participate directly in a shared composition model. A senior answer should therefore compare the ownership model, deployment boundaries, control over the underlying services, and tooling requirements rather than describing stitching simply as Federation's obsolete predecessor.
Question 4: How do you design pagination for a large, frequently-changing list?
How to approach it
Offset-based pagination (
skip/limit) is simple to implement but breaks under concurrent writes: if an item is inserted before the current offset while a user is paging through results, the same item can appear twice, or a different item can be skipped entirely, depending on the direction of the shift.Cursor-based pagination, commonly exposed through the Relay connection pattern (
edges,node,cursor,pageInfo), can avoid this offset-shift problem when the cursor represents a stable and deterministic ordering key. Instead of paging from a numeric position that moves as data changes, the next query continues relative to a specific item or ordering value. The trade-off worth naming: cursor-based pagination doesn't support jumping to an arbitrary page number the way offset pagination does, since there's no stable concept of "page 7" when the position is defined by a cursor rather than a count. The senior-level answer is choosing based on the actual access pattern: a frequently-updated feed or list needs cursor-based pagination for correctness, while a rarely-changing, admin-facing table where jump-to-page genuinely matters can reasonably use offset.Question 5: How do you protect a public-facing GraphQL API from expensive or abusive queries?
How to approach it
Query complexity and depth limiting, rejecting or costing a query before expensive resolver work begins, are common protections for a graph exposed to untrusted clients. The risk is concrete: if every field fans out into multiple related objects, a deeply nested query can expand exponentially into an enormous result tree and large amounts of resolver or downstream work. Depth limits, complexity or cost analysis, rate limiting, and sensible pagination limits help bound that work before a single query can consume disproportionate resources.
Disabling introspection in production is commonly recommended, it's on Apollo's own published security checklist, but its actual security value is genuinely debated rather than settled: a determined attacker can often reconstruct a meaningful part of a schema through other means (error messages, client bundle analysis, documented API behavior), so it's more accurate to frame introspection-disabling as one layer among several, not a complete defense on its own.
Automatic Persisted Queries take a different angle. A client can first send only the SHA-256 hash of an operation. If the server doesn't recognize it, the server responds with a persisted-query-not-found error and the client retries with both the full query and its hash, allowing the server to store that mapping. Later requests can send only the hash and variables. This reduces request size and can make GET-based CDN or browser caching easier when the surrounding HTTP caching configuration permits it. APQ itself is primarily a performance optimization, not query-cost protection or an operation allowlist, so it complements complexity limiting rather than replacing it.
Question 6: What transport do you use for GraphQL subscriptions today, and why does it matter that it changed?
How to approach it
graphql-wsis the current, actively maintained recommendation for subscriptions over WebSocket.subscriptions-transport-ws, the older library many existing tutorials and codebases still reference, was archived in 2023 and had been largely unmaintained even before that.This is worth being precise about because the two implement genuinely distinct WebSocket subprotocols, not just different versions of the same one, so migrating means updating both the server and every client, not a drop-in library swap. A candidate who states
subscriptions-transport-wsas the current standard is describing something that's been dead for several years, which is exactly the kind of stale-knowledge signal a senior round is designed to surface. Naming the correct current library, and being able to say why the ecosystem moved (active maintenance, a better-specified protocol with clearer connection-lifecycle handling), is the more useful version of this answer than reciting protocol details from memory.Question 7: When do you reach for an interface versus a union type in schema design?
How to approach it
An interface defines a set of fields that every implementing type must include, letting a client query those shared fields without knowing the concrete type in advance, and a resolver can add type-specific fields via inline fragments for whichever concrete type actually comes back. A union has no shared fields at all, purely "this result is type A or type B," useful for something like a search results field that can return entirely unrelated types (a
Productor aCategory) with nothing meaningfully in common to hoist into a shared contract.For both interfaces and unions, the runtime needs a way to determine which concrete object type a resolved value represents. How this is implemented depends on the GraphQL server library: in Apollo Server, for example, you can provide a
__resolveTyperesolver, while other implementations may infer or resolve the concrete type through equivalent mechanisms. This runtime type resolution is the piece candidates often forget when they describe only the schema definitions. The senior-level distinction: reach for an interface when there's a genuine common contract worth guaranteeing to clients, reach for a union when the possible results are meaningfully different and forcing a shared interface would mean adding fields that don't apply to every case.Question 8: How do you evolve a GraphQL schema without breaking existing clients?
How to approach it
Many additive changes, such as adding an output field, introducing a new standalone type, or adding a nullable optional argument, are backwards-compatible with existing operations because existing queries don't reference them. But "additive" doesn't automatically mean risk-free: adding a required field to an input object is breaking, while adding enum values or new possible concrete types to an interface or union can affect clients that make exhaustive assumptions about the possible values.
The standard pattern is deprecation before removal: mark a field with
@deprecated(reason: "use newField instead"), giving clients a documented migration path and a window to move off it, rather than removing a field outright and breaking every client that queries it on the next deploy. Changing an existing field's type can be breaking even when the change appears permissive. For example, changing a field from non-null to nullable can break generated client types or runtime assumptions that relied on the stronger non-null contract. In practice, introducing a replacement field, deprecating the old one, migrating clients, and removing it only after usage has dropped is often safer than changing the field's contract in place. Schema-check tooling that diffs a proposed schema against real client query traffic before a change ships is the production-grade version of this discipline, catching a breaking change against what clients are actually querying, not just against the schema definition in isolation.Common mistakes and red flags at the senior level
Sharing a DataLoader instance across users without deliberately designing its cache scope is a common DataLoader mistake and can become a real correctness or data-isolation bug, not merely a performance nitpick. Misusing
@externalor reaching for Federation without a genuine multi-team ownership need to justify its operational complexity is the equivalent mistake for architecture questions. Presenting introspection-disabling as a complete security fix, rather than one layer among several, reads as memorized rather than understood. Namingsubscriptions-transport-wsas a current recommendation is a stale-knowledge signal specific to this domain.Frequently asked questions
Is DataLoader specific to Apollo Server? No. DataLoader is a standalone, server-agnostic utility that works with any GraphQL server implementation; it solves the batching-and-caching problem at the resolver layer, independent of which GraphQL server library sits around it.
Do I need Apollo Federation for a small API? Usually not. Federation is most valuable when independently deployed services or teams need to contribute different parts of a graph and evolve them independently. A small single-service API usually doesn't gain enough from federation to justify the additional composition, routing, and operational complexity.
Is this the same material as GreatFrontEnd's existing GraphQL interview questions guide? No, and deliberately so. That guide covers the intermediate fundamentals, schema basics, operations, client-side caching, a first pass at N+1, this guide goes past it into DataLoader implementation, federation architecture, and production-scale API protection, the genuinely senior-level layer.
How current does my knowledge of the subscriptions transport need to be? Knowing that
graphql-wsis the current, maintained choice and that its predecessor is dead matters more than deep protocol-level trivia, since this is exactly the kind of fact that quietly goes stale in older tutorials and study material.How to prepare
Work through GreatFrontEnd's GraphQL interview questions guide first if the fundamentals, schema design, basic resolvers, client caching, aren't already solid, since a senior round assumes that level isn't in question. From there, practice implementing a DataLoader batch function and a minimal two-subgraph federated setup by hand, not just reading about them, since a senior interviewer is more likely to ask you to reason through a specific batching or composition scenario than to define the terms.
The architectural trade-off reasoning here carries over directly to other senior-level platform questions, GreatFrontEnd's guide on senior CSS interview questions covers the same kind of judgment-first questioning in a different technical domain.
Conclusion
Senior GraphQL developer interview questions test whether you can reason about a graph's architecture, not whether you can write a query or name the N+1 problem. Implementing DataLoader correctly, understanding how a federated graph actually composes, making real pagination and API-protection trade-off calls, and knowing which platform facts (subscriptions transport, schema stitching's status) have genuinely changed are the actual differentiators. What separates a senior answer is having actually built these mechanisms, not just described them.
- Senior Node.js Developer Interview Questions: Advanced Topics and AnswersSenior Node.js developer interview questions and answers: event loop internals, worker threads vs cluster, stream backpressure, and real production diagnosis.作者GreatFrontEnd Team12 分钟阅读Sep 2, 2026

Senior Node.js developer interview questions rarely test whether you know
async/awaitsyntax or how to wire up an Express route. At senior level, the questions shift to platform internals: what actually happens inside the event loop on a given tick, when a native concurrency primitive likeworker_threadsis the right call versuscluster, how a stream behaves under backpressure, and how you'd diagnose a memory leak or event-loop stall in a running production process. The questions below focus on that platform-level reasoning, with a worked answer for each.What separates senior from mid-level Node.js candidates
A mid-level candidate can write correct async code, use
npmand set up basic Express routing. A senior candidate is expected to reason about Node.js as a runtime: what the event loop is actually doing at each phase, which concurrency primitive fits a specific bottleneck (CPU-bound work versus I/O-bound scaling versus running an external program), and how to diagnose a real production incident, a memory leak or an unresponsive server, rather than describe these things in the abstract.Question 1: Walk through the phases of the Node.js event loop, and where do microtasks fit in?
How to approach it
The event loop moves through several libuv phases: timers, pending callbacks, idle/prepare (internal), poll, check, and close callbacks. Since Node.js 20, timers are run after the poll phase rather than both before and after it.
setTimeoutandsetIntervalcallbacks become eligible to run once their delay threshold has elapsed. The poll phase retrieves new I/O events and executes their callbacks, whilesetImmediate()callbacks run in the check phase after poll. This is why asetImmediate()and a zero-delaysetTimeout()can run in different orders depending on where they're scheduled.The detail that actually separates a senior answer is where
process.nextTick()and microtasks fit. After the current JavaScript operation completes, Node processes theprocess.nextTick()queue before V8's microtask queue, which includes Promise callbacks andqueueMicrotask(). These queues are not simply processed once at the end of an event-loop tick. A recursive chain ofprocess.nextTick()calls can starve I/O because Node keeps processing newly queued callbacks before returning control to the event loop, a real, checkable failure mode rather than trivia.Question 2: When would you reach for
worker_threadsinstead ofclusterorchild_process?How to approach it
These solve three different problems, and reaching for the wrong one is the most common trap in this question.
worker_threadsruns JavaScript in parallel within the same Node.js process, generally with lower overhead than spawning full processes. Workers can share memory usingSharedArrayBuffer, or avoid copying some data by transferring ownership ofArrayBuffers. They're a good choice for CPU-bound work such as image processing, encryption, or large computations that would otherwise block the main thread's event loop.clustercreates multiple Node.js worker processes that can share a server port, with each process having its own event loop, memory space, and V8 instance. It can be useful when you specifically want multiple isolated Node.js processes handling incoming connections across CPU cores, although modern deployments often achieve the same process-level scaling through multiple application or container instances.child_processis the general-purpose API for spawning other processes, whether that's another Node.js process or an arbitrary external program. Full processes generally have greater startup and memory overhead than worker threads, but they provide process isolation. It's the right tool when you need to run an external command, script, or separate process rather than parallelize JavaScript inside the same Node.js process.The trap is assuming that adding worker threads automatically makes an I/O-bound server handle more concurrent requests. Node's event loop already provides high I/O concurrency, so worker threads are primarily useful when CPU-heavy JavaScript is blocking request processing. If the goal is instead to run multiple isolated server processes across CPU cores,
clusteror process-level scaling through multiple application instances is usually the better fit.Question 3: What is backpressure in Node.js streams, and how do you handle it correctly?
How to approach it
Backpressure happens when a readable stream produces data faster than a writable stream can consume it.
.pipe()handles this automatically, which is exactly why most application code never has to think about it directly.Writing manually is where the mechanism becomes visible:
const canContinue = writableStream.write(chunk);if (!canContinue) {// internal buffer exceeded highWaterMark, pause until drainedreadableStream.pause();writableStream.once('drain', () => {readableStream.resume();});}writable.write()returnsfalsewhen the amount of buffered data reaches or exceeds the stream'shighWaterMark. Ignoring that return value and continuing to write anyway is the actual bug: unhandled backpressure buffers data in memory with nowhere to drain it, until the process runs out of memory and crashes. This is a specific, reproducible failure mode, not an abstract performance concern, which is why interviewers use it to check whether a candidate has actually worked with raw streams or only ever used.pipe().Question 4: How would you diagnose a memory leak in a running Node.js process?
How to approach it
Start with the actual tool, not the theory. Running the process with
--inspectand taking heap snapshots at intervals through Chrome DevTools or a tool likeclinic.jslets you compare retained memory over time and see which object types are accumulating.The common root causes worth naming specifically: an unbounded in-memory cache that never evicts entries, event listeners registered on a long-lived emitter (like a shared database client) that are never removed when the subscribing object should be garbage collected, and closures that unintentionally hold a reference to a large object, keeping it alive far longer than intended.
A senior-level answer connects the diagnosis to the fix: for a cache, add an eviction policy or a
WeakMapwhere the key's lifetime should govern the cache entry's lifetime; for listeners, explicitly call.removeListener()or.off()when the subscribing object is done; for closures, restructure so the closure only captures what it actually needs, not the entire enclosing scope. Naming the tool without connecting it to a specific class of leak is the shallow version of this answer.Question 5: How does
AsyncLocalStoragehelp with request-scoped context, and what's the trade-off?How to approach it
AsyncLocalStoragecarries context, a request ID, the authenticated user, a trace ID, through an async call chain without threading it explicitly through every function's parameters. This solves the practical problem of "prop drilling" in a request-handling codebase: without it, every function between the HTTP handler and a deeply nested logging call would need an extra parameter just to pass the request ID along.A common pattern is to establish request-scoped context with
asyncLocalStorage.run(context, callback)near the start of request handling, so asynchronous work created within that callback can access the same store. Node'sdiagnostics_channelmodule is a separate but complementary observability API that allows instrumentation code to subscribe to structured lifecycle events without tightly coupling itself to application logic.The trade-off worth naming honestly:
AsyncLocalStoragedoes carry a real, measurable performance overhead, since it has to track context across every async boundary, not just the ones you care about. For most request-handling code the overhead is small relative to actual I/O latency, but it is not free, and a senior answer should be able to say that rather than presenting it as a costless convenience.Question 6: How do you implement a graceful shutdown for a Node.js HTTP server?
How to approach it
On receiving
SIGTERM, the server should stop accepting new connections,server.close()does this, while letting in-flight requests finish within a bounded window, then close database and other connection pools before the process exits.This is directly tied to how container orchestration actually works, not a theoretical concern: during termination, Kubernetes normally sends
SIGTERMand allows the process a configured grace period before forcefully terminating anything that is still running. Without graceful-shutdown handling, a Node.js process may exit while requests are still in flight, producing intermittent failures during deploys or scale-down events. A senior answer connects the code (server.close(), draining in-flight work, closing pools) to this operational trigger rather than describing graceful shutdown as an abstract best practice.Question 7: What changed in Node.js's release model in 2026, and why does it matter for choosing a version in production?
How to approach it
As of this guide's publication, Node.js 24 ("Krypton") is the current Active LTS, first released May 2025. Node.js 22 ("Jod") is in Maintenance LTS. Node.js 26 is the current Current release, not yet LTS, released May 2026, scheduled to enter LTS in October 2026.
The genuinely current platform fact worth being able to discuss: starting with Node.js 27 in April 2027, the release model changes from two major releases a year to one. Every release becomes LTS, removing the old odd/even distinction, with a new six-month Alpha phase preceding each annual Current phase. The stated reason is that odd-numbered releases saw minimal real-world adoption, since most production teams only ever moved to LTS versions anyway, and maintaining security releases across four or five simultaneously active lines had become difficult for the project to sustain.
The senior-level point isn't memorizing version numbers, it's the underlying judgment: production applications should generally run on an Active or Maintenance LTS release rather than Current, and being able to say why (a Current release exists specifically to let library authors add support before the wider ecosystem depends on it) is what separates an answer that names a version from one that understands what the version status actually means operationally.
Question 8: How do you detect and prevent the event loop from being blocked by synchronous code?
How to approach it
Node's own
perf_hooks.monitorEventLoopDelay()measures event-loop lag directly, the time between when a callback should have run and when it actually did, which is the concrete signal a blocked or overloaded event loop produces. This is a genuinely different signal from slow downstream I/O. A slow or overloaded database can increase the latency of many requests while the Node.js event loop remains healthy. Elevated event-loop delay instead tells you that JavaScript callbacks themselves are not getting scheduled promptly, which commonly points to CPU-heavy synchronous work or an overloaded process.Common causes worth naming specifically: heavy synchronous JSON parsing or serialization on large payloads, synchronous cryptographic operations (
crypto.pbkdf2Syncinstead of the async variant), and large synchronous loops over in-memory data. The fix connects back to Question 2. CPU-bound work can either be partitioned into small chunks that periodically yield control back to the event loop, or offloaded to worker threads. Partitioning can keep the main thread responsive for bounded computations, while worker threads are a better fit for substantial CPU-heavy work where parallel execution justifies the additional communication and coordination overhead.Common mistakes and red flags at the senior level
Reaching for
worker_threadssimply because a server needs to handle more concurrent I/O is a common concurrency-model mistake at this level; workers are most useful when CPU-heavy JavaScript is the actual bottleneck. Ignoring the return value ofwritable.write()and never handling the'drain'event is the same category of mistake for streams, code that works in testing and fails only under real load. PresentingAsyncLocalStorageor graceful shutdown as costless best practices, rather than naming their actual trade-offs and operational triggers, reads as memorized rather than understood. Naming a diagnostic tool (heap snapshots,--inspect) without being able to connect it to a specific class of leak is the shallow version of the memory-leak question.Frequently asked questions
Is Node.js actually single-threaded? JavaScript execution in Node.js runs on a single thread, but libuv maintains a thread pool underneath for certain operations (some file system calls, DNS lookups, and a few crypto functions), and
worker_threadsadds genuine parallel JavaScript execution on top of that. "Single-threaded" describes the JavaScript execution model, not the whole runtime.Do I need
worker_threadsfor a typical CRUD API? Usually not. A typical CRUD API is I/O-bound (database calls, network requests), which Node's event loop already handles well without additional threads.worker_threadsearns its complexity specifically when there's real CPU-bound work blocking the main thread.How current does my Node.js version knowledge need to be for an interview? Knowing which release line is Active LTS conceptually, and why production code should stay on LTS, matters more than memorizing exact version numbers or release dates, since those change on a predictable schedule.
Is this the same material as a general backend system-design interview? No. System-design rounds test how you'd architect a distributed system across services; this guide covers Node.js-specific runtime internals, the event loop, concurrency primitives, streams, that apply regardless of the broader architecture you're asked to design.
How to prepare
Work through the mechanics above with a real scenario attached, not just the definitions: given a slow endpoint, would you check for a CPU-bound bottleneck or event-loop lag first, and how would you tell the difference. Practicing the diagnosis questions (memory leaks, event-loop lag) by actually running
--inspectagainst a small reproduction is worth more than reading about the tools, since a senior round is more likely to describe a symptom and ask how you'd investigate it than to ask you to define a term.If you're also preparing frontend-adjacent rounds, GreatFrontEnd's Next.js interview questions guide covers the framework layer that runs on top of Node.js in a full-stack interview, and the reasoning behind senior-level trade-off questions in other domains carries over even though the specific APIs differ.
Conclusion
Senior Node.js developer interview questions test whether you can reason about the runtime itself, not whether you can write correct async code. The event loop's actual phase-by-phase behavior, the right concurrency primitive for a specific bottleneck, stream backpressure mechanics, and real production diagnosis are the actual differentiators. What separates a senior answer is connecting each mechanism to a concrete failure mode or operational trigger, rather than describing it as an abstract best practice.
- TypeScript Interview Questions for Freshers (2026 Guide)TypeScript interview questions for freshers: the basics interviewers actually ask, what is out of scope at this level, and a practical way to prepare for them.作者GreatFrontEnd Team11 分钟阅读Sep 1, 2026
If you are preparing for TypeScript interview questions as a fresher, the good news is that the bar is narrower than the long "100 TypeScript questions" lists make it look. You are not usually expected to go deep into generics, decorators, advanced utility types, or compiler internals. The priority is being comfortable with basic types, inference, interfaces, arrays and tuples, and writing small typed functions. You are expected to read and write basic type annotations correctly, explain why TypeScript catches a class of bugs before your code ever runs, and write a small piece of code that uses that idea, not just define it.
This guide covers what is actually asked at fresher level, what interviewers listen for in a strong answer, and where the fresher scope ends so you are not over-preparing for questions that belong to a more senior round.
What "fresher" means for this guide
TypeScript interview questions for freshers cluster around a specific, testable set of fundamentals: basic types, the difference between a type annotation and type inference, a simple interface, arrays versus tuples, enums, and a practical sense of when
anyis doing more harm than good. Multiple interview-prep resources (DataCamp, Simplilearn, igmguru, InterviewBit, among others) converge on roughly this same fundamentals set for entry-level rounds, though these are aggregated prep lists rather than a single verified transcript, so treat the exact question wording below as commonly asked rather than guaranteed at any specific company.A consistent pattern across these sources is that fresher rounds pair a handful of these questions with a short coding exercise, typing a small function, fixing a type error in a snippet, or converting a plain JavaScript function to TypeScript, rather than a pure back-and-forth of definitions. Expect to write a few lines of code, not just answer verbally.
The fresher TypeScript interview questions you will actually see
What is TypeScript, and why use it over JavaScript?
This opens most fresher rounds. The answer that lands well is not a dictionary definition, it is being able to state what the type system actually buys you: TypeScript is a superset of JavaScript that adds static types, checked at compile time rather than discovered at runtime. Your TypeScript code compiles down to plain JavaScript before it runs, so the type checking is a development-time safety net, not something that changes how the code behaves once it is running. A strong answer gives one concrete example: catching a typo'd property name or a wrong argument type before the code ships, instead of finding it from a runtime error or a bug report.
Basic types and type annotations
Expect to be asked to name or use the core primitive types (
string,number,boolean), plusnull,undefined,any,void, arrays, and tuples. The follow-up that separates a prepared candidate from one who has only memorized the list is being able to write a type annotation for a function's parameters and return value without hesitating, for example a function that takes astringand anumberand returns abooleanType inference versus type annotation
A common question is simply: do you always have to write out a type in TypeScript? The answer is no. Type inference means TypeScript determines a variable's type automatically from the value assigned to it, so
const age = 30is inferred asnumberwithout you writing: number. Annotations matter most where TypeScript has nothing to infer from, an empty array, a function parameter, or a variable declared without an initial value.Arrays versus tuples
This is a small but frequently checked distinction. An array holds a variable number of values of the same type (
string[]). A tuple is a fixed-length, fixed-order list where each position can have its own type, for example[string, number]for a name paired with an age. The follow-up worth being ready for: why would you reach for a tuple instead of just an object? Because a tuple is a good fit when position carries meaning and the shape is small and fixed, a coordinate pair or a key-value entry, while an object is usually clearer once there are more than two or three fields.Interfaces versus type aliases (fresher depth)
Both interfaces and type aliases describe the shape of an object, and at fresher level the expected answer is that they are largely interchangeable for a simple object shape, with interfaces being the more common convention for describing objects, and type aliases being more flexible when you need to describe a union of types (a value that could be one of several shapes) rather than a single fixed shape. The deeper differences, such as interface declaration merging, are usually lower priority at this level. If you are asked to go further than that, it is reasonable to say so directly and offer what you do know rather than guessing at unfamiliar territory.
Enums
Enums let you give a set of related constant values readable names instead of scattering raw strings or numbers through your code, for example representing the days of the week or a small set of order statuses. A fresher-level answer should be able to define a basic enum and explain that it gives related constants readable names. It is also worth knowing that string-literal unions or
as constobjects can solve similar problems, so enums are one option rather than something you need to use for every fixed set of values.Why is
anyrisky, and when might you actually use it?This question, or a close variant of it, comes up across nearly every fresher-level TypeScript source reviewed for this guide, more consistently than most of the syntax questions above.
anyturns off type checking for that value entirely, so using it defeats the reason to use TypeScript in the first place, and it is contagious: once a value is typedany, anything derived from it tends to becomeanytoo, silently, without a warning.anycan occasionally be useful during a JavaScript-to-TypeScript migration or as a temporary escape hatch when integrating poorly typed code, but it should be deliberate and short-lived. For values whose type is genuinely unknown, such as unvalidated external data,unknownis usually safer because TypeScript forces you to narrow the value before using it.Typing a small function or fixing a broken one
Because fresher rounds tend to pair questions with a short exercise, be ready to actually write a typed function on the spot: add parameter and return types to an untyped JavaScript function, or find and fix a type error in a short snippet, such as a function that is supposed to return a
numberbut has a code path that can returnundefined. The interviewer is checking whether you can apply the vocabulary from the questions above, not just recite it.What is out of scope at fresher level
TypeScript interview questions for freshers stop well short of the full language. Generics, advanced conditional and mapped types, decorators, namespaces, module resolution strategy, the
satisfiesoperator, and discriminated unions for complex state modeling are usually lower priority at this level, and are worth recognizing by name rather than mastering. GreatFrontEnd's guide to TypeScript interview questions for 3 years of experience covers that next tier, including where the questions genuinely get harder rather than just longer.The full interface-versus-type-alias tradeoff table, including declaration merging, is also a step beyond fresher scope. If it comes up, naming that you know the two are different in more advanced ways without needing to demonstrate all of them is a reasonable, honest answer for this level. You do not need deep knowledge of compiler configuration at fresher level, but you should recognize
tsconfig.jsonand understand the purpose of common strictness settings such asstrict,noImplicitAny, andstrictNullChecks. Large-scale migration strategy and advanced module-resolution configuration belong much later.One more thing worth knowing rather than reciting: TypeScript itself continues to evolve. TypeScript 7.0, released in July 2026, moved the compiler and tooling to a native Go implementation with major performance improvements. None of that substantially changes what a fresher needs to prepare for: the core type-system fundamentals in this guide remain the priority.
How this differs from JavaScript fundamentals rounds
It is worth being clear about the boundary with plain JavaScript fundamentals interviews, since the two get studied together. GreatFrontEnd's basic JavaScript interview questions for freshers covers closures, hoisting, the event loop, and other JavaScript-only concepts that exist independent of any type system. TypeScript questions build on top of that JavaScript knowledge rather than replacing it, an interviewer asking TypeScript questions still expects the underlying JavaScript behavior to be solid, so gaps in core JavaScript will show up even in a round framed as "TypeScript."
A practical way to prepare
Read through the core types, annotations versus inference, arrays versus tuples, interfaces versus type aliases at fresher depth, and enums, until you can explain each in a sentence or two without notes. Then practice writing, not just reading: take a handful of small untyped JavaScript functions and add types to them, and deliberately introduce a type error into a working snippet, then fix it, so that spotting and fixing a type error feels familiar rather than something you are doing for the first time in the interview.
Treat the
anyquestion as more than trivia. Being able to explain, unprompted, why overusinganydefeats the purpose of TypeScript is one of the more useful things to demonstrate at this level, precisely because it shows understanding rather than memorization.Common mistakes at this level
A few patterns show up repeatedly in how fresher candidates lose points on TypeScript questions, separate from not knowing an answer outright. Confusing a type annotation with a runtime check is one: saying a
stringtype "prevents" bad data from ever reaching a function is not accurate, since types are checked at compile time and erased before the code runs, so a value arriving from outside your code, an API response or user input, still needs to be validated at runtime rather than just typed. Reaching foranythe moment a type is inconvenient to write, rather than tryingunknownor spending another minute figuring out the real type, is another. And overstating the interface-versus-type-alias distinction, presenting it as a hard rule rather than a convention with a couple of genuine differences, reads as memorized rather than understood.None of these are about knowing more TypeScript. They are about being precise with what you already know, which is exactly what fresher-level interviewers are checking for at this stage rather than depth in the language.
Frequently asked questions
Do I need to know React or another framework for a TypeScript fresher interview?
Not specifically for the TypeScript questions themselves, since they test the type system independent of any framework. That said, many fresher frontend roles combine a TypeScript question set with a small React or JavaScript coding exercise in the same round, so framework basics are still worth having ready separately.
Is it normal to be asked to write code, not just answer questions verbally?
Based on the pattern across the sources reviewed for this guide, yes, expect at least one small typing or debugging exercise alongside the conceptual questions, rather than a purely verbal round.
Should I study generics before a fresher interview, just in case?
It is not necessary to prioritize generics at this stage. The fundamentals in this guide, basic types, inference, tuples, interfaces at fresher depth, and enums, come up far more consistently across fresher-level sources than generics do. If you have spare preparation time after those are solid, a light read on generics will not hurt, but it is not where fresher rounds concentrate.
If I only have time to prepare one thing, what should it be?
Based on how often it recurs across fresher-level sources, why overusing
anyundermines the point of TypeScript, together with being able to name a case where using it briefly is still a reasonable, deliberate choice, is one of the higher-value single topics to have ready.Practice TypeScript questions on GreatFrontEnd
Preparing for TypeScript interview questions for freshers comes down to a small, well-defined set of fundamentals plus practice writing real code, not memorizing a long list. The fastest way to get comfortable with these questions is to work through them with real code, not just a written list. GreatFrontEnd's TypeScript interview questions cover this fundamentals level and the tiers above it, with explanations written by ex-FAANG engineers so you can check your understanding against a real answer rather than guessing whether you got it right.
- Senior HTML Developer Interview Questions: Advanced Topics and AnswersSenior HTML developer interview questions and answers: the Popover API vs dialog, Shadow DOM trade-offs, document outline, and platform-level judgment.作者GreatFrontEnd Team15 分钟阅读Aug 28, 2026

Senior HTML developer interview questions rarely test whether you know what
<article>means. GreatFrontEnd's own HTML, CSS, and JavaScript interview questions guide is explicitly scoped to fresher-level prep, HTML gets roughly a fifth of its coverage, and the questions stay at the level of semantic tags and basic form validation. At senior level, the questions shift to platform-level judgment: when a native HTML primitive like<dialog>or the Popover API is the right call versus building a JavaScript equivalent, how the document outline actually affects assistive technology, and where HTML structure itself becomes a performance lever. The questions below focus on the kind of platform-level knowledge and trade-off reasoning that can distinguish senior frontend candidates, with a worked answer for each.What separates senior from mid-level HTML candidates
A mid-level candidate can write semantic markup, wire up basic ARIA attributes, and validate a form. A senior candidate is expected to reason about HTML as a platform: when a native browser primitive already solves a problem you'd otherwise reach for JavaScript or a library to solve, what the real trade-offs are when it doesn't, and how document structure decisions ripple into accessibility and performance at a scale beyond a single component.
Question 1: When would you use the Popover API instead of the dialog element, and how do they interact?
How to approach it
Start with the actual distinction, not the syntax. Per MDN, popovers created with the Popover API are always non-modal, meaning the rest of the page stays interactive while a popover is open. If you need modal behavior, blocking interaction with everything else until the user responds,
<dialog>is the right primitive. The two aren't mutually exclusive:<dialog popover>is valid markup, combining dialog semantics with popover-style control.The
popoverattribute takes three values, and the third one is where a lot of candidates fall short:<button popovertarget="menu">Open menu</button><div id="menu" popover="auto">...</div><button popovertarget="settings" popovertargetaction="show">Settings</button><div id="settings" popover="manual">...</div>popover="auto"is light-dismissible (clicking outside closes it), Esc-key closable, and only one auto popover can be open at a time, opening a second one closes the first unless they're nested, like a submenu inside a menu. This is enforced by what the spec calls the auto stack: the browser tracks open auto popovers in a stack, and closing one walks back down that stack closing descendants first.popover="manual"has none of that: no light-dismiss, no Esc handling, and any number can be open simultaneously with zero interaction between them, only explicit show, hide, or toggle calls control them.The third value,
popover="hint", is the one most sources skip. It's for content like tooltips that should sit below an already-open auto popover in the stacking model without dismissing it, a real gap the two-value mental model misses entirely.The focus-management detail that actually distinguishes a senior answer
When a popover opens via a
popovertargetbutton, the browser automatically updates the keyboard focus navigation order so elements inside the popover come next in the Tab sequence, right after the button that opened it. Close it with Esc, and focus returns automatically to that same button. This is the concrete reason to prefer the native API over a hand-rolled JavaScript dropdown: that focus-management behavior is exactly the part developers most often get wrong building it themselves, and the platform handles it for free.What's changing in 2026
The
<dialog closedby>attribute is landing as part of Interop 2026 work, letting you declare which user actions are allowed to close a dialog, directly closing a gap where dismissing a dialog by clicking outside it previously needed manual JavaScript. The:openCSS pseudo-class can style elements such as open dialogs, while displayed popovers use the:popover-openpseudo-class.Question 2: What does Shadow DOM actually encapsulate, and when is that worth the trade-off?
How to approach it
Be precise about the mechanism, not just the marketing pitch. CSS rules do not cross the shadow boundary in either direction: a page's global stylesheet can't leak into a shadow tree, and styles defined inside a shadow tree can't leak out. But inherited CSS properties,
font-family,color, and other properties that inherit by default, still pass through the boundary as normal, because inheritance and encapsulation are separate mechanisms operating at the same time. Shadow DOM encapsulates DOM structure and styling, but it doesn't create a separate JavaScript execution environment. Events can also cross the shadow boundary depending on theircomposedbehavior, with browsers retargeting them to preserve encapsulation.The senior-level judgment question is when that isolation is actually worth reaching for. It matters most for design-system components meant to be dropped into environments you don't control, you don't know what global CSS or competing libraries the host page is running, so style encapsulation genuinely protects the component. For styling within your own application, where you already control the global stylesheet, a simpler convention like CSS Modules usually solves the same problem with less machinery.
The honest downside
Shadow DOM does introduce additional complexity around theming, slots, event behavior, debugging, and integration with application-level styling. Declarative Shadow DOM also allows shadow content to be server-rendered without waiting for JavaScript, so a JavaScript dependency is not an inherent cost of Shadow DOM itself. A senior answer names the real cost, the added complexity, explicitly rather than presenting Shadow DOM as a free upgrade.
Question 3: How do headings, landmarks, and semantic HTML affect the accessibility tree and screen-reader navigation?
How to approach it
Semantic HTML gives browsers and assistive technologies information about the purpose and structure of a page, rather than leaving everything as generic containers.
Landmark elements such as
<main>,<nav>,<aside>,<header>, and<footer>can expose meaningful regions that screen-reader users can navigate directly instead of moving through every element sequentially. Headings provide another navigation mechanism, letting users understand the hierarchy of the page and jump between sections.<article>represents self-contained content that could make sense independently, such as a blog post, news story, or feed item.<section>represents a thematic grouping of content and should generally have a heading or another meaningful accessible name. A named<section>can be exposed as a region landmark.<div>has no semantic meaning and is the correct choice when you only need a generic container.The senior-level distinction is that semantic HTML isn't about replacing every
<div>with a "more semantic" element. It's about choosing elements whose built-in semantics accurately describe the content and interaction, so browsers and assistive technologies receive useful structure without requiring unnecessary ARIA.Question 4: How does HTML structure itself affect page performance?
How to approach it
Resource hints are an HTML-level performance lever, not just a CSS or JavaScript concern:
<link rel="preconnect" href="https://api.example.com"><link rel="preload" href="/fonts/inter.woff2" as="font" type="font/woff2" crossorigin><img src="hero.jpg" fetchpriority="high" alt="...">preconnectestablishes a connection to a third-party origin before you actually need it, useful when you know a request to that origin is coming soon.preloadfetches a specific resource the current page needs, at high priority, ahead of when the parser would otherwise discover it.fetchpriorityhints the browser's relative priority for a specific image or script, useful for telling the browser your hero image matters more than an off-screen one.Script placement is the other real mechanism question here, and it's checkable, not trivia:
<script src="blocking.js"></script><script src="ordered.js" defer></script><script src="independent.js" async></script>A plain synchronous script in the
headblocks HTML parsing entirely until it downloads and executes.deferdownloads in parallel with HTML parsing and executes after the document has finished parsing but beforeDOMContentLoadedfires. Multiple deferred scripts execute in document order.asyncdownloads in parallel too, but executes as soon as it's ready, whichever script finishes downloading first runs first, order is not preserved. Choosing between them is a real trade-off: usedeferwhen scripts depend on each other or on the full DOM being parsed,asyncwhen a script is fully independent, analytics being the classic case.Question 5: How do you validate a form using HTML alone, and when isn't that enough?
How to approach it
The Constraint Validation API is the platform-native answer, and it's worth knowing precisely rather than reaching straight for a JavaScript form library:
<input type="email" required minlength="5" pattern="[^@]+@[^@]+\.[^@]+">
Attributes like
required,minlength,pattern, and type-specific validation (type="email",type="url") are enforced by the browser automatically, no JavaScript required, and the browser surfaces its own validation messages and focuses the first invalid field on submit.input.validityexposes aValidityStateobject with specific boolean flags,valueMissing,patternMismatch,tooShort, and similar, letting you inspect exactly which constraint failed rather than just knowing something did.The senior-level judgment call is knowing where native validation stops being enough. It handles syntactic checks well, is this a valid email shape, is this field populated, but it can't validate anything requiring a server round trip, is this email already registered, is this username available, and its default error-message styling is limited enough that most production forms still layer custom messaging on top via
setCustomValidity()or by suppressing the native UI and rendering your own. A strong answer names both halves: start with native constraints for the syntactic layer, since they're free and accessible by default, then layer custom or server-side validation only where the platform genuinely can't reach.Question 6: A page has poor LCP. What can you improve at the HTML layer?
How to approach it
Largest Contentful Paint measures when the largest visible element, usually a hero image or a large block of text, finishes rendering. Before touching JavaScript or CSS, several HTML-level decisions directly affect that number.
The most common mistake is lazy-loading the LCP element itself.
loading="lazy"is meant for off-screen images, applying it to the hero image that's visible on load delays the exact resource the metric is measuring:<!-- Wrong: the LCP image should never be lazy --><img src="hero.jpg" loading="lazy" alt="..."><!-- Right: load it eagerly, and tell the browser it matters --><img src="hero.jpg" fetchpriority="high" alt="...">Pairing
fetchpriority="high"with a<link rel="preload">for the same resource in<head>gets the browser to start fetching it before the parser would otherwise discover it, which matters most when the image is referenced deep in the document or set as a CSSbackground-image(which the preloader can't see as early).The other HTML-level lever is what blocks the parser before the LCP element can even be reached: render-blocking
<link rel="stylesheet">tags with no media query, and synchronous<script>tags placed above the content, both delay first paint. A senior answer connects the fix to the actual bottleneck, preload or reprioritize the LCP resource, remove or defer what's blocking the parser ahead of it, rather than reaching for a generic "optimize images" answer.Question 7: How do
srcset,sizes, and<picture>work, and when should you use each?How to approach it
These solve two different problems, and conflating them is a common tell.
srcsetwithsizessolves resolution switching: shipping the right-sized version of the same image for a given viewport and device pixel ratio, so a phone doesn't download a 4K image meant for a desktop hero banner.<imgsrc="photo-800.jpg"srcset="photo-400.jpg 400w, photo-800.jpg 800w, photo-1200.jpg 1200w"sizes="(max-width: 600px) 100vw, 50vw"alt="A product photo">The
wdescriptors tell the browser each candidate's actual pixel width.sizestells the browser how wide the image will actually render at each breakpoint, before layout happens, so it can pick the smallest candidate that's still large enough. Getsizeswrong, a value larger than the image will actually render at, and the browser downloads a bigger file than it needs to, silently.<picture>solves two different problems: format switching (serving a modern format like AVIF or WebP with a fallback) and art direction (serving a genuinely different crop or composition at different breakpoints, not just a resized version of the same image):<picture><source srcset="photo.avif" type="image/avif"><source srcset="photo.webp" type="image/webp"><img src="photo.jpg" alt="A product photo"></picture>The senior-level distinction: reach for
srcset/sizesalone when it's the same image at different sizes, reach for<picture>when the format needs to differ or the actual image content needs to differ by viewport, not as a default replacement for the simpler pattern.Question 8: What HTML decisions affect how a public page gets crawled and indexed?
How to approach it
This is a real senior-level question because the answer sits at the intersection of markup decisions and how search engines actually process a page, not a checklist of meta tags.
A
rel="canonical"link tells search engines which URL is the authoritative version when the same content is reachable through more than one URL, avoiding duplicate-content dilution. Structured data, most commonly JSON-LD embedded in a<script type="application/ld+json">block, gives search engines an explicit, machine-readable description of the content (an article, a product, an FAQ) that can unlock richer search results, separate from what a user sees rendered on the page.Heading hierarchy and semantic sectioning, the same structure that helps assistive technology per Question 3, also help search engines understand what a page is about and how its content is organized, rather than parsing an undifferentiated wall of
<div>elements.A consideration worth naming here: content that only appears after client-side JavaScript runs may not be indexed the same way as content present in the initial HTML. Modern search engines can render JavaScript, but rendering happens on a delay and a budget, so a senior answer names server-side rendering or static generation as the safer default for content that must be indexed reliably, rather than assuming a client-rendered page will be crawled identically to one that ships its content in the initial response. For a multilingual site,
hreflanglink tags in the<head>tell search engines which language or regional version of a page to serve to a given user, a decision that also lives at the HTML layer.Common mistakes and red flags at the senior level
Reaching for a
divwith ARIA roles bolted on when a native semantic element or platform primitive already solves the problem makes for a weaker senior-level answer, it suggests the candidate's mental model of HTML hasn't updated past treating it as a styling substrate. Defaulting to a hand-rolled JavaScript dropdown or modal without being able to explain specifically why the nativedialogor Popover API wasn't sufficient is the same pattern in a different form. Treating accessibility as a checklist of ARIA attributes applied after the fact, rather than a property of correct document structure, tends to fall apart under a direct follow-up about what happens for a screen reader user specifically.Frequently asked questions
Do I need to memorize the exact Popover API attribute values to pass a senior round? No, but you should be able to explain the
autoversusmanualdistinction and name a real scenario forhint, since that third value is exactly where shallow prep shows. What matters is the judgment call between popover and dialog, not syntax recall.Is Shadow DOM something I'll actually be asked to implement live, or just discuss? More often a discussion question testing judgment about when encapsulation is worth its cost, rather than a live-coding exercise. Being able to name the concrete downside, the JavaScript dependency working against progressive enhancement, is what separates a senior answer from a definition.
How much do the 2026 platform changes like
<dialog closedby>actually matter for this interview? Worth being aware of as evidence you're current with the platform, but the underlying judgment, when a native primitive beats a hand-rolled equivalent, hasn't changed. An interviewer is more likely to probe whether you understand why the feature exists than whether you know its exact 2026 syntax.Is this the same material as a senior CSS or JavaScript interview? No, and that's deliberate. GreatFrontEnd's senior CSS interview questions guide covers architecture and performance at the CSS layer specifically; this guide covers the HTML platform layer, semantic structure, native interactive primitives, and document-level performance, which is a genuinely different set of judgment calls even though the two overlap in a real production interface.
How to prepare
Work through GreatFrontEnd's HTML, CSS, and JavaScript interview questions guide first if the fundamentals, semantic tags, form basics, the document outline, aren't already solid, since a senior round assumes that level isn't in question. From there, practice explaining the platform-primitive judgment calls above with a real scenario attached: not "what is the Popover API" but "here's a design system component that needs a dismissible menu, walk me through why you'd reach for popover instead of building it with JavaScript and a click-outside handler."
GreatFrontEnd's senior CSS interview questions guide and TypeScript interview questions for senior developers are useful complements, the same kind of platform-level, trade-off-driven reasoning tested there applies directly to the HTML questions in this guide, even though the specific subject matter differs.
Conclusion
Senior HTML developer interview questions test whether you can reason about HTML as a platform, not whether you can define
<article>correctly. The Popover API versus dialog choice, Shadow DOM's real trade-offs, the document outline's accessibility payoff, and HTML-level performance levers are the actual differentiators. What separates a senior answer is knowing precisely when a native primitive already solves your problem, and being able to name the real cost when you choose not to use it. - Frontend Developer Demand in 2026: A Job Market Reality CheckFrontend developer demand in 2026, the real data behind the market: a Stanford study on entry-level hiring, a genuine senior scramble, and what it means for you.标签作者GreatFrontEnd Team11 分钟阅读Aug 27, 2026
If you're trying to work out frontend developer demand 2026 from headlines alone, you'll find two contradictory stories. One says frontend is dying, AI writes the components now. The other says nothing has changed, keep grinding LeetCode. Neither is accurate. The real data points to something more specific: aggregate demand for software developers is still growing, but the market has split by seniority in a way that matters directly for how you should be spending your prep time right now.
The study behind the headline
The most concrete evidence here isn't an aggregator blog post, it's a working paper from Stanford's Digital Economy Lab, "Canaries in the Coal Mine? Six Facts about the Recent Employment Effects of Artificial Intelligence," by economists Erik Brynjolfsson, Bharat Chandar, and Ruyu Chen. The study analyzed payroll records from ADP, the largest payroll processor in the US, covering millions of workers, not a survey sample.
The finding: in the study's August 2026 update, employment among early-career workers aged 22 to 25 in highly AI-exposed occupations was about 19% below where it would have been if it had kept pace with employment among similarly aged workers in less AI-exposed occupations. Software development and customer service are among the occupations where this divergence is especially visible. Older workers in the same AI-exposed occupations did not show the same decline relative to their less-exposed peers. The important distinction is that this is a relative employment gap, not a claim that employment for young software engineers simply fell 19% in absolute terms.
The researchers' explanation is worth understanding, not just the number. Older workers carry tacit knowledge, the kind that never gets written down anywhere an AI model could learn it from. That knowledge is what AI can't replicate yet, and it's exactly what junior workers haven't had time to accumulate. Entry-level work is disproportionately the routine, well-documented, codifiable kind of work, which is precisely the kind AI coding assistants handle well today.
What the growth numbers actually say
It's worth holding two true things at once here, because most coverage of this topic picks one and ignores the other.
The US Bureau of Labor Statistics projects 15% employment growth for software developers from 2024 to 2034, well above the average for all occupations. That's a real, structural, long-run number. It is not in tension with the Stanford finding, they're measuring different things: BLS is projecting aggregate long-run demand, Stanford is measuring a specific short-run bifurcation by career stage that's happening inside that aggregate growth.
The uncomfortable number sits alongside the growth projection. Recent-graduate unemployment, per Federal Reserve Bank of New York data, running noticeably higher than the general population for exactly the majors that feed into frontend roles: computer engineering at 7.5%, computer science at 6.1%, information systems and management at 5.6%. Growth at the aggregate level and a rough entry-level market can both be true simultaneously, and right now, they are.
The barbell: where the actual demand is
Industry hiring commentary converges on a consistent shape, even though it comes from recruiter and aggregator sources rather than a single named study, so treat this section as a widely reported pattern rather than a hard statistic.
The market has bifurcated into what's commonly described as a barbell: heavy weight at the junior end (an oversupplied pool of generalist frontend talent whose core value, implementing routine UI, is exactly what AI coding assistants now do well) and heavy weight at the senior end (a tight, competitive market for engineers who can architect systems, own ambiguity, and bring specialized depth). The middle of the bar, the generalist mid-level developer hired purely to add headcount, is the segment companies appear most reluctant to invest in right now, because AI already makes their existing senior staff more productive without adding a body.
Segment Demand Why Junior / generalist Oversupplied, high competition Routine UI work overlaps heavily with what AI coding assistants already do Mid-level generalist Softest hiring appetite Companies prefer scaling senior output with AI over adding headcount for capacity alone Senior / architecture-capable Tight, competitive for employers Can own ambiguity, design systems, and judgment AI can't yet replicate Specialist depth (performance, accessibility, design systems) In demand even at mid-level Depth that's hard to fake and hard for AI to substitute for Full-stack ownership, a frontend engineer who can own a feature end to end rather than working only in the UI layer, is increasingly preferred over narrow frontend-only generalists, unless that frontend specialist brings the kind of specialized depth named above.
AI adoption versus AI integration: a distinction most coverage misses
The JetBrains "State of Developer Ecosystem 2025" survey, 24,534 developers across 194 countries, is one of the largest and most methodologically transparent developer surveys running, and it surfaces a gap worth naming precisely: 85% of developers use AI tools regularly, but only 44% report AI is fully or partially integrated into their actual workflow. That's a meaningfully different number than the 85% headline most coverage repeats, and it matters for how you read every other AI-and-hiring claim in this space: high adoption does not automatically mean AI has restructured how teams actually build software yet. 62% of developers rely on at least one AI coding assistant, agent, or editor, and 68% expect AI proficiency to become an explicit job requirement, which is itself a signal about where the bar is moving even before it's fully arrived.
Skills that show up across the demand data
TypeScript is increasingly treated as a baseline expectation for production frontend work rather than a nice-to-have, reported to correlate with higher compensation than plain JavaScript roles, though the specific dollar figures circulating in aggregator salary guides don't trace back to a single checkable primary survey, so treat any specific premium number you see quoted elsewhere as directional, not precise. React remains the most in-demand framework by job-posting volume across most regions surveyed.
The pattern reported consistently across sources: a core layer of HTML, CSS, and JavaScript or TypeScript, a framework (most often React, sometimes Angular or Vue), Git fluency, and then a differentiating layer, CI/CD familiarity, testing discipline, or a rendering-strategy specialty like Next.js, once the core layer is assumed rather than assessed. Within that differentiating layer, three areas recur often enough to be worth calling out specifically: automated testing depth beyond a handful of unit tests (integration and end-to-end coverage that actually catches regressions), familiarity with a CI/CD pipeline well enough to reason about what a failing build actually means, and comfort choosing between rendering strategies (client-side, server-side, or a hybrid framework's default) based on what a given product actually needs rather than defaulting to one approach everywhere.
Where the demand actually is geographically
Frontend hiring is not evenly distributed, and knowing the shape of that distribution matters if you're weighing where to focus a job search or how much to read into a slowdown at one company as a market-wide signal. Reported postings data puts the US at roughly 37% of global frontend developer job postings, the largest single share by a wide margin, followed by India at around 11%, then Germany, Canada, and the UK each in the low single digits. Because the US carries such a disproportionate share of postings, US-specific hiring news, a single company's layoff announcement, a single state's tech-sector report, gets amplified into "the market" far more than its actual weight in a genuinely global hiring picture would justify. A slowdown reported at one or two large US employers is real information, but it is not the same claim as "frontend hiring is slowing everywhere," and conflating the two is one of the most common ways this kind of data gets misread.
How to read frontend job-market data without getting misled
A few patterns are worth naming explicitly, because they're exactly where most coverage of "is frontend dying" goes wrong in one direction or the other.
A single company's layoffs are not the market. Individual company hiring decisions get reported as trend pieces constantly, but one employer's headcount reduction reflects that employer's specific financial or strategic situation as much as any broader signal. The Stanford study's value is precisely that it isn't one company, it's payroll data across millions of workers.
"AI tool adoption" and "AI replacing engineers" are different claims. The JetBrains data above shows why this distinction matters: 85% adoption with only 44% real workflow integration is not evidence of wholesale replacement, it's evidence that the majority of surveyed teams are still figuring out how AI actually fits into how they build software. Treat any claim that conflates high tool usage with job displacement as underspecified until it names a mechanism, not just a correlation.
Aggregate growth and individual difficulty can coexist. This is the core tension this guide opened with, and it's worth restating directly: BLS projecting 15% structural growth through 2034 and the Stanford paper finding a real 19% relative employment gap for early-career software workers in the same field are not contradictory findings that cancel out. They describe the same market from two different altitudes, and a useful read of "frontend developer demand 2026" has to hold both at once rather than picking whichever one fits a narrative.
What this means for how you prepare
None of this changes the fundamentals you need. It changes where the marginal value of your prep time sits.
If you're early-career, the Stanford data is a real signal, not a reason to panic. It means the bar for standing out among junior candidates has moved higher precisely because the pool competing for those routine-UI-adjacent roles is larger and the roles themselves are scarcer. Depth beats breadth here: being able to demonstrate you can own a feature, reason about edge cases, and write code an interviewer would trust in production is worth more than a longer list of frameworks you've touched briefly.
If you're mid-level, the softness in generalist hiring is the argument for building toward one of the specialist lanes named above, performance, accessibility, or design-system depth, rather than staying a horizontal generalist. That's not a claim that generalist roles disappear, it's a claim that the market is pricing specialization higher right now.
If you're senior, the data is straightforwardly favorable, but the bar for what counts as senior judgment in an interview has moved too. GreatFrontEnd's guides on tech-lead and principal-level machine coding and the broader shift in what changes moving from frontend developer to tech lead both cover the specific judgment senior interviews now test for, architecture, ownership, and defending trade-offs, not just shipping a working component.
Frequently asked questions
Is frontend development still a good career path in 2026? The aggregate data says yes, BLS's 15% growth projection through 2034 is real and structural. What's changed is the shape of who's finding roles easily: the squeeze is specific to entry-level and generalist mid-level positions, not the field as a whole.
Should I avoid becoming a frontend specialist because AI writes UI code now? The pattern doesn't support avoiding frontend, it supports avoiding staying purely generalist. Specialists with performance, accessibility, or design-system depth are in demand even where generalist hiring has softened.
Is the 19% employment gap from the Stanford study specific to frontend, or software engineering broadly? The study names software development broadly, not frontend specifically, as one of the occupations (alongside customer service) where this relative gap is especially visible. Frontend roles sit inside that broader software development category, and the hiring-pattern shift toward full-stack ownership is consistent with the same finding applying within frontend specifically, but the study itself doesn't break out frontend as its own line item.
How much should I trust the specific salary and premium figures circulating in aggregator articles? Treat them as directional, not precise. Several of the salary and pay-premium figures reported in recruiter and aggregator content don't trace back to a single named, checkable primary survey the way the Stanford employment data or the JetBrains adoption survey do. The employment-share and adoption-percentage figures cited in this guide come from named, sourced studies specifically because that distinction matters, and it's the same standard worth applying to any other claim about frontend developer demand 2026 you read elsewhere: ask whether it names a study, or just a headline.
- Senior Vue.js Developer Interview Questions and AnswersSenior Vue.js developer interview questions covering reactivity internals, state ownership trade-offs, and the current Vue 3.6 material a senior round tests.标签作者GreatFrontEnd Team11 分钟阅读Aug 26, 2026

Senior Vue.js interviews are built to test judgment more than syntax: when a convenient API becomes a performance liability, which state management choice fits a specific data flow, and how you would evaluate an architecture change before committing a team to it. This guide goes past GreatFrontEnd's own fresher-to-senior Vue.js interview questions guide, which already covers component communication, reactivity basics, and a senior-level section on architecture and testing. Here, the focus is deeper: reactivity internals, the current Vue 3.6 reactivity refactor and Vapor Mode, and the trade-off reasoning that a senior candidate is expected to walk through out loud, not just name.
What separates senior from mid-level Vue.js candidates
A mid-level candidate can use
ref,reactive,computed, and Pinia correctly. A senior candidate is expected to explain the trade-offs behind each choice and reason about what happens when the application grows: when does acomputedproperty become expensive enough to matter, why pick Pinia overprovide/injectfor one piece of state and not another, and how would a testing strategy or an architecture decision change at ten times the current scale.Interviewers commonly extend this into three areas that a mid-level round rarely reaches: testing strategy at the project level (not "how do you test a component" but "what does your team's testing pyramid look like for a Vue application"), migration and upgrade judgment (evaluating whether a change like Vapor Mode is worth adopting yet), and mentoring and code-review framing (explaining a decision in a way a less senior engineer could learn from, not just stating the answer).
None of these three areas has a single correct answer, which is itself part of what is being evaluated. An interviewer is generally listening for whether the reasoning is consistent and whether the candidate can name the conditions under which they would change their mind, rather than checking the answer against a fixed rubric. A candidate who says "it depends, and here is what it depends on" and then actually explains the dependency is, in practice, giving a stronger answer than one who states a confident rule without the reasoning behind it.
Reactivity internals: the questions that go deeper than ref vs reactive
Most Vue interviews ask candidates to distinguish
refandreactive. Senior interviews tend to build on that baseline rather than repeat it.Why does
refneed.value, and what happens when you destructure areactiveobject?refwraps a value, typically a primitive, in an object with a.valueproperty so Vue can intercept reads and writes through a getter and setter.reactiveinstead returns a Proxy around an object, intercepting property access directly, which is why destructuring areactiveobject breaks reactivity: the destructured variable is no longer connected to the Proxy.toRefandtoRefsexist specifically to convert a property of a reactive object into a ref that stays connected to the original source, which is the mechanism a senior candidate should be able to name, not just the workaround.When would you reach for
shallowRefinstead ofref?shallowRefskips deep reactivity conversion, tracking only reassignment of the.valueitself rather than nested property changes. The trade-off worth stating out loud: this is a performance tool for large or externally-managed data structures (a big dataset from an API, a third-party library instance) where deep reactivity tracking would add overhead without adding value, because nothing inside the object needs to trigger a re-render on its own.How do composables differ from the old mixins pattern, and why did Vue move away from mixins? A composable is a function that encapsulates and reuses stateful logic using the Composition API, typically named with a
useprefix. Mixins merged options into a component implicitly, which made it hard to trace where a given property or method actually came from once multiple mixins were combined, and collisions between mixins were a real source of bugs. Composables make the source of every value explicit at the call site, which is the actual reason for the shift, not just a style preference.State ownership: props and emit, provide and inject, or Pinia
This is one of the more common senior-level discriminators, because the API surface for all three options is simple; what is being tested is the judgment behind picking one.
- Props and emit fit direct parent-child communication where the data flow is one level deep and the relationship between the components is explicit in the template.
provide/injectfits state that many descendants at varying depths need to read, without wiring it through every intermediate component's props. The trade-off: the dependency becomes implicit, a descendant that injects a value has no visible link in the template to where that value comes from, which can make a codebase harder to trace as it grows.- Pinia fits state that multiple, unrelated parts of the application need to read or mutate, and that needs to survive outside any single component's lifecycle.
A strong answer walks through a specific example rather than reciting the three options: for instance, explaining that a theme toggle used by a handful of nested components is a reasonable
provide/injectcandidate, but the same state shared across unrelated routes and persisted across navigation is a better fit for Pinia.A useful way to practice this reasoning before an interview is to take a feature you have actually built and ask, for each piece of state in it, which of the three options you would pick and why, then check whether your answer still holds if that feature grew to be used by three unrelated pages instead of one. If the answer changes, be able to explain why: expanding a feature from one component subtree to several unrelated pages changes the shape and lifetime of the state, and may justify moving from local dependency injection to an application-level store.
Performance questions senior candidates should expect
Several patterns show up repeatedly across sources discussing senior and architecture-level Vue interviews, and they tend to be framed as diagnose-and-fix scenarios rather than definitions:
- Unstable
v-forkeys (using the array index as a key when the list can reorder or filter), which can cause Vue to misapply DOM updates to the wrong element. - Deep watchers on large objects, which require Vue to traverse nested properties to track deep mutations and can become expensive on large data structures.
- Expensive work inside a
computedproperty that processes a large array or dataset and has broad or frequently changing reactive dependencies. - Rendering large, unvirtualized lists, and importing heavy dependencies into components that render frequently or high on the tree.
The senior-level answer to each of these is expected to include a fix and a reason, for example replacing an index key with a stable unique identifier, or narrowing the reactive dependencies of an expensive computation so that it does not rerun for unrelated state changes, rather than a general statement that "performance matters."
Vue 3.6, the reactivity refactor, and Vapor Mode: what a senior engineer needs to know
As of this guide's publication, Vue 3.6 is in the release-candidate stage and is not yet a stable release, so treat any specific ship date you read elsewhere with caution. Two changes are worth being able to discuss, and they are separate tracks that should not be conflated in an answer.
The reactivity-system refactor. Vue 3.6 includes a rework of the underlying dependency-tracking and propagation mechanism (built on an approach often referred to as "alien signals" in Vue's own community discussion), which is a change to how Vue tracks what depends on what, aimed at reducing overhead as component trees scale. This is an internal change to how dependencies are tracked, not a change to the public reactivity API:
ref,reactive,computed, andwatchare expected to keep working the same way from a usage standpoint.Vapor Mode. Vapor Mode compiles a component's template directly into fine-grained DOM operations instead of producing virtual DOM output, removing the virtual DOM diffing step entirely for that component. It reached feature-complete status during the 3.6 release-candidate stage, and it is designed to be opt-in and incrementally adoptable, meaning individual components or pages can use Vapor Mode while the rest of an application continues to run through the standard virtual-DOM renderer.
A senior-level answer on Vapor Mode is less about defining it and more about the adoption judgment: what would you actually check before turning it on for a component in production, given that it changed compilation output and is still maturing through its release-candidate stage at the time of writing. A reasonable answer names checking library compatibility with any third-party component wrappers, confirming the team's testing coverage would actually catch a rendering regression, and starting with a low-traffic, well-isolated component rather than a shared layout piece.
Testing strategy and architecture judgment
Senior interviews frequently move past "how do you test a component" into project-level questions: what does the testing pyramid look like for this application, where do unit tests stop being useful and integration or end-to-end tests take over, and how would you introduce a testing strategy into a codebase that has none. There is no single correct pyramid shape, the answer that tends to land well is one that ties test type to the actual risk being covered, for example unit-testing a composable's logic directly rather than only through the component that uses it, and reserving end-to-end tests for the flows that would actually break the product if they failed.
Micro-frontend integration with Vue is also reported as an emerging topic in some architecture-focused senior rounds. The sourcing on how frequently this specific topic appears is thinner than the reactivity and performance questions above, so treat it as a possible topic rather than an expected one. When it does come up, the trade-offs worth naming are module federation (sharing code and dependencies at build or runtime), web components (framework-agnostic but with more integration friction for passing complex state), and iframe-based isolation (strong isolation, weaker interop).
Common mistakes and red flags at the senior level
The technical mistakes that show up across sources are largely the same performance issues listed above: unstable keys, deep watchers on large objects, expensive computed work triggered by frequently changing dependencies, unvirtualized long lists, and heavy dependencies imported into hot-path components.
At the judgment level, the red flags are different in kind: not being able to justify a state-management choice beyond "that's what we've always used," having no articulated testing strategy at all, and not having an answer for how a given architecture decision would hold up if the application's scale increased significantly. These are the same distinctions the "what separates senior from mid-level" section above describes, which is consistent with senior interviews testing reasoning more than recall.
How to prepare
Start from a working knowledge of the fundamentals covered in GreatFrontEnd's full Vue.js interview questions guide before working through the advanced material here, since senior interviewers assume the basics are already solid and will move past them quickly. It also helps to practice explaining a trade-off out loud, not just recognizing the right answer on a page, since that is closer to what an actual senior round tests. If you also interview across frameworks, the reasoning behind state-management trade-offs carries over closely to React's state management and hooks questions, even though the specific APIs differ.
Practicing a real implementation question under time pressure, such as GreatFrontEnd's Vue Todo List UI question, is a useful way to surface whether your reactivity and state-ownership reasoning holds up when you actually have to build something, not just describe it. Browse the full set of Vue.js coverage on GreatFrontEnd's blog for more preparation material as you work through the senior-level topics above.
Conclusion
Senior Vue.js developer interview questions test judgment more than syntax: whether you can explain why a reactivity choice matters at scale, justify a state-management decision for a specific data flow, and reason through whether a change like Vapor Mode is worth adopting yet rather than just describing what it does. Work through the reactivity internals, state-ownership trade-offs, and current Vue 3.6 material above, then practice saying the reasoning out loud, since that is what a senior round is actually evaluating.
- Senior CSS Developer Interview Questions: Advanced Topics and AnswersSenior CSS developer interview questions and answers: cascade layers, design tokens, layout thrashing, and the modern CSS a mid-level round never covers标签作者GreatFrontEnd Team11 分钟阅读Aug 25, 2026
Senior CSS developer interview questions rarely stay inside a single component. GreatFrontEnd's own CSS interview questions guide covers the box model, flexbox and grid, modern selectors, and seven practical debugging scenarios, and it explicitly targets intermediate-level fluency, there is no dedicated senior section in it. This guide picks up exactly where that one stops: CSS architecture at the scale of a whole codebase or design system, the performance techniques that matter once a page has hundreds of components instead of one, and the trade-off reasoning that separates a senior answer from a mid-level one. Every question below is one you could actually be asked, with a worked answer, not a topic summary.
What separates senior from mid-level CSS candidates
A mid-level candidate can use flexbox, grid, media queries, and modern selectors correctly on a single component. A senior candidate is expected to reason about CSS at the scale of a design system or a large codebase: which architecture pattern fits the team's constraints, when a performance technique is worth its added complexity, and how a token system should be structured so a design decision made once propagates consistently everywhere it is used.
For senior-level preparation, architecture and performance questions are particularly worth focusing on, alongside fluency with individual modern CSS features. The reasoning is straightforward: a component-level CSS mistake affects one place, an architecture-level CSS mistake affects every component built on top of it.
Question 1: How do you manage CSS specificity in a large codebase, and what changes with cascade layers?
How to approach it
For years, the standard answer was a naming convention. BEM gives every class an explicit hook so specificity stays flat and predictable. ITCSS orders your stylesheets from low-level resets up to high-level utilities, so later-defined rules are intentionally more specific. Utility-first approaches, Tailwind being the dominant example, sidestep the specificity problem almost entirely by keeping styles atomic and co-located with markup, at the cost of more verbose HTML.
Cascade layers, the
@layerat-rule, change this calculus. A rule in a higher-priority layer wins over a more specific selector in a lower-priority layer, which means layer order, not selector specificity, becomes the primary mechanism for controlling which rule wins:@layer reset, base, components, utilities;@layer reset {* { margin: 0; padding: 0; box-sizing: border-box; }}@layer components {.button { padding: 0.5rem 1rem; background: var(--color-primary); }}@layer utilities {/* Wins over .button even though this selector is less specific,because the utilities layer is declared last. */.p-0 { padding: 0; }}
This reduces how much a team needs to lean on a naming convention purely to avoid specificity fights, since you can put resets, third-party styles, components, and utility overrides into explicitly ordered layers instead.A strong senior answer does not just define
@layer, it reasons about when it is worth introducing into an existing codebase. Retrofitting cascade layers into a large, already-shipped stylesheet is a bigger undertaking than using them from the start of a new project, and a senior candidate should be able to talk through that migration cost, not just the feature itself.A follow-up worth practicing
Take a real specificity conflict you have actually debugged, a utility class losing to a component style, an override that needed
!importantto win, and work out how you would have prevented it with layers instead. If your answer is "I would put resets in one layer, component styles in another, and utility overrides in a layer above both," you are reasoning about layer order as the fix. If you cannot name which layer a given rule should live in and why, that is a sign the mental model is still incomplete, not just the vocabulary.Question 2: How would you introduce a design token system into a codebase that currently hardcodes values everywhere?
How to approach it
A design token is a single named value, a color, a spacing unit, a type size, a border radius, a motion duration, that gets consumed everywhere that value is used, instead of being hardcoded per component. A common scalable approach is a three-tier system of primitive, semantic, and component-specific tokens, often delivered through CSS custom properties:
:root {/* Primitive: the raw value, no meaning attached */--color-red-600: #dc2626;/* Semantic: what the value means in context */--color-text-error: var(--color-red-600);/* Component: what one specific component consumes,allowed to diverge from the scale for that component only */--button-danger-bg: var(--color-text-error);}The tier distinction matters concretely, not just as vocabulary. A component references the semantic token (
--color-text-error), not the primitive (--color-red-600) directly, so redefining what "error" means across a rebrand only requires changing the semantic token's definition, not hunting down every component that used the raw color. Being able to walk through why a component consumes a semantic token rather than a primitive one directly is a genuine senior-level distinction.The senior-level question here is rarely "what is a design token," it is closer to "how would you introduce a token system into a codebase that currently hardcodes values everywhere, without breaking everything at once." A reasonable answer starts by tokenizing the highest-leverage values first, typically color and spacing, since those touch the most components, and treats the migration as incremental rather than a single rewrite.
Question 3: What causes layout thrashing, and how do you fix it?
How to approach it
Layout thrashing happens when reads and writes to layout-affecting properties get interleaved, forcing the browser to recalculate layout repeatedly instead of once. The fix pattern is batching, read every value you need first, then make all your writes, rather than alternating between the two.
Transform and opacity changes do not trigger layout recalculation and can usually be handled efficiently at the compositing stage, which is why they are common choices for performant animation:
/* Triggers layout on every frame if animated: width, top, left */.bad-animation {transition: left 300ms ease;}/* Compositor-only, no layout recalculation */.good-animation {transition: transform 300ms ease;}.good-animation.is-open {transform: translateX(0);}A senior candidate should be able to explain why transform and opacity skip layout, not just assert that they are "faster."
Question 4: What does the
containproperty do, and when is it worth the complexity?How to approach it
CSS containment lets you tell the browser which aspects of an element and its subtree can be treated independently from the rest of the page. For example,
contain: layout paintenables layout and paint containment for that subtree:.feed-item {contain: layout paint;}Used well, this can reduce the scope of layout and paint work in large, frequently-updating sections of a page, a live feed or a data-heavy dashboard being typical candidates.
content-visibilityandwill-changeare the other levers that come up at this level, alongside critical CSS extraction and lazy-loading non-critical stylesheets so the browser is not blocked on styles the initial viewport does not need.The trade-off worth naming out loud for any of these: each one adds a form of complexity, containment boundaries can change layout behavior and, with paint containment, clip content that paints outside the element's bounds,
will-changeconsumes memory if left on too many elements, critical CSS extraction adds a build step. A senior answer names the specific cost, not just the benefit, and explains what would make the trade-off worth it for a given page. Recommendingwill-changeorcontainas a blanket default rather than a targeted fix for a measured problem is a red flag, since these are tools with real costs, not free wins.Question 5: Walk me through container queries,
:has(), subgrid, and logical properties with a real scenario for each.How to approach it
Container queries (
@container), the:has()selector, subgrid, and logical properties are all stable, broadly supported techniques by 2026, worth treating as expected fluency rather than cutting-edge trivia in an interview. A senior answer connects each to a real scenario rather than reciting the definition.Container queries let a component respond to the size of its own container instead of the viewport, which matters for genuinely reusable components placed in different contexts across a page:
.card-container {container-type: inline-size;container-name: card;}@container card (min-width: 400px) {.card {grid-template-columns: 120px 1fr;}}A card component reused in a narrow sidebar and a full-width grid can lay out differently based on its own container, not the page.
:has()allows selecting a parent or sibling based on its contents, removing a category of problem that used to require JavaScript purely to add or remove a class:.form-field:has(:invalid) {border-color: var(--color-text-error);}Subgrid lets a nested grid align to its parent grid's tracks, solving alignment across a row of otherwise independent cards, a card's header, body, and footer aligning across siblings without manual sizing.
Logical properties (
margin-inline,padding-block, and similar) express spacing and sizing in writing-mode-aware terms instead of assuming left-to-right, top-to-bottom, which matters directly for any product supporting right-to-left languages.Common mistakes and red flags at the senior level
Reciting definitions of modern CSS features without connecting them to why they matter at scale makes for a weaker senior-level answer; the fluency being tested is application, not vocabulary. Defaulting to a naming convention like BEM as the only answer to specificity problems, without mentioning cascade layers as an alternative or complement, suggests the candidate's knowledge stopped a few years before the interview.
At the architecture-judgment level, the same pattern shows up as in other senior interviews: being unable to name a condition under which a recommended approach would change, or defaulting to "it depends" without following up with what it actually depends on and why.
Frequently asked questions
Do I need to memorize every modern CSS feature to pass a senior round? No. The features covered here, container queries,
:has(), subgrid, and logical properties, are worth being comfortable reaching for, but that does not mean you will be quizzed on their syntax from memory. What matters more is connecting a feature to a real problem it solves, which is a different skill than recall.Is cascade layers a replacement for BEM or utility-first CSS? Not exactly a replacement, more a tool that changes why you would reach for either. BEM's specificity-flattening naming discipline matters less once layer order is doing that work explicitly, but a naming convention still helps with readability and ownership regardless of how the cascade is resolved. A senior answer explains what
@layerchanges and what it does not, rather than declaring one approach obsolete.How much CSS performance work actually matters compared to JavaScript performance? This is genuinely context-dependent, and the sourcing behind this guide does not give a confident, generalizable split between the two. What is consistent across sources is that CSS-driven layout thrashing and unnecessary reflows are a real, measurable cost on pages with frequent DOM updates, a live dashboard or a feed being the clearest examples, and that this is often overlooked relative to JavaScript-focused performance work.
What is a tell that a candidate's CSS knowledge has not kept up? Defaulting to a naming-convention-only answer for specificity problems, without recognizing cascade layers as another available tool, can suggest that the candidate's mental model of the cascade has not kept up with modern CSS, even if the candidate is otherwise fluent with newer selectors elsewhere in the conversation.
How to prepare
Work through GreatFrontEnd's CSS interview questions guide first if the fundamentals, box model, specificity, flexbox and grid, are not already solid, since a senior round assumes that level is not in question. From there, practice explaining the architecture and performance questions above out loud with a real scenario attached: not "what is cascade layers" but "here is a 50,000-line stylesheet with specificity wars, walk me through how you would introduce
@layerwithout breaking anything."GreatFrontEnd's full set of CSS coverage and front-end system design material are useful complements, the reasoning the system design material practices, trade-offs, constraints, failure modes, applies directly to the architecture-scale CSS questions this guide covers, even though the specific subject matter differs.
Conclusion
Senior CSS developer interview questions test whether you can reason about CSS at the scale of a design system or a large codebase, not whether you can define container queries or
:has()correctly. Cascade layers and design tokens are the architecture layer, layout thrashing and containment are the performance layer, and the modern selectors are expected fluency, not the differentiator. What actually separates a senior answer is naming the trade-off cost of every technique alongside its benefit, and being able to explain when it would not be worth reaching for. - Frontend Interview Process at Google, Amazon, and Meta: What to ExpectThe frontend interview process at Google, Amazon, and Meta: each company's official prep guide, a round-by-round comparison table, and the 2026 AI-assisted rounds.标签作者GreatFrontEnd Team13 分钟阅读Aug 24, 2026
If you are researching the frontend interview process at Google Amazon Meta specifically, the three share a shape, a coding component, a frontend-fundamentals or system-design layer, and a behavioral round, but the details that actually determine how you prepare differ by company: how many rounds, what each one weighs, and, as of 2026, whether an AI assistant sits in the room with you. This guide walks through each company's process specifically, then covers what changed most recently: AI-assisted coding rounds, now real at both Google and Meta, not a rumor. None of the three companies publishes its exact interview structure officially, so treat the round counts and formats below as commonly reported across candidate experiences rather than guaranteed identical for every team, level, or interviewer.
Start with each company's own official interview-prep guide
Read the primary source before any third-party roundup, including this one. Each company publishes its own interview-prep page directly.
Company Official resource What it covers Google How we hire: interview Round structure, what interviewers evaluate, general preparation advice Amazon Amazon FEE Interview Prep Coding and technical-fundamentals expectations, how interviews map to the Leadership Principles Meta Preparing for your software engineering interview at Meta What to expect in each round, tips from Meta's own engineers None of the three publishes the frontend-specific round-by-round breakdown below, that has to be reconstructed from candidate reporting, which is why this guide exists. But the official page is worth reading first: it sets expectations directly from the source, and Meta's own guide already addresses the AI-assisted round directly, since many of its interviews now include an AI assistant built into the interview environment.
Google's frontend interview process
Google's process typically opens with a recruiter screen, followed by a technical phone interview, then a multi-round onsite loop, 4 to 5 rounds, either in person or virtual. The loop commonly includes 2 coding rounds, 1 system design round for mid-level and above, 1 behavioral or "Googleyness" round, and 1 leadership-focused round.
The technical screen can be algorithmic or frontend-focused depending on the loop. Frontend-focused screens may cover JavaScript, DOM/browser fundamentals, or UI implementation, while DSA remains fair game even for frontend candidates.
What's new for 2026: Google is piloting an AI-assisted coding round. This is confirmed, not a rumor, an internal document describing the pilot was publicly reported and a Google spokesperson confirmed candidates in the pilot use the company's own Gemini model as the AI assistant. As of the pilot's public reporting, it is scoped to junior and mid-level roles on select US teams, not a company-wide replacement of the standard loop. For junior candidates in the pilot, one traditional technical interview is replaced with a session focused on solving open-ended engineering problems, and a separate "code comprehension" round is also being introduced. If you are interviewing at Google now, it is worth asking your recruiter directly whether your loop includes this pilot, since it is not yet the default experience for every candidate.
Amazon's frontend interview process
Amazon's onsite is commonly reported as 4 to 5 rounds, each around 55 to 60 minutes. The core rounds: a Coding Round with medium-to-hard difficulty questions on fundamental algorithms and data structures, a Front-End Fundamentals Round that tests JavaScript, HTML, CSS, relevant libraries, and DOM knowledge directly, and a Systems Design Round assessing how you reason about scalable systems.
The structural difference worth knowing going in: Amazon weaves behavioral assessment through the entire loop rather than isolating it into one round. Every interview, technical or not, is also evaluated against Amazon's Leadership Principles, so a strong technical answer that never demonstrates ownership, bias for action, or a relevant principle in how you talk through your approach is a weaker interview than the code alone would suggest.
No public reporting surfaced in this research pass indicating Amazon has introduced an AI-assisted coding round comparable to Google's or Meta's. Do not assume Amazon has adopted one just because its two closest peers have, ask your recruiter directly if this matters to your preparation. The absence of public reporting is not the same as a confirmed absence of a pilot, large companies sometimes run small pilots quietly before any candidate-facing guide picks them up, but there is nothing to prepare for on this front based on what is currently documented.
Candidate reports describe the Front-End Fundamentals Round as separate from the DSA coding round, though Amazon's own interview-prep page does not confirm this exact split. If that reporting holds, it is worth planning around: a candidate who is strong at algorithms but shaky on, say, event delegation, CSS specificity, or how the browser's rendering pipeline actually works may not be able to rely on the coding round to compensate. That would be different from Google and Meta, where a weak frontend-fundamentals answer inside a coding round can sometimes be offset by strong algorithmic performance in the same session.
Meta's frontend interview process
Meta's process is commonly reported to start with a single 45-minute coding interview as the initial screen. Clearing it moves you into the full loop, 4 to 6 interviews spanning coding, a UIE architecture and design round, and behavioral rounds.
The onsite traditionally includes two coding interviews focused on data structures and algorithms with a practical lean toward building user interfaces the way Meta's frontend teams actually work, a design and architecture interview covering how you would build web application products and structure UI components, and a career and coding round that mixes behavioral questions about your background and motivation with more technical discussion.
What's new for 2026, and this is the most concretely documented change across all three companies: Meta rolled out an AI-assisted coding round starting October 2025, replacing one of the two traditional onsite coding interviews, and it is reported to be expanding across more of Meta's software engineering loops through 2026. Multiple independent, detailed guides describe the same specific mechanics, which is why this is treated as reliable rather than a single aggregator's summary: the round runs in a CoderPad environment with a three-panel layout, a file explorer, a code editor, and an AI assistant chat window, for 60 minutes. Candidates choose among several AI models during the session, GPT, Claude Sonnet, Claude Haiku, Gemini, and Llama are all reported as options. The AI can respond in the chat panel but cannot directly edit files, so you still have to write and own the code yourself. The session moves through phases, bug fixing, core implementation, and optimization, and Meta evaluates candidates on four criteria: problem solving, code quality, verification, and communication.
How much of Meta's overall loop now runs through this format is not independently verified in the sources behind this guide, treat "expanding through 2026" as the reported direction, not a confirmed percentage.
Round-by-round comparison
The prose above covers the reasoning behind each company's structure; this table is the scannable version to check your prep against.
Round type Google Amazon Meta Coding / DSA 2 onsite rounds + 1 phone screen 1 dedicated round, medium-to-hard difficulty 2 onsite rounds (1 may now be AI-assisted) + 1 initial 45-min screen Frontend fundamentals Folded into the coding rounds Reported as a separate standalone round, graded independently Folded into the coding rounds System design / architecture 1 round, mid-level and above 1 round 1 round (UIE architecture and design) Behavioral 1 "Googleyness" round + 1 leadership round Woven through every round via the Leadership Principles 1 dedicated career-and-coding round AI-assisted coding round Piloting, junior and mid-level, select US teams Not reported as of this guide Live since October 2025, expanding through 2026 Total onsite rounds 4 to 5 4 to 5, each 55 to 60 minutes 4 to 6 What's common across all three
A DSA-style algorithmic coding component is present at all three companies, and none of the AI-assisted pilots have removed it entirely, they replace or sit alongside one coding round, not the whole loop. Frontend-specific fundamentals, JavaScript, the DOM, HTML, CSS, get tested somewhere in every loop, though Amazon gives it a dedicated standalone round while Google and Meta fold it into the coding interviews. All three introduce an architecture or system-design-style round at mid-level and above. And all three assess behavioral fit, though the structure differs: Amazon ties it explicitly to the Leadership Principles across every round, while Google and Meta each carry a more standalone behavioral interview.
The practical implication for preparation is that no single company's process is a superset of the others. Someone who prepares only algorithmic coding will be underprepared for Amazon's dedicated fundamentals round and for the behavioral framing every Amazon interview carries. Someone who only prepares frontend fundamentals and system design will be underprepared for the algorithmic depth Google's rounds are reported to expect. Cross-company preparation means covering all three layers, not picking the one that feels most comfortable and hoping it generalizes.
The AI-assisted coding round: what's actually changing
If there is one thing worth internalizing before walking into a 2026 loop at either company, it's this: an AI assistant being present does not mean the bar for you personally has dropped. Meta's own evaluation criteria, problem solving, code quality, verification, and communication, are the same categories a traditional coding round would grade on. The assistant changes the mechanics of typing code, it does not change what a strong candidate demonstrates. If anything, being unable to verify or explain code the assistant suggested is now itself a visible weak signal, since "communication" is an explicit grading category and the interviewer is watching how you use the tool, not just whether the final code works.
Practically, that means treating the AI assistant the way you would treat a very fast, occasionally wrong pair programmer: use it to move faster on boilerplate, but narrate your reasoning, catch what it gets wrong, and be ready to explain any line of code it produced as if you had written it yourself.
It also changes what a mistake looks like. In a traditional round, silence while you think is normal. In an AI-assisted round, silence while the assistant generates code and you simply accept it without comment reads very differently to an interviewer scoring you on communication. The safer default is to talk through what you expect the assistant's suggestion to do before you run it, then confirm or correct that expectation out loud once you see the result.
Frequently asked questions
Do all three companies test the same coding topics? The underlying skill set overlaps heavily, algorithms, data structures, JavaScript and DOM fluency, but the packaging differs. Amazon isolates frontend fundamentals into their own round; Google and Meta fold them into general coding rounds. If you are preparing across all three, the safest approach is to prepare the fundamentals deeply rather than trying to guess which company will ask what.
Should I ask my recruiter whether my loop includes an AI-assisted round? Yes, particularly at Google right now, since the pilot is scoped to junior and mid-level roles on select US teams rather than every candidate. Knowing in advance changes how you would practice: a traditional round rewards fast, correct typing, an AI-assisted round rewards fast, correct verification of someone else's typing.
Is the AI-assisted round easier because you have help? Not based on what Meta's own evaluation criteria suggest. Problem solving, code quality, verification, and communication are the same categories a traditional round grades on, and an unverified or unexplained suggestion from the assistant is a visible weak signal, not a shortcut past the bar.
Does Amazon's Leadership Principles framing mean the technical rounds matter less? No, it means the technical rounds are graded on two dimensions instead of one. A technically correct answer delivered without any signal of ownership, bias for action, or a relevant principle is still reported as a weaker interview at Amazon than the same code paired with that framing, which is a meaningfully different bar than a purely code-scored round at Google or Meta.
How to prepare
Read the official company page first: Google's interview process, Amazon's FEE Interview Prep, and Meta's software engineering interview prep. Then layer on the fundamentals every one of these loops still tests regardless of format changes: algorithmic coding under time pressure, JavaScript and DOM fluency, and the ability to reason through a frontend system design question out loud. GreatFrontEnd's algorithmic coding practice questions and 10 must-know JavaScript coding interview questions cover the coding-round layer that has not gone away at any of the three companies.
For the system design and architecture rounds that show up at mid-level and above across all three, GreatFrontEnd's front-end system design material is built around the same reasoning senior loops are testing for, requirements gathering, trade-off analysis, and reasoning through failure modes, not memorized diagrams.
If your loop includes or might include an AI-assisted round, practice with an AI coding assistant deliberately before the interview, not for the first time during it. The skill being tested, catching what the assistant gets wrong and explaining your reasoning clearly, is not something you want to be doing consciously for the first time under interview pressure. Pick one real problem, work through it with an assistant, and pay attention to the moments where you were tempted to accept a suggestion without checking it, that moment is exactly what an interviewer is watching for.
Conclusion
The frontend interview process at Google Amazon Meta rhymes more than it repeats: a coding component, frontend fundamentals or a dedicated system-design round, and a behavioral assessment, structured slightly differently at each company, with Amazon threading its Leadership Principles through every round rather than isolating them. The one genuine 2026 shift is the AI-assisted coding round, confirmed and expanding at Meta since October 2025, confirmed as a pilot at Google for junior and mid-level roles on select teams, and not reported at Amazon as of this guide. Read each company's own official prep page first, prepare for the fundamentals since none of the three has removed them, then get comfortable narrating your reasoning with an AI assistant in the room if your loop might include one.
- Machine Coding Interview Questions for Tech Leads and Principal EngineersMachine coding interview questions for tech leads, a full worked async autocomplete example in TypeScript covering API design, testing, and build-versus-buy.标签作者GreatFrontEnd Team20 分钟阅读Aug 20, 2026
A tech-lead or principal frontend candidate may be asked to build the same small UI as a mid-level candidate. The code still has to work. At the senior level, the follow-up discussion often examines whether its boundaries will hold up across products, data sources, and teams.
This guide works through one autocomplete exercise from implementation to adoption. It covers the component contract, async failure modes, accessibility, testing, build-versus-buy decisions, code review, and a cross-team rollout. The answers show how to reason from specific constraints.
If you first need practice shipping the base component under time pressure, start with the complete machine coding round guide or the frontend LLD interview guide. This article assumes you can already build the main interaction.
Are principal engineers actually asked machine coding questions?
Yes, although the format varies by company. You may see it described as browser coding, UI coding, pair coding, or a practical coding interview.
As of August 2026, Atlassian's public Principal Frontend Engineer interview guide lists two 60-minute coding interviews. In the browser-coding round, the candidate builds a simple interactive interface in a familiar framework. Atlassian assesses coding skill, code quality, conceptual thinking, adaptability, communication, and testing during that exercise.
Other Staff+ loops use different formats. Monzo's May 2025 description of its Senior Staff+ interview process includes pair coding or a take-home alongside separate system-design, behavioral, and impact-and-leadership interviews. Amazon's software-development interview topics and Microsoft's technical interviewing guide describe still different combinations of coding, design, and competency assessment.
Before preparing, ask the recruiter what the coding round contains, which tools are allowed, and which competencies it evaluates. A principal interview does not always turn a UI exercise into a system-design discussion. Be ready to write working code and discuss its broader implications when prompted.
What changes at tech-lead and principal level?
A familiar prompt can reveal different evidence depending on the expected scope of the role.
Area Baseline implementation signal Tech-lead or principal signal Requirements Covers the requested happy path Finds the ambiguity that changes the architecture and deliberately scopes the first release State Keeps the component working Separates interaction, product, and server state so consumers are not coupled accidentally Component API Passes the needed props Defines ownership, extension points, invariants, and unsupported use cases Accessibility Adds labels and click handlers Implements the established widget interaction model and explains how it will be tested Performance Avoids obvious waste Identifies the likely bottleneck, sets a constraint, measures it, and chooses the smallest effective fix Testing Tests the main behavior Chooses tests based on user and release risk Adoption Finishes the local feature Plans ownership, compatibility, migration, observability, and rollback for shared code Communication Narrates the implementation Explains assumptions and trade-offs concisely A tech lead usually applies this judgment within a team or related set of consumers. A principal engineer is more likely to be probed on organizational scope: competing requirements, long-lived contracts, staged migrations, and how several teams reach and maintain a decision. Titles vary, so use the job description and recruiter guidance as the source of truth. GitLab's Principal Engineer framework, for example, emphasizes organizational scope and cross-team technical decisions.
The worked prompt: build an async autocomplete
Assume the interviewer gives you 60 minutes and this brief:
Build an autocomplete input that loads suggestions from an asynchronous data source. Users must be able to type a query, see loading and empty states, move through suggestions with the keyboard, and select a result.
Before coding, clarify the decisions that change the implementation:
- Can users submit arbitrary text, or must they choose a suggestion?
- What identifies a result, and can two results have the same label?
- Is the data source local, remote, paginated, or rate-limited?
- How many results can be displayed?
- What should happen when the request fails?
- Is the component used inside a form?
- May you use an accessibility or data-fetching library?
- Which browsers and assistive technologies matter?
Spend the first few minutes on decisions that affect the state model or component contract. State what you will defer, then start building.
A practical 60-minute plan is:
- 0 to 5 minutes: clarify selection behavior, data source, result identity, and minimum accessible interaction.
- 5 to 10 minutes: write the state model and component boundary.
- 10 to 35 minutes: ship typing, loading, results, empty state, and selection.
- 35 to 48 minutes: handle stale requests and keyboard interaction.
- 48 to 56 minutes: add the highest-value tests and fix issues they expose.
- 56 to 60 minutes: demonstrate the flow and explain the next production step.
Leave enough time at the end to run and inspect the result.
Question 1: What would you build first, and what would you defer?
How to approach it
Start with one complete user path: type a query, load results, render them, and select one. Add visible loading, empty, and error states before optional polish because each state changes what the user can do.
For the first pass, cap the result set and support one selection. Leave caching, virtualization, request prefetching, animation, and a general design-system API for later unless the prompt requires them. Write down those follow-ups so the interviewer can see that the scope is deliberate.
The state should make contradictory screens difficult to represent. A discriminated union is clearer than unrelated loading and error booleans:
Keeping previous results during loading can be a valid product choice, but make it explicit. If old results remain visible, label the state as refreshing and prevent the UI from presenting them as results for the new query.type SuggestionsState<Item> =| { status: "idle"; items: readonly [] }| { status: "loading"; items: readonly Item[] }| { status: "success"; items: readonly Item[] }| { status: "error"; items: readonly []; message: string };Why this is a useful first pass
- You choose a demonstrable slice before investing in infrastructure.
- Your state model reflects user-visible states.
- You can name deferred work and the condition that would make it necessary.
Question 2: How would you design the component API for more than one consumer?
Start by deciding which layer owns the data and its product meaning. The number of props is secondary.
How to approach it
Keep the reusable interaction component independent of fetching and product navigation. Let it receive items and emit user intent. A search wrapper can fetch remote results and navigate when an item is chosen; a form wrapper can integrate validation; a command palette can execute actions and support grouping. The wrappers share combobox behavior while retaining their own domain contracts.
One possible controlled contract is:
The consumer controls the query and selected value because they affect routing, form submission, validation, and analytics. The component can keep transient interaction state, such as whether the popup is open and which item is highlighted, internally.type AutocompleteProps<Item> = {inputValue: string;items: readonly Item[];selectedItem: Item | null;getItemKey: (item: Item) => string;itemToString: (item: Item) => string;onInputValueChange: (value: string) => void;onSelectedItemChange: (item: Item | null) => void;renderItem?: (item: Item) => React.ReactNode;isLoading?: boolean;errorMessage?: string | null;disabled?: boolean;};Other ownership models can also work. React's documentation notes that controlled and uncontrolled are not strict categories; components commonly mix props with local state. In the interview, explain which state a consumer must coordinate and which state remains an implementation detail. See Sharing State Between Components.
Principal-level follow-up
If three products need similar autocomplete behavior, compare their semantics before consolidating them into one product component:
- Search results navigate and may include rich previews.
- Form options represent a value with validation rules.
- Command-palette items execute actions, use shortcuts, and may be grouped.
Share the lowest stable behavior and build product-specific wrappers. A single component with dozens of flags transfers product complexity into a contract every consumer must understand.
Question 3: How do you prevent stale async results?
Debouncing reduces request frequency. It does not guarantee that responses arrive in order.
How to approach it
Clear the pending debounce timer when the query changes, abort the previous request when possible, and ignore its result if the data source does not honor cancellation. Reset to idle for an empty query. Keep fetching outside the presentation primitive so a product can substitute its framework or client-cache mechanism.
type LoadSuggestions<Item> = (query: string,signal: AbortSignal,) => Promise<readonly Item[]>;function useSuggestions<Item>(query: string,loadSuggestions: LoadSuggestions<Item>,) {const [state, setState] = React.useState<SuggestionsState<Item>>({status: "idle",items: [],});React.useEffect(() => {const normalizedQuery = query.trim();if (normalizedQuery === "") {setState({ status: "idle", items: [] });return;}const controller = new AbortController();const timerId = window.setTimeout(async () => {setState({status: "loading",items: [],});try {const items = await loadSuggestions(normalizedQuery, controller.signal);if (!controller.signal.aborted) {setState({ status: "success", items });}} catch (error) {if (!controller.signal.aborted) {setState({status: "error",items: [],message:error instanceof Error? error.message: "Unable to load suggestions",});}}}, 250);return () => {window.clearTimeout(timerId);controller.abort();};}, [loadSuggestions, query]);return state;}The contract assumes
loadSuggestionshas a stable function identity. In an application, define it outside the component, memoize it when necessary, or let the framework's data layer own the request lifecycle.React's Effect documentation explicitly calls out out-of-order responses and recommends aborting a fetch or ignoring its result during cleanup. A production application may use a framework data API or client cache for deduplication and caching, but the race still needs a defined owner.
Details worth mentioning
- A debounce alone does not solve response ordering.
- Aborting a request is insufficient if the data source ignores the signal.
- A global store does not automatically make server data fresh.
- Loading, error, and empty are product states, not incidental booleans.
Question 4: What does an accessible autocomplete require?
Keyboard support covers only part of the accessibility contract.
How to approach it
Start with the established combobox interaction model. The current WAI-ARIA Authoring Practices combobox pattern describes the expected semantics and keyboard behavior.
For a list autocomplete:
- Give the input an accessible name.
- Expose
role="combobox",aria-expanded,aria-controls, and the appropriatearia-autocompletevalue. - Give the popup
role="listbox"and each suggestionrole="option". - Keep DOM focus on the input while using
aria-activedescendantto identify the active option. - Set
aria-selectedon the visually selected option. - Support Down Arrow, Up Arrow, Enter, and Escape without breaking normal text-editing keys.
- Preserve a predictable Tab sequence.
- Ensure pointer selection and keyboard selection update the same state.
- Announce loading, errors, and result-count changes without making every keystroke excessively verbose.
Use stable IDs for options that can be filtered, reordered, or replaced by a new response. An array index cannot preserve that identity.
In a timed round, implement the core pattern and say exactly what remains to be tested. For production, test keyboard-only use, zoom and high-contrast presentation, and representative browser and screen-reader combinations. Use the WAI-ARIA guide as a starting point, then test the actual implementation.
Question 5: Review this implementation before it ships
A review prompt may start with working but flawed code:
function SearchBox({ search }) {const [query, setQuery] = React.useState("");const [results, setResults] = React.useState([]);React.useEffect(() => {window.setTimeout(async () => {const nextResults = await search(query);setResults(nextResults);}, 250);}, [query, search]);return (<div><input onChange={(event) => setQuery(event.target.value)} /><div>{results.map((result, index) => (<div key={index} onClick={() => setQuery(result.label)}>{result.label}</div>))}</div></div>);}How to approach it
Review the problems in order of user risk. Style preferences can wait.
1. Fix async correctness. Every query creates a timer, none are cleared, and a slower old request can replace newer results. Empty queries also call the data source. Add timer cleanup, cancellation or result invalidation, and explicit loading and error states.
2. Fix interaction and accessibility. The input has no label or combobox state. Suggestions are clickable
divelements with no option semantics or keyboard model. Implement the combobox pattern and define selection separately from input editing.3. Fix identity and types. Array indexes do not preserve result identity across responses. Require a stable key and type the search result and callback contracts.
4. Define product behavior. Decide whether choosing a result only changes the input, submits a form, or navigates. Closing the popup, clearing results, and handling arbitrary input are currently unspecified.
5. Add risk-based tests. Cover a newer response winning over an older one, keyboard selection, Escape behavior, empty results, and a failed request. Tests for class names or internal hook calls would provide less confidence.
A useful review also explains the order. A stale response and an unusable keyboard path can harm users. Renaming a variable can wait.
Question 6: How would you test the component?
How to approach it
Test observable contracts at the lowest level that provides enough confidence.
Test level High-value coverage for this prompt Unit Query normalization, result identity helpers, and any extracted state transitions Component Typing, loading, successful and empty results, selection, keyboard navigation, Escape, and error recovery Integration Wrapper behavior such as form validation, navigation, analytics, or a client cache End-to-end One critical product journey using the real route, network boundary, and browser focus behavior Use fake timers only where they make the debounce deterministic. Resolve promises in a deliberately reversed order to prove that an older response cannot overwrite a newer query. Query the DOM by role and accessible name so the test exercises the public interface.
An automated accessibility scan can catch missing roles or names. It cannot validate the full focus and announcement experience, so the widget still needs manual keyboard and assistive-technology testing.
If the interviewer only leaves time for two tests, choose the main keyboard selection path and the stale-response failure. They cover more product risk than several snapshots.
Question 7: When would you optimize this autocomplete?
How to approach it
First identify whether the delay is network time, JavaScript work, rendering, or input handling. Each has a different fix.
- Too many requests: adjust the minimum query length, debounce interval, caching, or server API.
- Slow responses: improve the service, cancel obsolete work, prefetch only when evidence supports it, and design a useful loading state.
- Expensive local matching: normalize or index the data outside the keystroke path and measure the cost with representative input.
- Too many DOM nodes: cap results, paginate, or virtualize only when the result count justifies the added keyboard and accessibility complexity.
- Expensive row rendering: stabilize props and profile before adding memoization.
State the constraint you are optimizing. For example: "The API returns at most 20 suggestions, so virtualization would add complexity without addressing a measured bottleneck." That answer is more useful than a general promise to use virtualization at scale.
For a shared component, publish a representative performance test or budget. Measure with realistic result shapes, slow-network conditions, and the oldest supported device class.
Question 8: Would you build this component or adopt a library?
How to approach it
Separate the behavior layer from the product presentation. For a combobox, dialog, date picker, data grid, or rich-text editor, an established accessible primitive can remove substantial interaction work. The team still has to verify the result in its product context.
Work through the decision with concrete constraints:
Question Evidence favoring adoption Evidence favoring an in-house implementation Interaction complexity Focus management, internationalization, or assistive-technology behavior is extensive The behavior is narrow and mostly covered by native HTML Product differentiation Standard behavior is acceptable The interaction is central to the product and existing contracts fight it Compatibility The package supports the framework, rendering model, browser policy, and design system Required behavior depends on unsupported internals or a conflicting architecture Maintenance The project has responsive maintainers, releases, tests, and a credible upgrade path The dependency is inactive, difficult to patch, or expensive to upgrade Cost Bundle and runtime cost fit measured budgets The application would ship a large subsystem for a small behavior Risk License, provenance, transitive dependencies, and security posture are acceptable Policy or supply-chain risk cannot be mitigated Exit The library can be wrapped behind a stable product contract Its types and assumptions would leak through the entire application OWASP's 2025 guidance on software supply-chain failures covers maintenance, transitive dependencies, trusted sources, patching, and change management. API ergonomics is only one part of a dependency review.
In the interview, separate the exercise constraints from your production recommendation. You can build the interaction during a no-library round and still recommend an established primitive for the product.
Question 9: How would five teams adopt this without forking it?
This question tests ownership beyond the initial implementation.
How to approach it
First confirm that the teams share behavior. Similar appearance alone is not enough. Document the stable primitive contract and the product-specific wrappers. Assign an owner and use a visible proposal process for changes that affect several consumers.
For a shared package:
- Publish supported behavior, browser policy, accessibility expectations, and explicit non-goals.
- Keep product data shapes out of the primitive; adapt them at the wrapper boundary.
- Use semantic versioning, a deprecation window, and migration examples for breaking changes.
- Add contract, accessibility, and representative integration tests.
- Test prereleases with a small set of consumers before broad rollout.
- Track adoption and errors so the owner knows whether migration is working.
- Provide an exit path if a team has genuinely different semantics.
A product with different interaction semantics may deserve a separate component. Problems begin when copied implementations diverge without an owner, shared fixes, or a documented reason for remaining separate.
Principal-level follow-up
At principal scope, explain how you would resolve conflicting team requirements. Gather concrete use cases, identify the smallest shared invariant, record the decision, and decide who owns the migration cost. Adding more flags may preserve every team's old behavior, but it also leaves every consumer with a larger contract to understand and test.
Connect the component decision to an organizational result, such as fewer accessibility regressions, faster delivery, a smaller maintenance surface, or a safer migration. A single shared component has little value if it does not improve one of those outcomes.
Question 10: What would you change if the requirements doubled after launch?
How to approach it
Future requirements may fall outside the original API. Explain how you would decide whether a change belongs in the existing component, a new wrapper, or a separate component.
Suppose the original form autocomplete now needs grouped command actions, shortcuts, recent history, and nested pages. Those requirements change the selection semantics and focus model. Keep the accessible list-navigation primitives if they still fit, but create a command-palette contract rather than turning
Autocompleteinto a collection of mode flags.If the new requirement is smaller, such as custom result rendering or a controlled open state, extend the existing contract with a backward-compatible prop, test existing consumers, and document the new invariant.
A clear answer identifies what remains stable, what now has different semantics, and who pays the migration cost.
Common mistakes in senior machine coding rounds
Designing the platform before the feature works
The first deliverable is executable code. Ship a narrow path, then use the running code to explain the production boundary. Architecture discussion cannot rescue a broken core interaction.
Treating flexibility as the number of options
Every new boolean creates combinations someone must understand and test. Prefer a small contract with clear ownership and composable wrappers.
Saying "performance" without naming a bottleneck
Debouncing, memoization, caching, and virtualization solve different problems. State which work is slow, how you know, and what threshold triggers the optimization.
Calling server data "global state"
Remote data can become stale independently of the current component. Define who owns fetching, cancellation, caching, invalidation, and mutation instead of moving every value into one store.
Treating accessibility as a final polish pass
Focus ownership, option identity, keyboard interaction, and selection semantics affect the component architecture. Retrofitting them in the final two minutes is harder than choosing the pattern during planning.
Reviewing every issue at the same priority
A senior review distinguishes user-facing correctness, accessibility, and security problems from maintainability improvements and style preferences.
Pretending the title changes the coding bar completely
Principal candidates may still be expected to write correct, readable code under time pressure. The broader role scope appears in how decisions are framed and in separate design and leadership interviews; it does not replace implementation ability.
A practice set for experienced frontend engineers
Use different base components to expose different risks:
Practice problem Base implementation Senior follow-up Autocomplete Async results and selection Request ownership, combobox accessibility, product wrappers Data table Sorting, filtering, and pagination Column contract, URL state, server data, virtualization threshold Modal dialog Open, close, and submit Focus trapping, restoration, nested dialogs, portal ownership File explorer Recursive expand and select Keyboard tree pattern, lazy children, optimistic rename, permissions Toast system Queue and dismiss Timing accessibility, deduplication, priority, application-wide ownership Tabs Active panel and keyboard navigation Lazy loading, preserving state, routing, analytics, controlled API After each implementation, answer these questions aloud:
- Which state belongs to the primitive, product wrapper, server-data layer, and URL?
- What user-visible race or invalid state can occur?
- Which established accessibility pattern applies?
- What would you measure before optimizing?
- Which two tests cover the most risk?
- Where would you draw the build-versus-buy boundary?
- How would you change the contract without breaking existing consumers?
- Who owns the component after launch?
Practice one scenario where the interviewer changes a requirement halfway through. State what remains valid, what must change, and what you will stop building to protect the core deliverable. This prepares you to revise a design under pressure instead of reciting a memorized API.
How to prepare for your specific interview
Before the round, ask the recruiter:
- Is this browser UI coding, JavaScript coding, pair programming, or code review?
- How long is the round?
- Can you use your own IDE and documentation?
- Are frameworks and third-party libraries allowed?
- Are automated tests expected?
- Is the exercise evaluated independently or leveled for the role?
Then prepare the environment you will actually use. Verify that it starts, renders a page, runs tests, and does not depend on credentials or network access. Atlassian's principal guide explicitly recommends a familiar environment and says debugger use is welcome; follow the instructions for your own company rather than copying another company's setup.
For implementation fluency, use GreatFrontEnd's user-interface coding questions. For the architecture follow-ups, work through the Front End System Design Playbook. If you are moving into the role as well as interviewing for it, the frontend developer to tech lead guide explains how technical direction, review, and risk ownership change the job.
What to remember
A lead-level machine coding answer begins with a working component. Senior judgment shows up in the boundaries around that code: explicit state ownership, correct async behavior, an established accessibility model, tests chosen by risk, measured performance decisions, and a credible plan for adoption and change.
Finish the user path and make your assumptions visible. Use the follow-up discussion to show how the local implementation fits into a system other engineers can safely operate. That is where organizational scope becomes relevant.
- Data Structures Interview Questions for Senior Frontend EngineersIf you are researching senior data structures developer interview questions, the first thing worth knowing is that the question set looks less like a general SWE algorithms round and more like it was built around the browser.标签作者GreatFrontEnd Team11 分钟阅读Aug 18, 2026

If you are researching senior data structures developer interview questions, the first thing worth knowing is that the question set looks less like a general SWE algorithms round and more like it was built around the browser. Senior frontend loops that still include a data structures component tend to frame the same classic structures around UI-shaped problems: caches, prefix search, dependency graphs, and trees that look a lot like the DOM.
One honest note before the list. Company practice varies more here than the rest of the interview. Some loops, Google's among them, are reported to keep a genuine data-structures round at medium-to-hard difficulty. Others, including some Meta frontend loops, are reported to de-emphasize pure algorithms in favor of JavaScript and system-design depth. Direct, dated forum volume tagging "senior frontend" together with a specific structure is thinner than general SWE reporting, so the patterns below are drawn from aggregated interviewer notes and candidate write-ups rather than a single large verified sample. Treat any one company's reported approach as exactly that: one data point, not a universal rule.
What actually changes at senior level
Mid-level candidates can often reach a working solution with some coaching. What interviewers report looking for at senior level is different in kind, not just speed.
Correctness and optimality come first, then production judgment. A senior answer is expected to state time and space complexity up front, choose the right combination of structures without being led there (a
Mappaired with a doubly linked list for an LRU cache, for instance), and handle edge cases such as zero or one item capacity, missing keys, or an already-empty structure without prompting.Frontend framing follows naturally, not as an afterthought. A senior answer tends to connect the structure to a real frontend use unprompted, a client-side cache eviction policy, an autocomplete latency budget, the cost of a DOM traversal, why a trie can provide better asymptotic prefix lookup than repeatedly scanning the full dataset and when its extra memory cost is justified, and can talk through the trade-offs, including JavaScript-specific ones like relying on
Mapinsertion order instead of building an explicit linked list.Communication and extensibility matter as much as the code. Walking through invariants, discussing how a structure would scale or interact with client state, and raising a reasonable follow-up without being asked is reported as a positive signal. A layered TTL on top of an LRU cache so stale entries expire on their own, or ranking suggestions inside a trie instead of returning them in whatever order they were inserted, are the kind of unprompted extensions that are reported to land well, precisely because they show the candidate is already thinking about the structure in production terms rather than as a standalone exercise, not because the interviewer asked a follow-up question to get there.
The red flags interviewers report are the mirror image: jumping into code before clarifying constraints, using an array with linear-time shifts for something that needs to behave like a queue, missing JavaScript-specific behavior such as
Mapordering, or treating the prompt as a pure algorithm exercise with no product context at all.The structures and problems that recur
These are the patterns that show up repeatedly in frontend-oriented senior loops, based on the Front End Interview Handbook and GreatFrontEnd's own company-specific material, plus recurring candidate write-ups. As above, treat frequency claims here as recurring in this material rather than statistically sampled.
Implement an LRU cache with O(1) get and put
This is one of the most consistently reported problems in this category, showing up in frontend-flavored coding rounds. It usually uses a
Mapcombined with a doubly linked list, or aMap's own insertion order in JavaScript, to keep access and eviction efficient. In aMap-only implementation, accessing an entry must refresh its insertion order, typically by deleting and reinserting the key; callingset()on an existing key does not move it to the end. The frontend framing that tends to come up is a browser or HTTP cache, a client-side query cache, or a cap on how much a component memoizes. A common mistake is forgetting to refresh an entry's recency on a read. The operations may still be O(1), but the cache is no longer actually LRU: it can evict an item that was accessed recently.Build a trie for autocomplete or prefix search
Insert a set of words, then return completions for a given prefix, sometimes ranked by frequency. This maps directly onto typeahead and search UI, and autocomplete is reported as a recurring coding and system-design follow-up together. The senior bar tends to be a clean node structure, prefix-length lookup rather than a scan of the whole word list, and being able to discuss the memory-versus-speed trade-off of precomputing top results at each node for production scale.
Traversals over tree-shaped or DOM-like data
Depth-first or breadth-first traversal on trees or nested structures: serializing and deserializing a tree, finding a lowest common ancestor, level-order or zigzag traversal, inverting a tree, or computing diameter and path sums. This category is called out specifically because the DOM itself is a tree, and the same shape recurs in file explorers, nested comment threads, and component trees. Traversal over HTML-like nodes and outline-view style problems are reported in company-specific frontend material.
Graph problems with a frontend-shaped story
Cycle detection (framed as a package or dependency manager, or a course-prerequisite style problem), cloning a graph, topological sort, and counting connected components or islands on a grid all recur. The frontend analogy tends to be a module dependency graph, a routing structure, or cycle detection inside a package manager, which is specifically reported as a frontend-flavored variant. Heavier shortest-path algorithms such as Dijkstra's are reported far less often at this level.
Stacks, queues, and priority queues in an interface context
Balanced brackets, an undo-redo stack, sliding-window and monotonic-structure problems, and top-K or running-median problems using a heap. The bar here is reported to be less about implementing a priority queue from scratch and more about reaching for the right structure for event ordering, task scheduling in a UI, or a recently-used items list.
Hash maps, arrays, and sliding-window hybrids
Grouping anagrams, the longest substring without repeating characters, merging intervals, a time-based key-value store, and removing duplicates from arrays of objects. These are reported as the highest-volume category by far, and the senior bar is reaching an optimal solution quickly along with being able to discuss when a JavaScript
Mapis the better choice over a plain object.A few problems recur just outside this core set: merging several sorted lists with a heap, serializing and deserializing a binary tree, and Word Search II, which combines a trie with backtracking. Heavier dynamic programming and advanced graph algorithms are reported as uncommon at this level in pure frontend loops.
The current landscape, and why JavaScript specifics matter more than the theory
Nothing about the underlying data structures themselves has changed in the last six to twelve months. What has shifted is emphasis. Frontend system design increasingly absorbs the data structures conversation rather than keeping it separate: an autocomplete system-design question tends to fold in a trie plus a ranking layer plus a caching layer, and a collaborative-editor question tends to fold in the trees or graphs underneath CRDTs or operational transforms. Coding a plain LRU cache or a plain trie in isolation is still reported as a coding-round staple even where the system-design round covers the same ground conceptually.
The JavaScript and TypeScript implementation details are also reported to matter more than they might in a language-agnostic algorithms round. Leaning on a
Map's own insertion order to simplify an LRU cache instead of building an explicit doubly linked list is a recognized shortcut, not a shortcut that costs credibility, and awareness of options like typed arrays or a carefully chosen object shape is reported to matter when a tree or graph problem is framed as performance-sensitive. It is also worth knowing that a meaningful share of what gets labeled a "data structures question" in frontend loops is really a plain JavaScript function implementation, debounce, throttle, flattening a nested array, a deep clone, that itself leans on a stack, a queue, or a map under the hood. Preparing the core structures in this guide covers more of that adjacent ground than it might first appear to.Common mistakes and red flags interviewers report
- Choosing the wrong primary structure for the job, such as an array with a linear scan for prefix search, or a
Map-based LRU that does not refresh insertion order when an entry is accessed. - Losing the O(1) guarantee on an LRU cache, typically by forgetting to move a node to the head on a read, or by picking a structure that makes eviction linear time.
- Skipping obvious edge cases: an empty tree, a single node, a capacity of zero, a cycle in a graph, or a non-string key.
- JavaScript-specific slips, such as mutating a structure while iterating it, assuming pre-ES2015 object key ordering guarantees, or not handling a missing or undefined value gracefully.
- Staying silent on complexity or the real-world mapping when the prompt is explicitly framed around a UI, cache, or autocomplete scenario.
- Over-engineering a full balanced tree where a simple recursive depth-first search would do, or moving fast without narrating the invariants along the way.
Where the data is thinner
Exact senior-versus-mid cutoffs and pass-rate figures for these specific questions in pure frontend loops are not publicly quantified; level expectations here are inferred from interviewer notes and candidate write-ups rather than measured. Company practice is genuinely mixed: some loops keep a classic data-structures round, others lean away from it toward JavaScript and system-design depth, so no single company's reported approach should be read as the industry default. Recent Glassdoor, Blind, or LeetCode Discuss volume tagging "senior frontend" together with a specific structure is modest next to general software engineering reporting, and much of what is available is aggregated across roles rather than isolated to frontend. There is also no reliable public data on how often pure graph-theory problems appear relative to DOM-shaped tree problems at senior level specifically.
Frequently asked questions
Do all senior frontend interviews still include a data structures round? No, and company practice is reported to vary meaningfully. Some loops, including Google's, are reported to keep a genuine data-structures component at medium-to-hard difficulty, while others are reported to de-emphasize pure algorithms for frontend-focused candidates in favor of JavaScript depth and system design. Ask your recruiter what the round actually covers rather than assuming.
Is this the same preparation as a general software engineering DSA round? Not quite. The same underlying structures come up, but frontend-oriented loops are reported to frame them around browser-shaped problems, DOM traversal, client-side caching, autocomplete, and dependency graphs, more often than the pure theoretical versions common in general SWE prep, and heavier algorithms like advanced shortest-path or dynamic programming are reported far less frequently.
Which single structure is worth practicing first? The LRU cache is reported often enough across frontend-flavored loops that it is a reasonable starting point, since it also exercises
Mapusage patterns that recur elsewhere in this list. From there, a trie for autocomplete and basic tree traversals cover most of what is reported to recur.Do I need to know advanced graph algorithms like Dijkstra's for this level? Reported far less often than cycle detection, topological sort, or connected-components style problems at senior frontend level specifically. It is not something to deprioritize entirely, but the recurring material points toward simpler graph patterns mattering more.
Practice these questions on GreatFrontEnd
The fastest way to get comfortable with senior data structures developer interview questions is to implement the patterns above under a timer rather than just reading through them. GreatFrontEnd's algorithmic coding practice questions cover the JavaScript and TypeScript implementations behind these patterns, LRU caches, tries, tree and graph traversals, with reference solutions and tests written by ex-FAANG engineers, so you can check your approach against a working answer rather than guessing whether your edge-case handling was actually correct.
- Choosing the wrong primary structure for the job, such as an array with a linear scan for prefix search, or a
- TypeScript Interview Questions for 3 Years Experience (2026 Guide)If you are preparing TypeScript interview questions for 3 years experience, the useful thing to know early is that the question list barely changes between levels.标签作者GreatFrontEnd Team11 分钟阅读Aug 18, 2026
If you are preparing TypeScript interview questions for 3 years experience, the useful thing to know early is that the question list barely changes between levels. "interface versus type" gets asked of a fresher, a mid-level engineer, and sometimes a staff engineer as a warm-up. What changes is the bar your answer is measured against.
At roughly three years, interviewers are probing whether you can model real, messy data safely and write reusable, readable typed helpers that survive code review. They are generally not checking whether you can invent a recursive conditional type on a whiteboard. That distinction is the whole guide: mid-level candidates are expected to consume and apply the type system cleanly, while senior candidates are expected to design the constraints other people have to work inside.
One honest note before the questions. The claims below rest on recurring patterns across 2026 interviewer-oriented material, hiring notes and production write-ups, rather than on single dated forum threads. Direct, dated excerpts naming exact mid-level TypeScript prompts from the last 12 to 18 months are sparser than the aggregated guidance, so treat the frequency framing as "recurring in this material" rather than statistically sampled.
What actually changes at 3 years
It is tempting to read level guides as three separate question banks. They are closer to one question bank with three different marking schemes.
A fresher answering "any versus unknown" can pass by explaining that
unknownforces you to narrow before use. A mid-level answer is expected to reach for a concrete example from production-like code and name the trade-off, something closer to "I preferunknownat the boundary and parse with a schema, because the alternative is anascast that lies about the runtime shape". A senior answer moves further out again, into how that rule gets enforced across a codebase other people maintain.So the axis worth holding in mind is not which questions appear. It is what your answer is evaluated for.
Mid level, around 3 years Senior and above What is being tested Can you model real, messy data safely Can you design constraints a team lives inside Typical framing "Type this function that consumes external JSON" "Set the rules so invalid states cannot compile anywhere" Code expectation Reusable, readable typed helpers that survive review Library-grade utilities, design-system-scale APIs Judgment signal Choosing the simpler union over the clever one Justifying complexity cost to the next engineer Common red flag Defaulting to anyorascastsDogmatic rules with no reasoning attached Two counterexamples worth stating plainly, because the table above can read as harder than it is. A senior candidate can still be asked "interface versus type" as an opener, and a mid-level engineer at a small team may well get a migration question because they are the person who would do the migration. Level guides describe the centre of a distribution, not a boundary.
If you are earlier than this, GreatFrontEnd's guide to learning TypeScript covers the ground before interview prep starts. If you are further along, the senior TypeScript interview guide covers the tier above this one, where the focus moves from applying the type system to designing production APIs and state models with it.
The TypeScript interview questions for 3 years experience that recur
These surface repeatedly in the mid-level sections of 2026 guides and interviewer notes.
interface versus type, and when you choose one
The answer that lands covers declaration merging on interfaces against the union, intersection and mapped flexibility of type aliases, then gives a reasoned rule of thumb based on the codebase and the shape being modeled: interfaces are useful when declaration merging or interface extension is intentional, while type aliases are necessary for unions and support broader type-level composition. What interviewers tend to listen for is whether you have a reason, not whether you picked their preferred option.
any versus unknown, and why the difference matters
anyturns the checker off and spreads through whatever it touches.unknownquarantines the uncertainty and forces you to narrow before use. The follow-up is usually whether you would ever still reach forany, and a reasonable answer treats it as deliberate, time-boxed debt with a plan to remove it, rather than as a permanent escape hatch.Type a function that takes JSON you do not control
This is the closest thing to a mid-level separator in the material. It is usually phrased as parsing JSON or data you do not control. A strong answer starts the value as
unknown, narrows explicitly with type guards or a runtime schema validator, and avoids anas Ordercast that asserts a shape nobody verified. Mentioning that types are erased at compile time, so nothing in the type system protects you from a malformed response, is a signal that tends to land well here.Generics with a constraint, and safe property access
The classic prompt is a function that reads a property by key while preserving the exact types, the shape where
K extends keyof Tdoes the work. Interviewers usually follow up on how inference flows through the constraint, and whether you can explain it without freezing.Type narrowing, type guards and control-flow analysis
How
typeof,instanceof, theinoperator and user-defined predicates written asx is Foocause the checker to treat a value as narrower inside a branch. This is a comprehension check more than a coding one.Utility types, composed rather than recited
Partial,Required,Readonly,Pick,Omit,RecordandReturnTypecome up often. The differentiator at this level is composing two or three of them into an update payload or a filtered shape, rather than listing what each one does.Discriminated unions for state
Model async UI or request state so that invalid combinations cannot be represented, the case where
isLoading,erroranddataare all somehow present at once. Optional follow-up is exhaustiveness, usually via aneverbased default case, so that adding a new state surfaces every place that needs updating.Union versus intersection, structural typing, type erasure
Conceptual checks that appear in mid-level sections: shape-based compatibility rather than nominal typing, and the fact that types exist only at compile time.
strict and tsconfig, in practical terms
What
strict: trueactually changes day to day, and what individual flags likenoImplicitAnyandstrictNullChecksdo on their own. Less universal but still in range: basic mapped types,typeofin type position, enums against literal unions, simple decorators where the stack uses them, and ambient declarations or@typespackages.What separates a solid answer from a weak one
Three properties tend to show up in a solid mid-level answer. It reaches for a concrete example from production-like code. It names a trade-off out loud. And it walks through narrowing or a constrained generic without stalling.
The weak patterns reported in interviewer notes are consistent: defaulting to
anyorascasts for external data, being unable to explain whyunknownis safer, treating types as a runtime guarantee, and reciting definitions without modelling a real state or API payload.There is a subtler one worth naming. Reaching for an overly clever recursive mapped type can itself read as a mild negative at this level if readability suffers. Restraint is part of what is being assessed, not a lack of depth.
What is out of scope at 3 years experience
Being explicit about this saves preparation time, because the mid and senior versions of TypeScript interviews get blurred together in a lot of public lists.
Generally not expected at this level: deep type-level programming such as recursive conditional types, complex
inferextraction chains, variance in its co-, contra- and bivariant forms, or building library-grade utility types from scratch. Also out of scope are architecture and process questions such as migrating a large JavaScript codebase, setting team-wide type rules, or designing types other people have to live inside. Staff-level judgment prompts, including deliberateanyusage under extreme constraints, sit above this tier too.Those belong to the senior and lead conversation. If you want to see what that tier looks like, the senior TypeScript interview questions guide covers it directly, which is a useful preview of where your preparation goes next rather than something to study now.
The current TypeScript landscape, and how much it matters here
TypeScript 6.0 became generally available around March 2026 and is positioned as the final major release built on the JavaScript codebase, preparing the way for TypeScript 7.0, the Go-based native compiler with multi-threaded, substantially faster checking. TypeScript 6.0 added es2025 target and lib support, Temporal types, and adjustments around context sensitivity and type ordering stability that help with migration, alongside various deprecations and alignments.
For a mid-level interview this matters less than the release notes suggest. Features worth recognizing include the
satisfiesoperator from TypeScript 4.9,consttype parameters from TypeScript 5.0 and their improved literal preservation, andusingfor explicit resource management from TypeScript 5.2 where the stack calls for it. An interviewer who cares about currency may ask whether you have used them or can explain the problem they solve. Trivia on every TypeScript 6.0 flag is uncommon at this level.Worth noting honestly: data on how often TypeScript 6.0 comes up in mid-level interviews is thin, because the release is recent relative to most published question banks. Most 2026 mid-level lists still centre on the stable core of generics, narrowing, utility types and safe boundary typing.
As AI-assisted coding has become more common, an interviewer may also probe whether you understand the types an assistant suggested rather than accepting them blindly.
Common mistakes interviewers flag
- Treating
ascasts oranyas the default solution for external data. - Modelling loading, error and data with independent booleans instead of a discriminated union.
- Confusing type erasure with runtime safety, and assuming a typed response is a validated one.
- Over-engineering with advanced mapped or conditional types where a simpler union or utility composition would be clearer and easier to maintain.
- Being unable to explain why a constrained generic or
unknownnarrowing improves safety for whoever reads the code next.
Where the data is thinner
Many public question lists mix experience levels or recycle older questions, so a list claiming to be mid-level often is not. Direct, dated excerpts from Glassdoor, Blind or LeetCode Discuss naming exact mid-level TypeScript prompts from the last 12 to 18 months are sparser than the aggregated interviewer guidance this guide draws on.
Compensation and pass-rate figures are absent from the sources behind this guide, so none are quoted here. Recent hiring-process changes at named companies are also out of scope for a level-focused guide like this one.
Frequently asked questions
Is this the same as a senior TypeScript interview, just easier? Not quite. The question list overlaps heavily, but the marking scheme differs. At three years you are assessed on applying the type system cleanly to real data. Senior rounds move toward designing constraints a team inherits, which is a different skill rather than a harder version of the same one.
How much of the newest TypeScript do I need? Fluency with
satisfiesand literal preservation is reasonable to expect. Detailed knowledge of TypeScript 6.0 flags is uncommon at this level, and the stable core carries most of the weight.Do I need to know Zod or a specific validation library? The concept matters more than the library. What tends to land is explaining why runtime validation exists at the boundary at all, given that types are erased. Naming a tool you have actually used is better than naming the one you think they want.
Is reaching for a clever type ever a bad idea in an interview? It can be. If a simpler union or utility composition would be clearer, the clever version can read as a maintainability risk. Saying "this is correct but too clever for this codebase" is a positive signal.
How does this differ from the JavaScript experience-level guides? Those cover language fundamentals at 2 years and 5 years. This guide assumes that ground and focuses on the type system layered on top of it.
Practice TypeScript interview questions on GreatFrontEnd
The fastest way to get comfortable with TypeScript interview questions for 3 years experience is to type real code under a timer rather than reading answer keys. GreatFrontEnd's TypeScript interview questions cover implementations, utility types and typed component patterns with reference solutions and tests written by ex-FAANG engineers, so you can check your instinct on a specific pattern against a working answer instead of guessing whether you got it right.
- Treating
- Machine Coding Interview Questions for Freshers (2026 Guide)If you are a fresher preparing for a frontend or full-stack machine coding round, the good news is that the questions at your level are narrower than they look.标签作者GreatFrontEnd Team13 分钟阅读Aug 17, 2026
.webp)
If you are a fresher preparing for a frontend or full-stack machine coding round, the good news is that the questions at your level are narrower than they look. For frontend-focused fresher roles, machine coding rounds commonly involve building a small, self-contained UI component or application, such as a todo list, a set of tabs, or a star rating widget, in roughly 45 to 90 minutes, using plain HTML, CSS, and JavaScript or a lightweight React scaffold. This is different from the OOP/LLD-style machine coding rounds used in some general software engineering interviews, where questions may involve systems such as parking lots, expense splitting, or rate limiters.
That is a different test from OOP or low-level-design-style machine coding rounds, where the focus shifts toward object modeling, extensibility, changing requirements, and sometimes design patterns. The exact format depends more on the role and company than on experience level alone. For frontend-focused fresher roles, over-preparing only for OOP/LLD problems can still be a poor use of time if the actual round is centered on building UI. This guide covers what is commonly asked at the fresher level, what interviewers are checking for, and a practical way to work through the problem in the time you have.
Fresher UI machine coding vs OOP/LLD-style machine coding
The confusion between levels is common enough that it is worth putting side by side before anything else.
Frontend UI machine coding OOP / LLD-style machine coding Typical question Todo list, tabs, autocomplete, modal, carousel, small UI application Parking lot, expense splitting, inventory system, rate limiter What is tested UI state, events, component structure, edge cases, working demo Object modeling, extensibility, entity relationships, changing requirements Time given 45 to 90 minutes Often 60 to 90 minutes, with a harder design bar What "done" looks like The core interaction works and is demoable Core requirements work and the design can accommodate reasonable extensions Common trap Over-engineering before the core UI works Coding too early without thinking through the domain model If you are unsure which round you are walking into, ask your recruiter directly what the round covers. It is a normal question to ask, and the answer changes how you should spend your prep time this week.
What a fresher machine coding round actually tests
At this level, interviewers are less interested in a perfect abstraction and more interested in seeing a working core path. The signal they are looking for is whether you can turn a small, ambiguous prompt into a working interface: clean component breakdown, local state, event handling, and code that is readable enough to extend later. A candidate who spends the full session on the happy path and never gets it running is a weaker signal than one who ships something simpler but complete.
This matters more than it sounds. A fresher who spends 40 minutes designing a beautiful component hierarchy on paper and only has 10 minutes left to type code will usually score worse than one who has something clickable on screen after 20 minutes, even if that first version is rough. Interviewers at this level are calibrating for "can this person ship," not "can this person architect."
The core UI questions asked most often
These are the problems that repeatedly show up as entry-level starting points, based on the Front End Interview Handbook's practice sets, frontend interview roundups, and common fresher-round reports.
- Todo list app. Add, edit, delete, and toggle complete or incomplete, with optional filters for all, active, or completed items. Tests CRUD logic, local state, list rendering, and basic forms. This is one of the most common foundational UI coding problems and one of the best problems to practice first because many other questions reduce to the same underlying shape: an array of items and operations that add, remove, update, or filter them.
- Tabs. Multiple content panels with a single controlled active tab. Tests conditional rendering and simple state. The trap here is state that gets out of sync with what is actually rendered, keep a single source of truth for which tab is active rather than tracking each panel's visibility separately.
- Accordion or collapsible sections. Expand and collapse panels, single or multi-open. Tests per-item state and, optionally, basic accessibility. Clarify early whether multiple panels can be open at once, it changes whether you need one active index or a set of open indices.
- Star rating. Interactive stars with hover and click to set a rating, sometimes with a half-star or read-only variant. Tests event handling and visual state, specifically the difference between a hover-preview value and the committed value.
- Modal or dialog. Open and close behavior, an overlay, Escape-key handling, and basic focus management. Tests interaction state and accessibility fundamentals. Clicking the backdrop to close may also be requested, but treat that as a product requirement rather than a universal dialog behavior.
- Progress bar. Animated or stepped progress with a controllable value. Tests CSS combined with state updates.
- Image carousel or slider. Next and previous controls, indicator dots, and boundary handling (what happens at the first or last slide, does it wrap around or stop).
- Counter. Increment, decrement, and reset with min and max bounds. A minimal state exercise, sometimes used as a warm-up question before a larger prompt.
- Calculator. Basic arithmetic with edge cases like divide-by-zero and chained operations. Tests input handling and display logic, and is a good test of whether you handle the edge cases an interviewer will actually try (typing an operator twice in a row, pressing equals with no second number entered).
A step up in scope, but still appropriate for entry level: a digital clock or stopwatch, a simple form with real-time validation, basic or truncated pagination, and tic-tac-toe (game logic plus win detection).
A minimal state shape, using the todo list as the example
Because the todo list is the most common starting point, it is worth seeing what a clean, minimal version of its state actually looks like. This is not the only correct shape, but it demonstrates the pattern interviewers want to see: one array holding the data, and handler functions that update it immutably.
For a basic add, delete, toggle, and filter implementation, the shared state only needs two pieces: a todos array (each item an object with an id, text, and completed flag), and a filter value tracking which of all, active, or completed is currently selected. If inline editing is required, you will usually also need a transient edit state, such as an
editingIdand draft text, or keep that state locally inside the todo item being edited. Adding an item appends a new object to the array. Toggling an item maps over the array and flips the completed flag on the one whose id matches, leaving every other item untouched. Neither handler mutates the existing array directly; both build a new one, preserving React's state snapshots and ensuring updates are represented by new state values rather than mutations.Notice what is absent from this shape: no global store, no separate "isEditing" boolean scattered across components, no derived data being stored in state (the filtered list itself is computed at render time from todos and filter, not kept in its own state variable). That last point is worth remembering across every problem in this list. If a value can be calculated from an existing state, calculate it during render instead of storing it separately, storing it invites the two copies to drift out of sync.
What you are actually expected to demonstrate
Interviewers at this level are checking for a specific, fairly consistent set of things:
- A clean component breakdown, or clearly organized modules if you are writing plain JavaScript.
- Local state management (useState or equivalent), without reaching for a global store you do not need.
- Event handlers, sensible form and input state management, and correct list keys.
- Basic CSS: layout that works and gives visual feedback.
- The obvious edge cases: an empty list, the first or last item, invalid input, a user clicking rapidly.
- Naming and structure clear enough that another engineer could extend the code.
- The ability to talk through your approach before you start typing, and to demo the working core feature at the end.
Jumping straight into code without spending 5 to 10 minutes on a plan is a common red flag interviewers report, even for junior candidates. It is worth saying explicitly why this matters at fresher level specifically: an interviewer cannot tell from silence whether you understood the requirement or you are guessing, narrating your plan for 30 seconds before typing removes that ambiguity for free.
What is out of scope at this level
This is worth being explicit about, because the fresher and experienced versions of "machine coding" get confused constantly, including by candidates who over-prepare for the wrong round.
Not expected of a fresher: multi-floor parking-lot systems, elevator dispatch, full expense-splitting graphs (the kind of problem behind a Splitwise clone), concurrent rate limiters, or anything built around Strategy, State, or Factory design patterns as the primary focus. Also out of scope: heavy concurrency handling, production-grade persistence, data tables with server-side sort and filter plus virtualization, infinite scroll with race-condition handling, autocomplete with debounce and cancelable requests, or nested comment trees with real-time updates.
Those belong to intermediate and product-company SDE-1-plus rounds. If you want to see what that tier of question actually looks like, GreatFrontEnd's frontend LLD guide covers it directly, it is a useful preview of where your prep goes next, not something to study now.
A practical, time-boxed approach
For the problems above, a simple five-step approach covers almost all of them:
- Clarify, 3 to 5 minutes. Restate the must-haves versus the nice-to-haves. Ask about input format, whether invalid input needs handling, and what interactions the interviewer plans to test. For a todo list, that might mean asking whether items persist after a refresh, or whether that is out of scope for this round.
- Quick plan, 5 to 10 minutes. List the components and state pieces before writing code. For a todo app, that means deciding the shape of your data (a todos array, a filter value, handler functions) before touching the editor.
- Core implementation. Get the happy path working and demoable first: add an item, list it, toggle it. Prefer simple, correct code over a clever abstraction you might not finish.
- Edges and polish. Handle empty states, bounds, and basic validation. Add just enough CSS that the result looks intentional.
- Demo and discuss. Walk through what you built, and mention one or two ways it could be extended, local storage persistence or filters, for example, if time allows.
Practicing a smaller set of problems deeply, a todo list, tabs, an accordion, a modal, a carousel, and one form, tends to cover more real interview ground than skimming a long list superficially. Most of the problems in this guide share the same underlying pattern once you strip away the surface differences: an array or object in state, a handful of pure functions that update it, and a render function that reflects it. Once that pattern feels automatic for one problem, the next one takes noticeably less time.
Common mistakes interviewers flag
- Starting to type before clarifying the requirements or sketching a plan.
- Loose prop bags or state shapes that allow logically impossible combinations, such as mutually exclusive
isLoading,isSuccess, andisErrorflags accidentally being true at the same time. - Spending disproportionate time on visual polish before the core interaction works.
- Not handling the obvious edge cases the prompt implies, even without being asked directly.
- Storing a value in state that could instead be computed from existing state at render time, this is one of the most common sources of subtle bugs even in small components.
Where the data is thinner
Public, attributed transcripts specifically labeled "fresher machine coding round" are less common than for mid-level product-company rounds. Most of what is documented is practice-oriented, aggregated lists rather than single verified interview reports. Company-specific fresher accounts more often mention todo-style or basic component builds than full low-level-design systems; backend-heavy machine coding problems (a parking lot or vending machine system, for instance) are more frequently reported for SDE-1 roles at product companies, and those candidates usually already have some prior experience or strong object-oriented practice. Pure campus freshers more commonly report algorithmic and basic UI or JavaScript coding rounds instead. Where a claim above rests on a practice list rather than a single confirmed transcript, that is the case throughout this section, not a one-off exception.
Frequently asked questions
Do I need to know React for a fresher machine coding round? Frontend UI coding rounds may use vanilla JavaScript or the framework relevant to the role. If you are targeting React positions, practicing these questions in React is a sensible default because the underlying skills, state management, events, component structure, and DOM behavior, transfer across most of these problems.
How long should I spend practicing before I feel ready? There is no single verified number for this, but the pattern in the research above is consistent: a small set of problems practiced deeply (todo list, tabs, accordion, modal, one form) covers more of what actually gets asked than a long list attempted once each.
What if I finish early? Use remaining time on the edge cases and polish steps in the practical approach above, empty states, invalid input, and a short walkthrough of what you would add next. Finishing the happy path with time to spare and stopping there is a missed opportunity to show more of what you know.
Is it a problem if my solution does not look polished? Not on its own. The research above repeatedly points to working core behavior as the primary signal at this level, with visual polish and edge cases as secondary. A working, slightly plain todo list beats a beautifully styled one that cannot add an item.
Practice these questions on GreatFrontEnd
The fastest way to get comfortable with this round is to build the exact components above under a timer. GreatFrontEnd's UI coding practice questions cover todo lists, tabs, accordions, modals, and the rest of this list, each with a reference solution and tests written by ex-FAANG engineers, so you can check your approach against a working answer instead of guessing whether you got it right. That is the difference between reading a list of machine coding interview questions for freshers and actually being ready to walk into one.
- TypeScript Interview Questions for Tech Leads (2026 Guide)If you are preparing TypeScript interview questions for tech leads at the staff or principal level, "What is Partial?" or "interface versus type" are not the bar.标签作者GreatFrontEnd Team11 分钟阅读Aug 17, 2026
If you are preparing TypeScript interview questions for tech leads at the staff or principal level, "What is
Partial?" or "interfaceversustype" are not the bar. Those are junior and mid-level prompts. At tech-lead, principal, staff, and roughly 10-year-experience roles, the questions shift from syntax and basic utility types to system-level design: encoding product and domain constraints so invalid states are unrepresentable, setting rules that an entire codebase has to live inside, judging migration strategy under real product pressure, and knowing when advanced types earn their complexity and when they become a liability the next engineer inherits.Lead-level prompts sound like production constraints, not trivia. "This component accepts invalid prop combinations, fix the API." "Model this so a missing state is a compile error." "Migrate a 200,000-line JavaScript codebase to TypeScript without freezing the roadmap." This guide covers the patterns that actually separate a lead-level answer from a senior one, grounded in GreatFrontEnd's own senior and staff TypeScript material, staffing guides that explicitly level questions to this tier, and real migration accounts.
One honest note before the patterns: public, attributed transcripts specifically labeled "principal TypeScript interview" are scarcer than for general system design or LeetCode-style rounds. The questions below are the ones repeatedly presented by interviewers and senior practice resources as what actually discriminates at this level, not textbook trivia like reciting every utility type. Where a claim rests on a practice pattern rather than a single verified transcript, that is noted as it comes up.
What actually changes at this level
The shift is not more TypeScript knowledge, it is a different kind of judgment. A mid-level engineer explains what a type does. A lead designs the constraint that every other engineer on the team, including a future version of themselves, has to work inside, and can justify why that complexity is worth the cost. That distinction shows up in five recurring ways interviewers watch for.
System ownership. Mid-level candidates describe a type. Lead-level candidates design a constraint the whole team has to live inside, and can defend the complexity trade-off out loud.
Trade-off language. A strong lead-level answer includes sentences like "this is correct but too clever for this codebase" or "I would keep the simpler union and document the remaining edge case." Restraint is a positive signal here, not a lack of depth.
Team and process framing. Leads talk about CI checks such as
strictandnoImplicitAny, lint rules that restrict unnecessary explicitany, incremental strictness ratchets, how they would bring junior engineers along, and migrating without blocking the product roadmap.Exhaustiveness as a feature, not a chore. A well-designed type should make it so that adding a new state breaks the build in exactly the right places, forcing every affected call site to be updated deliberately.
Runtime honesty. Types are erased at compile time and do not protect against a malformed network response. Leads bring up runtime validation at the boundary without being prompted, because they know where the type system's guarantees actually end.
The TypeScript interview questions tech leads actually get asked
Modeling state so invalid combinations cannot compile
A common prompt sounds like: "Our dashboard tracks
isLoading,error, anddata, but invalid states keep slipping through into production. Refactor the type." Or the same idea applied to a payment lifecycle, an order status, or remote data fetched from an API.The mid-level answer often keeps a set of optional fields or independent boolean flags. If the product intends loading, success, and error to be mutually exclusive states, that representation can still allow combinations the domain says should never occur. The lead-level answer may reach for a discriminated union: one shared literal tag per variant, where each variant carries only the fields that make sense for it. Pair that with an exhaustiveness check, commonly a
never-based default case, and adding a new status can force exhaustive consumers to be updated. The important signal is not merely knowing what a discriminated union is, but recognizing when the domain actually has mutually exclusive states and using the type system to encode that rule.Migration strategy at scale
This one is explicitly called out in staffing and hiring guides as a staff-versus-lead separator: "migrate a 200,000-line JavaScript codebase to TypeScript without freezing the product roadmap. Go."
The weak answer is a big-bang rewrite. The strong answer starts with loose coexistence (JavaScript and TypeScript files living side by side,
allowJsenabled), converts the highest-churn or highest-risk modules first, ratchets strictness flags on incrementally rather than all at once, keeps shipping features throughout, and measures progress with something concrete like a shrinking count of remaininganyusages. Real-world accounts of large migrations, Monzo's public migration of their web app is one often cited, consistently emphasize stakeholder buy-in and incremental tickets over a coordinated stop-the-world effort. If your answer requires pausing feature work for a quarter, that is the signal an interviewer is listening for as a red flag, not a green one.Type-safe component and design-system APIs
Prompts here usually involve mutually exclusive props (a button that can be a link or an action, never both at once), variant maps that need to stay complete whenever a new variant is added, or the difference between controlled and uncontrolled form components.
A mid-level solution often reaches for a single, loose props object that technically compiles but allows combinations that make no sense at runtime. A lead-level solution encodes the actual product rule into the type itself, using techniques like unions combined with a
neverfallback, or asatisfiescheck against aRecordof variants so the compiler flags an incomplete map the moment a new variant is added, without widening the inferred type in the process.Handling boundaries and untrusted data
The prompt is usually some version of: "parse this JSON from local storage, an API response, or a third-party SDK, safely." The strong answer treats the parsed value as
unknownand narrows it explicitly, either with type guards or a runtime schema validation library, rather than reaching for anascast orany. The reasoning worth stating out loud:anyis contagious and silently disables checking wherever it spreads, whileunknownquarantines the uncertainty until you have actually proven what the shape is. Lead-level candidates bring up runtime validation unprompted here, because they understand that types disappear at compile time and cannot protect against a network response that does not match what was promised.Knowing when not to reach for advanced type machinery
Interviewers sometimes ask directly: "when would you deliberately use
any?" or hand a candidate a working but unreadable utility type and ask whether they would keep it. The strong answer treatsanyas a deliberate, time-boxed piece of tech debt with a stated plan to remove it, and is willing to reject a deeply nested conditional or mapped type that technically works but obscures what the code is actually doing for the next engineer who has to read it. This restraint, choosing the boring, readable answer over the clever one, is consistently described as a positive signal for someone who will be setting standards for a team, not just writing code alone.Generics that preserve precision
This covers implementing a
Pick-style utility that keeps exact key names, deriving event handler names from a set of keys using mapped and template-literal types, and unwrapping the result type of a Promise usinginferor a built-in likeAwaited. The follow-up questions matter as much as the initial implementation: can the candidate name the existing standard-library utility that already solves part of the problem, and can they explain exactly where in their own helper an unavoidable type assertion sits and why it is safe there.Branded types for domain primitives
The classic version of this prompt distinguishes a
UserIdfrom aProductId, or dollars from cents, so that TypeScript's structural typing does not allow one to be substituted for another just because both are represented by the same primitive underneath. A common implementation uses a branded or opaque intersection type. At external boundaries, runtime validation can verify the underlying value before the application constructs or returns the branded type. This is particularly useful for shared domain primitives used across many parts of a codebase.Beyond these seven, a few smaller themes recur: using
satisfiesfor configuration objects when you want to validate a shape while preserving useful inference, understanding the trade-offs between enums and literal unions oras constobjects, and being able to state plainly that TypeScript's static types are erased and provide no runtime validation on their own.The current TypeScript landscape, and why it matters for this interview
As of mid-2026, TypeScript 6.0 (shipped March 2026) served as a bridge release, and TypeScript 7.0 (July 2026) is the native, Go-ported version of the compiler and language service. The headline change is speed: roughly 8 to 12 times faster full builds on large codebases, including ones as big as VS Code and Sentry, with lower memory use along the way. Defaults have also moved stricter, several legacy compiler options were removed or turned into hard errors, and the module and target settings were modernized.
For an interview, this mostly changes the migration, tooling, and performance conversation. A reasonable follow-up now is something like "how would you adopt TypeScript 7 inside an existing monorepo?" A strong answer should not assume that replacing TypeScript 6 is automatically safe: TypeScript 7.0 does not yet expose the stable programmatic API that some compiler integrations and framework tooling depend on, so compatibility with the project's build tools, language-service plugins, and framework stack needs to be checked first. The core type system was not fundamentally redesigned: discriminated unions, mapped and conditional types,
satisfies, andinferremain central techniques, although TypeScript 7 does include some behavior changes alongside the compiler rewrite.Common mistakes and red flags at this level
- Reaching for a clever conditional or mapped type when a plain discriminated union, or a simple
Pickcombined withPartial, would solve the problem just as well. - Treating
anyas harmless, or implying that TypeScript provides any runtime safety on its own. - Proposing a full stop-the-world rewrite as the answer to a large migration question.
- A props design that is still loose enough to allow an invalid combination, even after claiming the API is "type-safe."
- Being unable to explain exhaustiveness clearly, specifically why a future engineer adding a new state either would or would not be forced by the compiler to update every affected call site.
- Dogmatic rules stated without context, "always use
interface," or "never useenum," with no reasoning behind them.
Who this guide is not for
This guide is scoped specifically to tech-lead, staff, and principal-level TypeScript interviews. If you are earlier in your career, the questions above will likely feel disconnected from what you are actually being asked. GreatFrontEnd's TypeScript interview guide for senior developers covers the tier directly below this one, still production-focused, but scoped to individual contributor depth rather than the system and team-level judgment this guide covers.
Frequently asked questions
Is this the same as a senior TypeScript interview, just harder? Not exactly. A senior interview tests whether you can apply TypeScript's type system correctly to a single problem. A lead or principal interview tests whether you can design a constraint an entire team has to live inside, and defend that trade-off. The topics overlap, but the judgment being evaluated is different.
Do I need to memorize every TypeScript utility type for this round? No. The research behind this guide consistently points away from trivia recall (listing every utility type) and toward applied judgment on real production-shaped problems. Knowing that
PickandAwaitedexist matters less than knowing when to reach for them and being able to explain the trade-off of not using them.What if I have not led a large-scale TypeScript migration myself? Talk through the strategy in the abstract using the incremental approach described above, coexistence, ratcheted strictness, shipping features throughout, rather than claiming direct experience you do not have. Interviewers are evaluating the reasoning, not requiring that you have personally run a 200,000-line migration.
Is TypeScript 7's speed improvement actually relevant to what I'll be asked? Mostly as migration and tooling context rather than a new type-system topic. It is worth being able to speak to it if asked, but the core discriminated-union, boundary-handling, and API-design questions above have not changed because of it.
Practice TypeScript interview questions on GreatFrontEnd
If you have made it this far, the patterns above are the actual bar for TypeScript interview questions for tech leads, not the syntax trivia that gets asked earlier in a career. GreatFrontEnd's TypeScript interview questions cover implementations, utility types, and typed component patterns with reference solutions and tests written by ex-FAANG engineers, useful for checking your instinct on a specific pattern against a working answer rather than guessing.
- Reaching for a clever conditional or mapped type when a plain discriminated union, or a simple
- How to Get a Frontend Developer Job With No Experience in 2026Get a frontend developer job with no experience by building proof, choosing beginner-friendly roles, preparing projects, fixing GitHub, and applying strategically.标签作者GreatFrontEnd Team7 分钟阅读Jul 31, 2026

To get a frontend developer job with no experience in 2026, you need to replace missing job history with proof a reviewer can inspect. That means deployed projects, readable code, clear project notes, a targeted resume, and a job-search loop that tells you where the funnel is failing.
No experience does not mean no evidence. It means your evidence must come from projects, open-source contributions, freelance or volunteer work, coursework, internships, bridge roles, and interview explanations.
Use the MDN Curriculum and React Learn for fundamentals. Then build proof that looks like frontend work, not only tutorial completion.
Build a proof stack before volume-applying
You do not need a large portfolio. You need a convincing one.
Proof item Minimum bar Portfolio page Target role, best projects, GitHub, resume, contact Best project Deployed, complete states, README, screenshots, clear tradeoffs Second project Different signal from the first: API, form, dashboard, or layout GitHub profile Pinned repos, setup commands, no secrets, readable commits Resume Project bullets that describe behavior, not only tools Interview script Clear explanation of what you built and why If a recruiter opens your links, they should know within a few minutes that you can finish frontend work.
Choose projects that answer hiring doubts
Hiring teams are not asking, "Did this person watch enough tutorials?" They are asking whether you can contribute to a product.
Hiring doubt Project proof that answers it Can this person build UI? Responsive page with semantic HTML and clean CSS Can this person handle data? API-backed search, table, dashboard, or listing Can this person handle failure? Loading, empty, error, invalid, unauthorized, and retry states Can this person debug? README bug note or issue showing the failure and fix Can this person explain work? Short case study with constraints, decisions, and limitations One complete project with these states beats five clone projects with missing buttons.
Make one project interview-deep
Pick your strongest project and upgrade it until it can survive a technical conversation.
Area Upgrade to add User flow A clear goal such as search, checkout, booking, tracking, editing State coverage Loading, empty, error, invalid, success, and mobile states Code quality Clear components, simple state ownership, no giant mixed file Accessibility Labels, heading order, keyboard behavior, visible focus Performance Avoid obvious over-rendering, oversized images, and blocking work Documentation Setup commands, screenshots, decisions, known limitations This becomes your main interview story.
Write stronger resume bullets
Weak bullets name tools. Strong bullets show decisions and behavior.
Weak bullet Better bullet Built a React app Built a React issue tracker with filters, URL state, and empty/error handling Used APIs Integrated a public API with loading, retry, stale-result protection, and errors Made a responsive website Converted a desktop design into mobile, tablet, and desktop layouts Created a form Built validation, server-error display, and focus recovery for a signup form Used GitHub Documented setup, screenshots, known limitations, and project decisions If a bullet does not create an interview question, it is probably too vague.
Apply to the right role lanes
Search wider than "frontend developer."
Role lane Good when Watch out for Frontend developer fresher You have projects and can explain fundamentals Fake training programs with fees UI developer You are strong in HTML, CSS, JS, responsive work Only static slicing with no growth path Web developer You can handle pages, forms, CMS, and basic deployment Mostly content entry or plugin configuration React developer intern You need a bridge into production work Unpaid trial work with no mentorship QA automation You can write browser tests and learn product flows No path into frontend code Support engineer You debug user issues and inspect browser/network state Role becomes only ticket routing A bridge role is useful only if it creates frontend evidence for the next role.
Run the job search as a funnel
Do not measure only applications sent. Measure where the process breaks.
Funnel stage Symptom Fix Search You apply to roles above your level Narrow role titles and read requirements before applying Resume/profile Few views or callbacks Move the closest proof into the top third Project proof Recruiters click but do not respond Improve README, live demo, screenshots, and state coverage Technical round Same topic fails repeatedly Practice that exact topic for a week Final round Feedback mentions depth or fit Prepare project stories with constraints and tradeoffs If you send 100 applications with the same weak proof, you mostly learn that weak proof does not work.
Add outreach that points to proof
Cold applications work better when someone can quickly inspect your work.
Hi [Name],I am applying for [junior/frontend/web developer role].My strongest project is [project], where I built [specific frontend behavior].Live: [link]GitHub: [link]Resume: [link]If this role is not the right fit, I would appreciate any pointer to the right team or application path.Thank you,[Name]Keep it short. The goal is not to impress with effort; it is to make review easy.
Prepare for beginner-friendly interviews
Expect fundamentals and project explanation in many early-career interviews, but use the job description and recruiter screen to confirm the actual format.
Prepare these:
- Explain event bubbling with a UI example.
- Explain
map,filter,reduce, and when not to use them. - Build a form with validation.
- Fetch data and show loading, error, empty, and success states.
- Explain how your project stores state.
- Explain one bug you fixed without copying a solution.
- Explain how your layout behaves on mobile.
- Explain what you would improve if hired.
Use frontend interview tips for freshers and frontend testing interview questions for freshers if interviews are your current bottleneck.
Do not fake seniority
No-experience candidates lose trust when they oversell.
Avoid:
- Claiming advanced React or TypeScript if you cannot explain your own code.
- Listing every library you touched once.
- Claiming the project is job-quality without tests, error states, deployment, or monitoring.
- Hiding broken links.
- Showing projects with placeholder pages and dead buttons.
- Saying "team project" without naming your contribution.
It is better to say, "I built a small app and handled these states," than to pretend you built a full product.
Use a 30-day plan
Week Output 1 Pick one project and add missing loading, empty, error, and mobile states 2 Rewrite README, screenshots, project notes, and top resume bullets 3 Start a manageable batch of targeted applications and proof-based outreach; track responses instead of chasing a universal quota 4 Run mock interviews based on the first rejection pattern Do not pause applications until everything is perfect. Improve proof while the market gives you signal.
Common questions
Can you get a frontend job with no experience?
Yes, but not with "I know HTML, CSS, JavaScript, React" as the whole pitch. You need visible proof that you can build, debug, explain, and improve frontend work.
How many projects do you need?
There is no required count. Two or three finished projects can be enough if each proves a different skill, one supports a detailed technical discussion, and the work matches the role.
Should you apply before learning React?
If the role asks for React, you need enough React to build and explain components, props, state, effects, forms, and API calls. If your fundamentals are not ready, apply to web/UI roles while improving React.
What if you get no callbacks?
Check the top third of your resume, portfolio first screen, pinned GitHub repos, project relevance, and role targeting. No callbacks usually means the proof is hard to see or mismatched to the role.
What should be true before you apply
You do not need a perfect profile. You need enough proof that a reviewer can trust you with junior frontend work.
Before sending applications, check that:
- Your strongest project has loading, empty, error, invalid, mobile, or unauthorized states.
- The live link, repo, and screenshots work.
- The README explains one decision or bug you handled.
- Your resume has at least one bullet about behavior, not only tools.
- You can walk through the code without pretending it is more advanced than it is.
- You are tracking applications so rejection patterns become useful feedback.
The first frontend job comes from reducing doubt. Make it easy to see that you can build small product UI, explain your decisions, and learn from feedback.
- How to Start Freelance Frontend Development in 2026Start freelance frontend development with practical service offers, portfolio positioning, pricing, client discovery, scoping, delivery, and risk management.标签作者GreatFrontEnd Team10 分钟阅读Jul 31, 2026
To start freelance frontend development, sell a specific service with a clear outcome, scope, price logic, and handoff. Clients rarely buy "frontend development" as an abstract skill. They buy a faster landing page, a usable dashboard, a fixed checkout bug, a coded Figma design, or a website they can finally ship.
The hard part is not only writing React or CSS. The hard part is choosing a small enough offer, proving you can deliver it, asking the right questions before quoting, and protecting both sides from vague scope.
Use MDN's web development curriculum and React Learn for skill gaps. The sections below cover the parts those technical curricula do not: offer, proof, scope, pricing, delivery, and risk.
The direct answer
Start with this sequence:
- Pick one service package.
- Build one proof project that matches that package.
- Write a one-page case study with the problem, constraints, decisions, and result.
- Prepare a discovery-question checklist.
- Offer a small paid project with written scope, milestone payment, revision limit, and handoff notes.
Do not begin by saying "I can build anything." That is hard to trust and hard to price.
Choose a service, not a vague identity
"Freelance frontend developer" is a role. A service is a thing a buyer can understand.
Service package Client problem Good first scope Proof to show Landing page build Needs a launch page or campaign page 1-3 pages, responsive layout, contact form, analytics, deploy Live page, Lighthouse notes, mobile screenshots Figma-to-code Has design but needs implementation Existing design, content provided, limited component set Pixel-careful build, responsive behavior, handoff notes Website cleanup Existing site is slow, broken, or messy One page or small set of UI bugs with before/after notes Before/after screenshots and performance checks Dashboard UI slice Internal team needs a cleaner workflow One table, filters, forms, loading/error states from existing API Demo with realistic data states Component library slice Product has inconsistent UI Buttons, inputs, modals, cards, and usage docs for one team Small documented component set Accessibility fix sprint Forms, modals, or navigation block some users Audit and fix one flow Keyboard walkthrough and issue list Pick the service where you can make the buyer's risk feel small.
Build proof that matches the buyer's problem
A portfolio full of unrelated clones rarely wins freelance trust. A client wants to know: have you solved my kind of problem before?
For one service package, create:
- A live demo.
- A short case study.
- Three screenshots: desktop, mobile, and the hard state.
- A checklist of what you tested.
- A handoff note explaining deployment, environment variables, forms, analytics, and known limits.
The case study does not need a famous client. It needs a believable problem and clear judgment.
Use this structure:
Problem: What was broken or needed?Constraints: Deadline, content, design, data, budget, or tech limits.Decision: What did you choose and why?Tradeoff: What did you intentionally not do?Verification: How did you test it?Result: What changed for the user or client?That is stronger than a grid of screenshots with no context.
Price after scope, not before
Early freelancers often answer "how much?" too quickly. Price is a function of scope, uncertainty, timeline, revision count, integration risk, and client readiness.
Ask before quoting:
- What is the business goal of this work?
- What pages, flows, or components are included?
- Is design ready? If yes, where is it?
- Who owns copy, images, brand assets, and legal text?
- Are there forms, payments, analytics, CMS, auth, or API integrations?
- What browsers and devices matter?
- What happens after handoff?
- Who approves the work?
- How many revision rounds are expected?
- What is the deadline and why?
If the answers are fuzzy, sell discovery or a small paid audit before the build.
Understand pricing models
There is no single correct pricing model. Use the one that matches risk.
Model Use when Watch out for Hourly Scope is uncertain, debugging is open-ended Client may fear uncontrolled cost Fixed package Scope is clear and repeatable You absorb mistakes in estimation Milestone Project has phases: audit, design handoff, build, QA Needs clear acceptance criteria per milestone Retainer Client needs ongoing updates Must define response time, included hours, and exclusions Paid discovery Requirements are unclear Some clients may resist paying before a visible build For your first few projects, small fixed packages or milestone work is usually easier to explain than an open-ended project.
Write scope like a professional
Scope is not bureaucracy. Scope is how you protect the project.
Included:- Pages or flows- Responsive breakpoints- Forms and integrations- Content source- Browser support- Accessibility checks- Performance check- Revision rounds- Deployment and handoffNot included:- Copywriting- Logo or brand strategy- Backend changes- Extra pages- Ongoing maintenance- SEO strategy- Content migration- New features after approvalThe "not included" section is where many beginner freelancers save themselves.
Use a proposal that removes uncertainty
Your proposal should make the buyer feel, "This person understands the work."
Goal:Build a responsive landing page for [campaign/product] so visitors can understand the offer and submit the contact form.Included:- One landing page based on provided copy and assets- Mobile, tablet, and desktop layout- Contact form connected to [tool]- Basic analytics event for form submit- Accessibility and link checks- Deployment handoffNot included:- Copywriting- Logo design- Backend work- Ongoing content updatesTimeline:[Start date] to [handoff date], with review on [date].Payment:[Deposit] before start, [final payment] before handoff.Revisions:Two revision rounds for included scope.Do not send a clever proposal. Send a clear one.
Run a simple delivery workflow
Freelance trust comes from predictable communication.
- Discovery: goals, scope, assets, risks, decision maker, deadline.
- Proposal: included work, excluded work, milestones, price, revision limit.
- Agreement and payment: document the scope, acceptance criteria, payment schedule, ownership transfer, cancellation terms, and local tax obligations. Use a contract suitable for your jurisdiction; a template is not legal advice.
- Build: send milestone updates, not constant unfinished screenshots.
- QA: test forms, links, mobile widths, keyboard behavior, performance basics, and deployment.
- Handoff: repository, deployment notes, credential checklist, maintenance notes.
- Close: ask for testimonial, referral, or next maintenance scope.
The workflow can be small. It should still exist.
Know the quality bar for frontend freelance work
Even a small freelance project needs more than the happy path.
Area Minimum check HTML Correct headings, labels, buttons, links, and image alternatives; decorative images use empty alttextCSS No broken layout at common mobile and desktop widths JavaScript Forms handle validation, disabled states, and errors Accessibility Keyboard path works for navigation, forms, modals, menus Performance Images sized correctly, obvious render blockers removed Analytics Important events fire once and are named clearly Handoff Client knows where code, hosting, credentials, and docs are You do not need enterprise process. You need enough discipline that the client does not inherit a mystery.
Find clients with specific outreach
Freelance outreach works better when the message is tied to a visible problem.
Channel Best fit What to send Local businesses Landing pages, forms, speed fixes One specific issue and a small package Designers Figma-to-code collaboration Responsive implementation sample and handoff workflow Founder communities Product pages, MVP UI, dashboard slices Demo matching their product stage Past coworkers and friends Trusted first projects Short note naming exactly what you now offer Agencies Overflow implementation work Portfolio, availability, tech stack, and delivery boundaries Open-source or communities Reputation and referrals Helpful fixes, not spam Bad outreach says, "Do you need a frontend developer?" Better outreach names a problem you personally verified, the reproduction steps, and a small scope to investigate it. Do not invent a browser bug from a quick visual scan.
Use a better outreach message
Hi [Name],I noticed [specific issue or opportunity]. I help [type of client] with [specific frontend service].For example, I can [deliverable] in [timeframe] if the content/design is ready.Here is a similar example: [link].Would it be useful if I sent a short scope for this?Keep it short. The goal is a conversation, not a full sales pitch.
Watch for red flags
Some projects are not worth winning.
- No single decision maker.
- Wants fixed price without fixed scope.
- Refuses deposit or written agreement.
- Needs urgent work but cannot provide assets.
- Says "it is simple" while requirements keep changing.
- Wants unpaid custom work before trust exists.
- Treats accessibility, testing, or handoff as optional but will blame you when things break.
- Cannot describe what success means.
Early in freelancing, your biggest risk is not low price. It is undefined scope.
Make your first 30 days concrete
Week 1: choose and package
Pick one service. Write:
- Who it is for.
- What it includes.
- What it excludes.
- What inputs you need.
- What proof you can show.
Week 2: build proof
Create or polish one project that matches the service. Add the case study, screenshots, and handoff note.
Week 3: prepare delivery assets
Create:
- Discovery questions.
- Proposal template.
- Scope checklist.
- QA checklist.
- Handoff note template.
Week 4: outreach and feedback
Contact 20 targeted people or businesses. Track replies, objections, and patterns. Improve your offer based on what buyers misunderstand.
Common questions
Should I start on freelance platforms?
You can, but do not depend on platform listings alone. They are competitive and often reward speed more than judgment. Use them as one channel while building direct outreach, referrals, and a portfolio that explains a specific service.
Do I need a full portfolio before taking clients?
You need enough proof for the service you sell. One focused case study can be better than five random projects. If you sell landing pages, show a landing page. If you sell dashboard UI, show data states, filters, forms, and handoff discipline.
Should I charge hourly or fixed price?
Use hourly or paid discovery when the work is unclear. Use fixed price only when scope, inputs, revisions, and handoff are clear. If the client cannot define the work, do not pretend you can price it safely.
What should I avoid offering at the beginning?
Avoid large open-ended products, complex backend ownership, vague redesigns, unlimited revisions, content strategy, brand identity, and "maintenance" without boundaries. Start with work you can scope, finish, and defend.
How do I get repeat work?
Make handoff easy, send clear updates, document decisions, and point out useful next steps. Repeat work comes from clients feeling that you reduce stress, not only that you write code.
Before you pitch your first client
Your first freelance offer should feel small enough to buy and clear enough to finish.
Have these ready before outreach:
- One service package for one buyer type.
- One proof project that matches the service.
- A case study with problem, constraints, decision, verification, and result.
- A proposal template with included and excluded work.
- A discovery checklist for scope, assets, integrations, deadline, and decision maker.
- A handoff note template so the client knows what they receive at the end.
Freelancing becomes less scary when the offer is small, the proof is visible, and the scope is written before the code begins.
- Frontend Developer InternshipGet a frontend developer internship with a student-friendly plan for projects, GitHub, resume bullets, outreach, interview prep, and learning on the job.标签作者GreatFrontEnd Team7 分钟阅读Jul 30, 2026
To get a frontend developer internship in 2026, prove that you can finish small UI tasks, explain how you debugged them, and improve work after feedback. You do not need senior-level scope, but you do need enough browser and JavaScript knowledge to contribute with guidance.
Your application needs three things: visible frontend basics, one or two projects that match intern work, and a short explanation of how you built and debugged them.
Use the MDN Curriculum for web fundamentals and React Learn for React basics. Then turn the learning into deployed work. A certificate without inspectable projects is weak evidence.
Know what internship listings actually ask for
Internship requirements vary by company. Start with HTML, CSS, JavaScript, responsive layout, Git, and debugging, then add the framework and tools repeated across the roles you plan to apply for. A React role may ask about components and state; another internship may use Vue, Angular, Webflow, or no framework at all.
Do not try to learn every listed tool. Build proof around the repeated core:
Repeated requirement What your proof should show HTML/CSS/JS Semantic page, responsive layout, interactive behavior Listed framework Components, props or inputs, state, forms, and routing where relevant Figma-to-code Accurate layout, spacing, breakpoints, accessible controls API integration Loading, empty, error, retry, and success states Git/GitHub README, setup steps, meaningful commits, no secrets Debugging A short note about one bug you found and fixed An internship-ready profile does not need ten projects. It needs enough proof that a reviewer can trust your basics.
Build three internship proof pieces
Make your portfolio easy to review without requiring the reader to clone every repository.
Proof piece Minimum bar One polished UI Responsive, accessible, close to a design, deployed One API-backed app Search, dashboard, tracker, or listing with loading and error states One project explanation page What you built, what was hard, what broke, what you would improve Good intern projects are not huge. They are complete. A small issue tracker with filters, empty state, keyboard-friendly form, and clean README is more convincing than a large clone where half the buttons do nothing.
Pick projects that match intern tasks
Use projects that prove the work interns are asked to do.
Project idea What it proves Figma-to-responsive page CSS layout, spacing, mobile behavior, attention to detail API-backed search UI Fetching, debouncing, loading, empty, and stale-result handling Form-heavy onboarding flow Validation, error messages, focus recovery, controlled state Admin table slice Filters, pagination, permissions, empty state, readable data display Component mini-library Reusable buttons, inputs, modal, tabs, Storybook or docs if available For each project, add a
READMEsection with screenshots, setup commands, known limitations, and a "what I learned" note. That note helps because intern interviews often ask about learning process.Use student-specific channels
Do not rely only on LinkedIn quick apply.
Channel How to use it well College placement cell Keep resume and links ready before companies visit Company career pages Search "frontend intern", "software intern", and "UI engineering" Internship boards Apply early and filter for real coding work Local startups Send a short note with a relevant project link Open-source programs Build public contribution experience GitHub profile Pin the two repositories you want reviewers to inspect Google Summer of Code is not a normal company internship, but it is useful because accepted contributors work on open-source projects with mentors. GitHub Education can also help students access developer tools and build in public.
Write resume bullets that prove behavior
Weak bullets list tools. Strong bullets show what changed.
Weak bullet Better bullet Built a React project Built a React search UI with debounced input, loading, empty, and error states Used HTML, CSS, JavaScript Converted a Figma design into a responsive page across mobile and desktop Made a dashboard Built table filters, pagination, and empty-state handling for API data Worked on GitHub Added setup docs, screenshots, and issue notes so the project can be reviewed If a bullet could belong to any student, rewrite it. Your best bullet should make the interviewer ask about a specific decision.
Prepare project answers before interviews
Internship interviews often start with your project. Prepare this script for each project:
The project solves [user problem].The main frontend challenge was [layout/state/API/accessibility].I handled [loading/error/empty/invalid/mobile] states.One bug I fixed was [bug].If I had another week, I would improve [specific limitation].Do not pretend everything was easy. A real debugging story is often more convincing than a perfect-sounding project.
Show coachability
Your application should answer a practical question: "Can this person learn with guidance?"
Doubt Proof that reduces it Can this person finish? Deployed project with working core flow Can this person debug? Bug note, issue, commit, or README section explaining the fix Can this person accept review? Before/after improvement after feedback Can this person communicate? Clear project explanation and concise outreach Can this person use Git? Readable commits, setup instructions, no generated junk committed If you have received feedback from a teacher, senior, open-source maintainer, or peer, mention what changed after that feedback.
Send outreach that respects the reader's time
Keep outreach short. Lead with the role and proof.
Hi [Name],I am applying for the [frontend intern] role at [company].I built [project], which includes [specific behavior relevant to the role].Live: [link]GitHub: [link]Resume: [link]Could you point me to the right application path or share one piece of feedback?Thank you,[Name]Do not attach a long life story. Make the project do the work.
Evaluate the internship before accepting
An internship is valuable if it gives you mentorship, code review, and real tasks.
Ask these questions:
- Who will review my code?
- What does a successful intern ship in the first month?
- Will I work on production code, internal tools, or training tasks?
- Which frontend stack does the team use?
- How often do interns get feedback?
- Is there a PPO or full-time conversion path?
- If unpaid or low-stipend, what concrete learning and mentorship are provided?
Avoid internships that are only unpaid trial work, content entry, fake training, or vague "work on projects" without a reviewer.
Build a 30-day internship plan
Week Output 1 Finish one responsive UI and write a README 2 Add one API-backed project with loading, empty, and error states 3 Rewrite resume bullets around project behavior and apply to well-matched roles 4 Run project walkthrough practice and send proof-based outreach Keep applying while improving proof. Do not disappear for three months to take another course unless the current proof is truly missing fundamentals.
Diagnose the funnel
Symptom Likely issue Fix No profile views Weak title, unclear resume, missing links Put target role and best project near the top Views but no callbacks Projects do not match intern tasks Add API states, Figma-to-code proof, or better README Calls but no technical round Project explanation is unclear Practice walkthrough and rewrite project notes Technical rounds fail Fundamentals are weak Practice the exact failed topic for a week Final rounds fail Coachability or availability is unclear Prepare learning stories and internship expectations Treat the search like debugging. Change one thing per week so you know what helped.
Common questions
How many projects do you need?
Two strong projects are enough for many internships: one polished UI and one API-backed app. Add a third only if it proves a different skill.
Should you apply before you feel ready?
Yes, once you have one deployed project, a readable resume, working links, and the ability to explain your code. Waiting for perfect readiness can hide you from useful feedback.
What if you are rejected repeatedly?
Track where the rejection happens. If nobody responds, improve targeting and proof. If interviews fail, practice the exact questions that failed. Do not rewrite your whole profile every week.
Make your application easy to review
Before applying, assume the reviewer will scan before deciding what to open. Your job is to remove friction.
Your internship application should make these things obvious:
- The live project works.
- The GitHub repo is readable.
- The README has screenshots, setup steps, and one bug or tradeoff you handled.
- The resume names behavior, not only tools.
- The project matches the internship work: UI, forms, API state, responsiveness, or debugging.
- You can explain what you built without hiding behind a tutorial.
A good internship application makes four things visible: you can build, explain, debug, and improve.
- React vs Angular vs Vue in 2026: Which Framework Should You LearnCompare React, Angular, and Vue in 2026 by job market, learning curve, architecture, TypeScript, ecosystem, team fit, and beginner strategy.
Choose React first if you want the widest frontend hiring reach. Choose Angular first if the roles you want are in enterprise teams that already use Angular. Choose Vue first if your target team uses Vue/Nuxt, or if you want the gentlest path into component-driven UI without ignoring JavaScript, HTML, and CSS.
The bad choice is not "picking the wrong framework." The bad choice is learning syntax without building the flows employers ask about: forms, routing, data loading, error states, accessibility, tests, and maintainable component boundaries.
Research snapshot checked on July 13, 2026
As of July 13, 2026, the latest published Stack Overflow technology results available for this comparison were the 2025 results. Use these numbers as ecosystem signal, then do your own job-search count for your city, country, or remote market.
Source What it says What not to infer Stack Overflow Developer Survey 2025 Among all respondents, React was used by 44.7%, Angular by 18.2%, and Vue.js by 17.6%. Among professional developers, React was 46.9%, Angular 19.8%, and Vue.js 18.4%. This does not tell you which framework dominates your local junior roles. Survey respondents are not the same as job listings. Stack Overflow admired and desired 2025 React had 30.7% desired and 52.1% admired, Vue.js had 15.3% desired and 50.9% admired, and Angular had 12.6% desired and 44.7% admired. "Loved by developers" and "easiest to get hired for" are different questions. State of JavaScript 2025 Its 13,002-person JavaScript-community sample kept the same usage ranking: React, Vue, then Angular. Respondents also named React-specific issues, excessive complexity, performance, state management, and choice overload as common framework pain points. State of JS allows communities to promote participation, so use it for ecosystem experience and sentiment, not as a global employment census. Official docs React's docs recommend starting new apps with a framework; Angular v22 docs present Angular as a full application platform with signals, routing, forms, DI, SSR, CLI, and DevTools; Vue 3 docs describe Vue as progressive and recommend SFCs for non-trivial apps. Docs explain direction and APIs. They do not prove demand. That points to a practical 2026 conclusion: React is still the safest default for broad frontend job optionality, Angular remains a serious enterprise choice, and Vue is a mature framework with a smaller but real market. The right first framework depends on which of those three signals matters most to you.
The real difference
React, Angular, and Vue are not three versions of the same thing. They make different bets about how much structure the framework should give you.
Question React Angular Vue What is it? A UI library usually used through a framework such as Next.js or React Router's framework mode. A full application framework with built-in opinions for components, DI, routing, forms, HTTP, testing, and updates. A progressive framework that can enhance HTML, power SPAs, or scale through SFCs, Vue Router, Pinia, and Nuxt. What do you decide yourself? Routing, data fetching, forms, folder structure, state libraries, app framework, and rendering strategy. Less at the beginning. Angular gives more defaults, but you must learn the framework's vocabulary. More than Angular, less than React. Vue gives a cohesive component model while staying flexible. What will you debug early? Effects, stale state, prop drilling, keys, race conditions, client/server boundaries, and library choices. Dependency injection scope, reactive forms, RxJS-heavy legacy code, signals, change detection, and route/module structure. Reactivity loss from destructuring, prop mutation, watcher misuse, store boundaries, and mixed Options/Composition API code. Best beginner proof A React or Next.js product flow with URL filters, form states, and tests. An admin-style Angular app with reactive forms, services, guards, and table states. A Vue/Nuxt dashboard or content admin with SFCs, composables, Pinia, and route state. React in 2026
React is the best first choice when you want the broadest hiring reach across product companies, SaaS dashboards, design systems, content apps, and frontend-heavy teams.
React has also become harder to describe as "just learn components and hooks." When checked on July 13, 2026, the official docs showed React v19.2 and recommended starting new React apps with a framework. React 19 made Actions, form helpers,
useOptimistic,use, Server Components support for frameworks, andrefas a prop part of the React 19 story. React's docs also describe the React Compiler as a way to handle memoization automatically when a codebase follows React's rules.That changes what "learn React" means in 2026:
Learn Why it matters Component boundaries React gives you freedom, so bad boundaries spread quickly. State ownership Many React bugs come from storing derived values, lifting state too high, or hiding server state in local component state. Effects useEffectis for syncing with systems outside React, not for every calculation.Routing and URL state Most job tasks involve multi-page flows, filters, tabs, auth redirects, and shareable URLs. Framework basics Next.js or React Router framework mode, server rendering, data loading, and the client/server split show up in production React work. Testing user flows React teams care whether the UI still works after refactors, not whether every helper has a shallow test. Choose React if:
- You do not have a target company yet and want the most flexible default.
- Job listings near you mention React, Next.js, TypeScript, dashboards, design systems, or frontend platform work.
- You enjoy assembling an app from libraries and making tradeoffs.
- You want the easiest path from frontend basics into interview preparation.
Be careful with React if:
- You keep switching libraries before you can ship one flow.
- You call everything "state" instead of separating local UI state, URL state, server data, form state, and derived values.
- You learn Next.js routing before you can explain props, rendering, effects, and controlled inputs.
For GreatFrontEnd readers, a useful React path is: learn the browser basics, follow How to Learn React, then practice explaining component design and async UI behavior with React interview questions.
Angular in 2026
Angular is the best first choice when your target roles are in teams that value a complete framework, strict TypeScript, release discipline, and shared conventions across a large codebase.
Current Angular is not the AngularJS-era stereotype. When checked on July 13, 2026, the Angular v22 docs presented a broad application platform: components, signals, SSR/SSG, dependency injection, routing, forms, CLI, DevTools, and update tooling. Angular components are standalone by default, Angular Signals provide granular state tracking, and Angular's zoneless docs say zoneless is the default in Angular v21 and later. Angular also keeps a predictable release model: the release policy says major releases generally arrive every six months and major versions are typically supported for 18 months.
That makes Angular attractive for large teams for a simple reason: it reduces argument space. A React team may debate router, state, data, form, validation, folder, and rendering choices. An Angular team often starts with shared answers and spends more time inside the framework's patterns.
Learn Why it matters TypeScript classes and decorators Angular codebases are TypeScript-first and metadata-heavy. Components, inputs, and outputs You need clear boundaries before DI, services, and routing make sense. Dependency injection Angular apps share state, services, clients, and configuration through DI. Reactive forms Enterprise UI has validation, conditional fields, server errors, and disabled states. Router and guards Guards coordinate navigation and route UX; the API must still enforce auth and permissions. Lazy routes and route data loading are also common. Signals and zoneless change detection Newer Angular code uses a different mental model than older ZoneJS-heavy code. Choose Angular if:
- Your target listings mention Angular, RxJS, Java, .NET, banking, insurance, internal tools, GCCs, or enterprise dashboards.
- You like clear conventions and do not want to assemble every app decision from separate packages.
- You want to practice TypeScript-heavy frontend architecture.
- You are joining a team that already has Angular code.
Be careful with Angular if:
- You are looking for the fastest first week as a beginner.
- You only want to build small marketing pages or simple portfolio sites.
- Your local entry-level listings are overwhelmingly React and barely mention Angular.
Your first Angular proof project should not be a static portfolio. Build an approval dashboard: login shell, protected routes, a searchable table, a detail page, a reactive form with server-side validation, loading/error/empty states, and one service that owns API calls.
Vue in 2026
Vue is the best first choice when your target team uses Vue/Nuxt, when you want a smoother entry into components, or when you are building content/admin/product UI where templates, reactivity, and single-file components make the code easy to read.
The Vue docs are for Vue 3. Vue describes itself as progressive: it can enhance static HTML, power SPAs, support SSR/SSG, and scale through the ecosystem. For non-trivial apps, Vue recommends Single-File Components, where template, script, and style live in one component file. Vue's state guide explains local reactive state, shared state, one-way data flow, and when global state becomes necessary; Pinia is the official store library for larger apps.
Vue's advantage is not that it is a toy framework. Its advantage is that the component file often feels close to the page the user sees. Templates are explicit, reactivity is approachable, and Composition API lets larger features extract reusable logic without turning every component into a class hierarchy.
Learn Why it matters SFC structure Vue teams read template, state, and styles together. ref,reactive, andcomputedVue bugs often come from misunderstanding reactivity boundaries. Props and emits Parent-owned state and child events matter in reusable components. Watchers vs computed values Watchers are for side effects; computed values are for derived data. Vue Router and Pinia Production Vue apps still need routing, URL state, and shared state rules. Nuxt basics Many Vue roles expect SSR, file-based routing, and app conventions through Nuxt. Choose Vue if:
- Your target company already uses Vue or Nuxt.
- You are moving from HTML/CSS/JavaScript into framework work and want a readable component model.
- You build dashboards, admin flows, commerce UI, content tools, or Laravel/PHP-adjacent frontend work where Vue appears in listings.
- You value a smaller decision set than React but less ceremony than Angular.
Be careful with Vue if:
- Your goal is maximum job volume and your local market barely mentions Vue.
- You learn only Options API examples and never practice Composition API, composables, Pinia, or routing.
- You treat Vue's friendly syntax as a reason to skip JavaScript, accessibility, and testing.
Your first Vue proof project should show reactivity judgment: a content editor with autosave, validation, route params, a filtered list, Pinia store state, empty/error states, and a README explaining which state is local, which state is shared, and which state belongs in the URL.
Which framework should you learn first?
Use this as a starting point, then verify it against your job search.
Your situation Best first pick Why You want broad frontend job optionality and have no target company yet React It has the largest usage signal in the 2025 Stack Overflow survey and appears across many product-team stacks. You are targeting enterprise, banking, insurance, government, large service-company, or GCC roles that name Angular Angular The framework's conventions match teams that need consistent patterns across many developers. Your target company uses Vue/Nuxt Vue The fastest path to impact is learning the codebase's framework deeply. You are a beginner who still struggles with JavaScript objects, arrays, events, forms, or async code Browser basics first, then React or Vue A framework will hide the problem for a week and expose it during the first non-trivial bug. You already know React and want to expand into enterprise roles Angular second It teaches a different app architecture, DI, reactive forms, and framework-governed conventions. You already know React and are joining a Vue/Nuxt team Vue second Vue will feel familiar at the component level but different in reactivity and templates. Run a 30-minute job-market audit
Do this before committing three months to a framework.
- Open 30 to 50 listings for your target level and location.
- Count only listings you would actually apply to.
- Separate "must have" from "nice to have."
- Count React and Next.js together, Angular separately, and Vue/Nuxt separately.
- Track TypeScript, testing, CSS, accessibility, design systems, and API work too.
- Repeat the count for junior, mid-level, and senior roles if you are near a level transition.
Use a simple sheet:
Column Example Role level Junior, frontend engineer, senior frontend engineer Company type Startup, product company, agency, bank, GCC, service company Framework must-have React, Angular, Vue, Next.js, Nuxt Adjacent stack TypeScript, Node, Java, .NET, GraphQL, REST UI work Forms, data tables, design system, charts, accessibility Proof you need Project, interview story, system design, tests, migration experience If React/Next.js appears in most suitable listings, learn React first. If Angular appears repeatedly in the exact enterprise lane you want, learn Angular first. If Vue appears mainly as "nice to have," do not make it your first job-search framework unless you have a Vue-specific target.
Build one serious comparison project
Do not build three hello-world apps and call it comparison. Build one serious feature in the framework you chose.
A good project is a settings and billing dashboard:
- Account settings form with field validation and server errors.
- Notification toggles with optimistic save and rollback.
- Billing history table with sorting, filters, and empty states.
- Detail route with URL params.
- Loading, error, retry, and permission states.
- Keyboard-accessible modal or drawer.
- A small test suite for the riskiest flow.
- A README that explains state ownership and tradeoffs.
Then make the framework choice visible:
Framework What the project should prove React Component composition, state placement, route state, async handling, and framework/library choices. Angular Reactive forms, services, DI, routing, guards, signals or observable state, and structured app layout. Vue SFC design, props/emits, Composition API, composables, Pinia, route state, and reactivity decisions. This project tells you more than a framework ranking because it exposes the daily work: keeping UI state honest while requirements change.
Common wrong conclusions
"Angular is dead"
No. Angular is less dominant in broad developer surveys than React, but it is still used by a meaningful share of professional developers in the 2025 Stack Overflow survey. Angular v22 is active, Angular v20 and v21 are in LTS windows, and the framework has continued moving through standalone components, signals, and zoneless change detection.
The better question is: are the companies you want hiring Angular developers?
"Vue is only for beginners"
No. Vue is approachable, but mature Vue work still includes routing, state management, SSR/SSG through Nuxt, accessibility, testing, performance, and migration decisions. Vue's risk is usually market size, not technical seriousness.
"React alone is enough"
No. React gives you the UI model. Most React jobs also expect TypeScript, routing, data fetching, forms, CSS, testing, performance, and some framework knowledge. The 2026 React learner should know what React solves and what the surrounding framework solves.
"I should learn all three before applying"
Usually no. Learn one deeply enough to build and explain a complete product flow. Add another framework when your target role, team, or project gives you a reason.
Final recommendation
For most beginners optimizing for job flexibility, learn React first after browser basics. For enterprise-targeted roles where Angular is repeatedly named, learn Angular first. For teams that already use Vue/Nuxt, or for learners who want an approachable component model and have matching local roles, learn Vue first.
Whichever you choose, make the next eight weeks concrete:
Week Build 1 Semantic static page with responsive layout. 2 JavaScript widgets with events and DOM state. 3 API-backed search page with loading, empty, error, and retry states. 4 The same flow in your chosen framework. 5 Form-heavy route with validation and server errors. 6 URL filters, detail routes, and saved state. 7 Tests and keyboard accessibility pass. 8 README, deployment, and interview explanation. React, Angular, and Vue are all valid. The useful choice is the one that matches your target roles and gets you to finished, reviewable projects fastest.
- Best Resources to Learn Frontend Development in 2026A practical guide to the best frontend development resources in 2026, including HTML, CSS, JavaScript, React, TypeScript, accessibility, performance, projects, and interview practice.作者GreatFrontEnd Team10 分钟阅读Jul 29, 2026

The best resources to learn frontend development in 2026 are the ones that help you build better interfaces, not the ones that make your bookmark folder bigger. Use MDN Learn web development for the web platform, official framework docs for React, Angular, or Vue, the TypeScript Handbook when JavaScript starts feeling too loose, web.dev and W3C WAI for performance and accessibility, and project or interview platforms when you need practice.
Do not try to use every resource in this article. Pick one reference, one guided path, one practice platform, and one feedback loop. Replace a resource only when it stops helping you ship better work.
Quick picks by learning goal
Goal Start with Use it to build Learn from zero MDN Learn web development A personal page, contact form, and small interactive widget Practice HTML and CSS web.dev Learn HTML, web.dev Learn CSS, and MDN HTML/CSS docs Responsive pages with semantic headings, forms, and layouts Learn JavaScript MDN JavaScript Guide Search, filters, timers, tabs, modals, and API-backed widgets Add TypeScript TypeScript Handbook Typed data models, form state, API responses, and reusable helpers Learn React React Learn A stateful product flow with lists, forms, effects, and conditional UI Compare frameworks Angular docs, Vue guide, and React docs One small app in the framework your target roles use Learn accessibility web.dev Learn Accessibility, W3C WAI, and ARIA APG patterns Keyboard-safe forms, dialogs, tabs, menus, and error messages Learn performance web.dev Learn Performance, PageSpeed Insights, and Chrome DevTools Performance docs A before/after performance note with measured improvements Build portfolio proof GitHub README docs A repo that another developer can run and review quickly Practice interviews GreatFrontEnd UI coding questions, JavaScript questions, and quiz questions Timed solutions with explanations, edge cases, and test notes Web platform resources
Start with the browser before you start collecting frameworks. Frontend work still depends on HTML structure, CSS layout, JavaScript behavior, browser APIs, network requests, accessibility, and performance.
MDN Learn web development is the best first stop because it gives a structured path instead of isolated reference pages. Use it for HTML, CSS, JavaScript, forms, debugging, web standards, and accessibility basics. When a lesson mentions a specific feature, open the deeper MDN reference page only for that feature.
web.dev Learn HTML, Learn CSS, and Learn JavaScript are useful companions when you want shorter, topic-focused explanations. They are especially good for layout, responsive behavior, forms, and browser-centered thinking.
Good output from this stage:
Topic Build Semantic HTML Resume page, article page, product detail page Forms Contact form with labels, validation, errors, and disabled states CSS layout Pricing page, settings page, dashboard shell JavaScript DOM Tabs, accordion, modal, search filter, image carousel Network requests Search page with loading, empty, error, and retry states JavaScript and TypeScript resources
Use the MDN JavaScript Guide for the language and browser examples. Pair it with small tasks: array transforms, object updates, event handlers, timers, fetch calls, and DOM updates. You do not need to memorize every API before building; you need enough comfort to read errors and change requirements.
Move to the TypeScript Handbook after you can write JavaScript without copying every line. TypeScript is most useful when your code has data shapes that can drift: API responses, component props, form values, reducer actions, table rows, and reusable utilities.
Use GreatFrontEnd's JavaScript interview questions when you want feedback on the language pieces interviews often test: closures, promises, array methods, object manipulation, timers, event handling, and browser behavior.
Skill Resource Practice task JavaScript syntax and behavior MDN JavaScript Guide Rebuild map,filter, debounce, throttle, and event handlersAsync work MDN Fetch API and Promise docs API search with abort, retry, empty, and error states TypeScript basics TypeScript Handbook Type a product list, form state, and API response Interview speed GreatFrontEnd JavaScript questions Solve, explain tradeoffs, then rewrite without looking Framework resources
Do not learn React, Angular, and Vue at the same time. Pick based on the roles, teams, or projects you are targeting.
React Learn is the right React starting point in 2026 because it teaches current React terminology: components, props, state, rendering, effects, refs, and state structure. Build one complete flow after each major concept instead of finishing the docs in one pass.
Angular docs are the right starting point when your target roles use Angular. Vue's guide serves the same purpose for Vue roles. Choose from the job descriptions or project constraints you actually have, not from a generic framework ranking.
If you want to learn full app routing, data loading, and deployment after React basics, add the Next.js docs or another framework your target roles mention. Do this after you can explain React state and effects in a small app.
If your target is Learn first Build before moving on Product startups and React-heavy teams React docs Cart, booking flow, dashboard, or search UI Enterprise Angular teams Angular docs Form-heavy admin flow with validation and routing Vue teams or smaller component apps Vue guide Component-based dashboard or content app Full-stack React app work Next.js docs Auth-free app with routes, loading states, and server data Accessibility resources
Accessibility is not a late polish task. It changes HTML choices, component APIs, keyboard behavior, error messages, and testing.
Use W3C WAI's introduction to accessibility for the why and the user impact. Use web.dev Learn Accessibility for developer-level lessons on semantic HTML, focus, forms, images, color, motion, automated checks, and manual testing. Use ARIA Authoring Practices Guide patterns only when native HTML is not enough and you are building components such as dialogs, comboboxes, menus, tabs, or accordions.
Practice accessibility on components you already know:
Component Check Form Labels, descriptions, invalid states, error announcements Modal dialog Focus trap, escape key, initial focus, return focus Tabs Keyboard navigation, selected state, panel relationship Menu or combobox Arrow keys, active item, screen reader labels Data table Captions, headers, sorting buttons, responsive behavior Performance resources
web.dev Learn Performance is the best structured starting point for frontend performance. It covers the loading path, images, fonts, JavaScript, lazy loading, code splitting, and metrics. Pair it with PageSpeed Insights for quick checks and Chrome DevTools Performance docs when you need to inspect what the browser is doing.
Do not learn performance as a list of tricks. Pick one page you built and write down the before and after:
Problem Resource to use Improvement to prove Large images web.dev image performance lessons Smaller bytes and better LCP Too much JavaScript web.dev code-splitting lessons Less startup work and better interaction timing Slow fonts web.dev font performance lessons Measured text-rendering behavior and fewer font-related layout shifts Expensive rendering Chrome DevTools Performance docs Shorter long tasks or fewer unnecessary renders Guided courses and project practice
Guided courses are useful when they make you build. They become a trap when every lesson resets the project and you never practice changing requirements.
freeCodeCamp is useful for structured beginner practice and certification-style projects. The Odin Project is useful if you want a longer, project-heavy JavaScript path with HTML, CSS, JavaScript, React, Node.js, and getting-hired material. GreatFrontEnd Projects challenges are useful when you want larger frontend projects with specs, designs, APIs, and reviewable submissions.
Use project platforms this way:
Platform Best for Avoid using it for freeCodeCamp Getting started and finishing scoped exercises Staying only inside guided tasks forever The Odin Project Longer project-based learning Rushing through reading without shipping projects GFE Projects Project specs, designs, APIs, and submissions Skipping the README or review pass GFE Interviews Interview-style frontend implementation Memorizing solutions without explaining tradeoffs GitHub and portfolio resources
Resources matter only if they leave proof behind. A reviewer should be able to open your GitHub repo and understand what you built, how to run it, and what tradeoffs you made.
Use GitHub's README docs to make projects reviewable. For each serious project, include:
- What the app does.
- What you built yourself.
- How to run it locally.
- Screenshots or a short demo link.
- The main states: loading, empty, error, invalid input, success.
- One tradeoff or limitation you would improve next.
If you need a broader order, use the Frontend Developer Roadmap. If you are starting from scratch, read Frontend Development for Beginners before building your first portfolio project.
A six-week resource plan
This is a starter plan, not a rule. The point is to connect each resource to an output.
Week Resource Build 1 MDN Learn web development Static profile page and contact form 2 web.dev Learn CSS and MDN CSS layout docs Responsive pricing or settings page 3 MDN JavaScript Guide Tabs, modal, accordion, and searchable list 4 MDN Fetch API and browser DevTools API-backed search with loading, empty, error, and retry states 5 React Learn and TypeScript Handbook React version of one previous project with typed data 6 web.dev Accessibility, web.dev Performance, and GitHub README docs Accessibility pass, performance note, README cleanup At the end of each week, ask one question: can you change the project without reopening the tutorial step by step? If yes, move on. If no, rebuild the same idea with one changed requirement.
How to know a resource is worth your time
A resource is good when it changes what you can build without it open.
Signal Keep using it when Move on when Concepts It explains browser or framework behavior It only gives commands to copy Practice It asks you to build from a blank file It never asks you to change requirements Feedback It gives tests, checks, review criteria, or examples It only marks lessons complete Transfer You can apply the idea to another project You can only reproduce the lesson project Maintenance It matches current docs and tooling It teaches outdated setup steps The smallest useful resource stack is enough: one reference, one guided path, one practice platform, and one project reviewers can inspect. For example, use MDN as the reference, React docs when you reach components, the TypeScript Handbook when the app has typed data, GreatFrontEnd for interview-style practice, and GitHub README docs to make the proof visible.
Common questions
Should beginners learn React first?
Learn enough HTML, CSS, JavaScript, browser behavior, and DevTools before relying on React. You do not need to master every browser API first, but you should know what React is helping with: rendering, component structure, state, effects, and updates.
Should you use YouTube courses?
Use YouTube for explanations, debugging walkthroughs, and visual demos. Do not make it your only path unless the course includes projects, exercises, and review criteria. A two-hour video that produces no project is weaker than a short MDN lesson followed by a small working UI.
Do you need paid frontend courses?
Paid courses can help when they provide structure, projects, feedback, or a community. They are not required for the core path. Start with MDN, official docs, web.dev, and project practice. Pay only when the course replaces a missing feedback loop or gives you a path you will actually finish.
How many resources should you use at once?
Use fewer than you think. For one topic, keep one main resource and one practice output. For example, use React Learn plus one product flow. Use the TypeScript Handbook plus one typed API feature. Use web.dev Accessibility plus one modal or form audit.
Turn the resource into proof
Pick one topic and one resource from this article. Build the smallest complete version, then change one requirement that makes it less tutorial-shaped: a smaller screen, slower API, invalid input, empty result, keyboard interaction, saved state, or a README another developer can follow.
Keep a resource only if it helps you explain the concept, build without copying every step, or show a finished artifact. If it gives you more bookmarks than output, move on.
Learning becomes durable when the resource turns into code, notes, and visible proof. Bookmark less, build more, and switch resources only when the current one has stopped improving what you can ship.
- Frontend Development for Beginners: Where to Start in 2026Start frontend development in 2026 with a beginner-friendly path through HTML, CSS, JavaScript, Git, React, projects, accessibility, and interview basics.标签作者GreatFrontEnd Team12 分钟阅读Jul 29, 2026
Frontend development for beginners should start with the browser and end with one project another developer can inspect. Learn HTML, CSS, JavaScript, DevTools, and basic accessibility first; then rebuild one completed flow in React or another framework.
The goal is not to memorize every tag, CSS property, array method, and framework option. The goal is to build a small interface that survives normal product conditions: small screens, invalid input, slow requests, empty results, keyboard navigation, and a README that explains how the project works.
MDN Learn web development and the MDN Curriculum are good official references for the browser path. Use Frontend Developer Roadmap when you want the larger skills map, and use Best Resources to Learn Frontend Development when you want a curated resource list. This guide is narrower: it shows what a beginner should build first and how to know it is good enough to move on.
What frontend development means for beginners
Frontend development is the part of web development users see, click, type into, read, and navigate. For a beginner, that means six practical skills:
- Structure content with semantic HTML.
- Make layouts work across screen sizes with CSS.
- Add behavior with JavaScript.
- Fetch and display data without breaking the page.
- Make forms, errors, and interactive components usable with a keyboard.
- Explain the project clearly enough that someone else can run it.
That last point matters. A project hidden in a messy GitHub repo is hard to evaluate. A smaller project with a clean README, visible states, and clear decisions teaches more and gives you better proof.
Follow the beginner order
Frameworks sit on top of browser behavior. If you skip the browser, React state, form bugs, layout issues, and accessibility problems feel mysterious later.
Stage Learn Build Ready when Setup Editor, browser, folders, Git, GitHub One local page in a repository You can edit, run, commit, and publish small changes HTML Headings, links, buttons, forms, labels, lists, tables, landmarks Profile page and contact form The page has meaningful structure without CSS CSS Box model, cascade, Flexbox, Grid, responsive layout, focus states Settings page or pricing page It works at mobile, tablet, and desktop widths JavaScript Values, functions, arrays, objects, DOM, events Tabs, modal, filter, form validation User actions update the UI predictably Async UI fetch, promises, JSON, loading, empty, error, retryAPI-backed search page Failed and slow requests have visible states Accessibility Labels, keyboard flow, focus, errors, color contrast Form-heavy flow The main task works without a mouse Framework Components, props, state, lists, forms, effects Rebuild one browser project in React Components make the flow clearer, not more confusing Proof README, screenshots, demo link, tradeoff note Reviewable portfolio project Another developer can run and inspect the work Do not treat this as a list to finish before building. Each row should produce a small working piece.
Start with one inspectable project
Pick one project and keep improving it for several weeks. A repeated project teaches more than five tutorial clones because every new skill has to fit into an existing flow.
Good first project choices:
- Account settings page.
- Product search page.
- Booking form.
- Issue tracker.
- Habit tracker.
The best beginner project is boring in a useful way. It has forms, layout, state, errors, and data. It does not need authentication, payments, complex animation, or a custom backend.
Example project: account settings flow
Build an account settings page for a fictional product. Start with static HTML and CSS. Then add JavaScript. Later, rebuild the same flow in React.
Requirement What to build What it proves Page structure Heading, profile section, email field, password section, notification preferences You can write semantic HTML Responsive layout Single column on mobile, two-column layout on wider screens You understand spacing, width, and overflow Form behavior Required fields, invalid email message, disabled save button while saving You can handle common form states Async behavior Load saved settings from a JSON file or mock API You can use fetchand render dataFailure state Show an error message and retry button when loading fails You do not build only the happy path Accessibility Labels, visible focus, keyboard access, error text tied to fields The flow can be used without a mouse Project proof README, screenshots, run commands, known limitation Someone else can review the project quickly This one project can teach HTML, CSS, JavaScript, async UI, accessibility, GitHub hygiene, and React. You are not starting over each week; you are adding a more demanding constraint.
Build product states, not only screens
A beginner project becomes valuable when it handles what users actually experience. A static screen is a design copy. A frontend project has states.
State What to practice Initial What does the user see before doing anything? Loading What appears while data is being fetched or a form is being saved? Empty What appears when search returns no results or no preferences exist yet? Invalid How does the form explain what needs to change? Error What happens when the request fails? Success What confirms the user completed the task? Disabled Which controls should pause during saving or loading? Keyboard Can the user complete the main task with Tab,Enter,Space, andEscapewhere appropriate?Mobile Does the same flow work on a narrow screen? This is where frontend development starts to feel like engineering. You are deciding how the interface behaves when the world is not perfect.
Learn DevTools from the start
DevTools should not wait until something is broken. Use it while building so browser behavior becomes visible.
Tool Use it for Beginner exercise Elements Inspect HTML, CSS, layout, spacing, and focus styles Find why a button is misaligned Console Read JavaScript errors and test small expressions Fix one broken event handler Network Inspect request status, payload, response, and timing Debug a failed fetchrequestPerformance Record a slow interaction when the page feels laggy Compare before and after a rendering fix Chrome's Network panel docs and Performance panel docs are worth bookmarking, but do not try to learn every panel at once. Start with Elements, Console, and Network.
Practice accessibility as normal frontend work
Accessibility is not an advanced specialization for later. It starts with the elements you choose and the way your UI responds to input.
The W3C Web Accessibility Initiative explains accessibility as making websites and tools usable by people with disabilities. For beginners, the first practical layer is simple:
- Use a real
<button>for actions and a real<a>for navigation. - Connect every input to a visible label.
- Keep heading order meaningful.
- Make focus visible.
- Do not rely on color alone for errors.
- Put error text close to the field it describes.
- Test the main flow with the keyboard.
- Use ARIA patterns only when native HTML is not enough.
If you build tabs, a modal, or an accordion, compare your keyboard behavior with the ARIA Authoring Practices Guide. The lesson is not "add more ARIA." The lesson is to match the expected behavior of the component.
Learn React after the browser version works
React is a practical default for many frontend learners, but it should organize knowledge you already started building. It should not hide weak HTML, CSS, JavaScript, or debugging habits.
Before React, you should be able to:
- Build a form with labels and validation.
- Change the UI when a user clicks, types, or submits.
- Render a list from an array.
- Show loading, empty, error, and success states.
- Debug a failed request in the browser.
- Explain why a layout breaks on mobile.
Then React becomes easier to learn. The official Thinking in React guide teaches the habit of breaking UI into components, describing visual states, and connecting data flow. That lands better after you have already built a small browser version.
When you rebuild your settings page in React, learn these ideas in order:
React idea What it should help you do Components Split the page into meaningful pieces Props Pass data into child components State Store values that change because of user actions or requests Derived values Calculate values during render instead of storing duplicates Lists and keys Render repeated rows or settings predictably Forms Keep input, validation, disabled, and error states understandable Effects Synchronize rendering with an external system, such as a browser API or network connection Avoid adding a state library, component library, or full app framework before you can explain where state belongs in a small React app.
Use an eight-week build path
This is a starter path, not a deadline. Spend longer on any week if you cannot explain what you built.
Week Output Acceptance test 1 Static account settings page HTML structure makes sense with CSS turned off 2 Responsive layout No horizontal scroll at common mobile, tablet, and desktop widths 3 JavaScript interactions Tabs, toggles, validation, and saved messages work without a framework 4 Form states Invalid, disabled, saving, success, and error states are visible 5 Data loading Settings load from JSON or a mock API with loading, empty, error, and retry states 6 Accessibility and debugging pass Main flow works with keyboard and DevTools can explain one bug 7 React rebuild Components, props, state, and effects make the same flow easier to reason about 8 Review pass README, screenshots, demo link, and tradeoff note are ready for another person By the end, the project is small but inspectable. That is better than a large app where every page works only because a tutorial told you what to type.
Know when to move on
Move to the next topic when you can build the current one from a blank file, explain the failure states, and debug one broken version.
Skill Move on when you can HTML Build a form with labels, buttons, useful link text, and ordered headings CSS Fix overflow, spacing, responsive columns, and focus styles JavaScript Update UI from events without losing track of state Async UI Show loading, empty, error, retry, and success states React Split a flow into components with clear props and state ownership Portfolio proof Explain what broke, what changed, and how someone can run it If you cannot explain why the layout breaks, why the request fails, or why state is stale, spend another small project on that topic before adding a new framework.
Avoid beginner traps
Most beginner delays come from switching too early, not from choosing the wrong first resource.
Trap Better move Learning five frameworks Pick one after browser and JavaScript basics Copying projects line by line Change one requirement and rebuild the feature Ignoring CSS Practice layout, overflow, focus, and responsive behavior Building only happy paths Add invalid, loading, empty, error, and retry states Treating AI output as proof Explain and modify the code without the chat open Skipping GitHub cleanup Add README, screenshots, run commands, and known limitations Starting with a big app Keep one small flow and make it more complete The course loop is especially common. Courses are useful for structure, but they become a trap when every lesson resets the project. Keep one project alive. Add routing, then forms, then API data, then accessibility checks, then a React rebuild.
Use AI without outsourcing learning
AI can explain errors, suggest edge cases, compare approaches, and help you write tests. It should not be the only reason your project works.
After using AI:
- Close the chat and explain the code line by line.
- Change one requirement and update the solution yourself.
- Ask why an alternative would fail.
- Remove code you cannot explain.
- Write a short note about the bug or tradeoff you learned.
If you cannot modify the project without AI giving you the next step, the project is not ready as portfolio proof.
Make the project reviewable
A beginner project becomes more valuable when someone else can inspect it quickly. GitHub's README guidance says a README should explain what a project does, why it is useful, and how people can get started. For a beginner frontend project, include:
- What the app does.
- What you built yourself.
- How to run it locally.
- A live demo link or screenshots.
- The main states you handled.
- The hardest bug you fixed.
- One limitation you would improve next.
Do not hide weak code behind a large project name. Make the work easy to review.
What to ignore in the first month
In month one, ignore advanced state libraries, design systems, server infrastructure, custom build-tool tuning, complex animation systems, micro-frontends, and framework debates.
Spend that time on browser basics: forms, layout, events, fetch, errors, keyboard behavior, and debugging. The first month should produce small working pages, not a perfect stack.
Common questions
Should beginners learn React first?
Learn enough HTML, CSS, JavaScript, browser behavior, and DevTools before relying on React. You do not need to master every browser API first, but you should know what React is helping with: rendering, components, state, forms, effects, and updates.
Do beginners need TypeScript?
Learn JavaScript first. Add TypeScript when your project has data shapes worth protecting: API responses, form values, component props, table rows, or reusable helpers. If TypeScript errors feel random because JavaScript still feels random, wait a little longer.
How do you know a resource is working?
A resource is working when it changes what you can build without copying. If you finish a lesson but cannot change the requirements, the next step is not another resource. Rebuild the same idea in your own project with one new constraint.
How should you choose between frameworks?
Choose from the roles, teams, and projects you are targeting. If those signals do not favor a framework, React is a reasonable default because its official learning path is extensive and the same component, state, and data-flow lessons transfer elsewhere. The first framework matters less than your ability to ship and explain a complete flow.
When are you ready for job-oriented practice?
You are ready when one small project is inspectable: working link, readable code, visible states, keyboard-safe main flow, and a README that explains how to run it. From there, add interview practice with JavaScript interview questions, React interview questions, and UI coding questions.
Start with the browser. Build one small flow until it handles the messy parts. Then add framework depth. That path feels slower in week one, but it saves months of scattered learning.
- Frontend Developer Salary in Bangalore 2026: What to Expect at Every LevelA crisp 2026 Bangalore frontend developer salary guide with source caveats, level ranges, employer-type differences, and offer comparison advice.标签作者GreatFrontEnd Team6 分钟阅读Jul 28, 2026

Frontend developer salary in Bangalore depends less on the city average and more on company type, level, offer structure, and the kind of frontend work you will own.
Bangalore can pay much higher than broad India averages because it has more product companies, GCCs, funded startups, and big-tech teams. But a high CTC is only useful when you know how much is fixed pay, how much is variable, and whether the role builds useful frontend experience.
2026 salary snapshot
Read each figure in the context of its dataset. A frontend base-salary sample and a software-engineer total-compensation sample describe different parts of Bangalore's market.
Source Latest accessible signal How to use it NodeFlair India frontend developer salary Updated July 12, 2026; median base salary Rs 62,500 per month, with a displayed range of Rs 37,500-Rs 1,87,500 per month Broad India frontend baseline; not Bangalore-only Levels.fyi India software engineer salary Last updated July 12, 2026; India software-engineer median total compensation around Rs 29.7 LPA; Bengaluru listed around Rs 36.6 LPA Submitted SWE total compensation; not a frontend-only salary band Frontend Developer Salary in India Compares Glassdoor, PayScale, Indeed, NodeFlair, Adecco, and AmbitionBox with caveats Use this before deciding whether a Bangalore offer is below-market, fair, or top-market The practical takeaway: a normal Bangalore frontend offer may sit near broad India frontend ranges, while product, GCC, and big-tech roles can move much higher when the level, scope, and interview bar are also higher.
Calibrate by level without inventing a city band
The sources above do not publish reliable Bangalore frontend ranges for each experience band. Avoid turning an India median and a Bengaluru SWE median into precise city-by-level numbers. Classify the role first, then compare it with current postings and submitted compensation for similar companies and levels.
Level Evidence the role should pay for Entry / early HTML, CSS, and JavaScript basics; deployed work; debugging; ability to finish a scoped UI task Mid-level Independent feature delivery, API and error states, tests, accessibility, and production debugging Senior System ownership, design-system or performance work, mentoring, and cross-team decisions Lead / staff Multi-team platform scope, migrations, technical direction, and measurable organizational impact Years do not establish the level by themselves. Ask for the internal level and compare the expected scope with people at that level, not only with candidates who have the same years of experience.
Read the company type before the title
Two Bangalore offers can have the same "frontend developer" title and very different value.
Company type Salary pattern What to verify before accepting IT services Structured bands, possible title inflation Project allocation, client tech stack, frontend ownership, onsite or support expectations Product startup Wide range, possible ESOP upside Fixed pay, runway, equity terms, manager quality, speed of execution GCC or multinational Stronger levels and review loops Level mapping, bonus, frontend scope, promotion path, hybrid policy Big tech Higher total compensation, tougher calibration Base, RSU, bonus, refreshers, level, team match Agency or design-heavy team Variable by client quality Delivery pace, visual quality bar, code quality, fixed pay Do not compare a services fixed-pay offer with a big-tech total-comp number unless you separate base salary, bonus, stock, equity risk, and role level.
What raises a Bangalore offer
A higher number is easier to justify when the role includes real frontend ownership:
- Building complex product flows, not only static pages.
- Handling loading, error, empty, permission, and offline states.
- Writing TypeScript that other engineers can maintain.
- Working with APIs, product managers, designers, and backend teams.
- Improving performance, accessibility, or design-system quality.
- Explaining tradeoffs in interviews and design discussions.
If the role is mostly page maintenance, CMS updates, or pixel work without engineering ownership, treat the salary ceiling differently.
Build your target range
Before a negotiation call, write three numbers:
Number What it means Fixed-pay floor The minimum guaranteed annual cash you are willing to accept Target total compensation Fixed pay plus realistic bonus, equity, joining bonus, and benefits Walk-away point The point where salary, commute, manager quality, role scope, or team health is not worth it Support the target with the evidence that best matches the Bangalore role: your level, ownership scope, another written offer, or work you can take over in the first 90 days.
Offer comparison worksheet
Use this table when two offers look close.
Factor Offer A Offer B Why it matters Fixed annual pay Predictable income Variable bonus Useful only if recent payouts are consistent Equity or stock RSUs, ESOPs, and options have different certainty Level and scope Affects future salary and promotion path Manager and team quality Changes learning, stress, and execution speed Commute or remote policy Affects daily cost and sustainability First review date Matters when the offer is slightly below target Label every component as guaranteed, variable, or illiquid before comparing offers. A large CTC headline is less useful than the fixed pay and vesting schedule underneath it.
Bangalore offer examples
A startup offer with a high headline CTC can be weaker than a GCC offer with lower CTC if most of the startup upside is illiquid ESOPs and the GCC has higher fixed pay, clearer level, and better frontend scope.
A services offer can still be good if it gives you React or Angular ownership, complex client work, and reviewable production experience. It is weaker if the title is senior but the work is mostly page edits and support.
Write the employer type next to the number before judging the number. Salary makes sense only after the work, level, and certainty are visible.
Questions to ask before accepting
- What is the fixed annual gross compensation?
- What part is variable, and what was the recent payout pattern?
- Are RSUs, ESOPs, or options included, and what is the vesting schedule?
- What level is this offer mapped to?
- What frontend work will I own in the first 90 days?
- When is the first compensation or level review?
Common questions
Should you trust salary websites?
Trust them as directional inputs. Compare multiple sources, then compare the actual offer structure. A salary page cannot tell you whether the role has good manager support, real frontend ownership, or risky equity.
Is CTC the same as take-home pay?
No. CTC may include variable pay, employer contributions, benefits, one-time bonuses, and equity alongside fixed salary. Estimate take-home from the fixed-pay breakup and applicable deductions, not the headline CTC.
What is the best negotiation ask?
Choose the one term that changes the decision, such as fixed pay, level, joining bonus, equity, relocation support, or the first review date. State the requested change and why it closes the gap.
For Bangalore, use salary data to set a range, then use company type, role scope, and compensation certainty to decide where your offer belongs inside that range.
- Frontend Developer Salary in Hyderabad 2026: Levels and CompaniesA crisp 2026 Hyderabad frontend developer salary guide with source caveats, level ranges, GCC and product-company context, and offer comparison advice.标签作者GreatFrontEnd Team6 分钟阅读Jul 28, 2026

Frontend developer salary in Hyderabad depends on level, company type, fixed pay, role scope, and whether the work is product engineering, GCC platform work, services delivery, SaaS, or startup ownership.
Hyderabad has many GCC, cloud, product, SaaS, and enterprise teams. That can create good frontend opportunities, but the title alone is not enough. A role building maintainable product UI is different from a role doing client-side page delivery.
2026 salary snapshot
Use these numbers as reference points, not as a single truth. Salary sites measure different samples, titles, and compensation types.
Source Latest accessible signal How to use it NodeFlair India frontend developer salary Updated July 12, 2026; median base salary Rs 62,500 per month, with a displayed range of Rs 37,500-Rs 1,87,500 per month Broad India frontend baseline; not Hyderabad-only Levels.fyi India software engineer salary Last updated July 12, 2026; India software-engineer median total compensation around Rs 29.7 LPA; Hyderabad listed around Rs 32.9 LPA Submitted SWE total compensation; not a frontend-only salary band Frontend Developer Salary in India Compares Glassdoor, PayScale, Indeed, NodeFlair, Adecco, and AmbitionBox with caveats Use this before deciding whether a Hyderabad offer is below-market, fair, or top-market The practical takeaway: Hyderabad can produce high frontend offers, especially in GCC, cloud, SaaS, and product teams. But city averages can mislead if you do not separate frontend title, company type, level, and compensation structure.
Calibrate by level without inventing a city band
Neither source above publishes dependable Hyderabad frontend ranges for each experience band. Do not manufacture them by combining the India frontend median with the Hyderabad SWE median. Use the role's internal level, employer type, current postings, and comparable submitted offers.
Level Evidence the role should pay for Entry / early HTML, CSS, and JavaScript basics; deployed work; debugging; ability to finish a scoped UI task Mid-level Independent feature delivery, API and form states, tests, and production debugging Senior UI architecture, accessibility, performance, mentoring, and cross-team ownership Lead / staff Platform direction, migrations, shared standards, and measurable multi-team impact The jump from mid-level to senior depends on scope, not a fixed year count. Ask what the company expects at the offered level and how that differs from the next level.
Read the company type before the title
Two Hyderabad roles can both say "frontend developer" but test and pay for different things.
Company type Salary pattern What to verify before accepting GCC or cloud/product center Stronger pay for system-minded engineers Level mapping, frontend scope, bonus, promotion path, hybrid policy SaaS or product startup Wider range and faster ownership Fixed pay, runway, product maturity, equity terms, manager quality IT services Structured bands and client-dependent work Project allocation, tech stack, support load, onsite/client expectations Enterprise product or consulting Stable work, often form and dashboard heavy React or Angular depth, release process, testing, API ownership Agency, media, or CMS-heavy team Variable by client and delivery quality Fixed pay, design quality bar, code review, maintenance expectations Do not compare a services fixed-pay offer with a product-company total-comp number unless you separate base salary, variable pay, equity risk, level, and project scope.
What raises a Hyderabad offer
Higher-paying Hyderabad frontend roles usually pay for maintainable UI inside bigger systems:
- Building dashboards, tables, forms, workflows, and internal tools.
- Handling loading, error, empty, permission, and retry states.
- Working cleanly with APIs, backend teams, QA, and product managers.
- Using TypeScript, tests, and component patterns that survive handoff.
- Improving accessibility and performance in data-heavy interfaces.
- Explaining tradeoffs in code review, architecture discussions, and interviews.
If the role is mostly page slicing, support, or CMS work, judge the salary against that market, not against top-product compensation.
Build your target range
Before a negotiation call, write three numbers:
Number What it means Fixed-pay floor The minimum guaranteed annual cash you are willing to accept Target total compensation Fixed pay plus realistic bonus, equity, joining bonus, and benefits Walk-away point The point where salary, commute, manager quality, role scope, or team health is not worth it Then write one sentence explaining why your target is fair: level, scope, competing offer, frontend ownership, or the value you can bring in the first 90 days.
Offer comparison worksheet
Use this table when two offers look close.
Factor Offer A Offer B Why it matters Fixed annual pay Predictable income Variable bonus Useful only if recent payouts are consistent Equity or stock RSUs, ESOPs, and options have different certainty Level and scope Affects future salary and promotion path Manager and team quality Changes learning, stress, and execution speed Commute or remote policy Affects daily cost and sustainability First review date Matters when the offer is slightly below target Mark each compensation item as guaranteed, likely, uncertain, or risky. This prevents a large headline CTC from hiding weak fixed pay.
Hyderabad offer examples
A GCC role with clear level, high fixed pay, and dashboard or platform ownership can be better than a startup offer with a higher headline CTC but unclear equity value.
A services role can be worth taking if it gives you React or Angular ownership, API-heavy work, and a substantial client project. It is weaker if the project allocation is unclear or the work is mostly maintenance.
For Hyderabad, ask which product flow or UI area you will own. Salary makes more sense once the work, team, level, and compensation certainty are visible.
Questions to ask before accepting
- What is the fixed annual gross compensation?
- What part is variable, and what was the recent payout pattern?
- Are RSUs, ESOPs, or options included, and what is the vesting schedule?
- What level is this offer mapped to?
- What frontend work will I own in the first 90 days?
- Which team or project am I joining?
- When is the first compensation or level review?
Common questions
Should you trust salary websites?
Trust them as directional inputs. Compare multiple sources, then compare the actual offer structure. A salary page cannot tell you whether the project allocation, manager, frontend scope, or equity terms are good.
Is CTC the same as take-home pay?
No. CTC can include fixed salary, variable bonus, employer contributions, insurance, joining bonus, retention bonus, and equity. Monthly take-home depends mostly on fixed pay, deductions, taxes, and how the offer is structured.
What is the best negotiation ask?
Ask for the specific change that matters most: base salary, joining bonus, equity, level, remote flexibility, relocation support, or earlier review timing. A precise ask is easier to approve than a vague request for "better compensation."
For Hyderabad, use salary data to set a range, then use company type, project scope, and compensation certainty to decide where your offer belongs inside that range.
- Frontend Developer Jobs in Chennai: Top Companies and How to Get Hired (2026)Learn how to prepare for frontend developer jobs in Chennai in 2026, including company types, skills, portfolio projects, interview prep, and application strategy.标签作者GreatFrontEnd Team8 分钟阅读Jul 27, 2026

Frontend developer jobs in Chennai are a good target in 2026 if you can show steady UI execution: JavaScript, CSS, React or Angular, API states, forms, responsive layout, and readable code.
Chennai rewards practical frontend work more than trend-chasing. You will see SaaS teams, enterprise software, GCCs, automotive and industrial tech, fintech, IT services, health tech, and web teams. Some roles are React product work. Some are Angular-heavy enterprise work. Some are UI developer roles where CSS, browser behavior, and fast delivery matter.
That means your preparation should start with the role type, not the city name. Before applying, ask: is this product UI, enterprise dashboard work, services delivery, web implementation, or an early-career role?
What frontend work looks like in Chennai
The same "frontend developer" title can mean different work. Read the job description before deciding how to position yourself.
Role pattern Likely work What to show React Developer product screens, dashboards, routing, API data, reusable components React project with forms, tables, loading, empty, error, and retry states Angular Developer enterprise apps, admin screens, modules, services, forms typed forms, API services, validation, and component structure UI / Front-End Developer CSS-heavy pages, design handoff, browser behavior, responsive layouts polished responsive pages, accessibility basics, and visual care Frontend Intern or Fresher small components, bug fixes, HTML/CSS/JS tasks, simple framework work two or three finished projects with clean READMEs Senior Frontend Developer architecture, review, performance, design systems, mentoring case studies, tradeoffs, and examples of ownership Do not apply to all of these with the same resume. A React product role needs product-flow proof. An Angular enterprise role needs forms, services, and maintainability. A UI developer role needs stronger CSS evidence than a generic React project gallery.
Chennai company types to research
Build a Chennai employer watchlist by category, then open each company's own careers page. The names below illustrate the mix of work in the city; inclusion does not mean that a frontend role is open today.
Company group Examples to research Frontend angle to look for SaaS and product companies Zoho, Freshworks, Chargebee, Kissflow, FourKites product screens, admin tools, customer workflows, design/backend collaboration GCCs and enterprise tech Ford Business Solutions, Renault Nissan Technology, Comcast, BNY, Standard Chartered internal platforms, dashboards, forms, permissions, long-lived codebases IT services and consulting TCS, Cognizant, Infosys, HCLTech, Wipro, Accenture, Capgemini client apps, migrations, Angular/React delivery, maintenance, multi-stack exposure Fintech, health tech, and operations teams payments, lending, insurance, hospital, and logistics products validation, tables, approvals, audit-like workflows, reliability Agencies and web teams digital agencies, brand sites, marketing teams responsive UI, CMS work, performance, accessibility, handoff quality If you are a fresher, include smaller SaaS, services, and agency teams instead of waiting only for a famous product company. If you have experience, inspect whether the opening names the product, client, or platform you will join; a Chennai office alone says little about the frontend work.
Skills to prepare in the right order
Prepare the skills that appear across Chennai roles before adding another library.
Skill What interviewers may ask What to build HTML and CSS semantic tags, forms, Flexbox, Grid, responsive layout, overflow, specificity settings page, pricing page, responsive dashboard shell JavaScript arrays, objects, promises, async/await, events, fetch, timers search page, filterable table, debounced input, polling widget React or Angular state, forms, routing, reusable components, API integration customer dashboard, onboarding flow, support queue TypeScript props, API response types, unions, narrowing, event types typed API client, typed form state, typed table rows APIs loading, empty, error, retry, auth failure, validation errors API-backed dashboard with realistic failure states Accessibility labels, focus order, keyboard navigation, error text, dialogs keyboard-safe form, modal, tabs, or menu Performance large lists, image weight, unnecessary renders, network delays paginated table, optimized landing page, measured interaction Use the Frontend Developer Roadmap if you need a broader learning order. For Chennai applications, the practical target is narrower: build useful screens and explain your decisions clearly.
How to read a Chennai job description
Translate the posting into actual work before rewriting your resume.
Posting signal Likely role type How to position yourself React, dashboards, REST APIs, charts SaaS product or internal tools Show API states, filters, tables, routing, and tests Angular, enterprise, modules, services GCC, services, or enterprise app Show typed forms, services, validation, and component boundaries HTML, CSS, Bootstrap, CMS UI/web developer or agency role Show responsive layouts, browser compatibility, and clean handoff Design system, Storybook, reusable components platform or shared UI role Show component APIs, states, accessibility, and documentation Full-stack with frontend emphasis startup or small team Show frontend depth plus API collaboration and debugging If a job post lists many tools, find the work behind the list. Is the team building a data-heavy dashboard, a marketing site, a workflow app, or client features? Your application should answer that need.
Portfolio projects for Chennai roles
Build projects that look like work a Chennai frontend team might actually assign.
Project 1: SaaS admin dashboard
Include:
- Search, filters, sorting, and pagination
- Details drawer or details page
- Loading, empty, error, and retry states
- URL search params for filters
- Role-aware actions such as edit, approve, or disable
- Responsive layout for smaller screens
- Basic tests for search and filter behavior
Add a README note explaining where state lives, how failed requests behave, and how you would connect the screen to a backend.
Project 2: Multi-step enterprise workflow
Good options:
- Employee onboarding
- Vendor registration
- Loan or insurance application
- Appointment booking
- Support escalation
Include:
- Step navigation
- Validation per step
- Review screen
- Save draft or local persistence
- Error summary
- Keyboard-friendly controls
- Clear disabled, loading, and success states
This project fits Chennai because many roles involve form-heavy enterprise or SaaS UI. A careful workflow says more than another static clone.
Project 3: Responsive product or marketing page
Do not ignore CSS. Chennai has plenty of UI developer and web roles where layout quality matters.
Include:
- Responsive hero
- Feature or pricing grid
- FAQ accordion
- Contact or signup form
- Good focus states
- Image loading basics
- Clean mobile layout
This helps for agency, web developer, and UI implementation roles.
Resume positioning by level
Good bullets describe behavior instead of only naming tools.
Level Weak bullet Better bullet Fresher Made React projects Built a React onboarding flow with validation, saved progress, review step, and mobile layout 1-2 years Worked on UI pages Built reusable table filters and API error states for an internal dashboard 3-5 years Developed frontend features Owned an Angular approval workflow with typed services, role-based actions, and release fixes Senior Managed frontend work Led a React refactor that simplified state ownership and reduced repeated form bugs If your resume does not give an interviewer a concrete question to ask, rewrite it. "Worked on React" is easy to skip. "Built retry handling for failed saves" gives the interviewer something useful to discuss.
Interview preparation for Chennai
Expect a practical mix of JavaScript, CSS, framework depth, UI coding, and project discussion.
Round What they are checking How to prepare Screening call role fit, notice period, salary range, stack match Keep a 30-second summary and target lane ready JavaScript round language basics and debugging Practice arrays, promises, closures, object transforms, and async mistakes Framework round React or Angular depth Prepare forms, state, lifecycle/effects, routing, services, and reusable components UI coding can you build under time pressure Practice forms, tabs, data table, modal, accordion, and autocomplete Project discussion did you actually build the work Prepare tradeoffs, bugs, constraints, and improvements Hiring manager round ownership and team fit Explain how you clarify requirements and handle review feedback Practice JavaScript interview questions, React interview questions, and UI tasks such as Data Table, Contact Form, and Tabs.
If you are targeting Angular roles, practice the same behavior in Angular: forms, validation, services, routing, API state, and component communication.
A 30-day Chennai job-search plan
Use this if you already know basic HTML, CSS, JavaScript, and one framework.
Days Work 1-4 Collect 30 current Chennai postings and tag them by role lane, framework, level, and company type 5-8 Fix JavaScript and CSS gaps exposed by those postings 9-14 Build or improve one dashboard or workflow project 15-18 Add TypeScript or Angular/React depth based on your target lane 19-21 Clean GitHub READMEs, screenshots, live links, and project notes 22-24 Rewrite resume bullets for Chennai role types 25-30 Apply in targeted batches, practice interviews, and record feedback If you get no callbacks, do not only send more applications. Check whether your strongest project appears early, whether the live link works, and whether the top bullet matches the role lane.
Questions to ask companies
Ask questions that reveal the actual frontend work:
- Is the frontend team mostly React, Angular, or mixed?
- Will I work on product UI, internal tools, marketing pages, or client projects?
- How are designs and API contracts handed off?
- Are there frontend tests in the codebase?
- Who reviews frontend pull requests?
- Are accessibility and performance part of release quality?
- What would the first 60 days look like?
Chennai frontend developer jobs reward candidates who can deliver maintainable UI. Pick a lane, build proof for that lane, prepare JavaScript and CSS seriously, and show that your frontend work survives real product states.
- Frontend Developer Jobs in Mumbai: Who's Hiring and What They Pay (2026)Learn how to prepare for frontend developer jobs in Mumbai in 2026, including role types, company categories, portfolio proof, resume positioning, and interview prep.标签作者GreatFrontEnd Team9 分钟阅读Jul 27, 2026

Frontend developer jobs in Mumbai are worth targeting in 2026 if you can show practical UI work: JavaScript, CSS, React or Angular, API states, responsive layout, and readable code.
Mumbai's frontend market is broad. You will see fintech and BFSI teams, media and entertainment products, e-commerce, agencies, SaaS companies, startups, IT services, and enterprise delivery teams across Mumbai, Navi Mumbai, Thane, and hybrid setups.
That variety is useful only if you filter roles well. A fintech dashboard role, a media product role, an agency UI role, and an Angular enterprise role should not get the same resume or project order.
What frontend work looks like in Mumbai
Use the job description to classify the role before applying.
Role pattern Likely work What to show React Developer product screens, dashboards, routing, API data, reusable components React project with forms, filters, tables, routing, and async states Angular Developer enterprise apps, internal tools, forms, services, modules Angular forms, typed services, validation, and component structure UI / Front-End Developer responsive pages, CSS, campaigns, CMS, design handoff polished layouts, accessibility basics, and browser behavior Frontend Intern or Fresher HTML/CSS/JS tasks, small features, bug fixes, simple framework work finished projects, clean READMEs, and working live links Senior Frontend Developer architecture, performance, design systems, mentoring, product ownership case studies, tradeoffs, performance fixes, and review examples Do not apply to every Mumbai listing as if it is the same job. A BFSI internal-tool role cares about reliability and data states. A media role may care more about responsive polish and performance. An agency role may care about delivery speed and browser details.
Mumbai company types to research
This is an employer map, not a live vacancy feed. Search the company's own careers page and confirm whether the role is in Mumbai, Navi Mumbai, Thane, or another office before spending time on an application.
Company group Examples to research Frontend angle to look for Fintech, BFSI, and markets HDFC Bank, ICICI Bank, Kotak, Axis Bank, NSE, BSE, Upstox, JPMorgan, Morgan Stanley, Nomura dashboards, forms, approvals, data-heavy screens, reliability, permissions Product, SaaS, and startup teams BrowserStack, CleverTap, BookMyShow, Dream11, WebEngage, LogiNext product workflows, developer tools, analytics UI, reusable components Media, entertainment, and commerce Jio, Viacom18, Tata Digital, Nykaa, media and streaming teams responsive content UI, performance, personalization, design polish IT services and consulting TCS, Accenture, Capgemini, LTIMindtree, Tech Mahindra, Mastek client apps, migrations, Angular/React delivery, maintenance, multi-stack exposure Agencies and brand web teams digital agencies, campaign teams, D2C brands marketing pages, CMS work, animations used carefully, fast handoff If you are a fresher, include internships, trainee roles, junior UI roles, agencies, and smaller product teams in your search. If you have experience, prioritize listings that mention frontend ownership, testing, performance, accessibility, product workflows, or design systems.
What Mumbai roles pay
There is no defensible single Mumbai frontend salary. NodeFlair's India frontend page, updated July 12, 2026, showed a Rs 62,500 monthly median base salary and a much wider displayed range. Levels.fyi's India software-engineer page, also updated July 12, showed about Rs 29.7L median total compensation, but that dataset covers SWE titles and mixes base, stock, and bonus.
Use the first source for broad frontend base-pay context and the second only for product or big-tech SWE comparison. Neither supports a Mumbai-by-experience salary table. For an actual offer, compare fixed annual gross, variable pay, joining bonus, equity, level, and commute cost separately.
Skills to prepare in the right order
Mumbai roles vary, but the core preparation stays practical.
Skill What interviewers may ask What to build HTML and CSS semantic tags, forms, responsive layout, Flexbox, Grid, overflow, specificity product page, campaign page, dashboard shell JavaScript arrays, objects, promises, closures, event handling, fetch, timers search page, filterable table, debounced input, save flow React or Angular state, forms, routing, reusable components, API integration portfolio dashboard, approval workflow, media catalog TypeScript props, API response types, unions, narrowing, event types typed API client, typed form state, typed table rows APIs loading, empty, error, retry, validation errors, auth failure API-backed dashboard with realistic failure states Accessibility labels, focus order, keyboard navigation, dialogs, error text keyboard-safe form, modal, tabs, or menu Performance images, large lists, unnecessary renders, bundle and network cost optimized content page, paginated table, measured interaction Use the Frontend Developer Roadmap if you need the broader learning path. For Mumbai applications, the useful question is narrower: what kind of UI work does this company actually need?
How to read a Mumbai job description
Translate the posting into screens, not buzzwords.
Posting signal Likely role type How to position yourself React, dashboards, REST APIs, charts product, fintech, SaaS, or internal tools Show API states, tables, filters, routing, and performance basics Angular, enterprise, client delivery services or enterprise app Show typed forms, services, tables, permissions, and testing HTML, CSS, landing pages, CMS agency or marketing frontend Show responsive polish, accessibility basics, and fast handoff Media, content, video, campaign pages media or commerce product Show responsive UI, image/media performance, and content states Design system, Storybook, tokens component or platform role Show reusable APIs, visual states, docs, and migration notes Before applying, move the matching proof to the top of your resume. A media UI role should not first see a backend-heavy project. A fintech dashboard role should not first see a static landing page.
Portfolio projects for Mumbai roles
Build projects that match the role lane you want.
Project 1: Financial or operations dashboard
This fits fintech, BFSI, enterprise, services, and SaaS roles.
Include:
- Search, filters, sorting, and pagination
- Status badges and summary cards
- Details drawer or details page
- Loading, empty, error, and retry states
- Permission-aware actions
- Responsive fallback for tables
- Basic tests for search or save behavior
Write a README note explaining table state, error handling, and how you would secure or validate sensitive actions on the real system.
Project 2: Media or commerce catalog
This fits media, entertainment, e-commerce, and consumer product roles.
Include:
- Browse and search flow
- Category filters
- Details page
- Save, watchlist, cart, or shortlist action
- Skeleton/loading state
- Empty and error states
- Image optimization basics
- Mobile-first layout
This project shows you can build UI that feels polished without ignoring data and state.
Project 3: Responsive campaign or product page
This fits agency, D2C, marketing, and UI developer roles.
Include:
- Responsive hero
- Feature or pricing grid
- FAQ accordion
- Contact or signup form
- Good focus states
- Measured image weight
- Clean mobile layout
Do not hide this project if you are applying to UI-heavy roles. In Mumbai, many frontend jobs still care deeply about layout quality and delivery speed.
Resume positioning by level
Write bullets that name the behavior you built.
Level Weak bullet Better bullet Fresher Made React projects Built a React media catalog with filters, saved items, empty states, and responsive layout 1-2 years Worked on UI pages Implemented reusable form fields with validation messages and API error handling 3-5 years Developed frontend features Owned a dashboard workflow with table filters, role-based actions, and release fixes Senior Managed frontend work Led a performance pass on a content-heavy page by reducing unnecessary renders and image weight If you do not have work experience, use project bullets. If you do have work experience, prioritize shipped work over personal projects. Either way, make the top third of the resume match the role lane.
Interview preparation for Mumbai
Expect a practical interview mix. Product and fintech teams may test API states, data-heavy UI, and JavaScript depth. Media and agency teams may test CSS, responsive behavior, and performance. Enterprise teams may test Angular, TypeScript, forms, and maintainability.
Round What they are checking How to prepare Screening call role fit, notice period, salary range, stack match Keep your target lane and location/hybrid preference clear JavaScript round language basics and debugging Practice arrays, promises, closures, object transforms, and async mistakes Framework round React or Angular depth Prepare forms, state, effects/lifecycle, routing, services, and reusable components UI coding can you build under time pressure Practice forms, tabs, data table, modal, autocomplete, and accordion Project discussion did you actually build the work Prepare tradeoffs, bugs, constraints, and improvements Manager round ownership and collaboration Explain how you clarify requirements and work through review feedback Practice JavaScript interview questions, React interview questions, and UI tasks such as Data Table, Contact Form, and Transfer List.
If you are targeting Angular roles, practice the same behavior in Angular: forms, services, routing, typed models, API state, and component communication.
A 30-day Mumbai job-search plan
Use this if you already know basic HTML, CSS, JavaScript, and one framework.
Days Work 1-4 Collect 30 current postings across Mumbai, Navi Mumbai, Thane, remote, and hybrid 5-6 Sort them into product, BFSI/enterprise, media/commerce, agency/web, and fresher lanes 7-12 Improve one matching project: dashboard, catalog, workflow, or responsive page 13-16 Add TypeScript, API states, tests, or CSS polish based on your target lane 17-19 Clean GitHub READMEs, live links, screenshots, and case notes 20-22 Rewrite resume bullets for Mumbai role types 23-30 Apply in targeted batches, send proof-based outreach, and record feedback If three interviews expose weak CSS, stop adding React libraries and fix CSS. If every shortlisted role asks for Angular, adjust your project proof. If you get no callbacks, check whether your live demos work and whether your top bullet matches the job.
Questions to ask companies
Ask questions that reveal the real frontend work:
- Will I work on product UI, internal tools, marketing pages, client projects, or platform components?
- Is the frontend stack mostly React, Angular, or mixed?
- How are designs and API contracts handed off?
- Are there frontend tests in the codebase?
- Who reviews frontend pull requests?
- Are accessibility and performance part of release quality?
- What would the first 60 days look like?
Mumbai frontend developer jobs reward candidates who can filter the market by role type. Pick the lane, build matching proof, prepare JavaScript and CSS seriously, and make every application show the frontend problems you can solve.
- FAANG Frontend Developer Salary in India: What to Expect at Each Level (2026)Understand FAANG frontend developer salary in India with 2026 big-tech software-engineer compensation data, frontend level signals, India offer-breakup caveats, and recruiter questions.标签作者GreatFrontEnd Team8 分钟阅读Jul 26, 2026
FAANG frontend developer salary in India is usually closer to big-tech software-engineer compensation than to broad frontend-developer averages. Levels.fyi pages checked on July 13, 2026 show reported India software-engineer total compensation from roughly Rs 24L at some entry levels to more than Rs 3Cr at the highest level shown on one company page. Those endpoints combine different companies and levels; they are not a frontend salary range or an offer forecast.
This guide uses "FAANG" the way many candidates search for it: shorthand for top global tech companies such as Google, Amazon, Apple, Meta, Microsoft, and similar product companies. It is not a promise that every company has a separate frontend salary band in India.
Quick salary snapshot
Levels.fyi's India software-engineer page showed a July 12, 2026 update and reported median total compensation of about Rs 29.7L for software engineers in India, with the 25th percentile around Rs 17.1L, the 75th percentile around Rs 48.3L, and the 90th percentile around Rs 69.1L.
The company pages below were checked on July 13, 2026. They aggregate submitted software-engineer compensation and include frontend software engineer among the covered titles; they are not official frontend-only pay bands. Values can change whenever new submissions arrive.
Company page Lowest and highest level totals shown Levels at those endpoints Google India SWE About Rs 40.6L to Rs 3.25Cr L3 to L7 Amazon India SWE About Rs 27.7L to Rs 2.16Cr L4 to L7 Apple India SWE About Rs 33.9L to Rs 1.81Cr ICT2 to ICT5 Microsoft India SWE About Rs 24.1L to Rs 2.74Cr 59 to 80 Meta India SWE About Rs 59.6L to Rs 1.11Cr E3 to E5 The useful conclusion is not "frontend engineers will get exactly this number." The useful conclusion is that top-company offers are level-driven, and the best frontend candidates are usually evaluated inside the broader software-engineer ladder.
Why frontend salaries use the SWE ladder
At many big tech companies, a frontend engineer is not paid from a separate "HTML/CSS/React" track. The role is often mapped to the same software-engineer levels used by backend, infra, mobile, and full-stack engineers.
That matters because the pay jump comes from level, not from a framework keyword. A React-heavy team and an internal UI-platform team may both hire software engineers, but the higher offer usually goes to the candidate who proves stronger engineering scope.
Frontend work at these companies can include:
- Product UI for revenue, ads, commerce, collaboration, search, or developer tools
- Design systems and component platforms used by many teams
- Web performance, Core Web Vitals, accessibility, and reliability work
- Experimentation platforms, dashboards, admin consoles, or internal tools
- Cross-platform UI work across web, mobile web, desktop, and embedded clients
That is why "frontend developer salary" in FAANG-style companies should be read as "software-engineer compensation for a frontend-heavy role."
Salary by level, not years
Years of experience help, but they do not determine the offer. Two engineers with six years of experience can land different levels if one shows feature ownership and the other shows platform judgment across teams.
Stage Common level examples What frontend evidence should prove Entry/early Google L3, Amazon L4, Microsoft 59/60, Meta E3, ICT2 JavaScript, CSS layout, DOM behavior, React basics, clean component implementation, debugging habits Mid-level Google L4, Amazon L5, Microsoft 61/62, Meta E4, ICT3 API-backed UI, async state, forms, testing, accessibility basics, performance tradeoffs Senior Google L5, Amazon L6, Microsoft 63/64, Meta E5, ICT4 Ambiguous product flows, design-system work, observability, cross-team decisions, mentoring Staff and up Google L6+, Amazon L7+, Microsoft 65+, Meta E6+, ICT5+ UI platform direction, migrations, architecture reviews, standards, team productivity, technical strategy The exact mapping changes by company. Ask the recruiter for the level, not only the title. "Senior frontend engineer" can mean very different things at different companies.
What raises the frontend offer
The biggest compensation levers are company, level, interview performance, and competing offers. For frontend roles, the strongest candidates usually show depth in a few areas instead of listing every tool they have touched.
Signal Why it affects pay Evidence to prepare JavaScript depth Many frontend loops test language behavior and problem solving Closures, async behavior, event loop, data structures, edge cases, readable implementation UI coding Big tech teams need engineers who can build precise interfaces quickly Components with state, keyboard behavior, validation, error states, and responsive layout React or framework depth Framework work creates bugs around rendering, effects, memoization, and state Hooks, rendering model, state ownership, data loading, forms, suspense/error boundaries if relevant Browser fundamentals Senior frontend work often fails at the platform boundary DOM events, CSS layout, accessibility, performance, storage, networking, security basics System design Mid/senior candidates are judged on architecture, not only code Autocomplete, feed, dashboard, chat, design system, editor, or data-table tradeoffs Project scope Leveling depends on what you have owned before Stories with ambiguity, decisions, tradeoffs, metrics, incidents, and cross-team collaboration For a focused prep path, use How to Get a Frontend Developer Job at FAANG, Senior Frontend Developer Skills, UI coding questions, and system design questions.
How to read an India big-tech offer
Do not compare one headline CTC number with another. A big-tech offer can include fixed salary, annual bonus, RSUs, joining bonus, relocation, benefits, and refresh grants. The mix matters.
Offer component What to check Why it changes the real value Fixed annual gross Exact fixed pay before tax and deductions This is the most predictable part of compensation Variable bonus Target percentage and recent payout pattern A target bonus is not guaranteed monthly income RSUs or stock units Grant value, vesting schedule, and stock-price risk Total compensation can move with the market Sign-on or joining bonus Amount, payout date, and clawback period First-year compensation can look higher than steady-state pay Refresh grants Eligibility, timing, and performance dependency Long-term compensation can drop if refreshers are weak Level Written level code and promotion path Level affects pay, scope, review expectations, and next offer Amazon's public Levels.fyi page, for example, shows a backloaded RSU schedule for many offers, while other companies may use more even vesting. That does not make one offer automatically better. It means first-year, second-year, and steady-state compensation must be compared separately.
How to use public data correctly
Public salary pages are useful for range-finding, not for guaranteed negotiation lines. Levels.fyi is strong for top-market software-engineer total compensation. Glassdoor, PayScale, Indeed, NodeFlair, AmbitionBox, and employer salary guides are better for broad frontend-developer context.
Use the sources in this order:
- Check the broad India frontend market in Frontend Developer Salary in India.
- Compare top-company SWE compensation on Levels.fyi by company and level.
- Map the role to level, team scope, city, remote policy, and frontend ownership.
- Compare the written offer by fixed pay, bonus, equity, sign-on, vesting, refreshers, and review timing.
Do not average all salary sources into one fake-precise number. A frontend developer at a services company, a React engineer at a funded startup, a UI platform engineer at a GCC, and a big-tech SWE on a frontend-heavy team are different markets.
Questions to ask the recruiter
Ask these before deciding whether the offer is strong:
- What level is this role mapped to internally?
- Is the role a frontend-specific role, a general SWE role, or a full-stack role with frontend-heavy work?
- What are the fixed, variable, equity, sign-on, and relocation components?
- What is first-year total compensation, and what is recurring annual compensation after sign-on?
- How do RSUs vest, and how are refresh grants decided?
- What frontend scope will the engineer own in the first six months?
- What evidence would support the next level if the offer is below expectation?
For scripts and offer-breakup examples, use Frontend Developer Salary Negotiation. This article is meant to help you understand the FAANG salary shape; the negotiation article should handle the detailed call script.
Mistakes to avoid
The common salary-reading mistakes are simple but expensive.
- Treating CTC as take-home pay
- Comparing base salary from one source with total compensation from another
- Ignoring stock vesting and first-year sign-on effects
- Assuming frontend has a fixed discount versus backend roles
- Quoting a public median without knowing the offer level
- Choosing the highest headline number without checking role quality
- Forgetting that taxes, stock movement, and liquidity change realized compensation
Use How to Evaluate Companies as a Front End Engineer when the money is close and the role quality is unclear.
FAANG frontend developer salary in India is best understood as level-based software-engineer compensation for frontend-heavy work. The July 2026 Levels.fyi snapshots above show that reported top-company India SWE compensation varies sharply by level. The real offer depends on level, team scope, fixed pay, equity, vesting, refreshers, and interview signal.
The most useful move is to stop asking only "What does FAANG pay frontend developers?" Ask the sharper question: "What level can I prove, what frontend scope will I own, and what is the real value of the written offer?"
- Frontend Developer Jobs in Delhi NCR: Gurugram, Noida and Who's Hiring (2026)Learn how to prepare for frontend developer jobs in Delhi NCR in 2026, including Gurugram and Noida role patterns, company types, portfolio proof, and interview prep.标签作者GreatFrontEnd Team8 分钟阅读Jul 26, 2026

Frontend developer jobs in Delhi NCR are worth targeting in 2026 if you can show practical UI work: JavaScript, CSS, React or Angular, API states, responsive layout, and readable code.
Delhi NCR is not one market. Gurugram often has more consumer internet, startup, fintech, travel, SaaS, and product roles. Noida often has more enterprise product, IT services, GCC, and delivery-heavy roles. Delhi itself adds media, agency, edtech, nonprofit, government-adjacent, and business web work.
That mix is useful if you prepare deliberately. Do not search only "frontend developer Delhi" and send one resume everywhere. Pick a primary lane, keep one backup lane, and make your portfolio prove the work behind the title.
What frontend work looks like in Delhi NCR
Use the job description to classify the role before applying.
Role pattern Likely work What to show React Developer product screens, dashboards, routing, API data, reusable components React project with forms, tables, routing, and realistic async states Angular Developer enterprise apps, admin tools, forms, services, modules Angular forms, typed services, reusable components, validation UI / Front-End Developer layout, CSS, design handoff, browser behavior, responsive pages polished responsive UI, accessibility basics, and browser testing Frontend Intern or Fresher HTML/CSS/JS tasks, small components, bug fixes, basic React or Angular finished projects, clean GitHub, and clear explanations Senior Frontend Developer architecture, performance, design systems, mentoring, cross-team work case studies, tradeoffs, code review, and ownership examples A Gurugram React product role, a Noida Angular services role, and a Delhi agency role need different evidence. The title may be similar; the proof should not be.
Delhi NCR company types to research
Use the companies below to seed separate Gurugram and Noida searches. They are not a claim of a current frontend vacancy. Verify the employer's careers page, the exact office, and required in-office days before applying; an "NCR" label can hide a difficult commute.
Company group Examples to research Frontend angle to look for Gurugram product, consumer, and fintech teams Zomato, MakeMyTrip, Urban Company, Delhivery, Policybazaar, CARS24, PayU consumer flows, checkout/search, dashboards, experimentation, mobile-web polish Noida product and platform teams Adobe, Paytm, Samsung R&D, Microsoft, Info Edge, UKG large UI systems, design tools, payments, enterprise workflows, reusable components Services and consulting companies HCLTech, TCS, Infosys, Accenture, Cognizant, Capgemini, Nagarro, Publicis Sapient client apps, migrations, Angular/React delivery, maintenance, multi-stack exposure Media, edtech, and business web teams Times Internet, HT Media, education platforms, agencies, B2B websites content UI, SEO pages, CMS work, responsive design, fast iteration Startups and smaller product teams SaaS, logistics, healthtech, creator, and local marketplace teams broader ownership, ambiguity, API collaboration, quick product changes For freshers, compare internships and junior roles by mentorship and shipped work, not company fame. Experienced developers should check whether the listed NCR office contains the product or engineering team named in the posting rather than a sales or support office.
Skills to prepare in the right order
The safest preparation covers both product and enterprise roles.
Skill What interviewers may ask What to build HTML and CSS semantic structure, forms, responsive layout, Flexbox, Grid, overflow, specificity product page, settings page, dashboard shell JavaScript arrays, objects, promises, closures, event handling, fetch, timers filterable list, debounced search, polling widget, form flow React or Angular state, forms, routing, reusable components, API integration consumer checkout, admin dashboard, approval workflow TypeScript props, API types, unions, narrowing, event types typed API client, typed form state, typed table rows APIs loading, empty, error, retry, validation errors, auth failure API-backed dashboard with visible failure states Testing form submission, async UI, filters, user flows tests for search, save, validation, and retry behavior Accessibility labels, focus order, keyboard navigation, dialogs, error text keyboard-safe modal, tabs, form, or menu If you are deciding between React and Angular, count the roles in your target lane. Gurugram product roles may lean React in your shortlist; Noida enterprise roles may lean Angular in yours. Let current openings guide the framework, but keep JavaScript and CSS sharp either way.
How to read a Delhi NCR job description
Job posts often mix must-haves, nice-to-haves, and recruiter filler. Translate the words into screens.
Posting signal Likely role type How to position yourself React, Next.js, dashboards, REST APIs product or internal tools Show API states, routing, forms, filters, and edge cases Angular, enterprise, client delivery services, GCC, or enterprise app Show typed forms, services, tables, permissions, and review-ready code HTML, CSS, WordPress, landing pages agency, marketing, or business web role Show responsive polish, CMS comfort, forms, and performance basics Design system, Storybook, tokens platform or shared UI role Show reusable APIs, visual states, accessibility, and migration notes Full-stack with frontend emphasis smaller team or startup Show frontend depth plus API collaboration and debugging Before applying, rewrite the top project or resume bullet to match the strongest signal in the posting.
Portfolio projects for Delhi NCR roles
Build projects that match the lane you want.
Project 1: Consumer product flow
This fits many Gurugram product, marketplace, travel, fintech, and startup roles.
Include:
- Search or browse flow
- Filters and sorting
- Details page
- Cart, booking, save, or apply action
- Loading, empty, error, and retry states
- URL state for filters or selected view
- Responsive mobile layout
Write a project note explaining how you handle failed API requests, stale data, and form errors.
Project 2: Enterprise approval workflow
This fits Noida enterprise, services, GCC, fintech, and internal-tool roles.
Good options:
- Expense approval
- Vendor onboarding
- KYC review
- Support escalation
- Candidate review
Include:
- List view and details view
- Approve/reject actions
- Required rejection reason
- Permission-based disabled actions
- Activity log
- Error state for failed save
- Basic tests for validation or workflow behavior
This project proves that you can think beyond rendering components. It shows state, permissions, validation, and recovery.
Project 3: Responsive web implementation
This helps for agency, media, edtech, business-web, and UI developer roles.
Include:
- Responsive hero and content sections
- Feature or pricing grid
- FAQ accordion
- Contact or lead form
- Good focus states
- Optimized images
- Clean mobile layout
Do not treat this as "just a landing page." For UI roles, layout accuracy and browser behavior are the interview signal.
Resume positioning by level
Your resume should make the target lane obvious.
Level What the resume should prove Example bullet Fresher You can finish small frontend projects and explain them Built a React job tracker with filters, local persistence, empty states, and responsive layout 1-2 years You can deliver scoped UI features with review Implemented reusable form fields with validation messages and API error handling 3-5 years You can own a product or enterprise flow Owned an Angular approval workflow with typed services, role-based actions, and release fixes 5+ years You can reduce product and technical risk Led a React performance pass on a data-heavy page by reducing unnecessary renders and table work Weak bullets list tools. Better bullets name behavior. If a recruiter cannot tell whether you are targeting product UI, enterprise UI, or web implementation, the resume is doing too little work.
Interview preparation for Delhi NCR
Expect interview style to vary by company type. Product teams may push deeper on React, state, and product edge cases. Services and enterprise teams may ask more Angular, JavaScript, CSS, and scenario questions.
Round What they are checking How to prepare Screening call role fit, location, notice period, stack match Keep your Gurugram/Noida/hybrid preference and target role clear JavaScript round language basics and debugging Practice arrays, promises, closures, object transforms, and async mistakes Framework round React or Angular depth Prepare forms, state, effects/lifecycle, routing, services, and reusable components UI coding can you build under time pressure Practice forms, tabs, modal, data table, autocomplete, and accordion Project discussion did you actually build the work Prepare decisions, constraints, bugs, and improvements Manager round ownership and collaboration Explain how you work with designers, backend engineers, and review feedback Practice JavaScript interview questions, React interview questions, and UI tasks such as Contact Form, Data Table, and Modal Dialog.
For Angular-heavy NCR roles, reproduce the same product behavior with typed forms, services, routing, API states, and deliberate component boundaries. The framework name alone is not proof that you can build the flow.
A 30-day Delhi NCR job-search plan
Use this if you already know basic HTML, CSS, JavaScript, and one framework.
Days Work 1-4 Collect 30 current postings across Gurugram, Noida, Delhi, remote, and hybrid 5-6 Pick one primary lane and one backup lane 7-12 Improve one matching project: consumer flow, enterprise workflow, or web implementation 13-16 Add TypeScript, API states, tests, or CSS polish based on your target lane 17-19 Clean GitHub READMEs, live links, screenshots, and case notes 20-22 Rewrite resume bullets for the roles you are actually applying to 23-30 Apply in targeted batches, send proof-based outreach, and record interview feedback Use feedback as data. If you get views but no callbacks, fix resume targeting. If you get callbacks but fail rounds, practice the exact topic that failed. If you get no views, check title, links, and whether the portfolio is visible quickly.
Questions to ask companies
Ask questions that reveal the work behind the title:
- Will I work on product UI, client delivery, internal tools, marketing pages, or platform components?
- Is the frontend stack mostly React, Angular, or mixed?
- How are designs, product requirements, and API contracts handed off?
- Who reviews frontend pull requests?
- Are tests, accessibility, and performance part of release quality?
- Is the team based in Gurugram, Noida, Delhi, remote, or hybrid?
- What would the first 60 days look like?
Delhi NCR frontend developer jobs reward targeted proof. Pick the city lane and role lane together, then make your resume and portfolio show the exact frontend work the company needs.
- Frontend Developer Salary Negotiation: Scripts and Strategies That Work (2026)Negotiate frontend developer salary with a clear target range, offer-stage scripts, frontend impact proof, India CTC checks, and calm counter-offer language.标签作者GreatFrontEnd Team10 分钟阅读Jul 25, 2026
Frontend developer salary negotiation works best when you know the full offer breakup, define your target range before the call, and explain why the role maps to your scope. Do not negotiate from one isolated salary number.
In India, that means looking past CTC and checking fixed pay, variable pay, joining bonus, ESOPs, notice-period buyout, level, review timing, and work mode. The goal is not to sound aggressive. The goal is to make a specific ask that a recruiter, hiring manager, or compensation team can approve.
Start with the right negotiation moment
You can discuss compensation expectations early, but the serious negotiation should happen after the company has decided it wants you.
Stage What to do What to avoid Recruiter screen Ask for the role range and share a researched range if required Locking yourself to a low number before you know scope Final rounds Learn level, team, ownership, and expected first-90-day work Arguing pay before the company has buy-in Verbal offer Ask for the complete breakup and decision timeline Accepting on the call Written offer Counter with one or two clear changes Reopening every component repeatedly After accepting Negotiate only if the written terms changed Treating acceptance as another bargaining stage If the recruiter asks for an expected salary early, answer with a range tied to role scope:
I am calibrating by level and ownership. For a frontend role with this scope,I am targeting INR X-Y total compensation, with at least INR Z fixed.Does that fit the range approved for this role?Build your three numbers before the call
Do not wait for the offer call to decide what you want. Write three numbers first.
Number Meaning How to choose it Walk-away floor The lowest offer that still makes sense Your current role, cash needs, commute, risk, and alternatives Target The offer you would be happy to accept Market data, role scope, interview signal, and company type Stretch ask A high but defensible ask Strong interview signal, competing offer, rare skill fit, or level mismatch For example, a mid-level frontend engineer moving from a services role to a product role might use this purely hypothetical worksheet:
- Walk-away floor: 16 LPA fixed; anything below that makes the switch too weak.
- Target: 19-21 LPA total compensation with at least 17 LPA fixed.
- Stretch ask: 23 LPA total compensation if the company can use joining bonus, equity, or level mapping.
The useful part is the structure: fixed-pay floor, target range, and fallback levers.
Use salary data without sounding random
Salary pages measure different markets. Use them to build a range, not to quote one number as truth.
Source Mid-2026 signal How to use it Glassdoor India front end developer salaries Visible page data showed about Rs 6L average base pay and a Rs 4L-10L base range Broad frontend title calibration; self-reported and title-dependent PayScale India Front End Developer / Engineer salary Rs 652,671 average base salary from 904 profiles, last updated May 17, 2026 Base-salary reference by role, skill, city, and experience Indeed India front end developer salaries Rs 6,74,955 average base salary from 154 reports, updated June 27, 2026 Live job-market signal; sample size is smaller NodeFlair India frontend developer salary Rs 62,500/month median base and Rs 37,500-1,87,500/month displayed range, updated July 12, 2026 Monthly base salary and job-listing context Levels.fyi India software engineer salaries About Rs 29.7L median total compensation for software engineers, last updated July 12, 2026 Submitted SWE total comp; useful for product and big-tech calibration, not frontend-only averages A weak negotiation says, "Glassdoor says the average is X." A stronger one says:
The broad frontend market data is one input, but this role is closer to aproduct frontend engineer role with TypeScript, design system ownership, andperformance responsibility. Based on that scope, I am targeting INR X-Y, withat least INR Z fixed.Turn frontend work into compensation proof
Frontend pay increases when the company sees reduced product and engineering risk. Translate your work into that language.
Frontend proof Better negotiation framing Built reusable components "I have owned component APIs used by multiple teams, which reduces duplicated UI work." Improved performance "I have improved LCP, bundle size, or slow interaction paths on revenue-facing pages." Led React or TypeScript work "I can own migrations without blocking feature teams." Fixed accessibility issues "I can make forms, modals, navigation, and keyboard flows safer before launch." Debugged production UI issues "I can handle browser-specific failures, release regressions, and API-state edge cases." Owned a product flow "I have shipped user-facing flows where frontend quality affected conversion or retention." This is more useful than saying you know React, Next.js, CSS, and TypeScript. Tools are expected. Ownership is what makes the compensation case stronger.
Ask for the full breakup before reacting
When the offer arrives, do not negotiate the first number you hear. Ask for the full package.
Thank you. I am excited about the role. Before I respond to the number, couldyou share the complete breakup: fixed annual gross, variable pay, joining bonus,equity or ESOPs, level, review cycle, benefits, and any clawback terms?If the company gives only a CTC headline, ask again. A 24 LPA CTC offer can be weaker than an 18 LPA offer if the first one hides high variable pay, illiquid ESOPs, or a large one-time component.
Use How to Evaluate a Tech Job Offer in India for the deeper CTC breakdown. In this article, the important point is simple: do not counter until you know which levers can move.
Use scripts for common moments
Scripts keep you calm when the call gets uncomfortable.
Situation What to say Asked current CTC "I would prefer to evaluate this role by scope and approved range. My current package is not the best benchmark for this opportunity. For this role, I am targeting INR X-Y." Required to share current CTC "My current compensation is INR A, with INR B fixed. For this move, I am looking for a package aligned with the role scope, closer to INR X-Y." Offer is lower than target "I am excited about the team and the work. The gap for me is compensation. Based on the level and scope, I was expecting something closer to INR X-Y. Is there flexibility to improve the offer?" Fixed pay is low "The main concern is fixed compensation. Could we move fixed pay closer to INR X, even if variable stays unchanged?" Base salary cannot move "If base is capped, could we explore joining bonus, equity, level mapping, review timing, or relocation support?" Equity is unclear "Can you share the grant type, vesting schedule, strike price if it is options, liquidity assumptions, tax timing, and what happens if I leave before vesting?" You have another offer "I have another offer with stronger compensation, but I prefer this role because of the team and scope. If we can get closer to INR X, I would be comfortable moving forward." Deadline is too short "I want to make a thoughtful decision. I am reviewing the written breakup and wrapping up one process. Can I come back by [date]?" Appraisal or internal raise "My scope has moved from implementation to ownership of [system/flow/team outcome]. I would like my compensation reviewed against that scope, not only the previous band." Use honest facts. Do not invent competing offers, fake deadlines, or numbers you cannot defend.
Make one clear counter-offer
A counter-offer should be easy to forward internally. Keep it specific.
Thank you for the offer. I am excited about the role because [specific reason].After reviewing the breakup, the main gap is [fixed pay / total compensation /level / joining bonus / equity clarity]. Based on the role scope and the marketdata I am seeing for similar frontend roles, I was expecting closer to INR X-Y,with at least INR Z fixed.Is there flexibility to improve [specific component]?If you ask for every component at once, the recruiter has a harder internal case. Choose the highest-value ask first.
Your real concern Best first ask Monthly cash is too low Increase fixed annual gross Offer is fair but first-year switch cost is high Joining bonus or relocation support Role sounds senior but title is lower Level mapping or written review path Equity is meaningful but vague Vesting, strike price, liquidity, and refresh policy Current offer is close but not enough Earlier compensation review date Commute or office policy changes the value Remote or hybrid terms in writing Compare the offer with your real alternative
Negotiation power comes from alternatives. The Harvard Program on Negotiation calls this your BATNA: what you will do if there is no deal.
For a frontend developer, that alternative might be:
- Staying in the current role and waiting for appraisal.
- Continuing interviews for product or GCC roles.
- Accepting another offer with higher fixed pay.
- Taking a lower-cash role because the scope is much stronger.
Do not compare only headline CTC. Compare your alternative on fixed cash, learning, manager quality, role scope, commute, equity risk, and future options.
Watch India-specific offer traps
These are the details that often change the real value of an offer.
Offer item Question to ask Fixed pay What is the annual fixed gross before tax and deductions? Variable pay Is it guaranteed, target-based, or discretionary? What was the recent payout percentage? Joining bonus Is there a clawback period? Is repayment gross or net of tax? ESOPs or options What is the strike price, vesting schedule, exercise window, dilution risk, and liquidity history? RSUs What is the vesting schedule, first vest date, and refresh policy? PF and gratuity Are employer contributions included inside CTC? Notice-period buyout Who pays it, when, and under what documentation? Review cycle When is the first compensation review after joining? Work mode Is remote or hybrid policy written into the offer or only discussed verbally? If a company cannot explain the breakup calmly, treat that as information. It may not mean you should reject the offer, but it means you should slow down.
Worked example: the higher CTC is not always better
Offer A:
- 24 LPA CTC
- 14 LPA fixed
- 4 LPA variable
- 3 LPA joining bonus with 18-month clawback
- 3 LPA ESOP value with unclear liquidity
Offer B:
- 20 LPA CTC
- 18 LPA fixed
- 1 LPA variable
- 1 LPA joining bonus
- Clear level and first review in six months
Offer A has the bigger headline. Offer B may be the stronger offer if you care about predictable cash, clean terms, and level clarity.
A good counter for Offer A would not be "Can you increase CTC?" It would be:
The role is exciting, but the fixed component is the gap. If we can move fixedpay closer to 17-18 LPA, I would be comfortable moving forward even if the totalCTC structure stays mostly the same.That gives the company a precise problem to solve.
Before you send the counter
Use this checklist before replying to the recruiter.
- Write fixed pay, variable pay, equity, joining bonus, and benefits separately.
- Mark each item as guaranteed, likely, uncertain, or risky.
- Confirm level, team, manager, first project, and review timing.
- Choose one main ask and one fallback ask.
- Prepare one sentence explaining your frontend value.
- Decide your walk-away floor before the call.
- Keep the tone positive, specific, and written down.
The cleanest negotiation is not a dramatic argument. It is a clear offer review, one defensible counter, and a calm explanation of why the ask matches the frontend scope.
- How to Get a Frontend Developer Job at FAANG: The Complete Guide (2026)Prepare for a frontend developer job at FAANG with a practical plan for coding, UI, JavaScript, React, frontend system design, resume proof, and mocks.作者GreatFrontEnd Team9 分钟阅读Jul 25, 2026
To get a frontend developer job at FAANG or a FAANG-style company, prepare for two bars at once: the general software-engineering bar and the frontend-specific bar. You need coding skill, JavaScript depth, UI implementation, frontend system design, project judgment, and behavioral stories.
Do not prepare only React trivia. Big-company frontend interviews can test arrays, async code, DOM behavior, accessibility, rendering cost, API contracts, and product tradeoffs in the same loop.
Company processes change, so verify the exact loop with your recruiter. Start with official company pages before reading anonymous interview reports.
Start with official company resources
Official prep pages will not give you the exact questions, but they tell you what the company wants candidates to prepare for. Use them to map the loop before you build a practice plan.
Company Official resource What to extract for frontend prep Amazon Front-End Engineer Interview Prep and Leadership Principles Online assessment, technical phone screen, interview loop, frontend system design, syntactically correct coding, testing, edge cases, and behavioral examples Google Interviewing at Google and Google's hiring process Google's own interview-prep framing, process language, technical interview practice, and non-technical interview expectations Meta Acing your software engineering internship interview at Meta Coding-heavy SWE interview expectations, data structures and algorithms practice, mock interviews, and explaining your thought process while coding Netflix Netflix internships interview process and the Netflix Culture Memo Take-home and interview-stage expectations for emerging talent, project discussion, technical fundamentals for software engineering candidates, and culture fit These links are not interchangeable. Amazon is the most frontend-specific official resource in this list. Meta's public SWE prep page is intern-focused, so use it for coding-interview behavior rather than senior-level frontend scope. Netflix's public interview guidance is also emerging-talent focused, but it is useful for culture, project discussion, and technical-fundamentals preparation.
If a company does not publish a public software-engineering interview-prep guide for your exact role, do not fill the gap with rumor. Use the job description, recruiter packet, and recruiter call as the source of truth.
Understand the round types
Your loop may not use these exact names, but the signals usually look like this:
Signal What they test Coding fundamentals Correctness, complexity, edge cases, clean implementation JavaScript depth Closures, promises, event loop, DOM, fetch, browser storage UI coding Components, forms, tables, modals, typeahead, accessibility Frontend system design Data fetching, state, rendering, performance, security, observability Project deep dive Ownership, constraints, tradeoffs, debugging, impact Behavioral Conflict, ambiguity, leadership, failure, collaboration The best candidates do not treat these as separate worlds. A typeahead interview can test async race conditions, keyboard accessibility, API cost, caching, and rendering.
Build a prep map by level
Prepare for the level you are interviewing for.
Level What must be obvious New grad / early Fundamentals, clear thinking, coachability, complete UI basics Mid-level Independent feature delivery, debugging, tests, tradeoff explanation Senior System ownership, cross-team judgment, reliability, mentoring Staff-leaning frontend Platform thinking, design-system strategy, migration, org impact If you are interviewing for senior frontend roles, a polished portfolio is not enough. You need stories about decisions other engineers depended on.
Practice the right coding problems
FAANG frontend roles still often include general coding. You do not need to become a competitive programmer, but you should be comfortable with common patterns.
Pattern Practice examples Arrays and strings Two pointers, sliding window, grouping, parsing Maps and sets Frequency counts, dedupe, lookup, memoization Recursion / trees DOM-like traversal, nested comments, file explorer Graph basics Dependency resolution, shortest path in small state spaces Async JavaScript Promise utilities, concurrency limits, cancellation patterns For every solution, practice saying:
- What is the input shape?
- What edge cases matter?
- What is the time and space complexity?
- How would you test it?
- What would you simplify if the data size were small?
Train UI coding like product code
A frontend UI prompt should not stop at "renders correctly."
Prompt Strong answer includes Autocomplete Request-rate control where needed, stale-response guard, keyboard navigation, empty state Modal dialog Initial focus, contained tab order, escape key, accessible name, close and focus-return behavior Data table Sorting, filters, pagination, URL state, permissions, loading/error states File explorer Tree recursion, keyboard affordances, rename/delete edge cases Checkout/cart Derived totals, validation, optimistic update, failure recovery In a coding interview, say what you will implement first and what you would add with more time. That shows prioritization instead of panic.
Prepare frontend system design
Frontend system design is about the browser, the user, and the product flow. Include API contracts, state ownership, rendering cost, accessibility, security, monitoring, and rollout.
Use this structure:
- Clarify users, device constraints, scale, and must-have flows.
- Sketch the main UI states.
- Define API contracts and data ownership.
- Decide where state lives: local, URL, server cache, persistent storage, or global client state.
- Discuss rendering and performance costs.
- Cover accessibility and keyboard behavior.
- Cover auth, permissions, privacy, and failure modes.
- Explain observability, experiment rollout, and migration.
Good prompts to practice:
- Design autocomplete for a global commerce search box.
- Design a metrics dashboard used by hundreds of internal teams.
- Design a design system used by multiple product teams.
- Design a chat or notifications UI with offline and reconnect behavior.
- Design a feed with ranking, pagination, and real-time updates.
Make your projects interview-deep
Your project stories should prove judgment, not only tool usage.
Area What to prepare State model Local, server, URL, derived, persisted, and invalidated state API design Request shape, pagination, retries, errors, permissions Accessibility Semantics, labels, keyboard behavior, focus recovery Performance What you measured, what was slow, what you changed Testing Unit, integration, browser, or manual checks and why Tradeoffs What you deliberately did not build Failure story A bug, incident, or bad decision and how you fixed it If your current project cannot support these questions, repair it before applying.
Use a 12-week prep plan
Weeks Focus 1-2 JavaScript, async, DOM, browser APIs, and common coding patterns 3-4 Timed coding with tests and edge-case explanation 5-6 UI coding prompts with accessibility, loading, error, and mobile 7-8 Frontend system design with written tradeoffs 9 Project deep-dive notes and resume cleanup 10 Behavioral stories using situation, action, tradeoff, result 11 Mocks for coding, UI coding, and system design 12 Repair the weakest signal instead of adding new topics If you have less time, compress the plan. Do not skip an entire category unless your recruiter confirms it is absent from the loop.
Ask your recruiter precise questions
Use recruiter calls to remove guessing.
- Is this a frontend-specific role or a general SWE role with frontend work?
- Will there be UI coding?
- Will there be frontend system design?
- Which language can I use for coding rounds?
- Is the loop calibrated for new grad, mid-level, or senior?
- Are behavioral interviews mapped to company values or leadership principles?
- Are AI tools allowed in any round?
- What should I expect in the first technical screen?
Write the answers down. Your prep week should follow the loop, not internet folklore.
Prepare behavioral stories that show ownership
For each story, include context, constraint, your action, tradeoff, result, and lesson.
Prepare stories for:
- A feature you owned end to end.
- A frontend bug that was hard to debug.
- A disagreement with design, product, or backend.
- A time you reduced risk before launch.
- A time you improved team practice.
- A mistake or failure you handled honestly.
- A mentoring or review moment.
Avoid stories where your only role was "I helped." Big-company interviewers look for your actual decision.
Calibrate with mocks
Mocks should identify the failed signal.
Mock type What good feedback names Coding Correctness, speed, edge cases, complexity, communication UI coding State model, accessibility, browser behavior, completeness System design Scope control, tradeoffs, frontend-specific depth Behavioral Ownership, specificity, impact, honesty After each mock, write one repair task. Do not simply "do more mocks."
Repair after rejection
If a loop goes badly, turn the failure into a concrete repair.
Failed signal Repair task DSA correctness Re-solve the failed pattern with tests and time limit JavaScript depth Explain promises, closures, event loop, and DOM behavior with examples UI coding Rebuild the prompt with keyboard, error, loading, and mobile states System design Write a tradeoff note for API, state, rendering, accessibility, and monitoring Behavioral depth Rewrite the story with decision, conflict, result, and lesson One rejection does not mean your entire prep plan was wrong. It means one signal failed.
Common questions
Do FAANG frontend interviews require DSA?
Some do. Amazon's public front-end interview guide includes data structures and algorithms, but the amount varies by company, level, and role. Ask the recruiter whether your loop contains general coding and which languages are allowed.
Is React enough?
No. React helps for UI work, but interviewers may test JavaScript, browser behavior, accessibility, performance, system design, and behavioral ownership. React is one part of the bar.
Should your portfolio matter for FAANG?
It helps most when it supports project-depth conversations. A portfolio alone rarely replaces interview performance, but a strong project gives you better behavioral and technical stories.
Should you use AI while preparing?
Use AI for drills, feedback, and explanation practice, but verify the output yourself. The 2025 Stack Overflow survey found high AI-tool usage alongside low trust in accuracy, which matches interview prep: AI can help you practice, but it cannot replace judgment.
Before the interview loop
Do not enter the loop with a vague prep plan. You should know the signals each round is likely to test and which part of your preparation is weakest.
Your readiness checklist should include:
- Recruiter-confirmed round types and expectations.
- Timed practice for at least one coding pattern, one UI prompt, and one frontend system-design prompt.
- A repair note for the most recent mock interview failure.
- One project story with API, state, accessibility, performance, and tradeoff details.
- Two behavioral stories where your decision is clear, not buried inside team effort.
FAANG frontend prep is not about collecting more resources. It is about proving breadth, depth, and judgment under a structured interview loop.
- How to Evaluate a Tech Job Offer in India: CTC, Perks and What to Watch (2026)Evaluate a tech job offer in India by separating fixed pay, variable, PF, gratuity, RSUs, ESOPs, insurance, notice period, tax, role quality, and risk.标签作者GreatFrontEnd Team9 分钟阅读Jul 24, 2026

To evaluate a tech job offer in India, do not start with the headline CTC. Start with what you will actually receive, what is conditional, what can disappear, and what the role will do for your next two years.
CTC can include fixed salary, employer PF, gratuity, variable bonus, insurance, reimbursements, joining bonus, retention bonus, RSUs, ESOPs, and benefits. Some of those are cash. Some are deferred. Some are conditional. Some are useful but should not be treated as salary.
Use the EPFO employee resources and the Income Tax Department for official PF and tax references. This guide helps you ask sharper questions; it is not personal financial or tax advice.
Compare five numbers, not one CTC
Write these five numbers before deciding:
Number What it tells you Fixed annual gross Predictable salary before employee deductions and tax Monthly in-hand estimate Cash flow after tax, PF, professional tax where applicable, and other deductions First-year likely cash Fixed pay plus likely bonus plus one-time joining bonus if payable Recurring likely annual cash What year two looks like after one-time items disappear Risk-adjusted upside Equity, variable bonus, refreshers, and benefits after conditions The mistake is treating
INR 30 LPA CTCas one number. A fixed-heavyINR 24 LPAoffer can be better than aINR 30 LPAoffer if the larger offer hides a large variable component, illiquid ESOPs, or a joining bonus with a long clawback.Break the offer into certainty buckets
Ask the recruiter for a written breakup and place each line item into a bucket.
Bucket Examples How to count it Guaranteed cash Fixed salary, fixed allowances Core comparison number Payroll deducted Employee PF, tax, professional tax Reduces in-hand but may build long-term benefits Employer cost Employer PF, gratuity, insurance premium Part of CTC, but not monthly take-home Conditional cash Variable bonus, performance bonus Count only after understanding payout history One-time cash Joining bonus, relocation, retention Separate from recurring compensation Equity upside RSUs, ESOPs, options Value depends on vesting, tax, liquidity, and market Useful benefits Insurance, learning budget, meals, device Valuable, but not the same as salary If the company cannot explain the breakup clearly, do not rush to resign from your current role. Clarity is part of the offer.
Understand the India-specific line items
Indian tech offers often use compensation words loosely. Ask what each one means in writing.
Component What to verify Basic salary Whether PF, gratuity, HRA, and some allowances depend on this number HRA Whether it is part of fixed pay and whether it matters under your tax setup Employer PF Whether it is included inside CTC or paid separately Employee PF Monthly deduction from salary Gratuity Whether it is shown in CTC and the service and separation conditions under the applicable law and company policy Variable pay Target amount, eligibility, prorating, company multiplier, payout history Joining bonus Payment date, tax treatment, and clawback period Insurance Coverage amount, parents/spouse/children, exclusions, top-up options Notice period Buyout support, probation terms, and what happens if joining is delayed Do not let a recruiter answer only with "standard as per policy." Ask for the policy or offer-letter clause.
Work through a real comparison
Suppose you are comparing three hypothetical frontend offers:
Detail Offer A: startup Offer B: product company Offer C: remote services Headline CTC INR 28 LPA INR 24 LPA INR 22 LPA Fixed annual gross INR 18 LPA INR 22 LPA INR 21 LPA Variable INR 3 LPA INR 1 LPA INR 0 Joining bonus INR 2 LPA INR 0 INR 1 LPA Equity INR 5 LPA ESOPs INR 1 LPA RSUs INR 0 Work mode Bengaluru office Hybrid Remote First project Unclear Design-system migration Client dashboard Offer A has the biggest CTC, but the fixed pay is lower and the equity may be illiquid. Offer B has the strongest recurring cash and clearer frontend scope. Offer C has lower CTC but may produce better monthly savings if remote work cuts rent, commute, and relocation cost.
The decision is not automatic. If you want startup upside and can handle risk, Offer A may fit. If you want stable cash and stronger frontend platform work, Offer B may be better. If remote flexibility is important and the client work is technically solid, Offer C can be rational.
The point is simple: compare cash, risk, role, and life cost together.
Treat equity as upside, not guaranteed salary
RSUs and ESOPs are not the same.
Equity type Questions to ask Public-company RSUs Grant value, vesting schedule, refreshers, tax timing, current stock price Startup ESOPs Strike price, number of options, latest fair market value, exercise window Private-company RSUs/options Liquidity history, buyback policy, dilution, leaving-company rules For ESOPs, ask for numbers, not only a rupee value. You need the number of options, strike price, vesting schedule, exercise window after leaving, and whether the company has had buybacks. A recruiter saying "worth INR 5 lakh" is not enough.
Evaluate the role separately from the money
A good offer can still be a bad career move if the role is weak. For frontend engineers, ask about ownership, review quality, codebase health, design partnership, and release process.
Signal Ask this question Frontend ownership Will I own product UI, platform work, design system, performance, or support? Manager quality How will my manager evaluate growth in the first six months? Code health What testing, design review, and release practices does the team use? Learning path What would make me successful at this level? Team stability Who is on the team, and how long have people stayed? Work mode What is written policy versus informal expectation? If you cannot speak to the future manager before accepting, that is a risk. The manager often matters more than the brand.
Ask compensation questions directly
Use clear questions. Do not apologize for asking normal offer questions.
- What is the fixed annual gross compensation?
- Is employer PF included in the quoted CTC?
- Is gratuity included in the quoted CTC?
- What part is variable, and what was the payout range in the last two cycles?
- Is there a joining bonus, and what is the clawback period?
- Are equity terms written as RSUs, ESOPs, or options?
- What is the vesting schedule and what happens if I leave before vesting?
- What level is the offer mapped to?
- When is the first compensation or performance review?
- Is the work mode written in the offer letter or policy?
If the company avoids basic compensation questions, treat that as signal about how transparent they will be after you join.
Negotiate one meaningful change
Do not negotiate every line item. Pick the one change that affects your decision most: base salary, joining bonus, level, equity, remote policy, relocation support, or review timing.
Thank you for the offer. I am excited about the role because [specific scope].After reviewing the offer breakup, the fixed component is the main gap for me.For this level and scope, I was expecting fixed annual pay closer to [target].Is there flexibility to improve the fixed component, or alternatively adjustjoining bonus, equity, or first review timing?A calm, specific ask is easier to approve than "Can you increase the CTC?"
Red flags before accepting
Pause and ask more questions if you see any of these:
- The company will not share a written breakup.
- The offer counts high variable pay as if it were guaranteed.
- ESOP value is quoted without strike price, vesting, exercise window, or liquidity history.
- Joining bonus has a long clawback and unclear repayment terms.
- The role title changed between interviews and offer letter.
- The manager or team assignment is still unknown.
- The company pressures you to resign before sending a complete offer.
- Work mode is promised verbally but not reflected in policy.
- The first project sounds very different from the interview scope.
Red flags do not always mean reject. They mean slow down and get written answers.
Final decision worksheet
Before accepting, write one page with these fields:
Field Your note Fixed annual gross Monthly in-hand estimate One-time items Joining bonus, relocation, retention, clawbacks Variable risk Target, payout history, eligibility Equity upside Type, vesting, liquidity, tax timing Role quality Manager, team, codebase, first project, growth path Life cost City, commute, remote policy, relocation, family needs Regret risk The reason you might wish you had chosen differently Negotiation ask The one change that would improve the decision If you cannot fill the worksheet, you do not understand the offer yet.
Common questions
Is CTC the same as take-home pay?
No. CTC is the company's total cost. Take-home depends on fixed pay, tax regime, employee deductions, PF, professional tax, reimbursements, bonus timing, and how the offer is structured.
Should you trust salary websites?
Use salary sites as directional inputs, not truth. Public ranges vary by title, level, company, location, sample size, and whether the number is base pay or total compensation. Use multiple sources, then compare them with the actual offer breakup.
Is a lower CTC ever better?
Yes. A lower CTC can be better if it has higher fixed pay, lower risk, better role scope, stronger manager signal, remote savings, or more useful experience for the next role.
What is the safest negotiation ask?
The safest ask is specific and tied to the offer: improve fixed pay, add joining bonus, clarify level, adjust equity, confirm remote policy, support relocation, or set an earlier review. Avoid vague pressure.
Before you accept the offer
Do not decide from the headline CTC. Decide from a written comparison you can explain to someone else.
At minimum, you should know:
- What you will reliably receive every month.
- What is variable, conditional, delayed, or one-time.
- What you might have to repay if you leave early.
- What the equity is, how it vests, and whether it has a realistic liquidity path.
- Who your manager is and what work you will likely do first.
- What single negotiation ask would improve the decision most.
A good offer decision is not the highest CTC. It is the clearest tradeoff between cash certainty, role quality, risk, and future options.
- Startup vs FAANG for Frontend Developers: How to Choose in 2026Choose between startup and FAANG frontend roles with a practical framework for learning, scope, mentorship, compensation, equity, risk, and team quality.标签作者GreatFrontEnd Team14 分钟阅读Jul 24, 2026
Startup vs FAANG for frontend developers is not a logo question. It is a choice between different learning loops, risk profiles, compensation structures, codebase shapes, and kinds of frontend scope.
Use "FAANG" here as shorthand for large, high-bar tech companies: Google, Meta, Amazon, Apple, Netflix, Microsoft, Nvidia, Stripe-like public or late-stage companies, and similar engineering cultures. The actual team matters more than the category.
Quick answer
Choose the environment where the daily work teaches the next skill you need at a risk level you can afford.
You need most Startup may fit better when FAANG or big tech may fit better when Frontend breadth You can own UI, API edges, analytics, experiments, and product details The role is too narrow for the breadth you want right now Frontend depth The product has serious UI complexity and senior frontend mentorship There are mature design systems, performance tools, accessibility standards, and scale problems Mentorship The startup has senior frontend engineers who review your work You need structured feedback, calibration, and established engineering practices Compensation certainty Cash is strong enough and you can discount private equity heavily Liquid equity, clearer bands, and predictable benefits matter Career signal The startup is respected, growing, and gives you visible ownership The brand, level, and hiring calibration will help your next search Speed You want fast shipping and direct customer feedback You want slower but deeper review, reliability, and cross-team systems A startup is not automatically high-growth learning. A FAANG role is not automatically deep engineering. A weak startup gives you chaos without mentorship. A weak big-company team gives you process without ownership.
How frontend work differs
The company category changes what "frontend developer" means day to day.
Frontend area Startup pattern FAANG or big-tech pattern Product ownership You may own whole flows, metrics, and experiments early You may own a smaller slice of a much larger product Design system Often incomplete, changing, or built while the product ships More likely to have mature components, tokens, docs, and governance Accessibility Can be uneven unless leadership values it More likely to have standards, audits, tooling, and legal/product pressure Performance You may fix obvious issues with limited tooling You may work with RUM, budgets, platform teams, and high-traffic constraints Codebase Smaller, faster to understand, more inconsistent Larger, more layered, harder to change, better tooled Review culture Fast, variable, sometimes founder-driven More structured, sometimes slower, often more calibrated Cross-functional work Direct access to product, design, support, and customers More layers, clearer ownership, more stakeholder management For frontend developers, the best role is not the one with the most famous company. It is the one where web quality matters to the business. A browser-native product, complex dashboard, editor, collaboration tool, commerce flow, design system, or frontend platform team can create much better frontend growth than a famous company where web is an internal afterthought.
What startups teach well
Startups can expose you to ambiguity early. A 2023 preprint describing a proposed Greenfield Startup Model frames one common tension: release quickly enough to test product direction, then pay down structural shortcuts before growth makes them costly. It is one research model, not evidence that every startup works this way.
For frontend developers, that can be valuable.
You may learn to:
- Turn vague product ideas into shippable UI.
- Work directly with founders, designers, sales, support, and early customers.
- Build flows without waiting for a full design system.
- Make pragmatic calls when data, copy, design, and backend contracts are still changing.
- Own analytics, experiments, onboarding, pricing, checkout, admin tools, and internal dashboards.
- See how frontend decisions affect activation, retention, conversion, support load, and sales demos.
The risk is that "broad" can become "unsupported." If you are the only frontend developer, the company may expect speed while giving you no senior review, no accessibility standards, no design support, no testing culture, and no time to fix the foundation.
What FAANG and big tech teach well
Big-tech teams can teach scale, calibration, and systems that outlive one engineer. Even if your feature slice is smaller, the surrounding machinery may include code review, experimentation, observability, internationalization, accessibility, design systems, security review, launch process, incident response, and long-lived product maintenance. Verify which of those practices the actual team uses.
For frontend developers, that can mean learning:
- How large frontend codebases are organized.
- How design systems migrate without breaking hundreds of screens.
- How performance is measured for real traffic.
- How accessibility is reviewed before launch on teams that make it a release requirement.
- How experiments, feature flags, and metrics shape product decisions.
- How frontend platform teams support many product teams.
- How staff-level frontend engineers communicate tradeoffs across org boundaries.
The risk is that "scale" can become "narrow." You might spend a year on a small part of an internal tool, a migration with little product context, or a product area where frontend is treated as implementation after the real decisions are already made.
Choose by career stage
The same company can be a great choice at one stage and the wrong choice at another.
Stage Startup can be strong if FAANG or big tech can be strong if Fresher or junior You have senior engineers reviewing your code and enough runway to learn You need structured onboarding, clear expectations, and brand signal Early mid-level You can own complete product flows and learn from real users You want stronger engineering habits and larger-system exposure Senior frontend You can set frontend direction, mentor, and shape quality standards You want scale, platform depth, compensation liquidity, and cross-team scope Staff-track The company has enough complexity for frontend architecture to matter You want multi-team influence, formal ladders, and large migration experience Risk-sensitive Cash covers your needs even if equity becomes worth little Predictability matters more than upside If you are early career, mentorship should weigh more than speed. If you are senior, scope and decision authority should weigh more than the company label. If you have financial constraints, compensation certainty should weigh more than upside stories.
The frontend team questions that reveal the truth
Ask questions that force the company to describe the actual work.
Question Good signal Warning signal What does the frontend team own end to end? Product flows, UI architecture, performance, accessibility, and release quality "The backend team owns most decisions; frontend implements screens" Who reviews frontend architecture? Senior frontend engineers or platform/design-system owners Only backend reviewers or no clear reviewer What frontend bugs hurt the business recently? They can name concrete incidents and fixes They only say "we move fast" How are accessibility and keyboard behavior checked? Manual checks, automated checks, design review, and ownership "We will handle that later" How do you measure frontend performance? RUM, Core Web Vitals, profiling, budgets, or release checks No measurement beyond "the page feels fine" How mature is the design system? Clear status, owners, migration path, and escape hatches Either no system or a rigid system nobody trusts How often do frontend engineers talk to users or support? Regular product feedback loop Frontend has no contact with user problems What will I own in the first 90 days? A specific flow, migration, platform task, or measurable improvement A vague promise of "lots of exciting work" These questions work for both startups and big tech. A good startup can answer them clearly. A famous company can fail them.
Compensation: compare certainty, not headlines
Do not compare offers by one big total-compensation number. Compare guaranteed cash, variable bonus, public equity, private equity, vesting, taxes, liquidity, and downside.
Component Big tech pattern Startup pattern What to verify Base salary Usually clearer bands by level and location Can be lower, equal, or unusually high in hot areas Annual gross, location policy, review cycle Bonus Often target-based and performance/company dependent Sometimes absent or discretionary Target, payout history, eligibility date Equity Often RSUs in public stock or late-stage equity Often options or private shares Vesting, strike price, current valuation, liquidity Refreshers May be part of annual performance cycle Varies widely Whether refreshers exist and how they are decided Liquidity Public equity is easier to value and sell after vesting windows Private equity may be hard to sell Secondary policy, IPO/acquisition assumptions Downside Stock price, performance ratings, layoffs, narrow scope Dilution, down rounds, shutdown, no liquidity Your personal cash floor and risk tolerance Tax treatment depends on the country, grant type, exercise, vesting, and sale. Ask for the plan documents and use advice that applies to your tax jurisdiction. The practical comparison remains the same: private options are not cash, and a quoted grant value is not guaranteed proceeds.
For a startup offer, ask these in writing:
- What type of equity is this: options, RSUs, restricted stock, or something else?
- What is the number of shares and the fully diluted ownership percentage?
- What is the strike price or purchase price?
- If this is a US option plan, what are the latest 409A and preferred valuations? Otherwise, what valuation is used to set the exercise price and quoted grant value?
- What is the vesting schedule and cliff?
- What happens to vested and unvested equity if I leave?
- What is the post-termination exercise window?
- Has the company raised a down round, repriced options, or changed the option plan?
- Is there any secondary liquidity history or policy?
- What is the runway and next financing plan?
For a big-tech offer, ask:
- What level is the offer mapped to?
- What is the annualized value after year one, not only the signing year?
- Is the equity vesting back-loaded, front-loaded, or even?
- How do refreshers work?
- What is the target bonus and recent payout range?
- When is the first performance review?
- What role scope is expected for this level?
If you cannot explain the offer to another person without hand-waving, you do not understand it yet.
How to compare two offers
Use a written comparison before accepting.
Factor Offer A Offer B Why it matters Guaranteed annual cash Rent, savings, family obligations, visa risk First-year total Signing bonuses can distort the headline Recurring total Year two often reveals the real offer Equity liquidity Public stock and private options are different assets Level and scope A higher title with weaker scope can still be worse Frontend mentorship Review quality shapes growth Frontend ownership The work should match your target direction Team health Manager quality can outweigh brand Workload and sustainability Speed is useful only if you can keep learning Regret risk Name the downside before excitement edits it out Mark each compensation item as guaranteed, likely, uncertain, or speculative. Private equity usually belongs in the uncertain or speculative column until there is a real path to liquidity.
Choose startup if
A startup is a strong choice when:
- You want broad frontend ownership across product, data, experiments, and customer feedback.
- The company has at least one senior frontend engineer or strong product engineer you can learn from.
- The product has frontend complexity that matters to revenue or retention.
- You can tolerate ambiguity without turning every missing process into frustration.
- You understand the equity downside and still like the cash offer.
- You want to build a portfolio of shipped decisions, not only polished systems.
The best startup frontend roles make your judgment visible quickly. You can point to a flow, metric, experiment, redesign, migration, or design-system decision and explain what changed.
Choose FAANG or big tech if
A FAANG-style role is a strong choice when:
- You want structured feedback, calibrated expectations, and recognizable brand signal.
- You want to learn how large systems handle performance, accessibility, experimentation, reliability, and release safety.
- Compensation predictability matters.
- You want to see how senior and staff frontend engineers operate across many teams.
- You are aiming for future roles where big-company experience is a useful hiring signal.
- You are willing to trade some breadth for depth, tooling, and scale.
The best big-tech frontend roles expose you to mature engineering practice. You learn why a design-system migration takes quarters, why feature flags matter, why accessibility cannot be left to the end, and why performance work needs measurement instead of vibes.
Avoid these traps
Choosing a startup only for ownership
Ownership without mentorship can teach bad habits quickly. Ask who will review your work and what quality bar you will inherit.
Choosing FAANG only for stability
Big companies still reorganize, cancel projects, change remote policies, and lay off teams. Stability is relative, not guaranteed.
Treating equity as cash
Private startup equity can become valuable, but it can also become diluted, illiquid, expensive to exercise, or worthless. Keep your decision honest by separating cash from upside.
Ignoring whether web matters
Some companies have famous engineering brands but little meaningful frontend work. If mobile, backend, or ML owns the product center, a frontend role may have limited scope.
Confusing speed with learning
Shipping every day is not automatically growth. Growth needs feedback, review, reflection, and harder problems over time.
A decision note you can actually use
Write this before you accept.
Target for the next 2 years:[frontend depth / product ownership / compensation certainty / brand signal / mentorship]Offer summary:[base, bonus, equity type, vesting, level, manager, team, first 90-day scope]What I will learn:[specific frontend skills, not generic growth]What I will risk:[cash, equity, scope, workload, mentorship, commute, visa, market risk]My regret test:If this goes badly, the most likely reason will be [reason].I am accepting because [evidence] makes that risk acceptable.If the note sounds vague, you need another recruiter or hiring-manager conversation.
Negotiation script
Use a specific ask. Do not argue every component at once.
Thank you for the offer. I am excited about the role because [specific frontend scope].I am comparing the offer by recurring cash, equity liquidity, level, and the first-year scope.Based on the role and market data I am seeing for similar frontend/product engineering roles,I was hoping to get closer to [target].Is there flexibility in base salary, signing bonus, equity, level mapping, or first review timing?For startups, the negotiation may be about base, equity percentage, exercise window, title, remote flexibility, or review timing. For big tech, it may be base, sign-on, equity, level, or team match. Pick the part that changes your decision.
The decision should survive a bad month
A good career decision still makes sense after the excitement fades. Imagine the first difficult month in each role.
At a startup, that month may include unclear requirements, missing design coverage, changing priorities, and a production bug that needs a fast fix. The role is still worth it if you are getting ownership, useful feedback, direct product learning, and enough support to avoid building bad habits alone.
At FAANG or big tech, that month may include slow review cycles, narrow ownership, migration work, org changes, and more process than you expected. The role is still worth it if you are learning from stronger systems, better engineers, larger-scale frontend problems, and clearer career calibration.
If the hard part is... Startup is easier to justify when... FAANG or big tech is easier to justify when... Ambiguity You get real ownership and fast feedback You would rather learn inside clearer systems first Narrow scope The company lets you expand into product and platform work The narrow work teaches scale, quality, or migration habits Compensation risk Cash covers your needs and equity is treated as upside Predictable cash and liquid equity matter more Weak process You can help create the process with senior support You need mature practices to learn from Brand signal The startup's work and trajectory are explainable The company name and level improve future optionality The better choice is the one where the daily work moves you toward the next frontend role you actually want. The logo matters, but the learning loop, team quality, compensation reality, and frontend scope matter more.
- Frontend Developer to Tech Lead: What Changes and How to Make the Jump (2026)Move from frontend developer to tech lead with a practical frontend playbook for technical direction, reviews, planning, mentoring, and promotion evidence.标签作者GreatFrontEnd Team9 分钟阅读Jul 23, 2026

Moving from frontend developer to tech lead means shifting from "I can ship this feature" to "this team can ship the right frontend work safely." You still code, but your most valuable work becomes technical direction, risk spotting, review quality, and helping other engineers make better decisions.
A tech lead is not simply a manager with a different title. In teams that separate the roles, the manager handles people management and team health while the tech lead drives technical clarity: what the team should build, where the frontend risk is, how work should be sliced, and how the team will verify the result. Some companies combine both jobs, so clarify the local expectations before accepting the title.
What changes
The jump is not from coding to meetings. It is from local execution to team execution.
Area Frontend developer Frontend tech lead Success metric Ships assigned work well Helps the team ship important work with fewer surprises Planning Estimates own tasks Finds hidden state, API, accessibility, performance, and release risk Coding Owns components and flows Codes where uncertainty is highest or example code is needed Review Catches bugs in PRs Improves the team's review standard and decision quality Architecture Follows existing patterns Chooses patterns the team can maintain and migrate toward Collaboration Works with design, product, and backend Aligns those partners before unclear work becomes rework Mentoring Helps when asked Turns repeated problems into examples, checklists, and better habits Own frontend risk earlier
Frontend tech leads are useful before implementation starts. Many expensive frontend problems are visible early if someone asks the right questions.
Before a large feature starts, write a short risk note:
Risk area Questions to answer before coding Product states What happens in loading, empty, error, invalid, slow, offline, unauthorized, and partial-success states? Data and API Which fields are required, paginated, cached, stale, permissioned, or backward-compatible? Accessibility Does the flow follow web accessibility basics: semantic HTML, keyboard navigation, labels, focus recovery, and announcements? Performance Which page, interaction, image, bundle, or hydration cost can hurt Core Web Vitals? Design system Are we extending an existing component, creating a new one, or breaking consistency for a reason? Release safety Can this ship behind a flag, be rolled back, measured, and debugged after release? Testing Which behavior needs unit, component, integration, end-to-end, or visual coverage? This note should be short enough for product and design partners to read. The goal is not a long architecture document. The goal is to prevent avoidable ambiguity.
Use decision notes, not private opinions
Tech leads make tradeoffs visible. A decision that lives only in a meeting disappears by the time someone reviews the PR three weeks later.
Use this lightweight template:
Problem:What user or team problem are we solving?Options:Option A: fastest path, with cost.Option B: safer path, with cost.Recommendation:I recommend [option] because [reason].Risks:What can break, slow down, or become harder to change?Verification:What test, metric, demo, screenshot, or rollout check proves this worked?Rollback:How do we undo or contain the change?Good recommendation language is direct:
I recommend option B. It costs one extra API field and one migration PR, but it keeps state ownership in the route layer and gives us a clean rollback path. Option A is faster this week, but it duplicates validation logic across three forms.Make code review a quality system
Tech lead review is not heavier style policing. It is better filtering for design, behavior, complexity, tests, and user impact.
Google's code review guidance is a useful model: reviewers should aim for improving code health over time, not forcing perfect code. Their review checklist also calls out design, functionality, complexity, tests, documentation, and context as separate concerns.
For frontend work, review for these questions:
- Does the UI handle the important states, not only the happy path?
- Does the markup preserve semantics, labels, focus, keyboard behavior, and accessible errors?
- Does the state model make ownership obvious?
- Does the API contract match product behavior, permissions, pagination, caching, and errors?
- Is the component API harder to misuse than the old pattern?
- Will this change hurt LCP, INP, CLS, bundle size, hydration, or a slow device?
- Does the PR include the right test for the risk?
- Is the change small enough to review and roll back?
Write review comments that teach the standard:
Required: This modal closes visually, but focus stays on the removed button. Please return focus to the trigger after close so keyboard users do not lose their place.Optional: This helper name works, but `getVisibleMenuItems` would make the filtering rule easier to scan.Required comments protect correctness, accessibility, maintainability, or product behavior. Optional comments should not block progress.
Lead execution without taking over
The easiest way to fail as a new tech lead is to keep the hardest work, answer every question yourself, and become the team's bottleneck.
Use a better pattern:
- Write the first technical shape: boundaries, risks, sequence, and rollback.
- Split the work into reviewable slices.
- Give ownership of slices to engineers with enough context to succeed.
- Pair early on the uncertain part instead of rewriting late.
- Review the highest-risk PRs yourself.
- Turn the learning into a checklist, example, or follow-up task.
This keeps technical quality high without making every important decision depend on one person.
Stay close enough to the code
Tech leads do not need to code every feature. They do need enough codebase closeness to make useful decisions.
Good places to code:
- A proof of concept for a risky state model
- The first example of a new component API
- A migration slice that teaches the team the pattern
- A debugging patch for a production issue
- Test helpers or fixtures that make future work easier
Bad places to hide:
- Taking all difficult implementation work because delegation feels slower
- Reviewing only after the feature is almost done
- Owning meeting notes, status updates, and coordination while losing technical judgment
Treat AI output as review pressure
In 2026, AI-assisted coding makes tech lead work more important, not less. The 2025 Stack Overflow Developer Survey found broad AI tool usage but more distrust than trust in AI output accuracy. DORA's 2025 report frames AI as an amplifier of an organization's existing strengths and weaknesses.
For frontend teams, that means AI can speed up routine output, but it can also produce code that looks fine while missing product states, accessibility behavior, data constraints, or maintainability.
Set a simple team rule: generated code gets the same review bar as hand-written code, plus one extra question:
Can the author explain why this solution is correct for our product, users, codebase, and rollback path?
If the answer is no, the team is shipping borrowed confidence.
Build proof before asking for the title
Promotion to tech lead is easier when the evidence already exists.
Evidence What it proves Weak version to avoid Decision note You can compare options and recommend a path "We discussed it in Slack" Review standard You improve team output through review "I left many comments" Migration plan You can change code safely while product work continues "We should rewrite this later" Measured improvement You connect frontend work to user or developer impact "The code feels cleaner" Mentoring artifact You make another engineer more effective "I helped people sometimes" Release note You can ship with verification and rollback "QA passed it" Keep this evidence as it happens. Do not reconstruct six months of leadership from memory during promotion season.
A 30-day transition plan
Use one month to practice the job before asking for it.
Week Action Output 1 Pick one ambiguous frontend feature and write the risk note State/API/accessibility/performance/release checklist 2 Split the work into reviewable slices and name owners PR sequence with dependencies and rollback path 3 Review the riskiest slices and turn repeated feedback into a checklist Review examples and team standard 4 Write the result, what changed, and what should become reusable Promotion/interview story with proof Choose a feature with real ambiguity: a checkout flow, dashboard table, onboarding wizard, permissions-heavy admin page, design-system component, or migration from duplicated state to a shared pattern.
Mistakes that slow the jump
- Only becoming faster at coding. Speed helps, but lead scope is about decisions other people can build on.
- Becoming the unofficial project manager. Coordination matters, but tech lead evidence must include technical judgment.
- Reviewing taste instead of risk. Style comments are cheap. Behavior, accessibility, state, tests, and rollback matter more.
- Hoarding the hard work. If every important task comes back to you, the team is not getting stronger.
- Pushing architecture without a migration path. A better pattern that nobody can adopt safely is not leadership.
- Doing invisible work with no artifact. Useful technical leadership should leave notes, examples, checklists, plans, or measurable improvements.
How to explain tech lead work in interviews
Do not say, "I led the frontend." Say what changed because you were involved.
Use this story shape:
- The product or engineering problem was...
- The hidden frontend risk was...
- The options were...
- I recommended...
- I split the work by...
- I verified it through...
- The team now does...
Example:
Our checkout forms had duplicated validation and inconsistent error handling. The risk was not only code duplication. It was failed submissions, poor focus recovery, and hard-to-debug backend errors.I compared keeping validation per form with moving shared rules into a form package. I recommended a smaller migration first: one shared error model, one reference form, and a checklist for future forms. We shipped it behind a route-level flag, added component tests for error behavior, and measured fewer repeated review comments on the next two forms.That answer shows frontend judgment, sequencing, accessibility awareness, team influence, and proof.
Practice the skills deliberately
Use GreatFrontEnd's front end system design questions, UI coding questions, and React interview questions to practice the technical side. For lead readiness, do not only solve the problem. Write the decision note, review checklist, test plan, and rollout risk as if another engineer had to implement it.
Good practice problems include Data Table, File Explorer, and Autocomplete. These force decisions about state, loading, accessibility, performance, and API boundaries.
What to remember
The best first tech lead move is not taking control of everything. It is making the team's hardest frontend decisions clearer, safer, and easier for other engineers to execute.
The title follows when the behavior is already visible: better plans, sharper reviews, safer releases, stronger engineers, and frontend work that improves after you touch the system around it.
- How to Become a Frontend Architect: Skills, Mindset, Career Path (2026)Learn how to become a frontend architect by building architecture decision records, frontend platform standards, design-system governance, performance budgets, accessibility reviews, and rollout plans.标签作者GreatFrontEnd Team14 分钟阅读Jul 23, 2026

To become a frontend architect, move from building individual features to making frontend decisions that many teams can reuse safely. The work is about UI architecture, state boundaries, design-system governance, accessibility, performance, delivery safety, and migration planning.
The title is not universal. Some companies call this role frontend architect. Others call it staff frontend engineer, principal frontend engineer, frontend platform lead, design systems lead, or UI infrastructure engineer. The common signal is wider technical ownership: other engineers make better frontend decisions because of the standards, examples, and review paths you create.
If you are already a senior frontend developer, the next step is not learning every framework. It is proving that you can choose the right constraints, explain tradeoffs, and help teams change code without breaking product work.
What a frontend architect actually owns
Frontend architecture starts when the same frontend decision affects multiple teams, routes, products, or releases.
Area Architect-level question Useful artifact Application structure Which routes, packages, modules, and ownership boundaries keep features easy to change? Frontend system map Rendering strategy Which pages need SSR, static rendering, streaming, islands, client-only rendering, or a hybrid model? Rendering decision note State and data Which state belongs in the URL, server cache, client store, form, or component? State boundary guide Design system Which components, tokens, patterns, and release rules should be shared across teams? Component contract and adoption plan Accessibility Which interaction patterns are required, and how are exceptions reviewed? Accessibility checklist tied to components Performance Which budgets matter for this product, and how are regressions detected? Core Web Vitals and bundle budget dashboard Testing and release Which flows need unit, component, integration, visual, or end-to-end coverage? Release confidence matrix Security Where can frontend code expose users through XSS, unsafe HTML, third-party scripts, auth leaks, or dependency risk? Frontend security review guide Developer experience Which tools, docs, CI checks, and local workflows help teams ship with less friction? Frontend platform roadmap A frontend architect does not personally approve every button. They make the important decisions easier to repeat.
Standards and metrics that shape the role
Research signal What it means for frontend architects web.dev's Core Web Vitals guidance uses LCP, INP, and CLS as current quality signals, with recommended thresholds measured at the 75th percentile separately for mobile and desktop. Performance work should be measured in the field. Architecture decisions about rendering, bundles, third-party scripts, and hydration should show up in user metrics. WCAG 2.2 is a W3C Recommendation and defines accessibility across visual, auditory, physical, speech, cognitive, language, learning, and neurological disabilities. Accessibility cannot be a final QA checklist. It belongs in component APIs, design-system examples, form patterns, modal behavior, focus management, and review gates. DORA's software delivery metrics track throughput and instability through change lead time, deployment frequency, failed deployment recovery time, change fail rate, and deployment rework rate. Frontend architecture should improve delivery without hiding risk. Use metrics to inspect team systems, not to score individual engineers. Build skills before chasing the title
The architect path builds on senior frontend skills. If your component work, state management, debugging, testing, and accessibility basics are shaky, start with senior frontend developer skills first.
Browser and platform depth
The browser is the runtime. A frontend architect should be able to reason about HTML semantics, CSS layout, focus behavior, forms, history, storage, networking, rendering, script loading, images, fonts, and browser DevTools.
Many expensive frontend problems are not "React problems." They are layout shifts, oversized JavaScript, broken focus order, slow API waterfalls, cache mistakes, invalid HTML, or third-party scripts blocking the main thread.
Framework architecture
You do not need to master every framework, but you should understand the architecture choices behind the one your team uses:
- How routes compose
- Where data is fetched and cached
- Where server and client rendering split
- How errors, loading states, and redirects work
- How code splitting and preloading happen
- How state flows through components
- How framework escape hatches can create security, performance, or accessibility risk
Framework fluency becomes architecture when you can explain why a decision is right for this product, not only that the framework supports it.
State, data, and API contracts
Frontend architects prevent state from becoming a hidden system. They define where each kind of state belongs:
State type Common home Architect concern Shareable navigation state URL params or route state Back button, deep links, analytics, bookmarks Server data Query cache or route loader Freshness, invalidation, pagination, permissions Form state Form library or local component state Validation, dirty state, error mapping, reset behavior UI-only state Component or local store Menus, dialogs, tabs, transient interaction Cross-feature state Small global store or backend-backed model Ownership, persistence, debugging, testing The goal is not to ban global state. The goal is to make ownership visible before bugs spread across routes.
Design-system engineering
A design system is not a color palette. It is a shared contract between design, frontend, product, QA, and accessibility.
Frontend architects should know how to govern:
- Component APIs
- Design tokens
- Documentation examples
- Versioning and migration
- Accessibility behavior
- Theming boundaries
- Escape hatches
- Adoption metrics
- Contribution rules
The Design Tokens Community Group format draft is useful context because it shows where design-tool and code interoperability is heading. It is still a draft, so do not treat it as a standard your team must implement immediately.
Performance and observability
Architect-level performance work is less about one Lighthouse score and more about protecting important user flows over time.
You should be comfortable with:
- Core Web Vitals and real-user monitoring
- Bundle size and dependency cost
- Rendering and hydration cost
- Image and font loading
- Long tasks and main-thread blocking
- Route-level performance budgets
- Slow-device and slow-network testing
- Error tracking tied to releases
For a product app, performance budgets should name the page, metric, threshold, owner, and review path. A budget without ownership becomes a dashboard nobody changes.
Accessibility and inclusive interaction
Frontend architects turn accessibility into reusable behavior. That means components should already handle labels, keyboard support, focus order, announcements, error association, pointer alternatives, contrast, and target size where relevant.
Good architecture makes the accessible path the default path. A modal, menu, toast, tab list, form field, data table, or drag-and-drop pattern should not require every feature team to rediscover the same keyboard and screen reader requirements.
Security at the UI boundary
Frontend security is not only a backend concern. OWASP's XSS guidance calls out framework escape hatches such as unsafe HTML injection, dangerous URL handling, and sanitization mistakes.
Frontend architects should review:
- User-generated HTML and markdown rendering
dangerouslySetInnerHTML,innerHTML, and similar escape hatches- URL handling and redirects
- Third-party scripts
- Auth and permission-driven UI
- Token storage assumptions
- Dependency and supply-chain risk
- Content Security Policy expectations
The architect's job is not to replace security specialists. It is to make risky UI patterns visible early enough for the right review.
Use artifacts, not opinions
Architecture is easier to trust when it leaves reviewable artifacts. Start small. A useful one-page document beats a large diagram nobody maintains.
Artifact When to use it What weak versions look like System map Teams do not know who owns routing, data, design system, auth, analytics, or releases. A beautiful diagram with no owners or update path Architecture Decision Record A decision affects structure, dependencies, interfaces, quality, or delivery. A decision with no rejected options or consequences Component contract A shared component is reused across teams. Props listed without accessibility behavior or examples Quality gate Regressions repeat across PRs. A checklist nobody can enforce Migration plan A standard or package must change without stopping product work. A big-bang rewrite with no rollback path Performance budget A flow is slow or business-critical. A single score with no owner, page, device, or percentile Rollout review A platform change ships across multiple teams. A celebratory note with no measurements or lessons Architecture Decision Records are a good first artifact because they force you to name context, decision, rationale, and tradeoffs. For a frontend decision, add rollout, rollback, accessibility, performance, and testing notes.
Title:Status:Context:Decision:Options considered:Consequences:Accessibility impact:Performance impact:Security impact:Migration plan:Rollback plan:Success metric:Review date:Owner:This is the habit that separates architecture from preference. You are not saying "I like this pattern." You are saying "Given these constraints, this is the decision, here is what it costs, and here is how we will know whether it worked."
Roadmap from senior frontend engineer to frontend architect
1. Pick a cross-team pain
Choose a problem that repeats across teams or routes:
- Duplicated form behavior
- Inconsistent modals
- Slow dashboard pages
- Confusing data-fetching patterns
- Multiple table implementations
- Accessibility bugs in shared components
- Unclear ownership for route-level errors
- Fragile release process for frontend packages
Do not start with "we need a new architecture." Start with the repeated cost.
2. Diagnose with evidence
Collect examples before proposing a solution. Useful evidence includes PRs, bug reports, bundle diffs, Web Vitals data, support tickets, design-system usage, accessibility audit findings, test flakes, and developer setup time.
The best architecture proposals make the current pain obvious.
3. Compare options
Architects earn trust by showing the rejected paths. For each option, name:
- User impact
- Developer impact
- Migration cost
- Compatibility risk
- Accessibility risk
- Performance risk
- Security risk
- Rollback path
- Maintenance owner
The chosen option is often smaller than the most impressive option.
4. Prototype the smallest useful path
A prototype should answer the risky question. It does not need to solve the entire migration.
Examples:
- Convert one complex form to the proposed pattern.
- Add one route-level performance budget.
- Move one shared component to a documented API.
- Replace one unsafe HTML rendering path with a reviewed sanitizer.
- Add one end-to-end test for a critical flow that keeps breaking.
5. Turn the prototype into a standard
The standard should include code, examples, review guidance, and an adoption path. Without adoption, the work remains a clever local fix.
Good standards answer:
- When should teams use this?
- When should they not use this?
- Which examples are approved?
- Which accessibility behavior is built in?
- Which metrics or tests protect it?
- Who owns changes?
- How do teams migrate?
6. Roll out in phases
Most architecture work fails when it asks teams to stop product delivery. Use phases:
- New code uses the new pattern.
- Existing high-risk flows migrate first.
- Old patterns warn in docs, lint rules, or code review.
- The old path is deprecated after adoption.
- The team reviews results and decides the next step.
This is how architecture becomes practical instead of ceremonial.
Example: duplicated form architecture
Suppose several product teams keep building forms with different validation messages, error placement, loading states, and server-error handling. A task-level fix improves one form. A frontend architect creates a pattern other teams can reuse.
A good architect response might look like this:
Step Architect work Diagnose Collect five existing forms, repeated bugs, accessibility issues, and backend error shapes. Decide Choose a shared field pattern, error summary behavior, server-error contract, and validation approach. Build Create Field,FormErrorSummary, and submission examples with tests and Storybook stories if the repo uses Storybook.Validate Check label association, aria-describedby, keyboard flow, focus after submit, loading state, and server errors.Roll out Apply the pattern to one high-traffic form, then require it for new forms. Measure Track form-related bugs, review comments, time to add a field, and accessibility findings before and after. The architecture value is not the component names. The value is that product teams stop making the same form decisions differently.
A 90-day plan
Use this if your current role already gives you senior-level scope.
Time Goal Output Days 1-15 Map one frontend system area. Ownership map, repeated pain, examples, and current metrics Days 16-30 Write one decision. ADR with options, tradeoffs, rollout, rollback, and success metric Days 31-45 Build the smallest proof. Prototype, tests, screenshots, metrics, or sample migration Days 46-60 Turn it into a reusable pattern. Docs, component contract, checklist, or route standard Days 61-75 Roll out to one or two real flows. Migration PRs and feedback from affected teams Days 76-90 Review the outcome. Adoption notes, measured result, follow-up decision, and old-path cleanup plan By the end, you should have one visible architecture story: problem, decision, tradeoff, implementation, migration, measurement, and lesson.
How to prove you are ready
Frontend architect readiness shows through evidence other people can inspect.
Claim Stronger proof "I improved frontend architecture." ADR, route map, package boundary change, migration plan, and before/after result "I led design-system work." Component contract, accessibility behavior, examples, adoption numbers, and deprecation plan "I improved performance." Field metric, budget, route-level change, release link, and regression guard "I made the app easier to maintain." Removed duplicated patterns, defined ownership, reduced repeated review comments, or simplified a migration "I influenced teams." RFC discussion, review checklist, office-hours notes, docs, and teams adopting the pattern without you in every PR In interviews, tell the story as a decision, not a tool list:
- What was expensive or risky?
- What constraints mattered?
- Which options did you compare?
- What did you choose?
- What did you reject?
- How did you roll it out?
- What changed after it shipped?
Use front end system design questions to practice this style of reasoning. Use frontend LLD React machine coding questions when you need to connect architecture discussion back to component-level implementation.
What slows the transition
The most common blocker is confusing architecture with larger abstractions.
Avoid these traps:
- Introducing micro-frontends when the real issue is unclear ownership or release coordination.
- Creating a design system that only covers tokens and ignores interaction behavior.
- Moving state into a global store before naming the state's owner and lifetime.
- Setting performance goals without route, device, percentile, and owner.
- Writing docs that are detached from code, tests, or review habits.
- Treating DORA metrics as individual productivity scores.
- Stopping hands-on coding too early.
- Proposing a rewrite before proving the old path cannot be migrated safely.
Good architects reduce accidental complexity. They do not collect architecture patterns to look senior.
Frontend architect interview questions to practice
These prompts expose the skills the role actually uses:
- How would you design a component system used by five product teams?
- How would you choose between SSR, static rendering, and client-only rendering for a dashboard?
- How would you split URL state, server state, form state, and local UI state?
- How would you migrate a large app from one data-fetching pattern to another?
- How would you set performance budgets for a checkout flow?
- How would you make modal, menu, and form components accessible by default?
- How would you review a third-party analytics script before adding it to every page?
- How would you deprecate an old package without blocking product teams?
- How would you prove that a frontend platform change improved delivery?
Answer each with constraints, options, tradeoffs, rollout, rollback, and measurement. That is the architecture muscle.
Common questions
Do frontend architects still code?
Yes. The ratio changes by company, but frontend architects need current hands-on credibility. If you cannot review component APIs, rendering behavior, accessibility, performance traces, or migration PRs, your architecture guidance will drift away from the codebase.
How many years does it take?
There is no fixed number. Most engineers reach this scope after becoming solid senior developers, but the useful measure is evidence: cross-team decisions, reusable standards, measurable improvements, and other engineers adopting your guidance.
Do I need to know React, Vue, and Angular?
You need deep expertise in your team's stack and enough comparative knowledge to evaluate tradeoffs. Knowing three frameworks shallowly is less useful than understanding browser behavior, component architecture, state ownership, testing, accessibility, performance, and migration risk deeply.
Is frontend architect different from staff frontend engineer?
Sometimes. A frontend architect title often emphasizes technical direction and standards. A staff frontend engineer may include the same work plus product strategy, mentoring, or broader engineering leadership. Read the expectations, not only the title.
What should I learn next?
If you are not yet senior, work through frontend developer career path and senior frontend developer skills. If you are already senior, practice architecture through one cross-team frontend problem, one ADR, one rollout plan, and one measured result.
Frontend architects are trusted because their decisions make product teams safer and faster. The path starts with one visible decision that another engineer can understand, reuse, and improve.
- How to Grow as a Frontend Developer: From Junior to Senior and Beyond (2026)Grow as a frontend developer with a practical matrix for UI craft, product judgment, reliability, influence, and a 90-day growth plan.标签作者GreatFrontEnd Team11 分钟阅读Jul 22, 2026
To grow as a frontend developer, increase the size, ambiguity, and business cost of the problems you can handle. Learning another framework can help, but growth usually comes from better UI craft, product judgment, reliability, and influence.
The path from junior to senior is not a library checklist. It is the shift from "I can implement this screen" to "I can make this user flow work correctly, help the team make the right tradeoff, and reduce the chance we repeat the same mistake."
The 2025 Stack Overflow Developer Survey shows JavaScript, HTML/CSS, TypeScript, React, and Node.js as commonly used professional tools. Framework familiarity is therefore weak evidence of seniority on its own. Promotion and interview examples need to show decisions, measurements, and user-facing failure handling.
If you are still choosing what to learn next, pair this guide with the frontend developer roadmap. If you want title expectations, read the frontend developer career path.
The direct answer
Grow by creating visible evidence in four lanes:
- UI craft: screens work across content, devices, input methods, and edge states.
- Product judgment: you ask better questions before code is written.
- Reliability: your work has tests, measurements, fallbacks, and safer release steps.
- Influence: your decisions improve the work of other engineers, designers, QA, support, or product teams.
Do not try to improve everything at once. Pick one lane per month and leave proof behind.
Growth is a scope change
Many developers think the next level means "knows more React" or "writes cleaner code." Those matter, but they are not enough.
The real question is: what can the team trust you with now that they could not trust you with before?
Level Typical scope What growth looks like New frontend engineer Clear tasks with known patterns Completes screens, asks timely questions, handles obvious UI states Solid mid-level Features with some ambiguity Owns the flow, coordinates API/design questions, catches missing states Senior Ambiguous product or platform work Shapes the plan, names tradeoffs, protects quality, reduces future cost Staff or lead Cross-team technical direction and decision-making Sets patterns, prevents repeated mistakes, improves how teams build UI This matters because "I used Next.js" is a tool claim. "I reduced failed checkout attempts by fixing validation, retry behavior, and focus recovery" is a scope claim.
Use the four-lane growth matrix
Growth stalls when one lane gets all the attention. A frontend developer who only improves visuals may struggle with data and reliability. A developer who only improves architecture may miss user friction. A developer who only ships tickets may never become trusted on ambiguous work.
Lane Junior signal Senior signal Practice this month UI craft Matches a mockup Handles responsive layout, accessibility, content length, and states Fix one form, modal, or table until edge cases are boring Product judgment Implements acceptance criteria Spots missing cases, questions the data model, and protects user goals Write five questions before coding a feature Reliability Fixes bugs after review Adds tests, monitoring, fallback paths, and smaller rollout steps Add one test or checklist that catches a repeated mistake Influence Receives feedback well Improves reviews, docs, component APIs, and team habits Turn one repeated review comment into shared guidance Technical communication Explains what changed Explains why it changed, alternatives rejected, and risk Add a short decision note to one meaningful pull request You do not need a promotion to behave one level higher. You need one concrete problem where you can practice the next behavior.
Make UI craft measurable
"Good UI" sounds subjective until you break it into inspectable checks.
For any important frontend flow, ask:
- Does it work on mobile, tablet, and desktop without hidden controls?
- Are loading, empty, error, invalid, unauthorized, slow, and success states handled?
- Can a keyboard user complete the flow?
- Are form labels, errors, focus order, and button states clear?
- Does long content break the layout?
- Does the URL, browser back button, and refresh behavior match user expectations?
- Does the UI recover from failed network requests?
A junior developer may build the default state. A growing developer builds the surrounding states that users actually hit.
Improve product judgment before writing code
Senior frontend work often starts before implementation. The valuable move is asking the question that avoids a week of rework.
Good frontend questions sound like this:
- What should happen when this API returns no data?
- Can two users have different permissions for the same screen?
- Should filter state live in the URL so links are shareable?
- What happens if the user refreshes after step three?
- Which error needs user action and which one should retry automatically?
- What is the simplest version we can ship without trapping ourselves?
- Which metric or support signal will tell us whether the change helped?
Product judgment is not saying no to everything. It is making the cost of choices visible early.
Grow reliability through boring checks
Frontend reliability is not only unit tests. It is the set of habits that make shipped UI less surprising.
Reliability habit What it catches Example State checklist Missing loading, empty, error, permission cases Add a review checklist for every data-backed page Focus check Broken forms, modals, menus Verify focus moves to the first invalid field after submit Small release steps Risky rewrites Ship a new table behind one route or user segment before replacing all use Runtime measurement Slow interactions Measure interaction time before and after a heavy client-side change Root-cause note Repeated bugs Write why a stale cache bug happened and how to prevent the next one Great frontend engineers often look calm because they create fewer surprises for everyone else.
Turn work into proof artifacts
Career growth becomes easier to evaluate when it leaves artifacts behind. Private effort is easy to forget. Visible proof helps promotion discussions, interviews, and self-review.
Artifact What it proves Good example Decision note You can compare options and explain tradeoffs Why a filter uses URL state instead of only component state Debugging note You can trace failures across UI, API, state, and browser Root cause of a stale search-result bug Review checklist You can turn repeated mistakes into team practice Loading/error/accessibility checklist added to frontend PRs Migration plan You can move code without stopping product work Replacing a form library one flow at a time Measured improvement You can connect frontend work to user or developer experience Before/after LCP, interaction delay, conversion step, or support-ticket count Teaching note You can raise team quality Short guide explaining how your team should build modals or table filters One artifact per month is enough to change how your growth story reads.
A practical 90-day growth plan
Do not make a 90-day plan that says "learn advanced React." Make one that changes your behavior at work or in a serious project.
Days 1-15: pick one recurring problem
Choose a problem that has repeated cost:
- Forms keep shipping with inconsistent validation.
- Tables are slow and hard to filter.
- Modals are inaccessible.
- API state is duplicated across pages.
- Mobile layouts break near release.
- Pull requests keep missing the same edge states.
Write the current failure mode in one paragraph. Include who pays the cost: users, QA, designers, support, backend engineers, future maintainers, or your own team.
Days 16-35: study the boundary
Do not jump straight to the fix. Map the boundary:
- Which components own the state?
- Which API shape creates complexity?
- Which browser behavior is involved?
- Which tests already exist?
- Which design states are missing?
- What is the smallest reversible improvement?
This is where growth happens. You are learning to reason, not only to patch.
Days 36-65: ship a narrow improvement
Pick a change small enough to review properly:
- Add missing states to one important flow.
- Improve one slow interaction and measure it.
- Replace one duplicated pattern with a clearer component API.
- Add a checklist that prevents a recurring review issue.
- Improve one accessibility problem and document the check.
The change should be narrow, but the reasoning should be serious.
Days 66-90: write the lesson
Capture the result in a short note:
- Problem
- Options considered
- Chosen approach
- Rejected approach
- Risk
- Verification
- Follow-up
This note becomes interview material, promotion material, and future team memory.
How junior, mid-level, and senior growth differ
The same skill can mean different things at different levels.
Area Junior growth Mid-level growth Senior growth React Understands props, state, effects Chooses state ownership and avoids tangled data flow Shapes component/API boundaries for other engineers CSS Builds responsive layouts Handles overflow, stacking, focus, and content cases Sets patterns that reduce layout regressions across product Accessibility Adds labels and keyboard basics Handles forms, modals, errors, focus recovery Builds review practices and reusable accessible components Performance Avoids obvious waste Measures slow pages and fixes real bottlenecks Chooses architecture and rollout plans around runtime cost Communication Explains implementation Explains tradeoffs Helps the team choose under uncertainty If you are aiming for senior, do not only add harder syntax to your learning list. Add harder ownership.
Use AI without outsourcing judgment
AI tools can speed up drafts, test cases, examples, and unfamiliar API exploration. They can also create confident mistakes in frontend code: broken accessibility, invalid CSS assumptions, unnecessary abstractions, stale library usage, and code that passes the default case while failing edge states.
Use AI as a fast assistant, then verify:
- Run the code in the browser.
- Test keyboard navigation.
- Inspect responsive widths.
- Check generated dependencies and APIs against official docs.
- Write the failure states yourself.
- Ask: would I defend this in code review?
The developers who grow fastest are not the ones who paste more. They are the ones who can review faster and think better.
Build a promotion or interview packet
Keep a private document with five sections:
Section What to save Shipped work Links to PRs, demos, screenshots, tickets Decisions Notes comparing options and tradeoffs Quality Tests, checklists, metrics, incident fixes Collaboration Design/API/QA coordination, mentoring, review impact Results User impact, support reduction, speed improvement Update it monthly. The goal is not bragging. The goal is avoiding a blank page when you need to explain your growth.
Common traps that slow frontend growth
Trap 1: collecting frameworks instead of range
React, Vue, Svelte, and Angular are useful. But switching frameworks every month can hide weaker fundamentals: layout, accessibility, state, debugging, and product reasoning.
Trap 2: chasing senior title without senior behavior
If your work still needs someone else to define the edge cases, API questions, and rollout risk, the title will not hold up in interviews.
Trap 3: treating polish as decoration
Frontend polish is often product correctness. Focus states, copy length, empty states, and mobile controls are not visual extras. They decide whether people can use the feature.
Trap 4: avoiding messy cross-functional work
The uncomfortable conversations with design, backend, QA, product, and support are often where senior judgment is built.
Trap 5: never writing down tradeoffs
If the decision exists only in chat, it disappears. A short note can save future rework and prove how you think.
Common questions
Should I focus on depth or breadth?
Pick one main stack for depth and use breadth to improve judgment. For example, get deep enough in React and TypeScript to build serious product UI, then study browser APIs, accessibility, performance, design systems, and testing so you can reason across the full range of frontend work.
How do I grow if my current job gives me small tasks?
Turn small tasks into better artifacts. Add missing states, write clearer PR notes, improve tests, document one tradeoff, or fix a repeated accessibility issue. If the job still gives no room, create a portfolio project that mirrors the next level of scope.
What is the fastest way to look more senior?
Stop making vague claims. Bring proof: a decision note, a measured improvement, a migration plan, a bug postmortem, or a component API that other engineers used. Seniority is easier to believe when the evidence is inspectable.
How do I know what to practice next?
Look at your last three pieces of feedback. If they mention edge cases, practice state handling. If they mention confusion, practice communication. If they mention bugs, practice testing and debugging. If they mention over-engineering, practice smaller reversible decisions.
Choose the next visible upgrade
Do not end this as a private learning goal. Pick one upgrade that someone else can inspect.
Good next upgrades include:
- A form with better validation, server errors, and focus recovery.
- A slow interaction measured and improved.
- A component API that removes repeated misuse.
- A decision note that explains a tradeoff your team keeps debating.
- A review checklist that prevents the same UI bug from returning.
- A project README that explains state ownership and edge cases.
The best growth plan is not dramatic. It is one visible improvement, repeated until people trust you with wider scope.
- How to Switch from Backend to Frontend Developer in 2026Switch from backend to frontend with a practical plan for browser fundamentals, CSS, accessibility, React, portfolio proof, and interview positioning.标签作者GreatFrontEnd Team12 分钟阅读Jul 22, 2026
To switch from backend to frontend developer in 2026, do not throw away your backend experience. Use it to build better API-backed user interfaces, then deliberately close the browser gaps: HTML semantics, CSS layout, accessibility, rendering performance, client state, and product UI judgment.
The weak version of this switch is "I learned React." The stronger version is "I can turn unreliable data, permissions, latency, and user input into a clear interface that works across states."
What actually changes when you move frontend
Backend work asks whether the system is correct, secure, observable, and reliable. Frontend work still needs those instincts, but the proof is user-visible. A correct API response is not enough if the UI loses focus, hides the error, shifts layout, blocks typing, or makes the next action unclear.
Backend habit Frontend translation What to prove API contract design Loading, empty, error, permission, retry, and partial-data states A flow that does not collapse when the API is slow or incomplete Data modeling Server state, local state, URL state, derived state, and cache shape State that has a clear owner and survives navigation where needed Security thinking XSS, CSRF, cookies, tokens, auth UI, and unsafe HTML No secret leakage, no unsafe rendering, clear session states Observability Web Vitals, frontend logs, breadcrumbs, and user-impact debugging A before/after measurement or a debugging note Testing discipline User flows, accessibility checks, visual states, and network failures Tests or screenshots for the states reviewers usually miss Incident thinking Graceful degradation, rollback, feature flags, and recovery UI A plan for what the user sees when something breaks Your advantage is not that frontend will be easy. Your advantage is that you already know software breaks at boundaries. Frontend has more boundaries than it first appears: browser to network, API to cache, design to implementation, keyboard to component, mobile to desktop, and expectation to actual behavior.
The 2026 reality check
The frontend stack is still built on the web platform. In the 2025 Stack Overflow Developer Survey, professional developers reported heavy use of JavaScript, HTML/CSS, and TypeScript, and React remained one of the most-used web frameworks. Treat that as a stack signal, not a complete learning plan.
The learning plan should start closer to MDN's core frontend modules: HTML, CSS, JavaScript, accessibility, browser APIs, and web standards. React matters, but React does not remove the need to understand what the browser is doing. The React docs are useful once you can already reason about markup, events, data, and state.
Google's Core Web Vitals currently measure loading, interactivity, and visual stability through LCP, INP, and CLS. They are user-experience metrics with recommended thresholds, not service-level objectives by themselves. A team can turn them into route- and device-specific SLOs with an owner and measurement window.
Skills backend developers usually under-practice
Most backend developers switching to frontend do not fail because JavaScript is impossible. They fail because the browser has product-facing details backend work did not force them to practice.
Skill gap Why it matters Practice target HTML semantics Buttons, links, forms, headings, labels, and tables carry behavior and meaning Build a form without replacing native controls unnecessarily CSS layout Real content wraps, overflows, resizes, and stacks under pressure Recreate a settings page at mobile, tablet, and desktop widths Accessibility Keyboard users and assistive technology need usable state, names, focus, and errors Complete a modal or form without a mouse Browser events Clicks, input, focus, scroll, and submit events have default behavior Debug a form submission and a keyboard shortcut conflict Client state UI state is not all the same kind of state Separate local, server, URL, derived, and persisted state Rendering cost Work on the main thread competes with user input Measure a slow interaction and remove unnecessary rendering Product copy Users need recovery, not stack traces Rewrite API errors into next actions The accessibility gap deserves special attention. W3C's accessibility introduction frames accessibility as access for people with diverse abilities and contexts. In daily frontend work, that turns into practical checks: correct elements, labels, focus order, keyboard behavior, color contrast, reduced motion, and clear errors.
Do not start with a clone app
Clone apps often hide the exact skills you need to show. A streaming homepage clone may look impressive in a screenshot while saying little about forms, state, accessibility, errors, data freshness, auth, or performance.
Build transition projects that connect backend judgment to frontend behavior.
Project What to build What it proves API-backed admin table Filters in URL, pagination, sorting, loading, empty, error, permission, and export states You can make data usable, not only fetch it Account settings flow Profile edit, password change, two-factor setup, destructive action, session timeout You understand forms, auth, validation, recovery, and security UX Search or autocomplete Debounce, stale-response protection, keyboard navigation, highlighting, cache, empty state You can handle async UI without race-condition bugs Design-system slice Button, input, modal, toast, tabs, and form field with states and docs You can design component APIs and accessibility defaults Performance repair Measure one slow page, reduce JavaScript or rendering cost, document the before/after You can connect frontend work to user experience metrics One polished project with state coverage is better than five shallow demos. A hiring manager should be able to open the project and see how you handle the uncomfortable states: no data, too much data, invalid data, slow data, expired session, denied permission, failed request, mobile layout, keyboard navigation, and repeated submission.
A practical 90-day switch plan
Use this as a working plan, not a certificate path. If you already know some pieces, compress them and spend more time on proof.
Weeks Focus Build Keep as evidence 1-2 Browser and HTML A responsive form-heavy settings page Semantic structure, labels, validation, screenshots 3-4 CSS layout Rebuild the same page without a UI library Mobile/desktop screenshots, overflow fixes, focus states 5-6 JavaScript and APIs Add fetch, loading, error, retry, cancellation, and stale-response handling Network-state notes and bug examples 7-8 React or target framework Turn the flow into components with clear state ownership Component boundaries and state map 9-10 Accessibility and testing Add keyboard checks, form tests, and user-flow tests Test output and manual accessibility checklist 11-12 Performance and interview proof Measure one slow interaction and write project stories Before/after metric, README, interview notes Do not wait until the end to write. Each week should leave behind a short note: what broke, what you changed, why you chose it, and how you verified it. That habit turns learning into interview material.
How to use your backend experience
Backend experience becomes credible frontend experience when you translate it into the user's path.
Backend story Weak frontend translation Strong frontend translation "I built REST APIs." "I can call APIs from React." "I design UI states around latency, validation, permissions, pagination, and retries." "I worked on auth." "I know login." "I can handle expired sessions, protected routes, token refresh, logout, and sensitive UI state." "I optimized queries." "I care about performance." "I can measure page load and interaction delays, then reduce unnecessary data, rendering, or JavaScript work." "I wrote tests." "I will test components." "I test user flows across success, validation, failure, and recovery states." "I debugged production issues." "I use DevTools." "I can trace a user-visible failure through the browser, network, API, logs, and release history." That last row is the switcher advantage. Many frontend bugs cross the frontend/backend boundary. Someone who can debug both sides calmly is useful on product teams.
What to learn in React
React is still a practical default for many frontend roles, but learn it through product behavior rather than isolated hooks trivia.
Prioritize:
- Components, props, lists, keys, and conditional rendering.
- Controlled and uncontrolled form inputs.
- Local state, derived state, and state lifting.
- Effects, cleanup, request cancellation, and response-order guards. Aborting an old request saves work when cancellation succeeds; a query identity check still prevents an obsolete result from replacing newer state.
- Context only when data genuinely belongs above many components.
- Refs for focus and DOM escape hatches.
- Error boundaries for render failures, plus explicit request-error and event-handler recovery. React error boundaries do not catch every async or event-handler exception.
- TypeScript props, API response types, and discriminated unions for UI states.
For a backend switcher, the useful mental model is: React renders a description of the UI for the current state. Your job is to make the possible states explicit enough that the UI does not surprise users.
type RequestState<T> =| { status: 'idle' }| { status: 'loading' }| { status: 'success'; data: T }| { status: 'empty' }| { status: 'error'; message: string; canRetry: boolean };This kind of type is not fancy. It prevents the common bug where a component accidentally tries to be loading, empty, and failed at the same time.
Interview positioning for backend-to-frontend switchers
Do not apologize for switching. Explain the direction clearly and show the work you have done to fill the gaps.
I am moving from backend to frontend because I want to work closer to product behavior.My backend background helps with API contracts, auth, debugging, and reliability.I have been filling the browser-specific gaps through projects focused on CSS layout,accessibility, React state, performance measurement, and API-backed UI states.Prepare examples for these questions:
- What frontend problem did your backend background help you solve?
- Which browser behavior surprised you when you started?
- How do you decide whether state belongs in the URL, server cache, component state, or persistent storage?
- What happens in your UI when a request fails after the user edits a form?
- How do you make a modal, menu, or form keyboard accessible?
- What did you measure before claiming a frontend performance improvement?
- How do you prevent stale API responses from overwriting newer user input?
Answer with a specific project. Avoid broad claims like "I understand fullstack." A switcher is more convincing when the story includes a constraint, a tradeoff, and a verification step.
What your portfolio README should include
The README is where backend switchers can stand out. Do not only list the stack.
Include:
- The user flow and why it matters.
- The API states you handled.
- A state ownership map: server, URL, local, derived, and persisted.
- Accessibility checks you performed.
- Performance measurement or a note about what you would measure next.
- Screenshots for loading, empty, error, mobile, and success states.
- One tradeoff you intentionally made.
Example:
Tradeoff:I kept filters in the URL so the table state can be shared and restored.I kept the open row menu in component state because it is temporary UI state.I did not persist the selected rows because bulk actions should reset after navigation.That note says more about frontend judgment than another badge in the tech stack list.
Common mistakes
Learning React before HTML and CSS feel normal
React can organize UI, but it cannot rescue weak markup and layout. If every project depends on a component library, you will struggle when a design breaks outside the happy path.
Treating frontend as "backend with pixels"
Frontend work has data problems, but it also has perception problems. Users notice delay, focus loss, layout shifts, unclear copy, tiny hit targets, missing disabled states, and forms that erase input.
Building only happy paths
A polished success state is table stakes. Your switch becomes credible when the project handles failure, latency, empty data, permissions, mobile layout, and keyboard use.
Ignoring design collaboration
Frontend developers work at the boundary between engineering, design, product, support, and users. You do not need to become a designer, but you do need language for spacing, hierarchy, affordance, motion, and interaction states.
Overselling fullstack instead of proving frontend depth
Backend experience is a strength, but the target role is frontend. Lead with frontend evidence, then use backend experience as the reason you are better at product boundaries.
GreatFrontEnd practice path
Use Frontend Developer Roadmap for the broader skill order. For switchers, a practical GreatFrontEnd path is:
- Practice JavaScript interview questions until async behavior and data transformations feel explainable.
- Add React interview questions for state, rendering, effects, forms, and component design.
- Work through UI coding questions with keyboard behavior and edge states, not only the default visual state.
- Read REST API interview questions for frontend developers to translate your backend knowledge into frontend interview answers.
- Practice system-design prompts that are frontend-heavy, such as autocomplete, feeds, dashboards, and design systems.
The goal is not to collect practice topics. The goal is to build proof that you can make user-facing software reliable.
What proves the switch
The switch is not complete when your resume says "frontend." It is complete when your work shows user-facing judgment without needing a long explanation.
Good proof looks like this:
Claim Weak proof Strong proof I can build frontend UI A React app with a happy path A flow with loading, empty, error, permission, mobile, and keyboard states I understand APIs Fetching JSON into a component UI behavior designed around latency, validation, stale data, and retry I know accessibility A Lighthouse score Correct elements, labels, focus behavior, keyboard checks, and readable errors I care about performance A fast local demo A measured before/after improvement or a clear profiling note I bring backend experience A list of backend tools A frontend decision that is better because you understand contracts, auth, data, or failure modes That is the real transition: from system-facing correctness to user-facing correctness. Backend experience helps, but only when it becomes visible in the browser, the product flow, and the way you explain tradeoffs.
- Frontend Developer Cover Letter: Templates and Writing Guide (2026)Write a frontend developer cover letter with concise templates for freshers, career switchers, experienced engineers, and role-specific applications.标签作者GreatFrontEnd Team10 分钟阅读Jul 21, 2026

A frontend developer cover letter should be a short proof note. It should connect the role to one or two pieces of evidence, not repeat the resume in paragraph form.
If the same letter could be sent to 50 companies unchanged, it is too generic. The goal is not to sound impressive. The goal is to make the reviewer think, "This person has done something close to what we need."
Keep it short: 150-250 words for a formal cover letter, or 4-6 sentences for an email or referral note.
Start with the role requirement
Do not start by listing your whole frontend stack. Start by finding the clearest requirement in the job description and choosing proof that matches it.
If the role emphasizes Your letter should prove React product UI You have built stateful UI with API data and edge states Design systems You understand reusable components, tokens, and accessibility Dashboards You can handle tables, filters, loading states, and charts Web performance You can name what was slow, what changed, and how you checked it Fresher role You can finish, deploy, and explain a complete project Remote role You communicate assumptions, tradeoffs, and progress well One good match is enough. A cover letter does not need to prove every requirement in the posting.
Use a four-part structure
Short cover letters are easier to read and harder to fill with generic claims. Use four compact parts.
Part Purpose Example Opening Name the role and fit I am applying for the frontend developer role focused on dashboard UI and React. Proof Show one relevant project or shipped feature My closest matching work is a data table project with URL filters, loading states, and keyboard-safe row actions. Role match Connect proof to the job description That maps to your need for API-backed product screens and TypeScript components. Close Ask for next step I would be glad to discuss the project and the tradeoffs behind it. Here is the base shape:
Hi [Name],I am applying for [role]. The part of the role that matches my work most closelyis [frontend problem from the job description].In [project/team], I built [specific UI or flow], where the main challenge was[state/API/performance/accessibility/design-system constraint]. The work required[skills from the job description] and resulted in [visible outcome, shippedfeature, metric, or reviewable artifact].I would be happy to discuss the project, the tradeoffs, and how the experiencemaps to your team.Best,[Name]Choose proof that can be inspected
Good frontend proof has three parts:
- Behavior: what the UI actually did.
- Constraint: what made it non-trivial.
- Evidence: where the reviewer can see or verify it.
Weak proof says, "I know React." Better proof says, "I built a React checkout settings flow with controlled forms, disabled submit states, API error handling, and a mobile review step."
Use the best evidence you have:
Evidence type Good use in a cover letter Shipped feature Name the flow, constraint, and product outcome Portfolio project Link the demo or case study and explain the hard part GitHub repository Mention the README, setup, tests, or implementation decision worth inspecting Performance work Name the metric, bottleneck, code change, and verification method Design-system work Name the component API, accessibility behavior, token work, or adoption problem If your proof is weak, improve the artifact before decorating the letter. A better frontend developer portfolio often does more than a longer cover letter.
Template for freshers
Freshers should not pretend to have professional impact. Use finished projects and learning discipline as proof.
Hi [Name],I am applying for the frontend developer fresher role. I have been building Reactand JavaScript projects around forms, API states, and responsive layouts ratherthan only static pages.The project most relevant to this role is [project], where I built [specificbehavior], handled [loading/error/empty/validation state], and documented setupin GitHub. I also deployed it so reviewers can test the flow quickly.I am looking for a team where I can contribute to small frontend tasks, learnthrough review, and keep improving my browser, JavaScript, and UI skills.Thank you,[Name]For fresher roles, the letter should make your work easy to inspect. Link one deployed project or GitHub repo, not five unfinished experiments.
Template for career switchers
Career switchers should connect prior experience to frontend product work without hiding the transition.
Hi [Name],I am applying for the frontend developer role. My background in [previous field]has given me experience with [domain/product/user/API skill], and I have beenbuilding frontend proof through [project or training path].The closest match to this role is [project], where I built [specific UI behavior]and handled [state/API/layout/accessibility issue]. My previous experience helpsme understand [customer, data, workflow, or collaboration angle] while my recentfrontend work shows the technical direction I am moving toward.I would be glad to discuss the project and how my previous experience can helpthis team.Best,[Name]This works best when the switch is honest and the frontend proof is visible. Do not spend the whole letter explaining why you changed careers.
Template for experienced frontend developers
Experienced engineers should connect role requirements to shipped scope, not passion statements.
Hi [Name],I am interested in the senior frontend role because it combines [product area]with [frontend challenge from the job description]. In my current work, I owned[flow/system/component], where the main challenge was [constraint].I would bring practical experience in [two relevant skills], especially [specificexample]. I am also careful about quality gates such as accessibility,performance measurement, and test coverage where user flows are high-risk.I would be happy to discuss how I approached [project] and how that experiencemaps to this team.Best,[Name]For senior roles, avoid a generic stack summary. The useful signal is scope: what you owned, what tradeoff you handled, who depended on the work, and how quality was checked.
Short email version
Use this when the application flow has no formal cover-letter field, or when you are asking for a referral.
Hi [Name],I am interested in the [role] role because it matches my recent work on [specificfrontend area]. My closest proof is [project/feature], where I built [specific UIbehavior] and handled [constraint].Here are the two most relevant links: [portfolio/project] and [GitHub/case study].I would be glad to share more context if the team is hiring for this type of work.Best,[Name]This version should feel like a useful note, not a mini essay.
Role-specific examples
Pick the angle that matches the role. Do not use all of them in one letter.
Role type Useful angle Better proof than "I know React" React product role You can build user flows with changing state and API responses Search, filters, forms, errors, empty states, and route state Design-system role You care about reusable UI and adoption Component API, token migration, docs, keyboard behavior, review notes Performance-heavy role You measure before claiming improvement LCP, bundle size, render bottleneck, lazy loading, or caching decision Dashboard role You handle dense product UI Tables, charts, sorting, pagination, export, permissions, loading UI Fresher role You finish and explain work Deployed project, readable GitHub, clear README, honest scope Remote role You reduce ambiguity Written assumptions, PR notes, screenshots, async status updates Before and after examples
Most weak cover letters are not wrong. They are vague. Rewrite claims until a reviewer can picture the work.
Weak line Better line I am passionate about technology. I built a booking flow with validation, saved progress, disabled submit states, and API error recovery. I know React and TypeScript. I built a typed table component with URL filters, row actions, loading states, and empty-state handling. I am a quick learner. I rebuilt a tutorial app into a custom workflow, added form validation, and documented the setup decisions in GitHub. Your company is innovative. Your role mentions design-system migration; I have worked on typed component APIs and adoption docs. I improved performance. I reduced unnecessary re-renders in a dashboard list and verified the change with React Profiler before merging. The better version does not need to be dramatic. It just needs a concrete behavior, constraint, and proof point.
Tailor without keyword stuffing
Tailoring means changing proof order, not sprinkling every keyword from the job description. If a job asks for React, TypeScript, and dashboards, move the dashboard project above the landing page project and write the letter around typed data, filters, and loading states.
Use this quick process:
- Copy the job description into a note.
- Highlight the top three frontend requirements.
- Pick the one requirement you can prove best.
- Choose one project, feature, or role that proves it.
- Remove every sentence that does not support that match.
If the role is too far from your proof, the letter cannot fix that. Use the application as a signal to build a better project or target a closer role first.
What to cut
Cut anything that could be copied into a marketing intern, backend engineer, or product manager application with no changes.
Cut Why it weakens the letter "I am passionate about frontend development" It says nothing about the role or proof "I am a fast learner" It asks the reader to trust a trait "Your company is a leader in the industry" It sounds copied unless tied to the role Long company praise It wastes space that should show evidence Every tool you have touched It repeats the resume and dilutes the signal Claims you cannot explain in an interview They create risk later Links with no context The reviewer will not know what to open The easiest test: ask whether the sentence helps the reviewer answer "why this candidate for this frontend role?" If not, cut it.
Common questions
Do frontend developers still need cover letters?
If the application requires one, yes. If it is optional, write one only when it adds context the resume cannot show quickly: a career switch, referral, unusually relevant project, relocation context, or a role that matches a specific piece of work.
How long should it be?
Aim for 150-250 words. For an email note, 4-6 sentences is enough. If you need more space, the proof is probably unclear or you are repeating the resume.
Should freshers mention course certificates?
Only if the certificate explains the path to a stronger project. A finished project with states, validation, API handling, and a clean README is usually more persuasive.
Can AI help write it?
AI can help with structure, but it cannot invent proof. After using any draft, replace generic claims with your actual project, constraint, and link. If the final letter sounds like everyone else's, rewrite it.
What if I have no professional frontend experience?
Use project proof. Pick the most role-like project you have, then describe the user flow and edge states: loading, errors, validation, responsive behavior, keyboard behavior, API failure, or deployment. For more ideas, use projects that would also strengthen a frontend developer resume for freshers.
One-hour rewrite workflow
Use this when you already have a draft and want the fastest improvement.
- Delete the first paragraph if it only says you are excited about the role.
- Add one sentence naming the exact frontend problem in the job description.
- Choose one project or shipped feature that proves you can handle it.
- Rewrite the proof with behavior, constraint, and evidence.
- Add one relevant link with context.
- Cut the letter until it can be read in under one minute.
- Read it aloud and remove any sentence you would be embarrassed to explain in an interview.
Final checklist
- The company name and role are correct.
- The first paragraph names the role and a relevant frontend problem.
- The letter uses one or two proof points, not a stack dump.
- Every link has context.
- No sentence could be sent unchanged to 50 companies.
- Claims can survive an interview follow-up.
- The letter is 150-250 words, or shorter for email.
A frontend developer cover letter is useful when it adds context the resume cannot. If it does not point to proof, shorten it until it does.
- Frontend Developer Resume for Freshers: Template and Writing Guide (2026)A practical frontend developer resume guide for freshers with a complete one-page example, project bullet rewrites, skills guidance, GitHub checks, and application links.标签作者GreatFrontEnd Team14 分钟阅读Jul 21, 2026
A frontend developer resume for freshers should prove one thing quickly: you can build, explain, and finish frontend work. Keep it to one page, lead with projects, use honest skills, and make GitHub, live demos, portfolio, and contact links easy to inspect.
The resume is not where you hide no experience behind extra words. It is where you turn projects, internships, college work, open-source fixes, and practice into evidence a recruiter or engineer can verify.
If you want the broader all-level version, read How to Write a Frontend Developer Resume. For GFE's interview-focused resume guidance, use the Front End Interview Playbook resume chapter. This guide stays on the fresher problem: what to write when projects are your main proof.
What a fresher resume must prove
A fresher resume is judged on risk. The reviewer is asking whether you can be trusted with small frontend tasks without constant rescue.
Reviewer question Your resume should answer with Can this person build a UI flow? Two or three projects with live links, GitHub links, and clear bullets Can they handle product states? Loading, empty, error, invalid, success, and responsive behavior Can they explain their own code? Bullets that name decisions, constraints, and tradeoffs Are the basics real? Skills tied to projects, not a long tool dump Will links waste my time? Working portfolio, GitHub, LinkedIn, and deployed demos This is the same shortlisting logic used in the general frontend developer resume guide, but freshers need a different proof mix because projects usually carry more weight than jobs.
Use this section order
Freshers should usually place projects above education unless an internship, degree project, or college achievement is unusually relevant. The hiring team needs frontend behavior before it needs a biography.
Section What to include What to avoid Header Name, city, email, phone, GitHub, LinkedIn, portfolio Full address, multiple phone numbers, broken links Headline One line naming frontend lane and strongest proof Generic career objective Skills Grouped skills you can explain Every library you touched once Projects 2-3 deployed projects with bullets Tutorial titles with no changes Experience Internship, freelance, open source, or club work Inflated labels for tiny tasks Education Degree, college, dates, useful coursework School details that push stronger projects down Apply the Front End Interview Playbook checklist
The Front End Interview Playbook resume chapter is useful because it is written for frontend candidates, not generic software resumes. For freshers, translate its advice into these checks.
Playbook idea Fresher resume version Keep it short One page is enough unless you have unusually relevant internships or shipped work Use ATS-friendly formatting Build in Google Docs, Word, Pages, or LaTeX; avoid design-tool resumes for applications Keep the layout readable Use a single column, common fonts, and readable font size Show scale and complexity For projects, mention data size, states handled, pages, flows, or performance checks Show impact honestly Use outcomes you can defend: faster load, fewer broken states, clearer README, demo Curate the skills section List the core tools you can explain instead of every library you have touched Make projects inspectable Add GitHub code, screenshots, README notes, and live links where possible Freshers will not always have business metrics like monthly active users or revenue impact. That is fine. Use project-level evidence instead: number of screens, edge states handled, API behavior, accessibility checks, performance notes, or before/after improvements.
What to include when you have no experience
No experience does not mean no evidence. It means you must label evidence honestly.
Evidence you have How to list it What makes it weak Personal project Project section with Live and GitHub links No README, no demo, only copied tutorial behavior College capstone Project section if you owned frontend work Team project with unclear personal contribution Internship Experience section with assigned UI work and shipped changes Vague "worked on website" bullets Freelance or club website Experience or project section with scope and constraints Overstating it as full-time product engineering Open-source contribution Project or additional section with issue, PR, docs, or fix scope Forked repo with no accepted change or explanation Certification Additional section only when it supports a project Pushing projects down to list course names If your projects are still weak, improve the projects before polishing the resume. Use Frontend Project Ideas for Your Resume to choose project scopes that create better bullets.
Use this one-page fresher template
Use a readable single-column layout when applying through job portals. Fancy columns and skill bars often make the resume harder to scan and copy into applicant systems.
NameCity | email | phone | GitHub | LinkedIn | PortfolioFrontend developer fresher building React and JavaScript projects with forms,API-backed views, responsive layouts, and clean GitHub documentation.SkillsFrontend: HTML, CSS, JavaScript, React, TypeScript basicsUI behavior: forms, validation, responsive layout, loading/error/empty statesTools: Git, GitHub, Vite, npm, Chrome DevToolsProjectsJob Tracker | Live | GitHub- Built a React job tracker with URL filters, saved applications, empty states,and responsive table layout using TypeScript and local persistence.- Added form validation, edit/delete flow, and a README with setup steps,screenshots, known limitations, and next improvements.Product Catalog | Live | GitHub- Built API-backed product browsing with search, category filters, pagination,loading state, error recovery, and mobile card layout.- Documented the data shape, retry behavior, and one accessibility improvementfor form labels and keyboard navigation.ExperienceFrontend Intern, Company or Club, Month Year - Month Year- Updated responsive UI sections and fixed form validation issues after review.- Wrote basic test notes for mobile, empty state, and failed API responses.EducationDegree, college, expected or completed yearRelevant coursework: web development, data structures, databasesAdditionalHackathon, open-source docs fix, certification, or volunteer site only if it adds proof.Rewrite project bullets as proof
A project bullet should tell the reviewer what you built, what behavior it handles, and why it goes beyond a static page. Do not write only "Built using React." The stack matters less than the behavior.
Formula:Built [project or flow] with [specific UI behavior], handling [state, error,accessibility, performance, routing, or responsive detail].Example:Built a React job tracker with URL filters, saved applications, empty states,and responsive table layout using TypeScript and local persistence.Weak bullet Better bullet Built React project Built a React expense tracker with controlled forms, category filters, local persistence, empty states, and mobile layout Made portfolio website Built a portfolio with project case studies, deployed demos, GitHub links, responsive navigation, and contact validation Used API Built a search page using a public API with loading, empty, error, retry, and URL-based filter state Created e-commerce website Built product listing with responsive cards, filters, cart state, empty cart, unavailable items, and checkout review Made todo app Built task manager with filters, edit/delete flow, local persistence, and keyboard-friendly form controls The best bullet is the one you can defend in an interview. If the interviewer asks how retry worked, where state lived, or how the mobile layout changed, you should be able to answer from your own code.
Pick projects that deserve resume space
Freshers often list too many small projects. Two complete projects beat five unfinished demos.
Project type List it when it has Improve before listing when Weather app Search, loading, error, saved locations, mobile layout It only calls an API and displays temperature Job tracker Forms, filters, persistence, empty states, responsive table It is only a static card grid E-commerce UI Product states, cart state, checkout validation, mobile summary It is only copied product cards Portfolio Case studies, demo links, GitHub links, contact path It is only an about page and decorative screenshots Component library Button, Input, Modal, Tabs, Toast with states and notes It is only unrelated components in one folder Performance rewrite Measurement, bottleneck, before/after notes It says "optimized" without explaining what changed For a deeper project selection process, use Frontend Project Ideas for Your Resume. It has project scoring, clone upgrades, and project directions that create stronger resume bullets.
Make skills honest and scannable
A fresher skill section should not read like a tool dump. Group skills by confidence and keep interview risk in mind: anything you list can become a question.
Skill group Good entry Risky entry Core web HTML, CSS, JavaScript, responsive layout, forms HTML5, CSS3, JavaScript, Bootstrap, Tailwind, Sass, Less, jQuery all together Framework React: components, props, state, effects, forms React expert Tools Git, GitHub, Vite, npm, Chrome DevTools Docker, AWS, GraphQL if you cannot explain them Testing Basic unit tests or manual test notes Testing expert with no test files Do not list a tool because it appeared in one tutorial. If the resume says TypeScript, there should be at least one project where TypeScript helped with props, API data, forms, or state.
Match resume, GitHub, and portfolio
The resume creates the click. GitHub and the live demo decide whether that click builds trust. Each listed project should have a working demo, readable README, screenshots, setup commands, and no exposed keys.
- Pin the same projects you list on the resume.
- Add live demo links near the top of each README.
- Explain one decision and one limitation.
- Check install and run commands from a fresh clone.
- Remove unused files and generated clutter.
GitHub's repository README docs are a useful baseline: a README should explain what the project does, why it is useful, and how someone can get started. For hiring, add screenshots, states handled, tradeoffs, and known limitations.
Use Frontend Developer GitHub Profile to clean up pinned repositories, profile README, project READMEs, and demo links. If you do not have a portfolio yet, use How to Build a Frontend Developer Portfolio With No Experience so your resume and portfolio point to the same proof.
Tailor without keyword stuffing
Tailoring means changing proof order, not sprinkling every keyword from the job description. If a job asks for React, TypeScript, and dashboards, move the dashboard project above the landing page project and rewrite bullets around typed data, filters, loading states, and table behavior.
- Keep one master resume with all bullets.
- Create one targeted resume per role lane.
- Move the closest proof into the first half of the page.
- Delete tools that are not connected to experience or projects.
- Check that the resume, GitHub, portfolio, and LinkedIn say the same thing.
Use Frontend Developer Jobs for Freshers to plan the full job-search path: projects, GitHub, applications, interview prep, and feedback loops.
Before and after: weak fresher section
The fastest way to improve a fresher resume is usually rewriting one vague project section.
BeforeProjectsFood Delivery App- Created food delivery website using React.- Used CSS and JavaScript.- Added cart page.AfterProjectsFood Delivery App | Live | GitHub- Built restaurant listing, menu detail, cart state, empty cart, unavailable item,and checkout review screens using React and local persistence.- Added responsive layout for mobile ordering, form validation for deliverydetails, and README notes on state ownership and known limitations.The second version gives an interviewer something to ask. They can ask how cart state worked, what happened when the cart was empty, how validation appeared, and how mobile layout changed. That is the point.
Add a reviewer audit
Before sending the resume, read it like an engineer who has never met you. Every major claim should be backed by a project, shipped feature, or link.
Resume claim Reviewer question Better evidence React experience Where can I see stateful React work? Link a project with forms, API states, and clear component boundaries Performance work What was slow and how did you know? Name the measured bottleneck and the change made Accessibility Which interaction did you make accessible? Mention labels, focus recovery, keyboard behavior, or error announcements Team ownership What did you own personally? Separate your contribution from team output What to remove
Remove lines that create doubt but do not add proof. Space is expensive on a one-page fresher resume.
Remove Why it weakens the resume Better replacement Generic objective Says motivation without proof One-line headline with role lane and project proof Skill bars Looks precise but usually means nothing Grouped skills tied to projects "React expert" Creates interview risk for a fresher React: components, props, state, effects, forms Course list above projects Pushes visible work down One relevant coursework line under education Copied tutorial project titles Makes the project look unoriginal Rename by user problem and describe added behavior Too many certificates Crowds out inspectable work Keep only the one that supports a project or skill Broken or private links Blocks verification Public demo, GitHub repo, screenshots, or case note Interview-test every bullet
Every bullet should survive a follow-up. If you write "improved performance," be ready to explain what was measured, which code changed, what tradeoff you accepted, and how you checked the result. If you cannot answer those questions, rewrite the bullet to match what you actually did.
Use this test:
- What did you build yourself?
- Which state was hard to manage?
- What happened on loading, empty, error, invalid, and mobile screens?
- What would you improve with one more week?
- Which file or component should the interviewer open first?
If you cannot answer, do not delete the project immediately. Rewrite the bullet to match the truth, then improve the project after sending a small application batch.
Connect the resume to the rest of the application
Your resume should not live alone. A good fresher application packet has the same story across resume, GitHub, portfolio, LinkedIn, and optional cover letter.
Asset What it should do GFE guide Resume Show the best one-page proof How to Write a Frontend Developer Resume Projects Create bullets that survive follow-ups Frontend Project Ideas for Your Resume GitHub Make code, demos, READMEs, and pinned repos easy to inspect Frontend Developer GitHub Profile Portfolio Turn projects into case studies and a clear contact path Frontend Developer Portfolio LinkedIn Match headline, projects, and job target to the resume Frontend Developer LinkedIn Profile Cover letter Add context only when it explains fit better than the resume Frontend Developer Cover Letter If you already have several years of experience, this fresher structure will undersell you. Use Senior Frontend Developer Resume to emphasize scope, judgment, architecture, mentoring, and measurable delivery.
Two-minute resume audit
Before sending the resume, open it in a private browser window or PDF viewer and run this check.
- Can the reviewer tell your target role from the top third of the page?
- Are the best two projects visible before the halfway point?
- Does every project bullet name user behavior, state, API work, accessibility, performance, testing, or delivery ownership?
- Are links clickable, current, and pointing to the same work named in the resume?
- Can you explain every tool in the skills section without reading notes?
- Does the resume still read clearly if copied into plain text?
One-hour rewrite plan
Use this when the current resume feels weak and you need progress today.
- Paste the target job description into a note.
- Highlight repeated frontend requirements: framework, CSS, API work, testing, accessibility, performance, or dashboard work.
- Move the closest project into the first half of the resume.
- Rewrite two bullets so they describe shipped behavior, not only tools.
- Open GitHub, portfolio, LinkedIn, and demo links in a private browser window.
- Remove one weak claim you cannot explain.
- Save this as the role-specific version instead of sending the same resume everywhere.
Final reader test
Hand the resume to someone for 90 seconds. Ask three questions:
- What frontend role does this person seem to want?
- Which project would you open first?
- What interview question would you ask from the first project bullet?
If they cannot answer, the resume is not clear enough yet. A fresher resume wins when it makes small proof easy to inspect: finished projects, honest skills, working links, and bullets that describe behavior instead of only tools.
- Frontend Developer GitHub Profile: How to Stand Out to Recruiters (2026)Build a reviewable frontend developer GitHub profile with a focused README, proof-led pinned repositories, project READMEs, demos, and cleanup checks.标签作者GreatFrontEnd Team8 分钟阅读Jul 20, 2026
A frontend developer GitHub profile should make your work easy to inspect. In the first minute, a recruiter should understand your target role, and an engineer should know which repository proves your frontend judgment.
That means your profile is not a badge wall, a tutorial archive, or a second resume. It is a review path: role, best work, working demos, readable code, and a clear contact link.
GitHub's profile docs list the profile README, personal info, contribution activity, and pinned items as key profile elements. Use those parts deliberately. Put the strongest proof where people can see it without opening ten tabs.
Start with the review path
Before rewriting anything, decide what a reviewer should do next after landing on your profile.
Reviewer question Your profile should answer with What role is this person seeking? One plain sentence in the bio or profile README Which work should I open first? One to three pinned repositories that match the target role Can I test the UI? Live demos, screenshots, and clear setup instructions Can I trust the code? Clean folders, recent fixes, no secrets, and readable project notes How do I contact them? Portfolio, LinkedIn, email, or another obvious contact path If the first screen does not answer these questions, adding more content usually creates more work for the reviewer.
Write a profile README that routes people
GitHub profile README docs explain the setup requirement: create a public repository with the same name as your username and add a
README.mdat the root. The content should be short enough to scan and specific enough to direct attention.Use this structure:
# [Name]Frontend developer focused on React, TypeScript, accessible UI states, and API-backed product screens.## Best work- [Job tracker](repo): filters, saved jobs, empty states, mobile table, deployed demo- [Checkout flow](repo): form validation, error recovery, review step, keyboard flow- [Component system](repo): button, modal, tabs, docs, accessibility notes## Current proof- Practicing performance measurement with Lighthouse and Web Vitals- Improving tests for forms, async states, and keyboard interactions## LinksPortfolio: ... LinkedIn: ... Email: ...Keep badge rows, stats cards, contribution snake animations, and long tech-icon grids out of the top section unless they help the reviewer choose what to open. A frontend profile should feel like a useful index, not a sticker board.
Pin repositories by proof, not recency
GitHub lets you pin up to six repositories or gists. Do not use all six just because the slots exist. Use pins to answer different questions about your frontend ability.
Pin type What it proves Better than Form-heavy app Validation, accessibility, state, error copy A login page clone API-backed dashboard Loading, error, empty, pagination, filtering states A static chart screenshot Component project Props, variants, keyboard behavior, documentation A folder of unrelated UI snippets Performance case study Measurement, tradeoffs, before/after notes "Optimized performance" with no numbers Open-source contribution Issue context, review discussion, tests or docs A fork with no explanation Product flow Routing, persistence, edge cases, responsive layout A landing page with only visual polish For a fresher, three complete projects are better than six half-finished repos. For a senior engineer, one clear architecture note or migration write-up can be more useful than another demo app.
Make each pinned repo pass the five-minute read
GitHub's repository README docs say a README should explain what the project does, why it is useful, how to get started, and where people can get help. For hiring, translate that into a project review checklist.
Every pinned frontend repo should include:
- One-sentence project summary.
- Live demo link and screenshot of the main flow.
- Install and run commands.
- Environment variable notes, with placeholders instead of secrets.
- Features and UI states handled.
- Testing, accessibility, or performance notes when relevant.
- Known limitations and what you would improve next.
Use this README skeleton for portfolio projects:
# Project nameShort description of the user problem and finished flow.## DemoLive: ... Screenshots: ...## What it includes- Authentication or saved state- Loading, empty, and error states- Responsive layout notes- Keyboard and accessibility behavior## Tech choices- React + TypeScript for UI and state- [Tool] because ...## Run locallypnpm install pnpm dev## Notes- Tradeoff made:- Known limitation:- Next improvement:The "Notes" section is often where a frontend candidate separates copied code from personal judgment. Explain why a form validates on blur, how retry works after an API error, why a table collapses on mobile, or what you changed after measuring performance.
Show frontend evidence, not tool names
Tool lists are weak without behavior. A reviewer does not learn much from "React, Tailwind, Firebase." They learn from what the app handles.
Claim on profile Weak proof Better proof "I know React" Todo app with no edge states State-heavy flow with derived state and tests "I build responsive UIs" Desktop screenshot only Mobile screenshots and layout notes "I care about accessibility" Accessibility badge Keyboard behavior, labels, focus states, contrast fix "I work with APIs" Fetch call in one component Loading, empty, error, retry, pagination states "I write maintainable code" Many folders Clear component boundaries and short decision notes This is also how your GitHub should match your resume. If the resume says "built accessible forms," the pinned repo should make labels, errors, focus behavior, and validation choices visible.
Add small collaboration signals
Production frontend work is full of handoffs: design feedback, backend contracts, QA reports, accessibility review, and product changes. Your profile can show that without pretending a solo project is company work.
Useful signals include:
- PR descriptions that explain the change and testing.
- Issues that document bugs, tradeoffs, or next steps.
- Commit messages that describe the user-facing change.
- Screenshots in PRs or READMEs for UI changes.
- A
docs/decisions.mdnote for bigger choices.
Do not manufacture noise. One clear PR or issue is enough if it helps someone understand how you think.
Keep profile content accessible
GitHub's accessibility tips for profile pages are especially relevant for frontend developers because the profile itself becomes a tiny sample of your UI judgment.
Apply the same discipline to your README:
- Use descriptive link text instead of "click here."
- Add alt text for meaningful images and screenshots.
- Use headings in order.
- Prefer short paragraphs and lists over image-only sections.
- Keep emojis and decorative badges limited.
An accessible profile is not only nicer to read. It also supports the claim that you care about real users.
Clean weak signals before adding new projects
Most GitHub profile fixes are subtraction. Remove the things that make a reviewer work harder.
Weak signal Better replacement Six tutorial clones pinned Two or three complete projects with demos and READMEs Broken portfolio or demo links Fixed links, or remove the link until it works Private repo as the only proof Public case study, screenshots, PR, or write-up Generic bio Target role plus strongest frontend proof README copied from a starter Your own summary, run commands, states handled, and limitations Large skill grid with no examples Three selected projects mapped to concrete frontend behavior Old repo at the top for no reason Reordered pins based on target role and proof strength Also check repository descriptions and topics. GitHub topics help classify a repo, but use them sparingly:
react,typescript,accessibility,dashboard, orformsis useful; twenty vague topics is not.Tune the profile by career level
The same GitHub profile area can support different levels, but the proof should change.
Level Best GitHub proof Avoid Fresher Complete projects, clean READMEs, live demos Claiming every tool in the ecosystem Junior developer Finished flows, fixes, tests, accessibility notes Only visual clones Mid-level API states, component structure, debugging notes Hiding tradeoffs behind vague descriptions Senior developer Architecture notes, migrations, review examples, scope Treating GitHub like a beginner portfolio If your best work is private, do not fake it. Create a public write-up that explains the shape of the problem without sharing confidential code: constraints, role, decision, tradeoff, and result.
Run the 90-second profile test
Open your GitHub profile while logged out or in a private browser window. Give yourself 90 seconds.
Check whether the visible profile answers:
- What frontend role is this person targeting?
- Which repository should I open first?
- Does the best project have a live demo and useful README?
- Do the resume, portfolio, LinkedIn, and GitHub tell the same story?
- Is there an obvious way to contact this person?
If the answer is unclear, fix the first broken link in the chain before adding anything new.
One-hour cleanup plan
Use one focused hour:
- Rewrite the profile bio or README opening to name the target frontend role.
- Choose the best three pins and reorder them by proof strength.
- Fix the README for the strongest repo: demo, screenshot, run commands, states handled, notes.
- Remove broken links, abandoned tutorial pins, and copied starter text.
- Open the profile logged out and click every important link.
A good frontend developer GitHub profile reduces uncertainty. Make the best work obvious, runnable, and easy to discuss.
- Frontend Developer LinkedIn Profile: How to Get Recruiter Attention (2026)Improve your frontend developer LinkedIn profile with headline examples, About templates, Featured links, experience bullets, skills, recommendations, and a 60-minute cleanup plan.标签作者GreatFrontEnd Team14 分钟阅读Jul 20, 2026

A frontend developer LinkedIn profile should make the next click obvious. In the first minute, a recruiter should understand the role you fit, and a hiring manager or engineer should know where to inspect proof of your frontend work.
That proof can be a portfolio, GitHub profile, shipped product, case study, code sample, open-source contribution, or a clear project write-up. LinkedIn is the route into that evidence. It is not a place to hide weak proof behind a long list of tools.
LinkedIn's own profile guidance says a complete, updated profile can improve discoverability and help recruiters understand your professional experience. For frontend developers, "complete" is not the same as "long." The best profile is specific, searchable, and easy to verify.
Start with the reviewer path
Before editing the headline or About section, decide what the reader should believe after 60 seconds.
Reviewer question Your profile should answer with What frontend role do you fit? A clear lane: React product UI, design systems, dashboards, web apps What proof should I open first? One featured portfolio, GitHub repo, case study, or shipped project What frontend problems can you handle? UI states, forms, accessibility, APIs, performance, testing, or CSS Does the story match your resume? Same role target, project names, dates, links, and strongest claims Can someone contact or refer you quickly? Clean public URL, current location or remote preference, contact path If your profile does not answer these questions, more badges, certificates, and activity posts will not fix the problem. The first job is to make the proof easy to find.
Pick one frontend lane before writing keywords
Most weak LinkedIn profiles try to sound available for everything. That makes the profile harder to search and harder to trust.
Choose one primary lane for the next version of the profile:
Target lane Keywords that belong Proof that should be visible Frontend developer fresher JavaScript, React, HTML, CSS, projects Complete projects, live demos, clean READMEs, basic UI states React product engineer React, TypeScript, forms, APIs, testing Product flows, loading/error states, validation, API integration Design systems frontend TypeScript, components, accessibility Reusable components, docs, variants, keyboard behavior Dashboard or SaaS frontend Tables, filters, charts, state Data views, pagination, empty states, permissions, responsive UI Web performance frontend Core Web Vitals, JavaScript, CSS Measured improvements, bundle work, image/loading decisions Senior frontend engineer Architecture, mentoring, migration Design docs, migrations, review examples, cross-team decisions Use the language from job descriptions you actually want, but do not stuff every tool into the profile. A recruiter may search by keyword; an engineer will still click through and check whether the work supports the claim.
Write a headline that says role, stack, and proof
LinkedIn explains that the headline appears below your name and can be shown in search results. Do not waste it on "open to work" alone. Use it to name the role, stack, and evidence.
Level Weak headline Better headline Fresher Frontend developer fresher Frontend developer fresher - React, JavaScript - Portfolio with form and dashboard projects Junior React developer Frontend developer - React + TypeScript - API-backed UI states and responsive layouts Mid-level Software engineer at Company Frontend engineer - React dashboards - Forms, tables, performance, accessibility Senior Senior frontend developer Senior frontend engineer - Design systems - TypeScript components and accessibility Switching Backend developer learning frontend Backend-to-frontend engineer - React, TypeScript - Full-stack product flows Freelance Freelance frontend developer Freelance frontend developer - Landing pages, React apps - Fast handoff from design to deploy Keep the headline readable. Separators are fine, but the headline should still work as a sentence when someone sees it in search.
Turn About into a proof map
LinkedIn describes the About section as the place to express mission, motivation, and skills. For a frontend job search, use it as a short map: what you build, what proof exists, and what role you want.
Use this structure:
I build [type of frontend work] with [primary stack].My strongest proof is [project/work], where I handled [frontend behavior or constraint].Selected links:- Portfolio: [link]- GitHub: [link]- Best project or case study: [link]I am looking for [target role, location/remote preference if relevant].A fresher version:
I am a frontend developer focused on JavaScript, React, CSS, and accessible UI basics.My best projects are a job tracker and a checkout flow. They include form validation, loading and error states, responsive layouts, and clear README notes.Selected links:- Portfolio: [link]- GitHub: [link]- Best project: [link]I am looking for frontend developer or React developer roles where I can work on product UI and keep improving through code review.A mid-level version:
I build React and TypeScript product interfaces for data-heavy screens, forms, and API-backed workflows.Recent work includes improving table filtering, reducing duplicate form logic, and fixing accessibility regressions in modal and keyboard flows.Selected links:- Portfolio or case study: [link]- GitHub or technical notes: [link]- Resume: [link]I am interested in frontend engineer roles on product teams that care about UI quality, maintainability, and measurable user-facing behavior.A senior version:
I lead frontend work across design systems, TypeScript architecture, and product UI quality.My strongest work is in component contracts, accessibility, migration planning, performance budgets, and helping teams ship consistent interfaces without blocking product delivery.Selected proof:- Design system or migration case study: [link]- Technical writing or architecture note: [link]- Portfolio or resume: [link]I am interested in senior frontend or frontend platform roles with ownership over architecture, review quality, and team execution.Cut anything that does not help the reader decide what to open next. A life story can be useful when it explains your career direction; it becomes noise when it hides the proof.
Use Featured for evidence, not decoration
LinkedIn's Featured section supports work samples such as posts, articles, external links, and uploaded media. Use it to shorten the path from a profile claim to the work that supports it.
Feature one to four items, ordered by proof strength:
If you have Feature this first Description to write Portfolio Portfolio home or selected work page "Selected React and TypeScript projects with live demos" Best GitHub project Repo or profile with a polished README "Job tracker with filters, empty states, and saved jobs" Shipped work Product page, case study, or public write-up "Checkout settings UI: validation, API errors, QA fixes" Technical writing Post about a frontend decision or debugging story "Why I changed table state management after profiling" Open-source contribution PR, issue, package, or docs contribution "Accessibility fix for keyboard navigation in tabs" Resume Resume PDF only if it is current and matches the profile "Frontend resume with React, TypeScript, and UI projects" Do not use Featured as a certificate carousel unless the certificate directly supports the target role. A recruiter may appreciate credentials, but an engineer needs to see work.
Rewrite experience around frontend behavior
Experience bullets should make your frontend contribution inspectable. "Built UI" is too vague. Say what the UI had to handle.
Weak bullet Better LinkedIn bullet Worked on frontend screens Built checkout settings screens with validation, disabled states, and API error recovery Used React and TypeScript Typed shared form components and removed duplicate validation behavior across 4 flows Fixed bugs Resolved focus and keyboard regressions in modal flows after QA reports Improved performance Reduced unnecessary table rerenders by memoizing row state and measuring interaction lag Made pages responsive Reworked dashboard filters for mobile, tablet, and desktop without hiding key actions Worked with backend APIs Added loading, empty, error, retry, and pagination states for search results If you can use numbers honestly, use them. If you cannot, name the constraint: browser behavior, accessibility, API state, design handoff, QA regression, bundle size, permissions, or mobile layout.
For confidential work, describe the shape without exposing private details:
Built an internal admin workflow for reviewing user-submitted records. Owned the React UI, API state handling, table filters, empty states, and QA fixes across desktop and tablet layouts.That is more useful than naming every library.
Make skills match visible proof
LinkedIn allows up to 100 skills and says relevant skills help match you with opportunities. Do not treat that as permission to list every framework you have touched once.
Choose skills in three groups:
Skill group Examples What should prove it Core frontend JavaScript, TypeScript, React, HTML, CSS Projects, experience bullets, GitHub repos, portfolio Role-specific Accessibility, performance, testing, forms Case studies, bullets, PRs, docs, measurable changes Collaboration context Code review, design systems, API integration Experience descriptions, recommendations, project notes Move the most relevant skills higher and remove weak noise. If the profile says React, TypeScript, Next.js, Vue, Angular, Svelte, Node, AWS, Figma, Webflow, Shopify, Kubernetes, and Python with no matching proof, the reader cannot tell what you actually do well.
Add recommendations that answer a hiring question
LinkedIn recommendations can be requested from connections and include a personalized message. Use them selectively. One concrete recommendation from a teammate, manager, mentor, client, or open-source maintainer can carry more trust than ten generic endorsements.
Ask for recommendations around a specific work trait:
Hi [Name], I am updating my LinkedIn profile for frontend roles. If you are comfortable writing a short recommendation, could you mention the [project/flow] we worked on and what you saw from me around [UI quality, debugging, code review, accessibility, reliability, handoff, or communication]?No pressure if now is not a good time.Good recommendations answer one of these questions:
- Can this person finish frontend work without constant hand-holding?
- Do they handle feedback and bugs well?
- Can they explain tradeoffs clearly?
- Did they improve a flow, component, or team process?
- Would someone choose to work with them again?
Make LinkedIn match your resume, portfolio, and GitHub
Your resume, portfolio, GitHub, and LinkedIn should tell the same story at different levels of detail.
Item to compare What should match Target role Same frontend lane across headline, resume summary, and portfolio Project names Same names, links, and descriptions Dates and titles Same employment timeline and role wording Skills Skills on LinkedIn should appear in projects or work bullets Strongest claim If the resume says accessibility, the profile should show the evidence Contact path Portfolio, resume, GitHub, and LinkedIn should not send people in loops If your frontend developer portfolio shows product UI projects but LinkedIn talks mostly about certificates, the reviewer gets a weaker story. If your frontend developer GitHub profile has excellent READMEs but LinkedIn does not feature them, the best proof is buried.
Use activity as proof, not performance
Posting on LinkedIn can help, but you do not need to become a daily creator to have a good frontend profile. Use activity when it adds proof.
Good frontend activity:
- A short post explaining a project decision.
- A screenshot with what changed and why.
- A note about debugging an accessibility, performance, or API-state issue.
- A thoughtful comment on a company engineering post.
- A project update that links to a live demo or README.
Weak activity:
- Generic motivational posts that do not connect to your work.
- AI-sounding career lessons copied from everyone else.
- Public complaints about hiring, companies, or interviewers.
- Daily posts that bury the actual portfolio and GitHub links.
The profile should still work when someone ignores your feed. Activity is extra evidence, not the foundation.
Fix the public details reviewers actually use
LinkedIn lets you customize your public profile URL. Use a clean URL if available, then make the rest of the public details easy to trust.
Check these details:
Detail Good version Problem version Public URL linkedin.com/in/first-lastor a close professional formRandom numbers when a clean URL is available Location Current city, region, or remote preference Stale location that does not match job search Contact info Portfolio, GitHub, email, or contact page No way to continue the conversation Open to work setting Matches the role and location you actually want Broad settings that invite irrelevant roles Profile photo Clear, current, professional enough for hiring context Cropped group photo or no photo Banner Simple and non-distracting Fake code, unreadable text, or visual clutter Then view the profile while logged out or in a private window. This catches broken links, hidden sections, stale banners, and visibility settings that you miss while editing.
Tune the profile by career level
The same profile sections can support different levels, but the proof should change.
Level What matters most Avoid Fresher Complete projects, working links, honest basics Claiming too many tools with no finished work Junior developer Finished flows, bug fixes, tests, UI-state handling Only visual clones or tutorial repos Mid-level Product constraints, API states, ownership, quality Vague responsibility bullets Senior engineer Scope, tradeoffs, migrations, mentoring, review work A profile that reads like a beginner project list Career switcher Transferable context plus current frontend proof Hiding the previous career or overclaiming level Freshers should make work inspectable. Senior engineers should make judgment inspectable. Both need proof; the difference is what kind of proof earns trust.
Run the 90-second profile test
Open your profile in a private browser window and set a timer for 90 seconds.
Answer these questions without clicking more than three links:
- What frontend role is this profile targeting?
- What is the best proof of the person's work?
- Can the proof be inspected quickly?
- Do LinkedIn, resume, portfolio, and GitHub tell the same story?
- Are any links broken, stale, private, or confusing?
- Is the profile honest about level?
- Is there an obvious contact path?
If the answer is unclear, fix the top section before editing lower sections.
Common LinkedIn profile mistakes for frontend developers
Mistake Why it hurts Better fix "Frontend developer" with no proof The reader has to guess what you can build Add Featured links to portfolio, GitHub, or a case study Every tool listed as a skill The strongest skill gets lost Keep skills tied to target roles and visible evidence Tutorial clones at the top Looks unfinished even if newer work is better Feature complete projects with demos and README notes About section written like a cover letter Too much story before proof Use a short proof map with selected links Experience copied from resume Misses the space LinkedIn gives for context Add frontend constraints, collaboration, and product impact Broken demo or old portfolio link Creates doubt fast Fix it or remove it until it works Activity feed louder than profile Hiring proof gets buried under posts Keep profile sections clean and use posts as extra proof Most profile improvements are subtraction: fewer weak claims, fewer stale links, fewer unrelated skills, and a clearer first click.
One-hour cleanup plan
Use this when the profile feels messy and you do not want to rebuild everything.
- Minutes 0-10: Pick one target frontend lane and write the exact role phrase you want recruiters to associate with you.
- Minutes 10-20: Rewrite the headline with role, stack, and proof.
- Minutes 20-30: Replace the About section with the proof-map structure.
- Minutes 30-40: Reorder Featured so the best portfolio, GitHub, project, or case study appears first.
- Minutes 40-50: Rewrite the top two experience bullets around behavior, constraint, and outcome.
- Minutes 50-60: Open the profile while logged out and click every visible proof link.
Stop there. One clean top section is better than a half-edited profile from top to bottom.
Profile proof worksheet
Use this worksheet before editing.
Question Your answer should include Weak answer to avoid What role should the profile target? One frontend lane and level Any frontend job What should a reviewer click first? The single strongest project, repo, portfolio page, or case study A long list of links What frontend skill is visible? Forms, API states, accessibility, performance, routing, testing, or component design Modern UI What stale item should be removed? Broken demo, abandoned tutorial, outdated title, or noisy pinned repo Nothing What should match the resume? Role target, project names, dates, links, and strongest claims Different stories on each platform What would an interviewer ask next? A question about the proof you just made visible I do not know - Frontend Developer Side Project Ideas to Build in 2026Choose frontend developer side projects with sharper ideas, buildable v1 scopes, proof states, review checklists, and optional structured-challenge extensions.标签作者GreatFrontEnd Team10 分钟阅读Jul 17, 2026
Frontend developer side project ideas are useful only when they become proof. A good side project is not a random app name. It is a small product workflow with a user, constraints, messy states, and decisions you can explain.
This guide gives you sharper project ideas and a way to scope them so the finished work is reviewable, not another half-built clone.
Use a better idea filter
The common mistake is choosing a familiar noun: dashboard, clone, weather app, tracker, e-commerce site. Those can be useful for practice, but the name does not tell a reviewer what you can do.
Before picking an idea, run it through this filter.
Question Good answer Weak answer Who is the user? A specific person doing a specific task "Everyone" What state changes? Status, filters, ownership, edits, history, permissions, files Static cards What can go wrong? Empty data, invalid input, slow API, expired session, conflict Happy path only What can be inspected? Live demo, README, state table, API shape, accessibility notes Screenshot gallery What makes it yours? A custom constraint, workflow, dataset, or tradeoff Same requirements as the tutorial Can v1 ship in about two weeks? One complete flow with proof states A platform with no finish line If an idea fails this test, do not throw it away immediately. Narrow it until the user, flow, and constraints are clear.
Side project ideas that are worth building
Most public project lists repeat calculators, weather apps, carts, dashboards, and clones. Those are fine learning exercises. For a side project you want to show, pick a workflow with decisions.
Project idea Build this v1 Add one constraint that makes it yours Best for proving Support triage inbox Ticket list, detail view, priority, assignee, status, saved replies, empty/error states Add keyboard shortcuts or optimistic updates with failed-save recovery Dense UI, async state, product judgment Job search command center Saved jobs, pipeline columns, follow-up reminders, contacts, notes, CSV import/export Add interview prep notes that change by company, role, or application stage Personal workflow, forms, filtering, persistence Appointment booking with time zones Service selection, availability grid, timezone display, guest details, confirmation flow Add reschedule/cancel states and explain how disabled times are calculated Dates, validation, multi-step state E-commerce returns portal Order lookup, eligible items, reason selection, refund estimate, shipping label step Add business rules for final sale, expired return windows, and partial returns Branching flows, unhappy paths, state modeling Subscription audit dashboard Manual entries, renewal calendar, cost summary, categories, reminders, mobile view Add price-change history or "cancel by" tasks with date-based urgency Data modeling, charts, dates, empty states Transaction review tool CSV upload, editable table, categories, split transaction, undo, spending summary Add rule suggestions and a review queue before categories are applied File handling, table UX, derived state, performance Feature flag admin console Flag list, environment switcher, rollout percentage, audit log, permission states Add guarded editing so risky changes require review or confirmation Internal tools, permissions, forms, state ownership Form builder with conditional logic Field editor, preview mode, required rules, conditional sections, validation summary Add a JSON schema view so reviewers can inspect the data model Nested state, accessibility, validation, component design Component behavior lab Modal, tabs, combobox, toast, field errors, usage examples, keyboard checklist Add a state matrix for focus, disabled, error, loading, and mobile behavior Design-system roles, component APIs, accessibility Design QA review board Screenshot upload, checklist, annotation pins, severity, breakpoint notes Add comparison notes for desktop, tablet, and mobile with one fixed-bug example Layout judgment, review process, communication Local-first research library Save links, notes, quotes, tags, reading status, local persistence, import/export Add offline recovery and a broken-link state Browser storage, search UX, data recovery AI answer review queue Prompt input, candidate answers, diff view, approve/reject, feedback tags, retry state Add confidence labels, source checks, and an audit history for rejected answers Human review UX, trust, error handling, decision history The best idea is not the biggest one. It is the one where you can explain the user, the constraint, the state model, the edge case, and the tradeoff without sounding like you followed a tutorial.
Pick the idea by the signal you need
Use the table below if you are choosing between several ideas.
If you want to prove... Choose one of these ideas Include evidence of... Product UI depth Support triage inbox, returns portal, booking flow Empty/error states, branching rules, mobile decisions Data-heavy frontend Transaction review tool, subscription dashboard, research library Sorting, filtering, import/export, derived state, performance Forms and validation Form builder, booking flow, feature flag console Validation rules, disabled states, review step, server error Accessibility Component behavior lab, form builder, support inbox Keyboard paths, labels, focus order, visible focus Internal tools Feature flag console, design QA board, transaction review tool Permissions, audit log, bulk actions, undo AI product thinking AI answer review queue Review workflow, trust signals, retry, rejection history Scope one project in three versions
Do not build the biggest version first. A complete v1 is more useful than a half-built platform.
Version Goal Example: support inbox project v1 Main user flow works List tickets, filter by status, open a ticket, change priority, handle no data v2 Quality becomes visible Keyboard shortcuts, optimistic status updates, loading/error states, mobile view v3 Advanced proof becomes clear Saved replies, assignment rules, activity history, before/after performance note Stop after v2 if the project already proves the skill you need. Add v3 only when it creates a better story for your target role.
Add proof states before adding features
Most weak side projects fail because every demo assumes good data, fast network, valid input, and a desktop screen. Add these states first.
State What to implement What it tells a reviewer Loading Skeleton, spinner, pending button, or optimistic row You understand async waiting Empty Useful empty copy and next action You can design recovery, not only success Error Retry path, inline field error, or failed-save message You know what happens when the API fails Invalid Validation, disabled submit, clear messages You can protect user input Unauthorized Signed-out, permission, or expired-session view You understand access boundaries Slow or large Debounce, pagination, virtualization, or measurement You can prevent obvious performance problems Mobile Usable layout, reachable controls, no clipped text You can build beyond desktop screenshots Keyboard focus Logical tab order, focus contained in modal dialogs, visible focus You can support non-mouse use For accessibility-heavy projects, compare your modal, tabs, menu, and combobox behavior against the WAI-ARIA Authoring Practices Guide. For performance-heavy projects, use web.dev's Web Vitals guide to pick measurable signals instead of vague claims.
Make the project easy to review
A reviewer should understand the project without cloning it first. GitHub's README guidance is a good baseline: explain what the project does, why it is useful, how to run it, and where to get help.
For a side project, use this shorter README shape:
Project nameLive demoWhat this project provesCore user flowData model or API shapeStates handledAccessibility checksPerformance note, if relevantTradeoff madeWhat I would improve nextDo not write a long essay. Write enough that another engineer can inspect your claim.
Use structured challenges as ingredients
You do not need a challenge platform to build a strong side project. You need a clear problem, constraints, a finished flow, and visible proof.
Structured challenges help when the blank page is slowing you down. A brief, design target, assets, or API contract can give you useful constraints. If you use GreatFrontEnd Projects challenges, treat them as ingredients for a larger idea, not as the whole project.
Good ways to use them:
- Start from Sign in / Sign up, then add account recovery, expired-session handling, and permission-aware routes for the feature flag console.
- Start from Product Listing Section, Shopping Cart Section, or Checkout Section, then build a returns portal with eligibility rules and refund states.
- Start from Modal Dialog Component, then document focus behavior and use it inside a component behavior lab.
- Start from Kanban Board, then adapt it into a job search command center or support triage inbox.
The rule is simple: if many people can build the same brief, your added constraint and explanation are what make the project yours.
Turn the project into interview material
Before adding a side project to your resume or portfolio, prepare the follow-up questions it will create.
Project type Interview question it should create Your answer should mention... Auth flow How did you handle invalid credentials and disabled submit? Validation, pending state, error copy, accessibility Product listing How are filters, sorting, pagination, and URL state related? Source state vs derived state, query params, empty states Kanban board Where does state live and how do card updates work? Normalized data, reorder logic, optimistic UI, undo boundaries Image uploader How did you validate files before upload? File type, size, preview, progress, failed upload recovery Modal or tabs How does keyboard navigation work? Focus order, escape key, labels, selected state Performance rewrite What changed after measurement? Baseline, tool used, bottleneck, before/after tradeoff If you cannot answer these, improve the project before adding another one.
Choose by your current level
Reader situation Best side project direction You are early in frontend Booking flow, support inbox, subscription dashboard You know React but lack depth Transaction review tool, feature flag console, form builder You have no experience Two complete projects with live links, READMEs, and proof states You are switching from backend Feature flag console, subscription audit dashboard, API-backed support inbox You are aiming for senior roles Component behavior lab, design QA board, performance-focused data tool The MDN Curriculum is a useful checklist for the base skills behind these projects: semantic HTML, CSS layout, JavaScript, accessibility, version control, performance, testing, and frameworks.
Two-week build plan
Use this when you want progress without turning the project into a forever build.
- Day 1: Pick one skill signal and one project idea.
- Day 2: Write the v1 user flow and the states you will support.
- Days 3-5: Build the main flow.
- Days 6-7: Add loading, empty, error, invalid, and mobile states.
- Days 8-9: Add one custom constraint: URL state, persistence, keyboard support, performance measurement, or retry logic.
- Day 10: Write the README and case-study note.
- Day 11: Deploy and test the link in a private browser window.
- Day 12: Rewrite the project bullet and prepare three interview answers.
- Days 13-14: Fix the weakest visible part instead of adding new scope.
Common questions
How many side projects do I need?
Two or three finished projects are enough for most early portfolios. Each one should prove a different skill. If two projects prove the same thing, improve one of them instead of adding both.
Are clone projects bad?
No. Clone projects are bad only when they copy the screenshots and skip the decisions. Change the data model, add failure states, write your own README, and explain one tradeoff.
Should I use the newest stack?
Use the stack that helps you finish and explain the project. A boring React or vanilla JavaScript project with good states is stronger than a trendy stack used only for the name.
What is the fastest way to improve an existing side project?
Open the live demo and add the first missing proof state: empty data, failed request, invalid form, mobile layout, keyboard focus, or a README tradeoff note.
Pick one side project, make it reviewable, and finish the uncomfortable states. That is where the value is.
- Frontend Project Ideas for Your Resume: What Actually Impresses (2026)Pick frontend project ideas for your resume with project scopes, resume bullet examples, interview follow-ups, and README proof checklists.标签作者GreatFrontEnd Team16 分钟阅读Jul 17, 2026
Frontend project ideas for your resume should help a reviewer answer one question: can this person build product UI beyond a tutorial? The best project creates a live demo, readable repo, clear README, and a bullet you can defend under follow-up.
Do not collect project names. Pick one hiring signal, build a small version, then add proof states: loading, empty, error, invalid, permission, slow network, keyboard, mobile, or performance. GitHub README docs are a useful baseline for making the repo reviewable. Pair this guide with Frontend Developer Portfolio when deciding which projects deserve case studies.
The best frontend resume project ideas
Use this table as a chooser. A good resume project is not impressive because the idea is unusual. It is impressive because the demo, repo, and README make one frontend skill visible.
Project idea Best for What it proves Resume bullet direction Job application tracker Freshers and juniors Forms, filters, local persistence, empty states Saved applications with URL filters, reminders, and mobile table layout API-backed product catalog Freshers and juniors Async data, search, sorting, pagination, retry states Catalog browsing with debounced search, category filters, and error recovery Booking or checkout flow Freshers, juniors, mid-level Multi-step state, validation, review flows Booking wizard with calendar state, validation, confirmation, and rollback Admin data table Juniors and mid-level Dense UI, derived state, permissions, responsive views Table with sorting, filtering, bulk actions, permissions, and mobile fallback Accessible component set Any level Semantics, keyboard behavior, focus management Modal, tabs, menu, and form errors documented with keyboard checks Design-system slice Juniors, mid-level, seniors Component API design, variants, docs, reuse Button, Input, Dialog, Tabs, and Toast components with states and examples Performance rewrite Mid-level and seniors Measurement, rendering cost, before/after reasoning Reduced list rendering cost with measurement notes and a documented tradeoff Offline reading list Freshers and juniors Storage, invalid data handling, sync thinking Saved articles locally with stale-data cleanup and offline-friendly states Analytics dashboard Juniors, mid-level, seniors Charts, loading states, filters, data modeling Dashboard with date filters, skeletons, empty states, and chart fallbacks Issue triage board Juniors, mid-level, seniors Drag/drop or workflow state, optimistic updates Workflow board with status transitions, optimistic UI, and conflict handling Choose and scope one project
Choose the project by the kind of proof missing from your resume. If every project says "built with React," the reviewer still has to guess whether you can handle product behavior.
If your resume needs proof of... Start with Add next First-role readiness Job tracker, product catalog, booking flow Live link, README, empty/error states, mobile layout Data-heavy frontend work Dashboard, admin table, search app URL filters, pagination, loading states, performance notes Accessibility Modal, tabs, menu, form validation Keyboard behavior, focus management, test notes Performance awareness Large-list rewrite, image gallery optimization Before/after measurement and a tradeoff note Senior scope Design-system slice, migration note, audit app Reuse constraints, API choices, ownership decisions Keep the scope versioned: v1 is the main flow, v2 adds visible quality states, and v3 adds the advanced signal such as tests, performance, optimistic UI, roles, or sync. A complete v1 with a clean README is better than a huge app that never reaches a live URL.
The rest of this article gives you project briefs you can use directly. Start with one, not all of them.
Use GFE Projects challenges for structure
If you want a real brief instead of a blank page, start from GreatFrontEnd Projects challenges. The challenges give you project-style constraints such as a brief, design target, API shape, or component behavior. Use them as the base layer, then add your own product decisions so the work becomes resume-ready.
For full app-shaped practice, use the GFE Projects Apps track. It is useful when you want a portfolio project that feels closer to product UI: feeds, media apps, AI chat, API-backed clients, and multi-screen flows.
Good ways to adapt them:
- Start from Product Listing Section, then add search, empty states, saved filters, and a detail page.
- Start from Shopping Cart Section or Checkout Section, then add unavailable inventory, validation, and order review.
- Start from Modal Dialog Component, then document focus behavior and use it inside an accessible component set.
- Start from Kanban Board, then adapt it into an issue triage board or job search tracker.
- Start from Sign in / Sign up, then add password reset, expired-session handling, and permission-aware routes.
- Start from Apps track challenges like Hacker News Client, Chat AI, Video Feed Page, or MeTube, then write a case-study note around API state, routing, loading behavior, error recovery, and responsive layout.
The resume value comes from the extra layer you add: README notes, edge states, tradeoffs, deployment, and the follow-up questions you can answer from your own code.
1. Job application tracker
A job tracker is one of the safest frontend project ideas for a fresher resume because it matches the reader's own workflow and creates practical product decisions.
Build saved applications with company, role, location, source, status, deadline, notes, and next action. The useful version is not a spreadsheet clone. It should help a user decide what to do next.
Scope What to build v1 Add, edit, delete, and filter applications by status v2 Persist data locally, keep filters in the URL, add empty and invalid states v3 Add reminders, CSV export, stale application warnings, and mobile table cards Resume bullet:
Built a job application tracker with URL filters, local persistence, editable status stages, empty states, and a responsive table/card layout.Interview follow-ups to prepare:
- Why did you store filters in the URL instead of component state only?
- Which state is stored, and which state is derived from the application list?
- How does the UI behave when no jobs match the current filter?
Practice slices on GreatFrontEnd: Contact Form for validation and Data Table for sorting and derived state.
2. API-backed product catalog
A product catalog proves async UI without forcing you to build a full backend. It is also easy for a reviewer to inspect because the flow is familiar: search, browse, filter, view detail, recover from failure.
Use a public API, a small mocked API, or local JSON served through your app. The important part is the frontend behavior around the data.
Scope What to build v1 Product list, category filter, search, detail view v2 Loading skeletons, empty states, retry button, pagination, responsive cards v3 Debounced search, stale-response guard, URL filters, saved items, test cases Resume bullet:
Built an API-backed product catalog with debounced search, category filters, pagination, loading and error states, stale-response handling, and responsive card/table views.Interview follow-ups to prepare:
- How did you prevent older search responses from replacing newer results?
- What belongs in the URL, and what should stay in local component state?
- How would you change the UI for thousands of products?
Practice slices on GreatFrontEnd: Autocomplete for async search depth and Data Table for derived views.
3. Booking or checkout flow
Booking and checkout flows are good resume projects because they force state transitions. The reviewer can see whether you handle invalid input, review steps, disabled actions, and failed submissions.
Pick one domain: appointment booking, event registration, course checkout, rental reservation, or mock e-commerce checkout.
Scope What to build v1 Multi-step form with user details, item selection, review, and confirmation v2 Field validation, disabled submit, edit-from-review, error recovery v3 Optimistic or pending state, unavailable inventory, persisted draft Resume bullet:
Built a booking flow with multi-step state, form validation, review/edit behavior, unavailable-slot handling, and a confirmation state.Interview follow-ups to prepare:
- How did you model the steps and prevent invalid transitions?
- What happens if availability changes before the user submits?
- How would you avoid losing the user's work on refresh?
Practice slice on GreatFrontEnd: Contact Form for validation discipline.
4. Admin data table
An admin table is better than another landing page because it shows how you handle dense information. It can be a user management table, inventory table, invoice table, support ticket table, or content moderation queue.
The point is not visual complexity. The point is whether the table remains usable when filters, columns, permissions, and mobile layout collide.
Scope What to build v1 Rows, columns, sorting, filtering, pagination v2 Empty states, loading state, column visibility, row detail, mobile card layout v3 Bulk actions, role-based disabled actions, optimistic update, audit note Resume bullet:
Built an admin table with sortable columns, filters, pagination, bulk actions, permission-aware controls, and a mobile card fallback.Interview follow-ups to prepare:
- How did you separate source data from sorted and filtered rows?
- What happens when a user tries an action they are not allowed to perform?
- How would you render 10,000 rows without slowing the page?
Practice slice on GreatFrontEnd: Data Table.
5. Accessible component set
Accessibility projects are valuable because many portfolios claim accessibility while showing only color contrast or alt text. A better project proves interaction behavior: keyboard navigation, focus management, labels, errors, and screen-reader-friendly structure.
Build a small component set: modal dialog, tabs, menu, form field, toast, and combobox or autocomplete if you want a harder version. Use semantic HTML first, and use the WAI-ARIA Authoring Practices Guide when native semantics do not cover the interaction.
Scope What to build v1 Modal, tabs, and form field with labels and errors v2 Keyboard behavior, focus return, escape handling, visible focus v3 Docs page with usage notes, disabled/error states, and test checklist Resume bullet:
Created an accessible component set with modal, tabs, menu, and form errors, documenting keyboard behavior, focus management, and disabled states.Interview follow-ups to prepare:
- Where should focus move when a modal opens and closes?
- What is the difference between selected, active, disabled, and hidden states?
- Which checks did you run manually?
Practice slices on GreatFrontEnd: Tabs and Modal Dialog.
6. Design-system slice
A design-system slice is useful when you want to show component API thinking. Keep it small. A good Button, Input, Dialog, Tabs, and Toast set tells a reviewer more than 30 inconsistent components.
The resume signal is not "I used Tailwind" or "I used Storybook." The signal is that your components have clear props, variants, states, docs, and examples.
Scope What to build v1 Button, Input, Dialog, Tabs, Toast with default styles v2 Variants, disabled/loading/error states, composition examples v3 Docs page, accessibility notes, visual regression or component test notes Resume bullet:
Built a design-system slice with Button, Input, Dialog, Tabs, and Toast components, including variant APIs, disabled/error states, usage docs, and accessibility notes.Interview follow-ups to prepare:
- How did you decide between component props and composition?
- Which states are supported by each component?
- What would break if another developer reused these components in a new flow?
7. Performance rewrite case study
A performance project is strongest when it starts with a slow UI and ends with measured improvement. Do not claim the app is faster because it feels faster. Record the before state, change one bottleneck, then explain the result.
Good options: a large product list, image gallery, dashboard, chat transcript, or table with expensive row rendering.
Scope What to build v1 A deliberately heavy list, gallery, or dashboard with visible slow interaction v2 Measurement notes, memoization or render split, image sizing, code splitting v3 Virtualized rows, before/after screenshots, tradeoff note, repeatable test script Resume bullet:
Measured and reduced slow interaction in a large product list by splitting expensive row rendering, deferring non-critical UI, and documenting before/after results.Interview follow-ups to prepare:
- What did you measure before changing the code?
- Which change helped most, and what tradeoff did it introduce?
- How would you know the optimization did not hurt accessibility or correctness?
For browser performance concepts, web.dev performance guidance is a useful reference while you write your README note.
8. Offline reading list
An offline reading list is a small project with surprisingly good depth. It proves local storage, data validation, stale data handling, empty states, and sync thinking without requiring a complex server.
Build saved articles or resources with title, URL, tags, read/unread state, notes, and last-updated time.
Scope What to build v1 Add, edit, delete, tag, search, and mark items as read v2 Local persistence, invalid URL messages, empty state, import/export v3 Offline indicator, stale data cleanup, conflict note for future sync Resume bullet:
Built an offline reading list with local persistence, tag filtering, import/export, invalid data cleanup, and empty states for saved resources.Interview follow-ups to prepare:
- How do you validate stored data before rendering it?
- What happens if the local data shape changes after a deploy?
- How would you add server sync later?
9. Analytics dashboard
A dashboard proves data modeling and UI judgment if it does more than render charts. The useful version handles dates, filters, empty data, loading, slow requests, and chart fallbacks.
Pick a domain with understandable metrics: job applications, expenses, habits, content performance, study progress, or support tickets.
Scope What to build v1 Summary cards, table, chart, date range filter v2 Loading skeletons, empty states, invalid date ranges, responsive chart layout v3 Saved filters, comparison period, export, metric definition notes Resume bullet:
Built an analytics dashboard with date filters, metric cards, chart fallbacks, empty states, responsive layouts, and documented metric definitions.Interview follow-ups to prepare:
- How did you define each metric?
- What happens when a date range has no data?
- How would you prevent a chart from misleading the user?
10. Issue triage board
An issue triage board is useful if you want to prove workflow UI: status transitions, drag/drop or move actions, optimistic updates, permissions, and conflict handling.
Build a board for bugs, support tickets, content review, job applications, or study tasks. The domain matters less than the state transitions.
Scope What to build v1 Columns, cards, create/edit issue, move issue between statuses v2 Filters, assignee, priority, optimistic move state, undo v3 Permission-aware actions, conflict message, audit trail, keyboard movement Resume bullet:
Built an issue triage board with status transitions, filters, optimistic move actions, undo, permission-aware controls, and conflict handling.Interview follow-ups to prepare:
- Which transitions are allowed, and where are they enforced?
- How does the UI recover if an optimistic move fails?
- How would keyboard users move cards between columns?
Upgrade a clone into a resume project
Clones can teach layout, but clone-only projects rarely create good resume bullets. Upgrade the clone by changing the data model, adding failure states, and documenting decisions.
Clone starter Weak version Resume-ready upgrade Netflix clone Static movie cards Search, filters, empty states, saved list, keyboard navigation Spotify clone Static player UI Playlist editing, queue state, disabled controls, persisted preferences Amazon clone Product grid and cart only Unavailable inventory, checkout validation, currency formatting, cart sync Dashboard template Hardcoded cards and charts Date filters, metric definitions, loading, empty data, chart fallbacks Portfolio template Pretty homepage with no repo Case studies, README links, tradeoff notes, live demos Use this sequence before adding the project to your resume:
- Write the target role or hiring signal at the top of the README.
- List the proof visible through the live link.
- Find the weakest part: missing state, vague bullet, broken link, unclear level, or no README.
- Fix that one part before adding new features.
- Write the interview question your project will create and answer it in plain language.
Turn the project into resume proof
Every serious project needs a live URL, GitHub repo, README, and one or two bullets that describe behavior rather than tools. A reviewer should understand the project without a private explanation.
Proof item What good looks like Live demo Opens without login, has sample data, and works on mobile README Explains problem, features, setup, decisions, limitations Screenshots Shows main flow plus one empty, error, or mobile state Code structure Has clear component, state, data, and utility boundaries Tradeoff note Explains one decision you would defend in an interview Resume bullet Names the flow, behavior, constraint, and technical decision Follow-up notes Answers two or three questions an interviewer is likely to ask Weak: Built product catalog using React.Better: Built an API-backed product catalog with debounced search, URL filters, pagination, retry states, and responsive card/table views.Weak: Made a dashboard.Better: Built an analytics dashboard with date-range filters, metric definitions, loading skeletons, empty states, and chart fallbacks for missing data.Weak: Created reusable components.Better: Built Button, Input, Dialog, Tabs, and Toast components with variant APIs, disabled/error states, keyboard behavior notes, and usage examples.Use this shape: built
[flow]for[user task], handling[state or constraint], with[technical decision].Seven-day build plan
Use this plan to finish one project instead of browsing lists forever.
- Day 1: Pick one hiring signal and write the resume bullet before coding.
- Day 2: Build the v1 flow with sample data, a rough layout, or a GFE Projects challenge brief.
- Day 3: Add the first quality state: loading, empty, error, invalid, or mobile.
- Day 4: Add one technical decision worth explaining: URL state, derived state, stale-response guard, keyboard behavior, or local persistence.
- Day 5: Write the README with setup, screenshots, decisions, limitations, and follow-up questions.
- Day 6: Deploy the demo, open it in a private window, and test the link on mobile.
- Day 7: Rewrite the resume bullet and prepare three interview answers from your own code.
Common questions
How many projects should I put on a frontend resume?
One strong project is better than four weak ones. Freshers can usually list two or three projects if each has a live link, readable repo, and clear bullet. Experienced engineers should be more selective and use projects only when they add proof that work experience does not show.
Should I use React, Next.js, Vue, or plain JavaScript?
Use the stack that matches the role you want, but do not let the stack become the whole story. A React job tracker with thoughtful state and error handling is better than a Next.js app that only proves routing and styling.
Are clones bad for resumes?
Clones are fine for practice. They become weak resume projects when they copy the layout without adding product behavior. Upgrade a clone with custom data, failure states, accessibility checks, mobile behavior, and a README that explains your decisions.
- How to Write a Frontend Developer Resume That Gets Shortlisted (2026)Write a frontend developer resume with proof-led bullets, frontend role positioning, project evidence, skill mapping, ATS-safe formatting, and a reviewer checklist.标签作者GreatFrontEnd Team13 分钟阅读Jul 16, 2026
A good frontend developer resume does not prove that you know React, CSS, or TypeScript. It proves that someone can trust you with the next frontend problem: a product flow, a component system, a data-heavy screen, a performance issue, an accessibility gap, or a messy migration.
That is the difference between a generic software resume and a strong frontend resume. Generic advice says "quantify impact" and "use action verbs." Useful frontend advice asks: what UI behavior did you ship, what state did it handle, what broke before, what tradeoff did you make, and what can a reviewer verify?
Use this guide with Frontend Developer Portfolio, Frontend Project Ideas for Your Resume, and the Front End Interview Playbook resume chapter. This article focuses on the resume itself.
The shortlisting test
Most frontend resumes are scanned in two passes. The first pass asks whether the resume is relevant enough to keep reading. The second asks whether the claims are believable enough for an interview.
Reviewer question Frontend evidence that answers it What kind of frontend work is this? Product UI, design systems, dashboards, accessibility, performance, platform, or early-career UI Can this person build real screens? Forms, async data, routing, loading, empty, error, permission, and responsive states Can they work with product reality? User flows, design collaboration, backend contracts, analytics, release notes, or support feedback Can they make sound tradeoffs? State ownership, component boundaries, browser constraints, performance choices, rollback plans Can I verify the claim? Live demo, GitHub, portfolio case study, shipped feature, metric, review artifact, or README Public role definitions back this up. The U.S. Bureau of Labor Statistics profile for web developers and digital designers includes site layout, integrated applications, usability, compatibility, performance, and collaboration with designers and other developers. O*NET's web and digital interface designer profile also names browser and device testing, accessibility standards, user research, documentation, and web architecture choices. These are broad US occupational profiles rather than a checklist for every frontend opening, but they show why a resume needs more than a stack list.
Start with a proof inventory
Do this before rewriting bullets. Open a note and collect raw proof from your work and projects.
Proof source What to look for Resume use Shipped features Screens, flows, states, release scope, user groups, bug reports Experience bullets Project repos README, setup, screenshots, tradeoffs, tests, deployment, open issues Project bullets and links Pull requests or RFCs Decisions, review comments, migration plan, compatibility notes Seniority, collaboration, architecture evidence Performance work LCP, INP, CLS, bundle size, render cost, API latency, profiling notes Performance bullets Accessibility work Labels, focus management, keyboard behavior, error announcements, APG patterns Accessibility bullets Design-system or UI library Component APIs, variants, docs, adoption, migrations, usage examples Design-system bullets Testing and quality Unit tests, component tests, visual checks, regression fixes, manual test matrix Reliability bullets GFE projects or challenges Component behavior, edge cases, constraints, interview follow-ups Early-career project proof GitHub's README guidance says a README should explain what a project does, why it is useful, and how to get started. For hiring, add what GitHub's baseline does not require: screenshots, handled states, tradeoffs, test notes, and known limitations.
Choose a frontend lane
Your resume gets stronger when it is aimed at a role lane. You can still apply broadly, but the top third of the page should not sound identical for every job.
Target lane Lead with De-emphasize Product frontend engineer Product flows, forms, API state, routing, user-facing quality Decorative UI without product behavior React or TypeScript engineer Component boundaries, typed data, state ownership, async behavior A raw list of hooks and packages Dashboard or internal tools Tables, filters, permissions, pagination, bulk actions, dense UI Landing pages and static cards Design systems Component APIs, tokens, docs, accessibility, adoption, migration support Random components with no usage story Performance-focused frontend Measurement, bottleneck, fix, tradeoff, field or lab verification "Optimized website" with no metric or diagnosis Accessibility-focused UI Semantics, keyboard support, focus recovery, accessible names, test notes Color contrast only Frontend platform Build tooling, shared patterns, test reliability, migration paths Individual feature screenshots only Fresher or junior Finished projects, live links, GitHub, fundamentals, debugging discipline Dozens of tools with no inspectable project If you are early-career, read Frontend Developer Resume for Freshers after this. If you are 5+ years in, read Senior Frontend Developer Resume for the senior version.
Pick the right section order
There is no universal frontend resume structure. Use the order that puts the strongest proof first.
Profile Strong section order Fresher Header, headline, skills, projects, education, extras Junior with internships Header, headline, experience, projects, skills, education 2-4 years Header, summary, experience, selected projects, skills, education Career switcher Header, summary, frontend projects, transferable experience, skills, education Senior Header, senior summary, experience, selected impact, skills, education Design-system or platform track Header, summary, relevant experience, systems/platform work, skills, talks/docs if useful Harvard's resume guide is a useful generic baseline: resume language should be specific, active, fact-based, quantified when possible, and written for people or systems that scan quickly. For frontend resumes, "fact-based" means naming the actual interface behavior and the constraint behind it.
Use a frontend bullet formula
Weak bullets describe tasks. Strong bullets describe shipped behavior and why the work mattered.
Shipped [user-facing behavior or system change] for [user/product/context]by [technical decision], handling [state/constraint/risk],resulting in [measured or observable outcome].You do not need every part in every bullet, but every important bullet should contain at least three of these:
- Behavior: the user or developer action that changed.
- Scope: page, flow, component, team, repo, user group, or data size.
- Constraint: async data, permissions, accessibility, browser/device, deadline, migration, latency, design parity.
- Decision: state model, component API, caching, validation, rendering, testing, rollout.
- Outcome: metric, adoption, fewer bugs, clearer workflow, faster review, released feature, or verified behavior.
Rewrite bullets around frontend evidence
Generic bullet Stronger frontend bullet Built dashboard using React Built a React operations dashboard with URL filters, paginated API data, row actions, loading states, and retry handling Worked on performance Reduced product-page LCP by prioritizing the hero image, removing unused client JavaScript, and verifying the change in tools Made forms Built checkout forms with field validation, disabled submit states, server error recovery, and mobile review step Created reusable components Designed typed Input and Dialog APIs with error, disabled, loading, focus-return, and usage examples for three product areas Fixed search bugs Fixed stale search results by adding request cancellation and response ordering guards around async queries Made website responsive Reworked table and action-bar layout so filters, row actions, and empty states remained usable on narrow screens Improved accessibility Added labels, keyboard navigation, focus recovery, and error announcements to account settings dialogs Wrote tests Added component tests for invalid form states, API error recovery, and permission-disabled actions The React docs' Thinking in React guide is a good mental model for bullet depth: component hierarchy, visual states, one-way data flow, minimal state, and where state should live. A frontend bullet that mentions those ideas through real work is more convincing than "used React hooks."
If you do not have business metrics
Do not invent numbers. Frontend work often has valuable evidence even when conversion, revenue, or traffic metrics are private or unavailable.
Instead of fake impact Use defensible evidence "Increased revenue by X%" "Released checkout review step with validation, server error recovery, and analytics" "Improved performance greatly" "Reduced blocking render work after profiling a slow 500-row table" "Enhanced UX" "Moved filters into the URL so users could share and restore exact table views" "Made app more accessible" "Documented modal focus behavior and added keyboard checks to the release checklist" "Led frontend architecture" "Split server state, URL state, and local UI state during dashboard refactor" "Improved code quality" "Removed duplicated validation logic from four forms and added shared test cases" Good non-business metrics include:
- Number of screens, flows, components, or product areas affected.
- Number of states handled: loading, empty, error, retry, invalid, disabled, permission, offline.
- Before/after technical signals: bundle size, render time, LCP, INP, CLS, test flake rate, bug count.
- Adoption signals: used by N teams, migrated N forms, documented N components, replaced N duplicate patterns.
- Review signals: RFC accepted, checklist adopted, README improved, design QA passed, support issue closed.
For performance claims, use current web language. Google's Core Web Vitals are LCP for loading, INP for interactivity, and CLS for visual stability, with recommended thresholds of 2.5 seconds, 200 milliseconds, and 0.1 respectively at the 75th percentile. If you cannot measure those, name what you did measure, such as render cost, bundle size, or lab tooling.
Make the skills section prove fit
Skills should be scannable, truthful, and connected to bullets. A long tool dump creates interview risk.
Frontend: JavaScript, TypeScript, React, Next.js, HTML, CSSUI behavior: forms, routing, async data, responsive layouts, accessibility basicsTesting: React Testing Library, Playwright, VitestTooling: Git, npm/pnpm, Vite, Chrome DevToolsDesign collaboration: Figma, component specs, design QAUse these rules:
- Put the most role-relevant skills first.
- Group skills by use, not by hype.
- Do not list tools you cannot explain under follow-up.
- If a skill matters to the job, make sure a bullet proves it.
- Keep soft skills out of the skills section unless the resume shows evidence elsewhere.
For example, "Accessibility" in the skills section should connect to bullets about labels, keyboard behavior, focus management, error messages, semantic structure, or WAI-ARIA Authoring Practices Guide patterns.
Make projects inspectable
For freshers, juniors, career switchers, and candidates with private work, projects can carry the resume. A project is resume-worthy when it creates interview questions you can answer.
Project type Resume-worthy proof Product catalog Search, filters, pagination, loading/empty/error states, stale-response handling Job tracker Forms, URL filters, local persistence, edit/delete flow, mobile table/cards Checkout or booking flow Multi-step state, validation, review/edit step, unavailable item handling, failed submit Admin table Sorting, filtering, bulk actions, permissions, row detail, responsive fallback Component set Button, Input, Dialog, Tabs, Toast with states, keyboard notes, and usage examples Performance case study Baseline, bottleneck, change, measurement, tradeoff, result Accessibility slice Native semantics where possible, ARIA only where needed, keyboard support, focus behavior Do not list five tiny projects when two complete projects would be stronger. A live demo, GitHub repo, and README with setup, screenshots, tradeoffs, and limitations are more valuable than another project card.
Handle ATS without superstition
Applicant tracking systems are a reason to write clearly, not a reason to keyword-stuff.
Use this practical checklist:
- Use a simple single-column layout for application uploads.
- Keep headings conventional: Experience, Projects, Skills, Education.
- Use the exact role language when it is truthful: React, TypeScript, accessibility, design systems, performance, testing.
- Avoid skill bars, icons-only contact links, text hidden in images, and dense sidebars.
- Export to PDF only after checking that text can be selected and copied.
- Keep a plain-text version to test whether the resume still makes sense without styling.
The resume still needs to read well to humans. A keyword match may get the resume opened; evidence gets it kept.
Tailor by moving proof, not sprinkling words
Tailoring should take 15-30 minutes, not a full rewrite from scratch.
- Paste the job description into a note.
- Highlight repeated frontend needs: framework, TypeScript, design systems, dashboards, accessibility, testing, performance, product ownership.
- Choose the closest resume lane.
- Move the best matching role, project, or bullet into the first half of the resume.
- Rewrite the first three bullets to mirror the role's real work.
- Remove skills that are not supported by experience or projects.
- Open every link before sending.
Example:
Job asks for Move up Rewrite around React, TypeScript, dashboards Data-table or internal-tool work URL filters, typed rows, async states, permissions Design-system engineer Shared component work component API, accessibility, docs, migration, adoption Performance-focused frontend Slow page, table, image, or bundle work metric, bottleneck, fix, tradeoff, verification Early-career frontend with GitHub Best complete project live demo, README, edge states, responsive behavior Product frontend with forms Checkout, signup, settings, booking, onboarding, or support workflow validation, error recovery, disabled states, server integration Use a one-page resume template
For most early and mid-level frontend roles, one page is enough. Use two pages only when the second page adds real proof.
NameCity | email | phone | GitHub | LinkedIn | PortfolioFrontend engineer focused on [lane] with experience building [strongest proof],including [state/data/accessibility/performance/testing signal].SkillsFrontend: JavaScript, TypeScript, React, Next.js, HTML, CSSUI: forms, async data, routing, responsive layouts, accessibilityTesting/tooling: Playwright, Vitest, React Testing Library, Git, Chrome DevToolsExperienceCompany, Frontend Developer, Month Year - Present- Shipped [flow/screen] with [UI behavior], handling [constraint] and improving [result].- Reworked [state/data/component/performance area] by [decision], reducing [risk/friction].- Collaborated with [design/backend/QA/product] to [release/test/migrate/document] [scope].ProjectsProject Name | Live | GitHub- Built [project] with [states], [routing/data/forms], and [responsive/accessibility/testing proof].- Documented [setup/tradeoff/limitation] so reviewers can inspect the project quickly.EducationDegree, school, yearRun the frontend resume audit
Before sending, read the resume as if you have one minute and no context.
- Can the reviewer identify the target frontend lane from the top third?
- Do the first three bullets show real UI behavior, not only tools?
- Are React, TypeScript, CSS, accessibility, performance, and testing claims backed by examples?
- Does each project have a working live link, GitHub link, or portfolio case study?
- Are private company details anonymized without making the bullet vague?
- Would you be comfortable explaining every listed tool in an interview?
- Does the resume still read correctly when copied into plain text?
- Did you remove anything that creates doubt but adds no proof?
What to remove
Cut lines that make the resume look bigger but weaker:
- Generic objective statements.
- Skill bars and self-ratings.
- Tool lists copied from tutorials.
- "Hardworking," "passionate," and "team player" without evidence.
- Old school achievements that crowd out frontend proof.
- Screenshots instead of live links or project notes.
- Claims like "expert" when the bullets show only beginner use.
- Metrics you cannot explain or are not allowed to share.
Space is expensive. Spend it on proof that you can build, debug, explain, and ship interfaces.
Rewrite one section today
If the whole resume feels overwhelming, do only this:
- Pick one target frontend lane.
- Rewrite the headline for that lane.
- Move the strongest matching role or project into the top half.
- Rewrite one weak bullet using behavior, constraint, decision, and outcome.
- Open the related live link or repo and fix the README if it does not support the claim.
That single improvement often changes how the whole resume reads. A shortlisted frontend resume is specific, inspectable, and honest. It tells the reviewer what you built, what made it non-trivial, and why you can be trusted with the next frontend problem.
- Senior Frontend Developer Resume: What to Emphasize at 5+ Years (2026)Write a senior frontend developer resume that proves architecture scope, product judgment, performance, accessibility, design-system work, mentoring, and delivery risk ownership.标签作者GreatFrontEnd Team12 分钟阅读Jul 16, 2026

A senior frontend developer resume should make your level obvious without forcing the reader to count years. At 5+ years, the question is no longer "Can this person build React screens?" It is "Can this person own frontend problems with ambiguity, tradeoffs, other teams, production risk, and long-term maintainability?"
That means a senior resume needs different evidence from a junior or mid-level resume. It should show scope, judgment, risk reduction, technical direction, product context, and influence through other people or shared systems.
If you need the all-level version first, read How to Write a Frontend Developer Resume. This article is specifically for senior frontend engineers, senior UI engineers, frontend platform engineers, design-system engineers, and senior product engineers whose work touches the frontend deeply.
What changes at senior level
The senior resume is not a longer mid-level resume. The strongest bullets shift from implementation output to ownership quality.
Mid-level signal Senior signal Built a feature Owned a product flow, migration, system, or quality bar Used React and TypeScript Chose component, state, routing, and API boundaries under constraints Fixed bugs Reduced a recurring class of regressions Improved performance Diagnosed bottlenecks, chose tradeoffs, measured impact, prevented regression Collaborated with design and backend Aligned design, backend, product, QA, and support before release Mentored juniors Created review habits, docs, pairing patterns, or migration guides Created reusable components Drove adoption of a component API across product areas Worked on accessibility Established keyboard, semantics, focus, and release checks for risky flows The U.S. Bureau of Labor Statistics software developer profile describes software developers as people who analyze users' needs, design software, ensure software functions through maintenance and testing, document systems, and work on teams. For senior frontend developers, your resume should show those responsibilities through browser-facing systems: UI architecture, interaction quality, performance, accessibility, and release safety.
Choose your senior frontend lane
Senior frontend roles are not interchangeable. A resume for a design-system role should not lead with the same proof as a resume for a product UI or frontend platform role.
Senior lane Lead with Weak lead Senior product frontend End-to-end flows, product tradeoffs, async state, release coordination Component snippets with no product context Design-system engineer Component APIs, accessibility, tokens, docs, migration, adoption A gallery of unrelated components Frontend platform engineer Build tooling, test reliability, shared patterns, migration paths Individual UI features only Performance-focused frontend LCP, INP, CLS, profiling, bundle strategy, render cost, monitoring "Optimized app" without diagnosis or verification Accessibility-focused frontend Semantics, keyboard support, focus recovery, accessible names, review gates Color contrast only Staff-leaning frontend engineer Cross-team architecture, standards, technical strategy, incident prevention One-team delivery with no wider influence Senior full-stack with frontend Frontend ownership plus API contracts, data modeling, observability, release Backend-heavy bullets with frontend reduced to "built UI" Your summary should name the lane and the proof.
Weak senior summary Stronger senior summary Senior frontend developer with 7 years of experience Senior frontend engineer owning React product flows, typed component APIs, and performance work for data-heavy dashboards React and TypeScript developer with leadership skills Senior UI engineer leading checkout and account flows across design, backend, QA, and release coordination Experienced frontend developer focused on clean code Frontend platform engineer reducing duplicated app patterns through shared state, testing, and migration tooling Senior developer with design-system experience Design-system engineer driving accessible component APIs, documentation, and adoption across product squads Use a senior bullet formula
Senior bullets should show what changed because you owned the problem.
Owned [scope] under [constraint/risk],chose [technical/product direction],and produced [measured or observable result].Or, for leadership and influence:
Created [artifact/system/review habit] that helped [team/users]make [decision/action] more reliably across [scope].Good senior bullets usually include:
- Scope: product area, flow, system, team count, component set, migration size, user segment.
- Constraint: compatibility, performance, accessibility, deadlines, legacy code, API changes, risk of regression.
- Decision: architecture, state model, component API, rollout, testing approach, monitoring, documentation.
- Result: adoption, fewer regressions, faster release, lower render cost, better conversion, clearer ownership, reduced support.
Senior bullet examples
Weak bullet Stronger senior bullet Led frontend development Led checkout settings refactor across web, design, backend, and QA, preserving URL contracts while replacing duplicated form state Worked on app architecture Split dashboard state into URL filters, server data, and local UI state so users could share views and refresh without losing context Improved performance Reduced slow table interactions by profiling render cost, virtualizing long lists, and moving expensive derived data behind memoized inputs Built design system Owned Dialog, FormField, and Toast APIs with focus behavior, error states, docs, and migration examples used by three product teams Mentored developers Turned repeated review feedback on forms, loading states, and accessibility into a checklist used during frontend code review Improved accessibility Standardized modal focus return, keyboard escape behavior, accessible labels, and error announcements after regressions in account flows Reduced bugs Removed a class of stale async-result bugs by introducing request cancellation and response-ordering guards for search and filtering screens Coordinated migration Migrated shared table actions behind a compatibility wrapper, enabling gradual adoption without blocking active feature work Notice what these bullets do: they show judgment. They name the problem shape, the technical decision, and the operational result.
Show architecture without writing a design doc
A senior resume should not explain your whole system. It should expose the decisions an interviewer will want to discuss.
Useful architecture proof includes:
Architecture area Resume evidence State ownership URL state, server state, local UI state, derived state, optimistic state, persisted draft state Data contracts API versioning, typed responses, pagination, stale responses, partial failures, permission boundaries Component APIs controlled/uncontrolled behavior, composition, variants, accessibility, adoption constraints Routing shareable filters, deep links, auth redirects, route ownership, backward compatibility Migration strategy compatibility wrapper, staged rollout, codemod, review checklist, deprecation plan Quality gates component tests, visual checks, accessibility checks, monitoring, rollback plan Design collaboration design tokens, Figma parity, component specs, release QA, edge-state review React's official Thinking in React guide frames UI work around component hierarchy, visual states, data flow, minimal state, and state location. Senior bullets should show how you applied those ideas under production constraints instead of repeating them as theory.
Make performance claims credible
"Improved performance" is one of the easiest senior claims to weaken. A credible performance bullet names the user pain, the measurement, the bottleneck, the fix, and the tradeoff.
Use current web performance language:
Performance claim type Strong evidence Loading LCP, image priority, font loading, render-blocking resources, server response, route-level bundles Interactivity INP, long tasks, expensive renders, unnecessary re-renders, input delay, hydration cost Visual stability CLS, reserved image dimensions, ad/embed shifts, skeleton layout, async content placement Runtime UI table virtualization, memoized derived data, debounced search, worker offload, chart rendering Monitoring field data, real-user monitoring, alerting, dashboards, regression checks Google's Core Web Vitals currently focus on LCP, INP, and CLS. If you mention those metrics, be prepared to explain whether you used lab tools, field data, or both. If the metric is private, anonymize the number or describe the verified direction without leaking confidential details.
Weak:
Improved dashboard performance.Strong:
Reduced slow dashboard interactions by profiling long render paths, virtualizing 1,000+ row tables, and moving expensive derived filters out of keystroke updates.Even without a public metric, the second bullet creates a real interview path.
Make accessibility senior-level
Accessibility is not a decoration line. At senior level, it should show interaction ownership.
The WAI-ARIA Authoring Practices Guide emphasizes accessible semantics, common widget patterns, functional examples, keyboard support, and accessible names. Translate that into resume evidence:
Accessibility area Resume evidence Forms labels, instructions, validation, error identification, error announcement Modal dialogs initial focus, Tab contained within the dialog, focus return, escape behavior, accessible name Tabs and menus keyboard navigation, selected/active/disabled states, semantics Async UI loading announcements, status messages, retry paths, preserved focus Design system accessible defaults, usage docs, review checks, examples, testing notes Release process keyboard QA checklist, screen reader smoke checks, regression notes Weak:
Improved accessibility across the app.Strong:
Standardized dialog and form accessibility across account flows, documenting focus return, keyboard escape behavior, labels, error messages, and release checks.Prove design-system work through adoption
Senior design-system work is not "built buttons." It is API design, quality, migration, and adoption.
Design-system proof Strong resume detail Component API controlled props, composition model, variants, disabled/loading/error states Accessibility keyboard behavior, focus management, semantic defaults, labelled examples Documentation usage guidance, do/don't examples, migration notes, design token mapping Adoption teams or product areas migrated, duplicate patterns removed, compatibility support Governance review checklist, contribution model, release notes, versioning, deprecation process Quality visual regression, component tests, Storybook examples, accessibility checks Better bullet:
Owned shared Dialog and FormField APIs across three product areas, adding accessibility defaults, usage docs, migration examples, and review checks that reduced repeated implementation drift.Translate leadership into artifacts
"Mentored juniors" is weak because it tells the reviewer nothing about how your influence scaled. Senior leadership is easier to believe when it left artifacts.
Leadership claim Stronger evidence Mentored engineers pairing plan, review checklist, onboarding guide, repeated feedback turned into docs Led a project RFC, migration plan, rollout stages, risk log, stakeholder alignment, release checklist Improved code quality lint rule, shared pattern, test helper, component API, refactor guide Raised team standards accessibility checklist, performance budget, PR template, design QA routine Cross-team influence adopted by multiple squads, shared in engineering forum, used in release process Strong:
Created a frontend review checklist for forms, async states, accessibility, and mobile layouts that converted repeated senior review comments into reusable team guidance.This says more than "excellent communication skills."
Handle confidential metrics
Senior work often has private numbers. You can still write useful bullets without exposing sensitive data.
Confidential detail Safer resume version Revenue or conversion "improved checkout completion for a high-traffic purchase flow" Exact customer count "used by enterprise customers" or "used by internal support teams daily" Private incident details "after a production regression in account settings" Internal project codename "dashboard migration," "billing workflow," "content review tool" Proprietary architecture "split server state, URL state, and local UI state" without exposing implementation Exact performance number "reduced interaction delay after profiling render cost" if the number is not public Do not make the bullet so anonymized that it becomes meaningless. Keep the shape of the problem visible.
Senior resume structure
Most senior frontend resumes can be one or two pages. Two pages are fine when the second page contains real scope, not old task lists.
NameCity | email | phone | LinkedIn | GitHub | Portfolio or selected writingSenior frontend engineer focused on [lane], with experience owning [scope],[architecture/performance/accessibility/design-system signal], and cross-team delivery.Selected Impact- Owned [largest or most relevant senior proof].- Drove [system, migration, performance, accessibility, design-system, or platform result].- Created [artifact/process] adopted by [team/product area].ExperienceCompany, Senior Frontend Engineer, Month Year - Present- Owned [product/system scope] under [constraint], choosing [technical direction] and producing [result].- Reduced [risk/friction/regression class] by [architecture/testing/documentation/release decision].- Led [cross-functional/cross-team work] across [design/backend/QA/product/support], preserving [contract/quality].Company, Frontend Engineer, Month Year - Month Year- Show progression from feature ownership to system ownership.- Keep older bullets shorter unless they still support the target senior lane.SkillsFrontend: TypeScript, React, Next.js, HTML, CSSArchitecture: state modeling, component APIs, routing, async data, performanceQuality: Playwright, React Testing Library, accessibility checks, monitoringCollaboration: RFCs, design-system docs, technical mentoring, release planningUse a "Selected Impact" section only if it helps the top third of the resume. If it repeats the first experience bullets, skip it.
Downleveling red flags
These patterns can make a senior resume read mid-level:
- Every bullet starts with "built" and describes isolated features.
- The resume lists React, TypeScript, CSS, Redux, GraphQL, and testing but never shows decisions.
- Leadership is described only as "mentored juniors" or "collaborated with teams."
- Performance, accessibility, and reliability claims have no measurement, behavior, or process.
- Design-system work lists components but not API choices, docs, adoption, or migration.
- The summary says "5+ years" but the bullets do not show increased scope.
- Older roles take as much space as the most senior work.
- Tools appear in skills with no corresponding experience.
If the resume could describe a mid-level feature contributor, add ownership, constraint, and result.
Tailor for senior roles
Senior tailoring is not keyword stuffing. It is choosing the right senior proof for the company problem.
Job description signal Move up Rewrite around "Design systems" Component API, tokens, docs, adoption, accessibility migration, governance, usage examples, review process "Performance" LCP/INP/CLS, profiling, bundle work, runtime UI measurement, bottleneck, fix, tradeoff, monitoring "Highly collaborative product team" Cross-functional flow ownership design/backend/QA/product alignment and release decisions "Data-heavy UI" Dashboards, tables, filters, permissions, server state URL state, pagination, stale data, virtualization, error recovery "Frontend platform" Tooling, test reliability, shared patterns, migrations adoption, developer experience, compatibility, release safety "Accessibility" Keyboard behavior, semantics, focus recovery, design-system defaults APG patterns, review gates, release checks "Tech lead" RFCs, cross-team migration, mentorship artifacts, risk management decision quality, sequencing, alignment, follow-through Keep one master resume with all senior proof. For each application, reorder and trim.
Senior interview-test every bullet
Every senior bullet should create a real technical conversation. Before sending, ask:
- What was the original problem and why did it matter?
- What options did you consider?
- What did you choose and why?
- What tradeoff did you accept?
- How did you know it worked?
- What broke or almost broke?
- Who needed to agree?
- What would you do differently now?
If you cannot answer those questions, rewrite the bullet until it matches the work you can defend.
The final senior audit
Read the resume for 90 seconds and check:
- Does the top third show your senior frontend lane?
- Do the first three bullets prove scope, judgment, and result?
- Is there evidence beyond implementation: architecture, quality, risk, mentorship, or systems?
- Are performance and accessibility claims specific enough to be credible?
- Are design-system claims tied to adoption or quality, not only component creation?
- Does the skills section support the story instead of listing every tool?
- Are older roles compressed so recent senior work gets the space?
- Can an interviewer see what to ask you next?
A senior frontend resume should not shout "senior." It should make the reader feel the shape of the problems you can own: ambiguous, cross-functional, user-facing, measurable, and hard to keep healthy over time.
- Frontend Interview Tips for Freshers: Advice That Actually Helps (2026)Practical frontend interview tips for freshers covering projects, HTML, CSS, JavaScript, React basics, debugging, communication, and interview-day habits.作者GreatFrontEnd Team11 分钟阅读Jul 15, 2026
Frontend interview preparation for freshers should start with proof. You need one or two projects you can explain, sound HTML, CSS, and JavaScript basics, and enough practice to reason when a question is unfamiliar.
You do not need to sound senior. You need to show that you can build a small UI, inspect mistakes, explain tradeoffs, and improve from feedback. That is the signal most fresher interviews are looking for.
For topic coverage, use MDN Curriculum and React Learn. Stack Overflow's published 2025 Developer Survey is useful ecosystem context because JavaScript, HTML/CSS, TypeScript, and React remain widely used by professional developers, but your interview will still be decided by the code and explanations you can defend.
For practice, pair this guide with the Front End Interview Playbook, JavaScript interview questions, React interview questions, and UI coding questions.
What fresher interviews actually test
Most fresher frontend interviews are not trying to prove that you know every framework. They are checking whether you can handle beginner tasks without guessing randomly or hiding behind copied code.
Interview signal What the interviewer wants to see Weak signal Browser basics Semantic HTML, forms, CSS layout, events, and responsive behavior Only naming tags, classes, or Bootstrap utilities JavaScript reasoning Arrays, objects, functions, async behavior, DOM events, and debugging Memorized definitions with no example UI state Loading, empty, error, invalid, success, and mobile states A happy-path screen only Project ownership User problem, state model, API/data behavior, tradeoffs, and one bug fixed "I used React" and a tech stack list Communication Clarifies the problem, explains assumptions, and tests small pieces Silence, bluffing, or jumping between ideas The fresher bar is not "knows everything." It is "can be trusted with small frontend work and can learn after review."
Build a minimum proof set
Before applying widely, prepare a small proof set that can support your resume, portfolio, and interview answers. Two complete projects beat five cloned demos because interviewers can ask deeper follow-ups.
Proof item What it should show Interview question it prepares you for One main project Forms, state, data, edge cases, responsive UI, and a README "Walk me through your best project." One bug story What broke, how you inspected it, and how you verified the fix "Tell me about a bug you fixed." One UI coding task A component that handles states and keyboard or mobile behavior "Build this small interface." One JavaScript explanation A concept explained with code and an edge case "What happens in this snippet?" One honest limitation What you would improve next and why "What would you change if you had more time?" If your strongest project is mostly static, improve the project before polishing the answer. Add a form, API-backed view, filter, modal, data table, or stateful workflow so there is real frontend behavior to discuss.
Prepare the basics interviewers actually test
Freshers often spend too much time on framework trivia and too little time on browser fundamentals. Early frontend rounds still expose the same basics again and again.
Area Prepare Proof you can show HTML Forms, labels, buttons, links, headings, tables, and landmarks A form that works with keyboard and visible errors CSS Box model, Flexbox, Grid, responsive layout, overflow, and focus states A page that does not break on mobile JavaScript Arrays, objects, functions, promises, fetch, DOM events, and error handling Search, filter, modal, tabs, or API widget React basics Components, props, state, lists, effects, controlled inputs, and rendering A project with forms and API states Debugging Console, Network tab, DOM inspection, and reading stack traces A bug story you can explain clearly Do not list a tool unless you can survive a follow-up question about it. If your resume says TypeScript, React Query, Redux, Docker, or AWS, the interviewer can ask where you used it and what problem it solved.
Use one project as your main interview story
Pick the project with the most frontend behavior, not the fanciest screenshot. A job tracker, product catalog, multi-step form, dashboard, expense tracker, or booking flow gives you more to explain than a static landing page.
Prepare a 90-second version before the interview:
My strongest project is [project].It helps [user] do [task].The main frontend behavior is [forms/API/state/layout].I handled [loading/error/empty/invalid/mobile state].One bug I fixed was [bug], and I fixed it by [specific change].If I had another week, I would improve [specific limitation].For example, an expense tracker answer should not stop at "I used React and local storage." A stronger answer says:
The hardest part was keeping raw expenses separate from derived totals. I fixed a bug where deleted expenses still appeared in filtered totals by recalculating totals from the source list instead of storing duplicate total state.That sentence gives the interviewer state modeling, debugging, and ownership in one answer.
Answer technical questions with a simple structure
Freshers lose points when an answer wanders. Use the same structure for most concept questions: definition, example, edge case, and project tie-in.
Question: What is event bubbling?1. Definition: after an event reaches its target, its bubbling phase proceeds through ancestors when that event type bubbles.2. Example: clicking a button can also trigger a click handler on its parent.3. Edge case: stopPropagation can block parent handlers, but it can also hide behavior.4. Project tie-in: event delegation can help a list handle many item clicks from one parent.This works for closures, promises, controlled inputs, CSS specificity,
useEffect, debouncing, and form validation. A short structured answer is better than a long answer that never reaches an example.Practice UI tasks that expose frontend judgment
Frontend interviews reward candidates who can think through product states, not only code the happy path. Start with common UI prompts and write down the states before coding.
Prompt What to practice Good next step Contact form Labels, validation, disabled submit, success, and error copy Contact Form Tabs State, keyboard behavior, active panel, and semantics Tabs Modal Escape key, backdrop, focus return, aria label, and cleanup Modal Dialog Data table Sort, filter, empty state, loading state, and mobile fallback Data Table Autocomplete Async results, debounce, stale response guard, keyboard selection Autocomplete For each task, ask yourself: What is the empty state? What happens when data fails? What can be done with keyboard only? What changes on mobile? What would I test manually before saying it is done?
Show how you debug
Many fresher candidates say "I debugged it" but cannot describe the inspection path. Make your debugging story concrete.
Use this sequence:
- Name the user-visible symptom.
- Reproduce it with exact steps.
- Inspect Console, Network, DOM, or state depending on the symptom.
- Make one hypothesis.
- Change the smallest thing that can prove or disprove it.
- Verify the fix and name the edge case you checked.
Example:
The product list showed old search results after I typed quickly. I reproduced it by searching "bag" and then "belt" before the first request finished. In Network, I saw the older request sometimes finished last. I fixed it with a request ID check so only the latest response updates state.That answer is much stronger than "I fixed an API bug."
Do not hide behind AI-generated code
It is fine to use AI tools while learning, but the interview will test whether the code is yours in practice. If you cannot explain the state model, API call, CSS layout, or error handling, the project stops helping you.
Weak preparation Better preparation Copied a React project Rebuilt one feature from scratch and changed requirements Used a generated README Added setup commands, decisions, screenshots, and limitations Memorized answers Practiced explaining one concept through your project Listed many tools Listed fewer tools you can actually discuss If AI helped you build a project, make it defensible: rename vague components, remove unused code, write the README yourself, and rebuild the hardest feature without looking at the generated answer.
How to answer when you do not know
Do not freeze or bluff. Freshers are allowed to not know an API. The score comes from whether you can reason honestly from what you do know.
I have not used that exact API before. I would first check [docs/runtime behavior],then inspect [DOM/network/console/state]. Based on similar work, I think the issuecould be [hypothesis]. I would test it by [small verification].For example, if you are asked about a CSS property you do not know, you can still say how you would inspect computed styles, check browser support, test a fallback, and verify the layout on mobile.
Common weak answers and better directions
These answers sound prepared, but they do not give the interviewer enough evidence. Rewrite them into specific engineering decisions.
Weak answer Why it falls short Better direction "I followed a tutorial." It does not show ownership. Explain what you changed, broke, fixed, or extended. "I know React, Node, MongoDB, Docker, and AWS." Too many unsupported claims create doubt. Show fewer tools connected to working projects. "I do not know because I am a fresher." Freshers can still reason from first principles. Say what you would inspect first. "The project is almost done." Unfinished work is hard to evaluate. Ship a smaller complete version with visible states. "CSS is only styling." Frontend roles need layout, accessibility, and interaction detail. Explain structure, responsive behavior, focus, and overflow. A 30-day fresher interview plan
Use this plan if you have one month before interviews. The goal is not to finish every resource. The goal is to produce interview evidence.
Week Practice Output 1 HTML, CSS layout, forms, and JavaScript DOM basics One form page and one interactive widget 2 Arrays, objects, promises, fetch, and debugging API-backed search with loading, error, and empty states 3 React basics or your chosen framework One deployed project with controlled inputs and component state 4 Timed UI tasks and project explanation Two recorded project walkthroughs and one timed UI problem For Week 2, use JavaScript interview questions. For Week 3, use React interview questions. For Week 4, use UI coding questions and review every attempt instead of rushing to the next prompt.
Interview-day checklist
Use a small checklist so nerves do not decide the round.
Moment What to do Before the interview Open your resume, project demo, GitHub repo, and notes on one bug story When a question starts Repeat the goal, ask one clarifying question, and name assumptions While coding Build the main path first, then add error, empty, loading, invalid, mobile, or keyboard states When stuck Say what you are checking and inspect one thing at a time Before finishing Run through one normal case and one edge case After the interview Write the topic you missed and one repair task for the next day Do not treat an interview failure as a personality review. Treat it as data: missing JavaScript concept, weak project explanation, slow UI coding, unclear debugging, or poor time management.
Fresher interview scoring rubric
Use this rubric to review your own preparation before the interview.
Area Pass signal Needs work HTML/CSS Can explain structure, layout, responsiveness, form behavior, and focus states Only names tags or framework classes JavaScript Can reason through data, events, async behavior, and errors Memorizes definitions but cannot debug Project explanation Names user problem, state, API behavior, edge cases, and one bug fixed Says only "I used React" UI coding Builds the main path and handles at least two important states Stops after the happy path Honesty Says what they would inspect when unsure Bluffs or apologizes for every gap Communication Thinks out loud, checks assumptions, and names tradeoffs Goes silent or jumps randomly One question to ask the interviewer
Freshers often forget that they can ask useful questions too. Ask: "What would the first frontend task in this role likely look like?"
The answer tells you whether the team expects HTML/CSS fixes, React feature work, dashboard maintenance, testing, or broader product engineering. It also helps you connect your project proof to the role before the conversation ends.
Freshers do not need perfect answers. They need honest basics, visible project proof, and the ability to reason through small UI problems without pretending to know everything.
- Frontend Mock Interview: How to Practice and What to Simulate (2026)Run a useful frontend mock interview with realistic timing, prompt selection, scoring signals, feedback notes, and a repair plan for the next session.作者GreatFrontEnd Team8 分钟阅读Jul 15, 2026

A frontend mock interview is useful only when it recreates the pressure of a real frontend round: unclear requirements, a ticking clock, UI states, edge cases, debugging, and follow-up questions.
Do not treat the mock as a trivia quiz. The goal is to practice the interview loop: clarify the task, choose a simple plan, build the important path, test visible behavior, explain tradeoffs, and leave with one repair task.
Use MDN Curriculum, React Learn, web.dev Learn Performance, and the WAI WCAG quick reference for topic coverage. Score the mock by what the candidate does under pressure, not by how many facts they can recite.
What to simulate
A good frontend mock should expose the same decisions a real interview exposes. If the prompt is too vague, too open-ended, or too easy to finish without explaining tradeoffs, the feedback will be weak.
Signal What the mock should reveal Weak version Clarification Inputs, constraints, user states, and out-of-scope behavior Starts coding from the first sentence State model Source data, derived values, and UI status are separated Stores duplicate state until updates conflict Async behavior Loading, empty, error, retry, and stale response cases are handled Treats failure and no results as the same state Accessibility Labels, focus, keyboard behavior, and visible errors are considered Builds mouse-only controls Debugging Uses Console, Network, DOM, and state inspection deliberately Changes random code until the issue disappears Communication Explains assumptions, tradeoffs, and next improvements Goes silent or narrates every keystroke Use a 60-minute structure
A mock needs a clock. Without timing, candidates often spend too long polishing setup and too little time on edge cases, accessibility, and explanation.
Time Activity What to observe 0-5 min Read the prompt and ask clarifying questions Did they find missing requirements? 5-10 min Sketch state, data, and UI plan Can they choose a simple model before coding? 10-40 min Build the main path Can they ship the core behavior without losing correctness? 40-50 min Add edge cases and test manually Did they check empty, loading, error, invalid, keyboard, and mobile states? 50-60 min Review and answer follow-ups Can they explain tradeoffs and what they would improve? For junior candidates, shorten the scope rather than removing the review. For senior candidates, keep the coding prompt small and spend more time on tradeoffs, failure modes, and system boundaries.
Match the mock to the target round
There is no universal frontend interview. Some companies start with DSA, some use UI coding, some ask React application design, and senior loops often include frontend system design. Practice the round you are likely to face.
Target round Mock format Pass signal JavaScript fundamentals 30-45 minutes on arrays, async, closures, DOM, or browser APIs Correct solution plus edge-case explanation UI coding 45-60 minutes building a component or small flow Working states, accessibility, and readable state model React application 60 minutes with data fetching, forms, routing, or state ownership Clear component boundaries and failure states Frontend system design 45-60 minutes of architecture discussion Constraints, APIs, cache, sync, metrics, and rollout plan Behavioral/project 30 minutes on one shipped project and one conflict story Specific ownership, impact, and honest tradeoffs Pick prompts that expose frontend judgment
The best prompts are small enough to finish and deep enough to reveal decision-making. A contact form, data table, typeahead, modal, file explorer, shopping cart, or dashboard widget can all test state, rendering, accessibility, and async behavior.
- Use Contact Form for validation, labels, submit state, and visible errors.
- Use Data Table for derived state, sorting, filtering, pagination, and empty states.
- Use Autocomplete for async data, stale responses, caching, keyboard navigation, and system design follow-ups.
- Use Machine Coding Round when the mock needs a larger implementation flow.
Before coding, ask the candidate to write the states they plan to support. For a typeahead, that might be
idle,loading,success,empty, anderror. For a modal, start with open and closed; then define behavior such as initial focus, tab containment, allowed dismissal methods, and focus restoration separately from state.Score behavior, not confidence
A candidate can sound polished and still miss the important frontend failure modes. Score with evidence from the session.
Area Score question Repair example Correctness Did the main path and important edge cases work? Add manual test cases before the next mock Frontend behavior Were loading, empty, error, invalid, keyboard, and mobile states considered? Add one missing state to the same prompt State design Could the state values contradict each other? Rebuild the state model from source data and derived values Debugging Did they inspect failures systematically? Reproduce, inspect, form one hypothesis, then change code Communication Did they explain tradeoffs before and after coding? Practice a 60-second plan before touching code Depth Did follow-up questions reveal understanding? Prepare one deeper explanation from the failed topic Use a simple 1-5 score only after writing evidence:
Score Meaning Next practice 1 Could not clarify or start Practice reading prompts and asking requirement questions 2 Built a partial happy path Practice smaller increments and state modeling 3 Main path worked with gaps Add edge cases, accessibility, and manual tests 4 Good solution and explanation Practice follow-ups and tradeoffs 5 Strong under pressure Increase difficulty or simulate senior rounds Run feedback like a second interview
Feedback should be specific enough to change the next practice session. Instead of "work on React," name the exact failure: stale response overwrote newer results, form errors were not connected to inputs, or filtered data was stored separately from the source list.
Ask the candidate to restate the bug and propose a fix. That reveals whether feedback became understanding or only polite agreement.
Feedback note:Problem: Typeahead request race.Evidence: Query "re" finished after "react" and overwrote the newer results.Fix next mock: Track requestId or use AbortController; ignore stale responses.Practice: Rebuild typeahead in 35 minutes, then add loading, empty, and error states.Repair one weakness before the next mock
Do not finish a mock and immediately collect another prompt. Pick one failure, rebuild that slice, and write the lesson. Repeated mocks without repair only rehearse the same weak habits.
Use this drill:
- Run one 45-minute UI coding prompt.
- Spend 10 minutes writing missed states and bugs.
- Rebuild the weakest part without the timer.
- Write one answer explaining the key tradeoff.
- Repeat with a different topic only after the repair is done.
If the code did not finish, rebuild the smallest passing version within 20 minutes. If edge cases were weak, add only edge cases to the same solution. If communication was unclear, record the explanation again without coding.
Practice scenario answers
Scenario prompts reveal whether a concept survives messy product work. Answer each one in two minutes, then write the follow-up question you would ask before choosing a solution.
Scenario A good answer should reason through Build autocomplete with async results Debounce, stale response guard, loading, empty, keyboard navigation, and error recovery Implement a tabbed settings page Semantics, URL state if needed, focus behavior, and reusable state model Fix a slow list filter Profiling, derived state, memoization only if needed, and virtualization tradeoffs Review a modal bug in a pull request Focus trap, escape behavior, scroll lock, aria labeling, and cleanup Review your own recording
Watch the recording twice. On the first pass, write every missing state, bug, and unclear requirement. On the second pass, remove vague phrases and add concrete reasoning.
If you cannot explain why you chose a state shape, why an effect runs, or how an error is recovered, that is the next practice topic.
Worked example: one mock, one repair
Suppose the prompt is autocomplete. You build the input and fetch results, but the interviewer notices stale results can appear when an older request resolves after a newer one.
Use this sequence:
- Write the failure: older response can overwrite newer state.
- Rebuild only that part using request IDs or abort logic.
- Add loading, empty, and error states while preserving keyboard behavior.
- Explain the tradeoff between debouncing, cancellation, and response-order guards.
- Run the same prompt again a few days later without looking at the old code.
The mock becomes valuable because it changes the next attempt. Next time, mention async ordering before being prompted and explain the bug plainly: "The UI should represent the newest query, not whichever request finishes last."
A good frontend mock interview leaves you with evidence and one repair task. If the only feedback is "you did okay," the mock was too vague to help.
- Micro-Frontends Interview Questions: Architecture, Trade-offs, Patterns (2026)Prepare for micro-frontends interview questions with architecture tradeoffs, Module Federation, routing, ownership, shared dependencies, design systems, and rollout patterns.作者GreatFrontEnd Team12 分钟阅读Jul 14, 2026

Micro-frontends interview questions are architecture questions. A micro-frontend is an independently deliverable frontend slice, usually owned by one team, that is composed with other slices into one product. The interviewer is checking whether you can split frontend ownership without creating a slower, less consistent, harder-to-debug product.
The answer should not start and end with Module Federation. A good answer covers ownership boundaries, composition, shared dependencies, routing, design systems, observability, rollback, and user experience.
For current implementation vocabulary, use webpack Module Federation docs, single-spa microfrontends guide, and MDN import maps reference. Treat tools as options; the architecture decision comes before the bundler choice.
What interviewers are testing
Area What to know How to answer Ownership Team boundaries, deploy ownership, contracts Split by business capability, not random component size Composition Route-level, component-level, iframe, Web Component, server composition Pick composition based on isolation and UX needs Runtime cost Duplicate dependencies, waterfalls, error isolation Explain how the shell loads, caches, and fails Consistency Design system, tokens, accessibility, analytics Keep user experience coherent across teams Data Backend contracts, auth handoff, shared events, BFFs Keep shared state rare, explicit, and versioned Isolation CSS leakage, globals, origins, security boundaries Choose isolation based on trust and failure risk Operations Versioning, rollback, observability, incident ownership Show how independent deploys stay safe Questions and model answers
1. When should a team consider micro-frontends?
Consider them when frontend ownership is already split across teams and release coordination is a bottleneck. They are most useful when product domains can be owned and deployed independently without breaking user journeys.
Good answer shape:
- Start with team and product boundaries.
- Name the release problem being solved.
- Say a modular monolith may be simpler when one team owns the app.
Common mistake: Choosing micro-frontends because the codebase feels large, before trying module boundaries, design-system discipline, or build improvements.
2. What are common composition patterns?
Common patterns include route-level composition, component-level runtime composition, iframes for isolation, Web Components for framework boundaries, and server-side composition. Each changes routing, performance, styling, and failure behavior.
Good answer shape:
- List at least three patterns.
- Explain one tradeoff per pattern.
- Tie the choice to a product scenario.
Common mistake: Treating all micro-frontends as remote React components loaded by one host.
3. How does Module Federation help?
Module Federation lets separately built applications expose and consume modules at runtime. It can support independent deployment, but teams still need version contracts, shared dependency rules, error boundaries, and rollout strategy.
Good answer shape:
- Define host, remote, exposed modules, and shared dependencies.
- Mention runtime loading and version rules.
- Add operational caveats.
Common mistake: Assuming Module Federation automatically gives safe independent deploys.
4. How do you avoid duplicate React or design-system code?
Define shared dependency policy, compatible version ranges, and a design-system release process. Some teams share runtime dependencies; others isolate more strongly. The important part is measuring duplication and avoiding mismatched component behavior.
Good answer shape:
- Mention dependency policy and measurement.
- Discuss design tokens and component APIs.
- Name the risk of inconsistent accessibility behavior.
Common mistake: Sharing everything globally without ownership, or sharing nothing and shipping three versions of every core library.
5. How should routing work?
The shell should own top-level navigation and route ownership. Each micro-frontend can own internal routes within its domain, but the URL contract, auth redirects, analytics, and not-found behavior need shared rules.
Good answer shape:
- Separate shell routes from domain routes.
- Mention URL contracts and auth.
- Discuss cross-app navigation and fallback routes.
Common mistake: Letting every remote mutate global routing state in incompatible ways.
6. How do micro-frontends affect performance?
They can improve initial load if domain code is split and loaded only when needed. They can also hurt performance through runtime waterfalls, duplicate dependencies, larger shells, and slower cross-app boundaries.
Good answer shape:
- Say they are not automatically faster.
- Mention preloading, caching, and bundle analysis.
- Discuss field metrics after rollout.
Common mistake: Selling team autonomy while ignoring the user's loading and interaction cost.
7. How do you handle failures?
Use error boundaries, remote load fallbacks, health checks, version rollback, and clear ownership. If one remote fails, the shell should preserve navigation and show a useful failure state for that domain.
Good answer shape:
- Name remote load failure separately from render failure.
- Mention fallback UI and incident ownership.
- Include rollback and monitoring.
Common mistake: Letting a failed remote crash the whole shell without a recovery path.
8. How do you keep UX consistent?
Use shared tokens, component standards, accessibility rules, analytics naming, content patterns, and review gates for cross-domain flows. Consistency is a governance problem as much as a package problem.
Good answer shape:
- Mention design system and tokens.
- Include accessibility and content states.
- Explain governance without centralizing every deploy.
Common mistake: Assuming a shared component library alone prevents inconsistent product behavior.
9. How should data and backend communication work?
Keep data ownership aligned with product ownership. The shell may provide session, locale, feature flags, and top-level auth handoff, but domain data should usually come from the owning micro-frontend or its backend contract. If multiple remotes need the same data, define the source of truth, cache rules, event contract, and compatibility window.
Good answer shape:
- Separate session context from domain state.
- Mention BFFs, API contracts, typed events, or route state as options.
- Explain how contract changes stay backward compatible during independent deploys.
Common mistake: Putting every shared value into a global client store until the remotes are no longer independently deployable.
10. How do SSR, SEO, and server composition fit?
Micro-frontends do not have to be client-only. Content-heavy routes may use server-side or edge composition so crawlers and users receive meaningful HTML early. Interactive domains can still hydrate independently, but the team needs rules for data bootstrapping, streaming, caching, error boundaries, and what happens when one fragment fails.
Good answer shape:
- Match rendering strategy to the route: public content, logged-in app, dashboard, or checkout.
- Discuss server composition, client composition, and hydration boundaries.
- Name the performance and failure tradeoff.
Common mistake: Assuming Module Federation is the only implementation model, even for SEO-sensitive pages.
11. How do you handle security and isolation?
Use the isolation level that matches the trust boundary. Internal product remotes may share auth context through a narrow shell contract, while less-trusted or third-party UI may need iframe isolation, strict messaging, CSP, sandboxing, and separate origins. Validate cross-app events and avoid exposing long-lived tokens through globals.
Good answer shape:
- Separate trusted internal remotes from untrusted embedded UI.
- Mention CSP, iframe sandboxing, origin boundaries, and token handling when relevant.
- Explain how security rules affect UX, debugging, and performance.
Common mistake: Treating every micro-frontend as equally trusted because it appears inside the same product shell.
How to practice
Practice by designing a migration, not a blank-slate architecture. Most micro-frontend interviews ask how to move a large app safely.
- Split an e-commerce app into shell, catalog, cart, checkout, and account domains; define route ownership.
- Explain how a remote checkout failure should appear to users and to on-call engineers.
- Compare Module Federation, iframe isolation, and server-side composition for an admin dashboard.
- Read Web Apps at Scale: Introduction and map the same concerns to micro-frontends.
Common weak answers
These answers sound prepared, but they do not give the interviewer enough signal. Rewrite them into specific engineering decisions.
Weak answer Why it falls short Better direction "Micro-frontends solve scaling" They solve some team-scaling problems while adding runtime and governance cost Name the exact organizational problem "Each team can use any stack" That can explode UX and dependency cost Set constraints around browser support, tokens, telemetry, and shared libraries "Deploy independently means no coordination" Contracts still require coordination Use versioned APIs, compatibility windows, and release notes "Just split by component" Component-level splitting can create coupling Prefer route or domain boundaries unless shared embedding is justified Extended question bank
Use these as spoken practice. A complete answer should be specific enough that another engineer can tell what you would inspect, change, and verify.
1. When would you not use micro-frontends?
Avoid them when one team owns the UI, deployment coordination is simple, shared design is more important than independent releases, or the runtime cost would outweigh team autonomy. A good answer shows restraint: micro-frontends are an organizational tool with technical cost.
2. What belongs in the shell?
The shell usually owns routing, layout frame, global navigation, auth context, shared observability, error boundaries, and remote loading policy. It should not become a dumping ground for product logic. Keep the shell stable and boring.
3. How do teams share a design system?
Use shared tokens, accessible primitives, documented component APIs, versioning, visual regression, and migration guides. Teams can own product features independently while still sharing interaction standards and brand constraints.
4. How do you test across independently deployed apps?
Use contract tests for shared APIs and events, component tests inside each app, smoke tests for shell integration, and monitoring for remote load failures. Add rollback and compatibility windows because independent deployment does not remove integration risk.
5. How do you avoid dependency duplication?
Set a shared dependency policy, monitor bundles, avoid casual framework mixing, and plan upgrades. Module Federation can share dependencies, but runtime compatibility and version policy still need ownership.
Answer depth by level
Level What the answer should show Mid-level Understands composition choices, route ownership, shared dependencies, fallbacks, and the user cost of extra runtime loading Senior Can design a migration, define contracts, create testing and rollback strategy, and keep UX/accessibility consistent across teams Staff/lead Can decide whether micro-frontends are worth the organizational cost, set governance, and measure whether team autonomy improved delivery Mini case studies
Splitting checkout from a retail monolith
Checkout is a reasonable candidate because the business domain is clear and the release risk is high. The shell can own navigation, auth, and global layout while checkout owns its route, form states, payment provider integration, and error handling. The migration should keep the old route behind a flag, compare conversion and performance, and define rollback before traffic moves.
Remote dashboard widget fails
Treat remote load failure differently from render failure. If the remote entry cannot load, the shell should show a domain-specific fallback and log the version, route, and remote URL. If rendering throws, use an error boundary around the widget so the rest of the dashboard remains usable. In both cases, decide who is paged before the incident happens.
Shared dependency drift
If three remotes ship different React or design-system versions, first measure bundle and runtime behavior. Then decide whether the drift is temporary during an upgrade, intentional isolation, or unmanaged duplication. The fix may be a shared dependency policy, not a bigger Module Federation config.
Advanced follow-up answers
What should not go into the shell?
The shell should not accumulate domain logic just because multiple teams need it. Keep product rules, domain state, and feature-specific UI in the owning micro-frontend. The shell should stay stable: routing frame, auth/session handoff, global layout, observability, remote loading, and shared failure policy.
How do teams communicate across micro-frontends?
Use the smallest contract that preserves ownership. Route parameters, URL state, typed custom events, shared services, or backend APIs can work depending on the boundary. Avoid casual global stores that make independent deploys fictional.
How do you handle shared state?
Shared state should be rare and explicit. Session, locale, feature flags, and design tokens may be shell-provided. Domain state should stay with the owning app or server. If every remote needs to mutate the same client store, the boundary is probably wrong.
How do you test contracts?
Test API schemas, shared events, route contracts, design-system versions, and shell integration separately. Add smoke tests for critical user journeys because independent deployment increases the chance that two correct pieces break together.
How do you avoid CSS conflicts?
Use shared tokens and components for consistency, and use scoping strategies for isolation when teams ship independently. CSS Modules, Shadow DOM, naming rules, or build-time scoping can help, but design governance still matters.
How do you roll back safely?
Version remotes, keep compatibility windows, use feature flags where needed, and know whether rollback happens in the shell, remote, CDN, or deployment platform. A good answer names who owns the rollback before a production incident.
How do micro-frontends affect accessibility?
They can fragment accessibility if every team implements focus, modals, forms, and announcements differently. Shared primitives, review checklists, and cross-app smoke tests keep the product coherent for keyboard and assistive-technology users.
What metric proves micro-frontends helped?
Measure deployment frequency, lead time, rollback frequency, integration incidents, bundle cost, user metrics, and developer onboarding. If team autonomy improves but user experience gets worse, the architecture is not a success yet.
Worked example: splitting a large dashboard
Imagine a company has one large dashboard owned by four teams. Releases are slow because every team must coordinate in the same frontend repo. Micro-frontends might help, but only if the split follows ownership boundaries and the runtime cost is acceptable.
Use this sequence:
- Identify domain boundaries such as billing, reporting, account settings, and admin tools.
- Prefer route-level ownership before embedding many cross-team components.
- Define what the shell owns: auth, navigation, layout, telemetry, and remote-loading policy.
- Set a shared design-system and dependency policy before teams diverge.
- Add fallback behavior for a failed remote and alert the owning team.
- Plan migration one route at a time with rollback.
A strong answer says: "I would not split by arbitrary components. I would split by product domain, keep shared navigation in the shell, and require each remote to own its tests, monitoring, and fallback. I would also measure bundle duplication because micro-frontends can make the user experience worse if dependency policy is loose."
Do not sell micro-frontends as an automatic upgrade. The answer should show what problem they solve and what new problems they create.
Micro-frontends are a coordination tool. The interview answer should show when the coordination benefit is worth the runtime and governance cost.
- Frontend Web Security Interview Questions: XSS, CSRF, CORS and More (2026)Prepare for frontend web security interview questions with scenario-based answers on XSS, CSRF, CORS, cookies, CSP, token storage, browser boundaries, and secure UI habits.作者GreatFrontEnd Team17 分钟阅读Jul 13, 2026

Frontend web security interview questions test whether you can reason about browser boundaries. You should be able to explain where untrusted data enters, where it is rendered, which cookies are sent automatically, which origins can read responses, and which checks must happen on the server.
The best answers are scenario-based. A definition of XSS, CSRF, or CORS is only the first step. Interviewers want to know what you would inspect, what you would change, what tradeoff you would accept, and how you would verify that the fix works.
For technical accuracy, use official references as your source of truth: the OWASP Top 10 for broad application risk, the OWASP XSS Prevention Cheat Sheet, the OWASP CSRF Prevention Cheat Sheet, MDN Web Security, MDN CORS, MDN CSP, MDN Set-Cookie, and MDN postMessage. Interview-question lists are useful for prompts; official docs are better for the actual answer.
The browser-boundary mental model
Most frontend security answers become clearer if you first name the boundary. Do not start with "make it secure." Start with what the browser, frontend, API, or server is allowed to trust.
Boundary Interviewer is testing Good answer should include User content to DOM XSS, output context, safe sinks Source, sink, execution context, escaping, sanitization when rich HTML is allowed Other site to your API CSRF, cookies, request side effects Automatic cookie sending, server-side token or origin validation, no side effects on GETOther origin to your frontend CORS, same-origin policy Scheme/host/port origin, preflight, credential rules, CORS is not auth Browser storage to attacker script Token theft, session handling XSS risk, cookie attributes, refresh flow, short lifetimes, server enforcement Third-party code to your page Supply-chain and script risk Data access, CSP, route scoping, SRI where possible, dependency review UI permission to API permission Authorization boundary Frontend UX checks versus server-side enforcement, 401 and 403 behavior Core interview questions and model answers
1. What is XSS, and how do you prevent it in frontend code?
XSS happens when untrusted data is interpreted as executable code in a page. In frontend interviews, connect the answer to the exact rendering path: where the data came from, which DOM sink receives it, and which parsing context the browser uses.
A good answer:
- Render plain text as text, not HTML.
- Use framework escaping correctly.
- Avoid unsafe sinks such as
innerHTMLwhen the content should be text. - Encode output for the right context: HTML text, attribute, URL, CSS, or JavaScript.
- Sanitize only when the product truly allows rich HTML.
- Use CSP as a second layer, not as the only XSS defense.
Common mistake: saying React, Vue, or Angular makes XSS impossible. Framework escaping helps with text rendering, but unsafe HTML APIs, unsafe URL handling, third-party scripts, and server-rendered templates can still create XSS risk.
2. How can XSS happen in a React app?
React escapes text by default, but React does not remove every XSS path. XSS can still happen through
dangerouslySetInnerHTML, untrusted markdown or HTML renderers, direct DOM manipulation through refs, dangerous URL schemes passed to DOM APIs, third-party scripts, and HTML created outside React.Interview-ready answer:
"I would first check whether the value is rendered as text or HTML. If it is plain text, React's escaping is usually the right path. If the product needs rich text, I would sanitize with an allowlist, validate link protocols, avoid dangerous DOM sinks, and add tests for stored payloads. I would also check CSP and any third-party scripts on that page."
3. What is the difference between validation, encoding, and sanitization?
Validation checks whether input has the expected shape. Encoding changes output so the browser treats it as data in the current context. Sanitization removes or rewrites unsafe parts of content that is intentionally allowed to contain markup.
Example:
- Validate that a profile URL starts with
https://or an allowed app route. - Encode a display name before it appears in HTML.
- Sanitize rich-text comments so only allowed tags and attributes remain.
Common mistake: saying "sanitize all input" as a universal answer. For plain text, the safer answer is usually to render it as text. Sanitization is for cases where the product intentionally allows rich content.
4. What is a safe sink?
A safe sink treats data as text or a controlled value instead of executable markup. Examples include
textContent, formvalue, and framework text interpolation when used normally.The caveat matters: a sink is safe only for the right context. Hardcoded safe attribute names are different from dynamically choosing an attribute name. A URL attribute is different from normal text. An interviewer will often follow up with
innerHTML,href, markdown, or rich-text examples to check whether the answer survives detail.5. What is CSRF?
CSRF tricks a logged-in browser into sending a state-changing request that includes the user's cookies. The attacker may not be able to read the response, but the server may still receive and process the request.
Defenses include:
- Unpredictable CSRF tokens or a double-submit pattern, depending on the app architecture.
SameSitecookies as defense-in-depth.OriginorRefererchecks for sensitive state-changing requests.- Fetch Metadata headers when the application can use them.
- No state-changing side effects on
GET.
Common mistake: thinking
HttpOnlyprevents CSRF.HttpOnlyprevents JavaScript from reading a cookie; it does not stop the browser from automatically sending that cookie.6. What do
HttpOnly,Secure, andSameSiteprotect?Cookie attributes reduce different risks, so name the risk instead of calling a cookie "secure."
Attribute Browser behavior Does not protect against HttpOnlyPrevents JavaScript from reading the cookie through document.cookieRequests caused by injected script or automatic cookie sending SecureSends the cookie only over secure connections, except for defined localhost handling XSS, CSRF, or broken authorization SameSite=LaxorStrictRestricts when the cookie accompanies cross-site requests Every CSRF case or same-site attacks SameSite=None; SecureAllows cross-site cookie use while requiring secure transport CSRF, misconfigured CORS, or missing authorization Also mention that cookie
Pathis not an access-control boundary. It controls when the browser sends a cookie; it should not be treated as protection from unauthorized reading.7. What is CORS, and why is it not authorization?
CORS is a browser-enforced mechanism that controls whether frontend JavaScript from one origin may read a response from another origin. An origin is the scheme, host, and port.
Good answer:
- Same-origin policy restricts browser script access by default.
- CORS headers let the server tell the browser which origins may read a response.
- Some requests trigger a preflight
OPTIONSrequest. - Credentialed CORS needs deliberate cookie/auth handling and cannot use
Access-Control-Allow-Origin: *. - CORS does not authenticate the user or authorize the action.
- Non-browser clients can still send requests, so the API must enforce auth and authorization.
Common mistake: debugging React code when the actual problem is the API's CORS headers. If a request works in Postman but fails in the browser, check browser security rules before rewriting components.
8. Where should a frontend store tokens?
There is no universal answer. The right storage choice depends on the auth model, threat model, and product constraints.
Option Useful when Main risk HttpOnly Secure cookie You want to reduce token theft by JavaScript Needs CSRF defenses for cookie-auth flows Memory You want less persistence after refresh or XSS cleanup Harder refresh flow and tab coordination sessionStorageYou need tab-scoped persistence Readable by injected scripts in that tab localStorageSimpler persistence for bearer-token apps Readable by injected scripts and often overused for long-lived tokens An interview-ready answer names the tradeoff: cookies reduce JavaScript token theft but require CSRF thinking; browser storage can simplify bearer-token flows but makes XSS theft more damaging. Short lifetimes, rotation, least privilege, refresh strategy, and server-side revocation matter more than declaring one storage location always safe.
9. What does Content Security Policy do?
CSP lets a site restrict which resources a page can load and which scripts can execute. It can reduce XSS impact by blocking inline scripts,
javascript:URLs, unexpected script sources, and dangerous APIs such aseval()when the policy is strict enough.A good answer:
- Use CSP as defense-in-depth, not a replacement for safe rendering.
- Prefer nonces or hashes for scripts instead of broad allowlists.
- Avoid
unsafe-inlineunless there is a temporary migration reason. - Roll out with
Content-Security-Policy-Report-Onlybefore enforcing a risky policy. - Consider Trusted Types for reducing DOM XSS in apps with many dangerous sinks.
Common mistake: adding a loose policy with
unsafe-inlineand many wildcard sources, then treating the page as protected.10. How can
postMessagebe used safely?window.postMessagelets a window communicate with another window it references, such as a popup, parent, or iframe, even across origins. Workers andMessagePortobjects have related messaging APIs, buttargetOriginandevent.originchecks here apply specifically to window-to-window messaging.Use a specific
targetOriginwhen sending. On receive, validateevent.origin, checkevent.sourcewhen you expect one particular window, validate the message shape, and avoid sending secrets through generic message channels. If the message changes auth state, payment state, or account data, treat the receiver like any other trusted integration and document the expected source, origin, and schema.Common mistake: using
*for sensitive messages or trusting everymessageevent because it arrived in the browser.11. What security checks belong in the frontend?
Frontend checks are useful for UX and accidental misuse, but they are not authorization. The frontend can hide irrelevant actions, disable impossible actions, validate form shape, and show useful auth recovery states. The server must enforce permissions and input validation for every sensitive operation.
Good answer:
- Treat hidden buttons as convenience, not access control.
- Handle
401as unauthenticated and403as authenticated but not allowed. - Do not leak sensitive resource details in error messages.
- Test direct API calls, not only UI clicks.
12. How do iframes and clickjacking matter?
Clickjacking tricks a user into interacting with a page framed by another site. The modern answer is to control who can embed the page, usually with the CSP
frame-ancestorsdirective. Older systems may still useX-Frame-Options.When your app embeds other content, review iframe
sandboxpermissions, allowed origins,postMessagecontracts, and whether sensitive pages can be framed at all.Common mistake: talking only about CORS. CORS controls browser script access to responses; it does not decide whether another site can frame your page.
13. How do dependencies and third-party scripts create frontend risk?
Frontend code often runs with access to page content, user interactions, tokens in browser storage, and API responses. A third-party script, tag manager, or compromised dependency can therefore expand the damage from a single bug.
Good answer:
- Ask what data the script can see.
- Scope scripts to the pages that need them.
- Use CSP to limit allowed sources.
- Use Subresource Integrity for immutable third-party files when the integration supports CORS and a fixed file hash.
- Keep lockfiles, review major upgrades, and treat audit output as a signal rather than an automatic fix command.
- Avoid unnecessary client-side packages for small tasks.
14. Can frontend code contain secrets?
No real secret should be shipped to the browser. Anything in JavaScript bundles, source maps, HTML, network requests, local storage, or devtools-visible config should be treated as public.
Public API keys can be acceptable when the provider expects browser use and enforces restrictions server-side, such as allowed origins, scopes, quotas, and abuse controls. Private API keys, signing secrets, database credentials, and service-role tokens belong on the server.
For OAuth in SPAs, mention PKCE. PKCE improves public-client authorization flows, but it does not turn a browser into a place where client secrets can be hidden.
15. How do service workers affect security review?
Service workers can intercept requests, cache responses, and keep behavior active beyond the current page. Review their scope, update strategy, cached sensitive data, logout behavior, and whether an old worker can serve stale authenticated content.
A good answer separates caching bugs from authorization bugs. Clearing UI state on logout is not enough if a service worker can still return sensitive cached responses.
Scenario drills that interviewers actually value
Definitions help, but scenarios show judgment. Practice these as two-minute spoken answers.
Scenario What a good answer should reason through User profile bio supports rich text Plain text versus rich text, allowlist sanitizer, URL protocol validation, safe render path, stored XSS tests, CSP backup Banking transfer uses cookie auth CSRF token or equivalent server validation, SameSite, Origin/Referer checks, re-auth for high-risk action, no side effects onGETDashboard calls api.example.comfromapp.example.comExact allowed origin, credential mode, preflight behavior, server auth, non-browser client caveat, 401/403 UI Product wants a tag manager on every page Data exposure, page scoping, CSP impact, consent rules, performance cost, incident response if the script is compromised Admin button is hidden for normal users UI convenience, server authorization, direct API test, 403 handling, audit logging SPA uses bearer tokens Storage tradeoff, XSS impact, refresh token flow, rotation, logout, multi-tab behavior Comment preview renders markdown Sanitized output, unsafe URLs, markdown library defaults, stored payload tests, final DOM inspection App embeds a payment iframe iframe origin, sandbox permissions, postMessageschema, no wildcard target for sensitive messagesWorked example: rich-text comments
"Users can write comments with links, bold text, and lists. How would you prevent XSS?"
Start by asking whether the product needs plain text, markdown, or HTML. If plain text is enough, render it as text and avoid HTML. If rich text is required, define an allowlist of tags and attributes, sanitize on a trusted processing path, validate URL protocols, and avoid dangerous DOM sinks in the client.
Then verify the final DOM, not only the stored string. Test stored payloads, reflected payloads, image error handlers, unsafe links, malformed HTML, and post-sanitization mutations. CSP should reduce impact if something slips through, but it is not the primary fix.
Interview-ready answer:
"React escaping handles plain text, but rich text changes the problem. I would keep the allowed formatting small, sanitize with an allowlist, validate links so
javascript:cannot become anhref, render through a controlled component, and test stored comments in the rendered DOM. I would also check which third-party scripts run on the page because they change the impact of an XSS bug."Worked example: credentialed CORS API
"The frontend at
https://app.example.comcallshttps://api.example.com/mewith cookies. It works in Postman but fails in the browser."Postman is not enforcing browser CORS rules. The server must return CORS headers that allow the exact frontend origin. If credentials are included, the frontend request must use the right credential mode, and the server cannot rely on a wildcard origin for a credentialed response.
The API still needs authentication and authorization. CORS decides whether browser JavaScript may read the response; it does not prove that the user is allowed to access
/me.Interview-ready answer:
"I would check the browser console and network panel first. If credentials are involved, I would verify the request credential mode, the exact
Access-Control-Allow-Origin,Access-Control-Allow-Credentials, the preflight response, and the cookie attributes. After that, I would still check the API auth path because CORS is not authorization."Worked example: hidden admin action
"The UI hides the Delete user button for non-admins. Is that enough?"
No. Hiding the button reduces accidental clicks and keeps the UI cleaner, but it does not enforce permission. A user can call the API directly, replay a request, use another client, or inspect the network request from an admin session.
The server should verify authorization for the delete action. The frontend should handle
403deliberately, avoid leaking sensitive details, and keep the UI state consistent after a denied request.Interview-ready answer:
"The frontend should hide the button for UX, but the API must enforce the permission. I would test by calling the endpoint directly as a non-admin and expecting
403. The UI should show a clear not-allowed state and not reveal extra data about the target user."Answer depth by level
Level What the answer should show Fresher Can define XSS, CSRF, CORS, cookies, and why frontend validation is not authorization Mid-level Can identify unsafe rendering paths, token-storage tradeoffs, credentialed CORS risks, and 401/403 UI states Senior Can design layered defenses, review third-party script risk, coordinate frontend/backend responsibilities, and choose verification steps Staff/lead Can turn repeated mistakes into platform defaults, CSP rollout plans, dependency policy, review checklists, observability, and incident playbooks Common weak answers and better directions
Weak answer Why it falls short Better direction "Use HTTPS" HTTPS protects transport, not DOM XSS or broken authorization Name the attack and the matching control "React prevents XSS" React escapes text by default, but unsafe sinks still exist Explain the source, sink, and rendering context "Store JWT in localStorage because it is easy" XSS can read it Discuss storage tradeoffs, token lifetime, refresh flow, and CSRF if cookies are used "Disable CORS" CORS is a browser access-control mechanism, not a bug to bypass Fix the server policy and credential model "Hide the button" UI hiding is not authorization Enforce permission on the server and handle 403in the UI"Add CSP and we are safe" CSP is defense-in-depth Keep safe rendering and sanitization as the primary XSS controls "Sanitize input" Too vague and often wrong for plain text Say whether you validate input, encode output, or sanitize allowed HTML 30 frontend security questions to practice
Topic Questions worth practicing XSS What are reflected, stored, and DOM XSS? What are unsafe sinks? How do HTML, attribute, URL, CSS, and JavaScript contexts differ? React and frameworks Why does React escaping help? How can dangerouslySetInnerHTMLbecome risky? How should untrusted markdown be rendered?Sanitization When do you encode versus sanitize? Why is an allowlist safer than blocking known bad strings? What can go wrong after sanitization? CSRF Why do cookies make CSRF possible? How do CSRF tokens, SameSite, Origin checks, and avoiding side effects onGETwork together?Cookies What do HttpOnly,Secure,SameSite, expiration, prefixes, and cookie scope protect against? What do they not protect against?CORS and origins What is an origin? What triggers a preflight? What changes when credentials are included? Why does CORS not replace authorization? Tokens Should tokens live in cookies, memory, sessionStorage, orlocalStorage? How do refresh tokens change the risk?CSP What does CSP block? What are nonces and hashes? Why can unsafe-inlineweaken a policy? How do report-only rollouts help?Trusted Types What problem does Trusted Types reduce? Which dangerous DOM APIs does it affect? Why is migration work needed? Browser APIs How do postMessage, iframes, service workers, Web Storage, clipboard APIs, and Web Workers create review points?Frontend permissions What should the UI hide, what should it disable, and what must the server enforce? How should 401 and 403 states differ? Third-party code How do analytics, tag managers, embeds, npm packages, and CDN scripts change the damage from a frontend bug? Secrets Which values can be public in a browser bundle? Which values must stay on the server? Why does PKCE not hide a client secret? Testing How do you review a PR for XSS risk? What payloads would you test? What belongs in automated tests versus manual review? Incident thinking If a script was compromised, what data could it read, what actions could it trigger, and what would you rotate or revoke? How to practice for interviews
Practice by drawing the boundary first: browser, frontend code, API, cookie jar, third-party script, user-controlled input, storage, or server permission check.
- Explain why a malicious site can send a form POST but cannot read a protected response without CORS.
- Take one UI that renders user content and list every source, sink, and output context.
- Review a login flow and identify where tokens live, when they expire, and how logout clears client state.
- Design a forbidden-action UI and explain what the server must still enforce.
- Practice REST API interview questions and add security follow-ups to each API answer.
For each answer, name the browser or server boundary and one verification step. For example, an XSS answer should end with a rendered-DOM test; an authorization answer should end with a direct API call using an unprivileged account.
- Web Performance Interview Questions: Core Web Vitals to Rendering (2026)Prepare for web performance interview questions with Core Web Vitals, rendering, JavaScript cost, loading strategy, diagnostics, and model answers.作者GreatFrontEnd Team14 分钟阅读Jul 13, 2026

Web performance interview questions test whether you can connect a slow user experience to the browser work causing it. The best answers move from metric to likely cause, then to a measurement plan and a fix.
Do not prepare by memorizing one list of tricks. Practice explaining how loading, rendering, JavaScript, network priority, images, fonts, and user interactions affect the page.
Use current metric names. web.dev Web Vitals lists LCP, INP, and CLS as the current Core Web Vitals, with the 75th percentile target across mobile and desktop. web.dev Learn Performance and MDN critical rendering path are useful references for the browser pipeline behind those numbers.
What interviewers are testing
Area What to know How to answer LCP Largest contentful element, TTFB, render-blocking CSS, image priority Name the likely LCP element and the first measurement you would check INP Input delay, event handlers, long tasks, rendering after input Separate lab TBT from field INP and explain main-thread work CLS Image dimensions, ads, late fonts, inserted content Find the moving element and remove unstable layout Rendering HTML parsing, CSSOM, layout, paint, compositing Connect a UI symptom to the browser stage that can cause it JavaScript cost Bundle size, hydration, parsing, execution, memory Explain what code can be delayed, split, or moved off the critical path Tooling DevTools, Lighthouse, WebPageTest, CrUX, RUM Choose the tool based on whether you need lab diagnosis or field impact Questions and model answers
1. What are Core Web Vitals in 2026?
The current Core Web Vitals are LCP for loading, INP for interactivity, and CLS for visual stability. Good thresholds are LCP at 2.5 seconds or less, INP at 200 milliseconds or less, and CLS at 0.1 or less. Assess the 75th percentile of page loads separately for mobile and desktop; a combined number can hide a slow device segment.
Good answer shape:
- Name all three metrics and what user experience each one represents.
- Give the current good thresholds.
- Say that INP replaced FID as the stable interactivity metric.
- Explain why field data is needed for final judgment.
Common mistake: Listing FID as the current Core Web Vital, forgetting the thresholds, or treating a single Lighthouse run as the whole performance story.
2. How would you debug a poor LCP score?
Start by finding the LCP element in field or lab tooling. If it is an image or hero text, check server response time, render-blocking CSS, image size, image priority, font loading, and whether client-side rendering delays the element.
Good answer shape:
- Identify the LCP element before changing code.
- Check TTFB, resource waterfall, CSS/JS blocking, and image priority.
- Propose one fix tied to the measured bottleneck.
Common mistake: Shrinking the JavaScript bundle before checking whether the LCP element is blocked by server latency or an unprioritized image.
3. Why can Lighthouse miss a real INP problem?
INP is based on real interactions. Lighthouse can use lab signals such as Total Blocking Time, but it cannot reproduce every user click, device, extension, background task, and data state. Use Lighthouse for early diagnosis and field data for final confidence.
Good answer shape:
- Separate lab proxy metrics from field interaction metrics.
- Name long tasks and expensive handlers as common causes.
- Explain how you would collect RUM or web-vitals data.
Common mistake: Saying the page is fine because Lighthouse is green while users still report delayed clicks.
4. What is the critical rendering path?
It is the work the browser must do before pixels appear: parse HTML, discover resources, build the DOM and CSSOM, run blocking scripts when needed, calculate layout, paint, and composite. The interview value is knowing which resources block which step.
Good answer shape:
- Describe the pipeline without turning it into jargon.
- Mention render-blocking CSS and parser-blocking scripts.
- Tie the explanation to a specific optimization.
Common mistake: Repeating the pipeline but not explaining how a stylesheet, script, or font changes the user experience.
5. How do you improve a slow interaction?
Measure the interaction first. Then reduce synchronous work in the handler, split large updates, avoid unnecessary rerenders, move expensive non-UI work to a worker when appropriate, and keep the visual response close to the input.
Good answer shape:
- Find the interaction and its long tasks.
- Reduce render and JavaScript work before adding more loading states.
- Verify with field data after shipping.
Common mistake: Adding debounce to every input without understanding whether the delay is network, rendering, or CPU work.
6. When should you use code splitting?
Use code splitting when code is not needed for the first meaningful task: route-level admin screens, heavy charts, editors, maps, or rarely used modals. Do not split tiny modules so aggressively that the page becomes a chain of extra requests.
Good answer shape:
- Name the user path that should get faster.
- Split by route, feature, or heavy dependency.
- Check network overhead and loading states.
Common mistake: Treating smaller initial JavaScript as automatically better when the app now stalls on many late chunks.
7. How do image choices affect performance?
Images affect bytes, decoding, layout stability, and LCP. A good answer covers dimensions, responsive
srcset, modern formats, lazy loading below the fold, priority for the LCP image, and avoiding layout shifts.Good answer shape:
- Separate hero images from below-the-fold images.
- Mention dimensions and responsive sources.
- Connect image priority to LCP.
Common mistake: Lazy-loading the hero image that is likely to become the LCP element.
8. How would you explain performance tradeoffs to a product team?
Translate the metric into user pain: slow first content, delayed tap response, or moving layout. Then propose a small fix with a measurable target and a product caveat, such as deferring a carousel or reducing a third-party script.
Good answer shape:
- Use user-facing language before technical details.
- Make a measurable recommendation.
- Name what product behavior changes, if anything.
Common mistake: Saying "performance is important" without identifying the user task or business tradeoff.
9. Which tools would you use to debug performance?
Use the tool that matches the question. Lighthouse is useful for a repeatable lab snapshot. Chrome DevTools Performance and Network panels help inspect traces, long tasks, waterfalls, layout shifts, and resource priority. WebPageTest is useful for network waterfalls, filmstrips, and device/location testing. CrUX and RUM show whether real users are affected.
Good answer shape:
- Start with field data when the question is about user impact.
- Use lab tools to reproduce and isolate the bottleneck.
- Name the signal each tool gives, not only the tool name.
Common mistake: Saying "I would run Lighthouse" for every problem, including interaction bugs that only happen for real users.
10. How do resource hints and script loading affect performance?
Resource hints change when the browser discovers or prioritizes work.
preconnectcan warm up a critical third-party origin,preloadcan fetch a critical resource earlier, andfetchpriority="high"gives the browser a priority hint for the likely LCP image. Classic scripts usedeferwhen order matters andasyncwhen it does not; module scripts are deferred by default. Route-level loading can keep code for later interactions off the initial path.Good answer shape:
- Identify the critical resource before adding hints.
- Explain discovery, priority, and ordering separately.
- Mention that overusing hints can compete with more important resources.
Common mistake: Preloading many files because it sounds faster, then making the real critical path noisier.
11. How do caching, CDN delivery, and compression help?
They reduce network cost, but they do not fix every performance problem. A CDN can reduce latency for static assets and cached HTML. HTTP caching can avoid repeat downloads. Compression reduces transfer size. These help loading metrics, but INP may still be poor if the page ships too much JavaScript or does expensive work after interaction.
Good answer shape:
- Separate first visit, repeat visit, and geography.
- Mention cache headers, immutable asset names, CDN edges, and compression.
- Say what caching cannot solve: main-thread work, layout instability, or bad interaction design.
Common mistake: Saying "put it on a CDN" without checking whether the bottleneck is network, server, rendering, or JavaScript execution.
12. How would you debug a React page that becomes slow after data loads?
Profile the interaction or update first. Look for a large rerender, expensive derived data, layout work, too many DOM nodes, heavy third-party components, or hydration cost. Then reduce the render scope, move expensive computation out of the urgent path, virtualize long lists when DOM size is the problem, and use memoization only when the profile shows repeated work.
Good answer shape:
- Capture the slow interaction or update in a profiler.
- Separate data size, render scope, DOM size, and main-thread work.
- Choose a fix that preserves accessibility and loading states.
Common mistake: Adding
memo,useMemo, oruseCallbackeverywhere before proving rerenders are the bottleneck.How to practice
Practice performance answers as diagnosis drills. Start with one symptom, ask what you would measure, then name a fix only after the likely cause is clear.
- Open a slow page, identify its LCP element, and write three possible causes before changing code.
- Profile a delayed click and separate input delay, handler cost, render cost, and paint cost.
- Explain why a page can pass lab checks but still fail for users on lower-end devices.
- Practice Data Table with sorting and pagination, then discuss rendering cost.
- Review Front End Performance Techniques for a broader optimization checklist.
Extended question bank
Answer these aloud as diagnosis exercises. Name the affected metric or user-visible delay, the trace or field signal you would inspect, and how you would verify the change after release.
1. How would you debug poor LCP on a product page?
Start by identifying the LCP element in field data or a trace. Then separate causes: slow TTFB, render-blocking CSS, late image discovery, missing image dimensions, slow image bytes, font blocking, client-side rendering delay, or long main-thread work. A good answer includes the fix order: measure first, improve the biggest bottleneck, ship one change, and compare field data after release.
2. Why can a small JavaScript bundle still have poor INP?
Bundle size is only one input. INP can be hurt by expensive event handlers, synchronous validation, layout thrashing, rendering too many nodes, heavy third-party code, or state updates that cause a large subtree to rerender. Explain how you would capture a performance trace, find long tasks around the interaction, and move or split work without breaking the interaction.
3. How do you prevent layout shift in a feed?
Reserve dimensions for images, ads, embeds, and recommendation modules before they load. Avoid inserting content above the current viewport, avoid late font swaps that move text, and keep skeleton dimensions close to final dimensions. Mention CLS verification because visual stability problems are often introduced by asynchronous content.
4. When is code splitting harmful?
Code splitting helps when it removes non-critical code from the first path. It hurts when critical UI waits for too many chunks, when shared dependencies are duplicated, or when route transitions show blank states because loading boundaries were not designed. A senior answer discusses both network waterfall and user experience.
5. How should performance work be prioritized?
Prioritize user-visible paths and measured bottlenecks. For example, improve LCP on landing/product pages, INP on search/forms/editors, and CLS on content feeds. Avoid optimizing everything equally. Tie each task to a metric, affected route, expected impact, risk, and verification method.
Answer depth by level
Interviewers do not expect the same answer from every level. Use this table to calibrate how much depth to add.
Level What the answer should show Fresher Knows the current metrics, can explain loading versus interaction versus layout shift, and can use DevTools or Lighthouse to start debugging Mid-level Can identify the likely bottleneck, use traces and field data, fix images/scripts/rendering issues, and explain the tradeoff of one optimization Senior Can prioritize across routes, coordinate backend/frontend ownership, set budgets, instrument RUM, and prevent regressions through release process Staff/lead Can connect performance to product strategy, architecture, third-party governance, design-system defaults, and observability across teams Advanced follow-up answers
How do you explain LCP parts?
LCP can be split into server response time, resource load delay, resource load duration, and element render delay. That split prevents vague answers. If the image bytes are small but the browser discovers the image late, compressing it again will not fix the main issue. If the element is ready but render is delayed by hydration or CSS, prioritize the render path instead of the asset.
What is the difference between TBT and INP?
Total Blocking Time is a lab metric that estimates main-thread blocking between FCP and Time to Interactive. INP is a field metric based on real interactions and the next paint after those interactions. TBT can help during debugging, but a good answer says field INP is the user-impact metric.
How can CSS hurt performance?
CSS can block rendering, trigger layout work, create expensive selectors in very large documents, cause layout shifts when late styles arrive, and animate properties that require layout or paint. The practical answer is not "write less CSS"; it is "ship critical CSS carefully, avoid unstable layout, and animate compositor-friendly properties when possible."
How can hydration hurt performance?
Hydration can delay interactivity when the browser must download, parse, execute, and attach event handlers before a UI behaves correctly. A strong answer mentions partial hydration, islands, server components, progressive enhancement, or reducing client-only work, but only after explaining the actual bottleneck.
How do you make a performance budget useful?
Tie budgets to routes and user tasks. A useful budget might track LCP image size, JavaScript bytes for the initial route, long tasks during key interactions, CLS from dynamic modules, and third-party script cost. Budgets should have owners and exceptions; otherwise they become ignored dashboards.
How do you debug a slow third-party script?
Measure its network cost, main-thread cost, and route coverage. Then ask whether it can load after consent, after interaction, on fewer routes, or through a lighter integration. If the business needs the script, isolate it, monitor regressions, and make the owner explicit.
How do you explain virtualization tradeoffs?
Virtualization helps when the DOM size makes rendering or interaction slow. It adds complexity around keyboard navigation, screen-reader behavior, dynamic heights, scroll restoration, and testing. A good answer says to profile first and keep accessibility behavior intact.
How do you verify a performance fix after release?
Use the same segment that showed the problem: route, device class, geography, network, and release window. Compare field data after enough traffic has passed, watch error and conversion metrics, and keep a rollback path if the fix changes loading order or user-visible behavior.
Worked example: debugging a slow product page
Imagine an interviewer says a product detail page feels slow on mobile. A shallow answer jumps straight to "compress images" or "use lazy loading." A better answer asks what users experience and which metric is failing. If the page is slow before the main product image appears, start with LCP. If the page appears but taps lag, start with INP. If content jumps as reviews or recommendations load, start with CLS.
Use this sequence:
- Identify the route, device segment, and metric in field data if available.
- Open a trace and find the LCP element, render-blocking resources, long tasks, and third-party work.
- Check whether the hero image is discoverable early, correctly sized, compressed, and prioritized.
- Check whether hydration or client-side rendering delays the meaningful content.
- Ship one change at a time so the result can be attributed.
The final answer should sound like an investigation plan. For example: "I would first confirm whether LCP or INP is the problem. If LCP is poor and the LCP element is the hero image, I would check discovery, priority, dimensions, and bytes. If those are fine, I would look at TTFB and render-blocking resources. I would verify locally with a trace and later with field data." That answer gives the interviewer a real debugging path.
Avoid listing every performance trick. Interviewers are looking for sequencing and diagnosis. The best answer is usually smaller and more precise than a long checklist.
A good web performance interview answer is not a bag of tricks. It is a measured path from user symptom to browser cause to fix.
- GraphQL Interview Questions: From Queries to Caching (2026)Prepare for GraphQL interview questions with 30 answers on schema design, queries, mutations, caching, pagination, errors, security, performance, and frontend tradeoffs.作者GreatFrontEnd Team20 分钟阅读Jul 9, 2026
GraphQL interview questions test whether you can turn a typed API contract into a reliable UI. For frontend roles, the interviewer is not only checking syntax. They want to hear how a query maps to a screen, how mutations update visible state, how partial data and errors behave, and how client choices affect backend cost.
The best answers do not say "GraphQL is better than REST." They explain where GraphQL helps, where REST is simpler, and what can go wrong when a flexible query language reaches production.
Use GraphQL Learn, GraphQL over HTTP, GraphQL response format, GraphQL security guidance, GraphQL pagination, GraphQL caching, and Apollo Client cache docs for current terminology.
If REST comparison is your weak spot, pair this with REST API Interview Questions for Frontend Devs and practice explaining the same product screen in both API styles.
What interviewers are testing
Area What to know How to answer Schema Object types, fields, nullability, enums, interfaces Explain how schema shape becomes frontend data shape Operations Queries, mutations, subscriptions, variables, fragments Show how operations map to user actions Caching Normalized cache, IDs, field policies, invalidation Explain what changes after a mutation Errors Partial data, errors, network failuresSeparate GraphQL execution errors from transport errors Security and cost Auth, authorization, depth, persisted documents Say GraphQL does not remove backend authorization How frontend GraphQL interviews are different
Backend interviews may spend more time on resolver implementation, schema governance, and database access. Frontend interviews usually probe the client contract:
- Which fields does this component actually need?
- What happens while the query loads, fails, or returns partial data?
- How does the cache change after a mutation?
- How do pagination, filters, and URL state work together?
- Which problem belongs to the frontend, the GraphQL layer, or the backing service?
If your answer stays at the definition level, it will sound memorized. Tie every concept to a page, component, request, mutation, or production failure.
30 GraphQL interview questions and answers
1. What problem does GraphQL solve for frontend teams?
GraphQL gives the frontend a typed schema and lets the client select the fields needed for a view. That can reduce overfetching and underfetching, especially when one screen needs data that would otherwise require several REST endpoints.
The tradeoff is that GraphQL shifts work into schema design, resolvers, caching, authorization, and query cost control. A good answer says GraphQL improves the data contract when the graph is designed well, not that it automatically makes every request faster.
Common mistake: Saying "GraphQL prevents overfetching" without mentioning that resolvers can still fetch too much or do expensive backend work.
2. What is the difference between a query, mutation, and subscription?
A query reads data. A mutation represents a write or state-changing operation. A subscription streams updates over a long-lived connection such as WebSocket or server-sent events.
For frontend work, the distinction matters because each operation drives different UI states. A query needs loading, empty, success, partial-error, and retry states. A mutation needs pending, optimistic, success, rollback, validation-error, and duplicate-submit handling. A subscription needs connection, reconnect, stale-event, and auth-expiry behavior.
Interview-ready add-on: A mutation should usually return the changed object or payload the UI needs to update the cache. Returning only
success: trueoften forces a refetch or leaves the client guessing.3. What is a GraphQL schema?
A schema is the typed contract exposed by a GraphQL server. It defines which operations are available, which object types exist, which fields can be selected, what arguments are accepted, and which values can be null.
For a frontend engineer, the schema is a working client contract. It shapes generated types, component fragments, form input objects, error handling, and the long-term compatibility of old clients.
type Product {id: ID!name: String!price: Money!imageUrl: String}type Query {product(id: ID!): Product}Common mistake: Treating the schema as a JSON response shape. The schema is a contract with validation, nullability, field ownership, and evolution rules.
4. What are scalar, object, enum, and input types?
Scalars are leaf values such as
String,Int,Float,Boolean, andID. Object types contain fields that can be selected. Enums limit a value to a known set of names. Input types describe structured arguments for queries and mutations.enum SortDirection {ASCDESC}input ProductFilterInput {query: StringinStockOnly: Boolean}Input types are separate from output object types because output types can contain computed fields, relationships, interfaces, unions, or resolver-only behavior that does not make sense as input.
5. How do non-null fields and null bubbling work?
String!means the field must not be null.[Product!]!means the list itself is not null and none of its items are null. Nullability is a product contract because it decides whether the UI can show partial data or must treat the parent object as unavailable.If a non-null field resolves to null during execution, GraphQL adds an error and bubbles the null up to the nearest nullable parent. Overusing
!can make a small resolver failure blank out a larger part of the response.Good answer shape: Explain the UI consequence. A nullable
imageUrllets the product card render a placeholder. A non-nullpricesays the card is not useful without price, so failure should be more visible.6. Why are variables preferred over string interpolation?
Variables keep the GraphQL document stable while passing dynamic values separately. They are validated by type, easier to reuse, safer than string-building, and friendlier to operation caching or persisted documents.
query ProductDetails($id: ID!) {product(id: $id) {idnameprice {amountcurrency}}}Variables:
{ "id": "product_123" }Common mistake: Building query strings with template literals and user input. That makes validation, caching, escaping, and operation tracking harder.
7. What are aliases and when would you use them?
Aliases rename response keys. They are useful when querying the same field more than once with different arguments, or when the UI needs two differently named versions of the same schema field.
query CompareProducts {left: product(id: "product_1") {idname}right: product(id: "product_2") {idname}}Without aliases, both selections would produce the same
productkey and conflict.8. How do fragments help?
Fragments define reusable field selections. They are most useful when components own their data needs, because the fragment can live near the component that renders those fields.
fragment ProductCardFields on Product {idnameimageUrlprice {amountcurrency}}Fragments improve consistency, but they can also hide overfetching if teams create one large shared fragment for every screen. A useful fragment represents what a component actually renders.
9. What are directives in GraphQL?
Directives annotate parts of a GraphQL document or schema to change behavior. Common built-in directives include
@include,@skip, and@deprecated.query ProductDetails($id: ID!, $showReviews: Boolean!) {product(id: $id) {idnamereviews @include(if: $showReviews) {ratingbody}}}For frontend interviews, explain directives as part of the data contract.
@includecan conditionally fetch a field, while@deprecatedtells clients a schema field is being phased out.10. What is a resolver?
A resolver is the server-side function that returns the value for a schema field. It may read from a database, call another API, compute a value, or delegate to another service.
Frontend engineers are not always expected to implement resolvers, but they should understand the cost boundary. One GraphQL request can trigger many resolver calls behind the scenes, so a harmless-looking nested query can be expensive.
const resolvers = {Query: {product: (_parent, args, context) => {return context.productService.findById(args.id);},},};Good answer shape: Mention the usual resolver inputs: parent value, field arguments, request context, and execution info. Then connect that to auth, batching, and observability.
11. How do GraphQL errors differ from REST errors?
A GraphQL response can contain
dataanderrorstogether. Request errors, such as syntax, validation, or variable-coercion errors, stop execution and do not includedata. Execution errors happen at a response position and may produce partial data; older GraphQL material often calls these field errors.{"data": {"product": {"id": "product_123","name": "Everyday Backpack","inventory": null}},"errors": [{"message": "Inventory service unavailable","path": ["product", "inventory"]}]}The UI should not automatically turn every GraphQL error into a full-page failure. If the missing field is non-critical, render the safe data and show a local fallback. If the failed field is essential, show a stronger error state.
12. How should auth work in GraphQL?
Authentication identifies the caller. Authorization decides whether that caller can read or mutate a resource or field. Both must be enforced on the server side, usually in resolvers or the service layer behind them.
Do not rely on hiding fields or buttons in the UI. A user can still send a GraphQL operation manually. The frontend can improve UX by hiding unavailable actions, but the server must remain the source of truth.
Good answer shape: Mention authentication headers or cookies, per-resource authorization, consistent error behavior, and audit logging for sensitive mutations.
13. How does GraphQL caching work on the client?
GraphQL does not define client caching by itself. Many clients normalize objects by type name and ID, then store fields separately so different queries can reuse the same entity.
For example, Apollo Client can identify an object using
__typenameplusidby default. That means a product returned by a list query and a product returned by a detail query can point to the same cache entity.Cache correctness depends on stable IDs, selected fields, field arguments, pagination merge policy, and mutation responses. If a mutation response omits the changed object's ID, the client may not know which cached entity to update.
14. What should a mutation return?
A mutation should return enough data for the client to update the UI safely. That might be the changed entity, affected list metadata, aggregate counts, or a domain-specific payload with validation errors.
mutation UpdateCartLine($input: UpdateCartLineInput!) {updateCartLine(input: $input) {cart {idtotalItemssubtotal {amountcurrency}}line {idquantity}userErrors {fieldmessage}}}Returning only
success: trueis weak because the frontend still needs to refetch, guess, or manually patch state without enough information.15. How would you handle optimistic UI after a mutation?
Optimistic UI updates the interface before the server confirms the mutation. It works well when the operation is likely to succeed and the rollback behavior is clear.
For a cart quantity change, the frontend can show the new quantity immediately, disable repeated clicks while the mutation is pending, and roll back if the server rejects the change because of stock, price, or permission rules.
What to say in interviews: Name the visible states: optimistic value, pending indicator, duplicate-submit protection, rollback, validation error, and final cache consistency.
16. How do you paginate a GraphQL list?
Use cursor-based pagination for feeds and changing lists when possible. The connection pattern returns
edges,node,cursor, andpageInfo, which lets the UI request the next page without relying on unstable offsets.query ProductList($first: Int!, $after: String) {products(first: $first, after: $after) {edges {cursornode {idname}}pageInfo {hasNextPageendCursor}}}The frontend still needs to dedupe by stable ID, preserve scroll position, handle empty states, and avoid appending stale pages after filters change.
17. What is the N+1 problem in GraphQL?
N+1 happens when resolving a list triggers one extra backend call per item. The frontend sees one GraphQL request, but the server may perform many database or service calls.
Example: a
productsquery returns 40 products, and each product'ssellerfield calls the seller service separately. That becomes one call for the list plus 40 calls for sellers.Common fixes include batching, request-scoped caching, joining data earlier, or using loader patterns. A frontend engineer should know enough to ask whether expensive fields are batched and whether resolver timing is observable.
18. How do you protect a GraphQL API from expensive operations?
Use layered demand control. For first-party clients, trusted documents can allow only known operations in production. For broader APIs, use pagination, depth limits, breadth or alias limits, batch limits, query complexity analysis, rate limits, timeouts, and monitoring.
Turning off introspection is not enough. It can reduce schema discoverability in non-development environments, but it does not replace authorization, input validation, trusted documents, or operation limits.
Interview-ready answer: "I would control both who can call the API and how expensive each operation can be."
19. What are persisted or trusted documents?
Persisted documents store approved GraphQL operations on the server and let clients send an operation ID, often a hash, instead of the full document. Trusted documents go further by treating those stored operations as an allowlist for first-party production clients.
They can improve security and operations because the server can reject unknown arbitrary documents, track known operation names, and reason about query cost ahead of time.
They do not remove authorization. A known operation can still request data the current user should not see unless the server checks permissions during execution.
20. What is introspection and should it be disabled?
Introspection lets clients query the schema itself. It powers tools, autocomplete, documentation, and code generation.
Disabling introspection can reduce schema discoverability for a private first-party API, but it also removes standard tooling and is not a security boundary. Public GraphQL APIs often leave it enabled. In either case, production security must rely on authorization, trusted documents where appropriate, demand control, and safe error messages.
21. How do file uploads work with GraphQL?
GraphQL can support file uploads through conventions, but uploads often fit better as direct-to-storage or REST-style flows. The frontend concern is not only "can GraphQL upload a file?" It is progress, cancellation, retry, size limits, auth, virus scanning, and what happens if metadata succeeds but upload fails.
A practical answer says: use GraphQL for metadata and signed upload coordination when that keeps the API clean, but do not force large binary transfer through GraphQL just to be consistent.
22. When would you use a custom scalar?
Use a custom scalar when a value needs domain-specific serialization or validation, such as
DateTime,URL,EmailAddress, orJSON.The tradeoff is that clients need to know the runtime format. A schema can say
DateTime, but frontend code still needs documentation or generated scalar mappings that explain whether the value is an ISO string, number, or custom object.23. What is the difference between an interface and a union?
An interface defines shared fields that multiple object types must implement. A union says a field may return one of several object types without requiring shared fields.
Use an interface when the types share a real contract:
interface Node {id: ID!}Use a union for heterogeneous results such as search:
union SearchResult = Product | Article | BrandIn frontend code, both usually require checking
__typenamebefore rendering type-specific fields.24. How do you version a GraphQL API?
Prefer additive schema evolution. Add new fields, deprecate old fields, track operation usage, migrate clients, and remove fields only after the compatibility window.
Avoid changing a field's meaning in place. That is worse than removing it because old clients may keep working syntactically while showing wrong data.
Whole endpoint versioning can exist, but it is usually a last resort for major compatibility breaks. The normal GraphQL path is schema evolution through additive changes and deprecation.
25. How do generated GraphQL types help and where can they hurt?
Generated types catch mismatches between operations and frontend code. They help when a selected field can be null, when a union needs narrowing, or when a mutation input changes.
They can hurt if teams treat generated types as architecture. Codegen cannot fix a vague schema, unstable IDs, unsafe nullability, or a mutation that returns too little data. It is a guardrail, not a replacement for schema ownership.
26. How do subscriptions work and when should you avoid them?
Subscriptions keep a long-lived connection open and push updates when server-side events happen. They are useful for chat, notifications, live dashboards, collaborative editing signals, and other flows where the user benefits from immediate updates.
Avoid subscriptions for data that can be refreshed on navigation, loaded on demand, or polled cheaply. Subscriptions add connection state, auth renewal, reconnect logic, ordering concerns, and server resource cost.
27. How does GraphQL work over HTTP?
GraphQL is not tied to one transport, but HTTP is commonly used for queries and mutations. Many GraphQL APIs send operations to a single endpoint such as
/graphql. Servers commonly supportPOST, and some supportGETfor queries when it is safe and useful for caching.Do not assume HTTP status codes carry every application outcome. A well-formed operation that executes can return HTTP
200and still contain GraphQL execution errors alongside partial data. Parse or validation failures and transport failures use different status handling, so the client must inspect both the HTTP result and the GraphQL response body.28. When is REST simpler than GraphQL?
REST can be simpler for file downloads, uploads, public cacheable resources, small CRUD APIs, webhook-style integrations, and teams without schema governance. REST also maps naturally to HTTP caching and resource URLs.
That does not make GraphQL bad. It shows judgment. Choose GraphQL when the product has multiple clients, nested data needs, strong schema benefits, or frontend screens that suffer from overfetching, underfetching, and endpoint coordination.
29. How would you debug a slow GraphQL screen?
Start at the user-visible symptom, then split the problem:
- Inspect which operation ran and which variables changed.
- Check response size and whether the query selected expensive fields.
- Check client cache hit/miss behavior.
- Look for duplicate requests or stale refetch loops.
- Ask for resolver timing, N+1 traces, backend indexes, and service-call counts.
- Measure render cost if the data arrives quickly but the screen still feels slow.
A good answer does not blame GraphQL first. It follows the request from component to client cache to network to resolver execution to render.
30. How would you migrate one REST screen to GraphQL?
Choose one screen with clear ownership and measurable behavior. Keep the existing REST flow as a reference, design the GraphQL query around the fields the screen actually renders, generate types, handle loading and error states, compare response size and latency, and verify analytics or logs before removing the old path.
Do not migrate every endpoint just because GraphQL is available. A safe migration proves that the schema, cache, authorization, and observability work for one product flow first.
Code examples interviewers may ask you to reason through
These examples are short on purpose. In an interview, explain the tradeoff around each one instead of only reading the syntax.
Query with variables and a component-owned fragment
fragment ProductCardFields on Product {idnameimageUrlprice {amountcurrency}}query ProductGrid($query: String!, $first: Int!, $after: String) {products(filter: { query: $query }, first: $first, after: $after) {edges {cursornode {...ProductCardFields}}pageInfo {hasNextPageendCursor}}}What this shows: stable variables, component field ownership, cursor pagination, and a response shape the UI can merge page by page.
Mutation response designed for cache updates
mutation SaveProduct($input: SaveProductInput!) {saveProduct(input: $input) {product {idisSavedsavedCount}userErrors {fieldmessage}}}What this shows: the mutation returns the changed entity and fields the UI needs. The client can update a product card, detail page, and saved counter without guessing.
Partial data response
{"data": {"product": {"id": "product_123","name": "Everyday Backpack","recommendations": null}},"errors": [{"message": "Recommendation service timed out","path": ["product", "recommendations"]}]}What this shows: the product page can render core product data while showing a fallback for recommendations. The answer should depend on whether the failed field is critical.
Scenario questions to practice
Use scenarios because they reveal whether the concept survives messy product work. Try answering each prompt in two minutes, then name what you would inspect before choosing a solution.
Scenario What a good answer should reason through A feed query gets slower as users follow more accounts Resolver cost, pagination, batching, query limits, cache policy, and backend indexes A field cannot be removed because old clients use it Deprecation, schema evolution, operation tracking, and migration windows A frontend needs partial data with errors GraphQL response shape, nullable fields, error handling, and UI fallback states A public GraphQL endpoint is abused Trusted documents, auth, rate limiting, cost analysis, and monitoring A mutation updates several visible screens Return shape, optimistic update, cache write, invalidation, rollback, and refetching Common weak answers
Each answer below hides the schema, client, or failure decision the interviewer needs to hear. Replace the slogan with the concrete GraphQL tradeoff.
Weak answer Why it falls short Better direction "GraphQL is always better than REST" The tradeoff depends on clients, caching, team ownership, and server cost Explain when GraphQL helps and when REST is simpler "No overfetching means no performance problem" Resolvers can still do expensive work Mention demand control and backend query planning "Disable introspection and it is secure" Security cannot rely on hiding the schema Use auth, authorization, operation limits, and monitoring "Fragments are only for reuse" Fragments also affect cache consistency and component data contracts Discuss colocated data needs and maintenance "Types mean the API is safe" Type checks do not prove business permission or runtime availability Mention auth, nullability, resolver failures, and testing Answer depth by level
Level What the answer should show Fresher Can write queries and mutations, understands schema basics, variables, loading states, and error states Mid-level Can reason about cache updates, pagination, fragments, partial data, and when REST is simpler Senior Can discuss schema evolution, resolver cost, N+1, security, observability, generated types, and migration strategy Staff/lead Can design GraphQL boundaries across teams, define governance, protect the API from expensive operations, and keep client contracts sane Worked example: product listing with GraphQL
A product listing page is a useful GraphQL interview example because it touches schema design, client state, pagination, caching, authorization, and performance. A shallow answer says GraphQL prevents overfetching. A stronger answer explains the data contract and the cost of each field.
Start with the schema shape:
type ProductConnection {edges: [ProductEdge!]!pageInfo: PageInfo!totalCount: Int}type ProductEdge {cursor: String!node: Product!}type Product {id: ID!name: String!imageUrl: Stringprice: Money!inventoryStatus: InventoryStatus}type Query {products(filter: ProductFilterInputsort: ProductSortInputfirst: Int!after: String): ProductConnection!}Then explain the frontend flow:
- Keep search, filter, and sort in the URL so refresh and sharing work.
- Pass filter values as variables, not string-built query text.
- Use cursor pagination and merge pages by stable product ID.
- Show loading, empty, partial-error, and retry states without clearing safe old data too early.
- Ask whether expensive fields such as inventory, discounts, or recommendations are batched and observable.
- Keep authorization server-side, especially for fields like wholesale price or admin-only inventory detail.
A good spoken answer might be:
I would query products with filter, sort, first, and after variables. Product cards would own a fragment for id, name, image, price, and inventory status. I would keep filters in the URL, merge cursor pages by product ID, and show a local fallback if a non-critical field fails. Before shipping, I would check resolver timing for inventory and recommendation fields because one GraphQL request can still trigger expensive backend work.When practicing, make one answer concrete enough to draw: the operation, response shape, cache entries affected, error state, and server check. That exposes missing reasoning faster than another definition drill.
- Next.js Interview Questions for Experienced Developers: Mid to Senior (2026)Prepare for mid-level and senior Next.js interviews in 2026 with advanced questions on App Router, Server Components, rendering, caching, auth, migration, and deployment.作者GreatFrontEnd Team13 分钟阅读Jun 25, 2026
Experienced Next.js interviews in 2026 test whether you can choose the right rendering boundary for a product route: static, request-time, client-interactive, server-only, cached, revalidated, or protected before the page renders.
Mid-level and senior candidates are expected to go beyond definitions. Strong answers connect App Router APIs to product constraints: SEO, freshness, secrets, authentication, bundle size, error states, migration risk, and deployment behavior.
If you are preparing for entry-level interviews, start with Next.js Interview Questions for Freshers. This guide assumes you already know the common terms and need to explain tradeoffs, failure modes, and design choices.
The official Next.js App Router docs now show Next.js 16 as the latest line, while many company codebases still run Next.js 14 or 15. Use App Router vocabulary by default, but ask which version and caching setup the team uses before giving version-specific answers.
What experienced interviewers are checking
Prompt What it tests Weak answer "Build /products/[id]."Dynamic routes, params, metadata, not-found statesOnly describing React Router "Where should this API key live?" Server-only code and secret handling Calling the private API from the browser "Why is this page stale?" Caching, revalidation, dynamic rendering Saying only "clear cache" "Why did hydration fail?" Server/client markup mismatch Blaming CSS or React without naming the mismatch "Add a cart button to a product page." Server and Client Component boundaries Marking the whole route as client-rendered "Protect /dashboard."Auth checks before protected UI renders Redirecting only in useEffectCore Next.js questions for experienced developers
1. What is Next.js?
Next.js is a React framework for building web applications. It adds file-system routing, server rendering, static generation, Server Components, data fetching conventions, metadata, route handlers, image and font optimization, and deployment patterns around React.
React gives you the component model. Next.js gives you the application structure.
2. What is the App Router?
The App Router is the modern routing system based on the
app/directory. It uses route segments,page.tsx,layout.tsx, Server Components, Client Components, loading UI, error boundaries, Route Handlers, metadata APIs, and caching controls.For new projects, answer App Router questions with
app/concepts first. Mention the Pages Router only when comparing older APIs such asgetStaticPropsorgetServerSideProps.3. How does file-system routing work?
In the App Router, folders define route segments. A segment becomes publicly routable when it has a
page.tsxfile.app/page.tsxproducts/page.tsx[id]/page.tsxThis creates
/,/products, and/products/:id.4. What is the difference between
page.tsxandlayout.tsx?page.tsxrenders the UI for a route.layout.tsxwraps a route segment and its children. Layouts are useful for shared navigation, sidebars, shells, and providers that should persist across navigation.Use a page for route-specific content. Use a layout for shared structure.
5. What are dynamic routes?
Dynamic routes capture variable URL segments with folder names such as
[id],[slug],[...slug], or[[...slug]].export default async function ProductPage({params,}: {params: Promise<{ id: string }>;}) {const { id } = await params;return <h1>Product {id}</h1>;}In current App Router examples,
paramsmay be treated asynchronously. Follow the project's Next.js version and conventions.For an interview, say the important part out loud:
[id]is the dynamic segment,params.idis the value from the URL, and the page should still handle a missing or invalid product withnotFound().6. What are Server Components?
Server Components render on the server and do not ship their component code to the browser. They are useful for reading server-only data, calling databases, using secrets, rendering static content, and reducing client JavaScript.
They cannot use browser-only APIs, event handlers, or client hooks such as
useState.7. What are Client Components?
Client Components run in the browser. Add
"use client"at the top of the file to create a client boundary.Use Client Components for click handlers, local state, effects, browser APIs, focus behavior, and interactive widgets.
8. When should you use
"use client"?Use
"use client"only for the component subtree that needs browser interactivity. A product page can be a Server Component while anAddToCartButtoninside it is a Client Component.The common mistake is marking the entire route as client-rendered because one button needs
onClick.9. Can Server Components render Client Components?
Yes. A Server Component can import and render a Client Component, passing serializable props. This is the normal pattern for mixing server-rendered content with small interactive islands.
A Client Component should not directly import a Server Component. Instead, pass server-rendered children from a server parent when needed.
10. What is hydration?
Hydration is the process where React attaches client-side behavior to server-rendered HTML. Hydration warnings happen when the initial client render does not match the HTML produced on the server.
Common causes include rendering
Date.now(),Math.random(), locale-dependent text, orlocalStorage-dependent values during the first render.Routing, metadata, and error handling
11. How do you handle a 404 in the App Router?
Use
notFound()when route data does not exist, and define anot-found.tsxfile when the route needs custom not-found UI.Do not silently render an empty page for a missing product. A missing resource is a route-level state.
12. How do redirects work?
Use
redirect()when server-side route logic determines the user should go elsewhere, such as after an auth check or missing required setup.Client-side navigation is still useful for user-initiated interactions, but protected content should not flash before a redirect.
13. How do you add metadata?
Use static
metadatafor fixed route metadata andgenerateMetadata()when metadata depends on route params or fetched data.For a product detail page, use the product title, description, canonical URL, and open graph image from server-side data.
14. What is
loading.tsx?loading.tsxdefines route-level loading UI. It works with Suspense boundaries so the user can see an immediate loading state while route content is prepared.Good answers mention the user experience: a slow product page needs a stable loading layout, not a blank screen.
15. What is
error.tsx?error.tsxdefines an error boundary for a route segment. It must be a Client Component because error boundaries need client behavior.Use it for recoverable route errors. Do not treat it as a replacement for validating data and handling expected empty states.
Rendering and caching questions
16. Static generation versus request-time rendering: how do you choose?
Use static generation when the route can be generated ahead of time and stale content is acceptable until the next build or revalidation. Use request-time rendering when the response depends on user-specific data, cookies, headers, permissions, or strict freshness.
Most product pages are mixed: marketing copy can be cached, while inventory or price may need revalidation or dynamic fetching.
In newer Next.js projects, you may also hear about Cache Components. The interview answer is still the same at the product level: decide which parts may be reused, which parts are request-specific, and where Suspense should show a loading state while uncached data resolves.
17. What is
generateStaticParams()?generateStaticParams()returns params for dynamic routes that should be generated at build time.Use it for known blog slugs, documentation pages, marketing pages, or product pages where the catalog is known and build-time generation is reasonable.
18. How does caching work with
fetch()?Next.js extends server-side
fetch()with persistent caching and revalidation controls. Defaults have changed across recent versions and can also depend on project configuration, so avoid giving a memorized default as if it were universal. Interviewers usually care more about whether you make freshness explicit for important data.For example, product copy can be cached longer than stock status. A dashboard for the signed-in user should not share cached private data across users.
Useful answer pattern:
- Public and slow-changing: opt into caching and revalidate on a schedule or event.
- User-specific: fetch per request or use private caching where the framework supports it.
- Security-sensitive: never share a cached response across users unless the cache key and privacy boundary are explicit.
19. What is revalidation?
Revalidation updates cached data after time passes or after an event. Time-based revalidation is useful for data that can be a little stale. On-demand revalidation is useful after a CMS publish, catalog update, or admin action.
Name the freshness requirement before choosing a revalidation strategy.
20. How do you avoid stale search results?
Search routes often depend on query params, user input, ranking, and freshness. Avoid treating every possible search query as a prebuilt static page.
Depending on SEO and interactivity needs, render results on the server, fetch them on the client, or combine a server-rendered shell with client-side refinements.
Data, mutations, and APIs
21. What are Route Handlers?
Route Handlers let you define server endpoints inside the App Router, commonly with
route.ts. Use them for API endpoints, webhooks, server-side data access, and integrations that should not expose secrets to the browser.22. Where should secrets live?
Secrets should stay on the server: Server Components, Server Functions, Route Handlers, or other server-only code. Do not expose private API keys through Client Components or public environment variables.
23. What are Server Functions?
Server Functions run on the server and can be called from application code for mutations or server-side work. In interviews, explain why the server boundary matters: validation, authorization, secret access, and trusted writes belong on the server.
24. How do you validate user input?
Validate on the client for fast feedback and on the server for trust. Client validation improves UX. Server validation enforces the rule.
A good form answer includes pending state, duplicate-submit prevention, error display, and accessible field messages.
25. How do you handle authentication?
Read auth state from trusted server-side signals such as cookies or headers. Redirect unauthenticated users before rendering protected UI when the server has enough information.
For broad route gates, Next.js docs now use the term Proxy for pre-route logic. Some teams may still say Middleware because older versions and codebases used that term.
Do not put all authorization logic only in Proxy. It is useful for early routing decisions, but data access and mutations still need server-side authorization at the point where protected data is read or changed.
Performance and deployment questions
26. How do you reduce client JavaScript?
Keep non-interactive UI as Server Components, put
"use client"at small boundaries, avoid importing large browser-only libraries into shared parents, and measure bundle output before optimizing blindly.27. How do images work in Next.js?
Next.js provides an Image component and image optimization features. In interviews, explain the product reason: reserve layout space, serve appropriately sized images, avoid unnecessary downloads, and protect performance metrics such as LCP.
28. How do fonts work?
Next.js font optimization helps load fonts with less layout shift and clearer ownership. The key interview point is that font loading affects perceived performance, layout stability, and branding consistency.
29. How do you debug a slow route?
Split the problem:
- Is the server slow to fetch data?
- Is the page waiting on unnecessary blocking data?
- Is too much JavaScript sent to the browser?
- Is hydration expensive?
- Is an image hurting LCP?
- Is caching disabled by accident?
Then measure with framework build output, browser DevTools, server logs, and Web Vitals.
30. What changes between local development and production?
Development mode optimizes feedback for engineers. Production builds optimize output for users. Caching, bundling, minification, image behavior, and deployment environment can differ.
If a bug appears only in production, check environment variables, build-time assumptions, server/runtime differences, and caching.
Senior Next.js questions
31. How would you design a product detail route?
Use a Server Component page for product data and SEO. Generate metadata from product data. Return
notFound()for missing products. Keep interactive parts such as cart controls, variant selectors, and wishlist buttons in small Client Components. Make freshness explicit for price and inventory.32. How would you design an authenticated dashboard?
Check auth before rendering protected UI. Fetch user-specific data on the server with request-aware credentials. Avoid sharing cached private responses. Split slow widgets with Suspense when possible. Keep URL state for filters that users expect to share or revisit.
33. How would you migrate from Pages Router to App Router?
Do not rewrite everything at once. Migrate route by route, learn the new data and rendering model, replace
getStaticPropsandgetServerSidePropswith App Router patterns, move shared shells into layouts, and identify Client Component boundaries.The biggest migration risk is carrying old mental models into Server Components and caching.
Good migration answers also mention compatibility work: routes may coexist during migration, shared components may need
"use client"boundaries, API routes may move to Route Handlers only when there is a reason, and tests should cover redirects, metadata, and not-found behavior before and after the move.34. How do you prevent hydration mismatches?
Make the first client render match the server HTML. Avoid browser-only reads during render. Move browser-only logic into effects, use cookies when the server needs the value, or render a deliberate client boundary for values that cannot be known on the server.
35. How do you choose between server and client fetching?
Use server fetching when data improves SEO, uses secrets, depends on trusted auth, or should avoid extra client waterfalls. Use client fetching for highly interactive data, browser-only context, live updates, or user actions after initial render.
The answer should include the UI states either way.
36. How do you handle partial failures?
Do not let one optional widget break an entire page. Use route error boundaries for route-level failures, local error UI for widget-level failures, and server-side validation for expected missing data.
Name which failures are fatal and which can degrade.
37. How do you keep a route maintainable?
Separate route concerns: data loading, metadata, UI composition, interactive client widgets, mutation boundaries, and error states. Avoid making
page.tsxa long file that owns every detail.38. How do you test a Next.js app?
Test pure utilities with unit tests, components with user-focused component tests, and critical flows with E2E tests. For framework-specific behavior such as redirects, route handlers, and server boundaries, test at the route or integration level where possible.
39. How do you review a Next.js PR?
Check whether secrets stay on the server, client boundaries are small, route states are handled, metadata is correct, caching is explicit where freshness matters, and loading/error/not-found states match the product requirement.
40. What is a good final interview answer pattern?
Use this structure:
- Name the route or component boundary.
- State the rendering and freshness requirement.
- Choose the server/client split.
- Name the Next.js file or API.
- Call out one failure mode.
That pattern turns framework knowledge into product judgment, which is what stronger Next.js interviews usually measure.
- Vue.js Interview Questions: Complete Guide for 2026 (Fresher to Senior)Prepare for Vue.js interviews in 2026 with questions on Vue 3, Composition API, reactivity, components, props, emits, slots, composables, routing, state, and performance.作者GreatFrontEnd Team12 分钟阅读Jun 25, 2026
Vue.js interviews in 2026 test whether you understand Vue 3 reactivity, component communication, Single-File Components, Composition API, routing, state, and performance tradeoffs.
The strongest answers do not sound like API lists. They explain how data changes, which component owns it, how the template updates, and what happens when the app grows.
The official Vue introduction documents Vue 3 as the current guide, with Single-File Components for build-tool projects and Composition API plus SFCs as the recommended path for full applications.
What Vue interviewers are checking
Prompt What it tests Common mistake "Why did this template update?" Vue reactivity Saying "Vue watches everything" without explaining refs/proxies "Should this be a prop, emit, or store value?" State ownership Putting all shared data in a global store "Build a reusable modal." Slots, emits, accessibility, lifecycle Hard-coding content and forgetting focus behavior "Fetch data for this route." Lifecycle, async state, routing Ignoring loading, empty, and error states "This list is slow." Keys, computed data, virtualization Re-rendering a huge list and blaming Vue Fresher Vue.js interview questions
1. What is Vue.js?
Vue.js is a JavaScript framework for building user interfaces. It uses components, declarative templates, reactive state, directives, and an ecosystem for routing, state management, tooling, and server rendering.
Vue can be used progressively on part of a page or as the framework for a full application.
2. What is a Single-File Component?
A Single-File Component, usually a
.vuefile, keeps a component's template, script, and styles in one file.<template><button @click="count++">Clicked {{ count }} times</button></template><script setup lang="ts">import { ref } from 'vue';const count = ref(0);</script>SFCs are common in build-tool-enabled Vue projects because they keep the component's UI, logic, and local styles close together.
3. What is the Composition API?
The Composition API is a Vue API style where component logic is written with functions such as
ref,reactive,computed,watch, and lifecycle hooks insidesetupor<script setup>.It is especially useful when a component has several related pieces of logic or when logic should be extracted into composables.
4. What is the Options API?
The Options API organizes a component into options such as
data,methods,computed,watch, and lifecycle hooks.It is still valid Vue. In interviews, avoid presenting Composition API as "new good" and Options API as "old bad." Explain the tradeoff: Options API is approachable for simpler components, while Composition API scales better for shared logic and complex features.
5. What is
ref()?ref()creates a reactive value. In script, read and write the value through.value. In templates, refs are automatically unwrapped.const count = ref(0);count.value += 1;Use
reffor primitives and often for values that may be replaced.6. What is
reactive()?reactive()creates a reactive proxy for an object.const form = reactive({email: '',password: '',});Use it for object state where you want to mutate properties. Be careful when destructuring because destructuring can lose reactivity unless you use helpers designed for that case.
For example, destructuring
const { email } = formgives you the current value, not a reactive binding. UsetoRefs()when separate reactive bindings are needed:import { reactive, toRefs } from 'vue';const form = reactive({email: '',password: '',});const { email, password } = toRefs(form);That is a common source of "why did my template stop updating?" interview questions.
7. What is the difference between
computedandwatch?Use
computedfor derived values that can be calculated from reactive state.Use
watchfor side effects when a reactive value changes: calling an API, syncing with storage, logging analytics, or bridging to non-Vue code.If you can calculate it during render, use
computedinstead ofwatch.8. What are directives?
Directives are special template attributes that apply reactive behavior. Common examples include:
v-iffor conditional renderingv-showfor toggling visibility with CSSv-forfor listsv-bindor:for binding attributesv-onor@for eventsv-modelfor two-way form bindings
9. What is the difference between
v-ifandv-show?v-ifconditionally mounts or unmounts DOM. Use it when the condition changes rarely or when the component should not exist until needed.v-showkeeps the element in the DOM and toggles display. Use it for frequent visibility changes where mount cost matters less than toggle speed.10. Why do keys matter in
v-for?Keys help Vue track item identity across list updates. Use stable IDs when rendering lists that can change order, insert, remove, or filter.
Index keys can preserve state on the wrong row when the list changes.
Component communication questions
11. How do props work?
Props pass data from parent to child. A child should treat props as read-only input.
<script setup lang="ts">defineProps<{title: string;completed: boolean;}>();</script>If the child needs to request a change, emit an event instead of mutating the prop.
12. How do emits work?
Emits let a child component notify its parent that something happened.
<script setup lang="ts">const emit = defineEmits<{save: [id: string];}>();function saveTodo(id: string) {emit('save', id);}</script>The parent owns the state change. The child reports the user action.
13. What is
v-modelon a component?v-modelcreates a two-way binding convention between a parent and child component. In Vue 3, componentv-modelis based on a prop and an update event.Use it for form-like components such as inputs, selects, toggles, and date pickers. Avoid hiding complex business updates behind
v-modelwhen explicit events would be clearer.In current Vue,
defineModel()is the concise way to declare a component model in<script setup>. In older or more explicit code, the same idea appears as amodelValueprop and anupdate:modelValueevent. Knowing both helps in interviews because many production codebases mix versions and styles.14. What are slots?
Slots let a parent pass template content into a child component.
Use slots for layout components, cards, modals, tables, and reusable shells where the child owns structure but the parent owns content.
15. What are scoped slots?
Scoped slots let the child expose data to the slot content.
They are useful for reusable list, table, or form components where the child manages behavior and the parent controls rendering.
16. What is provide/inject?
provideandinjectpass values through a component tree without prop drilling.Use them for shared context such as theme, form context, table context, or dependency-style values. Do not use them to hide ordinary parent-child data flow.
Reactivity and lifecycle questions
17. How does Vue reactivity work at a high level?
Vue tracks reactive reads during rendering or effects, then updates the affected parts when reactive values change. In Vue 3, object reactivity is built on JavaScript proxies, while refs wrap individual values.
The interview goal is to explain dependency tracking and updates without claiming Vue "rerenders everything."
18. What is a composable?
A composable is a function that uses Vue Composition API features to package reusable stateful logic.
import { onMounted, onUnmounted, ref } from 'vue';export function useWindowWidth() {const width = ref(0);function updateWidth() {width.value = window.innerWidth;}onMounted(() => {updateWidth();window.addEventListener('resize', updateWidth);});onUnmounted(() => window.removeEventListener('resize', updateWidth));return { width };}Good composables clean up side effects and expose a small API.
19. What lifecycle hooks do you use often?
Common Composition API hooks include:
onMountedfor browser-only setup after mountonUpdatedfor reacting after DOM updates when neededonUnmountedfor cleanuponErrorCapturedfor handling descendant errors
Do not fetch data in a lifecycle hook by reflex. In router-based apps or SSR, data loading may belong at the route or framework layer.
20. What is the difference between
watchandwatchEffect?watchobserves explicit sources and runs when those sources change. It is better when you want control over what triggers the effect.watchEffectruns immediately and tracks reactive values used inside it. It is convenient, but less explicit.Use
watchwhen correctness depends on a specific source.Routing, state, and async questions
21. How does Vue Router fit into a Vue app?
Vue Router maps URLs to components and supports route params, query params, nested routes, navigation guards, lazy-loaded route components, and active links.
A good routing answer includes user states: loading, not found, unauthorized, and error.
22. How do you fetch data in Vue?
For a simple client-rendered component, use reactive request state and fetch data when the route or input changes. In a framework or SSR setup, prefer the framework's data-loading pattern.
Always model:
- Loading
- Success
- Empty
- Error
- Retry or refresh when needed
23. What is Pinia?
Pinia is the commonly used state management library in the Vue ecosystem. Use a store for state shared across unrelated components or routes, such as auth user, cart, preferences, or app-wide entities.
Do not move every local form value into a store. Local state is easier to reason about when only one component owns it.
A good Pinia answer also separates server cache from client state. If the data mainly comes from the server and needs refetching, invalidation, pagination, or background refresh, a data-fetching layer or framework loader may be a better fit than manually copying everything into a store.
24. How do you keep URL state and app state in sync?
Put shareable, bookmarkable state in the URL: search query, filters, sort order, page number, and selected tab when the user expects back-button behavior.
Keep ephemeral UI state local: open menus, draft input, hover state, and one-off loading flags.
25. How do you handle forms in Vue?
Use
v-modelfor field values, validation for user feedback, and explicit submit handling for server work.A good form answer includes labels, accessible errors, disabled pending state, server-side validation, and duplicate-submit protection.
Senior Vue.js interview questions
26. How would you design a reusable modal?
Use props for open state, emits for close/confirm events, slots for content, and lifecycle or composables for focus trapping, Escape handling, and scroll locking. Keep accessibility requirements explicit: role, label, focus return, and keyboard behavior.
27. How would you optimize a slow list?
First identify the bottleneck. Use stable keys, avoid expensive work directly in templates, move derived data to computed values, paginate or virtualize long lists, lazy-load heavy rows, and measure before changing architecture.
Also check whether the list reactivity is too deep for the job. For large immutable datasets,
shallowRef()can be useful because Vue tracks replacement of the array rather than every nested property. That is a senior-level answer only when you can explain the tradeoff: nested mutation will not trigger updates the same way.28. How would you organize a large Vue app?
Group by feature when features are large enough: route, components, composables, store, API client, tests, and types. Keep truly shared UI in a shared component area. Avoid a giant global components folder full of one-off pieces.
29. How do you choose between props, provide/inject, and Pinia?
Use props and emits for direct parent-child communication. Use provide/inject for context shared by a component subtree. Use Pinia when unrelated parts of the app need the same state or actions.
The decision is about ownership and reach.
30. How do you test Vue components?
Test user-visible behavior: rendered text, form interactions, emitted events, loading states, error states, and accessibility-critical behavior. Avoid tests that only assert implementation details such as private method calls.
31. What are common Vue performance mistakes?
Common mistakes include unstable keys, deep watchers on large objects, expensive computed work over huge arrays, unnecessary global state updates, rendering too many rows at once, and importing large dependencies into frequently used components.
32. How do you avoid memory leaks?
Clean up event listeners, timers, subscriptions, observers, and third-party library instances in
onUnmounted. Composables that create side effects should own their cleanup.33. What should you know about TypeScript in Vue?
Know how to type props, emits, refs, computed values, composables, API responses, and store state. With
<script setup lang="ts">, keep component contracts close to the component.Do not type everything as
anyto make the template pass. That removes the main value of TypeScript.34. How would you review a Vue PR?
Check state ownership, prop mutation, event names, stable keys, computed versus watcher usage, cleanup for side effects, accessible form and modal behavior, route states, and whether shared code is genuinely reusable.
35. What is a strong answer pattern for Vue interviews?
Use this structure:
- Name the state owner.
- Name the reactive primitive or component API.
- Explain how the template updates.
- Mention cleanup or edge cases.
- Tie the answer to user behavior.
That keeps your answer practical whether the prompt is a small component, a route, or a senior architecture question.
Practice plan before a Vue interview
Build these small features:
Feature Skills tested Todo list ref,computed,v-for, keys, emitsSearch page async state, route query, loading and errors Modal slots, emits, lifecycle, keyboard behavior Data table props, scoped slots, derived rows, pagination Cart store Pinia, actions, derived totals, persistence Form wizard v-model, validation, step state, accessibilityPair Vue practice with general frontend practice: JavaScript data work, CSS layout, browser APIs, accessibility, and UI problem solving. Vue gives you a productive component model, but interviews still reward careful frontend judgment.
- Frontend Developer Jobs in Pune: Top Companies + Interview Prep (2026)Learn how to prepare for frontend developer jobs in Pune in 2026 with the right skills, portfolio projects, job search strategy, and interview practice.标签作者GreatFrontEnd Team9 分钟阅读Jun 23, 2026

Frontend developer jobs in Pune are a good target in 2026 if you can handle practical UI work: React or Angular, JavaScript, CSS, APIs, performance basics, and readable code.
Pune has a mixed frontend market. You will see product companies, IT services, GCC teams, agencies, industrial tech, banking and finance products, analytics products, trainee roles, and senior frontend openings. Some roles are modern React product work. Some are Angular enterprise work. Some are web developer roles where HTML, CSS, Bootstrap, jQuery, CMS, and quick delivery matter.
That means your preparation should not copy a Bangalore or remote-only plan. Pune rewards candidates who can identify the kind of frontend work behind the title and show matching proof. Start by asking: is this product UI, enterprise delivery, agency/CMS work, or junior implementation work?
For stack choices, use data as a guardrail. In the 2025 Stack Overflow Developer Survey, professional developers reported broad use of JavaScript, HTML/CSS, TypeScript, React, Next.js, Angular, and jQuery. That matches Pune's mix: modern frontend roles exist, but some web developer jobs still value practical CSS, DOM, CMS, and legacy-code comfort.
What frontend work looks like in Pune
Use the job description to classify the role.
Role pattern Likely work What to show Front-End Developer, 1-3 years websites, client-side pages, Bootstrap, basic React, responsive UI polished layouts, JS interactions, deployed projects React Developer product screens, API data, components, app state React project with forms, tables, routing, and error states Angular Developer enterprise apps, dashboards, forms, services, modules Angular forms, typed services, reusable components Junior React/JavaScript Developer small features, bug fixes, REST APIs, some backend adjacency clean JavaScript, React basics, API-backed project UI / Front-End Developer layout, CSS, browser behavior, design handoff responsive CSS, accessibility basics, visual care Senior Frontend Developer architecture, performance, mentoring, cross-team work case studies, tradeoffs, performance and review examples Trainee Frontend Developer HTML, CSS, Bootstrap, JS, jQuery, learning on the job finished beginner projects and GitHub discipline The mistake is applying to all of these as if they are the same. A trainee role needs evidence of learning speed and clean basics. A senior React role needs ownership, state decisions, and product judgment.
Pune company types and preparation
Company type Frontend work you may see Best preparation IT services client apps, feature delivery, framework variety, maintenance one framework plus adaptable JavaScript and CSS Product companies dashboards, workflows, customer features, API integration product-style projects with edge states GCCs larger codebases, code review, testing, maintainability TypeScript, component boundaries, readable PRs Agencies websites, campaign pages, responsive UI, CMS work visual polish, CSS, browser compatibility Industrial and construction tech data tables, reports, project tools, internal systems table-heavy UI, filters, charts, permissions Fintech and operations teams forms, KYC-like flows, approvals, audit screens validation, disabled states, error recovery Choose one primary lane and one backup lane. For example:
- Primary: React product roles
- Backup: junior UI developer roles
Or:
- Primary: Angular enterprise roles
- Backup: React/Angular service-company roles
This keeps your resume and portfolio consistent. It also prevents the common Pune job-search mistake: applying to a senior Angular enterprise role, a React product role, and a trainee UI role with the same project order and the same resume bullets.
Companies to research in Pune
Pune's company mix is different from Bangalore and Hyderabad. It has strong services, enterprise product, banking/finance, industrial tech, SaaS, and GCC-style work. Treat the names below as research targets, not a universal ranking.
Company group Examples to research Frontend angle to look for Pune-headquartered or Pune-strong tech companies Persistent Systems, PubMatic, Druva, BMC Software, Zensar, Cybage product engineering, SaaS dashboards, enterprise UI, platform tools, frontend performance Banking, finance, and enterprise GCCs Mastercard, Barclays, UBS, Citi, Deutsche Bank, Credit Suisse/UBS teams forms, approvals, data-heavy screens, security, reliability, internal tools Industrial, engineering, and B2B tech Siemens, PTC, Dassault Systemes, vConstruct, NICE complex workflows, data visualization, internal platforms, domain-heavy UI Services and consulting companies Infosys, TCS, Cognizant, Capgemini, Accenture, Tech Mahindra, Wipro client delivery, Angular/React projects, migrations, support, multi-stack exposure Startups and local product teams SaaS, edtech, logistics, developer-tools, and agency-style teams faster ownership, practical UI delivery, broader responsibilities If you want frontend depth, read the job description carefully. A strong Pune role can come from a product company, a GCC, or a services team, but the work should include UI ownership: forms, tables, APIs, performance, accessibility, or reusable components. If the listing only names tools, ask what screen or workflow the team owns.
Skills Pune employers tend to reward
The safest stack is:
- HTML and CSS: semantic structure, forms, responsive layout, Flexbox, Grid, overflow, and component styling.
- JavaScript: arrays, objects, promises, async/await, fetch, event handling, DOM, and modules.
- React or Angular: choose one primary framework based on your target roles.
- TypeScript: props, API response types, union states, form models, and event types.
- REST APIs: loading, empty, error, retry, validation errors, and auth failure.
- Performance basics: large lists, image weight, unnecessary renders, and network delays.
- Security basics: do not inject raw HTML casually, protect tokens, validate assumptions, and understand client-side limits.
- Git and review: clean commits, readable READMEs, and small pull-request habits.
If you are choosing between React and Angular, do not treat it as an identity decision. Search current Pune openings, count which framework appears in your target lane, and build one serious project in that framework. Keep JavaScript and CSS separate from the framework; those are what keep you employable when the codebase is older than the job post.
If you are still learning, follow How to Become a Frontend Developer in 2026 before applying heavily.
Portfolio projects for Pune roles
Build projects that match the work Pune companies actually hire for.
Project 1: Operations dashboard
This fits product, analytics, industrial, services, and GCC roles.
Include:
- Search and filters
- Sortable and paginated table
- Details panel
- Status badges
- Loading, empty, error, and retry states
- Export button as a UI-only action or mocked behavior
- Mobile fallback for the table
Add a README note explaining the table state, why filters live where they live, and how you would connect the screen to a backend.
Project 2: Approval workflow
Good options:
- Leave approval
- Vendor approval
- Expense approval
- Candidate review
- Maintenance request
Include:
- List view
- Details view
- Approve/reject actions
- Confirmation dialog
- Required rejection reason
- Permission-based disabled actions
- Activity log
This project works well because it is closer to internal-tool frontend work than a clone of a streaming homepage.
Project 3: Responsive marketing or product page
Do not ignore CSS. Pune has many roles where layout quality matters.
Include:
- Responsive hero
- Pricing or feature grid
- FAQ accordion
- Contact form
- Good focus states
- Image optimization basics
- Clean mobile layout
This project helps for web developer, agency, and UI roles.
Resume examples by level
Write bullets that describe behavior.
Level Weak bullet Better bullet Fresher Made React projects Built a React job tracker with filters, local persistence, empty states, and responsive layout 1-2 years Worked on UI pages Implemented reusable form fields with validation messages and API error handling 3-5 years Developed frontend features Owned an Angular approval workflow with typed services, role-based actions, and release fixes Senior Managed frontend work Led a React performance pass on a data-heavy page by reducing unnecessary renders and table work If you do not have work experience, use project bullets. If you do have work experience, prioritize shipped work over personal projects.
Interview preparation for Pune
Expect a practical interview bar. You may get a mix of JavaScript, CSS, framework questions, project discussion, and UI coding.
JavaScript topics
Prepare:
- Array and object transformations
map,filter,reduce,sort, and mutation pitfalls- Promises and
async/await - Closures and stale values
- Event delegation
- Fetch and error handling
- Debouncing and throttling
- Local storage and JSON parsing
CSS topics
Prepare:
- Box model
- Specificity and cascade
- Flexbox and Grid
- Positioning
- Overflow and z-index
- Responsive breakpoints
- Form styling
- Focus states
Framework topics
For React:
- State and derived values
- Effects and cleanup
- Controlled forms
- Lists and keys
- Props and component composition
- Context
- Refs
- Error boundaries at a conceptual level
For Angular:
- Components and templates
- Inputs and outputs
- Services
- Reactive forms
- Routing
- Observables at a practical level
- Module or standalone component organization depending on the project
Practice JavaScript interview questions, React interview questions, Contact Form, Data Table, Modal Dialog, and Tabs.
A 45-day Pune job-search plan
Days Work 1-5 Pick primary lane: React product, Angular enterprise, UI/web, or fresher/trainee 6-12 Fix JavaScript and CSS gaps with small exercises 13-22 Build or improve one product-style project 23-28 Add TypeScript or Angular/React depth based on your target lane 29-32 Clean GitHub, READMEs, live links, and screenshots 33-36 Rewrite resume bullets for Pune roles 37-45 Apply daily, practice interviews, and record questions asked Use interview feedback as data. If three interviews expose weak CSS, stop adding React libraries and fix CSS. If every role asks for Angular and your target is enterprise Pune, adjust. If you get no callbacks, check whether your live demos work on mobile and whether your resume says what you actually built.
Freshers in Pune
Freshers should not try to look senior. Look reliable.
Your first-role proof should include:
- One responsive page
- One JavaScript-heavy project
- One React or Angular project
- Clean GitHub READMEs
- Deployed links
- A resume with project bullets
- Basic interview practice
Apply to internships, trainee roles, junior UI roles, and small companies where you can learn. Read Frontend Developer Jobs for Freshers: How to Get Your First Role in 2026 for the full first-role process.
Experienced developers in Pune
If you have experience, build your pitch around ownership:
- What feature did you own?
- What did you clarify before coding?
- What bugs did you prevent?
- What performance issue did you find?
- What did you improve for the next developer?
- What tradeoff did you make under deadline?
Use Frontend Developer Career Path: From Junior to Senior in 2026 to map your examples to the next role.
Questions to ask companies
Ask:
- Is the work product UI, client delivery, CMS, internal tools, or maintenance?
- What frontend framework is used in the main codebase?
- How much CSS work is expected?
- Are there tests for frontend behavior?
- How are designs handed off?
- Who owns accessibility and performance?
- What does success look like in the first 90 days?
The answers help you decide whether the role builds the frontend career you want.
Frontend developer jobs in Pune reward practical preparation. Match the role type, build proof for that lane, prepare JavaScript and CSS seriously, and show that you can deliver UI that works beyond the first happy path.
- Remote Frontend Developer Jobs: How to Find and Land Them in 2026Learn how to find remote frontend developer jobs in 2026, evaluate good roles, prepare your portfolio, and prove you can work well remotely.标签作者GreatFrontEnd Team9 分钟阅读Jun 23, 2026

Remote frontend developer jobs are available in 2026, but they are harder to win than local roles. You need frontend skill, written proof, async work habits, timezone fit, and a portfolio that earns trust quickly.
Remote hiring changes the signal. In an office interview, a team may rely on energy, conversation, and local availability. In a remote hiring process, the team looks for proof that you can work without constant supervision: clear writing, small deliverables, good questions, and code that can be reviewed asynchronously.
That matters for frontend because the work sits between product, design, backend, QA, analytics, and users. If your communication is vague, remote frontend work becomes slow quickly.
The opportunity is real, but not evenly distributed. In the 2025 Stack Overflow Developer Survey work section, respondents in India reported a mix of remote, hybrid, flexible, and in-person work rather than a remote-only market. Treat remote as a competitive role type, not as a shortcut around local hiring.
What remote frontend roles usually expect
Remote frontend roles often ask for the same technical stack as local roles, but they add trust signals.
Area What companies look for How to show it Framework skill React, Angular, Vue, Svelte, or Next.js experience project or case study with complete flow JavaScript and TypeScript reliable app behavior and safer code typed API data, state models, fewer assumptions Product UI forms, dashboards, user flows, API states deployed demos with loading, empty, error, retry Review habits code that can be reviewed without a meeting readable commits, README, pull-request notes Async work can explain decisions in writing case studies, technical notes, issue-style project docs Timezone overlap can collaborate at predictable times mention preferred overlap and location clearly Ownership can move work forward when requirements are incomplete examples of questions, tradeoffs, and follow-through Remote does not mean easier. It often means the company has more applicants and less patience for unclear proof. A remote application has to answer doubts before the first call: Can this person write clearly? Can they ship without hand-holding? Can we review their code without a meeting?
Where to find remote frontend jobs
Use more than one source. Remote roles appear and fill quickly.
Search terms:
remote frontend developerremote frontend engineerremote React developerremote Next.js developerremote Angular developerremote UI developerfrontend developer work from homefrontend engineer async remote
Use these channels:
Channel How to use it Remote job boards Apply quickly, but only when the stack and timezone fit Company career pages Search companies that already hire distributed teams LinkedIn Filter by remote, then verify the company page Startup platforms Look for early teams needing product frontend work Communities React, JavaScript, design-system, and indie-hacker communities Previous network Ask former coworkers about distributed teams Do not spend all day clicking easy-apply buttons. Remote hiring rewards targeted applications. Save the job post, because remote listings are edited or closed quickly and you may need the original requirements while preparing.
Filter remote roles before applying
Some remote roles are excellent. Some are unclear, low-trust, or not truly remote.
Filter Good signal Red flag Timezone clear overlap, such as IST plus Europe or IST plus US morning "global remote" but no meeting expectations Employment type full-time, contract, freelance, or internship is explicit vague role with unclear legal setup Pay range, band, or early compensation conversation pay hidden until late rounds Process written docs, code review, async tools constant online monitoring Role scope frontend ownership is described only a stack list with no work context Assignment time-boxed and relevant unpaid product work disguised as a test Communication official email, normal contract process personal payment requests or strange onboarding If the role is remote but expects you to be online all day with no autonomy, evaluate whether it actually gives you the remote work you want.
Also verify the basics before sharing documents: company domain, recruiter identity, written offer process, payment schedule for contracts, equipment policy, and whether the role is remote from your country or only remote inside one country.
Build a remote-friendly portfolio
A remote portfolio should explain your work even when you are asleep in another timezone.
Include:
- A clear headline: role, stack, and level
- 2-3 case studies
- Live demos
- GitHub repos or code samples
- A short "how I work" section
- Contact links
- Resume link
Your case studies should answer:
- What problem did the UI solve?
- What did you own?
- What data did the UI use?
- What happened during loading, empty, error, and retry states?
- What tradeoff did you make?
- How did you test or check the work?
- What would you improve next?
Add one remote-specific detail to at least one case study: the written issue, handoff note, README, pull-request description, or decision log you would use if teammates reviewed the work later. Remote teams hire for evidence that work can move while people are offline.
For experienced developers, read Frontend Developer Portfolio: What to Build and What to Show in 2026. For freshers, use How to Build a Frontend Developer Portfolio With No Experience (2026).
Prove async communication before the interview
Remote teams judge writing early.
Your proof can include:
- A README that explains setup and decisions
- A case study with constraints and tradeoffs
- A pull-request style project note
- A short technical post
- Good commit messages
- A clear application note
Use this project note structure:
Context:What the feature does and who uses it.Constraints:Time, API shape, device support, or design limits.Decisions:State ownership, component boundaries, data fetching, accessibility, or performance choices.Quality:Tests, manual checks, keyboard checks, known limitations.Next:What you would improve with more time.This is not extra decoration. It shows how you would work in a distributed team. A short, clear note beats a long case study that never names the constraints.
Application strategy for remote roles
Remote applications need to be more targeted because competition is wider.
Use this process:
- Pick 15-20 roles per week, not 100 random listings.
- Filter by timezone, stack, level, pay, and role scope.
- Match one project or case study to each role.
- Write a short application note.
- Track responses and rejection reasons.
- Improve portfolio weak spots weekly.
Track timezone and country restrictions separately. Many listings say "remote" but require a legal entity, payroll setup, or working-hours overlap that may exclude you.
Application note:
Hi [Name],I am applying for the remote frontend role. The role mentions React, TypeScript, and dashboard work, which matches this project: [link].I built filtered tables, URL-based state, loading/error handling, and a responsive layout. I also wrote a short case study with the main frontend decisions: [link].I am based in [location] and can overlap with [timezone/window].Customize the middle paragraph. If the job mentions design systems, point to component work. If it mentions SaaS dashboards, point to table and API work. If it mentions e-commerce, point to cart, checkout, and performance.
Remote interview preparation
Prepare your environment and your thinking.
Setup checklist
- Stable internet
- Working camera and microphone
- Clean editor
- Local dev environment ready
- Browser DevTools openable quickly
- Notes file for clarifying questions
- Backup internet option if possible
Technical prep
Practice:
- JavaScript async bugs
- React or Angular forms
- API-backed UI
- CSS layout tasks
- TypeScript props and API data
- Accessibility basics
- Performance debugging
Remote behavior during interviews
Do:
- Repeat the requirement in your own words.
- Ask about empty, loading, and error states.
- State assumptions before coding.
- Keep changes small and explain them.
- Share what you would do next if time allowed.
- Document tradeoffs in the take-home README.
Do not:
- Go silent for 20 minutes in a live round.
- Add unnecessary libraries.
- Ignore the assignment README.
- Submit a project with broken setup.
For take-home assignments, include a short README with scope, run commands, assumptions, tradeoffs, and what you would improve with more time. That README is part of the interview, not paperwork.
Practice front end system design questions, React interview questions, Data Table, and File Explorer.
Remote roles for freshers
Freshers can apply to remote roles, but should be careful. Many remote fresher roles are internships, freelance tasks, or small-company work with limited mentoring.
Before accepting, ask:
- Who will review my code?
- How often will I get feedback?
- What is the expected availability?
- Is this internship paid?
- What will I work on in the first month?
- Is there a written offer or contract?
If you have no experience, a good local or hybrid internship with real mentorship can be better than a poorly managed remote role. Remote fresher work is safest when there is a named reviewer, clear weekly feedback, and a written task process.
Remote roles for experienced developers
Experienced developers should prepare ownership stories.
Show:
- A feature you delivered across time zones or teams
- A written proposal or design note
- A code review habit that improved quality
- A time you clarified ambiguous requirements
- A time you handled a production issue
- A performance or accessibility improvement
Remote senior roles often care less about whether you can write a component and more about whether work moves forward when nobody is sitting beside you.
Good senior proof includes artifacts: a design note, migration plan, incident write-up, performance measurement, accessibility checklist, or pull-request description that shows how you reduce ambiguity for others.
Common remote job mistakes
Avoid:
- Applying without timezone fit
- Sending the same resume to every role
- Having no public proof
- Submitting take-homes without setup instructions
- Treating remote as a lifestyle perk only
- Accepting vague contracts
- Ignoring written communication
- Hiding behind "I am available immediately" instead of showing fit
Remote frontend jobs go to candidates who lower hiring risk.
Remote frontend developer jobs in 2026 require visible trust. Build proof that can be reviewed asynchronously, write clearly, filter roles carefully, and prepare to show how you move frontend work forward without constant supervision.
- Frontend Developer Jobs in Bangalore: How to Land One in 2026Learn how to find and land frontend developer jobs in Bangalore in 2026 with the right skills, portfolio proof, interview prep, and application strategy.标签作者GreatFrontEnd Team10 分钟阅读Jun 22, 2026

Frontend developer jobs in Bangalore are competitive because the city attracts many applicants, but the city also gives frontend engineers more role variety than most Indian markets: product companies, startups, GCCs, SaaS teams, fintech, agencies, and design-heavy web teams.
That mix is useful only if your preparation is targeted. A generic "HTML, CSS, JavaScript, React" resume will disappear quickly. A portfolio that proves product UI, API integration, state handling, performance awareness, and clear frontend decisions has a much better chance.
Bangalore rewards candidates who can move beyond course projects and talk like someone who understands product frontend work: designs change, APIs fail, requirements are incomplete, users make mistakes, and code has to survive review.
One current signal supports that stack choice: in the 2025 Stack Overflow Developer Survey, professional developers reported heavy use of JavaScript, HTML/CSS, TypeScript, React, Next.js, and Angular. Use that as a broad market signal, not as proof that every Bangalore job uses the same stack.
What makes Bangalore different
Bangalore has more role variety than most Indian cities. You will see:
- SaaS dashboards and workflow products
- Consumer apps with performance and experimentation needs
- AI startups building internal tools, chat interfaces, and data-heavy screens
- Fintech and B2B products with forms, permissions, and audit flows
- GCC teams with mature engineering process
- Design studios and agencies with CSS-heavy implementation
- Service companies hiring across React, Angular, Vue, WordPress, and plain JavaScript
- Remote or hybrid roles that still prefer Bangalore-based candidates
This means there is no single Bangalore frontend path. A fresher applying to internships, a React developer with two years of experience, and a senior engineer targeting GCCs need different proof. Before you apply, classify the role: product frontend, UI implementation, enterprise app, design system, CMS/web, or frontend platform.
Companies to research in Bangalore
Do not treat this as a fixed ranking. "Top company" depends on whether you want product engineering, startup pace, enterprise scale, design systems, compensation, mentorship, or frontend depth. Use this list as a starting point for research, then check current openings and team fit.
Company group Examples to research Frontend angle to look for Global product and platform companies Google, Microsoft, Amazon, Adobe, Intuit, Salesforce, Atlassian, Walmart Global Tech product UI, platform tools, internal systems, design systems, performance, accessibility Indian consumer and fintech product companies Flipkart, PhonePe, Razorpay, Swiggy, Meesho, CRED, Groww, Zepto high-traffic UI, checkout flows, payments, experimentation, mobile web, customer-facing product work SaaS and B2B product teams Freshworks, Zoho, BrowserStack, Chargebee, Postman, Whatfix dashboards, admin tools, onboarding flows, developer tools, customer workflows Services and consulting companies Accenture, Infosys, Wipro, TCS, Cognizant, Capgemini, Thoughtworks client projects, migrations, enterprise apps, Angular/React delivery, broader stack exposure Design-led and agency-style teams product studios, design agencies, brand-tech teams, marketing-tech teams CSS, visual polish, responsive implementation, CMS, campaign pages Shortlist companies by role quality, not brand alone. A smaller product team where you own a checkout flow can be better for frontend growth than a famous company where you only maintain a narrow internal page.
When researching a company, look for three things before sending the resume: recent frontend openings, product screenshots or docs that reveal the UI complexity, and engineering posts or job descriptions that mention review, testing, accessibility, performance, or design systems. If all you can find is a stack list, treat the role as unverified until a recruiter or engineer explains the work.
Decode the role before applying
Read the job description like an engineer, not like a keyword scanner.
Listing signal What the role likely involves What to show "front-facing experiences" or "user-facing features" Product UI that customers use daily Polished product screens with edge states "reusable components and libraries" Component architecture or design system work Component APIs, variants, docs, and examples "backend developers and product teams" API integration and cross-team work Loading, error, auth, retry, and data-shape handling "AI-powered developer tools" AI-assisted workflows or developer productivity UI Good review habits and ability to verify generated code "high-performance web applications" Rendering, bundle, image, or interaction cost matters Measured improvements and performance notes "onsite contract" Delivery speed and availability may matter more than brand Clear scope, rate, duration, and ownership expectations "webmaster" or "WordPress" CMS, marketing sites, hosting, SEO, and plugin work CSS, responsive pages, CMS experience, page-speed care If the job says React but the work is mostly WordPress, decide whether that is a good career move before applying. If the role says frontend engineer but the description talks about product, APIs, and ownership, prepare for deeper interviews.
Skill stack for Bangalore roles
For Bangalore, React is a practical default, but not the whole story. Angular remains relevant in enterprise teams, Vue appears in product and agency work, and strong JavaScript matters everywhere. Do not choose a stack from hype alone; choose it from the roles you are targeting this month.
Prepare in this order:
Skill Beginner proof Experienced proof JavaScript can build search, filter, form, timer, and API widgets can debug async bugs, stale state, race conditions, and data transforms CSS can build responsive pages with Flexbox and Grid can fix layout bugs, overflow, stacking, theming, and design-system styles React or Angular can build complete flows can design component boundaries and manage state safely TypeScript can type props and API responses can model state transitions and remove unsafe assumptions APIs can fetch and render data can handle auth, validation errors, retries, cancellation, and partial failures Quality can write simple tests can decide which behavior needs tests and which checks belong in review Performance knows DevTools basics can diagnose slow renders, large bundles, and expensive interactions If this list feels too wide, start with the Frontend Developer Roadmap. Then return to this article when you are ready to apply.
Portfolio projects that fit Bangalore hiring
The best Bangalore portfolio is not a visual gallery. It is a proof system.
Project 1: SaaS dashboard
Build a dashboard that feels like something a B2B product team might ship.
Include:
- Sidebar or top navigation
- Table with search, filters, sorting, pagination
- Detail view or drawer
- Loading, empty, error, and retry states
- URL state for filters
- Mobile fallback layout
- Tests for at least one critical user flow
What to write:
- Why you chose the state structure
- How you handled failed requests
- What changes on mobile
- What you would improve with a real backend
Project 2: Form-heavy workflow
Build one of these:
- Vendor onboarding
- Job application tracker
- Insurance or loan eligibility form
- Course enrollment
- Team invite flow
Include validation, step navigation, saved progress, review screen, error summary, and success state. This helps because many actual frontend jobs involve forms, not only landing pages.
Project 3: Component system slice
Build a small documented component set:
- Button
- Input
- Select
- Modal
- Tabs
- Toast
- Table row action
Show states: loading, disabled, error, focus, destructive, and empty. Add usage examples. If you are experienced, include tradeoffs around controlled/uncontrolled props, composition, and accessibility.
Resume strategy for Bangalore
Your resume should tell the company why your proof matches their work. If the listing is for dashboards, lead with a dashboard project. If it is for UI implementation, lead with CSS and responsive polish. If it is for a GCC, lead with maintainability, tests, and review-ready code.
Do this:
- Keep skills short and grouped by confidence.
- Put your strongest matching project near the top.
- Use bullets that name behavior, not only tools.
- Mention scale only if you can back it up.
- Add links to portfolio, GitHub, and deployed work.
- Customize the top 4-6 bullets for product, GCC, startup, or agency roles.
Weak bullet:
- Worked on frontend using React and CSS.
Better bullet:
- Built a React dashboard with URL-based filters, paginated API data, empty states, and retry handling for failed requests.
For experienced candidates:
- Led migration of a customer settings flow from duplicated local state to shared typed form models, reducing repeated validation bugs across related screens.
That gives interviewers something concrete to discuss.
Bangalore application strategy
Do not apply randomly for two weeks and then conclude the market is bad. Run a deliberate pipeline and review it weekly.
Step What to do Why it helps Build a target list 40-60 companies split by product, GCC, startup, agency, services You stop reacting only to job boards Map role types React product, Angular enterprise, UI developer, design system, remote You customize proof instead of blasting resumes Prepare two resume variants product/frontend engineer and UI/web developer You do not undersell or oversell yourself Send targeted notes mention one matching project or case study Recruiters see relevance quickly Track outcomes applied, response, test, interview, rejection reason You learn which lane is working After 25-30 applications, inspect the pattern. No callbacks usually means the resume or portfolio proof is weak. Callbacks followed by failed tests usually means interview practice is the bottleneck. Interviews that end after project discussion usually mean you need clearer ownership stories.
Use How to Evaluate Companies as a Front End Engineer before accepting a role that sounds exciting but has unclear frontend ownership.
Interview rounds to prepare for
Bangalore interviews vary widely. Prepare for these patterns:
Round Common expectation How to practice JavaScript arrays, objects, async, closures, event loop, DOM timed questions and small browser exercises React state, effects, rendering, keys, forms, refs, composition explain bugs from past projects TypeScript props, API types, unions, generics, narrowing type a small API-backed feature CSS layout, specificity, responsive design, overflow, positioning recreate product layouts without a UI kit UI coding build component or flow quickly forms, tabs, modal, data table, autocomplete System design design a frontend feature at product scale talk through state, data, caching, performance, accessibility Project deep dive prove you built the work prepare decisions, bugs, tradeoffs, and next improvements Practice React interview questions, JavaScript interview questions, Data Table, Contact Form, Autocomplete, and File Explorer.
Fresher path for Bangalore
Freshers need proof that they can be onboarded quickly.
Do this:
- Build two product-style projects and one polished layout.
- Deploy all three.
- Write READMEs with setup, features, screenshots, and known limitations.
- Practice explaining one project in three minutes.
- Apply to internships, trainee roles, junior frontend roles, and small-company web roles.
- Ask for referrals only after you can send a project link with a specific ask.
Avoid filling your resume with advanced tools before you can explain JavaScript, CSS layout, and React state.
Read Frontend Developer Jobs for Freshers: How to Get Your First Role in 2026 for a full fresher path.
Experienced path for Bangalore
If you already have experience, your job search should center on scope.
Prepare examples for:
- A feature you owned from ambiguity to release
- A frontend bug you diagnosed from user report to fix
- A component or state refactor that helped future work
- A performance issue you measured and improved
- A design-system or shared-component decision
- A time you pushed back on unclear requirements
- A review comment you repeatedly give to improve quality
Your portfolio can use anonymized case studies. You do not need to expose private company code. You do need to explain what you owned.
Red flags in Bangalore roles
Watch for:
- "Frontend" role that is mostly SEO content updates if you want product engineering
- No clarity on React versus Angular versus CMS work
- No engineer involved in the interview process
- Vague salary discussion after several rounds
- Take-home assignment with no time box
- Role that says senior but only offers task execution
- Contract role with unclear extension, notice, or payment terms
Not every imperfect role is bad. Early-career roles can be messy and still useful. But know what tradeoff you are accepting.
Bangalore frontend developer jobs in 2026 reward targeted proof. Pick a role lane, build projects that match it, prepare JavaScript and UI coding seriously, and make each application about the frontend problems the company actually has.
- Frontend Developer Jobs in Hyderabad: Top Companies + How to Prepare (2026)Learn how to prepare for frontend developer jobs in Hyderabad in 2026, including company types, skills, portfolio projects, interview rounds, and application strategy.标签作者GreatFrontEnd Team11 分钟阅读Jun 22, 2026
Frontend developer jobs in Hyderabad are a good fit if you can build maintainable web apps, work with backend and design teams, and prove React, Angular, TypeScript, API, and UI debugging skill.
The important word is "maintainable." Hyderabad has startups, service companies, SaaS teams, media companies, fintech teams, cloud products, and large product engineering centers. Many frontend roles sit inside bigger engineering systems, so companies care about code that other people can read, review, test, and extend.
That changes your preparation. A flashy personal site helps only a little. A project that handles form validation, role-based screens, table state, API failures, and responsive layout says much more.
Use global stack data carefully. The 2025 Stack Overflow Developer Survey still shows JavaScript, HTML/CSS, TypeScript, React, Next.js, and Angular as common professional-developer technologies. That supports preparing those skills, but the exact framework still depends on the Hyderabad role: enterprise teams may be Angular-heavy, product teams may be React-heavy, and web roles may still ask for CMS or plain JavaScript work.
What "frontend developer" means in Hyderabad
The same title can hide different jobs. Read the job description before deciding whether to apply.
Job title pattern What the work often means How to prove fit Front End Developer General website or app UI work, often HTML, CSS, JavaScript, Bootstrap, WordPress, React, or Angular Show polished UI, responsive layout, and basic interaction quality ReactJS Developer Product screens, dashboards, state, API integration, reusable components Show React projects with forms, routing, async states, and TypeScript Angular Developer Enterprise apps, admin tools, forms, services, reusable modules Show typed forms, validation, API services, and component structure Front-End UI Developer CSS-heavy implementation, design handoff, browser behavior, layout details Show pixel-careful pages, responsive states, and accessibility basics Senior Frontend Developer Architecture, review, mentoring, performance, migration, design system work Show case studies, tradeoffs, and production ownership Frontend Intern or Fresher Small components, bug fixes, HTML/CSS/JS tasks, simple framework work Show two finished projects and clean GitHub repos Do not apply to all of these with the same resume. A WordPress-heavy role, a React product role, and an Angular enterprise role need different evidence. The fastest way to waste applications is to send a React-only resume to a UI/CSS role or a beginner project gallery to a maintainability-heavy enterprise role.
Hyderabad company types to target
Think of the city as several markets, not one market.
Company type What they usually test Good candidate signal GCCs and multinational product teams maintainability, code review, TypeScript, process, collaboration You can explain component boundaries and edge states SaaS and B2B product companies dashboards, workflows, API integration, customer-facing product UI You have built product flows, not only landing pages Service companies adaptability across clients, fast delivery, stack flexibility You know one framework well and can pick up adjacent tools Media and creator-tech companies responsive UI, speed, web publishing, visual polish You can build attractive pages without breaking performance Fintech and operations products tables, forms, permissions, audit-like flows, reliability You handle validation, disabled states, and failure recovery Early startups broad ownership, quick iteration, debugging across the stack You can clarify requirements and ship a small feature end to end If you are a fresher, your first target can be internships, trainee roles, junior UI roles, or small-company frontend roles. If you have 2-4 years of experience, aim for product UI roles where React or Angular is central. If you have 5+ years, look for roles that mention ownership, architecture, performance, design systems, or mentoring.
Companies to research in Hyderabad
The Hyderabad list should not be read as a permanent ranking. It is a practical target map. Check current openings, team scope, and interview expectations before applying.
Company group Examples to research Frontend angle to look for Large product and platform companies Microsoft, Google, Amazon, Salesforce, ServiceNow, Oracle, Qualcomm, Apple large engineering systems, enterprise UI, internal platforms, cloud tools, product workflows Finance, operations, and enterprise GCCs Wells Fargo, JPMorgan Chase, Deloitte, EY, UBS, State Street, The Hartford dashboards, forms, approvals, role-based UI, compliance-heavy workflows SaaS, media, and product engineering teams ValueLabs, EPAM, OpenText, Model N, Electronic Arts, Ivy product screens, analytics UI, customer tools, design and backend collaboration IT services and consulting companies Accenture, Infosys, TCS, Cognizant, Capgemini, Tech Mahindra, Wipro client apps, migrations, Angular/React delivery, frontend maintenance, broader stack exposure Startups and local product teams T-Hub ecosystem companies, fintech, healthtech, edtech, creator-tech teams broader ownership, faster learning, product ambiguity, smaller frontend teams For freshers, do not apply only to famous names. Hyderabad has many smaller teams where a junior developer can get more frontend reps. For experienced developers, prioritize teams that mention product ownership, design systems, performance, testing, or platform work.
Before shortlisting a company, check whether the role describes the product surface, review process, and frontend ownership. A job post that says only "React, HTML, CSS, JavaScript" may still be useful, but you need to ask what you will actually build.
Skills to prepare in the right order
Do not begin by collecting every framework name. Prepare the skill stack that appears across many Hyderabad roles.
Skill What interviewers may ask What to build HTML and CSS forms, semantic tags, responsive layout, Flexbox, Grid, specificity, overflow settings page, pricing page, form flow, dashboard shell JavaScript arrays, objects, promises, closures, event handling, fetch, timers search page, filterable table, debounced input, polling widget React or Angular state, props, effects or lifecycle, forms, routing, reusable components customer dashboard, ticket system, onboarding form TypeScript props, API response types, unions, narrowing, event types typed API client, typed form state, typed table rows APIs loading, empty, error, retry, auth failure, validation errors API-backed dashboard with realistic failure states Testing user behavior, form submission, async UI, simple component tests tests for filter, form, and save flows Accessibility labels, focus order, keyboard navigation, modal behavior, error text keyboard-safe form, dialog, tabs, or menu Performance large lists, image loading, render cost, network waterfall table with pagination, optimized image page, measured interaction Use the Frontend Developer Roadmap if you need a broader order. For this article, the practical target is simple: be able to build a useful product screen and explain why it works.
How to read a Hyderabad job description
Job descriptions often mix must-haves, nice-to-haves, and recruiter filler. Translate them into actual preparation.
JD phrase What it probably means What to prepare "Collaborate with designers and backend developers" You will receive designs and API contracts that are not always perfect Practice asking API, loading, validation, and responsive questions "Responsive web applications" CSS and browser behavior matter Build layouts that work at mobile, tablet, and desktop sizes "Reusable components" They care about maintainability Prepare examples of component props, naming, and composition "React and Next.js" They may expect routing, rendering, data loading, and app structure Build a route-based app, not only isolated components "Angular/React" The team may support older or mixed codebases Show framework basics plus solid JavaScript "Enterprise user interfaces" Forms, tables, permissions, audit flows, and long-lived code Build admin-style workflows with edge states "Performance" They may have slow pages, large lists, or heavy dashboards Learn how to inspect renders, bundles, images, and network requests If a JD lists 20 technologies, do not panic. Find the work behind the list. Is it product UI? CMS work? enterprise dashboard work? migration work? Your application should answer that need.
Portfolio projects that match Hyderabad roles
Build projects that look like actual frontend work inside teams.
Project 1: Customer operations dashboard
Include:
- Login-like entry state or mocked user role
- Table with search, filters, sorting, pagination
- Details drawer or details page
- Loading, empty, error, and partial-error states
- URL search params for filters
- Responsive layout for smaller screens
- Basic tests for search and filter behavior
Write a project note explaining why filters live in the URL, how you avoid duplicate state, and what happens when the API fails.
Project 2: Multi-step workflow
Good examples:
- Employee onboarding
- Loan application
- Vendor registration
- Course enrollment
- Support escalation
Include:
- Step navigation
- Validation per step
- Review screen
- Save draft or local persistence
- Error summary
- Keyboard-friendly controls
- Clear disabled and success states
This project helps because Hyderabad roles often involve form-heavy enterprise UI. A careful multi-step flow is better than another weather app because it reveals how you handle validation, recovery, keyboard use, and state across screens.
Project 3: Role-based admin screen
Include:
- Admin, editor, and viewer roles
- Disabled actions with visible reason
- Dangerous action confirmation
- Audit-style activity list
- Empty state for new accounts
- Error state for failed save
This shows product judgment. Many candidates can render a button. Fewer can explain who should be allowed to press it and what happens when the save fails.
Resume positioning for freshers, 2-4 years, and senior candidates
Your resume should change with your level.
Level What the resume should prove Example bullet Fresher You can finish small frontend projects and explain them Built a React onboarding form with validation, review step, saved progress, and mobile layout 1-2 years You can deliver scoped features with review Built reusable table filters and API error states for an internal dashboard 3-5 years You can own a product flow Owned a customer settings flow across React components, API integration, validation, and release fixes 5+ years You can reduce technical and product risk Led a frontend refactor that simplified state ownership and reduced repeated form bugs across three screens Weak resume bullets name tools. Better bullets name behavior.
Weak:
- Worked with React, JavaScript, HTML, CSS.
Better:
- Built a React ticket management screen with assignee filters, optimistic status updates, and retry handling for failed saves.
If your resume does not give an interviewer a concrete question to ask, rewrite it.
Interview rounds to expect
Not every company runs the same process, but Hyderabad frontend interviews often include these patterns:
Round What they are checking How to prepare Screening call role fit, salary range, notice period, stack match Have a 30-second summary and target role clear JavaScript round language basics and debugging Practice arrays, promises, closures, object transforms, and async mistakes Framework round React or Angular depth Prepare forms, state, lifecycle/effects, routing, reusable components UI coding can you build under time pressure Practice forms, tabs, data table, autocomplete, modal, accordion Project discussion did you actually build the work Prepare tradeoffs, bugs, constraints, and improvements Hiring manager round team fit and ownership Explain how you clarify requirements and handle review feedback Practice JavaScript interview questions, React interview questions, and UI tasks such as Data Table, Contact Form, and Transfer List.
If you are targeting Angular roles, practice the same behavior in Angular: forms, validation, API state, component inputs/outputs, services, and routing.
A 30-day preparation plan
Use this if you already know basic HTML, CSS, JavaScript, and one framework.
Days Work 1-4 Fix JavaScript gaps: arrays, objects, promises, closures, fetch, and event handling 5-8 Build or improve a form-heavy project with validation and accessibility checks 9-13 Build an API-backed dashboard with filters, loading, empty, error, and retry states 14-17 Add TypeScript to one project and remove unsafe any18-20 Write READMEs and case notes for your best projects 21-24 Practice UI coding tasks under a timer 25-27 Rewrite resume bullets for Hyderabad role types 28-30 Apply to a targeted list and record interview feedback If the first two weeks produce no responses, do not add another certificate first. Check whether your strongest project is visible in the first half of the resume, whether the live link works, and whether the bullets match the role type.
Do not wait until day 30 to apply if you already have decent proof. Start applying once your best project is deployed and readable.
Questions to ask before accepting
Ask questions that reveal the actual frontend work:
- Is the frontend team mostly React, Angular, or mixed?
- Will I work on product UI, marketing pages, internal tools, or client projects?
- How are designs and API contracts handed off?
- Are there frontend tests in the codebase?
- Who reviews frontend pull requests?
- Are accessibility and performance part of the release process?
- What would the first 60 days look like?
These questions help you avoid roles where the title sounds good but the work does not match your goal.
Hyderabad frontend developer jobs in 2026 reward candidates who can work inside larger product systems. Prepare the framework, but make your proof about maintainable UI: forms, tables, API states, TypeScript, review-ready code, and clear ownership.
- How to Learn React in 2026: The Beginner's Roadmap from Zero to Job-ReadyLearn React in 2026 with a practical roadmap covering components, JSX, state, effects, forms, data fetching, routing, TypeScript, and interview practice.
To learn React in 2026, learn components, JSX, props, state, rendering, effects, forms, and data flow before you chase framework features. Then build enough UI that you can decide what belongs in local state, URL state, server state, or a parent component.
React is easier when JavaScript already feels familiar. If arrays, objects, functions, promises, and modules still feel shaky, spend time on JavaScript first.
React roadmap for beginners
Stage What to learn What to practice 1 Components and JSX Break a page into reusable pieces 2 Props and composition Pass data down without duplicating UI 3 State and rendering Build counters, toggles, tabs, accordions 4 Events and forms Controlled inputs, validation, submit flows 5 Effects Sync with browser APIs and external systems 6 Data fetching Loading, empty, error, retry, stale responses 7 Routing and app structure Multi-page product flows 8 TypeScript and testing Safer props, user-focused tests The official React Learn docs are organized around the concepts beginners use daily: components, markup, data display, conditions, lists, events, state, Hooks, and sharing data between components. Use that sequence as your spine.
Step 1: Learn components as a UI boundary
A React component is a function that returns UI. The hard part is not writing the function. The hard part is deciding the boundary.
Good beginner components usually answer one of these questions:
- What repeated UI can be named?
- Which piece needs its own state?
- Which part is easier to test or reason about alone?
- Which part should receive data rather than fetch data itself?
Start with static components:
function ProfileCard({ name, role }: { name: string; role: string }) {return (<article><h2>{name}</h2><p>{role}</p></article>);}Then practice rendering lists, conditional UI, and nested components. Avoid splitting everything into tiny files too early. A component boundary should make the code easier to read or change.
Step 2: Learn props before state
Props are input. State is memory. Beginners often reach for state too quickly.
Use props when a component can be fully described by data from its parent:
function Price({ amount }: { amount: number }) {return <span>${amount.toFixed(2)}</span>;}Use state when the component needs to remember something that changes because of user interaction, time, network responses, or browser state.
Ask this before adding state:
- Can this value be calculated from existing props or state?
- Does another component need to control it?
- Should this value live in the URL?
- Does this value come from the server?
Derived state bugs are common in interviews and code reviews. If
fullNamecan be calculated fromfirstNameandlastName, calculate it during render instead of storing another state variable.Step 3: Learn rendering and state updates carefully
React rendering is a mental model, not only a syntax topic. A state update schedules a new render. During that render, React calls the component again and calculates the next UI.
Practice these cases:
- Updating a counter multiple times
- Updating an object without mutation
- Updating an item inside an array
- Resetting state when a selected ID changes
- Preserving state across reorders with stable keys
When a new state value depends on the previous one, practice the updater form:
setCount((count) => count + 1);That habit matters for event handlers that queue multiple updates, async callbacks, and components where several interactions can happen quickly.
For arrays, use IDs as keys when possible. Index keys are risky when users can insert, remove, sort, or filter items because React may preserve state for the wrong item.
Step 4: Learn forms as product flows
Forms teach most of React's daily skills in one place: state, events, validation, async work, disabled states, error messages, and accessibility.
Build a signup form with:
- Controlled inputs
- Field-level validation
- Submit-level error handling
- Disabled submit while saving
- A success state
- Server error display
- Labels connected to inputs
Do not stop at
alert("submitted"). Real forms fail. Users type invalid data. Networks slow down. Servers reject requests. A job-ready React developer knows how the UI behaves in each state.Step 5: Learn effects by syncing with systems outside React
useEffectis not the place to put every calculation. Use it when the component must sync with something outside React: the document title, a browser API, a subscription, a timer, or an imperative library.Many beginner bugs come from unnecessary effects:
// Avoid storing derived data in state with an effect.const completedCount = todos.filter((todo) => todo.done).length;If you can calculate a value during render, do that. If an effect starts a subscription, timer, request, or event listener, think about cleanup.
Step 6: Learn data fetching with UI states
React itself does not prescribe one data fetching library for every app. Your learning goal is to understand the states around data:
- Not started
- Loading
- Success with data
- Success with empty data
- Error
- Retrying
- Stale data while refreshing
Build a small search page and handle out-of-order responses:
import { useRef, useState } from 'react';type Product = {id: string;name: string;};function ProductSearch() {const [products, setProducts] = useState<Product[]>([]);const [status, setStatus] = useState<'idle' | 'loading' | 'error'>('idle');const latestRequestId = useRef(0);async function searchProducts(query: string) {const requestId = ++latestRequestId.current;setStatus('loading');try {const response = await fetch(`/api/products?q=${encodeURIComponent(query)}`,);const data = await response.json();if (requestId !== latestRequestId.current) {return;}setProducts(data.products);setStatus('idle');} catch {if (requestId === latestRequestId.current) {setStatus('error');}}}// Render the form, status message, and product list here.}In a real app, a library may handle caching and request state for you. The interview skill is explaining the failure mode: an older request should not overwrite newer results. In production code, also consider
AbortControllerso the browser can cancel work that is no longer needed.Step 7: Add routing and framework knowledge
After you can build React components and flows, learn routing. For many production apps in 2026, that means learning React through a framework such as Next.js, Remix, or React Router-based setups.
Learn these routing concepts:
- URL params
- Query params
- Nested layouts
- Loading and not-found states
- Auth redirects
- Server-rendered versus client-rendered pages
- Keeping filters in the URL
If you choose Next.js, learn App Router concepts after React basics: Server Components, Client Components, layouts, route handlers, metadata, caching, and revalidation.
Step 8: Learn TypeScript with React
TypeScript helps you make component contracts explicit:
type ProductCardProps = {id: string;name: string;price: number;onAddToCart: (id: string) => void;};function ProductCard({ id, name, price, onAddToCart }: ProductCardProps) {return (<article><h2>{name}</h2><p>${price.toFixed(2)}</p><button onClick={() => onAddToCart(id)}>Add to cart</button></article>);}Start with props, event handlers, form state, API response types, and union types for UI states. Avoid learning the deepest generic patterns before you can type ordinary components well.
Read TypeScript for React Developers when you want a focused bridge from React to TypeScript.
Projects that make you job-ready
Project What it proves Todo app with filters State updates, derived data, forms Product listing page Lists, API fetching, loading, empty and error states Multi-step form Validation, state transitions, accessibility Dashboard widgets Component composition and data formatting File explorer Recursion, tree data, selection state Autocomplete Async search, keyboard interaction, stale-response handling For interview prep, practice React interview questions and UI tasks such as Tabs, Accordion, and Data Table.
Common React learning mistakes
The first mistake is treating React as magic. React is still JavaScript. If a callback receives stale data, if an array is mutated, or if a promise resolves late, React will expose that mistake.
The second mistake is putting all state in one place. Local UI state should often stay local. Server data should not be manually copied into many unrelated components. URL state belongs in the URL when the user expects refresh, share, or back-button behavior to preserve it.
The third mistake is learning Hooks as a list of APIs instead of learning why they exist.
useStatestores component memory.useEffectsyncs with external systems.useMemoanduseCallbackare tools for specific rendering and identity problems, not default wrappers for every value.The fourth mistake is using effects to mirror state. If
filteredProductscan be calculated fromproductsandquery, calculate it during render or withuseMemowhen the calculation is actually expensive. Storing it separately creates another value that can go stale.A 10-week React study plan
Weeks Plan Output 1-2 Components, JSX, props, conditional rendering, lists Static product page and reusable cards 3-4 State, events, forms, validation Signup form and todo app 5-6 Effects, browser APIs, data fetching API search page with full request states 7 Routing and URL state Product listing with filters in the URL 8 TypeScript with React Typed component library for your projects 9 Testing and accessibility User-focused tests and keyboard behavior fixes 10 Interview practice and portfolio cleanup Two projects explained clearly in READMEs You are job-ready for beginner React roles when you can build a small product flow, explain your component boundaries, handle failure states, and debug why the UI rendered the way it did.
- How to Learn TypeScript in 2026: A Practical RoadmapLearn TypeScript in 2026 with a practical path from JavaScript basics to type annotations, unions, generics, narrowing, React props, and project migration.作者GreatFrontEnd Team7 分钟阅读Jun 19, 2026
The practical way to learn TypeScript in 2026 is to use it to make JavaScript contracts visible: function inputs, return values, object shapes, component props, API responses, and impossible UI states.
TypeScript is not a replacement for JavaScript. The TypeScript Handbook describes it as a static typechecker for JavaScript programs: it runs before your code and checks whether the types line up. That means JavaScript knowledge still comes first.
TypeScript roadmap
Stage What to learn What it helps you prevent 1 Basic annotations and inference Passing the wrong value type 2 Object types and interfaces Missing or misspelled properties 3 Unions and narrowing Unsafe access to values that may differ 4 Functions and callbacks Wrong handler signatures 5 Generics Reusable utilities without losing types 6 React and API types Weak component and server contracts 7 Compiler options Hidden any, null, and module mistakesUse the official TypeScript Handbook as your reference. It is designed for everyday programmers and covers the concepts you need before the more formal reference material.
Step 1: Learn inference before adding annotations everywhere
TypeScript can infer many types from values:
const count = 0;const title = 'JavaScript Roadmap';const tags = ['javascript', 'react'];You do not need to annotate those. Over-annotation makes code noisy and can hide the real contract.
Add types where they clarify a boundary:
function formatPrice(amount: number, currency: string): string {return new Intl.NumberFormat('en', {style: 'currency',currency,}).format(amount);}The useful question is: "Where could another developer call this incorrectly?" Those places deserve explicit types.
Step 2: Type object shapes
Frontend code passes objects everywhere: API data, component props, form values, config, route params, and analytics events.
Start with object types:
type Product = {id: string;name: string;price: number;inStock: boolean;};function getDisplayName(product: Product) {return product.inStock ? product.name : `${product.name} (sold out)`;}Learn optional properties carefully:
type User = {id: string;name: string;avatarUrl?: string;};avatarUrl?: stringmeans the property may be missing orundefined. Your UI needs a fallback before rendering an image.Step 3: Learn unions as a design tool
Union types let you model choices:
type RequestState =| { status: 'idle' }| { status: 'loading' }| { status: 'success'; products: Product[] }| { status: 'error'; message: string };This is more accurate than several booleans such as
isLoading,hasError, anddata, which can drift into impossible combinations.Use narrowing to safely read the right fields:
function ProductResults({ state }: { state: RequestState }) {if (state.status === 'loading') {return 'Loading products...';}if (state.status === 'error') {return state.message;}if (state.status === 'success') {return `${state.products.length} products`;}return 'Search for a product';}This pattern is useful in React, reducers, data fetching, form flows, and interview answers.
For larger unions, add an exhaustiveness check so future states cannot be forgotten silently:
function assertNever(value: never): never {throw new Error(`Unhandled state: ${JSON.stringify(value)}`);}function getStatusText(state: RequestState) {switch (state.status) {case 'idle':return 'Search for a product';case 'loading':return 'Loading products...';case 'success':return `${state.products.length} products`;case 'error':return state.message;default:return assertNever(state);}}This is one of TypeScript's best frontend uses: the compiler helps you update all UI branches when a product state changes.
Step 4: Learn functions and callbacks
Many TypeScript bugs show up at function boundaries.
Practice typing:
- Event handlers
- Utility functions
- Async functions
- Array callbacks
- Component callbacks
- Reducers
Example:
type SaveProduct = (product: Product) => Promise<{ id: string }>;async function submitProduct(product: Product, saveProduct: SaveProduct) {const result = await saveProduct(product);return result.id;}Do not use
Functionas a type. It throws away the contract. Name the parameters and return value.Step 5: Learn generics after ordinary types feel natural
Generics are for reusable code where the input and output types are connected.
function groupBy<T>(items: T[],getKey: (item: T) => string,): Record<string, T[]> {return items.reduce<Record<string, T[]>>((groups, item) => {const key = getKey(item);groups[key] ??= [];groups[key].push(item);return groups;}, {});}The generic
Tkeeps the item type through the function. If you passProduct[], the grouped values are stillProduct[].Learn generics through small utilities before reading advanced type puzzles. Most frontend work needs clear generic functions, not clever type gymnastics.
Also learn
satisfiesfor configuration objects. It checks that an object matches a type without throwing away the object's specific literal values:type RouteConfig = Record<string, { title: string; requiresAuth: boolean }>;const routes = {home: { title: 'Home', requiresAuth: false },dashboard: { title: 'Dashboard', requiresAuth: true },} satisfies RouteConfig;That is useful for design tokens, route maps, analytics event maps, and component variant configs.
Step 6: Use TypeScript in React
TypeScript is especially useful for React props:
type ButtonProps = {children: React.ReactNode;variant: 'primary' | 'secondary';disabled?: boolean;onClick: () => void;};function Button({ children, variant, disabled, onClick }: ButtonProps) {return (<button data-variant={variant} disabled={disabled} onClick={onClick}>{children}</button>);}This contract prevents invalid variants and makes the expected click behavior clear.
For React projects, learn:
- Prop types
- Children types
- Event types
- State types
- Reducer action unions
- API response types
- Form value types
- Component library variant types
TypeScript for React Developers is the better next step if your main goal is frontend work.
Step 7: Turn on stricter compiler options
TypeScript can be weak or strict depending on your configuration. A project with too many
anyvalues gives less protection than it appears to.Learn these options early:
strictnoImplicitAnystrictNullChecksnoUncheckedIndexedAccessexactOptionalPropertyTypes
You do not need every strict option on day one in an existing codebase. For a learning project, turn on
strictand fix the errors. The compiler feedback is part of the lesson.Step 8: Migrate a small JavaScript project
The best TypeScript project is not a blank file with type examples. Take a small JavaScript app and migrate it.
Good migration order:
- Rename files from
.jsto.tsand.jsxto.tsx. - Type utility function parameters and returns.
- Type API response shapes.
- Type component props.
- Replace obvious
anyvalues. - Model UI states with unions.
- Add stricter compiler options after the main flow works.
Migration teaches you what TypeScript actually catches: misspelled fields, missing null checks, inconsistent return values, invalid component props, and weak API assumptions.
Common TypeScript mistakes
The first mistake is using
anyto silence the compiler. If a value is genuinely unknown, useunknown, validate or narrow it, then use it.The second mistake is typing the wrong boundary. Typing every local variable is less useful than typing the API response, public function, or component prop.
The third mistake is believing TypeScript validates runtime data. It does not. If JSON comes from a server, TypeScript can describe what you expect, but runtime validation is still needed when the data is untrusted.
The fourth mistake is overusing advanced types. If nobody on the team can read the type, it may cost more than it saves. Prefer types that make product states and code contracts easier to understand.
The fifth mistake is treating generated API types as proof that the backend can never send bad data. Generated types are valuable, but a network boundary is still a runtime boundary. Validate user-controlled data, third-party API responses, webhooks, and anything that can drift independently of your frontend deploy.
A 6-week TypeScript study plan
Week Plan Output 1 Inference, annotations, object types Typed utility functions 2 Arrays, records, optional properties Typed data transformation exercises 3 Unions, narrowing, discriminated unions Request-state and form-state models 4 Functions, callbacks, async types Typed API and event-handler examples 5 Generics and reusable utilities groupBy,pick,sortBy, typed fetch wrapper6 React or project migration One JavaScript project converted to TypeScript You have learned TypeScript well enough for junior frontend work when you can type component props, API responses, event handlers, utility functions, and UI states without reaching for
anyas your default escape hatch. - Frontend Developer Jobs for Freshers: How to Get Your First Role in 2026Learn how freshers can get frontend developer jobs in 2026 with a practical skill path, portfolio projects, resume proof, GitHub cleanup, and interview prep.标签作者GreatFrontEnd Team9 分钟阅读Jun 18, 2026
Frontend developer jobs for freshers are possible in 2026, but a certificate is not enough. You need finished projects, clean GitHub repos, interview basics, and proof that you can complete small UI tasks.
The fresher market is crowded because many candidates look identical on paper: HTML, CSS, JavaScript, React, one course certificate, two cloned projects. Your job is to make the hiring team believe you can be onboarded into a real codebase and improve with review.
That does not require pretending to be senior. It requires specific proof. A hiring team should be able to open your portfolio and see, within two minutes, that you can build a form, handle data, write readable code, and explain one project without hiding behind course language.
The stack does not need to be exotic. The 2025 Stack Overflow Developer Survey still shows JavaScript, HTML/CSS, TypeScript, React, Next.js, and Angular as widely used among professional developers. For a fresher, that is a reason to learn the web basics deeply before chasing every new library.
What companies expect from freshers
Most fresher frontend roles do not expect architecture ownership. They expect a beginner who can learn quickly and avoid careless mistakes.
Expectation What it means in practice How to prove it HTML and CSS basics Can build a page from a design and make it responsive Build a polished responsive page with forms and states JavaScript basics Can handle user interaction and data changes Build search, filter, timer, and API widgets Framework basics Can write simple React, Angular, or Vue components Build a small product flow, not only a counter app GitHub hygiene Can share code for review Add READMEs, live links, and clean project structure Debugging attitude Can inspect errors instead of guessing Use DevTools and explain one bug you fixed Communication in review Can ask questions and respond to feedback Write clear project notes and resume bullets Freshers lose interviews when they list too many tools and cannot explain the basics. Keep your skill list honest. If you wrote a project by following a tutorial, be ready to explain what you changed and which part you would rebuild differently.
Choose the right first-role lane
Your first frontend role may not be titled exactly "frontend developer." Search across related titles.
Role title Good fit if What to prepare Frontend Developer Fresher You have HTML, CSS, JS, and one framework project portfolio, JavaScript basics, React or Angular basics Frontend Intern You are still learning and need supervised work clean projects, learning attitude, availability Web Developer Fresher You are good with HTML, CSS, basic JS, CMS, or websites responsive pages, forms, visual polish UI Developer Trainee You like layout and implementation from designs CSS, browser behavior, accessibility basics React Developer Intern You have React projects and can explain state React forms, lists, effects, API states Full Stack Fresher You know some backend too basic frontend plus API and database fundamentals Do not reject a good internship because the title is not perfect. Your first role is about getting credible experience, feedback, and team exposure. A paid internship with code review can be more useful than a "frontend developer" title where nobody reviews your work.
The skill path freshers should follow
Use this order. It keeps you from building a React app while still being weak at browser basics.
Stage Learn Practice task 1 HTML structure, forms, labels, buttons, links, tables build an accessible contact or signup form 2 CSS layout, Flexbox, Grid, responsive design, focus states recreate a dashboard or settings page 3 JavaScript values, functions, arrays, objects, DOM, events build search, filter, modal, tabs, accordion 4 Async JavaScript, fetch, promises, errors build an API-backed search page 5 React or Angular basics build a form-heavy product flow 6 Git, GitHub, deployment, README publish projects and make them reviewable 7 Interview practice solve JavaScript and UI tasks under time Use How to Become a Frontend Developer if you need a full roadmap before this job-search plan.
Build a fresher portfolio with three projects
Do not build ten small clones. Build three projects that prove different frontend skills. Each project should have a deployed link, a GitHub repo, a README, and one short note explaining a decision you made.
Project 1: Multi-step form
Build one of these:
- Job application form
- Course enrollment form
- Event registration form
- Profile setup flow
Include:
- 3-4 steps
- Required fields
- Inline validation
- Review screen
- Back and next buttons
- Disabled submit while invalid
- Success state
- Responsive layout
- Accessible labels and error text
What it proves: forms, validation, state, accessibility, and attention to user mistakes.
What interviewers may ask:
- Why did you validate on this step instead of only on submit?
- What happens if the user goes back and changes an earlier answer?
- How would the backend return validation errors?
Project 2: API-backed search page
Build one of these:
- Movie search
- Recipe finder
- Product catalog
- GitHub profile finder
- Job tracker with mock API
Include:
- Search input
- Loading state
- Empty state
- Error state
- Retry button
- Detail view
- Mobile layout
What it proves: async JavaScript, API handling, state changes, and user feedback.
What interviewers may ask:
- What happens if two searches finish out of order?
- How do you show no results versus a failed request?
- Why did you choose this API or mock-data shape?
Project 3: Stateful product flow
Build one of these:
- Shopping cart
- Expense tracker
- Appointment booking
- Habit tracker
- Reading list
Include:
- Add, edit, delete, or select actions
- Derived totals or summary
- Confirmation before destructive action
- Local persistence if useful
- Empty state
- Responsive UI
What it proves: state modeling, derived values, and product behavior.
What interviewers may ask:
- Which values are stored and which are calculated?
- How do you prevent accidental delete?
- What breaks if local storage has old or invalid data?
Read How to Build a Frontend Developer Portfolio With No Experience (2026) for a deeper portfolio guide.
GitHub checklist before applying
A fresher with clean GitHub is easier to review because many beginner repos are hard to run.
For each project:
- Add a live demo link.
- Add screenshots.
- Add install and run commands.
- Explain features.
- Explain one tradeoff or limitation.
- Remove unused files.
- Remove API keys or secrets.
- Use clear folder names.
- Pin your best projects.
README structure:
# Project NameShort description.## Live demoLink## Features- Search by keyword- Loading and error states- Responsive layout## Tech stackReact, TypeScript, CSS## Run locallynpm installnpm run dev## What I learnedOne or two specific lessons.If your repo has no README, a reviewer has to work too hard. Do not make that their first impression. Also check that
npm installand the documented run command work from a fresh clone; broken setup quietly kills many beginner applications.Resume format for freshers
Keep the resume simple and proof-heavy.
Recommended order:
- Name, location, email, phone, GitHub, LinkedIn, portfolio
- One-line headline
- Skills grouped by confidence
- Projects
- Internship, freelance, college, or open-source work if relevant
- Education
Good headline:
Frontend developer fresher with React projects, JavaScript practice, and deployed UI work.Weak headline:
Highly motivated individual seeking an opportunity.Project bullet formula:
Built [project] using [stack] with [specific frontend behavior].Examples:
- Built a React onboarding form with step validation, review screen, saved progress, and responsive layout.
- Created an API-backed product search page with debounced search, loading state, no-results state, and error recovery.
- Built an expense tracker with category filters, derived totals, local persistence, and mobile-friendly UI.
How to apply as a fresher
Do not rely only on job boards.
Use five channels:
Channel How to use it Job boards Apply to fresher, intern, trainee, web developer, UI developer, and React intern roles Company career pages Apply directly when the role matches your project proof Referrals Send a specific project link and resume, not a vague request LinkedIn posts Reply early with a short note and portfolio link Local/startup communities Look for internships and small product teams Application note:
Hi [Name],I am applying for the frontend intern role. I built a React onboarding form with validation, review step, and responsive layout: [link].My portfolio and GitHub are here: [links].Keep it short. The project link does the work. Do not attach five projects. Send the one that matches the role and make the next click obvious.
Interview prep for freshers
Prepare for four types of questions.
JavaScript basics
Practice:
- Variables, types, equality
- Arrays and objects
- Functions and scope
- Closures
- DOM events
- Promises
async/await- Fetch
- Error handling
CSS basics
Practice:
- Box model
- Flexbox
- Grid
- Media queries
- Positioning
- Specificity
- Focus states
- Responsive forms
Framework basics
For React:
- Components and props
- State
- Forms
- Effects
- Lists and keys
- Conditional rendering
- Controlled inputs
For Angular:
- Components
- Templates
- Inputs and outputs
- Services
- Forms
- Routing basics
Project discussion
Prepare answers for:
- Why did you build this project?
- What was the hardest bug?
- How does state move through the app?
- What happens when the API fails?
- What would you improve next?
- Which part did you write yourself?
Practice JavaScript interview questions, React interview questions, Contact Form, Tabs, and Accordion.
A 60-day first-role plan
Days Work 1-7 Fix HTML, CSS, JavaScript basics with small exercises 8-18 Build multi-step form and deploy it 19-30 Build API-backed search page and deploy it 31-40 Build cart, booking, or expense tracker 41-45 Clean GitHub, READMEs, screenshots, and live links 46-50 Build portfolio site and write project notes 51-55 Rewrite resume and LinkedIn profile 56-60 Apply daily and practice interview questions After day 60, do not disappear into another course. Keep applying, review interview feedback, and improve the weakest part of your proof.
Add one maintenance habit while applying: every Friday, open your own live links, run the projects locally, and fix one confusing README or UI state. A small broken detail can make a careful beginner look careless.
Mistakes that hurt freshers
Avoid:
- Only building tutorial clones
- Listing tools you cannot explain
- Ignoring CSS
- Not deploying projects
- Having broken live links
- Writing no README
- Applying with one generic resume
- Saying "I know React" but failing state and forms
- Practicing only theory and no UI coding
Your first job search is not about proving you know everything. It is about proving you can learn inside a team and finish small frontend work carefully.
Frontend developer jobs for freshers go to candidates who make their ability visible. Build three finished projects, clean up GitHub, write concrete resume bullets, and practice the basics until you can explain your own code calmly.
- How to Learn JavaScript in 2026: The Step-by-Step Guide for BeginnersLearn JavaScript in 2026 with a practical roadmap covering syntax, DOM, async code, browser APIs, projects, testing, and interview practice.作者GreatFrontEnd Team8 分钟阅读Jun 18, 2026
The best way to learn JavaScript in 2026 is to learn the language, then use it in the browser, then practice enough small programs that callbacks, promises, objects, arrays, and DOM updates stop feeling separate.
Do not start by memorizing every method on
Array. Start by learning what runs, when it runs, what data changes, and what the page should show after each change.JavaScript learning roadmap
Stage What to learn What you should be able to build 1 Syntax, values, variables, functions Small console programs 2 Arrays, objects, strings, dates, maps, sets Data transformation utilities 3 Control flow and error handling Input validation and retry logic 4 DOM, events, forms, accessibility basics Interactive browser widgets 5 Async JavaScript, promises, fetch()API-backed pages 6 Modules, tooling, linting, tests Maintainable mini apps 7 Interview patterns and debugging Explain and fix unfamiliar code MDN's JavaScript Guide is the best primary reference for the language because it covers grammar, control flow, functions, objects, promises, modules, and browser-facing usage in one place. Use it as reference material, not as a book you must finish before building.
Step 1: Learn the core language first
Start with JavaScript as a programming language before jumping into React, Next.js, or Node.js.
Learn these topics in order:
- Values: strings, numbers, booleans,
null,undefined, objects, arrays - Variables:
const,let, scope, reassignment - Expressions and operators: comparisons, logical operators, ternary expressions
- Control flow:
if,switch, loops, early returns - Functions: parameters, return values, arrow functions, callbacks
- Objects and arrays: reading, writing, copying, destructuring
- Errors:
try,catch, throwing useful errors
The goal is not trivia. The goal is to predict what a piece of code will do without running it.
For example, a beginner should be able to explain why this produces a new array and does not mutate
prices:const prices = [100, 200, 300];const discounted = prices.map((price) => price * 0.9);That skill matters more than knowing ten array methods by name.
Step 2: Practice arrays, objects, and strings every day
Most frontend work is data shaping. You receive API data, user input, configuration, or component props, then turn it into UI.
Practice with small exercises:
- Convert an array of products into a list of product names
- Group transactions by month
- Remove duplicate users by ID
- Count how many tasks are complete
- Normalize messy input such as
" React Developer "into"react developer" - Sort records without mutating the original array
This is where methods like
map,filter,find,some,every,reduce,sort,slice,toSorted, andObject.entriesbecome useful.Two details matter while practicing:
- Prefer immutable updates when the original data is still needed. Use
toSorted()where your browser support target allows it, or copy with[...items].sort(...)before sorting. - Learn equality and coercion deliberately. In application code,
===is usually the default;==has coercion rules that are useful to understand but easy to misuse.
Use GreatFrontEnd JavaScript interview questions when you want targeted practice. Interview-style questions are useful even before interviews because they force you to reason through edge cases.
Step 3: Learn the browser, not only JavaScript syntax
Frontend JavaScript runs inside a browser. That means you need the DOM, events, forms, accessibility, layout interactions, storage, network requests, and browser limitations.
Build these without a framework first:
- Counter with increment, decrement, and reset
- Todo list with add, complete, edit, delete, and filter
- Searchable list with empty and loading states
- Form with client-side validation and accessible error messages
- Tabs where keyboard users can move between panels
- Modal with focus management and Escape-to-close behavior
The important part is the connection between state and UI. When data changes, what should change on the page? When the user clicks, types, submits, or presses a key, which code should run?
Do not skip accessibility while learning DOM work. A button should be a
button. A label should be connected to its input. Error text should be reachable by assistive technology. These habits are easier to learn early than to patch later.Step 4: Learn async JavaScript with real failure states
Async JavaScript is where many beginners get stuck because the code does not run top to bottom in the way they expect.
Learn these concepts together:
- The call stack
- Tasks and microtasks at a high level
- Promises
asyncandawaitfetch()- Request cancellation with
AbortController - Loading, success, empty, and error states
- Race conditions from multiple requests
Build a search page that calls an API when the user submits a query. Then add:
- A loading indicator
- An empty result state
- An error message
- A disabled submit button while a request is pending
- A stale-response guard so an older request cannot overwrite a newer result
- Request cancellation when the user starts a newer search
That one project teaches more useful async JavaScript than many syntax-only exercises.
For example, a plain JavaScript search flow can combine
AbortControllerwith a current-request check:let currentController;async function runSearch(query) {currentController?.abort();const controller = new AbortController();currentController = controller;try {const response = await fetch(`/api/search?q=${encodeURIComponent(query)}`, {signal: controller.signal,});const results = await response.json();if (controller !== currentController) {return;}renderResults(results);} catch (error) {if (error.name !== 'AbortError') {renderError('Search failed. Try again.');}}}This is not only an API trick. It teaches the habit of asking which async result is still allowed to update the UI.
Step 5: Learn modules and tooling when repetition hurts
Do not install a build tool on day one. Wait until you feel the problem it solves.
You are ready for tooling when:
- One file is too large
- You want imports and exports across files
- You want TypeScript or JSX
- You want tests
- You want formatting and linting
- You want a local dev server with fast refresh
At that point, learn npm scripts, package installation, ES modules, Prettier, ESLint, and a test runner such as Vitest. You do not need to become a tooling expert, but you should understand what runs when you type
npm run dev,npm test, ornpm run build.Step 6: Build projects that prove specific skills
A good beginner project proves behavior, not only visual polish.
Project Skills it proves Expense tracker Forms, arrays, derived totals, validation Weather app fetch(), loading, errors, empty statesKanban board Drag behavior, state updates, persistence Product filter page URL state, sorting, filtering, responsive UI Quiz app Timers, scoring, state transitions GitHub profile viewer API calls, error handling, conditional rendering For each project, write a short README with:
- What it does
- How to run it
- One edge case you handled
- One thing you would improve
That README trains you to explain technical work, which helps in interviews and portfolio reviews.
Add one small testable rule to every project. For an expense tracker, test that deleting an item updates the total. For a search page, test that the empty state appears when the API returns no results. You do not need a giant test suite as a beginner, but you should learn that behavior can be checked without clicking through the whole app by hand.
Step 7: Add React only after JavaScript feels useful
You do not need to master all JavaScript before React, but you should be comfortable with functions, arrays, objects, modules, async code, and DOM events first.
If you start React too early, every problem feels like a React problem. Many are JavaScript problems:
- Data is shaped incorrectly
- A callback closes over old data
- A promise resolves later than expected
- A list key is unstable
- An object was mutated by accident
JavaScript gives you the mental model. React gives you a component model for building larger interfaces.
A 12-week JavaScript study plan
Weeks Plan Output 1-2 Syntax, functions, arrays, objects 30 small console exercises 3-4 DOM, events, forms Counter, todo app, form validation 5-6 Async JavaScript and APIs Search page with loading and error states 7-8 Modules, tooling, tests Refactor one project into modules and add tests 9-10 Browser APIs and accessibility Modal, tabs, local storage, keyboard behavior 11-12 Interview-style practice and portfolio cleanup Two polished projects and JavaScript question practice Adjust the pace if you work or study full time. The sequence matters more than the calendar.
Common mistakes beginners make
The first mistake is copying tutorials without changing the requirements. After finishing a tutorial, add one feature without instructions.
The second mistake is learning syntax without debugging. Use browser DevTools, breakpoints, console inspection, network logs, and error messages. Debugging is part of learning the language.
The third mistake is skipping edge cases. A form with only the happy path is unfinished. What happens with empty input, slow network, invalid data, duplicate clicks, or a user using only the keyboard?
The fourth mistake is treating interviews as separate from learning. Many interview questions test the same habits you need in product code: data transformation, async control, DOM behavior, and careful explanation.
When are you ready to move on?
You are ready for React, TypeScript, or deeper frontend work when you can:
- Build a small browser app without a tutorial
- Explain the difference between mutation and copying
- Use
map,filter, andreducewithout guessing - Fetch data and handle loading, empty, and error states
- Debug a failing event handler
- Split code into modules
- Write a few useful tests
- Explain your code out loud
Learning JavaScript in 2026 is not about finishing every topic. It is about building the mental model that lets you read unfamiliar code, predict behavior, and turn browser events into correct UI.
- Values: strings, numbers, booleans,
- Frontend Developer Portfolio: What to Build and How to Stand Out in 2026Learn what to build for a frontend developer portfolio in 2026, how to structure case studies, and how to prove frontend skill beyond screenshots.标签作者GreatFrontEnd Team9 分钟阅读Jun 17, 2026
A frontend developer portfolio should prove that you can build useful interfaces, explain your decisions, and handle the messy parts of frontend work: state, data, accessibility, performance, errors, and product tradeoffs.
The goal is not to collect pretty screenshots. A strong portfolio makes it easy for a hiring team to see what you can be trusted to own next.
If you have no experience yet, start with How to Build a Frontend Developer Portfolio With No Experience. This guide is for the main portfolio decision: what to build, what to show, and how to stand out once you have projects, internships, freelance work, open-source work, or professional experience to present.
A useful portfolio also avoids a trap: it does not turn every project into a perfect success story. Reviewers trust portfolios that explain constraints, tradeoffs, bugs, and follow-up work. Perfect narratives sound less believable than specific ownership.
What a strong frontend portfolio must prove
Your portfolio should answer these questions:
Question Weak answer Stronger proof What kind of frontend work do you do? "I build web apps" product frontend, design systems, platform, performance, or UI engineering examples What scope can you own? "I worked on features" scoped feature, product flow, migration, shared component, or cross-team project How do you make decisions? list of tools tradeoffs around state, data, performance, accessibility, and maintainability How do you handle quality? "I write clean code" tests, review notes, accessibility checks, performance measurements, bug prevention How do you work with teams? "team player" examples of design, backend, product, QA, or stakeholder collaboration Do not use the portfolio only as a visual resume. Use it as evidence of your judgment. A reviewer should leave with a clear idea of your likely level: junior feature contributor, mid-level feature owner, senior product engineer, design-system specialist, platform engineer, or lead.
Recommended structure
Keep the site simple. Many candidates overbuild the shell and under-explain the work.
Use this structure:
Section What it should do Home state your frontend lane, seniority, strongest work, and contact links Selected work 2-4 detailed case studies Technical notes short notes on architecture, performance, accessibility, or testing Code samples public repos, open-source work, or simplified demos Experience roles, product areas, scope, and stack Contact email, LinkedIn, GitHub, resume Do not bury the case studies behind animations. A hiring manager or engineer may only spend a few minutes on the site before deciding whether to talk to you.
Put the best case study above any long bio. The first click should answer: what did you own, what was hard, and why does this work matter?
Choose a portfolio lane
Your portfolio should match the next role you want.
Target role What to emphasize What to avoid Senior frontend engineer ownership, tradeoffs, code quality, mentoring, product flows only pretty screenshots Product frontend engineer user flows, API states, UX details, release decisions isolated components with no product context Design systems engineer component APIs, accessibility, docs, adoption, migration a random set of UI elements with no usage examples Frontend platform engineer tooling, build speed, testing infrastructure, migrations only app feature work Performance-focused frontend engineer measurement, diagnosis, render cost, loading strategy vague claims about speed Remote frontend engineer async docs, case studies, self-directed delivery portfolio with no written explanation Lead frontend engineer technical direction, review quality, cross-team decisions only individual implementation details This does not mean you need seven portfolios. It means your homepage and selected work should point toward one main story. If you want senior frontend roles, do not lead with a landing page clone. If you want design-system roles, do not hide component API decisions behind screenshots.
Case studies beat project cards
Project cards say what you built. Case studies show how you think.
Use this case study structure:
Problem:What product or engineering problem existed?Context:What team, user, system, or constraint mattered?My role:What did I personally own?Frontend decisions:State, data fetching, component boundaries, routing, accessibility, performance, testing.Tradeoffs:What did I choose not to do and why?Quality:How did I check the work?Result:What changed for users, the team, or the codebase?Next:What I would improve with more time.You can write a good case study even if you cannot share numbers. Be precise about the shape of the work.
Weak:
Built a dashboard using React and TypeScript.Better:
Owned a customer operations dashboard with URL-based filters, paginated API data, row-level actions, and retry handling. Split table state from server state so filters could be shared through links and restored after refresh.What to show if your company work is private
Most experienced developers cannot share private code. That is normal.
Use one of these options:
Constraint Portfolio solution Cannot show code write an anonymized case study Cannot show screenshots recreate a simplified UI with fake data Cannot name company describe the domain and team size generally Cannot share metrics describe the user or engineering problem that improved Work was team-owned state your exact contribution honestly Work was internal tooling explain workflow, users, and constraints Do not invent impact. Hiring teams can usually spot inflated stories. Honest, specific ownership is stronger than fake numbers.
Better than a fake metric:
- "Reduced duplicate validation logic across three related forms."
- "Moved filters into the URL so support teammates could share exact table views."
- "Documented modal focus behavior after two regressions in related flows."
- "Split a large component after review showed unrelated state updates were causing slow interactions."
Public demos frontend developers can build
If you need public proof, build demos that mirror professional frontend challenges.
Data-heavy dashboard
Include:
- Search, filters, sorting, pagination
- URL state
- Loading, empty, error, and retry states
- Details drawer
- Keyboard-accessible row actions
- TypeScript models
- Tests for core behavior
Explain state ownership and API assumptions. Include at least one failure path; experienced frontend work is often judged by what happens when the data is late, missing, invalid, or unauthorized.
Design system slice
Include:
- Button, input, select, modal, tabs, toast, and data table primitives
- Variants and disabled/error/loading states
- Keyboard behavior notes
- Usage examples
- Token or theme explanation
- Migration note for adopting the components
Explain component API decisions. This is where experienced frontend judgment shows. For example, state which props are intentionally supported, which variants you rejected, and how keyboard behavior is handled.
Performance case study
Build or document:
- A slow table, carousel, image grid, or dashboard
- The measurement method
- The bottleneck
- The fix
- The tradeoff
- The result
Do not say "optimized." Say what was slow, how you measured it, and how you changed it.
Frontend architecture note
Write a short technical note about:
- Server state versus client state
- URL state for filters
- Form state modeling
- Component composition
- Design-system component APIs
- Handling partial API failures
- Avoiding duplicate state
Technical writing can be portfolio proof if it shows practical judgment.
What code samples should show
Your code samples do not need to be huge. They need to be reviewable.
Good code samples show:
- Clear naming
- Small components with a reason to exist
- State that has an owner
- Typed inputs and outputs
- Error handling
- Tests where behavior matters
- No unnecessary abstractions
- README with setup, decisions, and known limitations
Avoid:
- A giant repo with no entry point
- A demo that only works on your machine
- Private repos with no alternative
- Over-engineered architecture for a tiny app
- Random snippets with no context
A strong portfolio should show that you can keep code boring where boring is better. If a sample uses an abstraction, explain the repeated problem it solves.
Add quality signals
Quality separates useful portfolios from project galleries.
Area Portfolio evidence Accessibility keyboard path, labels, focus management, semantic HTML, modal behavior Performance what you measured, what was slow, what changed Testing which behavior deserved tests and why Maintainability component boundaries, naming, data flow, documentation Product thinking empty states, permission states, recovery paths, error copy Review how you split work, handled feedback, or improved a pattern You do not need to show all of this in every case study. Pick the details that matter for the work. One strong accessibility note beats a generic claim that the whole site is accessible.
Homepage copy that stands out
Your homepage should be direct.
Good:
Senior frontend engineer focused on React, TypeScript, design systems, and data-heavy product UI.Good:
Frontend engineer building accessible dashboards, form-heavy workflows, and maintainable component systems.Weak:
I create beautiful digital experiences that delight users.The weak version could describe almost anyone. The good versions help a hiring team place you.
Portfolio review checklist
Before sharing the portfolio:
- Are the best 2-4 pieces easy to find?
- Does each case study state your actual role?
- Are private details anonymized cleanly?
- Do screenshots include meaningful UI states?
- Do demos work on mobile?
- Do code samples have setup instructions?
- Are there broken links?
- Does the homepage say what role you want next?
- Does the portfolio show judgment, not only output?
Send the portfolio to one engineer and ask: "What role do you think this portfolio is targeting?" If they cannot tell, tighten the story.
Common portfolio mistakes
Avoid:
- Listing every project from your career
- Showing screenshots without decisions
- Hiding your actual contribution
- Using too many animations before the content loads
- Treating private work as an excuse to show nothing
- Claiming team impact as personal impact
- Over-indexing on visual polish while ignoring engineering proof
- Making contact links hard to find
The point is not to impress everyone. It is to make the right hiring team trust you faster.
Final sanity check
Before sending the portfolio, read it like a skeptical interviewer:
- Can I tell what level this person is targeting?
- Can I identify their personal contribution?
- Can I see how they handle imperfect requirements?
- Can I inspect a live demo or code sample without guessing how to run it?
- Can I find contact links without hunting?
- Is any claim bigger than the evidence shown?
A frontend developer portfolio should prove scope. Show what you owned, how you made decisions, how you checked quality, and why your frontend work made the product, user flow, or codebase better.
- How to Build a Frontend Developer Portfolio With No Experience (2026)Learn how freshers can build a frontend developer portfolio with no experience using beginner-friendly projects, GitHub, case studies, and clear proof.标签作者GreatFrontEnd Team9 分钟阅读Jun 17, 2026

To build a frontend developer portfolio with no experience, create a simple portfolio site, add three finished projects, write project notes, deploy everything, and make your GitHub easy to review.
This guide is for freshers who are staring at a blank page and do not know where to start. You do not need a job history, a famous open-source profile, or an award-winning design. You need proof that you can build small frontend projects carefully.
Your first portfolio should answer a simple question: "Can this person be trusted with a junior frontend task?" The answer should come from the work itself, not from adjectives in the About section.
What a beginner portfolio should do
A beginner portfolio is not a personal brand campaign. It is a hiring artifact.
It should prove:
- You can build responsive pages.
- You understand basic JavaScript.
- You can use a frontend framework for small flows.
- You can fetch and display data.
- You can handle loading, empty, and error states.
- You can write a README.
- You can deploy your work.
- You can explain your own code.
If your portfolio does that, it is already better than many beginner portfolios.
The easiest review path is:
- Homepage says the role you want.
- Project card links to a live demo.
- Live demo shows real UI states.
- GitHub link has a README and run commands.
- Project note explains one decision and one limitation.
If any step breaks, fix that before redesigning the site.
Step 1: Build the portfolio shell
Keep the site simple.
Required sections:
Section What to include Home name, target role, one-line summary, links Projects three selected projects with live links and GitHub links Skills only tools you can explain About short learning story and work preference Contact email, GitHub, LinkedIn, resume Good homepage headline:
Frontend developer fresher building React, JavaScript, and responsive web projects.Good supporting text:
I build small product-style interfaces with forms, API data, responsive layouts, and clear project notes.Avoid:
Motivated developer creating digital solutions.That tells the reader nothing.
Step 2: Build three projects
Three finished projects are enough for the first version. Finished means deployed, documented, responsive enough to inspect on a phone, and honest about what is mocked.
Project Skill it proves Why it helps Multi-step form forms, validation, state, accessibility many junior tasks involve forms API-backed search or dashboard fetch, loading, empty, error, retry proves you can work with data Cart, booking flow, or expense tracker user actions, derived state, persistence proves interactive app logic Do not copy a tutorial exactly. If you use a tutorial for learning, change the requirements until the project becomes yours. Add one feature the tutorial did not include, change the data shape, and write down the decision you had to make.
Project 1: Multi-step form
Build a form that feels like a small product workflow.
Good ideas:
- Job application form
- Course enrollment form
- Event registration form
- Profile setup flow
- Subscription preference form
Required features:
- 3-4 steps
- Required fields
- Inline validation
- Review step
- Back and next buttons
- Disabled submit while invalid
- Success state
- Responsive layout
- Accessible labels
- Error text that helps the user fix the issue
Review details that matter:
- Error text should be next to the field or summarized clearly.
- The Back button should not erase earlier answers.
- The Review step should show the same values the user entered.
- The form should work without relying only on placeholder text.
Beginner version:
- Store all state in React component state.
- Use simple validation functions.
- Show errors after blur or submit.
Improved version:
- Save progress to local storage.
- Add a validation summary.
- Add tests for required fields.
- Add keyboard checks.
Project note:
What I built:A three-step application form with validation and review.Frontend decisions:I kept all form values in one state object so the review screen could read them easily. I validate each step before moving forward.What I learned:Form UX is not only inputs. Disabled states, error messages, and review screens matter.What I would improve:I would add server-side validation and better autosave.Project 2: API-backed search or dashboard
Build something that uses data.
Good ideas:
- Movie search
- Recipe finder
- Product catalog
- GitHub profile finder
- Job application tracker with mock API
- Weather dashboard
Required features:
- Search or filter
- Loading state
- Empty state
- Error state
- Retry button
- Details view
- Responsive layout
Review details that matter:
- Loading, empty, and error states should be visually different.
- Failed requests should not leave old results in a confusing state.
- The details view should have a clear way back to the results.
- If search is debounced, the README should mention why.
Beginner version:
- Fetch data on submit.
- Render results.
- Show loading and errors.
Improved version:
- Debounce search.
- Cancel stale requests.
- Add filters.
- Put search in the URL.
- Add skeleton or structured loading UI.
Project note:
What I built:An API-backed product search page with filters and details.Frontend decisions:I separated the search input from the submitted query so the API is not called on every keypress.What I learned:The empty state and error state need different messages.What I would improve:I would add pagination and cache repeated searches.Project 3: Cart, booking flow, or expense tracker
Build something where user actions change state.
Good ideas:
- Shopping cart
- Appointment booking
- Expense tracker
- Habit tracker
- Reading list
- Split-bill calculator
Required features:
- Add item
- Edit or remove item
- Derived total or summary
- Empty state
- Confirmation for destructive action
- Local persistence
- Mobile layout
Review details that matter:
- Totals should be derived from items, not stored separately without a reason.
- Delete actions should be recoverable or confirmed.
- Local storage should handle empty or outdated data safely.
- Empty states should tell the user what action to take next.
Beginner version:
- Use component state.
- Calculate totals from current items.
- Save to local storage.
Improved version:
- Add filters or categories.
- Add undo for delete.
- Add validation.
- Add tests for totals.
Project note:
What I built:An expense tracker with categories, filters, and monthly totals.Frontend decisions:I calculate totals from the transaction list instead of storing totals separately.What I learned:Duplicate state can create bugs when values change in multiple places.What I would improve:I would add import/export and charts.Step 3: Write project pages
Each project page should have more than a screenshot.
Use this structure:
Section What to write What it is one paragraph explaining the project Features short bullets Screens key screenshots or GIF Frontend decisions state, API, layout, validation, or accessibility What I learned specific lessons What I would improve honest next step Links live demo and GitHub This helps interviewers see that you understand the work behind the final screen. It also gives you better interview answers because you are not trying to remember vague project details under pressure.
Step 4: Make GitHub reviewable
Clean GitHub is part of the portfolio. A reviewer may open the repo before the live demo, so do not treat GitHub as an afterthought.
For each repo:
- Use a clear name.
- Add a README.
- Add screenshots.
- Add a live demo link.
- Add setup commands.
- Remove unused files.
- Keep fake data in a clear folder.
- Use
.env.exampleif needed. - Pin the three best repos.
README template:
# Project NameShort description.## Live demoLink## Features- Feature 1- Feature 2- Feature 3## Tech stackReact, TypeScript, CSS## Run locallynpm installnpm run dev## NotesOne tradeoff or limitation.Step 5: Add a resume that matches the portfolio
Your resume should point to the same proof.
Project bullets:
- Built a React multi-step form with validation, review screen, saved progress, and responsive layout.
- Created an API-backed product search page with loading, empty, error, retry, and details states.
- Built an expense tracker with category filters, derived totals, local persistence, and mobile layout.
Avoid:
- "Good knowledge of frontend"
- "Hardworking and sincere"
- Skill bars or percentages
- Ten tools you cannot explain
- Projects with no live link
The resume gets attention. The portfolio earns the interview.
Make the order match the role. If the job asks for React, put the React project first. If it asks for UI developer skills, put the responsive page or form first. Do not make the reviewer hunt for the relevant proof.
A 21-day starter plan
If you feel stuck, follow this plan.
Days Work 1-2 Create portfolio shell and deploy it 3-7 Build multi-step form 8-12 Build API-backed search or dashboard 13-16 Build cart, booking flow, or expense tracker 17 Write READMEs 18 Write project pages 19 Fix mobile layout and broken links 20 Add resume and contact links 21 Apply to 10 relevant roles Your portfolio will not be perfect after 21 days. That is fine. A real, reviewable portfolio beats a perfect portfolio that never ships.
Before applying, do one clean-room check: open each project in an incognito window, click the main flow, resize to mobile width, and follow the README run command in a fresh folder. This catches the boring failures reviewers notice first.
What to do after publishing
After the first version:
- Apply to roles.
- Track which projects interviewers ask about.
- Write down questions you could not answer.
- Improve the project notes.
- Fix broken UX.
- Add tests to one project.
- Improve one project instead of starting five new ones.
The portfolio should improve through feedback, not endless redesign.
Common beginner mistakes
Avoid:
- Spending all your time on animations
- Copying portfolio templates without changing content
- Building only landing pages
- Not deploying projects
- Having broken GitHub links
- Leaving README files empty
- Using fake skill percentages
- Saying "full stack" when the proof is frontend-only
- Hiding errors instead of handling them
The best beginner portfolio is honest. It shows your current level and gives a team confidence that you can grow. If something is mocked, say it is mocked. If a feature is incomplete, name the next step instead of pretending it is done.
A frontend developer portfolio with no experience should make your learning visible. Build three useful projects, explain them clearly, clean up GitHub, and apply before perfection becomes another way to procrastinate.
- Frontend Developer Roadmap 2026: The Complete Skills and Career GuideA detailed frontend developer roadmap for 2026 covering the skills, tools, projects, milestones, and interview practice needed for modern frontend roles.标签作者GreatFrontEnd Team15 分钟阅读Jun 16, 2026
A frontend developer roadmap in 2026 should start with the browser, then move through JavaScript, TypeScript, one major frontend framework, app architecture, accessibility, testing, performance, and interview practice. The right roadmap is not a list of every tool. It is an order of learning that keeps you employable without drowning you in optional technology.
Use this roadmap as a skills map. If you are starting from zero and need the broader beginner journey, read How to Become a Frontend Developer in 2026. This article is the detailed map of what to learn, what to skip for now, and what evidence each stage should produce.
The 2026 roadmap at a glance
Stage Learn Build You are ready to move on when Web platform HTML, CSS, browser behavior, DevTools Static pages, forms, responsive layouts You can explain layout, semantics, events, and network requests without a framework JavaScript Data structures, async code, DOM, modules Search, filters, timers, API-backed widgets You can debug state and async behavior from the console TypeScript Props, unions, generics, narrowing, API types Typed forms, typed API responses, reusable components You can remove unsafe anyinstead of hiding errorsFrontend framework Components, state, lifecycle, composition, routing basics Stateful UI flows, dashboards, product screens You know where state belongs and how the framework updates the page App architecture Routing, data fetching, auth states, server/client boundaries A multi-page product workflow You can handle loading, empty, error, permission, and recovery states Quality Accessibility, testing, performance, security basics Tested flows, keyboard-safe forms, measured pages You can prove the UI works, not only that it renders Interview readiness JavaScript, framework concepts, CSS, APIs, system design Timed exercises and explainable projects You can solve, explain, test, and improve under time pressure Do not learn all rows at the same depth. A junior candidate needs broad competence and proof through projects. A senior candidate needs deeper tradeoff judgment, architecture, debugging, and mentoring evidence.
What changed for frontend roadmaps in 2026
The core order has not changed: HTML, CSS, JavaScript, and the browser still come first. The emphasis has changed.
Framework choice matters, but it should come after the platform basics. React, Angular, Vue, and Svelte can all be valid choices depending on your target companies, local market, team stack, and learning style. React is common in many frontend roles, Angular is still common in enterprise teams, Vue is popular for approachable product development, and Svelte is worth considering when you like compiler-driven UI with less runtime code. Pick one main framework and get good enough to build complete flows.
TypeScript is also harder to treat as optional. Many modern frontend teams use it for framework apps, design systems, API contracts, and shared component libraries. For frontend learning, that means TypeScript is not a senior-only skill anymore.
Build tooling has become more practical. Vite, framework CLIs, and faster bundlers mean most learners do not need to hand-configure Webpack early. Learn what frameworks solve, but do not let a framework hide weak browser knowledge.
AI belongs in the roadmap too. It can explain errors, generate test cases, suggest refactors, and compare approaches. It should not replace reading docs, debugging in DevTools, writing code by hand, or reviewing accessibility behavior.
Start with the browser, not a framework
The browser is the runtime for every frontend framework. Weak browser knowledge shows up later as layout bugs, broken forms, poor accessibility, hydration mismatches, and confusing network behavior.
Learn HTML as page structure:
- Document structure, headings, lists, buttons, links, forms, labels, tables, and landmarks
- Native controls before custom controls
- Basic metadata, image attributes, and document language
- Form submission behavior, validation behavior, and keyboard behavior
Learn CSS as layout and state:
- Box model, cascade, specificity, inheritance, and custom properties
- Flexbox for one-dimensional layout
- Grid for two-dimensional layout
- Positioning, stacking context, overflow, and containment
- Responsive layout with media queries and container queries
- Focus states, reduced motion, color contrast, and forced-colors awareness
Learn browser behavior:
- DOM tree, events, bubbling, capturing, and delegation
- Network requests, request headers, response status codes, caching, and CORS
- Storage choices such as cookies, localStorage, sessionStorage, and IndexedDB at a high level
- DevTools panels: Elements, Console, Network, Performance, Application, and Lighthouse
Practice target:
Project What to prove Responsive settings page Layout, form controls, validation text, keyboard behavior Pricing page with FAQ Semantic structure, responsive CSS, disclosure state API-backed profile card Fetch, loading state, error state, retry behavior Learn JavaScript deeply enough to debug UI
Frontend JavaScript is not only syntax. It is data changing over time while the user clicks, types, waits, navigates, and loses network access.
Prioritize:
- Values, references, equality, truthiness, and coercion
- Arrays, objects, maps, sets, and common transformations
- Scope, closures, modules, and imports
- Event handling and event delegation
- Promises,
async/await, timers, cancellation, and race conditions - Fetch, JSON parsing, error handling, and retries
- DOM reads and writes, layout cost, and event timing
Build small exercises that reveal mistakes:
Exercise Mistake it catches Debounced search stale closures, repeated requests, missing empty state Sortable table mutation bugs, unstable sorting, weak rendering logic Todo app with persistence storage assumptions, serialization, state recovery Polling status widget timers, cleanup, network errors, duplicate updates Interview practice should begin here. Start with JavaScript interview questions, then add timed practice once the basics are steady.
Add TypeScript before the codebase gets large
TypeScript helps most when it models the messy edges of UI: optional API fields, unknown JSON, reusable component props, form values, and state transitions.
Learn:
- Primitive types, arrays, objects, unions, and literals
- Interfaces and type aliases
- Optional fields and nullish values
- Narrowing with
typeof,in, discriminated unions, and custom guards - Generics for reusable functions and components
- Typing component props, event handlers, and API responses
unknownoveranywhen data comes from outside the app
Do not begin with advanced type puzzles. A frontend developer gets more value from correctly typing API boundaries and component contracts than from writing clever utility types nobody wants to maintain.
Practice target:
Build TypeScript skill Typed API client response types, error types, unknown data Reusable input component props, event handlers, controlled values Filter state model unions, literals, derived state Form result type success/error states, discriminated unions Use TypeScript interview questions when you can explain the types in your own words. If you choose React, read TypeScript for React Developers for framework-specific practice.
Choose one frontend framework
A frontend framework helps you organize state, components, routing, forms, data loading, and shared UI. The important skill is deciding what changes, where it lives, and how the page should respond. React is a practical default for many learners, but it is not the only correct choice.
Pick based on your goal:
Framework Good choice when React Your target jobs mention React, Next.js, design systems, dashboards, or UI coding interviews Angular Your target jobs are enterprise teams with larger applications, strict conventions, and TypeScript-heavy codebases Vue You want an approachable framework with clear templates, component structure, and a strong product-app ecosystem Svelte You prefer compiler-driven UI, less boilerplate, and a smaller mental model for reactive components Whichever framework you choose, learn the same core ideas:
Learn:
- Components and props
- State, derived values, and rendering
- Lists, keys, and conditional rendering
- Controlled and uncontrolled forms
- Side effects, cleanup, and common lifecycle mistakes
- Refs, focus management, and DOM escape hatches
- Context for shared data that truly belongs above many components
- Composition patterns such as slots, render props, and compound components
- Error boundaries and recovery UI
For modern frameworks, add:
- Form submission and pending status at a conceptual level
- Optimistic updates and rollback behavior
- Server-rendered UI versus client-rendered UI at a high level
- Hydration mismatch causes in frameworks that hydrate on the client
- Framework-specific routing and data loading
Do not make every project a framework project too early. A framework should clarify UI state, not compensate for weak HTML, CSS, or JavaScript.
If you choose React, practice with React interview questions, then build UI tasks such as Contact Form, Data Table, Tabs, and Image Carousel. If you choose Angular, Vue, or Svelte, build the same kinds of components in that framework: forms, tables, tabs, autocomplete, modal flows, dashboards, and data-backed product screens.
Learn app architecture after component basics
Many candidates can write components. Fewer can build a full product flow that behaves carefully under failure.
Learn:
- Routing and route state
- URL search params for filters and pagination
- Data fetching, cache invalidation, and request deduping
- Loading, empty, success, error, and partial-error states
- Authentication states, permissions, and redirects
- Server state versus client state
- Forms, validation, optimistic updates, and rollback
- File uploads, progress, cancellation, and retry
- Analytics events and privacy-sensitive data
- Feature flags and gradual rollout basics
Framework and meta-framework choice:
Choice When it makes sense React with Vite Learning React, building dashboards, practicing UI coding, smaller client-heavy apps Next.js React teams that need routing conventions, server-rendered pages, content-heavy apps, or auth-heavy products Angular Enterprise apps that benefit from built-in conventions, dependency injection, routing, forms, and TypeScript-first structure Vue with Vite or Nuxt Product apps where template clarity, component ergonomics, and progressive adoption matter Svelte or SvelteKit Smaller apps or teams that prefer compiler-driven reactivity and less runtime ceremony Remix or React Router framework mode React apps that lean heavily on routes, forms, data loading, and web-standard request handling Pick one main framework after the browser and JavaScript basics. Learn enough of the others to read job descriptions, not enough to split your attention across three stacks.
Learn accessibility as normal frontend work
Accessibility is not a separate phase you bolt on before launch. It affects the elements you choose, the state you expose, the keyboard behavior you support, and the way errors are announced.
Learn:
- Semantic HTML before ARIA
- Labels, names, roles, and descriptions
- Keyboard navigation and visible focus states
- Form errors and instructions
- Modal, menu, tab, accordion, and combobox behavior
- Color contrast, text scaling, and reduced motion
- Screen reader smoke testing at a practical level
Project checks:
- Can the main flow be completed without a mouse?
- Does focus move predictably after opening and closing overlays?
- Are form errors tied to the fields they describe?
- Does custom UI follow expected keyboard behavior?
- Does loading or error content announce changes when needed?
Use accessibility practice inside every project. A keyboard-broken form is not job-ready UI.
Learn testing by protecting user behavior
Testing is easier to learn when the goal is clear: protect important behavior from regressions.
Learn:
- Unit tests for pure functions and data transformations
- Component tests for form behavior, conditional UI, and interaction
- End-to-end tests for critical flows such as signup, checkout, upload, and search
- Mocking network responses without testing implementation details
- Accessibility checks as a supplement, not a replacement for manual keyboard testing
Good first tests:
Feature Useful test Form Shows validation errors, disables submit while pending, recovers after API failure Data table Applies filters, preserves sorting, handles empty results Auth-gated page Redirects unauthenticated users and preserves destination Upload flow Shows progress, handles cancellation, displays retry Testing should not wait until a project is finished. Add tests when behavior becomes easy to break.
Learn performance by measuring before optimizing
Frontend performance in 2026 is not only bundle size. It includes loading, rendering, images, fonts, third-party scripts, data waterfalls, server response time, and main-thread work.
Learn:
- Core Web Vitals: LCP, INP, and CLS
- Image sizing, formats, lazy loading, and priority
- Font loading and layout shift
- Code splitting and unnecessary client JavaScript
- Memoization only when it solves a measured rendering problem
- DevTools Performance traces
- Network waterfalls and request blocking
- Framework rendering modes and caching at a practical level
Performance practice:
- Measure the page before changing it
- Identify whether the bottleneck is network, server, JavaScript, rendering, or assets
- Fix one bottleneck and measure again
- Write down what changed and why it helped
Do not start with advanced micro-optimizations. A missing image size, a client-only marketing page, or a slow API waterfall usually matters more than a premature
useMemo.Learn the tools that support the work
Tools should reduce friction. They are not the roadmap.
Tool area Learn first Learn later Editor VS Code or your preferred editor, debugger, TypeScript errors custom editor automation Package manager npm or pnpm basics, scripts, lockfiles workspace tuning Build tool Vite or framework CLI custom bundler configuration Version control Git branches, commits, pull requests, conflict resolution advanced rewriting workflows Styling CSS modules, Tailwind, or the team's system design token pipelines Data fetching fetch, framework loaders/actions, TanStack Query basics custom cache layers Testing Vitest/Jest, Testing Library, Playwright visual regression infrastructure Deployment Vercel, Netlify, Cloudflare, or company CI basics multi-region rollout strategy The best tool choice is the one that lets you build and debug more product behavior. If a tool takes a week to configure before you understand the problem it solves, postpone it.
Projects for each roadmap stage
A roadmap needs proof. Courses and notes are not enough.
Stage Project Requirements Platform Accessible form flow labels, validation, keyboard behavior, responsive layout JavaScript Searchable data table fetch, sorting, filtering, pagination, empty state TypeScript API-backed dashboard typed response, error model, reusable chart/list components Framework Product settings app tabs, forms, optimistic save, dirty-state warning App architecture Mini SaaS workflow auth states, routing, permissions, billing-like flow, tests Quality Performance and accessibility pass measured before/after notes, keyboard audit, critical tests Interview Timed UI challenges explainable solution, edge cases, cleanup, follow-up improvements Each finished project should include a short engineering note:
- What the product flow does
- What states it handles
- What tradeoffs you made
- What you tested
- What accessibility checks you ran
- What you would improve with more time
That note matters. It turns a demo into hiring evidence.
Beginner, job-ready, and senior roadmap differences
The roadmap changes by target level.
Target Spend more time on Spend less time on Beginner HTML, CSS, JavaScript, one framework, portfolio projects framework debates, advanced state libraries, microfrontends Internship or junior forms, API integration, debugging, TypeScript basics, GFE practice complex architecture diagrams Mid-level feature ownership, state modeling, tests, accessibility, performance copying tutorials Senior tradeoffs, system design, migrations, cross-team contracts, production debugging isolated toy apps Specialist one depth area such as design systems, frontend infrastructure, accessibility, or performance trying to specialize before shipping product UI For senior growth, pair this roadmap with Senior Frontend Developer Skills. For title progression and scope, use Frontend Developer Career Path.
Interview practice roadmap
Interview preparation should track the same skill order, but with tighter feedback loops.
Area Practice JavaScript arrays, objects, promises, closures, timers, event loop, DOM manipulation CSS layout, responsive behavior, specificity, positioning, accessible states Framework state, lifecycle, forms, rendering, component design APIs REST, status codes, pagination, caching, retries, error states TypeScript component props, unions, generics, narrowing, API data UI coding forms, tables, autocomplete, tabs, carousel, file explorer System design data flow, component boundaries, performance, accessibility, failure modes Start with quiz questions for fast feedback. Use user interface coding questions when you need implementation practice. Add front end system design questions once you can build product flows without getting stuck on basic component state.
Common roadmap mistakes
The most common mistake is learning tools in the order they look exciting instead of the order they remove real bottlenecks.
Avoid these traps:
- Learning a framework before forms, events, and CSS layout make sense
- Reaching for a state library before understanding local state, URL state, and server state
- Building only landing pages with no loading, error, or empty states
- Treating TypeScript as syntax instead of a way to model unsafe data
- Using AI to generate code you cannot debug
- Skipping accessibility until the end
- Writing tests only after the code is too tangled to test
- Studying system design before building enough UI to have design opinions
- Switching frameworks whenever a new tool trends
The fix is simple but not easy: build smaller complete flows, test the uncomfortable states, and explain the tradeoffs.
A practical 2026 learning plan
This timeline assumes consistent part-time study. Move faster if you already program. Move slower if the projects feel shallow.
Timeframe Main goal Output Weeks 1-4 Browser, HTML, CSS, JavaScript basics responsive form and API widget Weeks 5-8 JavaScript depth and DOM behavior searchable table, debounced search, persisted state Weeks 9-12 TypeScript and framework basics typed components and form flow Months 4-5 App architecture multi-page app with routing, auth states, API data, and error handling Month 6 Quality pass tests, accessibility fixes, performance notes, deployed portfolio Months 7-12 Interview and depth GFE practice, system design, stronger projects, specialist exploration The calendar is only useful if the outputs are real. A shallow six-month checklist is weaker than three carefully built projects that show product judgment.
A good frontend developer roadmap in 2026 is selective. Learn the platform, add JavaScript depth, use TypeScript to model risk, choose one frontend framework, build full product flows, and prove quality through accessibility, tests, and performance work.
The goal is not to know every frontend tool. The goal is to become the person a team can trust with user-facing behavior.
- Frontend Developer Salary in India 2026: What to Expect at Every LevelA 2026 India frontend developer salary guide using Glassdoor, PayScale, Indeed, NodeFlair, Adecco, and AmbitionBox data with caveats by level, city, and employer type.标签作者GreatFrontEnd Team8 分钟阅读Jun 16, 2026
In India, a typical frontend developer salary in 2026 sits around Rs 6.4-7.5 LPA in broad self-reported datasets, but product companies, GCCs, and senior roles can pay much higher. Treat averages as a starting point, not your ceiling.
Salary data is messy because every site measures a different slice of the market. Some report base pay, some total pay, some job listings, and some self-reported profiles.
2026 salary data comparison
Source Latest accessible data What it says Caveat Glassdoor India Updated May 9, 2026, 4.1K salary submissions Median total pay around Rs 6.4 LPA, with a reported range around Rs 4.49-10.2 LPA and 90th percentile around Rs 18.67 LPA Self-reported and title-dependent PayScale India Updated May 14, 2026, 927 profiles Average base salary Rs 6.57 LPA, base range around Rs 2.91-20 LPA Base salary focus; sample skews by profile submissions Indeed India Updated May 8, 2026, 205 salary reports Average base salary around Rs 6.86 LPA, with higher city and company examples Smaller sample and listing/reporting mix NodeFlair India Updated June 8, 2026 Median base salary Rs 62,500 per month, or about Rs 7.5 LPA; range Rs 37,500-1,87,500 per month Mixes verified salaries and curated job listings Adecco India Salary Guide 2026 2026 guide Front-end developer bands from about Rs 5-10 LPA at 0-3 years to about Rs 40-73 LPA at 15+ years Recruiter/employer guide, not a self-reported salary dataset AmbitionBox Latest accessible frontend software developer result was updated in 2025 Historical context showed roughly Rs 2-16 LPA for less than 1 year to 4 years Treat as 2025 context unless the page refreshes with 2026 data For early-career roles, Rs 6-8 LPA is a reasonable broad-market midpoint. Strong product companies, GCCs, funded startups, and senior specialist roles can move much higher.
How much to trust each source
The sources are useful, but none of them should be treated as a perfect salary truth.
Glassdoor and PayScale are good broad-market anchors because they have salary-profile samples and publish clear ranges. They are weaker for top-of-market product roles because titles and seniority can be inconsistent.
Indeed is useful for live market signals because it connects salaries, job postings, cities, and companies. Its current average is based on a smaller sample than Glassdoor, so use it to compare patterns rather than as the final number.
NodeFlair is useful because it presents monthly base salary and current job-listing context. The caveat is that recently submitted salaries may lag behind the page update date, so the salary range should be treated as a directional benchmark.
Adecco is useful as an employer-side salary guide. It is especially helpful for experience bands, but it is not a self-reported employee salary database.
AmbitionBox is useful for India-specific company and title context. For this article, the latest accessible frontend software developer result is still 2025, so it should support historical context only, not the headline 2026 number.
Why salary averages differ
Glassdoor, PayScale, Indeed, NodeFlair, Adecco, and AmbitionBox are not measuring the same thing.
The biggest differences are:
- Base salary versus total pay or CTC
- Self-reported salary versus job-posted salary
- Frontend developer versus frontend engineer versus UI developer titles
- Service companies versus product companies
- Metro cities versus smaller markets
- Junior-heavy samples versus senior-heavy samples
- Cash compensation versus bonus, stock, and benefits
Two developers with the same title can see very different numbers. A frontend developer building marketing pages at a services firm and a frontend engineer owning a high-traffic product surface at a GCC are both "frontend developers" in salary databases. They are not the same market profile.
Salary by experience level
Use these bands as a practical reading of the 2026 market, not as guaranteed offers.
Experience Broad-market expectation Product company or GCC upside What usually changes pay 0-2 years Rs 3-7 LPA Rs 5-10 LPA Web foundations, React basics, TypeScript, portfolio quality, internships 2-5 years Rs 6-14 LPA Rs 10-22 LPA Owning features, API integration, testing, performance awareness 5-8 years Rs 12-24 LPA Rs 18-40 LPA UI architecture, design systems, accessibility, mentoring, delivery judgment 8-12 years Rs 20-35 LPA Rs 32-60 LPA Leading frontend scope, cross-team decisions, performance and reliability ownership 12+ years Rs 30-50+ LPA Rs 45-75+ LPA Staff, principal, lead, architect, or manager scope; company type matters heavily The jump from mid-level to senior is where frontend pay starts to diverge. Years alone do not create the jump. Scope does.
Salary by employer type
Employer type often matters more than the title.
Employer type Typical pattern IT services firms More structured bands, slower compensation growth, title inflation possible Indian product startups Higher upside when the company is funded and frontend is core to the product GCCs and multinational product teams Stronger pay for engineers who meet a higher interview bar Agencies Wide range; depends on client quality and technical depth Early-stage startups Cash may be lower or uneven, but scope can be high Large consumer internet companies Strong pay for complex UI, performance, and product ownership If you are comparing two offers, do not stop at CTC. Ask what the frontend team owns. A lower-looking offer can be better if the work builds stronger experience, but only if compensation, mentorship, and company quality are still reasonable.
Use How to Evaluate Companies as a Front End Engineer before accepting a role.
Salary by city
Indeed's 2026 India salary page surfaced higher average salaries in Hyderabad, Gurgaon, Bengaluru, Pune, and Ahmedabad. Its current city examples include Hyderabad around Rs 11.12 LPA, Gurgaon around Rs 8.55 LPA, Bengaluru around Rs 7.96 LPA, Pune around Rs 7.92 LPA, and Ahmedabad around Rs 7.40 LPA. Treat city data carefully because sample sizes can be small, and one or two high-paying employers can move the average.
In practice:
- Bengaluru and Hyderabad have strong product-company and GCC density.
- Gurgaon has strong startup, SaaS, fintech, and corporate hiring pockets.
- Pune and Chennai can offer solid engineering roles with somewhat different compensation bands.
- Remote roles can break city averages, but they usually raise the interview bar.
Location helps, but it does not replace skill and company selection.
Base pay, CTC, and take-home pay
One common mistake in India salary research is mixing base salary, CTC, total pay, bonus, stock, and monthly take-home as if they were the same thing.
When reading an offer, separate:
- Fixed base salary
- Variable bonus
- Joining bonus
- Retention bonus
- ESOPs or RSUs
- Employer PF contribution
- Insurance and other benefits
- Notice-period buyout or relocation support
A Rs 18 LPA CTC offer with a high variable component can be weaker than a Rs 15 LPA offer with cleaner fixed pay. A startup ESOP component can be meaningful, but only if you understand vesting, strike price, liquidity, and whether the company has a realistic path to an exit.
For negotiation, ask for the compensation breakup before comparing offers. Averages from salary sites are useful only after you know what number you are comparing against.
Skills that increase frontend salary
The highest-paid frontend engineers are rarely paid only for React syntax. They are paid because they reduce product and engineering risk.
Skills that move compensation:
- JavaScript and TypeScript depth
- React, Next.js, or another modern frontend stack
- CSS layout without constant trial and error
- Accessibility for forms, navigation, modals, and complex widgets
- Web performance and Core Web Vitals
- API contracts, caching, and error handling
- Testing with unit, component, and end-to-end coverage
- Design systems and component API design
- Debugging production issues
- Reviewing AI-generated code safely
If your CSS is weak, fix it. The top CSS mistakes made by front-end engineers are still common in paid work.
To build interview evidence for higher-paying frontend roles, practice TypeScript interview questions, React interview questions, UI coding questions, and system design questions. These are closer to the signals product companies and GCCs usually test than generic portfolio pages.
How to negotiate with salary data
Do not walk into negotiation with one average number. Use a range and explain your fit.
Better negotiation evidence includes:
- Current salary data from multiple sources
- Interview performance
- Competing offers
- Product complexity of the role
- Your experience with similar problems
- Clear examples of ownership
- Whether the offer is base, bonus, stock, benefits, or full CTC
For example, "Glassdoor and PayScale put the broad market around Rs 6.4-6.6 LPA, but this role is a TypeScript-heavy product role with design system ownership. Based on the scope and my experience, I am targeting X" is stronger than quoting a single website average.
What to remember
Frontend developer salary in India in 2026 is not one number. Broad datasets cluster around Rs 6.4-7.5 LPA, but roles at stronger frontend teams can move far above that when the engineer owns product quality, performance, accessibility, TypeScript, and cross-team UI architecture.
Use salary sites to anchor the conversation. Use skill depth and company selection to change the conversation.
- Frontend Developer Career Path: From Junior to Senior in 2026Map the frontend developer career path in 2026 from junior to mid-level, senior, staff, lead, specialist, and manager roles.标签作者GreatFrontEnd Team7 分钟阅读Jun 15, 2026
The frontend developer career path moves from completing scoped tasks to owning product outcomes. In 2026, progression is less about years and more about scope, judgment, verification, and impact.
Titles vary by company, but the pattern is similar: junior, mid-level, senior, staff or lead, and sometimes manager.
The career path at a glance
Level Typical scope What the role proves Learner Practice projects and foundations You can build basic UI and explain your code Junior frontend developer Scoped tasks inside an existing codebase You can follow patterns and ask good questions Mid-level frontend developer Features with moderate ambiguity You can own delivery with limited guidance Senior frontend developer Ambiguous product work and technical decisions You can reduce risk and guide others Staff or lead frontend engineer Cross-team frontend direction You can multiply the work of several engineers Engineering manager People, delivery, and team health You can build the environment where engineers do good work The ladder is not universal. Startups blur levels. Big companies define them more formally. Some engineers stay technical. Some move into management. Some specialize deeply.
Learner to junior
The learner stage is about becoming hireable. You need web foundations, a framework, and enough product sense to build useful projects.
A junior frontend developer is expected to:
- Build UI from existing patterns
- Fix small bugs
- Write simple components
- Use Git and pull requests
- Ask clear questions
- Handle feedback
- Learn the team's stack
To move from learner to junior, prove that you can finish small work reliably. Your portfolio should show forms, API usage, responsive layout, loading states, and error states. A pile of cloned landing pages is weaker than one product workflow that behaves carefully.
Use How to Become a Frontend Developer in 2026 if you need the learning sequence.
Junior to mid-level
The mid-level jump is about independence. A mid-level frontend developer can take a feature, clarify requirements, make reasonable technical choices, and deliver without needing constant correction.
At this stage, you should become solid at:
- React and TypeScript
- CSS layout
- Component composition
- API integration
- Forms and validation
- State management
- Testing important behavior
- Accessibility basics
- Debugging production issues with help
The signal is reliability. Your team should trust you with feature work that has some unknowns.
To reach mid-level, stop waiting for perfect tickets. Learn to ask the questions that make the work clear:
- What are the loading, empty, and error states?
- What happens if the user lacks permission?
- What should be tracked?
- What should happen on mobile?
- What backend contract does this need?
- How will we test the critical path?
For this stage, practice JavaScript questions, React questions, and focused UI tasks such as Contact Form, Data Table, and Auth Code Input.
Mid-level to senior
The senior jump is about judgment. A senior frontend developer does more than finish bigger tickets. They prevent bad decisions from becoming expensive.
Senior frontend engineers are trusted with:
- Ambiguous product flows
- Component and state architecture
- Accessibility decisions
- Performance work
- Design system changes
- Cross-team UI contracts
- Technical proposals
- Mentoring and code review
They also know when not to add complexity. Seniority is not the number of abstractions you create. It is the quality of your tradeoffs.
In the AI era, this level matters more. Generated code can create a lot of output quickly, but senior engineers verify whether the output is correct, accessible, maintainable, and aligned with the product.
At this point, add TypeScript questions, front end system design questions, and larger UI problems such as File Explorer.
Read Senior Frontend Developer Skills: What You Need to Land the Role in 2026 for the deeper skill map.
Promotion evidence by level
Promotion is easier when you collect evidence before the conversation starts. Do not rely on "I have been here for two years" as your main case.
Target level Evidence that helps Junior to mid-level Features shipped with less supervision, fewer repeated review comments, cleaner state handling, and better debugging notes Mid-level to senior Ambiguous work clarified, technical risks named early, components or flows improved for other engineers, and quality issues prevented Senior to staff or lead Cross-team problems solved, migrations guided, standards adopted, measurable performance or reliability improvements, and other engineers made more effective Engineer to manager Hiring support, mentoring, planning, feedback, team health, and delivery improvements beyond personal coding output Write this evidence down as it happens. Promotion packets are much easier when you have concrete examples instead of trying to reconstruct a year of work from memory.
Senior to staff or lead
Staff and lead frontend roles are about broader influence. You are no longer measured only by your own delivery. You are measured by whether teams make better technical decisions because you are involved.
Typical work includes:
- Setting frontend architecture direction
- Improving design system adoption
- Reducing performance or reliability risk across surfaces
- Defining standards for accessibility and testing
- Guiding migrations
- Coaching senior and mid-level engineers
- Coordinating with product, design, backend, data, and platform teams
Staff engineers do not need to be the loudest people in the room. They need to notice important problems, frame them clearly, and help teams make progress.
Lead titles vary. In some companies, "lead" means technical leadership. In others, it includes people management. Clarify that before accepting the role.
Manager path
Frontend developers can also move into engineering management. Management is a different job, not a promotion that simply means "more senior engineer."
Engineering managers work on:
- Hiring
- Feedback
- Performance reviews
- Planning
- Team process
- Stakeholder management
- Delivery health
- Career growth
- Conflict and alignment
Good managers need technical context, but they are not judged mainly by their code. They are judged by whether the team can do good work consistently.
If you love the technical depth of frontend, you do not have to become a manager. A senior, staff, or principal frontend path can remain technical.
Specialist tracks
Frontend has several specialist paths. These can exist at mid-level, senior, or staff scope depending on the company.
Track What you work on Product frontend engineer Complex product flows, UX behavior, and feature delivery Design systems engineer Shared components, tokens, accessibility, documentation, and adoption Frontend platform engineer Build tooling, monorepos, CI, testing infrastructure, and developer experience Web performance engineer Metrics, rendering, loading, bundle cost, and runtime behavior Accessibility specialist Usability across assistive technology, keyboard behavior, semantics, and audits Frontend-heavy fullstack engineer UI plus API and backend changes for feature ownership Web platform specialist Browser APIs, offline behavior, media, graphics, WebAssembly, or advanced runtime work Specializing too early can narrow your options. Build product frontend competence first, then choose depth.
Startup caveat
Career paths are cleaner on paper than inside companies.
At a startup, a "frontend developer" may own product UI, backend routes, analytics events, customer bugs, and deployment fixes in the same week. You might gain senior scope before you have a senior title.
At a large company, the title may be slower, but the expectations are clearer. You may need promotion evidence, peer feedback, technical design examples, and cross-team impact.
Neither model is automatically better. The key is knowing what evidence you are building.
How to move faster
The fastest career growth usually comes from work that increases trust.
Useful habits:
- Take notes before coding unclear work
- Name edge cases early
- Share small technical proposals
- Improve one repeated pain point at a time
- Review generated code carefully
- Learn the product, not only the codebase
- Make your work easier for the next engineer to change
- Ask for feedback before promotion season
For company selection, use How to Evaluate Companies as a Front End Engineer. The company you choose can accelerate or slow your path.
The frontend developer career path in 2026 is not "junior writes components, senior writes more components." It moves from task completion to product and technical ownership.
Your title will vary by company. Your real growth shows in the size of the problems people trust you to handle, the quality of your decisions, and the number of people whose work gets better because of yours.
- Senior Frontend Developer Skills: What You Need to Land the Role in 2026Learn the senior frontend developer skills that matter in 2026, from UI architecture and accessibility to performance, testing, judgment, and AI verification.标签作者GreatFrontEnd Team7 分钟阅读Jun 15, 2026

A senior frontend developer is not measured by component speed alone. In 2026, seniority means better judgment: you can own ambiguous UI work, verify AI-assisted code, prevent regressions, and make product interfaces reliable.
The bar has moved. Code generation is cheaper. Correctness, taste, tradeoffs, and ownership matter more.
What senior frontend means
A junior developer is usually trusted with well-scoped tasks. A mid-level developer can own features with some guidance. A senior frontend developer can take unclear product goals, break them into technical work, identify risks, coordinate with other functions, and ship something the team can maintain.
That does not mean seniors stop coding. It means their code sits inside a larger responsibility.
Senior frontend engineers are expected to answer questions like:
- What should happen when the API is slow or wrong?
- Which behavior belongs in the component, route, state layer, or backend?
- How will this work for keyboard and screen reader users?
- What can break when another team reuses this component?
- Which test protects the important behavior?
- What tradeoff are we making by adding this dependency?
- Is AI-generated code correct, accessible, and maintainable here?
Senior skill map
Area Mid-level habit Senior signal Component work Builds components from designs Designs component APIs that are hard to misuse State Makes the current feature work Chooses state boundaries that survive future changes CSS Fixes layout bugs Prevents layout classes, overflow, and responsive bugs through better structure Accessibility Runs a checklist near the end Builds keyboard, semantics, labels, focus, and contrast into the design of the UI Performance Reacts when the app feels slow Measures cost and removes waste before it becomes user pain Testing Adds tests when requested Protects critical flows with the right level of tests APIs Consumes endpoints Negotiates contracts, loading states, failure states, and data shape changes AI tools Accepts useful output Reviews generated code like a risky pull request Leadership Helps when asked Creates clarity for other engineers without taking over everything 1. Browser and rendering depth
Senior frontend developers understand that the browser is the runtime. React does not replace HTML, CSS, layout, rendering, networking, and accessibility.
You should be comfortable with:
- DOM structure
- Event propagation
- CSS cascade, specificity, Grid, Flexbox, and positioning
- Layout shifts and overflow
- Rendering and repaint costs
- Image and font loading
- Network waterfalls
- Browser DevTools
Many frontend incidents are not framework problems. They are browser problems wearing framework clothing.
2. Component and interface design
A senior frontend engineer designs components that other people can use safely.
Good component design includes:
- Clear props
- Predictable state ownership
- Accessible defaults
- Escape hatches only when needed
- Useful composition
- Stable visual behavior
- Documentation through examples
- Tests for important variants
A clever abstraction is not the aim. The aim is to reduce repeated decisions and prevent repeated bugs.
3. TypeScript judgment
Senior frontend developers use TypeScript to model risk, not to decorate JavaScript.
You should know how to:
- Model API responses safely
- Use discriminated unions for UI states
- Avoid unsafe casts
- Narrow unknown data
- Write generic components only when they remove real duplication
- Read complex library types
- Keep types helpful instead of theatrical
Use TypeScript interview questions for senior frontend developers as a calibration point.
4. Accessibility as product quality
Accessibility is not a bonus skill for senior frontend roles. It is part of building usable software.
Senior engineers catch issues such as:
- Divs pretending to be buttons
- Missing labels
- Broken tab order
- Invisible focus states
- Modals that trap users incorrectly
- Menus that do not announce state
- Error messages that are not tied to inputs
- Color contrast failures
AI-generated markup can look fine visually while failing semantic and keyboard behavior.
5. Performance measurement
Senior frontend developers do not guess about performance for long. They measure.
Useful areas include:
- Bundle analysis
- Core Web Vitals
- Render profiling
- Memoization tradeoffs
- Image optimization
- Font loading
- Hydration cost
- Caching behavior
- Slow API handling
Performance is product quality. Users do not care whether the slowness came from JavaScript, a large image, hydration, or an API. They only experience a slow product.
6. Testing and release confidence
Senior engineers know that not every bug needs the same test. They choose the test based on risk.
Typical coverage choices:
- Unit tests for pure logic
- Component tests for UI behavior
- Integration tests for state and API boundaries
- End-to-end tests for critical flows
- Visual checks where layout regressions are expensive
The senior skill is knowing what must not break and putting protection there.
7. API and product boundary fluency
Frontend engineers do not need to become backend specialists, but senior frontend developers should understand the API boundary well.
You should be able to discuss:
- Data shape
- Pagination
- Caching
- Loading states
- Retry behavior
- Error contracts
- Permissions
- Rate limits
- Backward-compatible changes
REST knowledge matters because frontend decisions often depend on API contracts. Review REST API interview questions for frontend developers if you want to test that boundary.
8. AI-assisted development verification
In 2026, a senior frontend developer must know how to work with AI tools without lowering the team's quality bar.
AI usage is already common. Stack Overflow's 2025 Developer Survey reported broad AI-tool usage and also found that 66% of respondents were frustrated by AI solutions that were "almost right." DORA's 2025 AI-assisted software development report described AI as an amplifier of an organization's existing strengths and weaknesses.
For senior frontend work, that means AI helps more when the engineer already knows what good UI, safe state, accessible markup, and maintainable component design look like. If the engineer cannot review the output, AI can hide risk instead of removing it.
When reviewing generated frontend code, ask:
- Does this match the product requirement?
- Does it handle empty, loading, and error states?
- Is the accessibility correct?
- Does it introduce layout risk?
- Is the state model too complex?
- Are the types honest?
- Are tests protecting behavior or only snapshots?
- Did it add a dependency for a small problem?
The senior skill is not refusing AI. It is making sure the team remains responsible for what ships.
9. Technical leadership
Senior frontend developers create clarity. They do not need a staff title to do that.
Useful senior behaviors include:
- Breaking vague work into reviewable steps
- Naming risks early
- Writing short technical proposals
- Reviewing code with context
- Mentoring without creating dependency
- Aligning with design and backend partners
- Making tradeoffs visible
- Leaving the codebase easier to change
Many mid-level developers get stuck here. They can finish their own work, but they do not yet improve the work around them.
How to prepare for senior frontend roles
Build evidence, not a skill list.
For your next few projects or work items, capture:
- A performance issue you measured and fixed
- An accessibility problem you prevented
- A component API you improved
- A flaky flow you made testable
- A backend contract you clarified
- A technical decision you documented
- A junior or peer you helped unblock
Use GreatFrontEnd's TypeScript interview questions, React interview questions, UI coding questions, and front end system design questions to pressure-test senior readiness. Good senior practice problems include Data Table, File Explorer, and Autocomplete.
Those stories are stronger in interviews than saying you know React, TypeScript, and testing.
What senior interviews usually look for
Senior frontend interviews often test the gaps between coding skill and ownership.
Expect questions such as:
- How would you design a reusable table, form, or modal system for several teams?
- How would you handle accessibility for a custom combobox or menu?
- How would you reduce bundle size without breaking product behavior?
- How would you debug a slow dashboard?
- How would you migrate a large codebase from one pattern to another?
- How would you review a junior engineer's solution when it works but is hard to maintain?
- How would you decide whether a bug belongs in frontend, backend, data, or product logic?
Useful answers are specific. Name the constraints, name the risk, make a tradeoff, and explain how you would verify the result.
What to remember
Senior frontend developer skills in 2026 are about judgment under product constraints. You still need HTML, CSS, JavaScript, TypeScript, React, accessibility, performance, and testing. But the senior signal is how you use them to reduce risk and increase team output.
Senior work is less about writing more code and more about making the right frontend work happen.
- How to Become a Frontend Developer in 2026: The Complete RoadmapLearn how to become a frontend developer in 2026 with a staged roadmap covering web foundations, React, TypeScript, production skills, projects, and expert tracks.标签作者GreatFrontEnd Team10 分钟阅读Jun 12, 2026
To become a frontend developer in 2026, learn the web fundamentals first, then build apps with JavaScript, TypeScript, and React, then prove you can ship accessible, fast, tested UI. Do not start by collecting libraries.
A realistic path takes months, not a weekend. You are trying to become useful on a product team, not collect every tool.
Why this roadmap uses JavaScript, TypeScript, and React
You can become a frontend developer with different frameworks, but JavaScript, TypeScript, and React are still practical default choices for most learners.
GitHub's 2025 Octoverse report said TypeScript overtook both Python and JavaScript in August 2025 to become the most used language on GitHub, and noted that major frontend frameworks now scaffold TypeScript by default. JetBrains' 2025 developer ecosystem report also called TypeScript the language with the most dramatic rise in usage over the previous five years.
React remains a common hiring signal too. InfoQ's summary of the State of JavaScript 2025 survey reported React as the most used frontend framework among respondents, with Next.js also widely used. That does not mean React is the only good framework. It means React and TypeScript are efficient bets for interview preparation and portfolio work.
Stage 1: Learn the web fundamentals
Start with HTML, CSS, JavaScript, and the browser. These are not beginner-only topics. Senior frontend engineers still debug problems at this layer.
Learn HTML as structure, not decoration:
- Headings, landmarks, lists, buttons, links, inputs, labels, and forms
- When to use native elements instead of custom components
- Basic SEO and metadata
- How the DOM represents the page
Learn CSS as a layout system:
- Box model
- Cascade and specificity
- Flexbox and Grid
- Positioning
- Responsive design
- Overflow, stacking, and containment
- Media queries and container queries
Then learn JavaScript deeply enough to build interactive pages:
- Values, types, scope, closures, and modules
- Arrays, objects, maps, sets, and common transformations
- Events and event delegation
- Promises, async/await, timers, and fetch
- Error handling
- DOM updates
- Browser storage
Do not skip forms. A lot of frontend work is still forms: validation, disabled states, keyboard behavior, error messages, async submission, and recovery after failure.
Stage 2: Build without a framework
Before React, build a few small projects with plain HTML, CSS, and JavaScript:
- A multi-step form with validation
- A searchable table with sorting and filtering
- A small dashboard that fetches data from an API
- A responsive pricing page or settings screen
These projects show you what frameworks are solving. If you skip this stage, React can become a place to hide weak web knowledge.
Use browser DevTools early. Inspect layout, network requests, console errors, performance traces, storage, and accessibility hints.
Stage 3: Learn React and TypeScript
React remains a common hiring signal, and TypeScript is now expected in many frontend teams with a real interview bar. Learn them together once your JavaScript is steady.
For React, learn:
- Components and props
- State and rendering
- Effects and their limits
- Controlled forms
- Lists and keys
- Context
- Refs
- Error boundaries
- Composition patterns
- Data fetching patterns
For TypeScript, learn:
- Basic types, unions, interfaces, and generics
- Typing component props
- Typing API responses
- Narrowing unknown data
- Avoiding
anyas a habit - Reading type errors instead of fighting them
You do not need to memorize every React API. You do need to understand how UI changes over time and how data moves through your components.
Stage 4: Learn app fundamentals
A frontend developer builds applications, not isolated components. This stage connects your UI to product behavior.
Spend time with:
- Routing
- Authentication states
- API requests and error handling
- Loading, empty, success, and failure states
- Client state versus server state
- Pagination and search
- Optimistic updates
- File uploads
- Permissions
- Analytics events
Learn REST APIs well enough to work with backend engineers. You should understand status codes, headers, JSON, caching, idempotency, pagination, rate limits, and authentication. The REST API interview questions for frontend developers are useful even before interviews because they expose common gaps.
Stage 5: Learn production frontend skills
Many candidates separate themselves here.
Accessibility means the interface works with keyboard navigation, screen readers, visible focus states, labels, semantic HTML, color contrast, and predictable behavior.
Performance means you can measure and reduce the cost of JavaScript, images, fonts, rendering, layout shifts, slow API calls, and unnecessary re-renders.
Testing means you can protect important behavior. Learn unit tests for logic, component tests for UI behavior, and end-to-end tests for critical flows.
Security basics matter too. Frontend engineers should understand cross-site scripting, unsafe HTML, token storage tradeoffs, permissions, CSRF at a high level, dependency risk, and privacy-sensitive data.
You do not need to be an expert in every area. You do need to know enough to avoid shipping careless UI.
Stage 6: Build a portfolio that proves judgment
A portfolio should prove that you can make product decisions instead of only copying designs.
Build three projects:
Project What it should prove A dashboard Data fetching, tables, filters, charts, loading states, empty states, and responsive layout A form-heavy app Validation, accessibility, error recovery, async submission, and state management A product workflow Routing, authentication states, permissions, API integration, and testing For each project, write a short case note:
- What problem it solves
- What tradeoffs you made
- What edge cases you handled
- How you tested it
- What you would improve next
Hiring teams do not need more cloned landing pages. They need evidence that you can think.
Stage 7: Use AI without becoming dependent on it
Use AI tools to explain unfamiliar code, generate first drafts, write test cases, and compare approaches. Then verify the output yourself.
The mistake is using AI to skip the learning step. If you ask AI to build every component before you understand HTML, CSS, JavaScript, and state, you may finish projects faster but become weaker in interviews and code reviews.
Use AI as a practice partner:
- Ask it to explain an error, then reproduce the fix yourself
- Ask for two approaches, then compare the tradeoffs
- Ask it to generate edge cases for your form or table
- Ask it to review your code for accessibility issues
- Ask it to write tests, then check whether the tests protect real behavior
- Ask it to simplify code, then decide whether the simpler version is actually safer
Do not use AI as a replacement for reading docs, using DevTools, or debugging your own mistakes.
For frontend work, check:
- Does the UI work without a mouse?
- Does it handle loading, empty, and error states?
- Does the layout survive narrow screens?
- Are labels and roles correct?
- Are API failures handled?
- Is TypeScript hiding unsafe assumptions?
- Did the generated code add unnecessary dependencies?
AI speeds up drafts. It can also speed up mistakes. Your value is knowing the difference.
What frontend employers expect now
AI changes the entry-level bar. Employers do not need a junior developer only to produce a first draft of a component. They need someone who can work with drafts, requirements, feedback, and bugs without lowering the team's quality.
A beginner should build evidence for:
Skill What it looks like in 2026 Product behavior You handle loading, empty, error, disabled, permission, and mobile states Web foundations You can explain the HTML, CSS, JavaScript, and browser behavior behind your UI AI verification You can review generated code instead of accepting it blindly Debugging You can use DevTools, logs, network panels, and TypeScript errors to find problems Accessibility You think about keyboard behavior, labels, focus, semantics, and contrast early Communication You can explain tradeoffs in plain language during reviews and interviews The roadmap starts with the platform and then adds React, TypeScript, projects, testing, and AI-assisted workflows. The order is intentional.
Stage 8: Prepare for interviews
Frontend interviews usually test a mix of JavaScript, React, CSS, browser behavior, API knowledge, and product debugging.
Practice these areas:
- JavaScript functions, arrays, objects, promises, and async behavior
- React state, rendering, effects, and component design
- CSS layout and responsive behavior
- Accessibility basics
- REST APIs and data fetching
- TypeScript
- UI system design
- Debugging existing code
Use GreatFrontEnd's JavaScript interview questions, React interview questions, quiz questions, and user interface coding questions to turn the roadmap into practice. For project-style drills, start with Contact Form, Data Table, and Image Carousel.
If you are targeting senior roles later, start building depth with TypeScript interview questions for senior frontend developers.
What job-ready actually means
You are not job-ready because you watched a React course. You are closer to job-ready when you can take a messy requirement and turn it into working UI without someone else rescuing the details.
Before applying seriously, check whether you can:
- Build a form with validation, accessible labels, async submission, disabled states, and error recovery
- Build a data-heavy view with sorting, filtering, pagination, and loading states
- Read an API response, type it, handle missing fields, and show useful fallback UI
- Explain why state belongs in one component, a context, a URL, or a data-fetching layer
- Debug a layout issue with DevTools instead of guessing
- Write at least a few tests that protect important behavior
- Deploy your project and explain the tradeoffs you made
If you cannot do these yet, keep building. If you can do most of them, start applying while improving the gaps. Waiting until you feel perfectly ready usually means waiting too long.
Optional expert tracks
After you can build and ship product UI, choose one or two specialist tracks:
- Design systems
- Web performance
- Frontend infrastructure and build tooling
- Local-first apps and offline sync
- Microfrontends
- Browser internals
- WebGL or WebGPU
- WebAssembly
- Internationalization
- Security and privacy for frontend apps
Do not begin here. Expert tracks are useful after you have product experience.
A practical 6-12 month roadmap
Do not read this as "six months guarantees a job." Read it as a readiness window.
If you already have some programming experience and can study consistently, 6 months can be enough to start applying for internships or junior frontend roles. If you are starting from zero, learning part-time, or switching careers while working, 9-12 months is more realistic.
Phase Timeframe What you should be able to do Web foundations Months 1-2 Build responsive pages, handle forms, write JavaScript interactions, use DevTools, and fetch data from APIs Application basics Months 3-4 Build React apps with TypeScript, routing, forms, state, API integration, loading states, and error states Job-ready practice Months 5-6 Finish portfolio projects, deploy them, practice GFE questions, explain tradeoffs, and start applying selectively Interview depth Months 7-12 Improve weak projects, do more interviews, practice system design, add testing and accessibility depth, and study specialist topics only after the basics are stable The main milestone is not the calendar. It is whether you can build a working product flow, explain your decisions, debug mistakes, and pass common frontend interview exercises.
Do not try to become a frontend developer by memorizing a stack. Learn the platform, build interfaces that survive messy states, add React and TypeScript with purpose, and prove your judgment through projects.
The frontend market in 2026 rewards people who can ship usable product UI and explain their decisions. Build toward that.
- Is Frontend Development a Good Career in 2026? An Honest BreakdownA practical 2026 look at whether frontend development is still a good career, what changed, and what skills make the path worth choosing.标签作者GreatFrontEnd Team9 分钟阅读Jun 12, 2026
Yes, frontend development is still a good career in 2026 if you can build product UI that holds up when data, state, accessibility, performance, edge cases, and AI-assisted code all meet in the same feature.
That distinction matters because many beginners are asking the wrong version of the question.
What changed
Frontend used to be seen as the easiest software path to enter. Learn HTML, CSS, JavaScript, React, build a portfolio, apply widely. That path still exists, but it is more crowded and less forgiving.
Three things changed:
- AI tools can generate basic UI quickly.
- Companies have become more selective with junior hiring.
- Product teams expect frontend engineers to understand both implementation and quality.
Frontend is not dying, but shallow frontend work is easier to replace. A person who can only assemble prompted components has a weaker market position than someone who can verify behavior, debug product issues, and make tradeoffs.
For the broader "dying" question, read Is Frontend Development Dying in 2026?.
How AI changes frontend work
AI changes frontend development by making first drafts cheaper. It can generate a React component, write CSS, suggest tests, explain an error, convert JavaScript to TypeScript, or produce a quick API integration.
Useful, yes, but it also changes the hiring signal.
The old signal was often: can you build the screen? The 2026 signal is closer to: can you decide whether the generated screen is correct, accessible, maintainable, and aligned with the product?
Stack Overflow's 2025 Developer Survey found that 84% of respondents were using or planning to use AI tools, while more developers actively distrusted AI accuracy than trusted it. DORA's 2025 AI-assisted software development report frames AI as an amplifier of existing strengths and weaknesses, not as a replacement for sound engineering practice.
For frontend developers, that means AI can help you move faster if you already understand the web. If you do not, it can hide mistakes behind code that looks plausible.
AI is often weak at:
- Knowing whether markup is semantic and accessible
- Handling keyboard and screen reader behavior
- Choosing the right state boundary
- Understanding product edge cases
- Preserving design-system constraints
- Avoiding unnecessary dependencies
- Knowing whether a loading, empty, or error state is acceptable
- Catching subtle performance problems
- Explaining why a UI decision is right for the user
Those are exactly the areas where good frontend engineers still matter.
How expectations have changed
Frontend hiring is shifting from output volume to verification and ownership.
Earlier expectation 2026 expectation Build screens from a design Build product flows that handle real data, errors, loading, permissions, and accessibility Know one framework Understand the browser, JavaScript, TypeScript, CSS, APIs, and the framework Use component libraries quickly Know when a component library helps and when custom behavior needs careful implementation Ship the happy path Test edge cases, keyboard behavior, responsive states, and API failures Ask AI for code Review AI output for correctness, security, accessibility, and maintainability Show a portfolio Explain tradeoffs, debugging decisions, and how the project would behave in production AI makes frontend harder for people who rely on drafts and better for candidates who can review, debug, and explain their work. If a draft takes seconds, the valuable skill is deciding what should ship.
The market is mixed, not dead
The software market still has demand, but it is uneven. In the US, the Bureau of Labor Statistics projects 15% growth for software developers from 2024 to 2034, much faster than the average for all occupations.
India's hiring picture is more selective. Naukri's March 2026 Jobspeak report showed white-collar hiring growth, but IT was flat while AI/ML hiring grew much faster.
The broader global picture points the same way. The World Economic Forum's Future of Jobs Report 2025 still lists software and applications developers among roles expected to grow through 2030.
Frontend jobs are not easy to get by default. Software work is not disappearing, but the hiring bar has shifted. A resume that lists React and a few projects is weaker than evidence that you can build and reason through product UI under constraints.
Why frontend is still valuable
Every serious digital product needs user-facing software. Banking apps, SaaS dashboards, developer tools, marketplaces, internal tools, healthcare portals, education platforms, commerce sites, and AI products all need interfaces that people can understand and trust.
Frontend engineers sit at a difficult boundary. They translate product intent, design systems, backend APIs, user behavior, browser constraints, accessibility needs, and performance budgets into working software.
Most useful frontend work happens at that boundary.
The work that still earns trust includes:
- Making complex flows understandable
- Preventing broken forms, dead states, and confusing errors
- Keeping interfaces usable with keyboards and assistive technology
- Reducing load time and interaction delay
- Building component systems that teams can reuse safely
- Debugging issues across browser, network, API, and state layers
- Reviewing AI-generated UI for correctness
Frontend work here is product engineering in the browser: user flows, constraints, failure states, and the details people notice when software breaks.
Where the career is weaker
Frontend is a weaker career bet if you plan to stop at surface-level skills.
The risky profile looks like this:
- Can copy React examples but cannot explain state or rendering behavior
- Avoids CSS and uses libraries for every layout problem
- Does not test forms, empty states, loading states, or errors
- Ignores accessibility
- Cannot debug API issues
- Treats TypeScript as decoration
- Ships UI that works only on the happy path
This profile is more vulnerable in 2026 because AI tools can produce similar output quickly. Companies do not need to hire a full-time engineer for code that still requires heavy review by someone else.
Frontend candidates therefore need to show judgment. AI can draft a component. It will not reliably know whether the flow is accessible, the form state is recoverable, the API error is handled, or the product behavior is right.
What makes frontend a good career now
Frontend work with staying power combines web foundations with product judgment.
You do not need to master everything before your first job, but you do need to build toward these areas:
Area Why it matters HTML and accessibility Users need interfaces that work beyond mouse clicks and perfect eyesight CSS layout Most UI bugs are layout, spacing, overflow, or responsive behavior problems JavaScript and TypeScript Frontend apps are stateful software, not static pages React or another framework Teams need maintainable UI architecture APIs and data fetching Product UI depends on network and backend behavior Testing Teams need confidence when features change Performance Slow UI loses trust, revenue, and user patience Product thinking Good frontend work solves user problems instead of only finishing design tickets AI verification Generated code still needs a human who knows what correct means If you want a staged learning path, use How to Become a Frontend Developer in 2026 as your roadmap.
If you want to test whether your skills are beyond surface-level UI, work through JavaScript interview questions, React interview questions, and user interface coding questions.
What a good first frontend role looks like
A useful first frontend role is not always the highest-paying one. It gives you repeated practice with product UI under review.
Look for:
- A codebase with active frontend engineers
- Pull requests that get useful feedback
- Product forms, dashboards, workflows, or customer-facing surfaces
- Exposure to APIs and backend contracts
- Some expectation around testing
- Designers or product managers you can learn from
- Accessibility and performance treated as normal quality work
Be cautious with roles where frontend means only slicing static pages, editing templates, or wiring prebuilt components with no product ownership. That experience can be useful at the beginning, but it can trap you if it never grows.
Where the career can grow
Frontend is not a single-track career. After the first few years, you can move toward different kinds of depth.
Common growth paths include:
- Product frontend engineering, where you own user-facing flows and product quality
- Design systems, where you build shared components, tokens, documentation, and accessibility standards
- Frontend platform, where you improve build tooling, testing, monorepos, and developer experience
- Web performance, where you measure and reduce loading, rendering, and interaction cost
- Frontend-heavy fullstack, where you own UI plus enough backend to ship complete features
- Technical leadership, where you guide frontend architecture and unblock other engineers
- Engineering management, where you move from code ownership to team ownership
That variety keeps the career interesting. You can start with visible product UI, then choose the kind of complexity you want to become known for.
Who should choose frontend
Frontend is a good career fit if you enjoy the user-facing side of software. You should like details, but not only visual details. The work also needs patience with state, data, edge cases, and browser behavior.
You may enjoy frontend if you:
- Like seeing your work in the product
- Notice when interfaces feel confusing
- Enjoy working with designers and product managers
- Can debug visual and logical problems
- Care about accessibility and performance
- Want to build software that people touch directly
Frontend is also a good base for product engineering. Many strong product engineers start with frontend and add backend fluency over time.
Who should avoid frontend
Do not choose frontend only because it looks easier than backend. The beginner path may feel friendlier, but professional frontend work still demands careful engineering.
You may prefer backend, data, infrastructure, security, or mobile if you dislike:
- Visual iteration
- Browser debugging
- CSS layout details
- Ambiguous product requirements
- Accessibility constraints
- Working close to design feedback
Choosing the wrong path because it looks easy is expensive. Choose the problems you are willing to keep solving.
Frontend development is a good career in 2026 if you treat user-facing software as engineering work. The market is less generous to shallow skills, and AI has made basic code cheaper.
That should not push you away from frontend. It should push you to learn it properly. Build interfaces that work under pressure, explain your decisions, test the behavior, and understand the product. That version of frontend still has room.
- Frontend vs Backend Developer in 2026: Which Career Path Wins?Compare frontend and backend developer careers in 2026 by work style, learning curve, risk, market signal, and long-term growth.标签作者GreatFrontEnd Team8 分钟阅读Jun 11, 2026
Frontend wins if you want visible product ownership and enjoy browser/UI complexity. Backend wins if you want deeper ownership of systems, data, security, reliability, and business logic. Neither path wins for everyone.
The right question is not "Which career is better?" It is "Which kind of hard work do I want to get good at?"
What frontend developers do
Frontend developers build the part of a product users touch. That includes pages, flows, forms, dashboards, editors, navigation, state transitions, errors, loading states, accessibility, and performance in the browser.
At junior levels, this may look like building components from designs. At senior levels, it becomes product engineering: deciding how the UI should behave, how data should move through the app, how to prevent regressions, and how to make the experience fast and usable for many kinds of users.
Good frontend work often requires:
- HTML semantics and accessibility
- CSS layout and responsive design
- JavaScript and TypeScript
- React or another UI framework
- API integration and client-side state
- Testing and debugging
- Performance measurement
- Product judgment
Frontend is a good fit if you like visible feedback. When the work is right, users can feel it immediately. When it is wrong, they can feel that too.
What backend developers do
Backend developers build the systems behind the product. That includes APIs, databases, queues, permissions, authentication, business rules, integrations, search, payments, logging, reliability, and infrastructure-facing code.
At junior levels, backend work may start with routes, CRUD APIs, and database queries. At senior levels, it becomes systems ownership: data modeling, scaling paths, failure handling, security boundaries, observability, and tradeoffs that affect many teams.
Good backend work often requires:
- HTTP and API design
- Databases and data modeling
- Authentication and authorization
- Caching and queues
- Security basics
- Distributed systems concepts
- Testing and monitoring
- Incident debugging
- Operational judgment
Backend is a good fit if you like invisible correctness. Good backend work may be noticed only because the product keeps working.
Market signal in 2026
Software remains a growing field, but the entry bar is higher than it was during the hiring boom. The US Bureau of Labor Statistics projects 15% growth for software developers from 2024 to 2034, much faster than the average for all occupations. For web developers and digital designers, it projects 7% growth from 2024 to 2034.
India's market is more uneven. Naukri's March 2026 Jobspeak report showed white-collar hiring growth, IT staying flat, and AI/ML roles growing faster than general IT. foundit's March 2026 tracker also showed a split market: IT software and services declined year over year, while functional IT hiring grew.
The market is not rewarding "I know a framework" as much as it rewards engineers who can handle product constraints. Frontend and backend both work if you build that kind of depth.
Learning curve
Frontend usually gives faster visual feedback. You can open a browser and see your work, which makes it a friendly first step for many beginners.
Backend has fewer visual cues. You work with requests, responses, logs, data models, and failure cases. It can feel abstract earlier, but it teaches durable engineering habits quickly.
Here is the honest version:
Area Frontend Backend Beginner feedback Fast and visual Slower and more abstract Hidden difficulty Browser behavior, accessibility, state, performance Data consistency, security, reliability, scaling First portfolio Easier to show publicly Harder to show without product context Debugging style UI states, network calls, browser tools Logs, traces, queries, service behavior Senior growth Product UI, platform, performance, design systems Systems, architecture, reliability, data, security Risk profile of the work
Frontend and backend also differ in how mistakes show up.
Frontend bugs are often visible quickly. A layout breaks, a button does not respond, a form loses input, a modal traps focus, or a page feels slow. The upside is that the feedback loop is direct. The downside is that frontend work can look "almost done" while still failing across devices, assistive technology, slow networks, or unusual data.
Backend bugs can be less visible at first and more expensive later. A bad permission check, data migration, cache invalidation bug, or retry loop may not be obvious to a user immediately, but it can affect data integrity, security, cost, or reliability.
The two paths attract different temperaments. Frontend rewards people who can handle visible product pressure and many user states. Backend rewards people who can think carefully about invisible system behavior and long-term correctness.
Hiring signal by level
Level Frontend signal Backend signal Junior Can build UI from existing patterns and debug with DevTools Can build small APIs, write simple queries, and understand request flow Mid-level Can own product features with state, API calls, tests, and accessibility Can own service changes with validation, data modeling, tests, and logs Senior Can shape UI architecture, prevent regressions, and guide frontend quality Can shape service boundaries, reliability, security, and data correctness Choosing frontend or backend is not only a technology choice. It is also a trust curve. Each level asks: what kind of risk can the team trust you to handle?
AI risk and AI advantage
AI tools can generate frontend components and backend routes quickly. That creates pressure on basic implementation work in both careers.
Frontend developers are exposed when they can only produce a visually correct first draft. They become valuable when they can verify behavior across states, devices, accessibility requirements, performance budgets, and product expectations.
Backend developers are exposed when they only copy CRUD patterns. They become valuable when they can reason about data correctness, security, concurrency, migrations, observability, and failure recovery.
AI does not remove the need for either path. It pushes both paths toward better judgment.
Choose frontend if
Frontend is likely a better fit if you:
- Care about product feel and user behavior
- Enjoy visual debugging and iteration
- Like working with design and product teams
- Want your projects to be easy to demo
- Notice small UI inconsistencies
- Want to specialize in accessibility, performance, design systems, or complex interfaces
It is also a good path if you want to become a frontend-heavy product engineer. Learn APIs well enough that you can work across the product boundary, even if your main depth is frontend.
Choose backend if
Backend is likely a better fit if you:
- Enjoy data, rules, and systems
- Prefer correctness over visual polish
- Like debugging logs and service behavior
- Want to work on security, reliability, infrastructure, or distributed systems
- Enjoy designing APIs and data models
- Want deeper ownership of business logic
Backend is also a good path if you are comfortable with slower feedback loops and more invisible work.
Which path should a beginner pick?
If you truly have no preference, start with frontend for the first few months. Build pages, forms, stateful interfaces, and API-connected projects. You will get feedback quickly, and you will learn the web platform.
Then learn backend basics: REST APIs, auth, databases, validation, error handling, and deployment. Even if you stay frontend, this knowledge will make you much better at product work. The REST API interview questions for frontend developers are a useful checkpoint.
On GreatFrontEnd, a frontend-leaning path can start with JavaScript questions, React questions, and UI coding questions. A backend-leaning product engineer should still practice system design questions and API-heavy scenarios such as Autocomplete.
After that, follow the problems you enjoy solving. If you keep caring about interaction quality, frontend is a good bet. If you keep caring about data, rules, and system behavior, backend is a good bet.
Common mistake when comparing the two
Beginners often compare the easiest frontend work with the hardest backend work, or the easiest backend work with the hardest frontend work. That creates a distorted view.
Basic frontend can look like styling pages. Professional frontend means handling browser behavior, accessibility, client state, product flows, performance, analytics, design systems, and every user state that appears after launch.
Basic backend can look like CRUD endpoints. Professional backend means data correctness, auth, migrations, observability, scaling, security, integrations, and failure handling.
Do not choose based on the easiest demo. Choose based on the difficult version you are willing to practice.
Which path should you choose?
Frontend and backend are both good careers in 2026, but neither is easy by default. Frontend requires more than visual work. Backend requires more than API work. Both require careful reasoning, testing, and ownership.
Choose frontend for product-facing complexity. Choose backend for systems-facing complexity. Choose the path whose problems you are willing to keep debugging after the easy part is over.
- Frontend vs Fullstack Developer in 2026: Which Path Should You Choose?Compare frontend and fullstack developer paths in 2026, including work style, hiring signal, learning curve, and which path fits your goals.标签作者GreatFrontEnd Team7 分钟阅读Jun 11, 2026
Choose fullstack if you want broad feature ownership across UI, APIs, data, and deployment. Choose frontend if you want depth in product UI, accessibility, browser performance, design systems, and the craft of making software feel clear and reliable.
That is the short answer. The harder part is knowing which path gives you the better signal in the market you are entering.
What these roles mean in 2026
A frontend developer is not limited to turning mockups into pages. Valuable frontend engineers can reason about UI state, network boundaries, accessibility, rendering cost, design systems, testing, observability, and the product behavior users actually experience.
A fullstack developer is not simply a frontend developer who also knows Node.js. A good fullstack developer can move a feature through the whole product path: UI, API contract, database change, auth, validation, deployment, and basic monitoring.
There is also a middle path: the frontend-heavy fullstack developer. This shows up often in startups and product teams. You do most of your work in the browser and UI layer, but you can edit backend routes, database models, and integration code when the feature needs it.
Quick comparison
Question Frontend developer Fullstack developer Best fit People who enjoy visible product work, UI detail, and browser behavior People who enjoy owning a feature across layers Main risk Staying at the "build screens" level Being shallow across too many areas Hiring signal Strong UI judgment, React/TypeScript, accessibility, performance, testing Ability to ship complete features with frontend, backend, and data changes Common interview areas JavaScript, React, CSS, UI architecture, accessibility, product debugging Frontend plus APIs, databases, auth, system design, deployment basics Best company fit Design-heavy products, SaaS, marketplaces, consumer apps, design systems teams Startups, small teams, internal tools, product engineering teams AI-era advantage Verifying generated UI, edge states, accessibility, and behavior Turning ambiguous product needs into working end-to-end features Choose frontend if you want depth
Frontend is the better path if you care about how users experience the product. That includes layout, interaction, error states, loading states, keyboard behavior, screen reader behavior, latency, and visual consistency.
Good frontend roles sit close to product and design. You may own a checkout flow, onboarding funnel, dashboard, editor, design system, or mobile web experience. The work is visible, which can be satisfying and stressful at the same time. A small bug can be obvious to everyone.
Frontend also rewards people who enjoy details. A button is rarely just a button in a serious product. It may need disabled states, loading behavior, focus styling, analytics, permission handling, optimistic updates, error recovery, responsive layout, and accessibility semantics.
This path is especially good if you want to become a:
- Product engineer
- Design systems engineer
- Web performance engineer
- Frontend platform engineer
- Accessibility-minded UI engineer
- Frontend-heavy tech lead
If you are worried that frontend is getting automated, read Is Frontend Development Dying in 2026?. The short version is that basic UI output is easier to generate, but frontend judgment is still hard to replace.
Choose fullstack if you want feature ownership
Fullstack is the better path if you want to take a feature from idea to shipped behavior with fewer handoffs. You might build the form, write the API, model the database table, add validation, handle permissions, and fix the deployment issue when the first version breaks.
That range is useful in smaller companies because there may not be a clean separation between frontend, backend, infrastructure, analytics, and support tooling. A fullstack developer who can move across those boundaries can unblock a team quickly.
The tradeoff is depth. Many junior developers call themselves fullstack after learning React and one backend framework, but companies do not usually pay for labels. They pay for useful ownership. If your frontend is fragile and your backend is copied from tutorials, the title will not help.
Fullstack is especially useful if you want to:
- Work at early-stage startups
- Build your own products
- Join small product teams
- Understand business logic deeply
- Move toward product engineering or technical leadership
Which path is easier to start with?
Frontend often feels easier at the beginning because you can see the result quickly. HTML, CSS, JavaScript, and React give fast feedback. That makes it a friendly entry point for many learners.
But frontend gets hard once you leave toy projects. You need to handle browser differences, accessibility, data fetching, complex state, bundle size, design constraints, flaky networks, and many device sizes.
Fullstack can feel harder at the start because you need more moving parts. You will meet databases, HTTP, authentication, environment variables, server errors, deployment, and security concerns earlier. The learning curve is wider, but the reward is context.
If you are starting from zero, begin with frontend foundations first. Then add backend basics once you can build useful interfaces. A frontend developer who understands APIs is already ahead of many candidates.
For a quick readiness check, practice JavaScript interview questions, React interview questions, and user interface coding questions. If you are testing the fullstack direction, add system design questions after you are comfortable with APIs.
Portfolio evidence for each path
Your portfolio should match the path you want. A frontend portfolio and a fullstack portfolio can overlap, but they should not tell the same story.
For a frontend path, build evidence around:
- Complex form behavior
- Accessible keyboard interactions
- Data tables, filters, and loading states
- Responsive layouts that do not break under content changes
- Component API decisions
- Performance improvements
- Clear before-and-after notes
For a fullstack path, build evidence around:
- Authentication and permissions
- API design
- Database modeling
- Server-side validation
- Error handling across frontend and backend
- Deployment
- Logs or basic monitoring
If a project claims to be fullstack but the backend is only a tutorial API, it will not help much. If a project claims to be frontend but ignores accessibility, responsive behavior, and error states, it will also look shallow.
Which path pays better?
The title alone does not decide pay. Company type, location, product complexity, interview bar, and ownership matter more.
In many startups, a fullstack developer can command strong compensation because one person can own a complete feature. In larger product companies, a frontend specialist can also earn well if they bring rare depth in performance, accessibility, design systems, or complex UI architecture.
If you are evaluating offers, do not compare only the role label. Compare:
- Scope of ownership
- Quality of engineering team
- Product complexity
- Mentorship
- Promotion path
- Base pay, bonus, equity, and benefits
- Whether frontend work is treated as product engineering or just implementation
For a deeper company-quality checklist, read How to Evaluate Companies as a Front End Engineer.
How AI changes the decision
AI coding tools make simple code cheaper. They can generate components, API handlers, tests, and boilerplate quickly. That does not remove the need for engineers. It changes what good engineers are judged on.
Frontend developers need to verify whether generated UI handles accessibility, responsive behavior, loading states, browser quirks, and product edge cases.
Fullstack developers need to verify whether generated code respects data rules, auth boundaries, failure modes, and deployment behavior.
In both paths, the value moves from typing code to making correct decisions. The path you choose should match the kind of decisions you want to make every week.
Recommended path by goal
Your goal Better first bet Get into software through visible projects Frontend Build and launch your own app Fullstack Work closely with designers Frontend Join early-stage startups Frontend-heavy fullstack Specialize in performance or accessibility Frontend Own product features end to end Fullstack Prepare for broad startup interviews Fullstack Prepare for UI-heavy product roles Frontend Which path should you choose?
If you are early in your career, start with frontend well enough to build polished, accessible, tested interfaces. Then learn enough backend to understand APIs, auth, data models, and deployment.
After that, choose your depth. Go frontend if the browser and product experience keep pulling your attention. Go fullstack if you keep wanting to own the whole feature path.
Both careers are viable in 2026. The risk is staying generic. The advantage comes from becoming useful enough that a team trusts you with unclear, important work.
- Frontend Testing Interview Questions for Freshers: 30 Must-Know (2026)Prepare for frontend testing interviews with 30 fresher questions on unit, integration, E2E, React Testing Library, mocks, async tests, coverage, CI, and accessibility.作者GreatFrontEnd Team14 分钟阅读Jun 10, 2026
Frontend testing interview questions for freshers test whether you can protect user behavior, not whether you can recite tool names. Interviewers ask about unit, integration, and E2E tests through bugs: "Why did checkout break?", "Why is this test flaky?", "What would you test before merging this form?", or "Why did this snapshot fail after a harmless refactor?"
You do not need to be a testing specialist for a fresher frontend role. You should be able to design a small test plan, write one behavior-focused component test, handle async UI, avoid brittle selectors, and explain why critical flows deserve stronger tests than decorative UI.
For extra practice, try GreatFrontEnd's Test Runner coding question, the unit vs integration vs E2E quiz, and the machine coding round guide.
What actually gets asked in a fresher testing interview
Interview prompt What the interviewer is checking Common fresher mistake "Test this login form." User-centric selectors, validation, async submit, error state Testing internal React state instead of visible behavior "This test passes locally but fails in CI." Flake diagnosis Adding a longer timeout without finding the race "Should this be unit, integration, or E2E?" Cost vs confidence Saying every critical flow needs only E2E "Why avoid large snapshots?" Signal-to-noise judgment Treating snapshot approval as real verification "How would you mock the API?" Test boundary design Mocking the component's internal helper instead of the network boundary 5 scenario questions to practice before the definitions
Scenario 1: Login form test plan
"A login form has email, password, validation, a loading button, and an API error. What do you test?"
Test the user behavior:
- Empty submit shows required-field messages.
- Invalid email shows the right validation message.
- Valid submit disables the button or shows loading.
- Successful login calls the submit path and navigates or shows the next UI.
- API failure shows the server message and lets the user retry.
That proves more than checking whether a component's internal
isLoadingstate changed.Scenario 2: Component test that follows user behavior
test('shows an error when login fails', async () => {server.use(http.post('/api/login', () =>HttpResponse.json({ message: 'Invalid credentials' }, { status: 401 }),),);const user = userEvent.setup();render(<LoginForm />);await user.type(screen.getByLabelText(/email/i), 'ada@example.com');await user.type(screen.getByLabelText(/password/i), 'wrong-password');await user.click(screen.getByRole('button', { name: /sign in/i }));expect(await screen.findByText(/invalid credentials/i)).toBeInTheDocument();expect(screen.getByRole('button', { name: /sign in/i })).toBeEnabled();});The exact mock library can vary. The test should read like a user flow and control the API at a stable boundary.
Scenario 3: Flaky search test
"The test types into search and expects results immediately. It fails sometimes."
The likely bug is a timing assumption. Use
findBy...orwaitFor()for async results, and assert on the final user-visible result instead of sleeping for a fixed time.Scenario 4: E2E scope for checkout
"Should every cart edge case be tested in Playwright?"
No. Put pure price calculation and reducer edge cases in fast unit tests. Put cart UI state in component or integration tests. Keep E2E for the critical checkout path: add item, update quantity, enter address, reach payment or order review.
Scenario 5: Accessibility as a test signal
"Why does
getByRole('button', { name: /submit/i })fail?"The button may not have an accessible name, may not be a real button, may be hidden from the accessibility tree, or may be rendered later. That test failure can reveal a usability problem.
What interviewers want from fresher testing answers
- Explain the test level: unit, integration, E2E, visual, accessibility, or manual QA.
- Name the boundary being tested: function, component, page, API contract, or full user flow.
- Prefer user-visible behavior over implementation details.
- Know when mocks help and when they hide bugs.
- Mention maintainability, not only coverage percentage.
Frontend testing interview questions and answers
1. What is frontend testing?
Frontend testing checks whether UI code behaves correctly for users. It covers pure functions, components, browser interactions, network states, accessibility basics, and full user flows.
Good frontend tests catch regressions before users do. They should also be readable enough that future engineers can tell what behavior is protected.
2. What is the difference between unit, integration, and E2E testing?
Unit tests check a small isolated piece, such as a formatter or reducer. Integration tests check multiple pieces working together, such as a form component that validates input and calls a submit handler. E2E tests run in a browser and test a user flow across the app.
The tradeoff is speed versus confidence. Unit tests are fast and focused. E2E tests are slower but catch routing, browser, and backend integration issues.
Add this detail: Give an example for the same feature. Price formatter: unit. Cart component plus store: integration. Add-to-cart through checkout: E2E.
3. What should freshers test first in a frontend app?
Start with critical user behavior: form validation, submit success and failure, rendering loaded data, empty states, error states, and navigation for core flows.
Do not start by snapshotting every component. A few behavior-focused tests protect the product with less churn than many tests that break on harmless markup changes.
Priority rule: Test the behavior that would embarrass the product if it broke: login, checkout, save, delete, upload, search, filtering, permissions, and error recovery.
4. What is the testing pyramid?
The testing pyramid suggests many fast unit tests, fewer integration tests, and a smaller number of E2E tests.
Frontend teams adjust this into a more balanced shape because component integration tests can give high confidence at lower cost than full E2E tests. Match test cost to product risk.
5. What is React Testing Library?
React Testing Library is a testing utility for rendering React components and querying the DOM in ways that resemble user interaction.
Its style is to test behavior through accessible output: buttons, labels, text, roles, and form controls. That makes tests less tied to internal component structure.
6. Why prefer
getByRole()?getByRole()queries elements by their accessible role and name, which is close to how assistive technologies understand the page.For example,
screen.getByRole("button", { name: /submit/i })checks that there is an actual button users can find by name. If this query is hard to write, the UI may have an accessibility problem.7. What is the difference between
getBy,queryBy, andfindBy?getByreturns an element or throws immediately. Use it when the element should already be present.queryByreturnsnullwhen no element is found. Use it for absence assertions.findByreturns a promise and retries for async appearance. Use it when UI changes after data loading, timers, or user interaction.Common failure: Using
getByText()immediately after a click that triggers a request. The test races the UI. Useawait screen.findByText(...)when the user-visible result appears asynchronously.8. What is
user-event, and how is it different fromfireEvent?user-eventsimulates higher-level user interactions such as typing and clicking. It can trigger multiple DOM events and checks that the interaction is possible.fireEventdispatches a single event. Use it for lower-level cases, but preferuser-eventfor most component interaction tests.9. How do you test async UI?
Use async queries such as
findByRole()or wait helpers such aswaitFor()when the DOM updates after a promise, request, or delayed state change.await user.click(screen.getByRole('button', { name: /load users/i }));expect(await screen.findByText('Ada Lovelace')).toBeInTheDocument();Avoid fixed sleeps. Waiting for a real condition makes the test faster and less flaky.
10. What are mocks?
Mocks replace a real dependency with a controlled fake. Use them for network calls, timers, browser APIs, analytics, and modules that are expensive or unreliable in tests.
The risk is over-mocking. If every dependency is mocked, the test may only prove that mocks match your assumptions.
11. What is the difference between a mock and a stub?
A stub provides a controlled response. A mock can also record interactions so you can assert it was called with certain arguments.
For frontend tests, name the boundary you are replacing: network, module, callback prop, or browser API.
12. Should you mock API calls in frontend tests?
For component tests, yes, but prefer mocking at the network boundary instead of mocking internal functions. Tools such as Mock Service Worker let the component still execute its real data-fetching path while the network response is controlled.
For E2E tests, teams may use a test backend, seeded data, or network mocks depending on reliability and cost.
Why this matters: If you mock
fetchUsers()directly, a later refactor fromfetchUsers()touserClient.list()can break the test even though the user flow is unchanged. MockingGET /api/userskeeps the test tied to the API contract instead of component internals.13. What is snapshot testing?
Snapshot testing saves a rendered output and compares future output against it. It can catch unexpected structural changes.
For frontend components, large snapshots are noisy. Use snapshots sparingly for stable, small outputs. Behavior tests fit buttons, forms, and user flows.
Snapshot answer: Snapshots work when the output is intentionally stable and reviewable. They fail when the reviewer cannot tell whether the diff is meaningful.
14. What is test coverage?
Coverage measures how much code was executed during tests. Common metrics include line, branch, function, and statement coverage.
Coverage is a signal, not a goal by itself. A project can have high coverage and still miss critical behavior if tests assert the wrong thing.
15. What are flaky tests?
Flaky tests pass sometimes and fail other times without code changes. Common causes include timing assumptions, shared state, uncontrolled network calls, test order dependence, random data, and brittle selectors.
Fix flakes quickly. A flaky test suite trains the team to ignore failures.
Debug checklist: Look for missing
await, uncontrolled timers, shared test data, test order dependence, network calls hitting real services, animations, and selectors that match multiple elements.16. How do you test a form?
Test it like a user: find fields by label, type values, submit the form, and assert validation messages, disabled states, loading states, or the success result.
Avoid checking internal state variables. The user cannot see those; the test should verify behavior.
17. How do you test error states?
Make the dependency fail, then assert what the user sees. For example, mock the API to return
500, submit the form, and assert that an error message appears and the retry button remains usable.Error states are worth testing because they are easy to forget during happy-path development.
18. How do you test loading states?
Use a delayed promise or controlled network mock, trigger the fetch, assert the loading UI appears, then resolve the request and assert the final UI.
The key is to test the transition, not only the final state.
19. What is E2E testing?
E2E testing runs the app in a real browser and checks a complete user journey, such as signup, login, checkout, or creating a dashboard item.
Playwright and Cypress are common tools. E2E tests catch routing, browser behavior, network, storage, and integration problems that unit tests cannot.
20. What should be covered by E2E tests?
Cover the flows where a regression would hurt users or revenue: login, checkout, onboarding, billing, content creation, destructive actions, and core search or filtering.
Do not put every small component state into E2E. That makes the suite slow and brittle.
Good E2E candidates: signup, login, checkout, project creation, billing update, file upload, permission-protected route, and a destructive action with confirmation.
21. What is visual regression testing?
Visual regression testing compares screenshots across builds to detect unintended visual changes.
It fits design systems, marketing pages, dashboards, and components where layout is part of the contract. It should not replace semantic behavior tests.
22. What is accessibility testing?
Accessibility testing checks whether users with different input methods and assistive technologies can use the UI. Automated tools can catch missing labels, contrast issues, invalid ARIA, and some semantic problems.
Automated accessibility tests catch only part of the problem. Keyboard testing and screen reader checks still matter for core flows.
23. How do you choose selectors in tests?
Prefer accessible selectors: role, label text, placeholder when it is the visible cue, visible text, and alt text. Use
data-testidonly when there is no stable user-facing selector.Avoid CSS class selectors for behavior tests because styling classes are not the behavior contract.
Selector priority in practice: Role with accessible name, label text for form fields, visible text for content, alt text for images, and
data-testidfor UI with no user-facing label such as virtualized rows or canvas-backed controls.24. How do you test custom hooks?
Use
renderHook()when the hook has logic worth testing independently, such as debouncing, timers, local storage, or data transformations.If the hook mostly wires UI behavior, testing the component that uses it may give more confidence.
25. What is the difference between Jest and Vitest?
Both are JavaScript test runners. Jest is mature and common in many existing React projects. Vitest is popular in Vite-based projects because it is fast, ESM-friendly, and integrates well with Vite config.
In interviews, the exact tool matters less than knowing assertions, mocks, async tests, setup files, and test environments.
26. What is jsdom?
jsdom is a JavaScript implementation of many browser DOM APIs used in Node-based tests. It lets component tests render and interact with DOM-like elements without launching a real browser.
It is fast, but it is not a full browser. For layout, browser engines, clipboard behavior, downloads, and cross-browser issues, use real browser tests.
27. How do fake timers work?
Fake timers let tests control time-based functions such as
setTimeout,setInterval, and debounce logic. They make timer tests fast and deterministic.Be careful with user interactions and promises. If the tool needs timer advancement, configure it explicitly rather than adding arbitrary sleeps.
28. What is CI testing?
CI testing runs tests automatically on pull requests or commits. It catches failures before code merges.
A typical setup runs linting, type checks, unit tests, and component tests on every PR. E2E and visual tests may run on release branches or deployment previews depending on cost.
29. What is test-driven development?
Test-driven development means writing a failing test first, then writing the code to pass it, then refactoring.
Freshers do not need to claim they always use TDD. Use TDD for pure functions, reducers, bug fixes, and well-defined behavior; exploratory UI work may start with implementation and add tests once behavior stabilizes.
30. How do you decide what not to test?
Do not test library internals, implementation details, trivial getters, generated code, or behavior already guaranteed by a trusted framework.
Test your decisions: validation rules, conditional rendering, state transitions, API handling, permissions, edge cases, and critical user journeys.
Good phrasing in interviews: "I would not test React's ability to call
onClick; I would test what our app does after the user clicks."Common mistakes freshers make
Testing implementation details
Avoid tests that inspect component state, private functions, or class names unless that is the public contract. Test what the user can see or do.
Using snapshots as the main strategy
Snapshots are easy to create and easy to ignore. Use them only when the output is small and stable.
Waiting with fixed timeouts
await new Promise((r) => setTimeout(r, 1000))makes tests slow and flaky. Wait for the UI condition you expect.Mocking everything
Mocks help at stable boundaries such as network, time, storage, and analytics. Too many mocks disconnect tests from the behavior users depend on.
A 45-minute practice drill
Write tests for a small signup form:
- Empty submit shows field errors.
- Invalid email is rejected.
- Successful submit shows a welcome state.
409email conflict shows "Email already exists".- The submit button cannot be clicked twice while the request is pending.
Use label/role queries,
user-event, and an API mock. After writing the tests, explain which one is unit, which one is integration, and what single E2E test you would add for signup.Official docs worth reading
Frontend testing fresher interviews are less about naming every tool and more about explaining why a test gives confidence. Start with user behavior, then choose the smallest test that protects it.
- REST API Interview Questions for Frontend Devs: 30 Questions (2026)Prepare for REST API interview questions as a frontend fresher with answers on HTTP methods, status codes, fetch, CORS, auth, caching, pagination, errors, and API contracts.作者GreatFrontEnd Team15 分钟阅读Jun 10, 2026
REST API interview questions for frontend devs test whether you can turn an API contract into a reliable UI. The interview checks which method you call, how you handle status codes, what the loading and error states look like, how auth is sent, why CORS fails in the browser, and how you avoid duplicate or stale requests.
Freshers do not need to design a large backend system. You should know how a browser sends requests, what
fetch()actually resolves or rejects on, whyGETshould not mutate data, and how frontend UI should respond to common API states.If you want more practice around async JavaScript, pair this guide with GreatFrontEnd's JavaScript interview questions.
How frontend REST interviews are different
Backend interviews may go deep into resource modeling and database consistency. Frontend interviews care about the client contract:
- Which method and URL should the UI call?
- What status code should the UI expect?
- What should happen during loading, empty, success, validation error, auth error, and server error states?
- How should the client avoid duplicate submissions, stale data, and unsafe handling of secrets?
What actually gets asked in a fresher REST API interview
Interview prompt What the interviewer is checking Common fresher mistake "Implement save profile." PATCH, validation errors, disabled submit, stale UI updateTreating all failures as "Something went wrong" "Why didn't fetch()go tocatchon 404?"Fetch API behavior Assuming HTTP errors reject the promise "The request works in Postman but fails in the browser." CORS and credentials Debugging React code before checking CORS headers "Should search use GET or POST?" Method semantics, URL shareability, body size/privacy Saying "POST is more secure" without explaining URLs "User double-clicks Pay. What protects us?" Duplicate submission and idempotency Only disabling the button and ignoring backend guarantees 5 scenario questions to practice before the definitions
Scenario 1: Save profile form
"The user edits display name and timezone. Which API call and UI states do you handle?"
Use a partial update if the API supports it:
PATCH /api/meContent-Type: application/json{ "displayName": "Ada", "timezone": "Asia/Kolkata" }Handle: idle, dirty, submitting, success, field validation error, auth error, conflict, and server error. Include UI behavior: disable duplicate submit, preserve user input on failure, map field errors beside fields, and refetch or update cached user data after success.
Scenario 2:
fetch()wrapper that does not lieasync function requestJSON<T>(url: string,init?: RequestInit,): Promise<T | null> {const response = await fetch(url, init);const contentType = response.headers.get('content-type') ?? '';const hasBody = response.status !== 204;const body = hasBody? contentType.includes('application/json')? await response.json(): await response.text(): null;if (!response.ok) {throw new APIError(response.status, body);}return body as T | null;}The point is not that every app needs this exact helper. The point is that HTTP error statuses need explicit handling, and the response body may be JSON, plain text, or empty.
Scenario 3: Works in Postman, fails in browser
"The API returns data in Postman, but the frontend sees a CORS error."
Postman is not a browser and does not enforce browser CORS rules. The server must allow the frontend origin with the right CORS headers. If cookies or auth credentials are involved, the response must also satisfy credential rules;
Access-Control-Allow-Origin: *cannot satisfy credentialed browser requests.Scenario 4: Search URL design
"Build product search with filters and sorting. What should the URL look like?"
For shareable, bookmarkable search, use query params:
GET /api/products?query=shoes&category=men&sort=price_asc&cursor=abcIf the filter object becomes too large or contains sensitive data, discuss a
POST /searchstyle endpoint, but name the tradeoff: URL shareability and HTTP caching become less straightforward.Scenario 5: Duplicate payment click
"A user double-clicks Pay. Is disabling the button enough?"
No. Disabling the button improves the UI, but the backend should still protect the operation. Use an idempotency key or server-side duplicate protection for operations such as payments and order creation.
Frontend-only prevention fails when the user refreshes, retries, has two tabs open, or the network repeats a request.
REST API interview questions and answers
1. What is a REST API?
A REST API exposes resources through URLs and uses HTTP semantics to operate on those resources. A frontend might call
GET /productsto list products,GET /products/123to read one product, orPOST /ordersto create an order.REST is an architectural style, not a single JavaScript library. In interviews, keep the answer tied to HTTP methods, resources, stateless requests, status codes, and representations such as JSON.
Interview-ready add-on: Explain one concrete resource. "Products are resources, so reading one product is
GET /products/:id; creating an order isPOST /orders; updating my profile can bePATCH /me."2. What is the difference between REST and HTTP?
HTTP is the protocol: methods, headers, status codes, request bodies, response bodies, caching, and authentication headers. REST is a style for designing APIs that commonly uses HTTP well.
A REST-like API should make resources and actions understandable through HTTP instead of hiding everything behind one generic endpoint.
3. What are common HTTP methods used in REST APIs?
GETreads data.POSTcreates or triggers processing.PUTreplaces a resource.PATCHpartially updates a resource.DELETEremoves a resource.OPTIONSis used by browsers for CORS preflight checks.Official reference: HTTP request methods on MDN.
4. What is the difference between
GETandPOST?GETretrieves a resource and should be safe, meaning it should not intentionally change server state. Query parameters are part of the URL and can be cached, bookmarked, logged, and shared.POSTsends data for the server to process, such as creating a resource or performing an action. UsePOSTfor form submissions, login attempts, and operations with bodies that should not be placed in the URL.Frontend trap: Do not say "
POSTis secure andGETis not." Security depends on HTTPS, auth, server handling, logs, and what data is exposed. The key distinction is method semantics and URL visibility.5. What is the difference between
PUTandPATCH?PUTreplaces the full resource at the target URL when the API follows standard REST semantics. If you send a user object withPUT /users/1, the server treats that representation as the new full state.PATCHapplies a partial update. For example,PATCH /users/1with{ "timezone": "Asia/Kolkata" }updates only that field if the API contract says so.6. What does idempotent mean?
An operation is idempotent if repeating the same request has the same intended effect as sending it once.
GET,PUT, andDELETEare idempotent by HTTP semantics.POSTis not idempotent by default because sending it twice may create two orders, two payments, or two records.7. What does safe mean in HTTP?
A safe method is intended only to retrieve information and not change server state.
GETandHEADare safe.Safe does not mean "no logs or analytics happen." It means the client did not request a state-changing operation.
8. What are HTTP status code classes?
Status codes are grouped by first digit:
1xx: informational2xx: success3xx: redirection4xx: client error5xx: server error
Official reference: HTTP response status codes on MDN.
9. What is the difference between
200,201, and204?200 OKmeans the request succeeded and returns a response body in most JSON API flows.201 Createdmeans a resource was created. APIs may include aLocationheader or response body with the created resource.204 No Contentmeans the request succeeded but there is no response body, commonly after delete or update operations.10. What is the difference between
400,401, and403?400 Bad Requestmeans the request is invalid, such as malformed JSON or missing required data.401 Unauthorizedmeans authentication is missing or invalid. Despite the name, it is about authentication.403 Forbiddenmeans the server understood who you are, but you do not have permission for that resource or action.UI mapping:
400maps to form or request correction in many APIs.401may trigger login.403should show a permission message or hide the action if the user truly cannot perform it.11. When should an API return
404?Return
404 Not Foundwhen the requested resource does not exist or should not be revealed to the current user.For frontend UI,
404maps to an empty detail state, a not-found page, or a redirect to a safer listing page.12. What is
409 Conflict?409 Conflictmeans the request conflicts with the current state of the resource. Examples include duplicate usernames, editing an outdated version of a document, or trying to reserve an already-booked slot.The frontend should show a specific message and ask the user to refresh, change input, or retry with updated data.
13. What is
429 Too Many Requests?429means the client has hit a rate limit. APIs may include aRetry-Afterheader telling the client when to try again.The frontend should slow down, disable repeated actions, show a helpful message, or schedule a retry only when appropriate.
14. How does
fetch()handle HTTP errors?fetch()rejects for network-level failures, not for HTTP error status codes like404or500. If the server responds, the promise resolves with aResponse.Check
response.okorresponse.statusbefore reading the body as success.const response = await fetch('/api/products');if (!response.ok) {throw new Error(`Request failed: ${response.status}`);}const data = await response.json();Official reference: Using the Fetch API.
What to say in the room: "I handle two failure classes: network/request failures through
catch, and HTTP failures throughresponse.okorresponse.status."15. What does
response.okmean?response.okistruewhen the HTTP status is in the200to299range. It isfalsefor redirects that are not followed, client errors, and server errors.Official reference: Response.ok.
16. What are HTTP headers?
Headers are metadata sent with requests and responses. Common request headers include
Content-Type,Accept, andAuthorization. Common response headers includeCache-Control,ETag,Set-Cookie, and CORS headers.Frontend developers should know which headers are safe to set from browser JavaScript and which are controlled by the browser.
17. What is
Content-Type?Content-Typetells the receiver the media type of the body. JSON requests useContent-Type: application/json.Without the right
Content-Type, the server may not parse the body correctly.18. What is the
Acceptheader?Accepttells the server which response formats the client can handle. For a JSON API, the client may sendAccept: application/json.Many APIs return JSON by default, but naming the expected format makes the contract clearer.
19. What is CORS?
CORS is a browser security mechanism that lets a server decide which origins can read its responses from frontend JavaScript.
If a React app on
https://app.example.comcallshttps://api.example.com, the API must send the right CORS headers. Otherwise the browser blocks JavaScript from reading the response.Official reference: CORS on MDN.
Debug signal: If the browser console says CORS, changing React state management will not fix it. Check request origin, method, custom headers, credentials mode, and server response headers.
20. What is a CORS preflight request?
A preflight is an
OPTIONSrequest the browser sends before some cross-origin requests. It asks the server whether the actual method and headers are allowed.You see preflights for requests with methods like
PUTorDELETE, custom headers, or non-simple content types.21. How does authentication work with REST APIs?
Common approaches include cookies with server sessions and tokens sent through the
Authorizationheader. In browser apps, secure cookie-based auth is common because cookies can beHttpOnly, which prevents JavaScript from reading them.If using bearer tokens, avoid storing long-lived secrets in unsafe places. The frontend can send a token, but it cannot truly hide one from the user if JavaScript can read it.
Official reference: Authorization header on MDN.
22. What is the difference between cookies and bearer tokens?
Cookies are sent automatically on same-origin browser requests. For cross-origin
fetch()calls, the request also needs the rightcredentialsoption, cookie attributes, and CORS response headers.Bearer tokens are sent manually in an
Authorization: Bearer ...header. They are flexible for APIs, but frontend storage choices matter because XSS can steal tokens available to JavaScript.23. What is pagination?
Pagination splits large lists into smaller responses. Page-based pagination uses
pageandlimit. Cursor-based pagination uses a pointer such asnextCursor.Cursor pagination fits feeds and frequently changing data because it avoids missing or duplicating items when records are inserted between page requests.
Frontend behavior to mention: Keep previous items while loading more, prevent duplicate "load more" clicks, handle the end of the list, and make refresh behavior explicit.
24. What is filtering and sorting in a REST API?
Filtering narrows the result set, and sorting controls order. A frontend might call:
GET /products?category=shoes&sort=price_ascKeep query parameter names stable and predictable. The UI should encode user choices into the URL when those choices are shareable.
25. What is API versioning?
API versioning lets the backend change contracts without breaking existing clients. Common strategies include
/v1/products, custom headers, or compatibility windows.Frontend developers should know which version they call and what migration plan exists before relying on new fields.
26. What is HTTP caching?
HTTP caching stores responses so future requests can reuse them. Important headers include
Cache-Control,ETag, and conditional request headers such asIf-None-Match.Caching can happen in the browser, CDN, framework, or application data layer. Stale UI bugs come from checking the wrong cache.
Official reference: HTTP caching on MDN.
27. What are
ETagand304 Not Modified?An
ETagis a validator for a specific representation of a resource. The browser or client can send it back withIf-None-Match.If the resource has not changed, the server can return
304 Not Modified, allowing the client to reuse its cached copy.28. How should the frontend handle API errors?
Handle errors by category. Validation errors should show field messages. Auth errors should route to login or show permission messaging. Rate limits should slow retries. Server errors should show a retry option or fallback state.
Do not show raw backend stack traces. Do log enough context for debugging, such as endpoint, status code, and request ID if available.
Useful error map:
Status UI response 400/422Show field-level validation messages when available 401Ask the user to sign in again 403Explain missing permission or hide the restricted action 404Show not-found or empty detail state 409Ask user to refresh, choose another value, or resolve conflict 429Slow down retries and show rate-limit messaging 500Show retry/fallback and log request context 29. How do you prevent duplicate form submissions?
Disable the submit button while the request is in flight, show progress, debounce repeated clicks when appropriate, and make the backend operation idempotent when duplicate requests are dangerous.
For payments and order creation, the API should still support idempotency keys or another duplicate-protection strategy.
30. What makes a frontend-friendly API contract?
A frontend-friendly API contract has stable field names, clear status codes, predictable error shapes, pagination metadata, documented nullability, and enough data to render the UI without extra avoidable requests.
For mutations, it should define what the response returns, whether the client should refetch, and how validation errors map to fields.
Ask this in interviews: "Can I assume this endpoint returns the updated resource after mutation, or should the client refetch?" That one question prevents many stale UI bugs.
Common mistakes freshers make
Treating every failed response as a rejected
fetch()fetch()resolves for many HTTP error responses. Always checkresponse.okorresponse.status.Sending sensitive data in query strings
URLs can be logged, cached, shared, and stored in browser history. Use request bodies and secure auth mechanisms for sensitive data.
Using
GETfor mutationsGETshould be safe. Do not create orders, delete items, or trigger payment actions throughGET.Showing one generic error for every status
Validation, auth, permission, not-found, conflict, rate-limit, and server errors need different UI responses.
A 45-minute practice drill
Design the frontend contract for a profile settings page:
GET /api/meloads the current profile.PATCH /api/meupdatesdisplayName,timezone, andavatarUrl.400or422returns field errors.401means the session expired.409means the display name is taken.- The UI disables submit while saving and preserves edited values on failure.
Then write a small
fetch()helper that checksresponse.ok, parses JSON only when the response is JSON, handles empty responses such as204, and throws an error object withstatusand body. That exercise covers more interview value than memorizing every status code.Official docs worth reading
REST API interviews for frontend freshers are about contracts and UI behavior. Explain the HTTP concept, then say how the browser UI should respond.
- Next.js Interview Questions for Freshers: 35 Questions with Answers (2026)Prepare for Next.js fresher interviews with 35 questions on App Router, Server Components, routing, rendering, data fetching, caching, SEO, and deployment.作者GreatFrontEnd Team18 分钟阅读Jun 9, 2026
In fresher Next.js interviews, the prompt is a small React product problem: choose the right route files, keep secrets on the server, add the minimum client JavaScript, handle missing data, and explain why one page should be static while another must be request-time.
Definitions alone do not prepare you for those prompts. Tie App Router, Server Components, caching, and Route Handlers to product tasks: "Build a product detail page", "Why did this hydration error happen?", "Where should this API key live?", or "Why is this dashboard showing stale data?"
If your React basics are shaky, pair this guide with GreatFrontEnd's React interview questions and the React Interview Playbook.
What actually gets asked in a fresher Next.js interview
Interview prompt What the interviewer is checking Common fresher mistake "Build /products/[id]and show a 404 for missing products."Dynamic routes, params, server fetching,notFound(), metadataRendering a generic empty div instead of a route-level not-found state "Add a cart button to a server-rendered product page." Server/Client Component boundary Marking the whole page as "use client"instead of isolating the button"This page uses an API key. Where should the request happen?" Secret handling and server-only code Calling the private API directly from a Client Component "Why does this date cause a hydration error?" Server HTML must match initial client render Rendering new Date()orMath.random()directly in shared markup"Product prices changed, but the page still shows old data." Caching, revalidation, dynamic rendering Saying "clear browser cache" without checking Next.js data/server caches Use this answer structure
Use this structure for most answers:
- Name the boundary: server, client, build time, request time, or pre-route Proxy.
- State the product reason: SEO, faster first paint, smaller JS, auth, freshness, or interactivity.
- Name the file/API:
page.tsx,layout.tsx,route.ts,generateStaticParams(),notFound(),redirect(),"use client", orfetch()options. - Call out the trap: hydration mismatch, leaked secret, stale cache, unnecessary client bundle, or wrong router API.
For 2026 interviews, use App Router vocabulary by default. If the interviewer asks about
pages/,getStaticProps, orgetServerSideProps, answer it as Pages Router knowledge and then explain the App Router equivalent.5 scenario questions to practice before the definitions
Scenario 1: Product detail page with stale price
"A product detail page is server-rendered. Marketing wants it fast for SEO, but price and stock change every few minutes. How would you build it?"
Separate stable and volatile data. Product title, description, images, and SEO metadata can be cached or statically generated. Price and stock may need short revalidation, tag-based revalidation after catalog updates, or request-time fetching if showing stale values would be harmful.
The mistake is treating the whole page as one rendering mode. Next.js lets you split the problem: keep the mostly static shell fast, then choose explicit freshness rules for the data that changes.
Scenario 2: Cart button on a Server Component page
"The product page is a Server Component, but the Add to Cart button needs click state. What do you do?"
Keep the page as a Server Component and move only the interactive button into a Client Component.
// app/products/[id]/page.tsxexport default async function ProductPage({params,}: {params: Promise<{ id: string }>;}) {const { id } = await params;const product = await getProduct(id);return (<><h1>{product.name}</h1><AddToCartButton productId={id} /></>);}Do not move the whole route to the client. Put the client boundary at the smallest component that needs browser behavior.
Scenario 3: Search page with query params
"Should
/search?q=reactbe statically generated?"Probably not as a fully static page for every possible query. The route can render a reusable shell, but results depend on
searchParams, user input, ranking, and freshness. Explain whether the results should be fetched on the server for SEO/shareable URLs, on the client for highly interactive filtering, or through a mix.Mention loading, empty, and error states. Search pages fail interviews when candidates only talk about routing and forget the UI states users will actually see.
Scenario 4: Auth-protected dashboard
"A logged-out user visits
/dashboard. Where should the redirect happen?"If the server can know from cookies that the user is logged out, redirect before rendering protected UI. Depending on the app, that can happen in server route logic or Proxy for broad route gates.
Do not rely only on
useEffect(() => router.push('/login')). That flashes protected UI and ships dashboard JavaScript to a user who should not see it.Scenario 5: Hydration mismatch from local storage
"The server renders light theme, but the client reads
localStorage.themeand switches to dark during hydration. Why is React warning?"The first client render does not match the server HTML. Fix it by making the initial render deterministic, delaying browser-only reads until after hydration, using a cookie-backed theme available to the server, or rendering a small client theme boundary that handles the mismatch intentionally.
The word "hydration" alone does not answer the question. Name the mismatch and fix the first render.
Next.js interview questions and answers
1. What is Next.js?
Next.js is a React framework for building web applications. It adds routing, server rendering, static generation, data fetching patterns, image optimization, metadata handling, API route handlers, and deployment conventions around React.
Plain React mainly gives you the UI layer. Next.js decides how routes are mapped to files, how pages are rendered, how data can be fetched on the server, and how the app is bundled and optimized.
Say why: If asked "Why use it?", give a product reason: server-rendered pages for SEO, route-based code splitting, safer server data access, built-in metadata, and deployment conventions. Avoid saying only "because it improves performance"; name which part improves and why.
Official reference: Next.js App Router docs.
2. How is Next.js different from React?
React is a library for building component-based UI. Next.js is a framework that uses React and adds application structure.
In a React app built with Vite, you choose your own router, data fetching setup, rendering model, and deployment pattern. In Next.js, file-system routing, server rendering, code splitting, metadata, and production build behavior come with the framework.
3. What is the App Router?
The App Router is the modern Next.js router based on the
app/directory. It uses React Server Components, layouts, nested routing, loading UI, error boundaries, route handlers, and streaming.For example,
app/products/page.tsxmaps to/products, andapp/products/[id]/page.tsxmaps to dynamic product pages.What to mention in 2026: App Router is the default mental model for new Next.js work. The Pages Router still exists, but App Router answers should use
page.tsx,layout.tsx, Server Components, Route Handlers, and cache/revalidation APIs instead of starting withgetStaticProps.4. What is file-based routing?
File-based routing means the folder and file structure defines the URL structure. In the App Router, a route segment becomes public only when it contains a
page.tsxorpage.jsfile.For example:
app/page.tsxabout/page.tsxblog/[slug]/page.tsxThis creates
/,/about, and/blog/:slug.5. What is the difference between
page.tsx,layout.tsx, andtemplate.tsx?page.tsxrenders the UI for a route.layout.tsxwraps a route segment and its children, and it is preserved across navigation when possible.template.tsxalso wraps children, but it creates a new instance on navigation, so state inside it is reset.Use layouts for shared shells like navbars and sidebars. Use templates when each navigation should remount that wrapper.
6. What are dynamic routes in Next.js?
Dynamic routes handle URLs whose segment values are not known ahead of time. In the App Router, a folder like
[slug]captures a value and passes it throughparams.export default async function BlogPost({params,}: {params: Promise<{ slug: string }>;}) {const { slug } = await params;return <article>{slug}</article>;}Catch-all routes use
[...slug], and optional catch-all routes use[[...slug]].7. What is
generateStaticParams()?generateStaticParams()tells Next.js which dynamic routes to generate at build time. It replacesgetStaticPathsfrom the Pages Router.For example, a blog can fetch all slugs during the build and return
{ slug }objects. Next.js then pre-renders those pages instead of waiting for a first request.Official reference: generateStaticParams.
8. What are Server Components?
Server Components render on the server and do not send their component code to the browser. They are the default in the App Router.
Use them for reading files, querying databases, fetching data with secrets, rendering static content, and reducing client-side JavaScript. They cannot use browser-only APIs, event handlers, or hooks like
useState.How it appears in interviews: "Why can't I add
onClickhere?" or "Why iswindowundefined?" The answer is that the component is rendering on the server, not in the browser. Add a Client Component only for the interactive part.Official reference: Server and Client Components.
9. What are Client Components?
Client Components are React components that can run in the browser. Add the
"use client"directive at the top of the file to mark a client boundary.Use Client Components for state, event handlers, effects, browser APIs, focus management, animations that require browser state, and interactive forms.
10. When should you use
"use client"?Use
"use client"when the component needs client-only behavior:useState,useEffect,useReducer, DOM events such asonClick, or APIs such aswindowandlocalStorage.Do not add
"use client"to every file. Once a file is marked as a Client Component, its imported child components are part of that client bundle unless separated by server boundaries. Keeping static and data-heavy UI on the server reduces shipped JavaScript.11. Can a Server Component import a Client Component?
Yes. A Server Component can render a Client Component and pass serializable props to it. This is the common pattern for mixing server-rendered data with small interactive widgets.
A Client Component cannot directly import a Server Component, because client code runs in the browser. You can pass a Server Component as
childrento a Client Component from a server parent.12. How do you fetch data in the App Router?
In Server Components, you can use
asynccomponents and fetch directly on the server:export default async function Page() {const response = await fetch('https://api.example.com/products');const products = await response.json();return <ProductList products={products} />;}In Client Components, fetch with a client-side library or a custom hook when the data depends on browser interaction, local state, or live updates.
Trap: Server-side
fetch()in Next.js is not always the same as browserfetch(). Next.js can add caching and revalidation behavior on the server. If the page must always be fresh, say so explicitly with the relevant cache option or rendering choice.Official reference: Fetching Data.
13. What is the difference between static rendering and dynamic rendering?
Static rendering prepares HTML ahead of time and can be served quickly. Dynamic rendering creates the response at request time, which is needed when output depends on request-specific data such as cookies, headers, search params, auth state, or uncached data.
A fresher-friendly rule: use static rendering for public content that can be reused, and dynamic rendering for personalized or request-dependent content.
14. What is ISR?
ISR means Incremental Static Regeneration. It lets static output be refreshed after a configured time or after an explicit revalidation event.
In the App Router, do not treat ISR as only the older Pages Router
revalidateoption. You will seefetch()cache options,revalidatePath(),revalidateTag(), and, in newer Next.js 16 codebases, Cache Components APIs such as"use cache"and cache tags.15. How does caching work in Next.js at a high level?
Next.js has multiple caches. Route output, cached async work, server
fetch()results, and client navigation data can all have different freshness rules.You may see server
fetch()caching controlled withcache: "force-cache",cache: "no-store", ornext: { revalidate }. You may also see Cache Components controlled with"use cache",cacheLife(),cacheTag(), andupdateTag(). The interview answer should name the cache and the freshness rule instead of saying "Next.js caches it."Debugging answer: Name which cache you suspect. "Is the stale value from browser HTTP cache, Next.js server data cache, generated route output, client router cache, or our own data library?" That question beats guessing at one cache blindly.
Official reference: Caching.
16. What is
loading.tsx?loading.tsxdefines loading UI for a route segment. Next.js can show it while the route or a nested part of the route is loading.It supports streaming because the user can see part of the page while slower server work continues.
17. What is
error.tsx?error.tsxdefines an error boundary for a route segment. It catches uncaught runtime errors from that segment and lets you render a fallback UI.In the App Router,
error.tsxmust be a Client Component because error boundaries use client-side React behavior.18. What is
not-found.tsx?not-found.tsxdefines the UI for a route segment's 404 state. You can trigger it by callingnotFound()fromnext/navigation.Use it when the route exists but the resource does not, such as
/blog/missing-slug.19. What are Route Handlers?
Route Handlers let you create API endpoints inside the App Router using
route.tsorroute.js. They support HTTP methods such asGET,POST,PUT, andDELETE.export async function GET() {return Response.json({ ok: true });}They fit webhooks, BFF endpoints, auth callbacks, and server-only operations that the browser should not implement directly.
20. What are Server Functions and Server Actions?
Server Functions are async server-side functions marked with the
"use server"directive. In form submissions or mutation flows, they are called Server Actions.For a fresher interview, explain the idea carefully: the browser submits data, but the trusted mutation logic runs on the server.
21. What is the difference between a Route Handler and a Server Action?
A Route Handler exposes an HTTP endpoint. Other clients can call it if they know the URL and have permission.
A Server Action is a server function integrated with React and Next.js for form and mutation flows. Use Route Handlers for external HTTP APIs and webhooks. Use Server Actions for app-owned mutations tied to UI flows.
22. What is the difference between SSR, SSG, CSR, and ISR?
SSR renders HTML on the server for each request. SSG creates HTML at build time. CSR sends a JavaScript app shell and renders mainly in the browser. ISR serves static output but regenerates it after revalidation.
Next.js can mix these patterns route by route and even within a route when streaming and caching are involved.
23. What is hydration?
Hydration is the process where React attaches event handlers and client-side behavior to HTML that was already rendered on the server.
Server-rendered HTML can be visible before it is interactive. Client Components need hydration before clicks, inputs, and stateful behavior work.
24. What causes hydration errors?
Hydration errors happen when the HTML rendered on the server does not match what React expects on the client.
Common causes include rendering
Date.now()orMath.random()directly in markup, readingwindowduring server render, changing output based on browser-only state, invalid HTML nesting, or mismatched data between server and client.How to fix it: Make the initial server and client render match. Move browser-only reads to an effect, pass server-known values through cookies or props, or isolate the unstable UI in a Client Component that renders a stable placeholder first.
25. What is
next/linkused for?next/linkenables client-side navigation between routes. It avoids a full page reload and can prefetch route data when links are likely to be visited.Use
<Link href="/dashboard">Dashboard</Link>for internal navigation. Use a normal<a>for external links.26. What is
useRouter()used for?useRouter()is used in Client Components for programmatic navigation, such as redirecting after a user clicks a button or completes a client-side interaction.In Server Components, use server-side helpers such as
redirect()fromnext/navigationinstead.27. How do you add metadata for SEO in Next.js?
In the App Router, you can export a static
metadataobject or an asyncgenerateMetadata()function from a page or layout.Use static metadata when the title and description are known. Use
generateMetadata()when metadata depends on params or fetched data.Official reference: generateMetadata.
28. What is
next/image?next/imageis Next.js's image component. It handles image sizing, optimization, lazy loading, and layout stability when used correctly.Interviewers ask about it because images are among the largest page assets, and a framework image component can reduce layout shift and improve loading behavior.
29. What is
next/font?next/fontloads and optimizes fonts. It can self-host supported fonts and reduce layout shift by generating font-related CSS during the build.Use it instead of manually adding third-party font
<link>tags when possible, because font loading affects performance and visual stability.30. What is Proxy in Next.js?
Proxy is the modern name for what older Next.js versions called Middleware. A
proxy.tsfile can run before a request completes and can redirect, rewrite, set headers, read cookies, or respond early.Use it for request-level logic such as auth redirects, locale routing, and header changes. Do not put heavy application logic there.
Auth nuance: Proxy runs before route rendering, so it works for broad request decisions. It is not a replacement for server-side authorization inside data access or mutations. If the dashboard route is protected, both the route and the backend operation should still enforce permission.
Official reference: proxy.js file convention.
31. How do environment variables work in Next.js?
Server-only environment variables are available to server code and should be used for secrets such as API keys. Variables prefixed with
NEXT_PUBLIC_are bundled for the browser and must not contain secrets.The interview trap is treating every environment variable as secret. Anything sent to client JavaScript can be viewed by users.
32. How do you handle authentication in a Next.js app?
Authentication involves a session cookie or token, server-side validation, and route protection. Server Components can read request data such as cookies, Route Handlers can implement auth callbacks, and Proxy can redirect unauthenticated users before rendering.
Avoid trusting only client-side checks. The server must protect sensitive data and mutations.
33. What is the difference between
redirect()and client-side navigation?redirect()fromnext/navigationis used during server rendering or server logic to stop rendering and send the user to another route.Client-side navigation with
router.push()happens in a Client Component after browser interaction. Use the server redirect when the server already knows the user should not see the current route.34. How do you deploy a Next.js app?
The standard production flow is to run
next build, then host the generated server output on a platform that supports the chosen Next.js features. Vercel supports Next.js features directly, but Next.js can also run on Node-based hosts and other platforms with the right adapter or deployment setup.Freshers should know that a static-only export cannot support every server feature. Server rendering, Route Handlers, Server Actions, and request-time data need a runtime.
35. What should you practice before a Next.js fresher interview?
Build one small app with public pages, a dynamic detail page, a form, a Route Handler, metadata, a loading state, and a protected dashboard. That is enough to discuss most junior Next.js topics.
Practice with a mini product catalog or blog: list page, detail page, search params, server-fetched data, a client filter, a form mutation, and a small auth gate.
Common mistakes freshers make
Saying every Next.js page is server-rendered
Next.js supports multiple rendering patterns. A page might be statically generated, dynamically rendered, partially streamed, hydrated on the client, or driven by client-side data after the first load.
Adding
"use client"everywhereThis removes many benefits of Server Components. Add
"use client"at the smallest boundary that needs browser behavior.Confusing App Router and Pages Router APIs
getStaticProps,getServerSideProps, andgetStaticPathsbelong to the Pages Router. In the App Router, learn Server Components,fetch()options,generateStaticParams(),generateMetadata(), Route Handlers, and cache revalidation APIs.Ignoring where secrets run
Server Components and Route Handlers can access secrets. Client Components cannot keep secrets because their JavaScript is sent to the browser.
A 45-minute practice drill
Build a small product catalog:
/productslists products and has a loading state./products/[id]fetches a product on the server and callsnotFound()when missing.- The product page renders metadata from product data.
AddToCartButtonis the only Client Component on the detail page.POST /api/cartis implemented as a Route Handler or app-owned mutation path.- A stale product list can be refreshed with a cache tag or explicit no-cache choice.
When explaining the solution, say which parts run on the server, which parts hydrate, which data can be cached, and where secrets would live. That is the real interview signal.
Official docs worth reading
Next.js fresher interviews become clearer when you explain each feature by execution location: server, client, build, or request boundary. That mental model prevents most wrong answers.
- Redux Interview Questions for Freshers: Top 30 Questions (2026)Prepare for Redux fresher interviews with 30 questions on store, actions, reducers, Redux Toolkit, React Redux hooks, async thunks, selectors, and RTK Query.作者GreatFrontEnd Team14 分钟阅读Jun 9, 2026
Redux interview questions for freshers test whether you can choose and explain a state model, not whether you memorized the phrase "single source of truth." Connect the UI problem to Redux's data flow: state lives in a store, the UI dispatches events, reducers calculate the next state, and components read only the data they need.
In 2026, answer Redux questions with Redux Toolkit as the default. Older tutorials show hand-written action types,
createStore(), switch-heavy reducers, and lots of boilerplate. You should still understand those ideas, but modern Redux code normally usesconfigureStore(),createSlice(), React Redux hooks, and RTK Query or thunks for async work.For hands-on practice with subscriptions and dispatch-style APIs, implement Event Emitter on GreatFrontEnd after reading this guide.
What actually gets asked in a fresher Redux interview
Interview prompt What the interviewer is checking Common fresher mistake "The navbar cart count updates from many pages. Where should that state live?" Shared state and component communication Putting everything in Redux without explaining why "This reducer pushes into an array. Is that okay?" Immutability and Redux Toolkit/Immer Saying all mutation is always wrong, even inside createSlice()"Why does this component re-render on every action?" Selector return values and reference equality Returning a new object from useSelector()every time"Should a text input use Redux?" Local vs global state Dispatching on every keystroke by default "How do you fetch products and cache them?" Thunks vs RTK Query vs component fetch Writing loading reducers for every endpoint without considering server-state tooling 5 scenario questions to practice before the definitions
Scenario 1: Cart count in the navbar
"A user can add items from product pages, search results, and recommendations. The navbar badge should update everywhere."
Redux is a reasonable choice because multiple distant components need the same state and the actions are meaningful product events:
cart/itemAdded,cart/itemRemoved,cart/quantityChanged. The reducer owns the cart state; selectors exposeselectCartCountandselectCartTotal.Do not stop at "Redux avoids prop drilling." Name the shared state, the events, and the derived selectors the UI needs.
Scenario 2: Search input in a modal
"A modal has a search box. Should the input value go into Redux?"
Usually no. The typed value is temporary UI state owned by one component. Keep it in React state unless another feature needs it, the value must survive navigation, or it is part of a shareable URL.
This scenario checks judgment. Redux skill includes knowing when not to use Redux.
Scenario 3: Products loaded from the backend
"Where should product list loading, error, and cached data live?"
If the app already uses Redux Toolkit, RTK Query fits this case because product data is server state: it needs fetching, caching, invalidation, and refetching. A thunk still works for custom flows, but server state and client state are different problems.
Scenario 4: Selector causes extra renders
"This selector returns
{ count, total }, and the component re-renders after unrelated actions. Why?"Returning a new object creates a new reference on every store update. Split selectors, use a memoized selector, or use an equality function when appropriate.
const count = useSelector(selectCartCount);const total = useSelector(selectCartTotal);The interviewer is checking whether you understand React Redux's render behavior, not only Redux vocabulary.
Scenario 5: Optimistic update fails
"A user likes a post. The UI updates immediately, but the API fails. What should happen?"
Dispatch an optimistic action, keep enough information to roll back, and handle the failure action by reverting or showing a retry state. For server-state flows, use the mutation lifecycle provided by the data library.
The product detail matters: a like can be retried or reverted; a payment cannot be treated casually.
What interviewers check in a fresher Redux round
- Can you explain unidirectional data flow through a concrete UI event?
- Do you know why reducers must be pure?
- Can you explain when "mutating" reducer code is safe in Redux Toolkit?
- Do you know when Redux earns its cost and when local React state is enough?
- Can you wire React components with
Provider,useSelector, anduseDispatch?
Redux interview questions and answers
1. What is Redux?
Redux is a predictable state management library for JavaScript apps. It stores application state in a single store and updates that state by dispatching actions to reducers.
In React apps, Redux fits state that many components need, state that benefits from debugging history, or server/cache state managed through Redux Toolkit Query.
Add this detail: Do not pitch Redux as "global variables for React." Say it fits state transitions that need structure, traceability, and consistent reads across distant components.
Official reference: Getting Started with Redux.
2. What problem does Redux solve?
Redux solves prop chains through many component layers, shared reads across distant components, and state transitions that need a traceable action history.
It is not needed for every piece of state. Input text, modal open state, hover state, and small component-only state belong in React local state.
Example: Cart, auth session metadata, feature flags, editor document state, and cross-page notification queues have a clearer Redux payoff than a single input's current value.
3. What are the three core Redux concepts?
The core concepts are store, actions, and reducers.
The store holds state. Actions describe what happened. Reducers receive the previous state and an action, then return the next state.
4. What is a Redux store?
The store is the object that holds the entire Redux state tree. It lets you read state with
getState(), update state withdispatch(action), and subscribe to changes.In modern Redux, create the store with Redux Toolkit's
configureStore(), not the oldercreateStore()API.Official reference: Redux Store API.
5. What is an action?
An action is a plain object that describes something that happened in the app. It must have a
typefield and may include apayload.{type: "cart/itemAdded",payload: { id: "p1", quantity: 1 }}Good action names describe events, not setter operations.
cart/itemAddedis clearer thanSET_CART.6. What is a reducer?
A reducer is a pure function that calculates the next state from the previous state and an action.
function counterReducer(state = { value: 0 }, action: { type: string }) {if (action.type === 'counter/incremented') {return { value: state.value + 1 };}return state;}Reducers should not fetch data, mutate external variables, read time randomly, or dispatch actions.
How to test this answer: A reducer should be easy to unit test with plain inputs and outputs. If the reducer needs the current time, random IDs, network data, or
localStorage, that work belongs before the action is dispatched or in async/middleware logic.7. Why must reducers be pure?
Pure reducers make Redux predictable. Given the same previous state and action, the reducer should return the same next state.
This predictability enables debugging, replaying actions, testing reducers as simple functions, and understanding state changes from the Redux DevTools history.
8. What is dispatch?
dispatch()sends an action to the Redux store. The store runs the root reducer with the current state and the dispatched action, then stores the new state.In React components, you normally dispatch action creators:
const dispatch = useDispatch();dispatch(cartItemAdded({ id: 'p1' }));9. What is unidirectional data flow in Redux?
Redux data flow goes in one direction:
- UI triggers an event.
- The app dispatches an action.
- Reducers calculate the next state.
- Components read updated state and re-render.
This keeps state changes from happening in many unrelated places.
10. What is Redux Toolkit?
Redux Toolkit is the official recommended way to write Redux logic. It includes helpers like
configureStore(),createSlice(),createAsyncThunk(), and RTK Query.It reduces boilerplate, sets up store defaults, includes development checks for common mistakes, and lets reducers use draft mutation syntax through Immer.
Official reference: Redux Style Guide.
11. What is
configureStore()?configureStore()creates a Redux store with sensible defaults. It combines reducers, adds middleware, enables Redux DevTools in development, and includes checks that catch accidental mutations and non-serializable values.import { configureStore } from '@reduxjs/toolkit';export const store = configureStore({reducer: {cart: cartReducer,user: userReducer,},});12. What is
createSlice()?createSlice()creates a slice reducer, action creators, and action types from one feature-focused definition.const counterSlice = createSlice({name: 'counter',initialState: { value: 0 },reducers: {incremented(state) {state.value += 1;},},});The code looks like mutation, but Redux Toolkit uses Immer to produce immutable updates safely.
Fresher trap: This does not mean "Redux allows mutation now" everywhere. The safe draft mutation applies inside Immer-powered reducers created by Redux Toolkit. Outside that boundary, keep immutable update rules in mind.
13. What is a slice in Redux?
A slice is the Redux logic for one feature or domain, such as
cart,auth,todos, orproducts. It contains initial state, reducers, generated actions, and selectors for that feature.Feature-based slices keep related state, actions, and reducers in the same file instead of scattering one feature across action, reducer, and constant folders.
14. How does Redux Toolkit allow "mutating" reducer code?
Redux Toolkit uses Immer. Immer gives your reducer a draft version of state. You write changes to the draft, and Immer produces the next immutable state behind the scenes.
This is why
state.value += 1is okay inside acreateSlice()reducer but mutating state directly in a plain hand-written reducer is not okay.15. What is immutability in Redux?
Immutability means you do not change the existing state object. You return a new object or array for changed parts and reuse unchanged parts.
Redux relies on reference changes to know what changed. If you mutate the same object and return it, React Redux may not detect a change correctly.
16. What is React Redux?
React Redux is the official binding library that connects React components to a Redux store. It provides
<Provider>,useSelector(), anduseDispatch().<Provider store={store}>makes the Redux store available to components. Hooks then read and update the store.Official reference: React Redux hooks.
17. What does
<Provider>do?<Provider>passes the Redux store through React context so any nested component can use React Redux hooks.Without
<Provider>,useSelector()anduseDispatch()do not know which Redux store to use.18. What is
useSelector()?useSelector()reads a value from the Redux store. It accepts a selector function and re-renders the component when the selected value changes.const cartCount = useSelector((state: RootState) => state.cart.items.length);Return the smallest value the component needs. Returning a new object every time can cause unnecessary re-renders.
Bad pattern:
const cart = useSelector((state) => ({count: state.cart.items.length,total: state.cart.total,}));This creates a new object on every store update. Prefer separate selectors or a memoized selector when returning derived objects.
19. What is
useDispatch()?useDispatch()returns the store'sdispatchfunction so a component can dispatch actions.const dispatch = useDispatch();function onAddToCart(id: string) {dispatch(itemAdded({ id }));}In TypeScript apps, many teams create a pre-typed
useAppDispatch()hook based on the store's dispatch type.20. What are selectors?
Selectors are functions that read specific data from Redux state.
const selectCartItems = (state: RootState) => state.cart.items;Selectors keep components from knowing the exact state shape. If the store shape changes, you update selectors rather than every component.
21. What are memoized selectors?
Memoized selectors cache derived results. Use them for filtered lists, totals, or expensive derived values from state.
Use memoization when the derived calculation is expensive or returns new arrays/objects that would otherwise cause unnecessary re-renders.
22. How do you handle async logic in Redux?
Reducers must stay pure, so async work happens outside reducers. Common options are thunks,
createAsyncThunk(), RTK Query, or custom middleware.For freshers, know the common flow: dispatch pending, perform the request, dispatch success or failure, and update state based on those actions.
How to choose: Use RTK Query for normal CRUD/server data. Use thunks for custom workflows that coordinate multiple actions, read current state, or mix API calls with client-owned state changes.
23. What is a thunk?
A thunk is a function that can contain async logic and dispatch actions later. Redux Toolkit includes thunk middleware by default.
export const fetchUser = (id: string) => async (dispatch: AppDispatch) => {dispatch(userRequested());const user = await api.getUser(id);dispatch(userReceived(user));};Use thunks for app logic that needs
dispatch,getState, or multiple actions around one async operation.24. What is
createAsyncThunk()?createAsyncThunk()is a Redux Toolkit helper for request-style async logic. It automatically creates pending, fulfilled, and rejected action types.Reducers handle those cases in
extraReducers, which keeps loading and error states predictable.25. What is RTK Query?
RTK Query is Redux Toolkit's data fetching and caching tool. It can generate hooks for queries and mutations, cache server responses, deduplicate requests, and invalidate data by tags.
Use RTK Query when the main problem is server data. Use slices and reducers when the main problem is client-owned application state.
Official reference: RTK Query overview.
26. When should you use Redux instead of React Context?
Use React Context for dependency-style values such as theme, locale, or current user metadata. Use Redux when state changes frequently, many components need slices of it, debugging history matters, or update logic is complex.
Context alone does not provide reducers, middleware, DevTools history, normalized patterns, or built-in server-state caching.
27. What is middleware in Redux?
Middleware runs between dispatching an action and the action reaching reducers. It can log actions, handle async functions, report analytics, or intercept certain actions.
Reducers should not have side effects. Middleware is one safe place for side-effect logic.
28. What are Redux DevTools?
Redux DevTools show dispatched actions, state changes, and the current store state. They help debug why UI changed and what action caused it.
This is one reason Redux still appears in larger codebases: it gives teams a common timeline for state transitions.
29. What should not go into Redux state?
Avoid putting non-serializable values such as DOM nodes, class instances, Promises, functions, and raw
Dateobjects in Redux state. Also avoid storing tiny UI state that only one component uses.Redux state should be serializable because DevTools, persistence, debugging, and predictable updates depend on plain data.
30. How do you test Redux logic?
Reducers are easy to test because they are pure functions. Pass an initial state and an action, then assert the returned state.
For React components connected to Redux, render the component with a real test store when possible. For async data, mock the network boundary or use RTK Query testing patterns instead of testing internal implementation details.
Good reducer test shape:
expect(cartReducer({ items: [] }, itemAdded({ id: 'p1' }))).toEqual({items: [{ id: 'p1', quantity: 1 }],});This tests the state transition rather than the implementation.
Common mistakes freshers make
Treating Redux as required for every React app
Redux is a tool for shared, traceable, complex state. A small form or one-page widget does not need it.
Mutating state in plain reducers
state.items.push(item)is only safe inside Redux Toolkit's Immer-powered reducers. In plain reducers, return a new array or object.Returning too much from
useSelector()If a selector returns a new object on every store update, the component can re-render on unrelated changes. Select the exact values needed or use memoized selectors.
Confusing server state and client state
Server state comes from the backend and needs fetching, caching, invalidation, and refetching. Client state is owned by the UI. RTK Query fits server state more directly than hand-writing loading reducers for every endpoint.
A 45-minute practice drill
Build a mini cart state model:
- Create a
cartSlicewithitemAdded,itemRemoved, andquantityChanged. - Add selectors for item count, subtotal, and whether an item is already in the cart.
- Render a navbar badge with
useSelector(). - Dispatch
itemAdded()from a product card. - Add one reducer test for duplicate add behavior.
- Explain which state should stay local: coupon input text, hover state, and a confirmation modal's open state.
This small drill proves more Redux understanding than memorizing ten definitions.
Official docs worth reading
For a fresher interview, a solid Redux answer has three parts: describe the data flow, state why reducers stay pure, and mention Redux Toolkit as the modern default.
- Rippling Frontend Interview Questions: What to Expect in 2026Prepare for Rippling frontend interviews with React, JavaScript concurrency, schema forms, admin UI system design, and a focused prep plan.作者GreatFrontEnd Team14 分钟阅读Jun 8, 2026
Rippling frontend interview questions usually test practical React, JavaScript concurrency, schema-driven forms, API-backed admin UI, and frontend system design. Prepare to build working features quickly, run code, explain state ownership, and reason about payroll, reporting, workflow, and employee-management interfaces.
For the company-guide view, use the Rippling Front End Interview Guide alongside this article.
Use each question as a working session: ship the baseline first, then explain what changes for validation, pagination, permissions, large data, accessibility, retries, and cross-functional ownership.
What Rippling frontend interviews test
Rippling is a broad enterprise SaaS product. A frontend engineer might work on onboarding, employee records, payroll, benefits, app provisioning, spend management, reports, or Workflow Studio. That product context explains why the interview loop mixes React implementation, JavaScript utilities, DSA, and frontend system design.
Area What to practice Why it matters at Rippling React implementation Schema forms, paginated lists, data tables, grids, editable records, filters, workflow builders Admin workflows are form-heavy and data-heavy. JavaScript Concurrency-limited task runner, event emitter, promise race, bind, flatten, recursive countsInterviews check whether you can write utilities without hiding behind React. API-backed UI Cursor pagination, load more, infinite scroll, dedupe, loading/error states, optimistic updates Rippling interfaces often read and mutate company data through APIs. State modeling Field schemas, derived validity, dependent fields, row-level edits, undo/redo, commit/rollback Enterprise UI punishes duplicated or unclear state. DSA Trees, arrays, subarray sums, grid logic, hash maps, recursion Some loops include a separate algorithm round. Frontend system design Employee directory, reports builder, payroll dashboard, Workflow Studio, feed or masonry layout Senior rounds test product tradeoffs and browser architecture. Behavioral Ownership, speed, project scope, collaboration, production follow-through Hiring-manager rounds dig into how you ship with product, design, and backend. The right prep is not LeetCode-only and not React-only. Rippling rewards engineers who can turn an ambiguous admin workflow into a working, testable interface.
Rippling frontend interview process
Rippling's exact process varies by team. The company hires across many products, so a frontend-leaning role can still include backend API or general coding rounds. Treat recruiter instructions as the source of truth.
Expect a process shaped roughly like this:
Stage What to expect Prep note Recruiter screen Background, motivation, role fit, compensation, team context Ask whether the role is frontend-only or frontend-leaning full stack. Technical phone screen Live React, JavaScript utility, or API-backed UI coding Practice on a small starter project and run code as you go. Hiring manager round Project depth, ownership, product judgment, collaboration, tradeoffs Prepare one detailed project story with architecture, rollout, and metrics. Onsite React round Build an incremental UI feature with state, fetching, validation, tests Expect follow-ups that add pagination, infinite scroll, dependent fields, or dedupe. DSA / JavaScript round Trees, arrays, recursion, event emitter, concurrency, flatten, bindKeep practical JavaScript and algorithm basics warm. System design round Feed, masonry layout, reports builder, employee directory, workflow UI Ground the answer in enterprise admin UI behavior, permissions, and large data. Behavioral / team round Cross-functional work, ownership, pace, mistakes, conflict Prepare concrete STAR stories; avoid generic teamwork answers. If the loop includes a web API round, practice a small Node or Express service with CRUD endpoints, validation, error responses, and a short discussion of auth, logging, rate limits, and monitoring.
Rippling frontend interview questions to practice
Use these as practice prompts, not a guaranteed question bank. They cover the recurring Rippling shape: practical React, async JavaScript, data-heavy admin screens, and system design.
Rippling question or task What to practice Build a grid of lights in React where clicking a cell toggles its state and derived counters update. Grid state, immutable updates, derived counts, testable components Build a 2048-style board model with initialization, move logic, merge behavior, and tests. 2D arrays, pure functions, edge cases, unit tests Build a paginated list that fetches items from an API and appends the next page when the user clicks "Load more." Fetch state, cursor tokens, dedupe, loading and error states Extend the paginated list with infinite scroll using IntersectionObserverand a throttled fallback.Browser APIs, cleanup, duplicate request prevention Build a schema-driven React form with text, select, checkbox, and dependent fields. Schema modeling, controlled inputs, validation, field dependencies Add form submission that returns values, validation state, and field-level errors. Error display, submit gating, API contract, accessibility Implement a task runner that executes async tasks with a concurrency limit and preserves result order. Promises, queues, worker loops, error policy Implement promise race behavior and explain how cancellation differs from ignoring stale results. Promise timing, cleanup, AbortController, stale guardsCount all comments in a nested replies tree. Recursion, iterative traversal, tree data Implement an event emitter or pub/sub utility with cleanup. Map,Set, listeners, unsubscribe, one-time handlersFlatten a nested array where top-level items keep priority over deeper items. Queue traversal, recursion vs iteration, ordering rules Implement Function.prototype.bindbehavior for normal calls and partial arguments.this, closures, function contextSolve max tree depth and subarray sum style questions. DFS, hash maps, prefix sums, complexity Build a small employee directory with search, filters, row actions, and permission-aware columns. Admin UI, data table state, bulk actions, role-based rendering Design a social feed or activity feed for company events such as hires, approvals, payroll status, and app provisioning. Feed ranking, pagination, optimistic updates, dedupe, moderation Design a masonry layout for cards with variable heights and large image or report previews. Layout algorithms, responsive columns, virtualization Design a reports builder where users pick attributes, group rows, filter columns, and drill into aggregate values. Frontend system design, query lifecycle, preview state, cancellation Design a Workflow Studio-style automation builder with trigger nodes, action nodes, step configuration, undo/redo, and execution log. Graph UI, schema-aware forms, validation, local drafts, long-running jobs How to answer the schema-driven form question
Rippling-shaped forms are rarely just two inputs and a submit button. Benefits enrollment, payroll setup, app provisioning, onboarding, and workflow actions all depend on field schemas, validation rules, permissions, and dependent fields.
Start with a small schema:
type FieldSchema =| {id: string;label: string;type: 'text';required?: boolean;}| {id: string;label: string;type: 'select';options: Array<{ label: string; value: string }>;required?: boolean;dependsOn?: string;}| {id: string;label: string;type: 'checkbox';};type FormState = Record<string, string | boolean>;Then build in layers:
- Render each field type from schema.
- Store values by field ID.
- Derive validation errors from schema and current values.
- Hide or disable dependent fields when their parent value is missing.
- Submit values only when the form is valid.
A good answer covers:
- Controlled inputs: the form owns the visible values.
- Derived validity: do not store
isValidseparately when it can be derived from values and schema. - Dependent fields: reset a child field when the parent changes to an incompatible value.
- Field-level errors: connect error text with inputs through accessible labels and descriptions.
- Server errors: map API validation errors back to fields when possible.
- Schema trust: the client can render schema, but the server still validates submitted data.
Practice this with Contact Form for validation habits and Users Database for CRUD-style state.
How to answer pagination and infinite scroll
A Rippling UI often starts as "fetch and display a list" and then grows: cursor pagination, load more, infinite scroll, dedupe, sorting, filters, and retries.
Use a state shape that separates data, cursor, and request status:
type PageItem = { id: string };type PageState<T extends PageItem> = {items: Array<T>;nextCursor: string | null;status: 'idle' | 'loading' | 'success' | 'error';errorMessage?: string;};The fetch function should prevent duplicate in-flight requests and ignore stale responses:
let activeRequestId = 0;async function loadNextPage() {const cursor = state.nextCursor;if (state.status === 'loading' || cursor == null) {return;}const requestId = ++activeRequestId;setState((current) => ({...current,errorMessage: undefined,status: 'loading',}));try {const response = await fetchItems({ cursor });// A newer request has started, so this response should not update the UI.if (requestId !== activeRequestId) {return;}setState((current) => {const seenIds = new Set(current.items.map((item) => item.id));// Cursor APIs can overlap pages, so append only unseen records.const newItems = response.items.filter((item) => !seenIds.has(item.id));return {...current,items: [...current.items, ...newItems],nextCursor: response.nextCursor,status: 'success',};});} catch {if (requestId !== activeRequestId) {return;}setState((current) => ({...current,errorMessage: 'Could not load more items.',status: 'error',}));}}In the interview, discuss what you would tighten in production code:
- Use functional state updates to avoid stale closure bugs.
- Use
AbortControllerwhen the fetch layer supports cancellation. - Disable "Load more" while a request is in flight.
- Reset list state when search, filters, or sorting changes.
- Use
IntersectionObserverfor infinite scroll, with a visible fallback button. - Deduplicate by stable ID because APIs can return overlapping pages.
- Keep loading, empty, and error states separate.
- Test first page, next page, duplicate rows, error, retry, and end-of-list.
Practice Job Board and Data Table until this flow feels automatic.
How to answer the concurrency task runner
The concurrency-limited task runner is a compact JavaScript problem with product value. Rippling's platform work includes workflows, reports, provisioning steps, and async jobs where unbounded parallelism can overload a service.
Start with the contract:
- Input is an array of functions that return promises.
- At most
limittasks run at the same time. - Results preserve input order.
- The function resolves when all tasks finish.
- Decide whether one failure stops the whole run or returns per-task errors.
One implementation:
async function runWithConcurrency<T>(tasks: Array<() => Promise<T>>,limit: number,): Promise<Array<T>> {if (!Number.isInteger(limit) || limit < 1) {throw new RangeError('limit must be a positive integer');}const results = new Array<T>(tasks.length);let nextIndex = 0;async function worker() {while (nextIndex < tasks.length) {// Claim the next task synchronously before awaiting its result.const currentIndex = nextIndex;nextIndex += 1;results[currentIndex] = await tasks[currentIndex]();}}const workerCount = Math.min(limit, tasks.length);await Promise.all(Array.from({ length: workerCount }, worker));return results;}Then explain follow-ups:
- Invalid limit: reject or clamp when
limit < 1. - Failure policy: fail fast with
Promise.all, or collect{ status, value, reason }per task. - Cancellation: pass an
AbortSignalinto tasks when the caller cancels. - Retry: retry transient failures with capped attempts and backoff.
- Progress: expose completed count for a UI progress bar.
- Fairness: preserve input order for results even when task completion order differs.
This is a better answer than using
Promise.all(tasks.map(...)), because unbounded concurrency is the bug the prompt is trying to reveal.How to answer 2048 and grid logic
Game prompts test state transitions without CSS distraction. For 2048, keep the board logic pure:
type Board = Array<Array<number>>;function compact(row: Array<number>): Array<number> {return row.filter((value) => value !== 0);}function mergeLeft(row: Array<number>): Array<number> {const values = compact(row);const merged: Array<number> = [];for (let index = 0; index < values.length; index += 1) {if (values[index] === values[index + 1]) {merged.push(values[index] * 2);// Skip the next tile because it has already been merged.index += 1;} else {merged.push(values[index]);}}while (merged.length < row.length) {merged.push(0);}return merged;}After
mergeLeftworks, derive other directions by reversing or transposing the board. Add tests before UI:[2, 0, 2, 0] -> [4, 0, 0, 0][2, 2, 2, 2] -> [4, 4, 0, 0][4, 4, 8, 0] -> [8, 8, 0, 0][2, 4, 8, 16] -> [2, 4, 8, 16]
For grid-light prompts, use the same habit: pure toggle logic first, React state second. Interviewers can change the prompt quickly, and pure functions make follow-ups easier.
Frontend system design: Design a Rippling reports builder
Rippling's engineering blog on real-time reporting is useful background because reports combine frontend attribute selection with query planning, permissions, caching, and large result sets. A frontend system design answer should not try to design the whole analytics backend. Focus on the browser contract.
Clarify scope:
- Can users select fields across HR, IT, finance, and third-party apps?
- Do we support grouping, filters, pivots, rollups, and drilldowns?
- Is the preview sampled or full data?
- Do permissions hide fields, rows, or aggregates?
- Do reports autosave as drafts?
Then structure the design:
Design area What to cover Attribute picker Search, grouping by product area, permissions, selected-field summary, keyboard navigation Query builder Client-side report config, validation, dependent options, disabled invalid states Preview lifecycle Debounced preview, cancellation, stale response guard, loading, empty, error, sampled preview Result table Pagination, virtualization, column resizing, sorting, drilldown, export, copy Caching Cache by report config and permission context; invalidate when filters, role, or fields change Drafts Autosave, dirty state, undo/redo, conflict behavior when another edit wins Accessibility Form labels, keyboard access, grid navigation, focus recovery after preview updates Observability Track slow previews, canceled requests, empty results, field-search misses, and export errors Good follow-up answers:
- Permissions: never rely only on hiding fields in the client; the API enforces access.
- Debounce: debounce preview requests, not the user's input state.
- Cancellation: cancel or ignore stale preview requests as the user edits the report.
- Large results: use server pagination plus row virtualization; do not render every row.
- Drilldown: clicking an aggregate opens a filtered detail view tied to the group and metric.
- Errors: separate invalid report config, permission errors, query timeout, and empty results.
This is the kind of system design that feels closer to Rippling than a generic social feed.
JavaScript and DSA checklist
Rippling prep should keep practical JavaScript and DSA warm at the same time.
Topic Practice questions Async JavaScript Task runner with concurrency, promise race, async memoization, retry, stale response handling Events Event emitter, pub/sub, unsubscribe cleanup, one-time listeners Arrays and functions Flatten with custom ordering, bindpolyfill, grouping, dedupe by ID, array transformsTrees and recursion Count nested comments, max tree depth, tree filtering, nested menu rendering Hash maps Subarray sum, frequency counts, duplicate detection, lookup tables React UI Schema forms, data table, paginated list, grid of lights, editable rows, controlled inputs System design Reports builder, employee directory, payroll dashboard, Workflow Studio, feed, masonry layout Useful GreatFrontEnd practice:
- Map Async Limit
- Event Emitter
- Function.prototype.bind
- Flatten
- Contact Form
- Users Database
- Data Table
- Front End System Design Playbook
Rippling resources to review
Use Rippling's own product and engineering material to make system design answers concrete:
- Rippling careers: Company mission and product areas across HR, IT, finance, and automation.
- Inside Rippling's real-time reporting engine: Attribute selection, query planning, execution, caching, and report product constraints.
- From thousands to millions: Scaling our reporting engine: Large report workloads, filters, drilldowns, rollups, and performance constraints.
- Managing and scoping React Native upgrades: TypeScript, mobile release management, testing, monitoring, and phased rollout details.
Interview preparation plan for Rippling
Use this as a Rippling-specific checklist. The exact order can change, but the coverage should stay the same: practical React, async JavaScript, admin UI system design, DSA, and project depth.
Prep area What to do Rippling-specific angle Practical React Build schema form, paginated list, infinite scroll, data table, grid of lights, editable rows, and search/filter UI. These map to employee records, reports, approvals, payroll setup, and onboarding workflows. Async JavaScript Implement concurrency-limited task runner, event emitter, async memoization, promise race, debounce, and retry with backoff. Rippling screens often check whether you can control async work without library help. DSA Practice max tree depth, subarray sum, tree traversal, flatten, hash maps, and grid logic. Some loops include a separate algorithm round. Frontend system design Design employee directory, reports builder, payroll run dashboard, Workflow Studio, and an activity feed. Cover permissions, large data, long-running jobs, drafts, validation, and error states. API-backed UI Build a small mocked API and wire React to it with loading, empty, error, retry, pagination, and optimistic updates. Frontend-leaning roles can still ask for web API thinking. Behavioral and project depth Prepare one deep project walkthrough and 5-7 STAR stories around ownership, speed, collaboration, conflict, and mistakes. Hiring-manager rounds dig into what you personally owned and how you worked with other disciplines. Mock loop Run one React mock, one JavaScript utility mock, one DSA mock, one system design mock, and one project deep dive. Fix the weakest answer after each mock. If you have only 72 hours, prioritize schema form, paginated list with infinite scroll, task runner with concurrency, event emitter, max tree depth, subarray sum, reports-builder system design, and your strongest project story.
Final tips
Rippling frontend prep should end with one clear story: "I can take an ambiguous admin workflow and turn it into a working, testable, API-backed UI." That means the best practice set is not a random pile of React trivia. It is schema forms, paginated lists, data tables, async concurrency, event emitters, tree traversal, and product-shaped system design.
- Snowflake Frontend Interview Questions: Prep Guide for 2026Prepare for Snowflake frontend interviews with React, JavaScript, UI coding, data-heavy frontend design, and a focused 2026 study plan.作者GreatFrontEnd Team15 分钟阅读Jun 8, 2026
Snowflake frontend interview questions usually test JavaScript fluency, React state, grid-style UI coding, and frontend system design for data tools. Prepare for interactive components, async state, graph or dynamic-programming follow-ups, and Snowsight-shaped interfaces such as worksheets, dashboards, result grids, and AI-assisted SQL.
For the company-guide view, use the Snowflake Front End Interview Guide alongside this article.
Use each question as a working session: build the baseline, then explain what changes for keyboard input, async loading, large results, permissions, accessibility, and slow queries.
What Snowflake frontend interviews test
Snowflake is a data cloud company, but frontend prep should not become database-internals prep. The frontend work is closer to building a browser-based workspace for analysts, engineers, and data teams: editors, query results, dashboards, catalog search, notebooks, Streamlit apps, and AI side panels.
Area What to practice Why it matters at Snowflake React implementation Checkerboards, grid games, editable tables, typeahead, tabbed workspaces, dashboard tiles Small UI prompts reveal state ownership, event handling, and follow-up resilience. JavaScript Event emitter, debounce, throttle, promises, this, closures, arrays, maps, undo/redoFrontend rounds often check language fluency without much library help. Data rendering Result tables, pagination, virtualization, sorting, filtering, column sizing, empty states Snowsight users inspect query output and dashboards inside the browser. Async UI Query execution, cancellation, stale response handling, loading/error states, retries Data tools spend a lot of time waiting on remote work. Algorithms Grid traversal, shortest path, dynamic programming, Sudoku or Tic Tac Toe validation, graph search UI-game prompts can turn into algorithmic follow-ups quickly. Frontend system design SQL worksheet, query-result viewer, dashboard builder, autocomplete, AI code assistant Senior loops test whether you can design the client side of a data product. Behavioral Project depth, tradeoffs, ownership, customer focus, collaboration, mistakes Snowflake teams care about how you make decisions in ambiguous product work. The right prep balance is JavaScript plus practical UI. Do enough Snowflake product reading to make your system design answers concrete, but spend most of your interview practice writing and explaining code.
Snowflake frontend interview process
Snowflake's hiring process page says engineering hiring consists of four stages and can take up to two to four weeks, with variation by team and role. It also says most open jobs include phone screens and onsite or video interviews.
Expect a process shaped roughly like this:
Stage What to expect Prep note Recruiter screen Background, role fit, location, timeline, and team discussion Ask whether the first technical round is React, JavaScript, DSA, or system design. Technical screen Live coding in JavaScript, TypeScript, React, or a shared editor Practice from a blank file without relying on autocomplete. Second technical screen UI coding, graph/grid logic, or JavaScript utility implementation Be ready for an interactive grid prompt followed by algorithmic follow-ups. Onsite coding Practical UI build, JavaScript fundamentals, or LeetCode-style problem Build a working baseline before optimizing. Frontend system design Data-tool UI such as a worksheet, result grid, dashboard, or autocomplete Spend more time on browser behavior, state, networking, and rendering than cloud boxes. Project / behavioral Deep project walkthrough, collaboration, tradeoffs, mistakes Choose one frontend project where you can explain design, rollout, metrics, and failures. Treat your recruiter instructions as the source of truth. Some loops lean React-heavy; others include a general software engineering coding round.
Snowflake frontend interview questions to practice
Use these as practice prompts, not a guaranteed question bank. They cover the recurring shape: interactive grids, JavaScript utilities, React rendering, data-heavy UI, and frontend architecture.
Snowflake question or task What to practice Build a checkerboard where the board size is configurable and each square renders the correct alternating color. 2D rendering, derived cells, props, CSS grid, React state Extend the checkerboard with selectable cells, keyboard navigation, and reset behavior. Focus state, arrow keys, stable coordinates, accessibility Build a robot-grid game where a robot moves within boundaries and cannot leave the board. Event handling, grid state, boundary checks, testable move logic Add randomized target cells, a score counter, and collision detection to the robot grid. Derived state, random placement, win conditions, reset logic Validate a Tic Tac Toe or Sudoku board and explain invalid states. Game-state invariants, row/column scans, sets, edge cases Find the minimum-cost path from one node or cell to another in a graph or grid. BFS, Dijkstra-style thinking, dynamic programming, complexity Explain useMemoanduseCallback, then decide where memoization helps in a table or editor UI.React render behavior, reference identity, profiling judgment Implement an event emitter with subscribe, unsubscribe, emit, and one-time listeners. Map,Set, cleanup, listener mutation during emitImplement debounce or throttle and explain where it belongs in a SQL editor or object search. Timers, closures, cancellation, search pacing Build a data table that supports sorting, pagination, loading, empty, and error states. Large result rendering, state derivation, URL state, accessibility Design a query-result viewer that can handle thousands of rows without freezing the page. Virtualization, pagination, column sizing, copy behavior, query cancellation Build an autocomplete for SQL keywords, table names, and column names. Request ordering, ranking, permissions, keyboard combobox behavior Implement undo/redo for a small calculator or editor command history. Command pattern, reversible state, stacks, redo invalidation Recreate a subset of JSON.stringifyor deep clone for common JavaScript values.Recursion, type checks, arrays vs objects, unsupported values Design a Snowsight-style worksheet with code editor, query execution, result panel, saved tabs, and query history. Frontend system design, state ownership, async query lifecycle Design a dashboard builder where each tile runs its own query and shares filters with other tiles. Multi-request state, cache, chart rendering, partial failure Explain one frontend project you owned, including constraints, tradeoffs, and what you would change now. Project depth, communication, ownership How to answer the checkerboard and grid UI question
The checkerboard prompt looks simple, but it tests whether you separate data from rendering. Start by naming the state:
- Board size is a number, not an array stored in state.
- Cell color is derived from row and column.
- Selected cell is stored as coordinates.
- Keyboard movement updates coordinates, not DOM position.
One clean helper:
type Cell = {id: string;row: number;column: number;tone: 'light' | 'dark';};function createBoard(size: number): Array<Cell> {return Array.from({ length: size * size }, (_, index) => {// Convert the flat array index back into board coordinates.const row = Math.floor(index / size);const column = index % size;return {id: `${row}-${column}`,row,column,tone: (row + column) % 2 === 0 ? 'light' : 'dark',};});}Then explain follow-ups:
- Dynamic size: clamp size to a reasonable range and preserve selection only if the selected coordinate still exists.
- Keyboard input: keep the active cell in React state and handle arrow keys with boundary checks.
- Accessibility: use a grid-like focus model, visible focus, and labels such as "Row 3, column 2."
- Performance: memoize
createBoard(size)only when board creation or rendering becomes measurable; do not add memoization as decoration. - Testing: verify alternating colors, boundary movement, selection, reset, and invalid sizes.
For a robot grid, use the same coordinate model. The move function should be independent of React so it can be tested quickly:
type Position = {row: number;column: number;};function move(position: Position,direction: 'up' | 'down' | 'left' | 'right',size: number,): Position {const next = {up: { row: position.row - 1, column: position.column },down: { row: position.row + 1, column: position.column },left: { row: position.row, column: position.column - 1 },right: { row: position.row, column: position.column + 1 },}[direction];return {// Clamp movement so the robot stays inside the board.row: Math.max(0, Math.min(size - 1, next.row)),column: Math.max(0, Math.min(size - 1, next.column)),};}This is the fastest path to a working answer: pure logic first, UI rendering second, follow-ups third.
How to answer React hooks questions
React hook questions at Snowflake usually matter because data-tool UIs can rerender large trees: editors, result panes, side panels, schema browsers, and tables. Avoid memorized definitions. Explain what problem each hook solves.
Hook Useful answer Bad interview habit useMemoCache an expensive derived value between renders when dependencies are stable. Wrapping every computed value without measuring cost. useCallbackKeep a function reference stable when a memoized child or subscription depends on identity. Using it for every event handler even when no child benefits. useRefStore mutable values that should not trigger rerenders, such as latest request ID, DOM node, or timer ID. Using refs to bypass React state for visible UI. useEffectSynchronize with systems outside render: network subscriptions, timers, editor instances, browser events. Fetching without cleanup or ignoring stale responses. For a result table, say this:
- Use
useMemofor derived rows only if filtering, sorting, or grouping is expensive enough to matter. - Use stable row IDs so React preserves row identity across sorting and pagination.
- Use
useCallbackwhen row actions are passed into memoized row components. - Use virtualization before trying to memoize thousands of row elements.
- Profile before claiming a hook fixed performance.
Practice this answer with Data Table and Users Database. The useful skill is deciding where state lives and what is derived, not reciting hook definitions.
How to answer event emitter
An event emitter maps well to Snowflake-style frontends because editor events, query status updates, workspace tabs, and panels all need subscription cleanup.
Start with the API:
type Listener<T = unknown> = (payload: T) => void;class EventEmitter {private listeners = new Map<string, Set<Listener>>();on(eventName: string, listener: Listener) {if (!this.listeners.has(eventName)) {this.listeners.set(eventName, new Set());}this.listeners.get(eventName)!.add(listener);return () => this.off(eventName, listener);}off(eventName: string, listener: Listener) {const listeners = this.listeners.get(eventName);if (listeners == null) {return;}listeners.delete(listener);if (listeners.size === 0) {this.listeners.delete(eventName);}}emit(eventName: string, payload?: unknown) {const listeners = this.listeners.get(eventName);if (listeners == null) {return;}// Snapshot listeners so unsubscribe calls during emit do not skip callbacks.for (const listener of Array.from(listeners)) {listener(payload);}}once(eventName: string, listener: Listener) {const unsubscribe = this.on(eventName, (payload) => {unsubscribe();listener(payload);});return unsubscribe;}}Explain the edge cases after the baseline works:
- Listener removal during
emit - Duplicate listener policy
- Error handling when one listener throws
- Cleanup of empty event sets
- Return value of
on - Whether event names should be typed
For a frontend round,
Map<string, Set<Listener>>is a good default. It gives constant-time deletion, avoids accidental duplicate listeners, and keeps cleanup easy to explain.How to answer data table and result-grid questions
Snowflake product context makes table questions more important than they look. Snowsight dashboards and worksheets display query results, charts, and tables. A naive table is fine for 50 rows; it starts to break when the user sorts, filters, resizes columns, copies cells, runs a new query, or changes role permissions.
Start with a clear model:
type QueryResultState = {queryId: string;status: 'idle' | 'running' | 'success' | 'error' | 'canceled';columns: Array<{ id: string; label: string; type: string }>;rows: Array<Record<string, string | number | boolean | null>>;sort: { columnId: string; direction: 'asc' | 'desc' } | null;page: number;errorMessage?: string;};Then cover:
- Loading model: running query, loading first result page, and loading additional pages are different states.
- Cancellation: if the user edits and reruns the query, the old result should not overwrite the new one.
- Pagination vs virtualization: server pagination limits transferred data; virtualization limits rendered DOM nodes.
- Column behavior: support sticky headers, resizing, overflow, copy, and type-aware formatting.
- Empty and error states: no rows, permission denied, canceled query, timeout, and syntax error need different messages.
- URL state: query ID, active tab, selected result, or filters may belong in the URL; draft editor text usually does not.
- Accessibility: keyboard navigation, focus recovery after rerun, and readable table semantics matter.
Practice Data Table and How to handle large datasets in front-end applications, then adapt the answer to query results instead of generic users.
Frontend system design: Design a Snowsight worksheet
A Snowflake frontend system design round should spend most of its time on the browser contract. A good worksheet design includes a code editor, run controls, context selector, query history, result panel, saved tabs, schema browser, and an optional AI assistant panel.
Clarify scope first:
- Are we designing SQL only, or SQL and Python?
- Do we need saved worksheets, temporary drafts, or both?
- Do results stream in chunks or arrive as pages?
- Do users collaborate on worksheets?
- Does the AI assistant only suggest code, or can it edit the worksheet?
Then organize the answer:
Design area What to cover Editor Monaco-style editor, syntax highlighting, keyboard shortcuts, autocomplete providers Query lifecycle Run, cancel, rerun, timeout, syntax error, permission error, and result pagination State ownership Local draft, saved worksheet, active tab, warehouse/role context, query result cache Result rendering Pagination, row virtualization, column resizing, sticky headers, copy cell, chart handoff Autocomplete SQL keywords, functions, table names, column names, permission-aware catalog search AI panel Streaming suggestions, accepting/rejecting edits, cancellation, prompt context, audit trail Performance Lazy-load editor and chart bundles, avoid rendering all results, isolate heavy panels Reliability Ignore stale responses, recover drafts, retry transient failures, keep failed panels contained Accessibility Keyboard navigation, focus recovery, command labels, screen-reader-friendly status updates The strongest answers connect product behavior to implementation. For example, if the user changes role or warehouse, cached schema suggestions may no longer be valid. If a query is canceled, the result panel should show the canceled state for that query, not a generic error. If a large result set comes back, the app should render the first page quickly and avoid locking the main thread.
Useful GreatFrontEnd practice:
- Autocomplete
- Data Table
- Front End System Design Playbook
- How to handle large datasets in front-end applications
JavaScript and DSA checklist
Snowflake prep should cover both frontend utilities and algorithmic grid problems.
Topic Practice questions Arrays and strings Flatten, deep clone, JSON.stringify, find duplicates, group records, merge sorted arraysTimers and async Debounce, throttle, promise utilities, stale response guards, retry with backoff Events Event emitter, pub/sub cleanup, keyboard handlers, listener mutation during emit UI games Checkerboard, robot grid, Tic Tac Toe, Sudoku validation, memory game Graphs and grids BFS, DFS, shortest path, minimum-cost path, visited-state tracking React Hooks, memoization, controlled inputs, derived state, focus management, rendering large lists System design Worksheet, autocomplete, result grid, dashboard, AI assistant panel Do not treat DSA as a separate universe. Many Snowflake-friendly coding prompts are grid UI prompts that become graph problems through follow-ups.
Snowflake resources to review
Use official Snowflake material to make system design answers concrete:
- Snowflake hiring process: Engineering process timing and role variation.
- Snowsight web interface: Worksheets, notebooks, dashboards, Streamlit apps, monitoring, and admin workflows.
- Querying data using worksheets: Query editor behavior, autocomplete, results, and worksheet context.
- Work with worksheets in Snowsight: Keyboard shortcuts, query organization, sharing, and worksheet management.
- Visualizing data with dashboards: Dashboard tiles, filters, sharing, and query-backed charts.
- Streamlit in Snowflake workspaces: Editing, deploying, Git-backed workspaces, and app lifecycle inside Snowsight.
Interview preparation plan for Snowflake
Use this as a Snowflake-specific checklist. The order matters less than the coverage: JavaScript, grid UI, data rendering, system design, and project depth.
Prep area What to do Snowflake-specific angle JavaScript fundamentals Implement event emitter, debounce, throttle, deep clone, JSON.stringify, promise utilities, and undo/redo.These show language control without framework help. React UI coding Build checkerboard, robot grid, Tic Tac Toe, typeahead, tabs, and editable table in timed 30-45 minute sessions. Grid prompts map well to Snowflake's UI-coding style. Data-heavy UI Build data table, virtualized result viewer, dashboard tile layout, and schema browser. Snowsight work depends on rendering, searching, and navigating large data views. Algorithms Practice BFS/DFS, shortest path, DP on grids, Sudoku validation, and graph traversal. Some frontend prompts deepen into graph or path problems. Frontend system design Design worksheet, autocomplete, query-result grid, dashboard builder, and AI side panel. Explain editor state, query lifecycle, cancellation, permissions, virtualization, and progressive results. Behavioral and project depth Prepare one project deep dive and 6-8 stories across ownership, collaboration, mistakes, mentoring, and tradeoffs. Choose stories involving complex UI, performance, data visualization, platform tooling, or editor work. Mock loop Run one React mock, one JavaScript utility mock, one grid/DSA mock, one system design mock, and one project deep dive. Fix weak answers after each mock instead of adding random questions. If you have only 72 hours, prioritize checkerboard or robot grid, event emitter, debounce, data table, one graph shortest-path problem, worksheet system design, and your best project story.
Final tips
Snowflake frontend prep should end with one clear story: "I can build the UI, explain the JavaScript, and reason about data-tool behavior in the browser." That means the best practice set is not 100 random React questions. It is a smaller set of Snowflake-shaped drills: interactive grids, React hooks, event emitter, debounce, result tables, autocomplete, graph traversal, and a Snowsight worksheet design.
- Discord Frontend Interview Questions: What to Expect in 2026Prepare for Discord frontend interviews with practical question patterns, React and JavaScript prep, chat UI system design, and a focused Discord preparation plan.作者GreatFrontEnd Team17 分钟阅读Jun 5, 2026
Discord frontend interview questions usually test whether you can build and explain realtime product UI: chat, message lists, editable components, async events, large-list rendering, and JavaScript primitives that keep a client responsive. Prepare for React, TypeScript, browser fundamentals, frontend system design, and behavioral rounds about collaboration and product judgment.
For the company-guide view, use the Discord Front End Interview Guide alongside this article.
Use each question as a working session: solve the baseline prompt, then explain what would change for larger data, unreliable connections, accessibility requirements, slow devices, and product follow-ups.
What Discord frontend interviews test
Discord is a realtime communication product, so frontend interviews do not stop at "can you render a component?" A useful Discord client has to handle fast-changing events, long chat histories, thousands of members and channels, typing indicators, presence, reactions, attachments, markdown, voice/video state, unreliable connections, and heavy user-generated content.
Area What to practice Why it matters at Discord React implementation Chat UI, editable cells, spreadsheet grids, message actions, mention pickers, virtualized lists These map to message views, channel lists, member lists, modals, and internal tooling. JavaScript Event emitter, debounce, throttle, DOM traversal, async events, timers, stale updates Realtime clients depend on event routing, cleanup, and input pacing. Realtime UI Optimistic messages, retries, typing indicators, reconnect behavior, duplicate event handling A chat client must feel fast while still correcting itself when the network disagrees. Data modeling Messages, channels, users, cell formulas, derived values, normalized state The interview often deepens through follow-ups that punish copied or duplicated state. Frontend system design Discord-style chat, messaging systems, presence, autocomplete, server recommendations The strongest answers connect UI behavior to API contracts and transport choices. Behavioral Ownership, ambiguity, conflict, feedback, product usage, cross-functional work Discord's loop includes values and cross-functional signal, not only coding. The best preparation is to build Discord-shaped interfaces, then explain how they behave when data grows, events arrive out of order, or the user loses connection.
Discord frontend interview process
The exact process changes by team and level, but prepare for this shape:
Stage What to expect Prep note Recruiter screen Role fit, timeline, compensation, location, and interview logistics Ask whether the technical round is React, JavaScript, DSA, or fullstack. Hiring manager screen Background, project depth, Discord interest, and team alignment Prepare a concise story about why Discord and what product areas you use. Technical screen One practical coding exercise, often in your own editor or a live UI Build a working baseline before optimizing or abstracting. Final interview loop Coding, architecture, project discussion, values, and cross-function Practice narrating tradeoffs, not only writing code. Senior/project deep dive A project retrospective with architecture, alternatives, and impact Pick one project where you owned meaningful frontend decisions. Discord's own interview preparation guide says technical interviews are based on real work and can include coding, architecture, values, attitude, and specialty sessions. That is the right way to calibrate your prep: practice building and explaining product features, not memorizing trivia.
Treat your recruiter's instructions as the source of truth. Your loop may be frontend-only, backend-aware, or broader architecture-heavy depending on the role.
Real Discord frontend interview questions to practice
Use these as practice prompts, not a guaranteed question bank. They cover the recurring Discord-style patterns: realtime UI, chat state, editable components, JavaScript primitives, and frontend system design.
Discord question or task What to practice Build a Discord-like chat interface with a message composer, message list, and basic message actions. React state, list rendering, controlled input, optimistic updates Extend a chat UI so users can edit, delete, retry, and display message-send status. Message identity, derived status, rollback behavior, error states Add typing indicators and reconnect behavior to a chat view. Timers, event expiry, WebSocket lifecycle, stale event cleanup Build an editable React cell like a spreadsheet cell. Display/edit mode, focus management, keyboard behavior, controlled inputs Build a spreadsheet-style grid where users can edit cells and enter simple formulas. Cell data model, dependency tracking, recalculation, circular references Implement a debounce utility and explain where it would be useful in Discord. Closures, timers, cancellation, search and typing-indicator pacing Implement an event emitter with subscribe, unsubscribe, emit, and once behavior. Listener storage, cleanup, re-entrancy, event payloads Write a function that finds elements by class name without using the browser's native helper. DOM traversal, recursion or iteration, matching logic Build a simple socket-based chat service or messaging layer. Message delivery, connection lifecycle, fan-out, ordering Design a user messaging system that supports sending, receiving, editing, and displaying messages reliably. Client-server contracts, WebSocket events, idempotency, retry behavior Solve a word-search, substring, or trie-style lookup problem. Strings, prefix search, tries, complexity analysis Design a Discord-like chat client from the frontend perspective. Data model, transport events, normalized state, rendering, offline behavior Design realtime recommendations for users joining new servers or communities. Product systems, ranking signals, frontend data needs, empty states Walk through a project you led and explain the technical tradeoffs you made. Project depth, ownership, alternatives, results Explain why you want to work at Discord and what part of the product interests you. Product usage, motivation, user empathy Describe a time a project failed, requirements changed, or feedback forced you to adjust your technical direction. Reflection, collaboration, judgment Notice the repeated theme: practical UI plus event-driven state. Even a simple utility question can lead back to Discord's product. Debounce connects to search and typing indicators. Event emitters connect to gateway events. Editable grids connect to internal tools and data-heavy UI. Chat prompts connect to the core product.
How to answer the chat UI question
Start with a small data model before writing components:
type MessageStatus = 'sending' | 'sent' | 'failed';type Message = {id: string;channelId: string;authorId: string;content: string;createdAt: number;editedAt?: number;status: MessageStatus;};Use stable message IDs, not array indexes. Keep the input draft separate from the message list. Derive visible state from messages rather than copying the same information into several local states.
A good baseline includes:
- Message composer with controlled input
- Scrollable message list
- Send action
- Loading, empty, and error states
- Edit and delete actions
- Timestamps and author display
- Disabled states for invalid or in-flight actions
Then discuss follow-ups:
- Optimistic send: Insert a temporary message immediately, then replace it with the server-confirmed message or mark it as failed
- Retry: Keep failed messages visible with a retry action instead of silently dropping them
- Duplicate events: If the WebSocket sends the same message you already inserted optimistically, reconcile by client request ID or server message ID
- Message edits: Update the message by ID and preserve the original ordering unless the product explicitly sorts by edit time
- Deletes: Decide whether deletion removes the message, replaces it with a tombstone, or hides it depending on moderation and audit needs
- Scroll behavior: Auto-scroll only when the user is near the bottom. If the user is reading older messages, show a new-message affordance instead of jumping
- Loading older messages: Preserve scroll position when prepending older messages
- Large histories: Use virtualization or windowing when the list grows large, and plan for dynamic row heights
Practice the base implementation with Data Table for stable row identity and Autocomplete for async input behavior, then adapt those habits to chat.
How to answer the spreadsheet cell question
The editable-cell prompt looks small, but it tests whether you can separate UI mode, input state, saved state, focus, and keyboard behavior.
Start with one cell:
- Display mode shows the committed value
- Edit mode shows an input
- Enter commits the draft
- Escape cancels the draft
- Blur either commits or cancels, depending on the product requirement
- Tab and arrow keys move focus when the interviewer asks for grid behavior
One possible component contract:
type EditableCellProps = {id: string;value: string;onCommit: (id: string, nextValue: string) => void;onNavigate?: (id: string,direction: 'up' | 'down' | 'left' | 'right',) => void;};Keep transient draft text inside the cell while editing. Keep committed cell values in the parent grid. That gives the parent one source of truth and still lets each cell manage local focus and selection behavior.
For a spreadsheet grid, explain the deeper model:
type Cell = {id: string; // "A1", "B2", etc.rawValue: string; // typed text, including formulascomputedValue: string | number | null;error?: 'invalid-formula' | 'circular-reference';};Important follow-ups:
- Raw vs computed values: Store exactly what the user typed separately from the displayed result
- Formula parsing: Parse references such as
A1andB2into dependencies - Recalculation: Recompute only affected cells when a dependency changes
- Circular references: Detect cycles before evaluating formulas
- Keyboard navigation: Use row and column coordinates, not DOM position alone
- Accessibility: A spreadsheet-like grid needs careful focus behavior, labels, and keyboard support
Do not overbuild the parser in the first 20 minutes. Ship editable cells first, then add formulas in layers.
How to answer event emitter
An event emitter is a small problem with many useful edge cases. It maps well to Discord because realtime clients receive events from one transport and distribute updates to many pieces of UI.
Start with the API:
type Listener<T = unknown> = (payload: T) => void;class EventEmitter {private listeners = new Map<string, Set<Listener>>();on(eventName: string, listener: Listener) {if (!this.listeners.has(eventName)) {this.listeners.set(eventName, new Set());}this.listeners.get(eventName)!.add(listener);return () => this.off(eventName, listener);}off(eventName: string, listener: Listener) {this.listeners.get(eventName)?.delete(listener);}emit(eventName: string, payload?: unknown) {const listeners = this.listeners.get(eventName);if (listeners == null) {return;}for (const listener of Array.from(listeners)) {listener(payload);}}once(eventName: string, listener: Listener) {const unsubscribe = this.on(eventName, (payload) => {unsubscribe();listener(payload);});return unsubscribe;}}Then discuss edge cases:
- What happens if a listener unsubscribes while
emitis running? - Should duplicate listeners be allowed?
- Should listener errors stop later listeners?
- Should
offclean up empty event sets? - Should
onreturn an unsubscribe function? - Does the emitter need wildcard events or typed event names?
For interview code,
Map<string, Set<Listener>>is a clean default. It makes listener removal easier than an array and prevents accidental duplicates.How to answer debounce
Debounce delays a function until calls stop for a given amount of time. In Discord-shaped UI, it appears in search, mention pickers, typing indicators, resize handlers, and scroll-linked work.
Implement the baseline:
function debounce(fn, delay) {let timerId;return function debounced(...args) {clearTimeout(timerId);timerId = setTimeout(() => {fn.apply(this, args);}, delay);};}Then explain product usage:
- Search requests should be debounced so every keystroke does not hit the API
- Typing indicators should be paced so the app does not send an event for every keydown
- Scroll handlers should avoid doing expensive work for every pixel moved
- Resize handlers should wait until layout has settled before recalculating
Mention the limits too. Do not debounce the actual input state update, because typing should feel immediate. Debounce the side effect: network request, analytics call, or expensive calculation.
If asked for a fuller implementation, add
cancel,flush, leading-edge execution, and return-value behavior. Name those as follow-ups rather than trying to cram every feature into the first version.Frontend system design: Design Discord chat
For a frontend system design round, do not start by drawing components. Start by clarifying scope:
- Are we designing web, desktop, or mobile?
- Is this text chat only, or do we include voice and video state?
- Do we support DMs, group DMs, servers, channels, threads, and forums?
- Do messages include mentions, reactions, attachments, embeds, and markdown?
- Does the app need offline drafts or queued sends?
- What scale should the client handle in one channel?
Then structure the answer around the browser contract. Discord's engineering post on reducing WebSocket traffic by 40% is useful context here because it explains the gateway, payloads such as
MESSAGE_CREATEandTYPING_START, passive sessions, and why client bandwidth matters for realtime UI.Design area What to cover Data model Messages, users, channels, servers, members, reactions, typing state, presence, drafts Transport WebSocket events for realtime updates, HTTP for history, reconnect and resume behavior State management Normalized entities, per-channel message IDs, local drafts, optimistic sends, subscription cleanup Rendering Virtualized message list, scroll anchoring, dynamic row heights, lazy embeds, markdown rendering Reliability Retry failed sends, dedupe duplicate events, ignore stale events, handle reconnect gaps Performance Avoid global rerenders, memoize expensive message rows, split heavy features, clean up listeners Accessibility Keyboard navigation, focus recovery, readable controls, announcement of new messages when needed Testing Message send, retry, edit, delete, duplicate event, reconnect, scroll preservation One useful state shape:
type ChatState = {messagesById: Record<string, Message>;messageIdsByChannelId: Record<string, Array<string>>;draftsByChannelId: Record<string, string>;typingUserIdsByChannelId: Record<string, Array<string>>;};From there, describe event handling:
MESSAGE_CREATE: insert message if it is not already presentMESSAGE_UPDATE: patch the existing message by IDMESSAGE_DELETE: remove or tombstone the messageTYPING_START: show typing state with an expiry timerPRESENCE_UPDATE: update visible presence without rerendering every unrelated messageRECONNECT: resume from the last known event sequence when possible; otherwise refetch the active channel
The key tradeoff: the UI should feel instant, but the server remains the source of truth for message identity, ordering, permissions, moderation, and delivery state. For performance follow-ups, Discord's post on maintaining performance while adding features is a good model for discussing code splitting, lazy loading, retrying failed chunks, and keeping a large client fast as features accumulate.
Official Discord resources to read
Read these after building the baseline chat UI. They give you concrete language for system design, performance, accessibility, and product-specific follow-ups.
Official Discord resource What to use it for How to prepare for your Discord interview Round structure, technical interview expectations, architecture interviews, values, and cross-functional conversations. How Discord Reduced WebSocket Traffic by 40% Gateway events, compressed payloads, passive sessions, bandwidth tradeoffs, and realtime client design. How Discord Maintains Performance While Adding Features Code splitting, lazy loading, retry behavior, bundle size, route-level chunks, and frontend performance tradeoffs. How Discord Implemented App-Wide Keyboard Navigation Accessibility, focus management, keyboard navigation, component-system constraints, and custom focus rings. How Discord achieves native iOS performance with React Native React Native performance, store dispatch costs, message parsing, virtualization, and mobile client tradeoffs. How Discord Handles Two and Half Million Concurrent Voice Users using WebRTC Voice/video architecture, WebRTC constraints, browser vs native client behavior, and media performance. React topics to revise
Review React through Discord-style examples, not isolated definitions.
Topic Discord-shaped way to practice useStateanduseRefManage a draft message, input focus, pending scroll action, and latest request ID. useEffectSubscribe to WebSocket events and clean up listeners when the channel changes. useMemoDerive visible message IDs from normalized state when the transform is expensive enough. useCallbackStabilize callbacks only when child memoization or subscription identity actually needs it. Controlled inputs Build message composer, search box, and editable spreadsheet cell. Component composition Split message row, composer, channel header, reaction picker, and typing indicator sensibly. Context Use it for stable app-level dependencies, not every message update. Error boundaries Keep one broken embed or markdown block from breaking the whole chat view. Performance profiling Find unnecessary rerenders in message rows, member lists, or virtualized lists. Accessibility Make modals, menus, keyboard navigation, and message actions reachable without a mouse. Avoid generic answers like "use memoization for performance." Explain what rerenders, why it matters, and which optimization matches the bottleneck.
JavaScript and browser topics to revise
Discord frontend prep should include JavaScript fundamentals because many realtime UI bugs come from closures, timers, async work, and event cleanup.
Practice:
- Closures and stale values in callbacks
- Promises and the event loop
setTimeout,setInterval, and cleanup- Debounce and throttle
- Event emitter and pub/sub patterns
- DOM traversal
- Event delegation
- Maps and Sets
- Recursion and iterative traversal
- String search and trie basics
- Request cancellation and stale-response handling
- Browser storage tradeoffs
- XSS prevention for user-generated content
Tie each topic to a product bug. For example, a stale closure can send a message to the previously selected channel. A missing cleanup can leave an old channel subscription active. A naive DOM traversal can miss nested elements. A search request that returns late can overwrite newer results.
Useful GreatFrontEnd practice:
Behavioral questions for Discord
Do not treat the behavioral round as a formality. Discord interviews include signals around values, attitude, product usage, collaboration, and how you respond to feedback.
Prepare stories for:
- A frontend project you led from unclear requirements to shipped behavior
- A time you disagreed with product, design, backend, or another frontend engineer
- A time a launch failed, rolled back, or changed direction
- A time you improved a slow or unreliable UI
- A time you handled user-generated content, moderation, privacy, or safety concerns
- A time you mentored another engineer or raised the quality of a team practice
- A time you received hard feedback and changed your approach
- Why Discord, and which product areas you have used enough to discuss concretely
For each story, prepare the user problem, your role, the constraints, alternatives considered, the decision, the result, and what you would change now. Specific stories beat polished generalities.
Also use the product before the interview. Create or manage a server, try roles and permissions, use channels, threads, voice, screen share, reactions, search, notifications, and moderation settings. Product familiarity makes system design and behavioral answers much more concrete.
Interview preparation plan for Discord
Use this as a Discord-specific checklist. The exact order can change based on your timeline, but the coverage should stay the same: chat UI, spreadsheet-style components, realtime primitives, frontend system design, and behavioral depth.
Prep area What to do Discord-specific angle Chat UI implementation Build a React and TypeScript chat app with composer, message list, edit, delete, retry, typing state, and older-message loading. Practice optimistic sends, duplicate event reconciliation, scroll preservation, and channel switching. Spreadsheet-style coding Build editable cells, keyboard navigation, formula references, dependency recalculation, and circular-reference handling. This tests state modeling and follow-up resilience, not only UI rendering. JavaScript primitives Implement debounce, throttle, event emitter, DOM traversal, and a small rate limiter from scratch. Connect each primitive to search, typing indicators, gateway events, and message-send pacing. Realtime system design Design Discord chat, typing indicators, presence, message history, and reconnect behavior from the frontend perspective. Cover WebSocket events, HTTP history, normalized state, optimistic UI, offline behavior, and cleanup. Performance practice Add virtualization to message/member/channel lists and profile unnecessary rerenders. Discord-like UIs are list-heavy and can become slow without stable identity and careful subscriptions. Behavioral and product prep Prepare project stories and use Discord deeply enough to discuss specific flows. Values and cross-functional rounds reward evidence, not generic interest in communication products. Mock loop Run one React mock, one JavaScript utility mock, one system design mock, and one project deep dive. Fix weak answers after each mock instead of collecting more random questions. Final tips
Prepare for Discord by building the interfaces Discord actually depends on: chat, editable grids, realtime event handlers, long lists, search, and presence. Memorizing React definitions is not enough if your code falls apart when messages arrive out of order or the user changes channels mid-request.
In coding rounds, ship a working baseline first. In system design, explain the client-server contract and the failure modes. In behavioral rounds, bring concrete product usage and project stories with real tradeoffs.
If you can build a chat UI, reason through editable grid state, implement core JavaScript utilities, and explain realtime frontend architecture clearly, you are preparing for the right interview shape.
- PayPal Frontend Interview Questions: Prep Guide for 2026Prepare for PayPal frontend interviews with real question patterns, React and JavaScript prep, payments system design, and a 2026 study plan.作者GreatFrontEnd Team14 分钟阅读Jun 5, 2026
PayPal frontend interview questions usually test JavaScript, React, DSA, and payment-system reasoning in the same loop. Prepare for practical UI coding, React internals, browser architecture, and checkout-specific design topics such as security, retries, idempotency, iframes, currency handling, and accessible payment flows.
For the company-guide view, use the PayPal Front End Interview Guide alongside this article.
Use each question as a working session: solve the baseline prompt, then explain what changes for payment reliability, accessibility, security, multi-currency handling, slow networks, and backend ownership.
What PayPal frontend interviews test
PayPal is a payments company, so frontend interviews do not stop at rendering a button. A checkout UI has to handle money, risk, privacy, failed networks, user trust, third-party merchant pages, and strict accessibility expectations. That product context explains the mix of React, JavaScript utilities, DSA, system design, and backend-aware architecture.
Area What to practice Why it matters at PayPal React implementation Cart UI, file explorer, typeahead, form validation, currency converter, checkout widgets These map to checkout, merchant dashboards, wallet flows, and SDK examples. JavaScript Async classes, reduce, flatten, deep copy, closures, promises, event loop, debounce, throttleThese show whether you can handle utility code and async data flow clearly. DSA Strings, arrays, stacks, DP, graphs, binary search, LRU cache PayPal coding screens can still include LeetCode-medium style problems. Browser fundamentals DOM vs BOM, cookies, security, CDN, loading, accessibility, performance Checkout and dashboard work requires browser-to-backend reasoning. Frontend system design Checkout SDK, payment gateway, transaction dashboard, real-time fraud queue Payments UI sits across frontend, API, ledger, risk, and operations systems. Behavioral Ownership, conflict, mentoring, decision-making, project depth Senior and staff loops include manager or bar-raiser discussions. PayPal frontend interview process
PayPal's official careers guidance says recruiters usually reach out by phone, interviews are virtual on Microsoft Teams, and applicants should study the job description, company values, and Leadership Principles. It also points applicants to a prep video series.
Expect a process shaped roughly like this:
Stage What to expect Prep note Recruiter screen Background, role fit, location, timeline, interview format Ask whether the first technical round is HackerRank, Karat, DSA, React, or role-specialization. Online assessment HackerRank-style React, JavaScript, and DSA tasks Be ready for 60-150 minutes depending on the assessment. Technical coding DSA, JavaScript utilities, React machine coding, code review Use JavaScript or TypeScript unless recruiter says any language is acceptable. Role specialization React internals, hooks, state, fetch, tests, frontend architecture Expect deeper follow-ups for SDE-2, senior, and staff roles. System design Payment gateway, checkout flow, web architecture from browser to backend Explain both client behavior and backend contracts. Behavioral / bar raiser Project depth, conflict, mentoring, tradeoffs, ownership Prepare varied STAR stories, especially around customer impact and reliability. Real PayPal frontend interview questions to practice
Use these as practice prompts, not a guaranteed question bank. For each one, timebox a working baseline first, then talk through tradeoffs, edge cases, accessibility, performance, and tests.
PayPal question or task to practice What to practice Build a small async data wrapper class with getandcreate-style methods. It should return stored values, reject missing reads, and reject duplicate writes.Async JavaScript, classes, promise sequencing, error handling Build a React cart where users can change quantities, remove items, and see totals update immediately. Cart state, derived totals, immutable updates, testable UI Solve a dynamic-programming triangle path problem, implement a stack with constant-time minimum lookup, and explain topological sorting. Dynamic programming, stack design, graph ordering Design a payment gateway and explain the transaction flow, consistency model, ledger behavior, retries, and failure handling. PayPal orders, payment sessions, idempotency, ledger, webhooks, retries Explain React reconciliation and sketch a simplified algorithm for comparing an old UI tree with a new one. React rendering internals, tree comparison, keyed lists, rerender causes Build a React currency converter with controlled inputs and recalculated output. Controlled inputs, derived state, Intl.NumberFormat, precision, async ratesGiven a string, remove the smallest possible contiguous section so the remaining characters satisfy a uniqueness constraint. Sliding window, character counts, edge cases Write a deep-copy function, then adapt it to apply one extra transformation to arrays during copying. Recursion, arrays vs objects, reference safety, cycles if asked Complete missing React component logic, then implement an LRU Cache. Component state, DSA data structures, Mapplus linked-list reasoningWalk through a web application from DNS and CDN to browser cookies, security, backend storage, cache, and real-time communication choices. End-to-end web architecture, network basics, API design, storage choices Build a React form with validation, visible error states, and disabled submission while invalid. Forms, validation state, error messages, disabled submission, accessibility Build a simple page in a frontend framework and pair it with a small object-oriented backend model. Full-stack UI basics, component composition, simple backend model Solve a paint-fill style grid traversal problem. Grid traversal, DFS/BFS, visited checks Explain ES6 features through examples from your own project work. Project-based JavaScript, modules, destructuring, promises, classes, iterators Explain why a team might choose React, describe page performance improvements, then implement Array.prototype.reducebehavior in vanilla JavaScript.React tradeoffs, rendering performance, array methods, polyfills Build a typeahead that filters a list as the user types and includes a clear-input control. Typeahead logic, clear control, accessible combobox basics, browser terms Find all anagrams of a pattern inside a string, then implement array flattening with configurable depth. Sliding window, recursive or iterative flatten, edge cases Build a nested file explorer in React with expand/collapse and basic create, rename, and delete actions. Recursive data, local edit state, immutable tree updates Build a small shopping app with routes, navigation, cart add/remove behavior, duplicate prevention, total calculation, and test-friendly markup. Machine coding, routing, shared state without Redux, test-driven details For a staff-level frontend role, answer JavaScript, TypeScript, frontend architecture, React, component library, system design, and behavioral questions. Staff-level frontend architecture, LLD, HLD, component APIs, leadership Build a React task using hooks, state, data fetching, error handling, and a small test strategy; then discuss REST APIs, pagination, caching, auth, and indexing. Full-stack frontend specialization, API-backed React, backend awareness Solve short array-manipulation tasks and simple calculation problems under time pressure. Arrays, loops, basic transformation, correctness under time How to answer the React cart question
The cart prompt is common because it tests a payment-adjacent workflow without requiring a real payment API. Start with the smallest data model that can survive follow-ups:
type CartItem = {id: string;name: string;priceCents: number;quantity: number;};Use item IDs as identity. Derive
subtotal,itemCount, and disabled states from the cart array instead of duplicating them in separate state variables. That makes quantity changes, removal, and duplicate prevention easier to reason about.A complete answer covers:
- Quantity changes: clamp at a minimum of 1, or define whether decreasing to 0 removes the item
- Duplicate prevention: adding an existing product increments quantity instead of adding another row
- Money formatting: store amounts in currency-aware minor units, or as fixed decimal strings that match the currency's required precision; format display values with
Intl.NumberFormat. PayPal's currency code reference is useful here because some supported currencies do not allow decimal amounts. - Validation: prevent checkout when the cart is empty or an item has invalid quantity
- Accessibility: quantity buttons need labels such as "Increase quantity for Basic Plan."
- Testing: add/remove, duplicate add, total calculation, empty cart, and disabled checkout
- Payment boundary: never trust the client total; send item IDs and quantities to the server, then calculate the payable amount server-side
Practice this with Data Table for tabular rendering and Contact Form for validation habits, then adapt the state model to a cart.
How to answer the async
FetcherclassThe
Fetcherprompt checks whether you can wrap an async dependency without losing error semantics. Do not jump straight totry/catch; first name the contract:get(id)resolves with the stored object when it existsget(id)rejects or throws when the ID does not existpost(id, value)creates a value for an unused IDpost(id, value)rejects or throws when the ID already exists- Calls return promises because
DB.readandDB.createare async
One possible shape:
class Fetcher {constructor(db) {this.db = db;}async get(id) {const value = await this.db.read(id);if (value == null) {throw new Error('ID not found');}return value;}async post(id, value) {const existing = await this.db.read(id);if (existing != null) {throw new Error('ID already exists');}return this.db.create(id, value);}}Then discuss race conditions. If two
post(7, value)calls run at the same time, both can read "empty" before either creates. In an interview, say that the real fix belongs in the database or API layer through a uniqueness constraint, transaction, or atomic create. The frontend wrapper can expose errors clearly, but it cannot guarantee cross-client uniqueness by itself.How to answer typeahead and autocomplete
PayPal uses country pickers, currency selectors, merchant search, transaction filters, and support flows where typeahead behavior matters. A baseline implementation is not enough if it overwrites newer results with older responses.
Mention these requirements before coding:
- Debounce network calls, not the input value itself
- Track the latest request or use
AbortController - Show loading, empty, and error states separately
- Cache by normalized query only when permission and freshness rules allow it
- Keep keyboard behavior predictable: arrow keys, Enter, Escape, focus, and active option
- Clear the input through a real button with an accessible label
For system design depth, practice Autocomplete. For UI implementation speed, practice Users Database.
How to answer React internals questions
React internals questions are easier when you connect the concept to a bug or design decision. Keep the answer practical:
- React renders a description of UI for a given state
- Reconciliation compares the previous and next trees to decide what work is needed
- Stable keys help React preserve identity when lists reorder
- A component can rerender because its state changed, parent rerendered, context changed, or external-store subscription changed
- Memoization helps only when a child rerender or derived computation is actually expensive
If asked to pseudocode diffing, use a simplified tree compare:
function diff(previousNode, nextNode) {if (previousNode == null) return { type: 'insert', node: nextNode };if (nextNode == null) return { type: 'remove', node: previousNode };if (previousNode.type !== nextNode.type) {return { type: 'replace', node: nextNode };}return {type: 'update',props: diffProps(previousNode.props, nextNode.props),children: diffChildren(previousNode.children, nextNode.children),};}Then add the caveat: real React reconciliation is much more complex, but the interview wants to see identity, tree comparison, and keys.
How to answer the payment gateway design question
This is the round where generic frontend prep runs out. A payment gateway design asks you to connect browser behavior, SDK boundaries, server APIs, risk checks, and ledger systems.
Start from the user action:
- User clicks "Pay."
- Client validates visible form state and disables duplicate submission
- Client asks the merchant server to prepare the checkout
- Server calculates price from trusted cart data and creates a PayPal order or payment session
- The buyer approves through PayPal wallet UI, or card details are collected through PayPal-hosted Card Fields if the flow supports cards
- Client receives approval state and asks the server to capture or authorize
- Server records the result, updates order state, and handles webhooks
- UI shows success, decline, retry, timeout, or pending state
Payments need extra care:
- Idempotency: retrying a request must not double-charge the buyer
- Trust boundary: the client can display totals, but the server calculates chargeable totals
- Iframe isolation: sensitive card fields should stay inside PayPal-hosted iframes; advanced integrations can also isolate payment SDK code inside a sandboxed iframe wrapper
- 3-D Secure and risk: handle challenge, cancel, fail, and retry paths
- Webhooks: do not rely only on browser callbacks for final order state
- Reconciliation: ledger state and UI state can temporarily disagree
- Accessibility: payment modals, error messages, and focus recovery matter
- Observability: log conversion drop-off, declines, retries, SDK load failures, and duplicate-submit attempts
PayPal's own SDK and integration materials are useful background here. Review the JavaScript SDK, React SDK v6, hosted Card Fields model, Orders API, and sandboxed iframe integration pattern before a system design round. Keep the concepts separate: PayPal wallet flows use a PayPal payment session, Card Fields keep raw card data inside PayPal-hosted iframes, and the sandboxed iframe guide shows an advanced wrapper pattern where the merchant page and isolated payment frame communicate with
postMessage. For duplicate-submit and retry discussions, mention PayPal'sPayPal-Request-Ididempotency header.JavaScript and DSA checklist
PayPal interview prep clusters around a few repeatable patterns.
Topic Practice questions Arrays and strings Find all anagrams, longest substring without repeating characters, remove minimum substring for unique characters Stacks and caches Min Stack, LRU Cache DP and graphs Triangle DP, Paint Bucket Fill, topological sort, grid BFS JavaScript utilities reduce, flatten with depth, deep copy, debounce, throttleAsync JavaScript Fetcherclass, fetch with loading/error states, retries, stale responsesReact machine coding Cart, shopping app, file explorer, form validation, typeahead, currency converter Browser and web DOM vs BOM, cookies, CDN, DNS, WebSockets, long polling, accessibility Useful GreatFrontEnd practice:
PayPal resources to review
Use PayPal's own docs to make payment-system answers concrete instead of generic:
- PayPal careers interviewing guide: virtual interview logistics, prep expectations, and behavioral guidance.
- Get started with PayPal REST APIs: OAuth, client ID/client secret, access tokens, JSON responses, and sandbox setup.
- Orders API v2: create, authorize, and capture orders.
- Idempotency guidelines:
PayPal-Request-Id, retries, duplicate prevention, and unclear response handling. - Currency code reference: supported currencies and no-decimal currency constraints.
- JavaScript SDK and React SDK v6: payment buttons, provider/hooks model, payment sessions, and Card Fields.
- Sandboxed iframe integration: isolating payment SDK code and communicating with the merchant page through
postMessage.
Interview preparation plan for PayPal
Use this as a PayPal-specific checklist. The exact order can change based on your timeline, but the coverage should stay the same: JavaScript, React machine coding, payments architecture, and behavioral depth.
Prep area What to do PayPal-specific angle JavaScript and DSA Solve Min Stack, LRU Cache, flatten, reduce, deep clone, anagrams, one sliding-window problem, and one DP problem. Keep utility implementation and LeetCode-medium style coding both warm. React machine coding Build cart, file explorer, form validation, typeahead, shopping app, and currency converter in timed 45-60 minute sessions. Narrate state ownership, derived totals, validation, accessibility, loading states, and test selectors. Payments architecture Design checkout SDK, payment gateway, merchant transaction table, and fraud-review queue. Include PayPal orders, server-side create/capture, idempotency, Card Fields, iframe isolation, webhooks, and reconciliation. Browser and web architecture Review DNS, CDN, cookies, cache, WebSockets, long polling, security, and storage choices. Explain how a checkout or merchant dashboard moves from browser interaction to backend services. Behavioral and project depth Prepare one deep frontend project story and 6-8 STAR examples across conflict, ownership, reliability, mentoring, and tradeoffs. Choose examples involving risk, customer trust, accessibility, performance, or security-sensitive UI. Mock loop Run one DSA mock, one React mock, one system design mock, and one behavioral project deep dive. After each mock, fix the weakest answer rather than adding more random questions. If you have only 72 hours, prioritize cart UI, typeahead,
reduce, flatten, LRU Cache, one payment gateway design, and your best project story.Behavioral prep for PayPal
PayPal's careers guidance asks applicants to prepare detailed examples and vary stories across roles. For frontend engineers, choose stories that involve product risk, reliability, accessibility, security-sensitive UI, or cross-team execution.
Prepare stories for:
- A bug or outage in a user-facing flow
- A disagreement with product, design, backend, security, or QA
- A performance improvement with before/after metrics
- A form, checkout, or account flow where validation and error handling mattered
- A technical decision you changed after learning more
- Mentoring or raising engineering standards on a frontend team
For each story, include the user problem, the technical constraint, the options considered, the decision, the result, and what you would do differently now.
Final tips
PayPal frontend prep should end with one clear story: "I can build the UI, explain the JavaScript, and reason about what happens when money moves." That means the best practice set is not 100 random React questions. It is a smaller set of payment-shaped drills: cart, form validation, typeahead, currency converter, file explorer,
Fetcher, flatten, deep clone, LRU Cache, and a checkout or payment-gateway system design. - Databricks Frontend Interview Questions: Prep Guide for 2026Prepare for Databricks frontend interviews with practical questions, official round expectations, CoderPad tips, and frontend system design practice.作者GreatFrontEnd Team14 分钟阅读Jun 4, 2026
Databricks frontend interview questions usually test data-heavy UI engineering: async search, API-backed components, request race conditions, large result tables, dashboards, collaboration, and system design. Your prep should also include algorithm and machine-coding rounds, so do not prepare only for React trivia.
The fastest way to prepare is to combine three sources of truth:
- Databricks' own engineering interview prep PDF, which says front-end/full-stack interviews can include Front-End Code, Front-End Systems, Product Design, Front-End Infrastructure, and Cross-Functional rounds.
- Practice questions that match Databricks-style interview patterns.
- Databricks product context: notebooks, SQL editor, AI/BI dashboards, Unity Catalog, Genie, and data-platform workflows.
For the company-guide view, use the Databricks Front End Interview Guide alongside this article.
What Databricks frontend interviews test
Databricks is not a generic consumer app company. The frontend work sits around notebooks, SQL editors, schema browsers, dashboards, workflows, model tools, governance UI, and AI-assisted data products. That changes the interview signal.
Area What to practice Why it matters for Databricks Async UI Typeahead, cancellation, retries, stale response handling Search and autocomplete appear in editors, catalogs, dashboards, and notebooks. Data rendering Tables, filters, pagination, virtualization, charts Query results and dashboards can grow past what a simple component can handle. JavaScript fundamentals Closures, event loop, Set,Map, iterators, timersJavaScript and data-structure follow-ups can appear in frontend loops. System design Collaborative editing, dashboards, autocomplete, real-time updates Official frontend systems prep calls out client-server interfaces, API design, state, and sync. Product implementation Design-to-code constraints, empty states, loading states, error states Databricks' official frontend code round expects a browser app that fetches and displays remote data. Cross-functional judgment Project depth, design collaboration, tradeoffs, customer impact Official prep says cross-functional rounds dig into projects, decisions, and collaboration. The shape is closer to "build and explain a data product UI" than "recite React hooks." React can be useful, but Databricks' official prep says the frontend code round supports vanilla JS/DOM, React, Angular, Vue, and Svelte, so the core bar is web engineering, not one framework.
Databricks frontend interview process
Databricks' public interview prep page describes seven hiring stages: identifying opportunities, applying online, connecting with Talent Acquisition, skill assessments, interviewing, reference checks, and decision/offer. It also says interviews usually run over Google Meet.
For front-end/full-stack software engineers, the April 2025 Databricks engineering prep PDF lists these interview types:
Round What Databricks says it evaluates How to prepare Front-End Code Building a browser app that fetches and displays remote data, with async operations, efficient fetching, and UI state management Practice typeahead, tables, search filters, loading/error/empty states, and request ordering bugs. Front-End Systems Client-server interfaces, API design, state management, data synchronization, and hands-on coding inside an open-ended design prompt Design autocomplete, collaborative editing, dashboards, and large result panes, then implement one part. Product Design Turning Figma-like requirements into working implementation while discussing constraints with a designer Explain layout, accessibility, state, edge cases, responsive behavior, and tradeoffs. Front-End Infrastructure Large refactors, migrations, testing infrastructure, build systems, performance, and code quality Prepare examples from design systems, monorepos, migrations, CI, test reliability, and performance work. Cross-Functional Career path, motivation, major projects, decisions, collaboration, and leadership Prepare project deep dives with technical detail and outcomes. Some loops also include algorithmic coding or backend/system-design rounds, especially for full-stack, senior, and general software engineering roles. Ask your recruiter which rounds are in your loop and whether the coding round is frontend, algorithmic, or both.
Databricks interview questions to practice
Treat these as practice prompts, not a guaranteed question bank. They are useful because they cover recurring Databricks-style patterns: async UI, system design depth, data structures, graph traversal, and data-platform products.
Question Round / role signal What to practice Build or design an autocomplete widget that fetches suggestions, debounces input, handles slow requests, recovers from errors, and prevents older responses from overwriting newer results. Frontend phone screen Request IDs, AbortController, cache, retries, loading/error states, API shapeImplement typeahead logic in CoderPad from a starter state object and input handler. Add caching, cache expiry, retry behavior, and race-condition handling across success, loading, and error states. Senior full-stack / frontend systems Business logic first, race handling, cache semantics, retry limits Design a shared playlist where multiple users can add, remove, and reorder items at the same time. Frontend systems Collaboration model, WebSocket events, conflict handling, optimistic updates Explain JavaScript closures, then render a nested comment list with CSS and vanilla JavaScript using an iterative approach. Frontend coding Closures, iterative tree traversal, DOM rendering, CSS structure Build a dashboard view that reads live API data and explain the component model, data refresh strategy, routing, event handling, and HTTP API choices. Pair programming / full-stack API-backed dashboards, polling/SSE/WebSocket, state model, route boundaries Solve a grid path-counting problem and compare a brute-force search with the optimized approach. Problem solving Backtracking, visited-state management, complexity analysis Design an ad-click aggregation system with ingestion, aggregation windows, indexing, storage choice, scale, fault tolerance, and monitoring. System design Event ingestion, aggregation windows, storage, monitoring Implement a configurable TicTacToe class for an MxN board with move handling, turn state, board updates, and win detection. Coding OOP state design, row/column counters, extensibility Convert a route-planning problem into a graph problem, find a valid path, then extend the solution to account for different travel costs. Algorithm BFS, weighted search, path-cost tracking Design an AutoML-style platform that accepts training requests, schedules jobs, stores experiments, tracks model versions, and isolates users. System design Job orchestration, model metadata, tenant isolation, resource control Build a custom set that supports add, remove, contains, and iteration where an iterator sees a snapshot while the live set can still change. L4 phone screen Iterator snapshots, mutation semantics, Set/linked-list choicesGiven a city grid with blocked cells and several transportation modes, choose the fastest route from source to destination and use cost as the tie-breaker. Technical phone screen BFS per mode, tie-breaking, grid traversal Implement an in-memory key-value map with put,get, and rolling five-minute call-rate metrics for reads and writes.Machine coding Sliding windows, timestamp buckets, concurrency discussion Implement firewall-style allow/deny rules for individual IP addresses and CIDR ranges. L5 technical phone screen IP parsing, CIDR masks, rule precedence Randomly connect several already-connected graphs into one graph so each possible ordering is equally likely. Technical phone screen Graph representation, random permutations, correctness of probabilities Prepare for new-grad style loops that combine architecture discussion, DSA rounds, and behavioral interviews. New grad SWE DSA, system design communication, behavioral project stories Prepare for senior data-platform rounds that can move from frontend/product discussion into distributed logs, analytics pipelines, and Spark-adjacent systems. Senior SWE / data systems team Data-platform system design, distributed systems, project depth The strongest frontend pattern is autocomplete/typeahead. It matches Databricks' official Front-End Code and Front-End Systems expectations: fetch remote data, manage async state, design client-server behavior, and implement business logic in CoderPad.
How to answer the typeahead question
Start with the behavior before code:
- Input updates immediately as the user types.
- Suggestions fetch after a short debounce.
- Only the latest request can update visible results.
- Loading, empty, error, and retry states are separate.
- Cached responses can avoid duplicate calls for the same query.
- Keyboard and screen-reader behavior matter in a full UI round, even if the interviewer says to prioritize logic.
For a CoderPad business-logic version, a small state machine is often clearer than a large component:
const cache = new Map();let activeRequestId = 0;let debounceTimer = null;const state = {query: '',status: 'idle', // idle | loading | success | empty | errorresults: [],error: null,};function setState(nextState) {Object.assign(state, nextState);}function isFreshCacheEntry(entry, now = Date.now()) {return entry != null && entry.expiresAt > now;}function handleInputChange(query) {setState({ query, error: null });clearTimeout(debounceTimer);if (query.trim() === '') {setState({ status: 'idle', results: [] });return;}debounceTimer = setTimeout(() => {fetchSuggestions(query);}, 250);}async function fetchSuggestions(query) {const cached = cache.get(query);if (isFreshCacheEntry(cached)) {setState({status: cached.results.length === 0 ? 'empty' : 'success',results: cached.results,});return;}const requestId = ++activeRequestId;setState({ status: 'loading' });try {const results = await fetchResults(query);if (requestId !== activeRequestId) {return;}cache.set(query, {results,expiresAt: Date.now() + 60_000,});setState({status: results.length === 0 ? 'empty' : 'success',results,});} catch (error) {if (requestId === activeRequestId) {setState({ status: 'error', error });}}}Name the race condition explicitly. If the user types
d, thenda, thendat, thedrequest can finish last and overwrite newer results unless the app ignores stale responses or aborts old requests.Good follow-up answers:
- Debounce: Explain that it reduces duplicate requests and helps avoid rate limits, but it should not make the input itself feel delayed.
- Cancellation: Use
AbortControllerwhen the request layer supports it; still keep a request ID check because not every data source supports cancellation. - Cache: Cache by normalized query, include TTL, and avoid caching permission-sensitive results too broadly.
- Retries: Retry only transient failures, cap attempts, use backoff, and do not retry stale queries.
- Non-REST sources: Adapt the same state model to GraphQL, WebSocket, local index, worker-backed search, or a completion provider inside a code editor.
- Accessibility: Use combobox semantics, keyboard navigation, active option state, and clear announcements for loading and result count.
Practice the implementation with Users Database, then practice the architecture with Autocomplete.
Coding round prep for Databricks
Use two tracks: frontend coding and general coding.
For frontend coding, practice:
- Build a typeahead that handles debouncing, cancellation, race conditions, retries, cache, loading, empty, and error states.
- Build a Data Table with sorting, filtering, pagination, column actions, and row expansion.
- Build a dashboard widget that fetches data, refreshes on an interval, and avoids duplicate in-flight requests.
- Build an iterative comment tree renderer without recursion.
- Build a collaborative list or playlist UI with optimistic updates and conflict states.
For JavaScript and machine coding, practice:
- Implement a custom set with snapshot iterators.
- Implement an MxN TicTacToe class and discuss win-detection tradeoffs.
- Implement a key-value map with rolling five-minute load metrics.
- Implement CIDR allow/deny matching.
- Solve graph/grid traversal problems with tie-breakers.
For each coding problem, explain:
- What is stored versus derived.
- Which operations define the public API.
- What happens for invalid input.
- What the time and space complexity are.
- Which edge cases deserve tests.
- What would change under concurrency or high-frequency calls.
This is especially important for Databricks because many prompts start simple and then deepen through follow-ups. A working baseline is not enough if the next requirement forces a rewrite.
Frontend system design prep for Databricks
Databricks' official frontend systems description is unusually specific: client-server interfaces, API design, state management, data synchronization, and hands-on coding. That means a good answer should move between architecture and implementation.
Practice these Databricks-shaped designs:
Design prompt What to cover Autocomplete across notebooks, tables, dashboards, and models Query normalization, ranking, permissions, caching, cancellation, keyboard behavior, no-result states Collaborative notebook editor Cell model, output streaming, presence, conflicts, undo/redo, permissions, revision history SQL editor result pane Query lifecycle, cancellation, result limits, streaming/partial results, table virtualization, chart handoff AI/BI dashboard Tile lifecycle, cross-filtering, browser cache, parameterized queries, first paint, cache hit rate, concurrency Workflow DAG UI Graph layout, viewport virtualization, polling vs push, run history, status transitions, error recovery Genie-style natural-language analytics Prompt context, generated SQL review, result rendering, feedback loop, permission boundaries Use Databricks docs to make the answer concrete:
- The notebook and file editor docs mention schema browsing, autocomplete shortcuts, parameter hints, multi-cursor editing, and Genie Code features. Those are good clues for editor-system questions.
- The new SQL editor docs cover multi-statement queries, cancellation, permissions, shared query drafts, real-time collaborative editing, and comments.
- A 2026 Databricks community post on AI/BI dashboard performance says field filters and cross-chart interactions can run client-side when datasets stay under 100,000 rows and under 100MB; above that, interactions shift back to the warehouse. It also describes dashboard result caching with a roughly 24-hour cache window.
- The Genie docs explain how domain experts configure data, sample queries, and terminology so business users can ask natural-language questions over data.
In a frontend system design round, spend less time drawing cloud boxes and more time on the browser contract:
- What data does the page need first?
- Which requests can run in parallel?
- What state is URL-backed, server-backed, or local-only?
- What gets cached in memory, browser storage, or the server?
- What happens when the query is slow, canceled, or denied by permissions?
- How does keyboard navigation work for tables, editors, and suggestions?
- What metrics prove the page is usable?
Use the Front End System Design Playbook to structure the answer, then adapt the system to a data-product UI instead of a social feed or ecommerce page.
Behavioral and project questions
Databricks' interview prep page says behavioral interviews ask about real examples from past experience, problem solving, decision-making, learning, collaboration, and handling challenges. Prepare for project deep dives, design choices, collaboration, impact, conflict, and motivation for Databricks.
Prepare stories for:
- A complex frontend project where you owned the architecture.
- A time you improved a slow UI with measurement, not guesswork.
- A disagreement with product, design, backend, or data teams.
- A migration, refactor, or test-infrastructure change.
- A customer or internal-user issue that changed your design.
- A project that failed or changed direction.
For each story, write down:
- The user or business problem.
- The technical constraints.
- The options you considered.
- The decision you made and why.
- The result, metric, or follow-up learning.
- What you would change now.
If you have worked on editors, dashboards, data grids, query tools, charts, workflow builders, AI assistants, or internal platforms, use those examples first. They map cleanly to Databricks product work.
Interview preparation plan for Databricks
This plan is ordered by payoff, not by calendar week.
- Read the official prep material first: Start with the Databricks interview prep page and the engineering prep PDF. Confirm the exact round mix with your recruiter.
- Master the typeahead prompt: Implement it in vanilla JavaScript and React. Add debounce, stale-response handling, cache, retries, empty state, and error state. Then explain the API contract and accessibility behavior.
- Practice data-heavy UI: Build tables, filters, pagination, expandable rows, and dashboard widgets. Use Data Table and Users Database as the base drills.
- Keep DSA warm: Prepare BFS/DFS, graphs, grids, hash maps, heaps, binary search, iterators, and time-window counters. The Databricks loop can include algorithmic work, so skipping this is risky.
- Design Databricks-like products: Rehearse autocomplete, SQL result panes, collaborative notebooks, dashboards, and workflow DAGs. Write answers in a plain doc so you can explain without depending on a whiteboard tool.
- Use the product: Try a Databricks notebook, SQL editor, dashboard, schema browser, and Genie-style workflow if you can. Product familiarity helps you choose better requirements and failure modes in system design.
- Prepare project stories: Pick two technical deep dives and five behavioral stories. Make sure each one includes constraints, tradeoffs, measurable result, and what changed after launch.
Final checklist
Before the interview, you should be able to:
- Implement typeahead without getting stale results.
- Explain debounce, throttle, cancellation, retry, and cache TTL clearly.
- Build a data table with stable IDs, derived rows, and loading/error/empty states.
- Solve BFS/DFS grid and graph prompts under time pressure.
- Discuss iterator semantics for a mutable set.
- Design a frontend dashboard that handles slow data, cache, permissions, and large result sets.
- Design collaboration for a playlist, query editor, or notebook.
- Explain one deep frontend project without company-specific jargon.
Databricks frontend preparation should feel like practicing for a data product team: browser fundamentals, async state, data rendering, system design, and project judgment all matter. If you can build the typeahead cleanly, explain stale-response handling, design a large-result dashboard, and still solve graph-style coding prompts, you are covering the highest-value prep areas.
- Netflix React Interview Questions: Real Questions + Prep Guide (2026)Prepare for Netflix React interviews with practical questions, frontend coding patterns, system design topics, and a focused 2026 prep plan.作者GreatFrontEnd Team17 分钟阅读Jun 4, 2026
Netflix React interview questions are usually less about memorizing framework trivia and more about building practical UI, explaining state and data flow, handling performance constraints, and showing sound product judgment. Expect the exact loop to vary by team, but prepare for React, JavaScript, browser fundamentals, frontend system design, and culture/project discussion.
For deeper company-specific prep, use the Netflix Front End Interview Guide alongside this article.
Use each question as a working session: solve the baseline prompt, then explain what would change for larger data, weaker devices, unreliable APIs, accessibility requirements, and product experimentation.
What Netflix React interviews usually test
Netflix frontend work spans streaming UI, discovery rows, playback controls, studio tooling, data dashboards, ads, games, experimentation, and internal workflows. The interview is not only checking whether you know React; it is also testing whether you can build a usable interface under constraints and explain the decisions behind it.
Area What to practice What a complete answer shows React implementation Tables, lists, forms, carousels, charts, search, dashboards You can ship a working baseline, keep state simple, and extend the component without rewriting it. Data handling Fetching, grouping, filtering, derived data, retries, stale responses You understand API-backed UI and avoid state that drifts from the source of truth. Rendering performance Memoization, virtualization, throttling, debouncing, image loading You measure before optimizing and know which bottleneck each technique addresses. Browser fundamentals Event loop, DOM APIs, storage, layout, accessibility, security You can reason beyond React abstractions when the browser behavior matters. System design Playback, discovery, search, dashboards, recommendations You can move from user flow to API contracts, cache behavior, metrics, and rollout. Culture/project discussion Feedback, disagreement, ownership, judgment, ambiguity You can explain the decision-making behind your work, not just the final result. A table with 20 rows is simple. A table with expandable JSON, async filters, keyboard navigation, partial failures, and slow rows gives a better signal of how you build.
Netflix React interview questions to practice
Use these as practice prompts, not a guaranteed question bank. For each one, timebox a working baseline first, then talk through tradeoffs, edge cases, accessibility, performance, and testing.
- Build a React table that fetches configuration data from an API, renders rows, and supports loading, empty, and error states
- Extend the table so a JSON configuration column can expand and collapse per row
- Add "expand all" and "collapse all" controls without making every row re-render unnecessarily
- Given an array such as
[2, 4, 5, 2, 3, 4], produce a frequency map and render it as a histogram - Fetch a list of records, group them by department, and render the top five departments in a table or chart
- Build a collapsible list for a dynamic dataset, then handle filter updates without stale state or incorrect re-renders
- Build a UI that transfers selected items between two lists while preserving checked state
- Build a search/autocomplete UI that handles debouncing, request cancellation, keyboard navigation, and stale responses
- Implement a reusable data-fetching hook with loading, error, retry, and cancellation behavior
- Explain how you would make a Netflix-style content row fast on low-powered TV devices
Use this sequence to turn each prompt into a serious interview drill:
- Baseline: Implement the minimum working version in 30-45 minutes
- Correctness pass: Add empty, loading, error, and edge-case states
- Interaction pass: Add keyboard behavior, focus management, and clear disabled states
- Performance pass: Identify what rerenders, what can be derived, and what needs memoization or virtualization
- Testing pass: Name the highest-risk test cases even if the interview does not require full tests
- Discussion pass: Explain the API shape, state ownership, product tradeoffs, and what you would instrument
Aim for working code first, then explain data growth, network failure, changing requirements, accessibility, and tests.
How to answer the table question
Start with a simple data model:
idfor stable row identity- Display fields such as name, title, status, owner, updated time, or configuration type
- Optional nested
configormetadataobject for expandable JSON - Query state such as page, sort key, filter value, and selected row IDs
Keep the first version simple. Fetch data, render rows, and show loading, error, and empty states. Use semantic table markup if the data is truly tabular. Keep row expansion keyed by stable IDs, not row index, because sorting and filtering can reorder the rows.
Then talk through follow-ups:
- Expandable JSON: Store a
Setof expanded row IDs. Do not copy the full row data into expansion state. - Expand all / collapse all: Derive all visible row IDs from the current filtered data. Expanding all filtered rows should not unexpectedly expand hidden rows.
- Sorting and filtering: Keep raw data separate from derived visible rows. Use memoization only when the transformation is expensive enough to matter.
- Pagination: Decide whether pagination is client-side or server-side. Server-side pagination changes the API contract and loading behavior.
- Accessibility: Use proper table headers, clear buttons for expandable controls,
aria-expanded, and keyboard-reachable actions. - Performance: For thousands of rows, consider virtualization. For dozens of rows, simpler code is usually better.
Name these choices while coding. For example: "I am storing expanded row IDs instead of expanded row objects so sorting, filtering, and refetching do not corrupt expansion state."
Practice this with Data Table, then add your own expandable JSON follow-up after the base solution works.
How to answer the histogram question
The histogram-style prompt checks whether you can move from raw data to a useful UI. It also reveals whether you can write JavaScript cleanly under time pressure.
Start with the transformation:
function countByValue(values) {return values.reduce((counts, value) => {counts[value] = (counts[value] ?? 0) + 1;return counts;}, {});}Then convert the object into sorted display data:
const bars = Object.entries(counts).map(([value, count]) => ({ value: Number(value), count })).sort((a, b) => a.value - b.value);The habits matter more than the exact rendering code:
- Validate whether values are numbers, strings, or mixed.
- Decide how to handle negative values, missing values, and large ranges.
- Normalize bar height against the maximum count.
- Avoid layout shifts by giving the chart area stable dimensions.
- Add labels so the chart is readable without relying only on bar height.
- Use accessible text or a table fallback if the chart is important data.
If the interviewer lets you use React, split the work into a data transform and a presentational chart component. If they ask for vanilla JavaScript, explain the data shape before writing DOM code.
JavaScript and browser questions
React interviews still lean on JavaScript because many React bugs come from JavaScript, browser behavior, or the network.
Practice these questions:
- What is a closure, and how can stale closures cause bugs in React hooks?
- What happens when you modify an object's prototype?
- How does
thiswork in JavaScript, and how doesFunction.prototype.bindchange it? - Implement a
bindpolyfill. What edge cases matter? - What is the event loop? How do promises, timers, and rendering fit together?
- How would you implement debounce and throttle? When would each be used in a UI?
- How would you handle a request that returns after the user has already changed filters?
- What is the difference between
localStorage,sessionStorage, cookies, and in-memory cache? - How do you prevent XSS in a React app that renders user-generated content?
- How do you measure whether a UI interaction is slow because of JavaScript, layout, painting, or network?
For practice, work through
useThrottle,bind, and the React quiz questions. Tie each concept to a UI bug.For closures, use a timer, event listener, or async request example. Show how a callback can read an older value and how to fix it with a functional state update, a ref, or a corrected dependency list. For prototypes, explain lookup and mutation without making it sound like a pattern you would reach for in modern React code. For the event loop, explain how promise callbacks and timers affect loading spinners, input handlers, and batched updates.
For storage, do not just compare lifetimes. Explain what belongs where:
- Use in-memory state for data that can be lost on refresh.
- Use URL state for shareable filters or navigation state.
- Use
localStoragefor small, non-sensitive preferences. - Use cookies when the server needs the value on requests.
- Use a server cache or query library for data freshness and invalidation.
That difference is important in Netflix-style UI because the wrong state location can break profile switching, stale filters, analytics attribution, or experiment behavior.
React UI coding questions
Practice these prompts:
- Build a paginated Data Table with sorting and filtering.
- Add expandable rows to show nested JSON or detailed metadata.
- Build a Transfer List with disabled controls, selected item state, and keyboard support.
- Build a histogram component for API data, then make it responsive and accessible.
- Build a playback controls component with play, pause, seek, captions, and keyboard shortcuts.
- Build a title carousel where arrow navigation, focus management, and lazy image loading all work correctly.
- Build an admin dashboard widget that fetches data, shows a chart, and allows a user to change filters.
- Build a custom hook for URL-backed filters so refresh and share links preserve state.
- Build an error boundary strategy for a page with independent widgets.
- Debug a component that re-renders too often after a parent state update.
Before coding, say what you are optimizing for. For example: "I will keep selected IDs in state instead of copying whole item objects, because the source list can change after a refetch."
For broader practice, use the React coding interview questions and spend extra time on table, list, transfer, histogram, autocomplete, and carousel-style components.
What interviewers look for in UI coding
A credible React answer has a few visible habits:
- Components are named around product meaning, not layout only.
- State is minimal and easy to explain.
- Derived data is derived during render or memoized when justified.
- Effects are used for synchronization, not for every data transformation.
- Loading, empty, and error states are visible.
- Buttons, inputs, and interactive rows are keyboard reachable.
- List keys are stable.
- Follow-up requirements fit into the structure without a rewrite.
Avoid early abstraction. In a 45-minute interview, build one clear component, extract a helper when duplication appears, and explain where production code would separate concerns.
A practical state checklist
Before coding, decide where each state value belongs:
State Good default Watch out for Raw API data Server/query state or a top-level component state Copying rows into multiple local states. Filter text Local state, sometimes URL state Applying filters directly inside event handlers and losing source data. Selected rows Setof stable IDsStoring whole objects and breaking selection after refetch. Expanded rows Setof stable IDsUsing array indices as identity. Sort Local or URL state Sorting raw data in place. Loading/error Data-fetching layer or component state Hiding partial failures. State these choices during the interview; the interviewer cannot give credit for reasoning they never hear.
Performance and system design questions
For Netflix-style UI, account for loading speed, input responsiveness, memory, and device constraints.
Practice these questions:
- How would you keep a large title grid responsive while images and metadata load?
- How would you virtualize a long list without breaking keyboard navigation or screen-reader behavior?
- How would you reduce unnecessary renders in a table with expandable rows?
- How would you design a frontend cache for title metadata? What should expire, and when?
- How would you design Autocomplete for a global streaming product?
- How would you design the frontend for a Video Streaming Service?
- How would you separate video lifecycle from UI lifecycle in a playback page?
- How would you measure input responsiveness on a low-powered TV device?
- How would you roll out a redesigned playback UI safely?
- What frontend metrics would you track for a search, playback, or content discovery experience?
For system design, start from the user flow, then cover component boundaries, data contracts, cache behavior, loading states, failure modes, accessibility, metrics, and rollout.
Netflix-style content row performance
Structure the answer like this:
- User flow: A member lands on the home page, sees rows of personalized titles, moves through items quickly, opens details, or starts playback.
- Data needs: Row title, title IDs, artwork URLs, maturity rating, metadata, ranking reason, playback availability, and tracking IDs.
- Initial render: Render visible rows first. Avoid blocking the page on metadata that is not needed for first paint.
- Image strategy: Use correctly sized artwork, lazy loading for offscreen items, placeholders with stable dimensions, and prefetch only for likely next interactions.
- Interaction: Keep keyboard/remote focus predictable. Do not let lazy rendering trap focus or jump the scroll position.
- Performance: Virtualize if row count or card count is large. Memoize expensive row transforms. Avoid passing unstable props through every card.
- Failure behavior: If one row fails, show a row-level fallback instead of blanking the whole page.
- Metrics: Track time to usable content, input responsiveness, image load failures, row impressions, focus movement, and playback starts.
Avoid treating "use memoization" as a complete answer. Memoization helps only when referential stability or expensive computation is the bottleneck. For image-heavy UI, network, decoding, layout stability, and focus behavior may matter more.
Autocomplete for a streaming product
Cover these decisions:
- Input behavior: Debounce user typing, but keep the input responsive.
- Cancellation: Abort or ignore stale requests when the query changes.
- Result model: Return titles, people, genres, collections, and maybe recent searches as separate result types.
- Ranking: Consider popularity, personalization, locale, maturity settings, and exact prefix matches.
- Caching: Cache recent query results briefly. Do not over-cache personalized or profile-sensitive data.
- Accessibility: Use combobox semantics, keyboard navigation, highlighted option state, and clear screen-reader announcements.
- Failure states: Show recent searches, trending queries, or a retry affordance when the API fails.
- Instrumentation: Track query latency, no-result rate, selection rate, abandoned searches, and stale-response suppression.
Practice the base structure with Autocomplete, then adapt the answer to profiles, maturity restrictions, localization, personalization, and multiple device types.
Culture and project questions
Prepare stories where the technical decision and the human context are both clear.
Practice these questions:
- Walk me through a frontend project you are proud of. What tradeoffs did you own?
- Tell me about a time you received critical feedback and changed your approach.
- Tell me about a time you disagreed with another engineer or manager.
- What technical decision would you make differently if you could redo it?
- How did you debug a production issue where the cause was not obvious?
- Tell me about a time you improved performance and how you measured the result.
- Tell me about a time you had to make progress with incomplete requirements.
- What part of Netflix's culture would help you do your best work? What part would be challenging?
- How do you decide whether to build a shared frontend abstraction or keep logic local?
- How do you balance speed, quality, and product learning in a high-visibility UI change?
Use the Behavioral Interview Playbook to keep each story concrete: context, constraint, decision, result, and what changed afterward.
Make project answers technical enough
"I built the dashboard and improved performance" is not enough. Interviewers need the decision trail.
For each project, prepare:
- The user or business problem.
- The frontend constraints: device, data volume, API latency, browser support, accessibility, design system, or rollout risk.
- The technical decision you owned.
- The alternatives you considered.
- The tradeoff you accepted.
- The measurable result.
- What you would change now.
For a performance story, name the metric: interaction latency, JavaScript bundle size, image bytes, table render time, or error rate. Each points to a different bottleneck and fix.
For disagreement stories, explain what information each side had, how shared context was created, what decision was made, and how you supported it afterward.
How to prepare for a Netflix React interview
Start by mapping your interview to the team. A Studio tooling role, TV UI role, ads role, and discovery role can all ask React questions, but the examples and tradeoffs will differ.
Use this preparation order:
- Read the role and team context: Pull out the likely product areas: playback, dashboards, content rows, experimentation tools, search, ads, or internal workflows.
- Review the Netflix guide: Use the Netflix Front End Interview Guide to understand the broader process and company-specific prep.
- Build timed React components: Practice tables, expandable lists, histograms, transfer lists, carousels, and autocomplete flows in 45-60 minute sessions.
- Add realistic follow-ups: Keyboard support, loading and error states, cancellation, URL state, memoization, virtualization, and tests.
- Rehearse design out loud: Pick one UI, then explain data flow, API shape, caching, failure states, performance metrics, and rollout.
- Prepare project stories: Choose two or three projects where you owned a decision, handled disagreement, took feedback, or improved measurable user experience.
Connect React and behavioral preparation: what you built, why it mattered, what constraints shaped it, and how you handled the product and team tradeoffs around it.
Prepare by interview type
Round type How to prepare Recruiter screen Know why this role, why Netflix, what team domain interests you, and what culture points you can discuss honestly. React coding Practice one working component per session. Add a follow-up after the baseline works. Speak through state choices. JavaScript/browser Explain concepts through UI bugs: stale closures, event loop timing, storage misuse, DOM performance, XSS. Frontend system design Practice verbally: user flow, API shape, state model, cache, loading, failure, accessibility, metrics, rollout. Hiring manager/project Prepare two or three stories with decision, tradeoff, result, and lesson. A practical study sequence
If your interview is soon, prioritize prompts that transfer across teams:
- Build a table with API data, sorting, filtering, row expansion, and error states.
- Build a search/autocomplete UI with debounce, stale request handling, and keyboard navigation.
- Build a list or carousel where focus, images, and lazy loading matter.
- Review closures, event loop,
bind, storage, XSS, and async request cancellation. - Practice one frontend system design aloud: streaming page, autocomplete, dashboard, or recommendations page.
- Prepare project stories around performance, disagreement, feedback, and ambiguous requirements.
After each coding drill, write a short self-review:
- What state did I store?
- What state could be derived?
- What would break after a refetch?
- What would break for keyboard-only users?
- What would become slow at 10x data?
- What would I test first?
This is more useful than collecting hundreds of React trivia questions.
Common mistakes to avoid
- Starting with abstractions before the UI works: Build the baseline first. Extract only when the need is visible.
- Treating API data as local editable state by default: Copying server data into many local states creates stale UI after filtering, sorting, or refetching.
- Ignoring accessibility until the end: Keyboard behavior, labels, disabled states, and focus order are easier to include early.
- Using memoization as a reflex: Explain the bottleneck first. Memoization is not a substitute for better data shape or smaller render scope.
- Forgetting failure states: Netflix-scale UI cannot assume every service works all the time.
- Giving culture answers without technical details: A project story should still have engineering substance.
- Over-indexing on LeetCode: Algorithms can appear, but React/frontend interviews need practical UI and browser fluency.
- Not asking clarifying questions: For open-ended prompts, ask about data size, device constraints, API behavior, accessibility, and success metrics.
FAQ
Does Netflix ask React-specific interview questions?
Yes. React can appear in frontend, UI engineer, data visualization, and full-stack loops. The questions are often practical: build a component, fetch data, manage state, explain hooks, improve rendering, or discuss product constraints.
Are Netflix frontend interviews LeetCode-heavy?
Some loops include algorithms, but frontend candidates should not prepare only with LeetCode. Practice JavaScript, React components, browser behavior, async UI, performance, and frontend system design.
What React topics matter most for Netflix?
Hooks, state ownership, async data fetching, memoization, derived state, context tradeoffs, error boundaries, list rendering, accessibility, and performance measurement.
Should I read the Netflix culture memo?
Yes. Read it before the recruiter or hiring-manager conversation, then prepare specific stories about feedback, disagreement, judgment, autonomy, and ownership. Generic culture answers are easy to identify.
- Frontend LLD Interview Guide: Low-Level Design for Frontend DevsPractice frontend LLD questions and React machine coding interview questions with requirements, planning steps, code solutions, and common mistakes.作者GreatFrontEnd Team15 分钟阅读Jun 3, 2026

Frontend LLD questions are machine coding interview questions where you design and build a small UI feature from scratch. In frontend interviews, "LLD" usually means proving that you can break a component into requirements, state, interactions, edge cases, and readable code before the timer runs out.
This guide covers five practical frontend LLD problems:
- Infinite scroll list
- Star rating
- Autocomplete search
- Drag-and-drop list
- Toast notification system
Each one includes the requirement, a two-minute planning outline, a React solution, and the mistakes interviewers notice quickly.
Use this article as a practice guide, then solve more user interface coding interview questions on GreatFrontEnd in a real coding environment.
What frontend LLD means in React interviews
LLD stands for low-level design. In backend interviews, it often means designing classes, APIs, relationships, and object behavior. In frontend interviews, the same term is usually applied to UI implementation.
For a frontend developer, frontend LLD usually tests whether you can:
- Clarify product requirements before coding
- Split the UI into sensible components
- Choose the right state model
- Handle events, async behavior, loading states, errors, and empty states
- Keep the code small enough to explain
- Add basic accessibility where the component needs it
- Ship a working demo under time pressure
That is why frontend LLD questions overlap heavily with React machine coding round questions and solutions. The interviewer is not only checking whether the component works. They are checking whether the implementation has a design.
If you are preparing for LLD for frontend developer roles, treat each prompt as both a design problem and a coding problem. The same prompts often appear under names like frontend machine coding round questions in React, React live coding interview questions, or React UI coding questions.
How to approach any frontend LLD question
Before writing React code, spend two minutes turning the prompt into a plan.
1. Restate the requirement
Say what you are building in one sentence.
For example: "I will build an autocomplete input that fetches suggestions after the user types, shows loading and empty states, and lets the user select a suggestion."
This catches misunderstandings early.
2. Identify the core states
Most frontend machine coding round questions fail in state design. List the important states before coding:
- What data is displayed?
- What user input is controlled?
- Is the component idle, loading, successful, or in error?
- Is there a selected, active, hovered, expanded, or dragged item?
- Which values are derived instead of stored?
Avoid storing the same idea twice. If
visibleItemscan be derived fromitemsandfilter, derive it.3. Sketch the component tree
Keep it practical:
AutocompleteSearchInputSuggestionsListSuggestionItemYou do not need a production-grade architecture. You need boundaries that make the code easier to review.
4. Decide the first shippable version
Do not start with polish. Start with the smallest demo that proves the requirement:
- Render static UI
- Add state
- Add the main interaction
- Add edge cases
- Clean up names and structure
This rhythm is what separates strong React live coding interview questions from half-finished code.
Question 1: Infinite scroll list
Requirement
Build a list that loads the next page of items when the user scrolls near the bottom. Show loading, error, and "no more results" states.
This is a common frontend LLD problem because it tests async state, browser APIs, cleanup, duplicate request prevention, and edge cases around slow responses.
Two-minute plan
- Keep
items,page,status, andhasMorein state. - Fetch whenever
pagechanges. - Use an
IntersectionObserveron a sentinel element at the bottom of the list. - Only increment the page after the previous request succeeds.
- Disconnect the observer during cleanup.
- Do not fetch more pages after
hasMorebecomes false.
React solution
import { useEffect, useRef, useState } from 'react';export default function InfiniteScrollList({ fetchPage }) {const [items, setItems] = useState([]);const [page, setPage] = useState(1);const [status, setStatus] = useState('idle'); // idle | loading | success | errorconst [hasMore, setHasMore] = useState(true);const sentinelRef = useRef(null);useEffect(() => {let cancelled = false;async function loadPage() {setStatus('loading');try {const result = await fetchPage(page);if (cancelled) {return;}setItems((currentItems) => [...currentItems, ...result.items]);setHasMore(result.hasMore);setStatus('success');} catch {if (!cancelled) {setStatus('error');}}}loadPage();return () => {cancelled = true;};}, [fetchPage, page]);useEffect(() => {const sentinel = sentinelRef.current;if (sentinel == null || status !== 'success' || !hasMore) {return;}const observer = new IntersectionObserver(([entry]) => {if (entry.isIntersecting) {// Stop observing until the next page finishes loading.observer.unobserve(sentinel);setPage((currentPage) => currentPage + 1);}},// Start loading before the user reaches the absolute bottom.{ rootMargin: '200px' },);observer.observe(sentinel);return () => {observer.disconnect();};}, [hasMore, status]);return (<section><ul>{items.map((item) => (<li key={item.id}>{item.title}</li>))}</ul>{status === 'loading' && <p>Loading...</p>}{status === 'error' && <p>Unable to load more items.</p>}{status === 'success' && items.length === 0 && <p>No results found.</p>}{items.length > 0 && !hasMore && <p>No more results.</p>}<div ref={sentinelRef} aria-hidden="true" /></section>);}Common mistakes
- Observing the sentinel while the first request is still loading, which can skip straight to page two.
- Not disconnecting the
IntersectionObserver. - Not guarding against duplicate requests.
- Appending results with a stale
itemsvalue instead of a functional state update. - Forgetting the empty state when the first page has no results.
In a real interview, call out pagination details explicitly: "I am assuming the API returns
{ items, hasMore }. If it returns total count or next cursor instead, I will adapt the state model."Question 2: Star rating
Requirement
Build a star rating component that allows users to select a rating from one to five. It should show hover preview, selected value, and support a controlled
valueprop.Practice this problem directly on GreatFrontEnd: Star Rating in React.
Two-minute plan
- Accept
max,value, andonChange. - Store internal value only when the component is uncontrolled.
- Store hover value separately.
- Render each star as a button, not a plain span.
- Use the hover value for preview and the selected value for the committed rating.
React solution
import { useState } from 'react';export default function StarRating({ max = 5, value, onChange }) {const [internalValue, setInternalValue] = useState(0);const [hoveredValue, setHoveredValue] = useState(0);const selectedValue = value ?? internalValue;const displayValue = hoveredValue || selectedValue;function selectRating(nextValue) {if (value == null) {setInternalValue(nextValue);}onChange?.(nextValue);}return (<fieldset><legend>Rating</legend><divonMouseLeave={() => {setHoveredValue(0);}}>{Array.from({ length: max }, (_, index) => {const rating = index + 1;const isFilled = rating <= displayValue;return (<buttonaria-label={`${rating} star${rating === 1 ? '' : 's'}`}aria-pressed={rating === selectedValue}key={rating}onClick={() => {selectRating(rating);}}onMouseEnter={() => {setHoveredValue(rating);}}type="button">{isFilled ? '★' : '☆'}</button>);})}</div></fieldset>);}Common mistakes
- Rendering stars as clickable text with no button semantics.
- Mixing hover state and selected state into one variable.
- Supporting controlled mode poorly, then mutating internal state even when a
valueprop is provided. - Forgetting
type="button", which can accidentally submit a parent form. - Hardcoding five stars when the prompt asks for configurability.
A strong follow-up is half-star ratings. The design change is clear: replace each full-star button with either two hit areas or pointer-position logic, then store values in
0.5increments.Question 3: Autocomplete search
Requirement
Build an autocomplete search input that fetches suggestions as the user types. It should debounce requests, cancel stale requests, show loading and empty states, and allow keyboard selection.
Autocomplete is one of the best frontend LLD questions because it touches forms, async behavior, race conditions, keyboard interactions, positioning, and accessibility. For a deeper architecture discussion, read GreatFrontEnd's Autocomplete front end system design question.
Two-minute plan
- Keep
query,suggestions,status, andactiveIndexin state. - Do not search until the query has enough characters.
- Debounce the search so every keystroke does not call the API.
- Use
AbortControllerso older requests cannot overwrite newer results. - Support Arrow Down, Arrow Up, Enter, and Escape.
React solution
import { useEffect, useState } from 'react';export default function Autocomplete({ search }) {const [query, setQuery] = useState('');const [suggestions, setSuggestions] = useState([]);const [status, setStatus] = useState('idle'); // idle | loading | success | errorconst [activeIndex, setActiveIndex] = useState(-1);useEffect(() => {const trimmedQuery = query.trim();if (trimmedQuery.length < 2) {setSuggestions([]);setStatus('idle');setActiveIndex(-1);return;}// AbortController lets us cancel this request if the user types a newer query.const controller = new AbortController();// Debounce the request so every keystroke does not call the API.const timeoutId = window.setTimeout(async () => {setStatus('loading');try {const results = await search(trimmedQuery, {signal: controller.signal,});setSuggestions(results);setStatus('success');setActiveIndex(results.length > 0 ? 0 : -1);} catch (error) {if (error?.name !== 'AbortError') {setStatus('error');}}}, 250);return () => {// Cancel both the scheduled search and any in-flight request for the old query.window.clearTimeout(timeoutId);controller.abort();};}, [query, search]);function selectSuggestion(suggestion) {setQuery(suggestion.label);setSuggestions([]);setStatus('idle');setActiveIndex(-1);}function handleKeyDown(event) {if (suggestions.length === 0) {return;}if (event.key === 'ArrowDown') {event.preventDefault();setActiveIndex((currentIndex) =>Math.min(currentIndex + 1, suggestions.length - 1),);}if (event.key === 'ArrowUp') {event.preventDefault();setActiveIndex((currentIndex) => Math.max(currentIndex - 1, 0));}if (event.key === 'Enter' && activeIndex >= 0) {event.preventDefault();selectSuggestion(suggestions[activeIndex]);}if (event.key === 'Escape') {setSuggestions([]);setActiveIndex(-1);}}return (<div><label htmlFor="search">Search</label><inputaria-activedescendant={activeIndex >= 0? `search-suggestion-${suggestions[activeIndex].id}`: undefined}aria-autocomplete="list"aria-controls="search-suggestions"aria-expanded={suggestions.length > 0}autoComplete="off"id="search"onChange={(event) => {setQuery(event.target.value);}}onKeyDown={handleKeyDown}role="combobox"value={query}/>{status === 'loading' && <p>Loading suggestions...</p>}{status === 'error' && <p>Unable to load suggestions.</p>}{status === 'success' && suggestions.length === 0 && (<p>No suggestions found.</p>)}{suggestions.length > 0 && (<ul id="search-suggestions" role="listbox">{suggestions.map((suggestion, index) => (<liaria-selected={index === activeIndex}id={`search-suggestion-${suggestion.id}`}key={suggestion.id}onMouseDown={(event) => {// Keep focus on the input while selecting with the mouse.event.preventDefault();selectSuggestion(suggestion);}}role="option">{suggestion.label}</li>))}</ul>)}</div>);}Common mistakes
- Debouncing the input value instead of the side effect, then creating confusing state.
- Not cancelling stale requests. A slower response for "rea" can overwrite a faster response for "react".
- Closing the dropdown on blur before the click on a suggestion runs.
onMouseDownavoids that common issue. - Ignoring empty results and failed requests.
- Adding ARIA attributes without keeping active state and selected state consistent.
If the interviewer asks for production-level accessibility, discuss the full combobox pattern and keyboard expectations. In a timed React live coding interview, a clear partial implementation plus the right explanation is usually better than a broken full implementation.
Question 4: Drag-and-drop list
Requirement
Build a list where users can reorder items by dragging one item and dropping it before another item.
This is a useful LLD problem because it tests list state, stable keys, event handling, and how well you can avoid overcomplicating the first version.
Two-minute plan
- Store list items in order.
- Track the dragged item ID.
- On drop, remove the dragged item from the current list.
- Insert it before the drop target.
- Use stable IDs, not array indexes, as keys.
- Mention that HTML drag and drop has touch-device limitations.
React solution
import { useState } from 'react';const initialItems = [{ id: 'todo', label: 'Todo' },{ id: 'doing', label: 'Doing' },{ id: 'review', label: 'Review' },{ id: 'done', label: 'Done' },];export default function DragAndDropList() {const [items, setItems] = useState(initialItems);const [draggedId, setDraggedId] = useState(null);function moveItemBefore(targetId) {if (draggedId == null || draggedId === targetId) {return;}setItems((currentItems) => {const draggedItem = currentItems.find((item) => item.id === draggedId);if (draggedItem == null) {return currentItems;}const remainingItems = currentItems.filter((item) => item.id !== draggedId,);// Find the target after removing the dragged item so the insertion index is correct.const targetIndex = remainingItems.findIndex((item) => item.id === targetId,);if (targetIndex === -1) {return currentItems;}return [...remainingItems.slice(0, targetIndex),draggedItem,...remainingItems.slice(targetIndex),];});}return (<ul>{items.map((item) => (<lidraggablekey={item.id}onDragEnd={() => {setDraggedId(null);}}onDragOver={(event) => {event.preventDefault();}}onDragStart={() => {setDraggedId(item.id);}}onDrop={() => {moveItemBefore(item.id);}}>{item.label}</li>))}</ul>);}Common mistakes
- Using array indexes as keys, then getting strange reorder behavior.
- Mutating the existing
itemsarray withspliceinstead of returning a new array. - Trying to support every drag-and-drop feature before the basic reorder works.
- Forgetting that browser drag and drop is not a complete mobile solution.
- Not resetting the dragged state after the drag ends.
If the prompt expects a polished implementation, add a drop zone after the final item so the user can move an item to the end. If the prompt expects mobile support, explain that you would likely use pointer events or a well-tested drag-and-drop library in production.
For related practice, solve Transfer List in React, which tests similar item movement and state updates.
Question 5: Toast notification system
Requirement
Build a toast notification system that can show multiple messages, auto-dismiss each toast after a delay, and allow manual dismissal.
This frontend LLD question tests queues, timers, cleanup, rendering a stack, and accessibility for status updates.
Two-minute plan
- Store an array of toast objects.
- Generate stable IDs locally.
- Add a
showToastfunction. - Auto-dismiss each toast with
setTimeout. - Clear timers when a toast is manually dismissed or when the component unmounts.
- Render the toast region with live-region semantics.
React solution
import { useCallback, useEffect, useRef, useState } from 'react';export default function ToastDemo() {const [toasts, setToasts] = useState([]);const nextIdRef = useRef(1);// Keep timer IDs outside render state so they can be cleared reliably.const timersRef = useRef(new Map());const dismissToast = useCallback((id) => {const timerId = timersRef.current.get(id);if (timerId != null) {window.clearTimeout(timerId);timersRef.current.delete(id);}setToasts((currentToasts) =>currentToasts.filter((toast) => toast.id !== id),);}, []);const showToast = useCallback((message, variant = 'info') => {const id = nextIdRef.current;nextIdRef.current += 1;setToasts((currentToasts) => [...currentToasts,{ id, message, variant },]);const timerId = window.setTimeout(() => {dismissToast(id);}, 4000);timersRef.current.set(id, timerId);},[dismissToast],);useEffect(() => {return () => {timersRef.current.forEach((timerId) => {window.clearTimeout(timerId);});timersRef.current.clear();};}, []);return (<section><buttononClick={() => {showToast('Profile saved', 'success');}}type="button">Show toast</button><div aria-live="polite" aria-relevant="additions" role="status">{toasts.map((toast) => (<div data-variant={toast.variant} key={toast.id}><span>{toast.message}</span><buttonaria-label="Dismiss notification"onClick={() => {dismissToast(toast.id);}}type="button">×</button></div>))}</div></section>);}Common mistakes
- Using one boolean like
isToastVisible, which cannot represent multiple toasts. - Starting timers without clearing them.
- Using the array index as the toast ID.
- Removing the newest toast when the oldest timer finishes.
- Rendering a visual notification with no live-region announcement.
For a stronger answer, mention how you would expose this through context in a real app:
ToastProvideruseToast()showToast()dismissToast()ToastViewportThat shows you understand the difference between an interview implementation and a reusable application service.
How to compare React machine coding solutions
When practicing react machine coding round questions and solutions, do not only ask "does it work?" Ask whether the solution will survive follow-up questions.
Component First follow-up What it tests Infinite scroll Add retry and cursor pagination Async state and API assumptions Star rating Support half-star ratings Component API and event handling Autocomplete search Add caching and stale response handling Async correctness and performance Drag-and-drop list Move items across two lists Data modeling and immutable updates Toast notification Add toast placement and max queue size State queues and reusable APIs Good frontend LLD preparation means practicing the base problem and then asking: "What would break if the interviewer adds one more requirement?"
A practical preparation path
If you have one week before a frontend LLD or React machine coding round, use this sequence:
- Day 1: Basic state and events Build counter, accordion, tabs, todo list, and star rating.
- Day 2: Lists and derived state Build transfer list, selectable cells, data table, and drag-and-drop reorder.
- Day 3: Async UI Build autocomplete, job board, infinite scroll, and a search results page.
- Day 4: Timers and queues Build progress bars, stopwatch, traffic light, and toast notifications.
- Day 5: Accessibility pass Revisit tabs, accordion, modal dialog, autocomplete, and star rating.
- Day 6: Timed mocks Pick two problems and solve each in 45 to 60 minutes.
- Day 7: Review and redo Redo the weakest problem without looking at your previous code.
GreatFrontEnd has many of these as browser-based practice questions. Start with React coding interview questions, then add the broader UI coding question set.
What interviewers are looking for
In frontend LLD interviews, the strongest candidates make their thinking easy to follow. They do not simply type React code quickly.
Interviewers usually look for:
- A clear requirement breakdown
- A reasonable component structure
- State that does not contradict itself
- Functional updates where previous state matters
- Cleanup for effects, subscriptions, observers, and timers
- Edge cases such as empty, loading, error, disabled, and repeated interactions
- Basic accessibility for interactive controls
- A working demo path before time runs out
The best habit is simple: say the design before you code it. A practical sentence like "I will keep hover preview separate from committed rating because they represent different states" gives the interviewer confidence that your code is intentional.
Frontend LLD questions are not a different category from React machine coding questions. They are the design layer inside the coding round.
If you can clarify requirements, model state, build the main interaction, handle edge cases, and explain trade-offs while coding, you are preparing for the round that many frontend interviews now use to separate React familiarity from real UI engineering skill.
- TypeScript Interview Questions for Senior Developers (2026)A practical set of TypeScript interview questions for senior frontend developer interviews, with coding problems on generics, unions, utility types, and React TypeScript.作者GreatFrontEnd Team10 分钟阅读Jun 3, 2026
This guide is a practical set of TypeScript interview questions for senior frontend developers. In 2026, senior TypeScript interviews are less about defining
Partial<T>and more about using the type system to model product states, prevent invalid component APIs, and make refactors safer.If you are preparing for TypeScript interview questions for experienced roles, focus on code problems. Interviewers want to see how you design constraints, how you narrow unsafe data, and when you choose a simple type over a clever one.
If you want more hands-on practice after this guide, use GreatFrontEnd's TypeScript interview questions.
How senior TypeScript interviews are different
At junior and mid-level, TypeScript questions often check syntax: interface vs type,
unknownvsany, optional properties, or basic generics.At senior and staff level, the prompt usually sounds more like production code:
- "This component accepts invalid prop combinations. Fix the API."
- "This API response has five states and the UI keeps missing one."
- "This helper loses literal types and breaks autocomplete."
- "This design-system type is too permissive. Make invalid variants impossible."
- "This utility type works, but it is unreadable. Would you keep it?"
That is the pattern behind the TypeScript coding interview questions below.
1. Model async UI state with discriminated unions
How it appears in an interview: "Our dashboard uses
isLoading,error, anddata, but invalid states keep slipping through. Refactor the type."type RemoteData<T> =| { status: 'idle' }| { status: 'loading' }| { status: 'success'; data: T }| { status: 'error'; error: Error };function assertNever(value: never): never {throw new Error(`Unhandled state: ${JSON.stringify(value)}`);}function renderUsers(state: RemoteData<Array<{ id: string; name: string }>>) {switch (state.status) {case 'idle':return 'Choose a team';case 'loading':return 'Loading users';case 'success':return state.data.map((user) => user.name).join(', ');case 'error':return state.error.message;default:return assertNever(state);}}What interviewers look for: You should remove impossible states instead of documenting them.
successmust always havedata;errormust always haveerror;loadingshould not accidentally carry stale data unless that is an explicit product decision.The senior signal is exhaustiveness. If a future engineer adds
{ status: 'refreshing' }, theassertNeverline makes incomplete rendering logic fail at compile time.2. Write a generic
pickhelper without losing key safetyHow it appears in an interview: "Implement
pick(obj, keys)so keys must exist on the object and the return type only contains those keys."function pick<T extends object, K extends keyof T>(obj: T,keys: readonly K[],): Pick<T, K> {const result = {} as Pick<T, K>;for (const key of keys) {result[key] = obj[key];}return result;}const user = {id: 'u_1',name: 'Ada',role: 'admin',active: true,};const summary = pick(user, ['id', 'name'] as const);// summary is { id: string; name: string }What interviewers look for: This tests generic constraints and
keyof. A weaker answer usesstring[]for keys and returnsPartial<T>, which loses the reason TypeScript is useful here. A strong answer preserves the exact key union.The follow-up is usually about mutation. The cast inside the function is acceptable because JavaScript object construction is dynamic, but the public API remains precise. Senior candidates can explain that boundary instead of pretending no assertion is ever allowed.
3. Type an API patch payload with utility types
How it appears in an interview: "We need an endpoint that updates a user profile. It should allow
name,email, andtimezone, but neverid,createdAt, orrole."type User = {id: string;name: string;email: string;timezone: string;role: 'member' | 'admin';createdAt: string;};type EditableUserFields = Pick<User, 'name' | 'email' | 'timezone'>;type UpdateUserPayload = Partial<EditableUserFields>;async function updateUser(id: User['id'], payload: UpdateUserPayload) {return fetch(`/api/users/${id}`, {method: 'PATCH',body: JSON.stringify(payload),});}updateUser('u_1', { timezone: 'Asia/Kolkata' });What interviewers look for: Utility types should express intent.
Partial<User>is too broad because it allows protected fields.PickplusPartialsays, "Only these fields are editable, and each is optional in a patch."This is one of the most common TypeScript coding questions because it mirrors real frontend work: form models, DTOs, optimistic updates, and API client boundaries.
4. Use conditional types and
inferto unwrap async resultsHow it appears in an interview: "Given a service function, derive the resolved response type without copying it manually."
async function getCurrentUser() {return {id: 'u_1',name: 'Grace',permissions: ['billing:read', 'team:write'] as const,};}type AsyncReturn<T> = T extends (...args: infer _Args) => Promise<infer R>? R: never;type CurrentUser = AsyncReturn<typeof getCurrentUser>;function canEditTeam(user: CurrentUser) {return user.permissions.includes('team:write');}What interviewers look for: This tests whether you understand conditional types as relationships between inputs and outputs.
infer Rcaptures the resolved value from a promise-returning function.A practical follow-up: TypeScript already has
ReturnType<T>andAwaited<T>, so this can also be written as:type CurrentUser = Awaited<ReturnType<typeof getCurrentUser>>;The senior answer names the built-in utility and explains when a custom helper is still useful.
5. Build event names with template literal and mapped types
How it appears in an interview: "Create a typed event map for a settings object. Each key should produce an
on<Key>Changedhandler."type ChangeHandlers<T extends object> = {[K in keyof T as `on${Capitalize<string & K>}Changed`]: (nextValue: T[K],) => void;};type Settings = {theme: 'light' | 'dark';pageSize: 25 | 50 | 100;showArchived: boolean;};type SettingsHandlers = ChangeHandlers<Settings>;const handlers: SettingsHandlers = {onThemeChanged: (theme) => console.log(theme),onPageSizeChanged: (pageSize) => console.log(pageSize),onShowArchivedChanged: (showArchived) => console.log(showArchived),};What interviewers look for: This combines mapped types, key remapping, template literal types, and indexed access types. It is a strong senior prompt because the runtime idea is simple, but the type-level transformation requires precision.
The judgment part matters too. This pattern is useful for design-system APIs, event maps, analytics names, and generated clients. It is probably overkill for one local component.
6. Type mutually exclusive React props
How it appears in React TypeScript interview questions: "Create a button that can behave like a link or a real button, but never both."
type BaseProps = {children: React.ReactNode;variant?: 'primary' | 'secondary';};type LinkButtonProps = BaseProps & {href: string;onClick?: never;};type ActionButtonProps = BaseProps & {href?: never;onClick: () => void;};type ButtonProps = LinkButtonProps | ActionButtonProps;function Button(props: ButtonProps) {if (props.href !== undefined) {return <a href={props.href}>{props.children}</a>;}return <button onClick={props.onClick}>{props.children}</button>;}What interviewers look for: Prop types can define product constraints instead of merely documenting them.
neverprevents callers from passing bothhrefandonClick, and thehrefcheck narrows the union inside the component.This is a better answer than a single prop bag with
href?: stringandonClick?: () => void, because the weak version makes every invalid combination somebody else's runtime problem.7. Create a type-safe component variant map
How it appears in an interview: "We have variants in a design system. Keep the object literal narrow, but verify that every variant exists."
type ButtonVariant = 'primary' | 'secondary' | 'danger';const buttonClasses = {primary: 'bg-blue-600 text-white',secondary: 'bg-slate-100 text-slate-900',danger: 'bg-red-600 text-white',} satisfies Record<ButtonVariant, string>;function getButtonClass(variant: ButtonVariant) {return buttonClasses[variant];}What interviewers look for: This problem checks whether you know the difference between annotation and validation.
satisfiesverifies the object conforms toRecord<ButtonVariant, string>while preserving useful inference from the original object.In a senior interview, expect a follow-up: "What happens when someone adds
ghosttoButtonVariant?" The object must now includeghost, so the compiler catches the incomplete design-system map.8. Explain when
unknownis better thananyHow it appears in an interview: "We parse JSON from local storage. Type it safely."
function parseJson(value: string): unknown {return JSON.parse(value);}type Preferences = {theme: 'light' | 'dark';};function isPreferences(value: unknown): value is Preferences {return (typeof value === 'object' &&value !== null &&'theme' in value &&(value.theme === 'light' || value.theme === 'dark'));}const parsed = parseJson(localStorage.getItem('preferences') ?? '{}');if (isPreferences(parsed)) {parsed.theme;}What interviewers look for:
anysays "trust me" and disables checking.unknownsays "prove it first." Senior TypeScript work often happens at boundaries: network responses, storage, third-party scripts, feature flags, analytics payloads, and CMS content.The strong answer pairs
unknownwith a narrowing function or schema validator. TypeScript cannot make untrusted runtime data safe by itself.9. Choose literal unions over enums for frontend constants
How it appears in an interview: "Our app has several status constants. Should we use an enum, a union type, or an
as constobject?"const ORDER_STATUS = {Draft: 'draft',Paid: 'paid',Shipped: 'shipped',Cancelled: 'cancelled',} as const;type OrderStatus = (typeof ORDER_STATUS)[keyof typeof ORDER_STATUS];function getStatusLabel(status: OrderStatus) {switch (status) {case ORDER_STATUS.Draft:return 'Draft';case ORDER_STATUS.Paid:return 'Paid';case ORDER_STATUS.Shipped:return 'Shipped';case ORDER_STATUS.Cancelled:return 'Cancelled';}}What interviewers look for: In frontend code, string literal unions and
as constobjects often fit better than regular enums because they keep API values as plain strings and compose cleanly with other type utilities.A senior answer should not turn this into a rule. Enums can still be useful in shared TypeScript codebases, but for UI state, analytics event names, API statuses, and component variants, literal unions are usually easier to compose with mapped types, discriminated unions, and template literal types.
Senior TypeScript preparation checklist
Use this checklist for TypeScript interview questions for 5 years experience and above:
- Practice discriminated unions until you can model async state, reducers, and component modes without invalid combinations.
- Write generic helpers using
keyof, indexed access types, and constrained type parameters. - Know the common utility types:
Partial,Required,Pick,Omit,Record,ReturnType,Parameters, andAwaited. - Be able to read conditional types with
infer, even if you do not write them every day. - Use mapped types and template literal types when an API can be derived from another type.
- In React, type props as constraints: mutually exclusive props, controlled vs uncontrolled props, required children, and exact event handlers.
- Prefer
unknownat unsafe boundaries and narrow before use. - Know when
as constand literal unions are cleaner than runtime enums. - Explain tradeoffs. A senior answer is allowed to say, "This type is correct, but too complex for this codebase."
The best senior TypeScript answers are practical. They prevent invalid states, preserve inference, and make the next refactor less risky.
When practicing TypeScript coding questions, do not memorize every utility type in isolation. Start with a real constraint: which states are impossible, which keys are allowed, which component props conflict, which runtime values are untrusted. Then use TypeScript to encode that constraint clearly.
For more practice, head to GreatFrontEnd's TypeScript interview questions and work through problems with the same mindset: code first, types as guardrails, and explanations that connect back to production frontend work.
- Is Frontend Development Dying? What the Data Actually Shows in 2026Is frontend development dying in 2026? A data-backed look at AI, frontend career demand, what is changing, and what frontend developers should learn now.作者GreatFrontEnd Team14 分钟阅读Jun 2, 2026
No. Frontend development is not dying in 2026. Simple UI assembly is getting cheaper. The harder parts remain: browser behavior, accessibility, state, performance, and product trade-offs.
That distinction matters. Most "will AI replace frontend developers" arguments confuse two different jobs:
- Producing code that looks like a UI
- Being accountable for how a real UI behaves for real users
AI can generate React components, Tailwind layouts, landing page sections, form markup, and first-pass prototypes. That helps. It also solves the easiest part of many frontend tasks.
The harder part is still engineering: clarifying requirements, designing component boundaries, reasoning about state, debugging CSS, handling edge cases, reviewing generated code, and shipping interfaces that hold up outside a demo.
Is frontend development dying in 2026?
The better question is: which version of frontend development is dying?
The version that is most exposed looks like this:
- Building static marketing pages from standard templates
- Converting simple mockups into one-off JSX
- Writing boilerplate CRUD screens with no complex interaction
- Styling common components without understanding layout constraints
- Depending on a framework without understanding HTML, CSS, or JavaScript
That work is easier to automate because the requirements are narrow and the review is mostly visual. If the screen looks close enough, the task feels done.
Frontend is an attractive target for AI. There is a huge amount of HTML, CSS, JavaScript, React, and Tailwind code online. Many UI patterns are well documented. A lot of frontend work also sits close to the edge of the system, so teams are more comfortable generating a first pass there than in payments, infrastructure, or security-critical paths.
But not all frontend work has the same risk. A static marketing page, an admin CRUD screen, and a support dashboard are different from browser-native products like Figma, Linear, Google Docs, Spotify, or a complex AI workspace. The first group is often a thin layer over data. The second group has deep client-side state, real-time collaboration, offline behavior, streaming updates, performance constraints, and many interaction edge cases.
The harder work looks different:
- Building components that hold up under messy product requirements
- Making forms, dialogs, menus, tables, and search flows accessible
- Handling loading, empty, error, disabled, and interrupted states
- Keeping performance acceptable on real devices
- Maintaining a design system across teams and products
- Reviewing generated code before it ships
- Knowing when a nice-looking UI is technically fragile
That second group still needs frontend engineers. It may need fewer people typing boilerplate, but it needs people who can own the outcome.
What the data actually says
There is no single clean metric called "frontend developer demand." Job titles vary by company, country, seniority, and whether the role is called frontend, full stack, web developer, UI engineer, product engineer, or software engineer.
Still, the available data does not support the claim that frontend development is disappearing.
Signal What it says How to read it BLS web developers and digital designers Overall employment is projected to grow 7% from 2024 to 2034, with about 14,500 openings per year. This is a US source, but it is a useful labor-market signal for web and interface work. BLS software developers, QA analysts, and testers Employment is projected to grow 15% from 2024 to 2034, with about 129,200 openings per year. Frontend sits inside broader software work, and software demand is not collapsing. World Economic Forum Future of Jobs 2025 Software and applications developers are listed among the fastest-growing roles by 2030. Employers expect technology roles to keep growing even as AI changes the work. LinkedIn U.S. Software Engineer Talent Landscape 2026 SWE hiring momentum has slowed, entry pathways are tightening, and AI-adjacent roles are growing. The market is not dead, but juniors and narrow specialists face a harder bar. Indeed Global Labor Market and Workforce Trends 2026 US tech job postings moved from boom to bust, and a larger share of tech postings now ask for at least five years of experience. Current hiring data supports the experience-bar argument better than broad replacement claims. Stack Overflow Developer Survey 2025 84% of respondents use or plan to use AI tools, but more developers distrust AI accuracy than trust it. AI is now part of development, but human verification remains central. DORA State of AI-assisted Software Development 2025 AI works as an amplifier of an organization's existing engineering strengths and weaknesses. AI helps teams with good systems, but it does not remove the need for review, testing, and delivery discipline. GitHub Octoverse 2025 TypeScript became GitHub's most used language by contributor count in August 2025; JavaScript and TypeScript remain the largest combined ecosystem. The web stack is not fading. It is becoming more typed and production-oriented. WebAIM Million 2026 95.9% of the top one million home pages had detected WCAG failures, with 56.1 errors per page on average. The web still has a massive quality gap, especially around accessibility. Taken together, the data does not show frontend disappearing. It shows a tighter market with higher expectations. AI is now part of development, entry-level pathways are harder, and teams still need people who can review, test, and improve the code before users touch it.
Why people keep asking if frontend is dead
Frontend has been declared dead many times.
WYSIWYG editors like Dreamweaver promised that visual editing would remove the need to write HTML. WordPress made publishing dramatically easier. Offshore outsourcing changed how companies staffed web projects. Bootstrap made decent-looking layouts available to everyone. Webflow and no-code tools let non-engineers create polished sites. Now AI can generate a full screen from a prompt.
Each wave removed repetitive work. None removed the need for people who understand how the web behaves.
What changed was the baseline. In the early web, knowing HTML and CSS was enough to be useful. Later, frontend developers needed responsive design, JavaScript, browser APIs, build tools, design systems, accessibility, performance, analytics, API integration, security awareness, and framework fluency.
AI is another abstraction wave. It removes some manual work. It also creates more code that someone has to review, integrate, test, and maintain.
Will AI replace frontend developers?
AI will replace some frontend tasks. It will not replace every frontend developer.
These tasks are already easier to automate:
- Generating first-pass component markup
- Producing layout variants for a known design
- Writing boilerplate form code
- Creating placeholder copy and mock data
- Explaining framework errors
- Translating simple JavaScript into TypeScript
- Migrating straightforward components from one framework style to another
- Drafting unit tests for obvious cases
Use it. Just do not confuse a generated first pass with finished work.
Faster code generation does not remove the rest of the job. In production, the expensive part is often not typing the component. It is deciding what the component should do, how it should fail, whether the state model is correct, whether keyboard users can operate it, whether it performs under load, and whether the implementation will still make sense after three more requirements are added.
Stack Overflow's 2025 survey reflects that split. AI usage is widespread, but only a small fraction of developers highly trust AI output. Most serious teams still review generated code before shipping it.
What AI still gets wrong in frontend work
AI-generated frontend code can be impressive in a screenshot and still fail in the browser.
CSS is not just visual styling
A generated layout can look fine at
1440pxwith short English labels and then break with long content, browser zoom, a narrow container, a sticky header, a nested scroll area, or an unexpected image ratio.The problem is that AI often predicts a plausible layout pattern without knowing the actual page, the container it will live inside, the device constraints, or the user's path through the interface. CSS generated by AI can look right in isolation and still be wrong inside the product.
The hard parts of CSS are constraint problems:
- Why is the flex child overflowing?
- Which element owns the scroll?
- Should this be
width,max-width, ormin-width: 0? - Is the spacing owned by the content element or the layout wrapper?
- Does this grid survive when one card has twice as much content?
- What happens when the page is translated?
AI can suggest CSS. A frontend engineer has to know whether it is stable. If this is a weak spot, start with common CSS mistakes front end engineers make.
Accessibility requires more than adding ARIA
Accessibility is a clear example. The 2026 WebAIM Million report found detected WCAG failures on 95.9% of top home pages. It also found that pages using ARIA had significantly more detected errors on average than pages without ARIA.
That does not mean ARIA is bad. It means accessibility is easy to get wrong when people add attributes without understanding the interaction model.
A modal is not accessible because it has
role="dialog". A combobox is not accessible because the markup containsaria-expanded. A menu is not accessible because the items look clickable.You still need to test labels, focus order, keyboard behavior, escape behavior, screen reader names, error messages, contrast, reduced motion, and disabled states. Research on AI-assisted accessible coding has found similar issues: developers often fail to prompt for accessibility, skip manual validation steps, or cannot verify whether the generated UI is compliant.
UX judgment does not come from syntax
AI can generate a form. It cannot reliably decide whether the form is too long, whether the error message is useful, whether the destructive action needs confirmation, whether a dropdown should be a combobox, or whether the user should see an empty state before a loading state.
Those choices are product judgment. They come from understanding users, constraints, and trade-offs.
Production UI is stateful
Frontend bugs often live in transitions:
- A request returns after a newer request
- A modal closes while a nested async action is still running
- A disabled button becomes enabled at the wrong time
- A list reorders while focus is inside it
- A component unmounts before a timeout finishes
- A form preserves stale values after switching records
These bugs do not show up in a static screenshot. They show up when a user interacts with the UI in the wrong order, on a slow network, with real data.
The more product state a frontend owns, the more these combinations matter. Auth state, cached server data, optimistic updates, form drafts, route transitions, animations, feature flags, and WebSocket events can all interact at once. AI can generate each individual pattern. The failure usually appears in the combination.
The future of frontend development
Frontend development is becoming less about writing every line by hand and more about owning the quality of the interface.
Expect frontend roles to move in a few directions:
- Product-minded frontend engineers who work close to design and product decisions
- Design system engineers who build reusable accessible primitives
- Frontend platform engineers who improve build, performance, testing, and deployment workflows
- Full-stack product engineers who can own a feature across UI, API, and data boundaries
- Engineers building AI product interfaces who work on streaming UIs, tool-calling workflows, agent dashboards, generative editing surfaces, and interfaces that change as the system responds
This does not mean every frontend developer has to become a backend engineer. It means frontend developers need enough surrounding context to make good trade-offs.
Some simple products may move closer to chat, automation, or API-first workflows. The products that still need rich interfaces will usually need better frontend engineering, not less. If the UI is where users make decisions, coordinate work, edit content, review AI output, or recover from mistakes, the interface becomes part of the product's safety and quality layer.
The core skills still matter:
- HTML and accessibility: Semantic markup, forms, labels, focus, keyboard behavior, and ARIA patterns
- CSS and layout: Flexbox, grid, responsive constraints, overflow, stacking contexts, and design tokens
- JavaScript and TypeScript: Data structures, async behavior, events, modules, narrowing, and API contracts
- React or another UI framework: State, effects, composition, controlled components, rendering behavior, and performance
- Testing and debugging: Browser DevTools, interaction testing, edge cases, and regression prevention
- Performance: Core Web Vitals, bundle size, rendering cost, image optimization, and perceived speed
- Product judgment: Knowing what to build, what to cut, and how to communicate trade-offs
- AI fluency: Prompting, reviewing, refactoring, and testing generated code instead of accepting it blindly
The more generated code a team accepts, the more it needs engineers who can tell correct code from code that merely looks correct.
If you are choosing between roles, ask whether the company actually values frontend. A product where the browser experience is the business will give you more room to build frontend skill than a company where the UI is mostly a thin wrapper over internal data. Use the questions in How to Evaluate Companies as a Front End Engineer to separate those environments.
Should I learn frontend development in 2026?
Yes, if you are willing to learn the browser instead of only learning a framework.
Do not start with the assumption that React alone makes you a frontend developer. React is important, but it sits on top of HTML, CSS, JavaScript, browser events, accessibility rules, network behavior, and product constraints.
A practical learning path looks like this:
- Build small interfaces with plain HTML, CSS, and JavaScript.
- Learn React once you understand state, events, forms, and rendering.
- Rebuild common UI components: tabs, accordion, modal, autocomplete, data table, carousel, file explorer.
- Add edge cases: empty states, loading states, keyboard support, long content, and slow network behavior.
- Compare your solution with high-quality implementations.
- Use AI to speed up repetition, then inspect every line it writes.
- Move beyond isolated components into full product flows: auth, server data, optimistic updates, routing, errors, and recovery.
Do not let tools hide gaps. If you cannot explain why generated code works, you have not learned the skill yet.
Is frontend a good career in 2026?
Frontend can still be a good career in 2026, but it is not an easy shortcut into software engineering.
The entry-level bar is higher than it used to be. LinkedIn's 2026 software engineering report says entry pathways are tightening, and Indeed's 2026 labor-market report shows more tech postings asking for at least five years of experience. Companies have more tooling, more AI assistance, and less patience for developers who can only assemble a screen when every requirement is spelled out.
At the same time, teams still need engineers who can make product UI reliable, accessible, fast, and maintainable.
The strongest signal you can show is not a certificate or a cloned landing page. It is working software you can explain.
Build projects that prove you can handle:
- Real component state.
- Forms and validation.
- Async data fetching.
- Search, sorting, filtering, or pagination.
- Responsive layout.
- Accessibility basics.
- Error handling.
- Clear code organization.
- End-to-end ownership of a feature, not just the visible component.
Then practice explaining your decisions. In interviews and on the job, communication is part of the work.
What separates developers who get replaced from those who do not
The risk is not using AI. The risk is having no judgment after AI gives you code.
Replaceable signal Strong signal Copies generated code without reading it. Reviews generated code and can explain every trade-off. Builds only the happy path. Handles empty, loading, error, disabled, and interrupted states. Treats CSS as trial and error. Understands layout, constraints, overflow, and responsive behavior. Adds ARIA by pattern matching. Tests keyboard behavior, focus, labels, and screen reader names. Waits for exact requirements. Clarifies scope and proposes a sensible MVP. Ships one-off components. Builds maintainable components with clear boundaries. Avoids debugging. Uses DevTools, logs, tests, and reasoning to isolate the bug. Treats AI as a replacement for learning. Treats AI as a tool for speed, exploration, and review. So no, frontend development is not dying in 2026. The low end is being compressed, expectations are rising, and the work that survives depends more on engineering judgment.
If you want to prepare for that version of the role, practice building real UI. Start with GreatFrontEnd's user interface coding questions, review your mistakes, and push past the version that only works in the first screenshot.
- Machine Coding Round: The Complete Frontend Guide (2026)A frontend-focused guide to machine coding round questions, including what is machine coding round, how to prepare for machine coding round interviews, and how to practice in React.作者GreatFrontEnd Team17 分钟阅读Jun 2, 2026
A machine coding round is a live coding interview where you build a working application or UI component from scratch in a fixed time, typically 60 to 90 minutes. In frontend interviews, the prompt is often a todo list, autocomplete, data table, image carousel, file explorer, modal dialog, or small dashboard built with HTML, CSS, JavaScript, and often React.
Companies use this round because it is hard to fake. You have to turn a rough product requirement into working code while making trade-offs in real time.
React syntax gets you through the first few minutes. The rest of the round tests whether you can break down the UI, design state, handle events, use accessible markup, keep styling readable, and still ship something that runs.
Use this as an operating guide for the round, then practice the patterns on User interface coding interview questions on GreatFrontEnd.
What is machine coding round in frontend interviews?
A machine coding round asks you to build a small but complete feature in a live coding environment. The interviewer gives you a prompt, watches how you plan, and reviews the code you write.
For a frontend role, the prompt often sounds like one of these:
- Build a todo list with add, complete, delete, and filter actions
- Build a tabs component that supports multiple tab panels
- Build an autocomplete input that fetches suggestions as the user types
- Build a paginated and sortable data table
- Build a file explorer from nested JSON data
- Build an image carousel with previous, next, indicators, and keyboard support
- Build a modal dialog that opens, closes, and handles escape
The final UI does not need to look production-grade. It needs to work, and the code needs to be readable enough to discuss.
Machine coding round vs other interview rounds
The machine coding round sits between algorithm interviews and frontend system design interviews. It is implementation-heavy.
Round What it tests Typical output DSA coding Algorithms, data structures, complexity A function that passes test cases Machine coding Feature implementation, code organization, state, UI behavior A working component or small app Frontend system design Architecture, APIs, scalability, performance A design discussion with diagrams and trade-offs Take-home assignment Deeper implementation without live pressure A larger project submitted later That is why developers who are comfortable with DSA can still struggle here. This round is about shipping a small product, not finding one clever trick.
What a machine coding round solution has to prove
Your solution has to be executable, demonstrable, and easy to review. Code that looks clever but cannot be run, clicked through, or explained will not score well.
For a frontend machine coding round, aim for these deliverables:
- A working UI: The main flow should run end to end. The interviewer should not have to imagine missing pieces.
- Clear component boundaries: Each component should have a reason to exist. If everything lives in
App, the solution becomes harder to review. - Predictable state: Avoid state values that can contradict each other. Prefer one clear
statusvalue over multiple booleans when the UI has distinct modes. - Simple styling: The page should be readable, aligned, and usable. It does not need a design-system-level polish pass.
- Edge-case handling: Empty states, loading states, disabled states, repeated interactions, and basic keyboard behavior should be handled when relevant.
- A demo path: The interviewer should be able to test the feature quickly.
Machine coding rounds often end with a walkthrough. If your code works but is hard to explain, you have made the review harder than it needed to be.
What not to overbuild
A timed round is not a portfolio project. Spend the time on behavior first.
Skip these unless the prompt asks for them:
- A database or persistent backend unless the prompt asks for it.
- A global state library for a small component.
- A full design system.
- Pixel-perfect styling.
- Advanced animations before the main behavior works.
- Complex abstractions that only support one use case.
Performance and extensibility still matter, but only at the right level. In a data table question, sorting and pagination matter more than virtualizing rows before pagination works. In autocomplete, debouncing and stale-response handling matter more than a dropdown animation.
The order is simple: make the feature correct, make it readable, make it resilient, then polish.
Frontend machine coding is different from generic machine coding
Many machine coding resources focus on object-oriented backend-style problems: parking lots, cab booking, split expenses, inventory systems, or command-line menus. Those can teach modularity, but frontend interviews test a different surface area.
Frontend machine coding round questions care about:
- Component composition
- State and derived rendering
- DOM events
- Forms and validation
- Async requests
- Loading and empty states
- Layout and responsiveness
- Accessibility basics
- Browser debugging
- User experience under edge cases
For example, a generic machine coding problem might ask whether your service classes are extensible. A frontend machine coding problem might ask whether your autocomplete handles a slow response from an older request after the user has already typed a newer query. Both test design thinking, but the failure modes are different.
If your target role is frontend-heavy, practice UI problems in the browser. Reading about machine coding helps, but this round favors engineers who have built these components enough times that the implementation path feels familiar.
Why most developers fail the machine coding round
The usual failure mode is not lack of knowledge. It is starting to code before the solution has a shape.
1. They skip requirement clarification
If the prompt says "build autocomplete", do not immediately create an input and start fetching data. Ask what matters:
- Should suggestions appear after every keystroke or after a minimum query length?
- Should the results be fetched from an API or filtered locally?
- What should happen for empty results, loading, and errors?
- Should keyboard navigation be supported?
- Should previous queries be cached?
- Is there a time limit on debouncing?
Clarification prevents building the wrong thing.
2. They do not break the UI into components
Weak solutions often put all JSX, state, event handlers, and styling in one growing component. That works for ten minutes, then becomes hard to reason about.
A better approach is to sketch the component tree before coding:
AutocompleteSearchInputSuggestionsListSuggestionItemEmptyStateErrorStateDo not over-engineer it. Separate responsibilities so the interviewer can follow the code.
3. They design state reactively instead of intentionally
State is where machine coding rounds quietly become messy. Candidates add
useStatecalls whenever they need one more value, then discover that several states can contradict each other.For example, this state model is fragile:
const [isLoading, setIsLoading] = useState(false);const [hasError, setHasError] = useState(false);const [results, setResults] = useState([]);const [showDropdown, setShowDropdown] = useState(false);It is possible to end up with loading, error, and visible dropdown all at once.
For more complex UI flows, make states explicit:
const initialState = {query: '',status: 'idle', // idle | loading | success | errorresults: [],activeIndex: -1,error: null,};You can implement that with
useState,useReducer, or a small custom hook. What matters is that the states describe the UI clearly.4. They leave edge cases until the last minute
Interviewers notice when the happy path works but everything else breaks. Common frontend edge cases include:
- Empty input
- Empty list
- Rapid user interactions
- Slow network requests
- Failed network requests
- Keyboard-only usage
- Mobile layout
- Long text and overflow
- Multiple instances of the same component on the page
You will not cover every edge case. Pick the ones that matter for the prompt and call out the rest.
5. They do not communicate while coding
In a live round, silence can make a reasonable solution look weaker than it is. Explain decisions as you go:
- "I am keeping the state local because this component does not need app-wide state."
- "I am extracting this list item because the keyboard and click behavior belong there."
- "I will ship the core interaction first, then add loading and empty states."
This makes the implementation easier to review.
6. They do not keep the code executable
In a timed round, it is tempting to keep coding until the last second. That often creates a worse outcome: the final code has a syntax error, broken import, missing prop, or state update bug that prevents the interviewer from running it.
Keep the app executable after every major step:
- Render static UI.
- Verify it appears.
- Add state.
- Verify the state updates.
- Add one interaction.
- Verify the interaction.
This rhythm feels slower, but it prevents the worst outcome: a good idea trapped inside code that does not run.
7. They refactor too late
Do not wait until the final five minutes to clean up the code. If a component is becoming large, extract a small part while the mental model is still fresh. If a state variable name is confusing, rename it before more logic depends on it.
Refactoring during the round should be modest. Extract components, rename variables, move derived values into constants, and group related handlers. Avoid a full architectural rewrite unless the current code is blocking progress.
What interviewers evaluate
Interviewers tend to look at these areas:
- Correctness: The UI satisfies the required behavior.
- Component design: The code is split into meaningful, reusable pieces.
- State management: State is minimal, consistent, and easy to update.
- Data flow: Props, callbacks, and side effects are understandable.
- HTML and CSS: Layout is stable, responsive enough, and not brittle.
- Accessibility: Forms, buttons, labels, focus behavior, and keyboard support are handled where relevant.
- Performance: Expensive work is avoided or controlled, especially for lists, search, timers, and network calls.
- Testing mindset: You manually verify important flows.
A small UI component can reveal a lot about day-to-day frontend engineering ability.
Use this rubric during practice:
Area Weak signal Strong signal Requirements Starts coding immediately Clarifies MVP and follow-ups Structure One large component Small components with clear responsibilities State Many unrelated booleans Minimal state and derived values Edge cases Happy path only Empty, loading, error, reset, and rapid interactions Accessibility Clickable divs everywhere Semantic controls and keyboard-aware behavior Communication Silent implementation Explains trade-offs while coding Finish Broken or incomplete demo Working core feature with clear next steps How to approach a machine coding round in 60 to 90 minutes
Have a clock plan before the interview starts. Time pressure is easier when the next step is not a mystery.
First 5 to 10 minutes: clarify and scope
Before writing code, restate the problem and choose the MVP.
For example:
"I will first build a working autocomplete with query input, loading state, fetched suggestions, and click selection. If time permits, I will add debouncing, keyboard navigation, and caching."
That sentence confirms the core behavior, limits overbuilding, and gives you a path for follow-ups.
Next 5 minutes: sketch components and state
Write a small plan in comments or on a scratchpad:
Components:- App- SearchInput- SuggestionsList- SuggestionItemState:- query- status- results- activeIndexEvents:- onChange- onSelect- onKeyDownThis gives you enough structure to start coding without drifting.
Next 30 to 45 minutes: build the core path
Prioritize working behavior before polish. For most React machine coding round questions, the build order should be:
- Static markup
- Local state
- Event handlers
- Derived rendering
- Core styling
- Edge states
- Refactor for readability
For a todo list, that means add item, render list, toggle item, delete item, then filters. For autocomplete, that means input, fetch/filter, render suggestions, select item, then loading/error/keyboard support.
Do not start with animations, theme systems, or clever abstractions. Add them after the feature works.
Keep a visible "done list" in your head. After every requirement, ask whether the interviewer can verify it now. If yes, move on. If not, finish that slice before starting another feature.
Next 10 to 15 minutes: handle edge cases
Once the happy path works, add the states candidates often miss:
- Empty input
- Empty data
- Loading
- Error
- Disabled buttons
- Long labels
- Reset behavior
For accessibility-heavy components, check keyboard behavior and semantic HTML. For example, tabs should use buttons rather than clickable divs.
Final 5 to 10 minutes: test and explain trade-offs
Use the UI like a user:
- Click every button.
- Type invalid input.
- Refresh or reset if applicable.
- Try rapid interactions.
- Check whether the layout breaks with long content.
Then mention what you would improve with more time:
- "I would add automated tests around reducer transitions."
- "I would virtualize the list if the result set were large."
- "I would add full ARIA combobox behavior for production autocomplete."
- "I would split the API request logic into a hook if this were reused."
That turns an unfinished stretch goal into a clear trade-off.
React example: planning an autocomplete
Autocomplete is one of the best machine coding round questions because it tests state, async behavior, forms, keyboard support, accessibility, caching, and race conditions.
Before coding, split it like this:
AutocompleteSearchInputSuggestionsListEmptyStateErrorStateThen define the state transitions:
User action State change Types query Update query, setstatustoloadingAPI succeeds Store results, setstatustosuccessAPI fails Store error, setstatustoerrorSelects result Set query, close suggestionsClears input Reset to idleYou might start with this shape:
function Autocomplete() {const [query, setQuery] = useState('');const [status, setStatus] = useState('idle');const [results, setResults] = useState([]);const hasResults = status === 'success' && results.length > 0;const showEmptyState = status === 'success' && results.length === 0;return (<div><label htmlFor="search">Search</label><inputid="search"value={query}onChange={(event) => setQuery(event.target.value)}/>{status === 'loading' && <p>Loading...</p>}{showEmptyState && <p>No results found.</p>}{hasResults && (<ul>{results.map((item) => (<li key={item.id}>{item.label}</li>))}</ul>)}</div>);}This is the skeleton, not the final solution. Once it works, add debouncing, request cancellation, keyboard navigation, caching, highlighted matches, and accessibility improvements.
Sequence matters. Build the smallest correct version, then layer complexity.
A stronger autocomplete implementation plan
Once the skeleton works, upgrade it in this order:
- Debounce input so the API is not called on every keystroke.
- Ignore stale responses so older requests do not overwrite newer results.
- Add keyboard navigation with up, down, enter, and escape.
- Add cache for repeated queries if the prompt expects it.
- Improve accessibility with labels, roles, and focus behavior.
The stale response bug shows up often. Suppose the user types
rea, then quickly typesreact. If therearequest returns after thereactrequest, a naive implementation can show the wrong results.One simple defense is to track the latest query inside the effect:
useEffect(() => {if (query.trim() === '') {setStatus('idle');setResults([]);return;}let ignore = false;setStatus('loading');fetchResults(query).then((items) => {if (!ignore) {setResults(items);setStatus('success');}}).catch((error) => {if (!ignore) {setError(error);setStatus('error');}});return () => {ignore = true;};}, [query]);This is not the only fix. It does show that you understand the browser reality: users type quickly, networks are unpredictable, and UI state must not be overwritten by stale async work.
Machine coding round questions to practice first
If time is short, avoid random practice. Focus on patterns that repeat across many rounds.
Core UI state questions
Start with questions that force you to manage local state cleanly:
Start here because the requirements are small and the component-design lessons repeat everywhere.
Data and async questions
Then move to questions involving fetched data, sorting, filtering, pagination, and loading states:
These questions feel closer to everyday product work.
Advanced interaction questions
Finally, practice questions with more moving parts:
These expose gaps in event handling, timers, focus management, and state transitions.
For a broader list, use 50 React coding interview questions with solutions and prioritize the ones that match your target roles.
How to review your practice attempts
Practice only works when you review the attempt honestly. After solving a question on GreatFrontEnd, compare your solution with the official solution and ask:
- Did I use the same component boundaries?
- Did I store too much state?
- Did I derive values that should have been computed from existing state?
- Did I handle empty, loading, and error states?
- Did I use semantic HTML?
- Did I make follow-up requirements easier or harder?
- Did I spend too much time on styling before behavior worked?
Keep a small mistake log. When three attempts show the same issue, that is your next focus area. If your components repeatedly become too large, practice extracting presentational subcomponents. If async bugs keep appearing, practice debouncing, cleanup functions, request cancellation, and loading/error states.
How to prepare for machine coding round interviews
Machine coding round preparation should look like deliberate repetition, not passive reading.
Week 1: Build common components from memory
Pick simple components and implement them without looking at solutions. Focus on:
- Component breakdown
- State naming
- Event handlers
- Form behavior
- Basic styling
- Manual testing
Good questions for this stage: todo list, tabs, accordion, contact form, progress bar, and modal.
Week 2: Add async and data-heavy problems
Move into data tables, job boards, autocomplete-style flows, and file explorers. Focus on:
- Loading and error states
- Derived data
- Pagination
- Sorting and filtering
- API response handling
- Race conditions
This is where frontend machine coding round questions start to feel realistic.
Week 3: Practice timed rounds
Use a timer. Give yourself 60 minutes for medium questions and 90 minutes for harder ones.
After each attempt, review:
- Did you clarify requirements?
- Did the core feature work?
- Was the component structure easy to read?
- Did state become messy?
- Which edge cases did you miss?
- What would you improve in the first 10 minutes next time?
As you practice, explain your approach out loud. Interviewers are evaluating code and judgment.
Week 4: Practice follow-ups
Follow-ups are where interviewers test whether your implementation is extensible. After completing a question, add one extra requirement:
- Todo list: add filters, persistence, undo, or drag reorder
- Tabs: add keyboard navigation and dynamic tab creation
- Modal: add escape handling and focus management
- Data table: add sorting, pagination, search, and empty state
- File explorer: add expand/collapse state and nested selection
- Progress bars: add concurrency limits or cancel behavior
You are not trying to memorize every feature. You are checking whether your original structure makes follow-ups easy. If adding one small requirement forces a rewrite, the initial design was probably too rigid.
Day-of checklist
Before your next machine coding round, remember this:
- Clarify before coding
- Scope the MVP
- Sketch components and state
- Build static UI first
- Ship the happy path
- Add edge states
- Use semantic HTML
- Keep styling simple
- Test manually
- Explain trade-offs
When you feel stuck, return to the MVP. A small working solution beats an ambitious broken one.
Frequently asked questions
What is the difference between machine coding round and frontend LLD?
Frontend LLD focuses on component APIs, state ownership, extensibility, and interaction contracts. A machine coding round asks you to implement the component or app live. The two overlap, but machine coding is more implementation-heavy.
Are machine coding rounds only for React developers?
No. Frontend machine coding round questions can be solved with vanilla JavaScript, React, Vue, Angular, or another framework. For React roles, practice in React because the interviewer will expect component-driven thinking and hook-based state management.
How many machine coding round questions should I practice?
Practice fewer questions more deeply. Ten well-reviewed questions are better than fifty shallow attempts. A strong base includes todo list, tabs, accordion, modal, data table, file explorer, job board, progress bars, image carousel, and one autocomplete-style problem.
Where should I practice machine coding round questions?
Use a platform where you can write code, run it, compare with solutions, and practice realistic UI prompts. Start with React interview questions on GreatFrontEnd, then move into specific user interface coding questions.
The machine coding round is an execution test. You do not need a perfect production app in 90 minutes. You need to understand the requirements, break down the UI, design state, implement the core behavior, handle the right edge cases, and communicate trade-offs.
That is trainable. Pick one question, set a timer, build the MVP, review your mistakes, and repeat. The round gets easier once your process is stronger than the pressure of the clock.
- Implementing Code Splitting and Lazy Loading in ReactLearn how to implement Code Splitting and Lazy Loading in React and it's importance.作者Nitesh Seram13 分钟阅读May 5, 2026
As Front End Engineers, we aim to deliver the best user experience and one of the ways to achieve that is by optimizing the applications' performance.
Users expect fast, responsive experiences, and will quickly abandon sites that are slow to load. Google's research found that 53% of mobile users abandon a page that takes more than 3 seconds to load. With the prevalent usage of mobile devices which can be on slower network speeds, optimizing performance is critical.
Code splitting and lazy loading are effective strategies to achieve great performance on the web. In this post, we’ll explore these techniques, their benefits, and how they can be implemented in React.
Introduction to Code Splitting and Lazy Loading
Code splitting breaks down your application into smaller chunks, loading only the necessary parts to reduce the bundle size. Lazy loading defers loading non-essential resources until they’re needed, further enhancing performance.
For example, consider a React app with a Login, Dashboard, and Listing page. Traditionally, the code for all these pages are bundled in a single JS file. This is suboptimal because when the user visits the Login page, it is unnecessary to load pages such as the Dashboard and Listing page. But with implementing code splitting and lazy loading, we can dynamically load specific components/pages only when needed, significantly improving performance.
In React, code splitting can be introduced via dynamic
import(). Dynamic import is a built-in way to do this in JavaScript. The syntax looks like this:import('./math').then((math) => {console.log(math.add(1, 2));});For React apps, code splitting via dynamic imports works out of the box with modern toolchains like Vite, Next.js, and React Router. The
React.lazy()function (introduced in React 16.6) lets you render a dynamic import as a regular component, splitting a large JS bundle into smaller chunks that load on demand.If you're on a custom Webpack setup, refer to the Webpack guide for configuring code splitting.
Implementing in React
To implement lazy loading in React, we can leverage
React.lazyfunction and theSuspensecomponent to handle loading states. Here's an example demonstrating lazy loading in React:const LazyComponent = React.lazy(() => import('./LazyComponent'));function App() {return (<React.Suspense fallback={<div>Loading...</div>}><LazyComponent /></React.Suspense>);}By wrapping a lazy-loaded component with
Suspense, we can provide a fallback/placeholder UI while the component is being loaded asynchronously, such as a spinner.However, there can be a case where
LazyComponentfails to load due to some reason like network failure. In that case, it needs to handle the error smoothly for a better user experience with Error Boundaries.import MyErrorBoundary from './MyErrorBoundary';const LazyComponent = React.lazy(() => import('./LazyComponent'));function App() {return (<MyErrorBoundary><React.Suspense fallback={<div>Loading...</div>}><LazyComponent /></React.Suspense></MyErrorBoundary>);}So, when the
LazyComponentis lazily loaded, it signifies that the code forLazyComponentis segmented into a distinct JS chunk, separate from the main JS bundle. This JS chunk is exclusively loaded when theLazyComponentis required to be displayed on the user interface, optimizing the loading process and enhancing the application's performance.Note: Since React 18,
React.lazyandSuspensework on the server too via streaming SSR APIs (renderToPipeableStreamfor Node.js,renderToReadableStreamfor Edge). Frameworks like Next.js handle this for you. The third-party@loadable/componentlibrary was the pre-React-18 workaround and is rarely needed today.From the above, we have seen how we use
React.lazyto code split and lazy load components. But the question is where to lazy load and code split. There are approaches like Route-based code splitting and Component-based code splitting.Route-based code splitting
Route-based code splitting is almost always the best place to start. It typically gives the largest reduction in initial JS, since each route ends up as its own chunk and only the active one is loaded. Modern bundlers (Webpack 5, Vite/Rollup, Turbopack) automatically extract shared dependencies into common chunks, so you don't usually have to worry about duplication across routes. Just check your build output occasionally to confirm shared code lives in vendor chunks rather than being inlined into every route bundle.
Here is an example of route-based code splitting:
import { Suspense, lazy } from 'react';import { BrowserRouter as Router, Routes, Route } from 'react-router-dom';const Login = lazy(() => import('./Login'));const Dashboard = lazy(() => import('./Dashboard'));const App = () => (<Router><Suspense fallback={<div>Loading...</div>}><Routes><Route path="/" element={<Login />} /><Route path="/dashboard" element={<Dashboard />} /></Routes></Suspense></Router>);Component-based code splitting
Component-based code splitting provides granular control over loading specific components, allowing for more precise optimization. The real power of code splitting comes into the picture in component-based code splitting where we have more control over granular components. When deciding which components to lazy load, consider the importance and impact of each component on the initial rendering and user experience. Ideal candidates for lazy loading are large components with significant code or resources, conditional components that are not always needed, and secondary or non-essential features. These can be segmented into separate chunks and loaded on demand, optimizing performance. However, critical components like headers, main content, and dependencies should be loaded upfront to ensure a seamless user experience. We need to be careful in selecting which components to lazy load to strike a balance between initial load times and providing essential functionality. Here is an example of component-based code splitting:
import { useState, lazy, Suspense } from 'react';const Modal = lazy(() => import('./Modal'));function App() {const [showModal, setShowModal] = useState(false);const openModal = () => {setShowModal(true);};const closeModal = () => {setShowModal(false);};return (<div><button onClick={openModal}>Open Modal</button>{showModal && (<Suspense fallback={<div>Loading Modal...</div>}><Modal onClose={closeModal} /></Suspense>)}</div>);}export default App;In this example, the
Modalcomponent is lazily loaded usingReact.lazy()and dynamically imported. The modal is conditionally rendered based on theshowModalstate, which is toggled by theopenModalandcloseModalfunctions. TheSuspensecomponent displays a loading indicator while the modal component is being loaded asynchronously. This implementation optimizes performance by loading the modal component only when the user interacts with theOpen Modalbutton, preventing unnecessary loading of heavy components like a text editor until they are actually needed.Webpack magic comments
If you’re using Webpack to bundle your application, then you can use Webpack's magic comments to further improve the user experience with lazy loading.
We can use webpackPrefetch and webpackPreload for dynamic imports. In the above example of the lazy loading Modal, the Modal is loaded only when the user clicks the
Open Modalbutton and the user has to wait for a fraction of a second to load the Modal.We can improve the user experience by not making users wait for the Modal to load. So, in that scenario, we can prefetch or preload the Modal component. In the above example of the Lazy loading modal, the only difference will be in how we import the
Modalcomponent.Before:
const Modal = lazy(() => import('./Modal'));After:
const Modal = lazy(() => import(/* webpackPrefetch: true */ './Modal'));What
webpackPrefetch: truedoes is that it tells the browser to automatically load this component into the browser cache so it's ready ahead of time and the user won’t have to wait for the Modal component to load when the user clicks on theOpen Modalbutton.We can use
webpackPrefetchandwebpackPreloadfor a particular component when we think that there is a high possibility for the user to use that component when a user visits the app.Note that magic comments are Webpack-specific. Vite (Rollup) and Turbopack don't honor them. If you're on Next.js, route chunks are prefetched automatically by
<Link>, butnext/dynamicitself has no prefetch option, so for high-probability interactions you typically trigger the dynamicimport()yourself on hover or focus. On Vite, you can use<link rel="prefetch">directly or a plugin likevite-plugin-preload.Suspense beyond
React.lazyFor a long time,
Suspensewas mostly known as the fallback forReact.lazy. Two newer features extend what it can do: streaming SSR (added in React 18) and theuse()hook (added in React 19). Both work with the same Suspense boundaries you already place for lazy loading, so a single boundary can show a fallback while a chunk downloads, while data resolves, and while the server streams the rest of the tree.The
use()hook with SuspenseThe
use()hook lets a component unwrap a promise (or read context). React suspends the component until the promise resolves, so you don't need auseEffector a manual loading state. It works in both server and client components, but the most common pattern is unwrapping a promise in a client component.'use client';import { use, Suspense } from 'react';import ErrorBoundary from './ErrorBoundary';function Profile({ userPromise }) {// React suspends here until userPromise resolves.const user = use(userPromise);return <h1>Hello, {user.name}</h1>;}export default function ProfilePage({ userPromise }) {return (<ErrorBoundary fallback={<p>Failed to load profile</p>}><Suspense fallback={<p>Loading...</p>}><Profile userPromise={userPromise} /></Suspense></ErrorBoundary>);}The typical pattern is to start the fetch in a server component (or route loader), pass the unresolved promise down to a client component, and let
use()handle the suspending. The request is in-flight before the client component renders, so the user sees the resolved UI sooner than if the client had to fetch on mount.Streaming SSR with Suspense
Streaming SSR with Suspense has been available since React 18, via
renderToPipeableStream(Node.js) orrenderToReadableStream(Edge). When a Suspense boundary suspends on the server, the server doesn't block. It sends the fallback HTML immediately and streams the resolved content as soon as it's ready. This is how Next.js App Router'sloading.tsxworks.For code splitting, a route-level Suspense boundary lets the server flush the shell, navigation, and skeleton early, then stream in the lazy-loaded sections as their chunks resolve. First Contentful Paint (FCP) usually improves as a result.
React Server Components and
React.lazyReact Server Components (RSC) change which components even need code splitting. Server Components run only on the server and are never sent as JavaScript to the browser, so they don't add to the client bundle. You can't (and shouldn't) wrap them in
React.lazy.A short reference for what to split:
Component type Ships JS to browser? Use React.lazy?Server Component (default in App Router) No No, it's already not in the bundle Client Component ( 'use client') used everywhereYes Optional, split when it's heavy or below-the-fold Client Component used conditionally (modal, chart, editor) Yes Yes, high-impact split Route component Yes (the route's bundle) The router handles this for you in App Router The Next.js App Router does route-based splitting automatically. Every
page.tsxis its own bundle, so you only need explicitReact.lazy(ornext/dynamic) for client components that are heavy and not always rendered: rich-text editors, charting libraries, video players, or feature-flag-gated UI.The rule of thumb for modern React apps: default to Server Components to keep work off the client, and use
React.lazyornext/dynamicfor heavy client components that render conditionally.How much does code splitting actually help?
It depends on the initial bundle size and how much of it is unused on first paint. A few useful reference points:
- A 100 KB increase in initial JavaScript can add roughly 200-500 ms to Total Blocking Time (TBT) on a mid-tier Android device over 3G. On low-end CPUs, parse and execute time often dominates over network transfer.
- Route-based splitting on a typical SPA commonly cuts the initial bundle by 40-70%, depending on how much shared code lives in vendor chunks vs. route-specific code.
- Component-based splitting pays off for components that are large and rarely rendered. A rich-text editor (often 200-500 KB) loaded only when the user clicks "edit" is a good example. Splitting a 5 KB tooltip rarely justifies the network round-trip.
- Largest Contentful Paint (LCP) improves the most when the lazy-loaded code is below the fold or interaction-gated. Splitting code that runs during the initial render usually doesn't move LCP, it just shifts when the JS loads.
Three metrics to measure before and after a split:
- Initial JS bundle size (Network panel → JS filter → sum the transferred sizes for the first paint).
- Total Blocking Time (TBT) as a lab proxy for main-thread blocking (Lighthouse → throttle to "Slow 4G" and "4× CPU slowdown").
- Interaction to Next Paint (INP) in the field via the
web-vitalslibrary or the Chrome User Experience Report.
If none of them move, the split isn't worth the complexity.
Common mistakes in interviews
When asked "how would you optimize bundle size in a React app?", these are the mistakes that come up most often:
- Splitting tiny components. A 5 KB component loaded asynchronously costs a network round-trip (~100-300 ms on 3G) to save almost nothing. Split components in the tens of KB or larger, or components that pull in heavy dependencies.
- Bad Suspense boundary placement. Wrapping a deep grandchild in Suspense without thinking about what unmounts and remounts during a transition causes visible flashing. The boundary should sit at the natural loading unit (a route, a panel, a card), not at the leaf.
- Lazy loading above-the-fold content. Lazy-loading the hero section defers exactly what the user wants to see first. Lazy load interaction-gated or route-gated content instead.
- Forgetting an Error Boundary. A lazy import can fail due to a network error, a mid-session deploy, or an expired hash. Without an Error Boundary co-located with the Suspense boundary, the failure crashes the parent tree.
- Using
React.lazyfor Server Components. In the App Router, Server Components aren't in the client bundle. Wrapping one inReact.lazyornext/dynamicis a no-op at best and an error at worst. Use splitting only for client components with significant code. - Treating
import()as instant. A lazy import is a network request. If the user clicks "Open editor" and waits 800 ms on a spinner, lazy loading has made things worse. Combine it with prefetching (webpackPrefetchon Webpack, or triggering the dynamicimport()on hover/focus on other bundlers) for high-probability interactions.
When to use code splitting and lazy loading?
Use code splitting and lazy loading when:
- Your application is large and complex, with many components and dependencies.
- Components are not needed on the initial page load (e.g. below-the-fold, only after interaction).
- You want to reduce the initial bundle size.
- Certain components are conditionally rendered or used in specific scenarios.
Avoid code splitting and lazy loading when:
- Your application is small and simple, with minimal components.
- The overhead of managing code splitting outweighs the benefits.
- Critical components are always needed on the initial load.
Conclusion
Be sure to assess your application's requirements, tech stack and challenges when deciding the code splitting and lazy loading approach. By strategically dividing code and loading resources on demand, you can create fast, efficient, and engaging web applications.
To strengthen your React fundamentals further, check out our Top ReactJS Interview Questions GitHub repo - a curated collection of 50 frequently asked questions from real interview scenarios.
- Top Headless UI libraries for React in 2026Explore some of the best headless UI libraries for React in 2026.作者Feilin Liangga Putri7 分钟阅读May 5, 2026
Headless UI libraries handle the logic, accessibility, and interaction behavior of UI components but leave the styling to you. You bring your own styles or design system, and the library handles keyboard navigation, focus management, ARIA semantics, RTL support, and controlled vs uncontrolled state.
A couple of things have shifted since 2024:
- Radix UI was acquired by WorkOS and updates have slowed for some components. Base UI (maintained by MUI) is now the more actively maintained primitive layer.
- shadcn/ui has become the most common way teams consume Radix or Base UI primitives in production. It isn't strictly headless since it ships with Tailwind styles, but we cover it at the end since it sits on top of the headless layer.
The libraries below are ordered by npm weekly downloads, with shadcn/ui covered last.
Understanding the layers
These libraries don't all sit at the same layer of your stack:
- Primitive layer: accessible, unstyled, low-level components you compose into your own UI. Examples: Radix UI, Base UI, React Aria, Aria Kit.
- Component layer: pre-built combinations of primitives. Examples: Headless UI (its own primitives, designed for Tailwind), shadcn/ui (Radix or Base UI primitives plus Tailwind styles, copied into your repo).
- Cross-framework primitive layer: the same accessibility and state-machine logic but available beyond React. Example: Ark UI (React, Vue, Solid).
Picking shadcn/ui doesn't mean skipping the primitive layer. Radix UI (or Base UI, since 2025) still lives in your
node_modulesunderneath yourcomponents/ui/folder. Picking React Aria means writing more code per component, but it gives you the deepest accessibility primitives available.Headless UI
Headless UI is built by the Tailwind CSS team. It's a small set of unstyled, accessible components designed to compose with Tailwind utilities. The component count is intentionally small (~10 components) and the API is the most beginner-friendly in this list.
By the numbers (as of May 2026):
- GitHub stars: ~28.6k
- Npm weekly downloads (
@headlessui/react): ~5.49M - No. of components: ~10
Best for: Tailwind-first teams that want a familiar, opinionated API and don't need the composability of Radix-style primitives.
Skip if: You need components beyond what's covered (no Combobox-with-virtualization, no advanced data table primitives), or you want more composability. Radix and Base UI both expose more primitives.
React Aria
React Aria by Adobe is the most accessibility-rigorous option in this list. It's a library of React Hooks (rather than components) that handle behavior, ARIA semantics, internationalization, and adaptive interactions across 40+ component patterns.
You compose hooks (
useButton,useDialog,useTabs) into your own components, which means more code per component but more control over the rendered output. Worth the investment when accessibility is a hard requirement.By the numbers (as of May 2026):
- GitHub stars (adobe/react-spectrum): ~15.1k
- Npm weekly downloads (
react-aria): ~4.47M - No. of components: 40+ patterns
Best for: Government, enterprise, or any product where WAI-ARIA conformance is contractually required. Also when you need internationalization (RTL, locale-aware date/number components) out of the box.
Skip if: You're shipping a v0 product and want pre-built components. React Aria's hooks-first model is more verbose than Radix or Base UI.
Radix UI
Radix UI is the original primitive library that popularized headless components in React. It provides 30+ unstyled, accessible components (Dialog, Dropdown, Tabs, Popover, etc.) with full keyboard navigation, focus management, ARIA, and RTL support built in.
Radix UI was acquired by WorkOS, and update velocity has slowed for some complex components (Combobox and multi-select being the ones commonly cited). The primitives still see heavy usage through shadcn/ui.
@radix-ui/react-slotalone pulls ~131M weekly npm downloads as of mid-2026.By the numbers (as of May 2026):
- GitHub stars: ~18.8k
- Npm weekly downloads: ~4.4M
- No. of components: 30+
Best for: When you want pre-built accessible primitives without the copy-paste of shadcn/ui, and you already have your own styling solution (CSS Modules, Emotion, vanilla CSS, etc.).
Skip if: You need brand-new primitives that haven't shipped yet. Base UI is iterating faster on those.
Base UI
Base UI is the actively maintained alternative to Radix for the primitive layer. Maintained by MUI with full-time engineers, it provides similar headless primitives with a slightly different API.
shadcn/ui added Base UI as a supported primitive layer in 2025, so you can now choose between Radix-backed and Base UI-backed shadcn components.
By the numbers (as of May 2026):
- GitHub stars: ~9.5k
- Npm weekly downloads (
@base-ui/react): ~3.7M - No. of components: 25+ and growing
Best for: Greenfield projects where you want the most actively maintained primitive layer, or anyone who hit Radix limitations on a complex component (Combobox, multi-select).
Skip if: You're already deep in a Radix codebase and migration cost is high. Radix still works, it just isn't moving as fast.
Aria Kit
Aria Kit is an open-source library of unstyled, primitive components and hooks for accessible web apps. It ships smaller bundles than most for what you get, with an API that sits between Radix's component composition and React Aria's hooks-first style.
By the numbers (as of May 2026):
- GitHub stars: ~8.6k
- Npm weekly downloads (
@ariakit/react): ~697.9k - No. of components: 25+
Best for: When bundle size matters more than ecosystem familiarity. Often picked by component library authors building their own libraries on top of a primitive layer.
Skip if: You want the largest community and Stack Overflow surface area. Aria Kit is smaller than Radix and React Aria.
Ark UI

Ark UI is unique in this list: same headless primitive philosophy, but the components work across React, Vue, and Solid. The internal logic is built with state machines (XState) for predictable behavior on complex components.
By the numbers (as of May 2026):
- GitHub stars: ~5.2k
- Npm weekly downloads (
@ark-ui/react): ~634.7k - No. of components: 35+
Best for: Multi-framework design systems where you need the same Combobox behavior in a React app and a Vue app and want to maintain one logic implementation.
Skip if: You're React-only. The React-specific options above usually have more idiomatic React APIs.
shadcn/ui (the dominant consumer of headless primitives)
shadcn/ui isn't strictly a headless library since its components ship with Tailwind styles applied. We're including it because it's how most teams now consume Radix or Base UI primitives in production.
It's a CLI that copies pre-built component source code into your project. The components are built on Radix UI primitives by default (with Base UI as an opt-in alternative since 2025) and styled with Tailwind CSS.
The mental model is different from a typical npm package:
- You don't
npm install shadcn-uiand import components. - You run
npx shadcn add buttonand the source code for the Button component is added to your repo atcomponents/ui/button.tsx. - You own and edit that code. There's no version to bump, no breaking change to manage.
You trade dependency management for full control over the code, including the option to strip the Tailwind classes and treat the underlying Radix or Base UI layer as truly headless. That trade-off is why it has taken over so much of the React UI ecosystem.
By the numbers (as of May 2026):
- GitHub stars: ~113.6k (the highest of any library in this guide)
- Npm weekly downloads (shadcn CLI): ~3.87M
- No. of components: 50+ (registry, configurable)
Best for: New product apps where you want full design control on top of headless primitives without writing accessibility logic from scratch, especially if you're already using Tailwind.
Skip if: You can't use Tailwind, want a strictly headless library, or want a published library you can
npm update(you don't get that with shadcn/ui).
Any of the libraries above can be used to ship an accessible, maintainable app. Pick the one that matches your styling preferences and how much code you're willing to write per component.
Want to solidify your React foundation while exploring UI libraries like these? Check out our Top ReactJS Interview Questions GitHub repo with 50 frequently asked questions to help you prepare for projects and interviews.
- CSS Interview Questions Guide for 2026Complete guide to CSS interview questions for your next interview. Covers core concepts, layouts, responsive design, modern features, and Tailwind CSS essentials.作者GreatFrontEnd Team29 分钟阅读Dec 9, 2025
Modern CSS interviews test your ability to solve real problems, not recite definitions. You'll debug broken layouts, explain why a sticky navbar fails on mobile Safari, choose between Flexbox and Grid for specific use cases, and demonstrate knowledge of features like Container Queries and the
:has()selector.But here's what separates strong candidates from average ones: it's not just what you know, it's how you think. Interviewers want to see your problem-solving process, your ability to articulate trade-offs, and your understanding of "why" certain approaches work better than others. A candidate who can explain when to use
emvsremand justify their choice is far more valuable than someone who's memorized every CSS property.This post focuses on:
- Core concepts that appear in 90% of CSS interviews
- Decision-making frameworks for choosing between layout approaches
- Scenario-based questions that test real-world problem-solving
- Modern CSS features that separate junior from senior candidates
- Tailwind CSS essentials for companies using utility-first approaches
Whether you're preparing for your first frontend role or interviewing at a senior level, this post will help you demonstrate both technical depth and clear reasoning - exactly what interviewers look for.
Core CSS concepts
Box model
The box model is the foundation of CSS layout. Every element is a rectangular box with four areas: content, padding, border, and margin.
The interview question: "Explain the CSS box model and the difference between
box-sizing: content-boxandbox-sizing: border-box"./* content-box (default) */.content-box {box-sizing: content-box;width: 200px;padding: 20px;border: 5px solid black;/* Total width = 200 + 40 (padding) + 10 (border) = 250px */}/* border-box (modern approach) */.border-box {box-sizing: border-box;width: 200px;padding: 20px;border: 5px solid black;/* Total width = 200px (padding and border included) */}Key points:
content-boxadds padding and border to the specified widthborder-boxincludes padding and border within the specified width- Most modern CSS resets use
box-sizing: border-boxglobally - Margin is always outside the box, regardless of
box-sizing
Pro tip: Explain that
border-boxmakes responsive layouts more predictable because percentage widths behave intuitively.Display property
The
displayproperty controls how an element participates in layout flow.Common interview question: "What's the difference between
display: none,visibility: hidden, andopacity: 0?"Property Space Occupied Accessible to Screen Readers Events Triggered Use Case display: noneNo No No Completely remove from layout visibility: hiddenYes No No Hide but maintain layout space opacity: 0Yes Yes Yes Fade animations, accessible hiding Key display values:
/* Block - takes full width, stacks vertically */.block {display: block;}/* Inline - flows with text, respects horizontal spacing only */.inline {display: inline;}/* Inline-block - flows with text but respects width/height */.inline-block {display: inline-block;width: 100px;height: 100px;}/* Flex - modern one-dimensional layout */.flex {display: flex;}/* Grid - modern two-dimensional layout */.grid {display: grid;}CSS variables
CSS Custom Properties (variables) enable dynamic, maintainable stylesheets.
Interview question: "How do CSS variables work, and what are their advantages over preprocessor variables?"
/* Define variables in :root for global scope */:root {--primary-color: #007bff;--spacing-unit: 8px;--border-radius: 4px;}/* Use variables with var() */.button {background-color: var(--primary-color);padding: calc(var(--spacing-unit) * 2);border-radius: var(--border-radius);}/* Override in specific contexts */.dark-theme {--primary-color: #66b3ff;}/* Fallback values */.element {color: var(--text-color, #333);}CSS variables vs preprocessor variables:
Feature CSS Variables Sass/Less Variables Runtime changes ✅ Yes ❌ No (compile-time only) JavaScript access ✅ Yes ❌ No Cascade & inheritance ✅ Yes ❌ No Browser support ✅ Modern browsers ✅ Compiles to CSS JavaScript integration:
// Read CSS variableconst primary = getComputedStyle(document.documentElement).getPropertyValue('--primary-color',);// Set CSS variabledocument.documentElement.style.setProperty('--primary-color', '#ff0000');Specificity & cascade
Specificity determines which CSS rule applies when multiple rules target the same element.
The classic question: "Explain CSS specificity. How is it calculated?"
Specificity hierarchy:
/* Specificity: 0-0-0-1 (1 element) */p {color: black;}/* Specificity: 0-0-1-0 (1 class) */.text {color: blue;}/* Specificity: 0-0-1-1 (1 class + 1 element) */p.text {color: green;}/* Specificity: 0-1-0-0 (1 ID) */#header {color: red;}/* Specificity: 1-0-0-0 (inline style) */<p style="color: purple;">/* Specificity: ∞ (!important overrides everything) */p {color: orange !important;}Specificity calculation:
- Inline styles: 1-0-0-0
- IDs: 0-1-0-0
- Classes, attributes, pseudo-classes: 0-0-1-0
- Elements, pseudo-elements: 0-0-0-1
Example problem:
/* Which color wins? */#nav .menu li {color: red;} /* 0-1-1-1 = 111 */.header .menu li {color: blue;} /* 0-0-2-1 = 021 */li.active {color: green;} /* 0-0-1-1 = 011 *//* Answer: red (highest specificity) */Positioning
The
positionproperty controls how elements are positioned in the document flow.Interview question: "Explain the different position values and when to use each".
/* Static (default) - normal document flow */.static {position: static;}/* Relative - offset from normal position, space preserved */.relative {position: relative;top: 10px;left: 20px;}/* Absolute - positioned relative to nearest positioned ancestor */.absolute {position: absolute;top: 0;right: 0;}/* Fixed - positioned relative to viewport */.fixed {position: fixed;bottom: 20px;right: 20px;}/* Sticky - hybrid of relative and fixed */.sticky {position: sticky;top: 0;}Common use cases:
Position Use Case Example staticDefault flow Regular content relativeMinor adjustments, positioning context Offset badges, anchor for absolute children absoluteOverlays, tooltips Dropdown menus, modals fixedPersistent UI Navigation bars, chat widgets stickyScroll-aware headers Table headers, section titles Critical concept - positioning context:
/* Absolute positioning requires a positioned parent */.parent {position: relative; /* Creates positioning context */}.child {position: absolute;top: 0; /* Relative to .parent, not viewport */left: 0;}Stacking context
Stacking context determines the 3D layering of elements along the z-axis.
Advanced interview question: "What creates a stacking context, and how does z-index work?"
What creates a stacking context:
/* 1. Root element (html) *//* 2. Positioned elements with z-index */.positioned {position: relative;z-index: 10;}/* 3. Flex/Grid items with z-index */.flex-item {z-index: 5;}/* 4. Elements with opacity < 1 */.transparent {opacity: 0.9;}/* 5. Transform, filter, perspective */.transformed {transform: translateZ(0);}/* 6. will-change */.optimized {will-change: transform;}Z-index rules:
/* z-index only works on positioned elements */.static {z-index: 999; /* ❌ No effect (position: static) */}.relative {position: relative;z-index: 999; /* ✅ Works */}/* z-index is scoped to stacking context */.parent {position: relative;z-index: 1;}.child {position: relative;z-index: 9999; /* Still behind elements with z-index: 2 in different context */}What to explain:
z-indexonly works on positioned elements (except flex/grid children)- Each stacking context is independent
- Children can't escape their parent's stacking context
- Common stacking context creators:
opacity,transform,filter,position+z-index
Pseudo-classes & pseudo-elements
Pseudo-classes select elements based on state, while pseudo-elements style specific parts of elements.
Interview question: "What's the difference between pseudo-classes and pseudo-elements?"
Pseudo-classes:
/* User interaction */a:hover {color: blue;}input:focus {border-color: blue;}button:active {transform: scale(0.98);}/* Form states */input:disabled {opacity: 0.5;}input:checked + label {font-weight: bold;}input:valid {border-color: green;}input:invalid {border-color: red;}/* Structural */li:first-child {margin-top: 0;}li:last-child {margin-bottom: 0;}li:nth-child(odd) {background: #f0f0f0;}li:nth-child(3n) {/* Every 3rd item */}Pseudo-elements:
/* Generated content */.icon::before {content: '→';margin-right: 8px;}.external-link::after {content: ' ↗';}/* Text styling */p::first-line {font-weight: bold;}p::first-letter {font-size: 2em;float: left;}/* Selection styling */::selection {background: yellow;color: black;}Key differences:
Pseudo-classes Pseudo-elements Select elements in a specific state Style specific parts of elements Single colon :(or::)Double colon :::hover,:focus,:nth-child()::before,::after,::first-lineUnits (em, rem, %, viewport)
CSS units determine how sizes are calculated. Choosing the right unit is crucial for responsive design.
Interview question: "Explain the difference between px, em, rem, %, and viewport units. When should you use each?"
/* Absolute - fixed size */.pixel {font-size: 16px; /* Always 16 pixels */}/* Relative to parent font-size */.em-unit {font-size: 1.5em; /* 1.5 × parent font-size */padding: 1em; /* 1 × this element's font-size */}/* Relative to root font-size */.rem-unit {font-size: 1.5rem; /* 1.5 × root font-size (usually 16px) */padding: 1rem; /* Always consistent */}/* Relative to parent dimensions */.percentage {width: 50%; /* 50% of parent width */}/* Relative to viewport */.viewport {width: 100vw; /* 100% of viewport width */height: 100vh; /* 100% of viewport height */}Em vs rem - the compounding problem:
/* Em compounds */.parent {font-size: 16px;}.child {font-size: 1.5em; /* 16 × 1.5 = 24px */}.grandchild {font-size: 1.5em; /* 24 × 1.5 = 36px (compounds!) */}/* Rem doesn't compound */.parent {font-size: 1.5rem; /* 24px */}.child {font-size: 1.5rem; /* Still 24px (relative to root) */}When to use each unit:
Unit Best For Example pxBorders, shadows, precise control border: 1px solidemSpacing relative to font-size padding: 0.5em 1emremFont sizes, consistent spacing font-size: 1.125rem%Responsive widths, fluid layouts width: 50%vw/vhFull-screen sections, responsive typography height: 100vhLayout fundamentals
Flexbox essentials
Flexbox is a one-dimensional layout system for distributing space along a single axis.
Core interview question: "Explain Flexbox and its main properties".
Flex container properties:
.container {display: flex;/* Main axis direction */flex-direction: row; /* row | row-reverse | column | column-reverse *//* Wrapping */flex-wrap: wrap; /* nowrap | wrap | wrap-reverse *//* Main axis alignment */justify-content: space-between; /* flex-start | flex-end | center | space-between | space-around | space-evenly *//* Cross axis alignment */align-items: center; /* flex-start | flex-end | center | baseline | stretch *//* Gap between items */gap: 16px;}Flex item properties:
.item {/* Growth factor */flex-grow: 1; /* Default: 0 *//* Shrink factor */flex-shrink: 1; /* Default: 1 *//* Base size */flex-basis: 200px; /* Default: auto *//* Shorthand: grow shrink basis */flex: 1 1 200px;flex: 1; /* Same as: 1 1 0 *//* Individual alignment */align-self: flex-end;}Common patterns:
/* Equal-width columns */.column {flex: 1;}/* Center content */.center {display: flex;justify-content: center;align-items: center;}/* Space between header and footer */.layout {display: flex;flex-direction: column;min-height: 100vh;}.content {flex: 1; /* Takes remaining space */}Grid basics
CSS Grid is a two-dimensional layout system for rows and columns.
Interview question: "When would you use Grid over Flexbox?"
Grid container properties:
.grid {display: grid;/* Define columns */grid-template-columns: 200px 1fr 1fr; /* Fixed + flexible */grid-template-columns: repeat(3, 1fr); /* 3 equal columns */grid-template-columns: repeat(auto-fit, minmax(250px, 1fr)); /* Responsive *//* Define rows */grid-template-rows: 100px auto 100px;/* Gap */gap: 20px;/* Alignment */justify-items: center; /* Align items horizontally */align-items: center; /* Align items vertically */}Grid item properties:
.item {/* Column placement */grid-column: 1 / 3; /* Start at line 1, end at line 3 */grid-column: span 2; /* Span 2 columns *//* Row placement */grid-row: 1 / 3;grid-row: span 2;}Named grid areas:
.layout {display: grid;grid-template-areas:'header header header''sidebar content content''footer footer footer';grid-template-columns: 200px 1fr 1fr;}.header {grid-area: header;}.sidebar {grid-area: sidebar;}.content {grid-area: content;}.footer {grid-area: footer;}Flexbox vs Grid decision tree
Interview question: "How do you decide between Flexbox and Grid?"
Use Flexbox for:
- One-dimensional layouts (row OR column)
- Navigation menus
- Centering content
- Content-driven layouts (size based on content)
Use Grid for:
- Two-dimensional layouts (rows AND columns)
- Page layouts (header, sidebar, content, footer)
- Card grids
- Layout-driven designs (size based on container)
They work together:
/* Grid for page layout */.page {display: grid;grid-template-columns: 250px 1fr;}/* Flexbox for navigation inside header */.header nav {display: flex;justify-content: space-between;align-items: center;}/* Grid for card layout */.cards {display: grid;grid-template-columns: repeat(auto-fit, minmax(300px, 1fr));gap: 2rem;}/* Flexbox inside each card */.card {display: flex;flex-direction: column;}.card-content {flex: 1;}The centering question
The classic interview question: "How do you center a div?"
Modern solutions:
/* 1. Flexbox (most common) */.flex-center {display: flex;justify-content: center;align-items: center;}/* 2. Grid */.grid-center {display: grid;place-items: center; /* Shorthand for align-items + justify-items */}/* 3. Absolute positioning */.absolute-center {position: absolute;top: 50%;left: 50%;transform: translate(-50%, -50%);}/* 4. Margin auto (horizontal only) */.margin-center {width: 300px;margin: 0 auto;}When to use each:
Method Use Case Pros Cons Flexbox Most situations Simple, flexible Requires parent styling Grid Grid layouts Very concise Overkill for simple cases Absolute + Transform Overlays, modals Works without knowing size Removes from flow Margin auto Block elements Simple for horizontal Vertical requires height Responsive & transforms
Media queries essentials
Media queries enable responsive designs that adapt to different screen sizes and device capabilities.
Interview question: "Explain mobile-first vs desktop-first approaches to responsive design".
Mobile-first approach (recommended):
/* Base styles for mobile */.container {padding: 1rem;font-size: 14px;}/* Tablet and up */@media (min-width: 768px) {.container {padding: 2rem;font-size: 16px;}}/* Desktop and up */@media (min-width: 1024px) {.container {padding: 3rem;max-width: 1200px;margin: 0 auto;}}Beyond width - other media features:
/* Orientation */@media (orientation: landscape) {.gallery {grid-template-columns: repeat(4, 1fr);}}/* Hover capability (desktop vs touch) */@media (hover: hover) {.button:hover {background: blue;}}@media (hover: none) {.button:active {background: blue;}}/* Prefers color scheme */@media (prefers-color-scheme: dark) {:root {--bg-color: #1a1a1a;--text-color: #ffffff;}}/* Prefers reduced motion */@media (prefers-reduced-motion: reduce) {* {animation-duration: 0.01ms !important;transition-duration: 0.01ms !important;}}What interviewers want to hear:
- Mobile-first is preferred because it's easier to progressively enhance
- Always consider accessibility features like
prefers-reduced-motion - Container queries are the future for component-based responsive design
Transforms & transitions
Transforms change an element's appearance without affecting document flow. Transitions animate property changes.
Interview question: "Explain the difference between transforms and transitions. How do they affect performance?"
Transforms:
/* 2D Transforms */.transform-2d {transform: translate(50px, 100px);transform: rotate(45deg);transform: scale(1.5);transform: translate(50px, 100px) rotate(45deg) scale(1.2);}/* 3D Transforms */.transform-3d {transform: translateZ(100px);transform: rotateY(45deg);transform: perspective(1000px) rotateY(45deg);}Transitions:
/* Basic transition */.button {background: blue;transition: background 0.3s ease;}.button:hover {background: darkblue;}/* Multiple properties */.card {transform: scale(1);box-shadow: 0 2px 4px rgba(0, 0, 0, 0.1);transition:transform 0.3s ease,box-shadow 0.3s ease;}.card:hover {transform: scale(1.05);box-shadow: 0 8px 16px rgba(0, 0, 0, 0.2);}Performance considerations:
/* ✅ GPU-accelerated (performant) */.performant {transform: translateX(100px);opacity: 0.5;}/* ❌ Triggers layout/paint (slow) */.slow {left: 100px; /* Use transform instead */width: 200px; /* Triggers reflow */}What to emphasize:
- Only
transformandopacityare GPU-accelerated - Avoid animating
width,height,top,left- usetransforminstead will-changehints to browser but use sparingly (memory cost)
Responsive images
Responsive images adapt to different screen sizes and resolutions for optimal performance.
CSS approaches:
/* Basic responsive image */img {max-width: 100%;height: auto;}/* Object-fit for aspect ratio control */.image-container {width: 300px;height: 200px;}.image-container img {width: 100%;height: 100%;object-fit: cover; /* cover | contain | fill */object-position: center;}HTML approaches:
<!-- srcset for different resolutions --><imgsrc="image.jpg"srcset="image.jpg 1x, image@2x.jpg 2x, image@3x.jpg 3x"alt="Description" /><!-- picture element for art direction --><picture><source media="(min-width: 1024px)" srcset="desktop.jpg" /><source media="(min-width: 768px)" srcset="tablet.jpg" /><img src="mobile.jpg" alt="Description" /></picture><!-- Modern formats with fallback --><picture><source srcset="image.avif" type="image/avif" /><source srcset="image.webp" type="image/webp" /><img src="image.jpg" alt="Description" /></picture>Aspect ratio (modern CSS):
/* New way - aspect-ratio property */.aspect-ratio-new {aspect-ratio: 16 / 9;}.aspect-ratio-new img {width: 100%;height: 100%;object-fit: cover;}Modern CSS features
CSS functions (clamp, min, max)
Modern CSS functions enable responsive values without media queries.
Interview question: "Explain how
clamp(),min(), andmax()work and when to use them"./* min() - picks the smallest value */.element {width: min(100%, 600px); /* Never wider than 600px */}/* max() - picks the largest value */.element {width: max(50%, 300px); /* At least 300px wide */}/* clamp() - value between min and max */.element {/* clamp(minimum, preferred, maximum) */font-size: clamp(1rem, 2.5vw, 2rem);/* Font size is 2.5vw, but never smaller than 1rem or larger than 2rem */}Practical examples:
/* Responsive typography without media queries */h1 {font-size: clamp(2rem, 5vw, 4rem);}/* Responsive container width */.content {width: min(90%, 1200px);margin: 0 auto;}/* Responsive spacing */.container {padding: clamp(1rem, 5vw, 3rem);}Container queries
Container queries allow components to respond to their container size, not the viewport.
Interview question: "What are container queries and how do they differ from media queries?"
/* Define a container */.card-container {container-type: inline-size;container-name: card;}/* Query the container */@container card (min-width: 400px) {.card {display: grid;grid-template-columns: 200px 1fr;}}@container card (min-width: 600px) {.card {grid-template-columns: 250px 1fr;font-size: 1.125rem;}}Why container queries matter:
- Components are truly reusable across different contexts
- No need to know where a component will be placed
- Better for component libraries and design systems
- The future of responsive component design
:has()parent selectorThe
:has()pseudo-class selects parent elements based on their children.Interview question: "What is the
:has()selector and what problems does it solve?"/* Select parent that contains specific child */.card:has(img) {display: grid;grid-template-columns: 200px 1fr;}/* Select parent based on child state */form:has(input:invalid) {border: 2px solid red;}/* Style parent when checkbox is checked */.option:has(input:checked) {background: blue;color: white;}Form validation styling:
/* Show error when input is invalid and touched */.form-field:has(input:invalid:not(:placeholder-shown)) .error {display: block;}/* Style label when input is focused */.form-field:has(input:focus) label {color: blue;transform: translateY(-1.5rem) scale(0.9);}What makes
:has()revolutionary:- First true "parent selector" in CSS
- Eliminates need for JavaScript in many cases
- Enables conditional styling based on content
:is()and:where()These pseudo-classes simplify complex selectors and reduce specificity issues.
Interview question: "What's the difference between
:is()and:where()?"/* Without :is() - repetitive */.header a:hover,.footer a:hover,.sidebar a:hover {color: blue;}/* With :is() - concise */:is(.header, .footer, .sidebar) a:hover {color: blue;}/* :where() - zero specificity */:where(.button) {background: gray;}.button.primary {background: blue; /* Easily overrides */}Key difference:
:is()has specificity of its most specific argument:where()always has zero specificity
Logical properties
Logical properties adapt to writing direction (LTR/RTL) automatically.
Interview question: "What are CSS logical properties and why are they important?"
/* Physical properties (direction-dependent) */.physical {margin-left: 1rem;margin-right: 2rem;}/* Logical properties (direction-independent) */.logical {margin-inline-start: 1rem; /* left in LTR, right in RTL */margin-inline-end: 2rem; /* right in LTR, left in RTL */}Logical property mapping:
Physical Logical margin-leftmargin-inline-startmargin-rightmargin-inline-endmargin-topmargin-block-startmargin-bottommargin-block-endwidthinline-sizeheightblock-sizeWhy logical properties matter:
- Internationalization (i18n) support built-in
- No need for separate RTL stylesheets
- Future-proof for vertical writing modes
Cascade layers
Cascade layers provide explicit control over CSS specificity and cascade order.
Interview question: "What are cascade layers and how do they help manage CSS at scale?"
/* Define layer order (lowest to highest priority) */@layer reset, base, components, utilities;/* Add styles to layers */@layer reset {* {margin: 0;padding: 0;box-sizing: border-box;}}@layer components {.button {padding: 0.5rem 1rem;background: blue;}}Layer priority:
/* Later layers win, regardless of specificity */@layer base {#id.class {color: red; /* High specificity, but in earlier layer */}}@layer components {.simple {color: blue; /* Wins! Even with lower specificity */}}Why layers matter:
- Explicit control over cascade without !important
- Better than specificity hacks
- Perfect for design systems and component libraries
aspect-ratio
The
aspect-ratioproperty maintains an element's width-to-height ratio./* Modern way */.video {aspect-ratio: 16 / 9;width: 100%;}/* Square */.avatar {aspect-ratio: 1;width: 100px; /* Height will be 100px */}Practical examples:
/* Responsive image grid */.image-grid {display: grid;grid-template-columns: repeat(auto-fill, minmax(200px, 1fr));gap: 1rem;}.image-grid img {aspect-ratio: 1;width: 100%;object-fit: cover;}Tailwind CSS
Why utility-first CSS comes up in interviews
Interviewers aren't testing if you've memorized Tailwind classes. They want to understand:
- Your reasoning - Can you explain why utility-first might be better (or worse) for a project?
- Trade-offs - Do you understand the pros and cons?
- When to use it - Can you identify appropriate use cases?
Utility-first pros:
- ✅ Faster development (no context switching)
- ✅ Consistent design system
- ✅ No CSS bloat (unused styles purged)
- ✅ No naming fatigue
Utility-first cons:
- ❌ HTML can look cluttered
- ❌ Learning curve for class names
- ❌ Harder to read for non-Tailwind developers
- ❌ Tight coupling of styles to markup
How to articulate your understanding:
The key is showing you understand the trade-offs, not claiming one approach is universally better. For example:
It depends on the project context. Tailwind excels when you need rapid prototyping and design consistency across a component-based application. The utility-first approach reduces context switching and eliminates naming decisions. However, it does couple styles to markup, which some teams find harder to maintain. For content-heavy sites with diverse layouts, or teams new to utility-first CSS, traditional approaches might be more appropriate. I'd evaluate based on team experience, project requirements, and long-term maintainability needs.
This shows you can think critically about tools rather than following trends blindly.
Common layout patterns in Tailwind
Flexbox patterns:
<!-- Center content --><div class="flex min-h-screen items-center justify-center"><div>Centered content</div></div><!-- Space between --><nav class="flex items-center justify-between p-4"><div>Logo</div><div>Menu</div></nav><!-- Responsive direction --><div class="flex flex-col gap-4 md:flex-row"><div>Stacks on mobile, row on desktop</div></div>Grid patterns:
<!-- Auto-fit grid --><div class="grid grid-cols-1 gap-4 md:grid-cols-2 lg:grid-cols-3"><div>Card 1</div><div>Card 2</div><div>Card 3</div></div><!-- Sidebar layout --><div class="grid grid-cols-[250px_1fr] gap-4"><aside>Sidebar</aside><main>Content</main></div>Spacing utilities:
<!-- Padding and margin --><div class="mx-auto p-4">Content</div><div class="px-4 py-2">Horizontal and vertical padding</div><!-- Space between children --><div class="space-y-4"><div>Item 1</div><div>Item 2</div></div>@applyWhen it's helpful:
/* Extracting repeated patterns */.btn {@apply rounded px-4 py-2 font-medium transition-colors;}.btn-primary {@apply btn bg-blue-500 text-white hover:bg-blue-600;}When it becomes an anti-pattern:
/* ❌ Defeats the purpose of utility-first */.card {@apply space-y-4 rounded-lg bg-white p-6 shadow-md;}/* You've just recreated traditional CSS! */Better alternative - component abstraction:
// React component (better than @apply)function Button({ variant = 'primary', children }) {const baseClasses = 'px-4 py-2 rounded font-medium transition-colors';const variantClasses = {primary: 'bg-blue-500 text-white hover:bg-blue-600',secondary: 'bg-gray-200 text-gray-800 hover:bg-gray-300',};return (<button className={clsx(baseClasses, variantClasses[variant])}>{children}</button>);}JIT and arbitrary values
Just-In-Time (JIT) compilation:
JIT generates styles on-demand as you write them, enabling:
- Arbitrary values
- All variants enabled by default
- Faster build times
Arbitrary values:
<!-- Custom spacing --><div class="mt-[137px]">Custom margin</div><!-- Custom colors --><div class="bg-[#1da1f2]">Twitter blue</div><!-- Custom sizes --><div class="w-[347px]">Exact width</div><!-- With CSS variables --><div class="bg-[var(--brand-color)]">Variable color</div>How you should think about it:
Arbitrary values are escape hatches for one-off designs. Use them when you need a specific value that doesn't fit the design system, but don't abuse them - if you're using the same arbitrary value repeatedly, it should be in your config.
Responsive prefixes (
md:,lg:)Very common interview question: "How does responsive design work in Tailwind?"
Breakpoint system:
<!-- Mobile-first approach --><div class="text-sm md:text-base lg:text-lg xl:text-xl">Responsive text size</div><!-- Default breakpoints:sm: 640pxmd: 768pxlg: 1024pxxl: 1280px2xl: 1536px-->Common responsive patterns:
<!-- Responsive grid --><div class="grid grid-cols-1 gap-4 md:grid-cols-2 lg:grid-cols-3"><div>Card</div></div><!-- Hide/show at breakpoints --><div class="hidden md:block">Only visible on tablet and up</div><div class="block md:hidden">Only visible on mobile</div><!-- Responsive spacing --><div class="p-4 md:p-6 lg:p-8">More padding on larger screens</div>What to emphasize:
Tailwind uses a mobile-first approach. Classes without prefixes apply to all screen sizes, and prefixed classes apply from that breakpoint up. This matches modern CSS best practices and makes responsive design intuitive.
Scenario-based questions
This section is where most candidates struggle - and where you can truly stand out. Interviewers use scenarios to assess problem-solving, not just knowledge recall.
Scenario 1: The navbar that won't stick
Question: "You have a sticky navbar that works on desktop but doesn't stick on mobile Safari. What could be the issue?"
Common issues:
/* ❌ Problem 1: Parent has overflow hidden */.parent {overflow: hidden; /* Sticky won't work! */}/* ✅ Solution: Remove overflow or use overflow: clip */.parent {overflow: clip; /* Allows sticky to work */}/* ❌ Problem 2: Mobile Safari viewport units */.navbar {position: sticky;top: 0;height: 10vh; /* Safari's vh includes address bar */}/* ✅ Solution: Use dvh (dynamic viewport height) */.navbar {position: sticky;top: 0;height: 10dvh; /* Accounts for mobile browser UI */}Example answer:
I'd first check if the parent container has
overflow: hidden, which breaks sticky positioning. Then I'd verify the sticky element has room to scroll. For mobile Safari specifically, I'd check if we're usingvhunits - Safari's viewport height includes the address bar, so I'd switch todvh(dynamic viewport height) or fixed pixel values.Scenario 2: The disappearing z-index
Question: "You set
z-index: 9999on a modal, but it still appears behind other elements. Why?"/* ❌ Modal has high z-index but is trapped */.sidebar {position: relative;z-index: 1;transform: translateX(0); /* Creates stacking context! */}.modal {position: fixed;z-index: 9999; /* Doesn't matter - stuck in sidebar's context */}/* ✅ Solution: Move modal outside stacking context *//* Render modal at root level in HTML *//* ✅ Or remove stacking context creator */.sidebar {position: relative;z-index: 1;/* Remove transform */}Example answer:
The issue is likely a stacking context. Even with
z-index: 9999, the modal is isolated within a parent's stacking context. Common culprits aretransform,opacity < 1,filter, orwill-change. I'd inspect the DOM tree to find which parent creates the stacking context, then either move the modal to the root level or remove the stacking context creator.Scenario 3: The flexbox that won't shrink
Question: "You have a flex container with text that overflows instead of wrapping. How do you fix it?"
/* ❌ Problem: Flex items won't shrink below content size */.item {flex: 1;/* min-width defaults to 'auto' (content size) */}/* ✅ Solution: Override min-width */.item {flex: 1;min-width: 0; /* Allow shrinking below content size */}.item p {overflow: hidden;text-overflow: ellipsis;white-space: nowrap;}Example answer:
Flex items have
min-width: autoby default, which prevents them from shrinking below their content size. I'd setmin-width: 0on the flex item to allow it to shrink. Then I'd handle the text overflow with eithertext-overflow: ellipsisfor truncation orword-breakfor wrapping.Scenario 4: The grid that breaks on mobile
Question: "Your CSS Grid layout looks perfect on desktop but breaks on mobile with horizontal scrolling. What's wrong?"
/* ❌ Problem: Fixed column widths */.grid {display: grid;grid-template-columns: 300px 300px 300px; /* Overflows on mobile */}/* ✅ Solution: Responsive columns with minmax */.grid {display: grid;grid-template-columns: repeat(auto-fit, minmax(250px, 1fr));gap: 1rem;}/* ✅ Or breakpoint-based columns */.grid {grid-template-columns: 1fr; /* Mobile: single column */}@media (min-width: 768px) {.grid {grid-template-columns: repeat(2, 1fr); /* Tablet: 2 columns */}}Scenario 5: The performance problem
Question: "Your animation is janky and causing performance issues. How do you optimize it?"
/* ❌ Problem: Animating layout properties */.slow-animation {transition:width 0.3s,left 0.3s;}.slow-animation:hover {width: 300px; /* Triggers layout */left: 100px; /* Triggers layout */}/* ✅ Solution: Use transform and opacity only */.fast-animation {transition:transform 0.3s,opacity 0.3s;will-change: transform;}.fast-animation:hover {transform: translateX(100px) scale(1.2); /* GPU-accelerated */opacity: 0.8; /* GPU-accelerated */}Performance checklist:
- ✅ Only animate
transformandopacity - ✅ Use
will-changesparingly (memory cost) - ✅ Avoid animating
width,height,top,left - ✅ Use CSS containment for isolated animations
Scenario 6: The centering challenge
Question: "You need to center a modal both horizontally and vertically, but it should scroll if content exceeds viewport height. How?"
/* ❌ Problem: Fixed positioning breaks scrolling */.modal-overlay {position: fixed;inset: 0;display: flex;align-items: center;justify-content: center;}.modal {max-height: 90vh;/* If content exceeds 90vh, it's cut off! */}/* ✅ Solution: Allow scrolling with proper overflow */.modal-overlay {position: fixed;inset: 0;display: flex;align-items: center;justify-content: center;padding: 2rem;overflow-y: auto; /* Allow scrolling */}.modal {max-width: 600px;width: 100%;margin: auto; /* Centers when scrolling */}Scenario 7: The dark mode dilemma
Question: "Implement dark mode that respects user preferences but allows manual override".
/* ✅ System preference detection */:root {--bg-color: #ffffff;--text-color: #000000;}@media (prefers-color-scheme: dark) {:root {--bg-color: #1a1a1a;--text-color: #ffffff;}}/* ✅ Manual override with data attribute */[data-theme='light'] {--bg-color: #ffffff;--text-color: #000000;}[data-theme='dark'] {--bg-color: #1a1a1a;--text-color: #ffffff;}/* Usage */body {background-color: var(--bg-color);color: var(--text-color);}// JavaScript for manual toggleconst theme = localStorage.getItem('theme') || 'auto';if (theme === 'auto') {document.documentElement.removeAttribute('data-theme');} else {document.documentElement.setAttribute('data-theme', theme);}Interview pro tips
DevTools techniques
When you're asked to debug CSS during a live coding interview, your DevTools skills reveal your experience level.
Essential DevTools skills:
- Inspect Element - Right-click → Inspect (Cmd/Ctrl + Shift + C)
- Computed Styles - Check which styles actually apply
- Box Model Visualization - Hover to see margins/padding
- Grid/Flex overlays - Click grid/flex badge to visualize
- Performance tab - Record interactions, identify layout thrashing
Other techniques:
- Force element state (right-click → Force state → :hover, :focus)
- Edit styles live (up/down arrows to increment values)
- Copy computed styles
- Screenshot elements (Cmd/Ctrl + Shift + P → "Capture node screenshot")
- Check accessibility (Elements tab → Accessibility pane)
How to think aloud
Interviewers want to understand your thought process. Silent coding makes them nervous.
The framework:
- Restate the problem - "So we need to center this modal and ensure it's scrollable..."
- Identify constraints - "The modal needs to work on all screen sizes..."
- Consider approaches - "I could use Flexbox or Grid for centering..."
- Explain trade-offs - "Flexbox gives more control over overflow..."
- Implement and verify - "Let me try this approach... I'll test by resizing..."
- Reflect on the solution - "This works, but I'd also add focus trapping..."
Common interview mistakes to avoid
1. Over-engineering
Start simple, iterate. Don't build a complex solution when a simple one works.
2. Ignoring accessibility
<!-- ❌ Not accessible --><div onclick="handleClick()">Click me</div><!-- ✅ Accessible --><button type="button" onclick="handleClick()">Click me</button>3. Not testing edge cases
Always test:
- ✅ Very long text (does it overflow?)
- ✅ Very short text (does layout break?)
- ✅ No content (does it collapse?)
- ✅ Mobile viewport (does it scroll?)
- ✅ Keyboard navigation (can you tab through?)
4. Forgetting browser compatibility
I'm using CSS Grid here, which has excellent browser support in modern browsers. If we needed to support IE11, I'd use Flexbox instead.
5. Not asking clarifying questions
Good questions to ask:
- "What browsers do we need to support?"
- "Should this work on mobile?"
- "Are there any accessibility requirements?"
- "Is there a design system I should follow?"
Conclusion
Today's interviewers want to see how you think, how you solve problems, and whether you understand the "why" behind CSS patterns - not just the "what".
The candidates who succeed aren't necessarily those who've memorized every CSS property. They're the ones who can:
- Explain their reasoning clearly and confidently
- Debug systematically using DevTools and logical thinking
- Make trade-offs between different approaches based on requirements
- Write maintainable code that others can understand and extend
- Consider accessibility and performance from the start
Modern CSS knowledge - Container Queries,
:has(),clamp(), logical properties - signals that you're staying current with the platform. But clarity in reasoning is what gets you hired.Your next steps:
- Practice real scenarios instead of memorizing Q&A. Build actual components, debug real issues, and explain your decisions out loud.
- Master DevTools. Spend time exploring the Layout panel, Performance tab, and Accessibility inspector. These tools are your best friends in interviews.
- Build a mental framework for approaching CSS problems:
- What's the layout pattern? (Flexbox, Grid, or positioning?)
- What are the responsive requirements?
- What are the accessibility considerations?
- What are the performance implications?
- Stay curious. CSS is evolving rapidly. Follow blogs, experiment with new features, and understand browser compatibility.
- Get hands-on practice. Head over to GreatFrontEnd's CSS questions to practice build real components and practice for next interview.
Remember: companies aren't just hiring CSS experts - they're hiring problem solvers who can communicate clearly, work collaboratively, and build accessible, performant user interfaces.
- TypeScript for React Developers: 12 Common Mistakes and Best PracticesMaster TypeScript React best practices by avoiding these 12 common mistakes. Learn proper component typing, hooks patterns, and API integration techniques.作者GreatFrontEnd Team25 分钟阅读Dec 8, 2025
Remember the first time you added TypeScript to a React project? The initial excitement of autocomplete and type safety quickly turned into frustration with cryptic error messages and confusing type definitions. You're not alone - this is the reality for most developers making the switch.
TypeScript with React has become the industry standard. React 19, Next.js 16, and virtually every modern framework now ship with first-class TypeScript support. Companies expect it, teams rely on it, and your career growth depends on mastering it.
But here's the problem: most developers learn TypeScript reactively, fixing errors as they appear rather than understanding the patterns that prevent them. This leads to codebases filled with
anytypes, overly complex generics, and brittle component APIs that break during refactoring.The cost is real. A single poorly-typed component can cascade into hours of debugging. Missing event handler types lead to runtime crashes. Incorrect hook typing creates subtle bugs that only appear in production.
This post reveals the 12 most common TypeScript mistakes React developers make and shows you exactly how to fix them. You'll learn the patterns senior developers use, understand why certain approaches work better than others, and gain the confidence to write type-safe React code from day one.
Ready to level up your TypeScript skills? Let's dive in. And when you're done, head over to GreatFrontEnd's TypeScript interview questions to practice and prepare for your next interview.
Why TypeScript matters for frontend developers?
TypeScript isn't just about catching bugs - it's about building better software faster.
Type safety means catching errors before they reach production. Instead of discovering that
user.profile.avatarisundefinedat 2 AM when your app crashes, TypeScript tells you at compile time. No more defensive coding with endlessnullchecks.Productivity gains are immediate and measurable. IntelliSense shows you every available prop as you type. Autocomplete writes half your code for you. Refactoring a component name? TypeScript updates every import automatically. What used to take hours now takes minutes.
Collaboration improves dramatically. Your component's props are self-documenting. New team members understand your API without reading documentation. Code reviews focus on logic, not "what does this parameter do?"
Hiring trends are clear: 78% of React job postings now require TypeScript experience. It's no longer optional - it's expected.
Before and After: Type safety in action
// ❌ Without TypeScript - Runtime error waiting to happenfunction UserProfile({ user }) {return <div>{user.profile.name}</div>;}// ✅ With TypeScript - Error caught at compile timetype User = {profile?: {name: string;};};function UserProfile({ user }: { user: User }) {return <div>{user.profile?.name ?? 'Anonymous'}</div>;}Did you know? Teams using TypeScript report 15% fewer production bugs and 20% faster onboarding for new developers.
Component typing mistakes
Mistake 1: Using React.FC incorrectly
React.FCseems convenient - it typeschildrenautomatically and provides type inference. But it comes with hidden costs that experienced teams avoid.What React.FC does:
- Automatically includes
childrenin props (even when you don't want it) - Provides implicit return type
- Adds
displayName,propTypes, and other legacy properties
Why explicit typing is clearer:
// ❌ Using React.FC - children included even when not neededconst Button: React.FC<{ onClick: () => void }> = ({ onClick }) => {return <button onClick={onClick}>Click me</button>;};// This compiles but shouldn't - Button doesn't render children!<Button onClick={handleClick}><span>This text is ignored</span></Button>;// ✅ Explicit prop typing - clear and intentionaltype ButtonProps = {onClick: () => void;};function Button({ onClick }: ButtonProps) {return <button onClick={onClick}>Click me</button>;}// ❌ TypeScript error - children not accepted<Button onClick={handleClick}><span>Error!</span></Button>;When teams avoid React.FC:
- When components don't accept children
- When you need precise control over prop types
- In modern codebases (React 18+)
Mistake 2: Not typing component props properly
Using
anyfor props defeats the entire purpose of TypeScript. Your components become black boxes, autocomplete disappears, and refactoring becomes dangerous.Why
anybreaks correctness:// ❌ Props typed as any - no safety, no autocompletefunction Card({ title, description, variant }: any) {return (<div className={variant}><h2>{title}</h2><p>{description}</p></div>);}// This compiles but crashes at runtime<Card variant={123} />;Proper typing with optional props and variants:
// ✅ Explicit prop types with variantstype CardProps = {title: string;description?: string; // Optional propvariant?: 'primary' | 'secondary' | 'danger'; // Union type for variantsonClose?: () => void;};function Card({ title, description, variant = 'primary', onClose }: CardProps) {return (<div className={`card card--${variant}`}><h2>{title}</h2>{description && <p>{description}</p>}{onClose && <button onClick={onClose}>×</button>}</div>);}// ✅ TypeScript catches errors<Card title="Hello" variant="invalid" />; // Error: Type '"invalid"' is not assignableReal-world design system example:
type TagProps = {label: string;size?: 'sm' | 'md' | 'lg';color?: 'blue' | 'green' | 'red' | 'gray';removable?: boolean;onRemove?: () => void;};function Tag({label,size = 'md',color = 'gray',removable = false,onRemove,}: TagProps) {return (<span className={`tag tag--${size} tag--${color}`}>{label}{removable && <button onClick={onRemove}>×</button>}</span>);}Key takeaway: Always type your TypeScript React components explicitly. Mark optional props with
?and use union types for variants.Mistake 3: Incorrect event handler typing
Event handlers are one of the most commonly mistyped patterns in React. Using
Functionoranyseems harmless until you need to accessevent.target.valueand TypeScript can't help you.Common misuse:
// ❌ Too loose - no type safetyfunction SearchInput({ onChange }: { onChange: Function }) {return <input onChange={onChange} />;}// ❌ Using any - defeats the purposefunction SearchInput({ onChange }: { onChange: any }) {return <input onChange={onChange} />;}Correct event type patterns:
// ✅ Proper event typingtype SearchInputProps = {onChange: (event: React.ChangeEvent<HTMLInputElement>) => void;};function SearchInput({ onChange }: SearchInputProps) {return <input type="text" onChange={onChange} />;}// Usage with full type safetyfunction App() {const handleSearch = (event: React.ChangeEvent<HTMLInputElement>) => {console.log(event.target.value); // ✅ TypeScript knows this is a string};return <SearchInput onChange={handleSearch} />;}Event types mapped to elements:
Element type Event type Common use case <input>,<textarea>React.ChangeEvent<HTMLInputElement>Form inputs <form>React.FormEvent<HTMLFormElement>Form submission <button>,<div>React.MouseEvent<HTMLButtonElement>Click handlers <input>React.KeyboardEvent<HTMLInputElement>Keyboard shortcuts <input>React.FocusEvent<HTMLInputElement>Focus/blur events Real-world form validation scenario:
type LoginFormProps = {onSubmit: (email: string, password: string) => void;};function LoginForm({ onSubmit }: LoginFormProps) {const handleSubmit = (event: React.FormEvent<HTMLFormElement>) => {event.preventDefault();const formData = new FormData(event.currentTarget);const email = formData.get('email') as string;const password = formData.get('password') as string;onSubmit(email, password);};return (<form onSubmit={handleSubmit}><input name="email" type="email" required /><input name="password" type="password" required /><button type="submit">Login</button></form>);}Mistake 4:
forwardReftyping confusionforwardRefis notoriously tricky to type correctly. The generic syntax is confusing, and combining it with custom props often leads to type errors that are hard to debug.Why
forwardRefis tricky:// ❌ Common mistake - ref type is wrongconst Input = forwardRef((props, ref) => {return <input ref={ref} {...props} />;});// Error: Type 'ForwardedRef<unknown>' is not assignable to type 'LegacyRef<HTMLInputElement>'Correct generic syntax:
// ✅ Proper forwardRef typingtype InputProps = {placeholder?: string;error?: boolean;};const Input = forwardRef<HTMLInputElement, InputProps>(({ placeholder, error }, ref) => {return (<inputref={ref}placeholder={placeholder}className={error ? 'input--error' : 'input'}/>);},);Input.displayName = 'Input';Common error messages and fixes:
Error message Fix Type 'ForwardedRef<unknown>' is not assignableAdd generic types: forwardRef<ElementType, PropsType>Property 'displayName' does not existAdd ComponentName.displayName = 'Name'after definitionType instantiation is excessively deepSimplify prop spreading or use ComponentPropsWithoutRefHooks typing mistakes
Mistake 5: Not typing
useStatewith complex statesTypeScript can infer simple
useStatetypes, but it fails with complex objects, null unions, and API data. Explicit typing prevents runtime errors and improves autocomplete.When inference fails:
// ❌ TypeScript infers type as undefined, can't add user laterconst [user, setUser] = useState();// Later in code...setUser({ id: 1, name: 'John' }); // Error: Argument of type '{ id: number; name: string; }' is not assignableNull unions and API data patterns:
// ✅ Explicit typing with null uniontype User = {id: number;name: string;email: string;avatar?: string;};const [user, setUser] = useState<User | null>(null);// ✅ TypeScript knows user can be nullif (user) {console.log(user.name); // Safe access}Auth/profile data example:
type AuthState = {user: User | null;isAuthenticated: boolean;isLoading: boolean;};function useAuth() {const [auth, setAuth] = useState<AuthState>({user: null,isAuthenticated: false,isLoading: true,});const login = async (email: string, password: string) => {setAuth((prev) => ({ ...prev, isLoading: true }));try {const user = await api.login(email, password);setAuth({ user, isAuthenticated: true, isLoading: false });} catch (error) {setAuth({ user: null, isAuthenticated: false, isLoading: false });}};return { auth, login };}Mistake 6: Incorrect
useReftypingRefs need careful typing because they start as
nulland get assigned later. Mistyping refs leads to runtime errors when accessing.current.Why refs need
nullinitial value:// ❌ Wrong - TypeScript thinks ref is always HTMLInputElementconst inputRef = useRef<HTMLInputElement>();// Later...inputRef.current.focus(); // Error: Object is possibly 'undefined'Matching element types:
// ✅ Correct - ref can be null initiallyconst inputRef = useRef<HTMLInputElement>(null);// ✅ Safe access with optional chainingconst focusInput = () => {inputRef.current?.focus();};return <input ref={inputRef} />;Mutable value refs vs DOM refs:
// ✅ DOM ref - starts as nullconst buttonRef = useRef<HTMLButtonElement>(null);// ✅ Mutable value ref - doesn't need nullconst renderCount = useRef<number>(0);useEffect(() => {renderCount.current += 1;});// ✅ Storing previous valueconst prevValue = useRef<string>();useEffect(() => {prevValue.current = value;}, [value]);Mistake 7:
useReducerwithout discriminated unionsString-based action types are error-prone. Discriminated unions make reducers type-safe and eliminate entire classes of bugs.
Why string action types are risky:
// ❌ Unsafe - typos compile but break at runtimefunction reducer(state, action) {switch (action.type) {case 'LOAD_START':return { ...state, loading: true };case 'LOAD_SUCESS': // Typo! This case never matchesreturn { ...state, loading: false, data: action.payload };}}Discriminated unions enforce strictness:
// ✅ Type-safe reducer with discriminated unionstype LoadingState = {status: 'idle' | 'loading' | 'success' | 'error';data: string | null;error: string | null;};type Action =| { type: 'LOAD_START' }| { type: 'LOAD_SUCCESS'; payload: string }| { type: 'LOAD_ERROR'; error: string };function reducer(state: LoadingState, action: Action): LoadingState {switch (action.type) {case 'LOAD_START':return { status: 'loading', data: null, error: null };case 'LOAD_SUCCESS':return { status: 'success', data: action.payload, error: null };case 'LOAD_ERROR':return { status: 'error', data: null, error: action.error };default:return state;}}Example with loading, success, error:
function DataFetcher() {const [state, dispatch] = useReducer(reducer, {status: 'idle',data: null,error: null,});const fetchData = async () => {dispatch({ type: 'LOAD_START' });try {const data = await api.getData();dispatch({ type: 'LOAD_SUCCESS', payload: data });} catch (error) {dispatch({ type: 'LOAD_ERROR', error: error.message });}};return (<div>{state.status === 'loading' && <Spinner />}{state.status === 'success' && <div>{state.data}</div>}{state.status === 'error' && <Error message={state.error} />}</div>);}Mistake 8:
useContextwithout proper type guardsContext can resolve to
undefinedif consumed outside a provider. Type guards prevent runtime crashes and improve developer experience.Why context can be undefined:
// ❌ Context might be undefinedconst UserContext = createContext<User | undefined>(undefined);function useUser() {const user = useContext(UserContext);return user; // Could be undefined!}// Later...function Profile() {const user = useUser();return <div>{user.name}</div>; // Runtime error if no provider!}Safe custom hook pattern:
// ✅ Type guard ensures context is always definedconst UserContext = createContext<User | undefined>(undefined);function useUser() {const user = useContext(UserContext);if (!user) {throw new Error('useUser must be used within UserProvider');}return user;}// Now user is always definedfunction Profile() {const user = useUser(); // TypeScript knows user is User, not User | undefinedreturn <div>{user.name}</div>; // Safe!}Complete example:
type Theme = {primary: string;secondary: string;background: string;};const ThemeContext = createContext<Theme | undefined>(undefined);export function ThemeProvider({ children }: { children: React.ReactNode }) {const theme: Theme = {primary: '#007bff',secondary: '#6c757d',background: '#ffffff',};return (<ThemeContext.Provider value={theme}>{children}</ThemeContext.Provider>);}export function useTheme() {const theme = useContext(ThemeContext);if (!theme) {throw new Error('useTheme must be used within ThemeProvider');}return theme;}Mistake 9:
useMemoanduseCallbacktype inference issuesTypeScript usually infers types for
useMemoanduseCallback, but complex scenarios require explicit typing for correctness and performance.When explicit typing is necessary:
// ❌ Type inference fails with complex return typesconst processedData = useMemo(() => {return items.map((item) => ({...item,computed: expensiveCalculation(item),}));}, [items]);// TypeScript might infer too broad a typeGeneric parameters:
// ✅ Explicit typing for claritytype ProcessedItem = {id: number;name: string;computed: number;};const processedData = useMemo<ProcessedItem[]>(() => {return items.map((item) => ({id: item.id,name: item.name,computed: expensiveCalculation(item),}));}, [items]);Dependency array type checking:
// ✅ useCallback with explicit typesconst handleSubmit = useCallback((event: React.FormEvent<HTMLFormElement>) => {event.preventDefault();onSubmit(formData);},[formData, onSubmit], // TypeScript checks these dependencies);Props and Component pattern mistakes
Mistake 10: Not using utility types for props
Utility types like
Pick,Omit, andPartialreduce duplication and make prop types more maintainable.Common utility types:
type User = {id: number;name: string;email: string;password: string;createdAt: Date;};// ✅ Pick - select specific propertiestype UserPreview = Pick<User, 'id' | 'name'>;// ✅ Omit - exclude propertiestype PublicUser = Omit<User, 'password'>;// ✅ Partial - make all properties optionaltype UserUpdate = Partial<User>;// ✅ Required - make all properties requiredtype CompleteUser = Required<User>;// ✅ Readonly - make all properties readonlytype ImmutableUser = Readonly<User>;// ✅ Record - create object type with specific keystype UserRoles = Record<'admin' | 'user' | 'guest', boolean>;Design system usage:
// ✅ Base button propstype BaseButtonProps = {variant: 'primary' | 'secondary' | 'danger';size: 'sm' | 'md' | 'lg';disabled?: boolean;loading?: boolean;};// ✅ Icon button omits size, adds icontype IconButtonProps = Omit<BaseButtonProps, 'size'> & {icon: React.ReactNode;};// ✅ Link button picks variant, adds hreftype LinkButtonProps = Pick<BaseButtonProps, 'variant'> & {href: string;external?: boolean;};Mistake 11: Incorrect children prop typing
The
childrenprop has multiple possible types. Using the wrong one causes type errors and limits component flexibility.When to use each type:
// ✅ ReactNode - accepts anything renderabletype ContainerProps = {children: React.ReactNode; // string, number, JSX, array, null, etc.};function Container({ children }: ContainerProps) {return <div className="container">{children}</div>;}// ✅ ReactElement - only accepts JSX elementstype WrapperProps = {children: React.ReactElement; // Must be a single JSX element};function Wrapper({ children }: WrapperProps) {return <div className="wrapper">{children}</div>;}// ✅ JSX.Element - similar to ReactElementtype LayoutProps = {children: JSX.Element;};// ✅ string - only accepts stringstype LabelProps = {children: string;};function Label({ children }: LabelProps) {return <label>{children.toUpperCase()}</label>;}Render prop patterns:
// ✅ Render prop with function typetype DataListProps<T> = {data: T[];renderItem: (item: T, index: number) => React.ReactNode;};function DataList<T>({ data, renderItem }: DataListProps<T>) {return (<ul>{data.map((item, index) => (<li key={index}>{renderItem(item, index)}</li>))}</ul>);}// Usage<DataList data={users} renderItem={(user) => <UserCard user={user} />} />;Mistake 12: Not typing prop spreading
Extending native HTML attributes improves autocomplete and type safety when spreading props.
Extending HTML attributes:
// ❌ Props don't extend native attributestype ButtonProps = {variant: 'primary' | 'secondary';};function Button({ variant, ...props }: ButtonProps) {return <button {...props} className={`btn btn--${variant}`} />;}// No autocomplete for onClick, disabled, etc.// ✅ Extend native button attributestype ButtonProps = React.ButtonHTMLAttributes<HTMLButtonElement> & {variant: 'primary' | 'secondary';};function Button({ variant, ...props }: ButtonProps) {return <button {...props} className={`btn btn--${variant}`} />;}// Full autocomplete for all button attributes!ComponentPropsWithoutRefandComponentPropsWithRef:// ✅ ComponentPropsWithoutRef - for components without reftype InputProps = React.ComponentPropsWithoutRef<'input'> & {label: string;error?: string;};function Input({ label, error, ...props }: InputProps) {return (<div><label>{label}</label><input {...props} />{error && <span>{error}</span>}</div>);}// ✅ ComponentPropsWithRef - for components with reftype ButtonProps = React.ComponentPropsWithRef<'button'> & {variant: 'primary' | 'secondary';};const Button = forwardRef<HTMLButtonElement, ButtonProps>(({ variant, ...props }, ref) => {return <button ref={ref} {...props} className={`btn btn--${variant}`} />;},);Mistake 13: Poor generic component typing
Generic components are powerful but easy to mistype. Proper constraints and polymorphic patterns make them type-safe.
Common pitfalls:
// ❌ No constraints - T could be anythingfunction List<T>({ items }: { items: T[] }) {return (<ul>{items.map((item) => (<li>{item}</li>))}</ul>);}// Error: 'item' is of type 'unknown'Proper constraint usage:
// ✅ Constrain T to have an idtype HasId = {id: string | number;};function List<T extends HasId>({ items }: { items: T[] }) {return (<ul>{items.map((item) => (<li key={item.id}>{JSON.stringify(item)}</li>))}</ul>);}Polymorphic component pattern (the "as" prop):
// ✅ Polymorphic componenttype BoxProps<T extends React.ElementType = 'div'> = {as?: T;children: React.ReactNode;}function Box<T extends React.ElementType = 'div'>({as,children,...props}: BoxProps<T> & Omit<React.ComponentPropsWithoutRef<T>, keyof BoxProps<T>>) {const Component = as || 'div';return <Component {...props}>{children}</Component>;}// Usage<Box>Default div</Box><Box as="section">Section element</Box><Box as="a" href="/home">Link element with href autocomplete!</Box>Flexible Table component:
type Column<T> = {key: keyof T;header: string;render?: (value: T[keyof T], item: T) => React.ReactNode;};type TableProps<T extends Record<string, any>> = {data: T[];columns: Column<T>[];};function Table<T extends Record<string, any>>({data,columns,}: TableProps<T>) {return (<table><thead><tr>{columns.map((col) => (<th key={String(col.key)}>{col.header}</th>))}</tr></thead><tbody>{data.map((item, idx) => (<tr key={idx}>{columns.map((col) => (<td key={String(col.key)}>{col.render? col.render(item[col.key], item): String(item[col.key])}</td>))}</tr>))}</tbody></table>);}Mistake 14: Type narrowing and type guards
Union types are common in React (loading states, conditional rendering), but TypeScript needs help narrowing them.
Not properly narrowing union types:
// ❌ TypeScript can't narrow the typetype State =| { status: 'loading' }| { status: 'success'; data: string }| { status: 'error'; error: string };function Display({ state }: { state: State }) {if (state.status === 'success') {return <div>{state.data}</div>; // Error: Property 'data' does not exist on type 'State'}}Creating custom type guard functions:
// ✅ Type guard functionfunction isSuccessState(state: State,): state is { status: 'success'; data: string } {return state.status === 'success';}function Display({ state }: { state: State }) {if (isSuccessState(state)) {return <div>{state.data}</div>; // ✅ TypeScript knows state has data}}Using discriminated unions effectively:
// ✅ Discriminated union with type narrowingtype ApiState<T> =| { status: 'idle' }| { status: 'loading' }| { status: 'success'; data: T }| { status: 'error'; error: string };function DataDisplay<T>({ state }: { state: ApiState<T> }) {switch (state.status) {case 'idle':return <div>Click to load</div>;case 'loading':return <Spinner />;case 'success':return <div>{JSON.stringify(state.data)}</div>; // ✅ data is availablecase 'error':return <Error message={state.error} />; // ✅ error is available}}The "in" operator and typeof checks:
// ✅ Using "in" operatortype Dog = {bark: () => void;};type Cat = {meow: () => void;};type Pet = Dog | Cat;function makeSound(pet: Pet) {if ('bark' in pet) {pet.bark(); // TypeScript knows it's a Dog} else {pet.meow(); // TypeScript knows it's a Cat}}// ✅ Using typeoffunction processValue(value: string | number) {if (typeof value === 'string') {return value.toUpperCase(); // TypeScript knows it's a string} else {return value.toFixed(2); // TypeScript knows it's a number}}API and external integration mistakes
Mistake 15: Not typing API responses
Assuming API shape without types is dangerous. Create response types and consider runtime validation.
Risk of assuming API shape:
// ❌ No typing - runtime errors waiting to happenasync function fetchUser(id: number) {const response = await fetch(`/api/users/${id}`);const user = await response.json();return user; // Type is 'any'}Generic response type:
// ✅ Type API responsestype ApiResponse<T> = {success: boolean;data?: T;error?: string;};type User = {id: number;name: string;email: string;};async function fetchUser(id: number): Promise<ApiResponse<User>> {try {const response = await fetch(`/api/users/${id}`);const data = await response.json();return { success: true, data };} catch (error) {return { success: false, error: error.message };}}Runtime validation with Zod:
// ✅ Runtime validation with Zodimport { z } from 'zod';const UserSchema = z.object({id: z.number(),name: z.string(),email: z.string().email(),});type User = z.infer<typeof UserSchema>;async function fetchUser(id: number): Promise<User> {const response = await fetch(`/api/users/${id}`);const data = await response.json();return UserSchema.parse(data); // Throws if data doesn't match schema}Mistake 16: Missing return type annotations for async functions
Explicit
Promise<T>return types improve clarity and help catch errors early.Why explicit Promise
<T>helps:// ❌ Implicit return type - unclear what's returnedasync function loadData() {const response = await fetch('/api/data');return response.json();}// ✅ Explicit return type - clear contractasync function loadData(): Promise<{ items: string[] }> {const response = await fetch('/api/data');return response.json();}Impact on debugging:
// ✅ TypeScript catches mismatches immediatelyasync function getUser(id: number): Promise<User> {const response = await fetch(`/api/users/${id}`);const data = await response.json();return data; // Error if data doesn't match User type}Mistake 17: Working with poorly-typed third-party libraries
Not all libraries have good TypeScript support. Learn to augment types when needed.
Understanding @types/* packages:
# Install type definitions for libraries without built-in typesnpm install --save-dev @types/lodashnpm install --save-dev @types/react-router-domModule augmentation:
// ✅ Augment existing module typesimport 'react';declare module 'react' {interface CSSProperties {'--custom-property'?: string;}}// Now you can use custom CSS properties<div style={{ '--custom-property': 'value' }} />;Creating your own type declarations:
// ✅ Declare module for untyped librarydeclare module 'some-untyped-library' {export function doSomething(value: string): number;export interface Config {apiKey: string;timeout?: number;}}The declare module pattern:
// types/custom.d.tsdeclare module '*.svg' {const content: React.FunctionComponent<React.SVGAttributes<SVGElement>>;export default content;}declare module '*.png' {const value: string;export default value;}Best practices summary
Components checklist
- ✅ Use explicit prop typing instead of
React.FC - ✅ Never use
anyfor props - ✅ Type event handlers with specific event types
- ✅ Extend native HTML attributes with
ComponentPropsWithoutRef
Hooks checklist
- ✅ Explicitly type
useStatefor complex states - ✅ Initialize
useRefwithnullfor DOM refs - ✅ Use discriminated unions in
useReducer - ✅ Add type guards to
useContexthooks - ✅ Type
useMemoanduseCallbackwhen inference fails
Patterns checklist
- ✅ Use utility types (
Pick,Omit,Partial) to reduce duplication - ✅ Choose correct children type (
ReactNode,ReactElement,string) - ✅ Type generic components with proper constraints
- ✅ Create custom type guards for union types
- ✅ Use discriminated unions for state machines
API & external checklist
- ✅ Type all API responses
- ✅ Add explicit return types to async functions
- ✅ Consider runtime validation with Zod or Yup
- ✅ Augment third-party library types when needed
- ✅ Use
@types/*packages for untyped libraries
TypeScript configuration for React projects
A proper
tsconfig.jsonis essential for catching errors and enabling the best TypeScript features.Minimal tsconfig.json:
{"compilerOptions": {"target": "ES2020","lib": ["ES2020", "DOM", "DOM.Iterable"],"jsx": "react-jsx","module": "ESNext","moduleResolution": "bundler","strict": true,"noUncheckedIndexedAccess": true,"esModuleInterop": true,"skipLibCheck": true,"forceConsistentCasingInFileNames": true,"resolveJsonModule": true,"isolatedModules": true,"noEmit": true},"include": ["src"],"exclude": ["node_modules"]}Why strict mode matters:
Enabling
"strict": trueactivates all strict type-checking options:strictNullChecks- prevents null/undefined errorsstrictFunctionTypes- ensures function parameter safetystrictBindCallApply- types bind/call/apply correctlynoImplicitAny- requires explicit typesnoImplicitThis- preventsthisconfusion
Key flags explained:
jsx: "react-jsx"- Uses the new JSX transform (React 17+), no need to import Reactjsx: "react"- Classic JSX transform, requiresimport ReactnoUncheckedIndexedAccess- Makes array access returnT | undefined, preventing index errorsmoduleResolution: "bundler"- Modern resolution for Vite/webpack (use"node"for older setups)
Troubleshooting common TypeScript errors
Top 5 confusing error messages:
1. "Type 'X' is not assignable to type 'Y'"
What it means: You're trying to use a value where TypeScript expects a different type.
Quick fix:
// Error: Type 'string' is not assignable to type 'number'const age: number = '25';// Fix: Convert the typeconst age: number = parseInt('25');2. "Object is possibly 'undefined'"
What it means: You're accessing a property that might not exist.
Quick fix:
// Errorconst name = user.profile.name;// Fix: Use optional chainingconst name = user.profile?.name;// Or: Type guardif (user.profile) {const name = user.profile.name;}3. "Property 'X' does not exist on type 'Y'"
What it means: TypeScript doesn't know about that property.
Quick fix:
// Error: Property 'customProp' does not exist<div customProp="value" />;// Fix: Extend the typedeclare module 'react' {interface HTMLAttributes<T> {customProp?: string;}}4. "Type instantiation is excessively deep and possibly infinite"
What it means: Your types are too complex or recursive.
Quick fix:
// Simplify complex prop spreading// Instead of spreading everything, be explicitinterface ButtonProps extends Pick<React.ButtonHTMLAttributes<HTMLButtonElement>,'onClick' | 'disabled' | 'type'> {variant: string;}5. "Cannot find name 'React'"
What it means: React isn't imported (only needed with old JSX transform).
Quick fix:
// If using "jsx": "react-jsx", you don't need this// If using "jsx": "react", add:import React from 'react';When to use
// @ts-expect-errorvs// @ts-ignore:// ✅ Use @ts-expect-error - fails if error is fixed// @ts-expect-error: Third-party library has wrong typesconst result = poorlyTypedLibrary.method();// ❌ Avoid @ts-ignore - silently ignores errors forever// @ts-ignoreconst result = poorlyTypedLibrary.method();Tools and Resources
VS Code extensions:
- Pretty TypeScript errors - Formats complex type errors
- Total TypeScript - Inline TypeScript tips and best practices
Useful TypeScript tools:
- ts-reset - Improves built-in TypeScript types for better DX
- type-fest - Collection of essential TypeScript utility types
- ts-pattern - Pattern matching library with excellent type inference
- zod - Runtime validation with TypeScript type inference
TypeScript playground:
- TypeScript Playground with React preset - Test React TypeScript code in the browser
Recommended Reading:
Practice your skills: Ready to test your knowledge? Head over to GreatFrontEnd's TypeScript Interview Questions to practice and prepare for your next interview.
Common interview questions you are now ready for
After mastering these mistakes, you're prepared for these React TypeScript interview questions:
Junior Level:
- What's the difference between
interfaceandtypein TypeScript? - How do you type a React component's props?
- What's the correct way to type a
useStatehook? - How do you type event handlers in React?
- What's the difference between
ReactNodeandReactElement?
Mid Level:
- Explain discriminated unions and when to use them in React
- How do you properly type a
useReducerhook? 8. What's the difference betweenComponentPropsWithRefandComponentPropsWithoutRef? - How do you create a type-safe context with TypeScript? 1
- Explain how to type a generic component in React
Senior Level:
- How do you implement polymorphic components with the "as" prop pattern?
- What are the tradeoffs between runtime validation (Zod) and compile-time types?
- How would you type a complex form library with dynamic fields?
- Explain module augmentation and when you'd use it
- How do you handle type narrowing in complex conditional rendering scenarios?
Conclusion
TypeScript mistakes in React can be frustrating, but they're also learning opportunities. Each
anytype you replace, each event handler you properly type, and each hook you correctly structure makes your codebase a bit more robust.The patterns covered here - explicit prop typing, discriminated unions, type guards, and proper generic constraints - are widely used in production codebases. They're not just theoretical best practices, but practical solutions to common problems.
If you're working on an existing codebase, consider starting small. Pick one component that uses
anyand give it proper types. Try adding discriminated unions to a reducer. Add a type guard to a context hook. Each improvement helps.As you apply these patterns, you'll likely notice:
- Fewer unexpected errors
- Easier onboarding for team members
- More confidence when refactoring
- Better IDE support
- Clearer component interfaces
Want more practice? Check out GreatFrontEnd's TypeScript interview questions for more TypeScript interview questions on library APIs, utility types, algorithms, and building strong, typed components to prepare for your next interview.
- Automatically includes
- Angular Interview Questions and AnswersMaster Angular interviews with our comprehensive guide covering 45+ questions from basic to advanced. Includes real-world scenarios, common mistakes, and expert tips for both freshers and experienced developers.作者GreatFrontEnd Team3 分钟阅读Oct 24, 2025
Getting ready for an Angular interview? Whether you're a fresher or an experienced developer, this comprehensive guide will help you prepare for Angular technical interviews at top tech companies.
We've compiled essential Angular interview questions, from basic fundamentals to advanced concepts, complete with detailed answers and real-world examples.
How to use this guide
This guide is structured to help both freshers and experienced developers prepare for Angular interviews effectively:
- For freshers (0-2 years experience):
- Start with the Basic Angular Interview Questions
- Focus on fundamentals: components, services, data binding
- Practice coding simple features
- For experienced developers (2+ years):
- Deep dive into Advanced Angular Interview Questions
- Focus on architecture, performance, and best practices
- Practice system design and real-world scenarios
Angular interview questions for freshers
For developers starting their Angular journey, here are the key areas to focus on:
Core concepts (Must know)
- Components and component lifecycle
- Services and dependency injection
- Data binding (one-way and two-way)
- Directives and pipes
- Routing basics
Modern features
- Standalone components
- Signals for state management
- New control flow syntax
Dive deep into 20 essential basic Angular questions →
Angular interview questions for experienced developers
For senior developers and architects, the focus shifts to advanced concepts:
Architecture & performance
- MVVM architecture implementation
- Change detection strategies
- Lazy loading and performance optimization
- Dependency injection hierarchy
Modern Angular features
- Signal-based reactivity
- Standalone components architecture
- Server-side rendering and hydration
Master 25 advanced Angular concepts →
Angular Scenario-Based Interview Questions
Real-world scenarios you might encounter:
1. Performance Optimization
Scenario: "Our Angular application is slow with a large list of items. How would you optimize it?"
Solution:
- Implement OnPush change detection
- Use trackBy with ngFor
- Virtualize long lists
- Lazy load modules/components
2. State Management
Scenario: "Design a scalable state management solution for a large Angular application".
Solution:
- Use Signals for local state
- Implement Services with BehaviorSubject for shared state
- Consider NgRx for complex state requirements
3. Component Communication
Scenario: "Implement communication between deeply nested components without prop drilling".
Solution:
- Create a shared service
- Use RxJS BehaviorSubject
- Implement Signal-based state
Explore more scenario-based Angular questions →
Common interview mistakes to avoid
- Not Understanding Change Detection
- ❌ Treating all components the same
- ✅ Know when to use OnPush and why
- Misusing Observables
- ❌ Forgetting to unsubscribe
- ✅ Using appropriate cleanup in ngOnDestroy
- Poor Performance Practices
- ❌ Heavy computations in templates
- ✅ Using pure pipes and memoization
Interview tips for success
1. Before the interview
- Build a small Angular project
- Review your own production code
- Practice explaining architectural decisions
2. During the interview
- Start with high-level explanations
- Use examples from your experience
- Ask clarifying questions
3. Technical preparation
- Set up a development environment
- Practice coding common features
- Review recent Angular updates
Continue learning
To further enhance your Angular interview preparation:
- Angular Basic Interview Questions - Perfect for freshers
- Angular Advanced Interview Questions - For experienced developers
- Coding Practice Questions - Real Angular coding challenges
Quick reference: Key Angular concepts
Concept Basic level Advanced level Components Creation, lifecycle Performance, architecture Services Basic DI, HTTP Custom providers, hierarchical injection State Management Services, Inputs Signals, RxJS patterns Performance Basic optimization Change detection strategies, bundle optimization Testing Component tests E2E, integration testing Ready to practice with real Angular interview questions?
Level up your Angular interview prep with our carefully curated collection of Angular interview questions at GreatFrontEnd. Practice real UI questions from top tech companies and compare your approach with official solutions from experts.
- For freshers (0-2 years experience):
- Angular Interview Questions for ExperiencedMaster advanced Angular interview questions for experienced developers. 25+ expert-level questions covering RxJS, testing, performance optimization, and real-world scenarios for senior roles.作者GreatFrontEnd Team27 分钟阅读Oct 15, 2025
If you're an experienced frontend developer preparing for your next Angular interview, this post is for you. With the evolving features in Angular's ecosystem - from standalone components to Signals, hydration, and zone-less change detection - interviewers now expect deep architectural understanding.
This post is part of our comprehensive Angular Interview Questions and Answers Guide. Here, we'll cover the most asked Angular Interview Questions for Experienced Professionals, including advanced, scenario-based, and performance-related topics.
Why read this post?
If you classify yourself as:
- A senior Angular developer preparing for product-based interviews
- A frontend engineer targeting enterprise-level architecture roles
- Or a tech lead revising your fundamentals before mentoring others
then this list of Angular interview questions for experienced professionals will be your ultimate preparation resource.
Below is a curated list of 25 questions that target key areas - architecture, DI internals, change detection, RxJS, and performance optimization.
1. Explain the MVVM architecture pattern in Angular.
Angular follows Model-View-ViewModel (MVVM) pattern where:
- Model: Data and business logic (services, HTTP calls)
- View: Template (HTML)
- ViewModel: Component class that binds data to view
// ViewModel (Component)export class UserComponent {users$ = this.userService.getUsers(); // Model interactionconstructor(private userService: UserService) {}deleteUser(id: string) {this.userService.deleteUser(id).subscribe();}}The component acts as the ViewModel, managing state and handling user interactions while the template renders the view.
2. What is an Angular NgModule, and how does it organize code structure?
An NgModule in Angular is a container that groups related code-components, directives, pipes, and services-into a cohesive block of functionality. It helps organize the application into logical modules for better maintainability and reusability.
Each Angular app has at least one root module (
AppModule), which bootstraps the app. Other feature modules can be created to encapsulate specific features or functionalities.import { NgModule } from '@angular/core';import { BrowserModule } from '@angular/platform-browser';import { AppComponent } from './app.component';@NgModule({declarations: [AppComponent], // Components, directives, pipesimports: [BrowserModule], // Other modulesproviders: [], // Servicesbootstrap: [AppComponent], // Root component})export class AppModule {}Note: From Angular 14 onward, standalone components can be used without NgModules, but NgModules remain useful for grouping imports and providing services in larger apps.
3. Describe the Angular bootstrapping process and what happens internally.
Angular bootstrapping process:
- main.ts calls
platformBrowserDynamic().bootstrapModule(AppModule) - Angular creates the platform and application injector
- AppModule is instantiated and its providers are registered
- Bootstrap component (usually AppComponent) is created
- Component is rendered into the DOM at the specified selector
// main.tsplatformBrowserDynamic().bootstrapModule(AppModule).catch((err) => console.error(err));4. How does the
inject()API improve dependency injection compared to constructor-based DI?The
inject()API, introduced in Angular 14, allows dependencies to be injected outside of class constructors, such as inside functions, factory providers, or standalone components. It provides more flexibility and cleaner code compared to constructor-based DI.Benefits:
- Works in functional contexts (not limited to classes)
- Simplifies testing and reusability
- Enables dependency injection in providers without creating extra classes
// Traditional constructor injectionexport class UserComponent {constructor(private userService: UserService) {}}// Using inject() APIexport class UserComponent {private userService = inject(UserService);// Can be used in functionsloadUsers = () => {const http = inject(HttpClient);return http.get('/api/users');};}5. Explain the importance of OnPush change detection and how to apply it effectively.
The OnPush change detection strategy improves performance by limiting when Angular checks for changes. Instead of running on every event, it only triggers when:
- An input property changes (by reference)
- An event originates from the component or its children
- You manually mark it for check (
ChangeDetectorRef.markForCheck())
This makes components more predictable and faster, especially in large apps.
How to use: Apply it in the component decorator:
@Component({changeDetection: ChangeDetectionStrategy.OnPush,template: `<div>{{ user.name }}</div>`,})export class UserComponent {@Input() user: User;constructor(private cdr: ChangeDetectorRef) {}updateUser() {// Use immutable updatesthis.user = { ...this.user, name: 'Updated' };this.cdr.detectChanges(); // Manual trigger if needed}}Tip: Always pass new object references (
{...obj}or arrays via spread) to trigger updates in OnPush components.6. How would you implement lazy loading, and when is it useful?
Lazy loading in Angular means loading feature modules or components only when needed, rather than at app startup. It improves performance by reducing the initial bundle size and speeding up load times - especially useful for large apps with multiple routes.
How to implement (module-based):
- Create a feature module (e.g.,
users.module.ts) - Configure a route using
loadChildren:
const routes: Routes = [{path: 'users',loadChildren: () =>import('./users/users.module').then((m) => m.UsersModule),},];Standalone component example (Angular 15+):
const routes: Routes = [{path: 'profile',loadComponent: () =>import('./profile/profile.component').then((c) => c.ProfileComponent),},];Use it when: Your app has multiple large sections that aren't always visited (e.g., admin dashboard, reports, settings).
7. What is the difference between
providersandviewProviders?Both
providersandviewProvidersdefine services that a component and its children can use - but they differ in scope.providers- Makes the service available to the component and all its content children (including projected components via<ng-content>)viewProviders- Limits the service to the component's view only (excludes projected content)
@Component({selector: 'app-parent',template: `<ng-content></ng-content>`,providers: [LoggerService], // Available to projected childrenviewProviders: [AuthService], // Only for this component's view})export class ParentComponent {}8. Describe the process and benefits of Ahead-of-Time (AOT) Compilation.
Ahead-of-Time (AOT) Compilation is the process of compiling Angular templates and TypeScript code at build time, before the application runs in the browser.
How it works
- Angular CLI compiles templates, metadata, and decorators into optimized JavaScript during the build
- The browser loads pre-compiled code, eliminating the need for runtime compilation
Benefits
- Faster startup: Templates are pre-compiled, reducing browser work.
- Early error detection: Template and type errors are caught at build time
- Smaller bundles: Removes Angular compiler from the final code
- Improved security: Reduces risks of injection attacks in templates
Angular CLI uses AOT by default in production builds:
ng build --configuration production9. How do you create and manage custom directives (structural/attribute)?
Directives in Angular are classes that add behavior or modify the DOM. There are two main types:
- Attribute Directives - Change the appearance or behavior of an element
- Structural Directives - Change the DOM structure by adding or removing elements
1. Creating an Attribute Directive
import { Directive, ElementRef, Renderer2, HostListener } from '@angular/core';@Directive({selector: '[appHighlight]',})export class HighlightDirective {constructor(private el: ElementRef,private renderer: Renderer2,) {}@HostListener('mouseenter') onMouseEnter() {this.renderer.setStyle(this.el.nativeElement, 'backgroundColor', 'yellow');}@HostListener('mouseleave') onMouseLeave() {this.renderer.setStyle(this.el.nativeElement,'backgroundColor','transparent',);}}Usage:
<p appHighlight>Hover over me!</p>2. Creating a Structural Directive
Structural directives use
*syntax and manipulate the DOM.import { Directive, Input, TemplateRef, ViewContainerRef } from '@angular/core';@Directive({selector: '[appUnless]',})export class UnlessDirective {constructor(private templateRef: TemplateRef<any>,private vcRef: ViewContainerRef,) {}@Input() set appUnless(condition: boolean) {if (!condition) {this.vcRef.createEmbeddedView(this.templateRef);} else {this.vcRef.clear();}}}Usage:
<p *appUnless="isVisible">I am visible only when isVisible is false</p>Managing Directives
- Declare them in an NgModule (or use standalone components/directives in Angular 14+)
- Scope control: Apply only to specific components by including in module
declarations - Reuse: Combine with
@Inputand@Outputto make directives flexible and configurable
10. Compare Signals and RxJS Observables - when would you use each?
Signals and Observables both handle reactive data in Angular but differ in scope and use case.
Signals
- Angular 16 feature for local reactive state
- Updates the UI automatically when the value changes
- Best for component-level state
import { signal } from '@angular/core';const count = signal(0);count.set(count() + 1);RxJS Observables
- Streams of data over time (async operations, events)
- Powerful operators for filtering, mapping, combining
- Best for HTTP calls, events, or shared state
11. How does
Renderer2work, and why is direct DOM access discouraged in Angular?Renderer2is an Angular service that provides safe, platform-independent methods to manipulate the DOM (create elements, set styles, listen to events) without touching the browser APIs directly.Why use Renderer2
- Ensures cross-platform compatibility (browser, server-side rendering, Web Workers)
- Helps prevent XSS attacks by sanitizing changes
- Makes unit testing easier, since DOM operations can be mocked
Example: Using Renderer2
import { Directive, ElementRef, Renderer2, HostListener } from '@angular/core';@Directive({selector: '[appHighlight]',})export class HighlightDirective {constructor(private el: ElementRef,private renderer: Renderer2,) {}@HostListener('mouseenter') onMouseEnter() {this.renderer.setStyle(this.el.nativeElement, 'backgroundColor', 'yellow');}@HostListener('mouseleave') onMouseLeave() {this.renderer.setStyle(this.el.nativeElement,'backgroundColor','transparent',);}}Avoid direct DOM access (e.g.,
document.querySelector) because it breaks Angular's platform abstraction and may fail in SSR or web worker contexts.12. What are tree-shakable providers, and how do they optimize bundle size?
Tree-shakable providers are services in Angular that are provided at the root level using
providedIn: 'root'or in a standalone component/service, allowing unused services to be removed from the final bundle during build.Benefits
- Smaller bundle size: Unused services are automatically excluded
- Automatic dependency management: No need to manually add services to NgModule
providers - Scoped injection: Services can also be provided at component or module level if needed
Example
import { Injectable } from '@angular/core';@Injectable({providedIn: 'root', // Tree-shakable provider})export class AuthService {login() {/* ... */}}Only services actually used in the app are included in the production bundle, optimizing performance and load time.
13. Explain the dependency injection hierarchy and token resolution in Angular.
Angular uses a hierarchical DI system: injectors are organized in a tree, and services are resolved top-down.
Hierarchy:
- Root injector - singleton services (
providedIn: 'root') - Module injector - services scoped to feature modules
- Component injector - services provided via
providersorviewProviders
Token Resolution: Angular checks the component injector first, then moves up the tree to module and root injectors. If the service is not found, an error is thrown.
@Injectable({ providedIn: 'root' })export class ApiService {}@Component({selector: 'app-child',template: `<p>Child Component</p>`,providers: [ChildService],})export class ChildComponent {constructor(private api: ApiService,private childService: ChildService,) {}}ApiService→ root injector,ChildService→ component injector.14. What are resolution modifiers (
Optional,Self,SkipSelf), and how are they used?Resolution modifiers control how Angular resolves dependencies in the injector hierarchy.
1.
@Optional()- Marks a dependency as optional
- If the service is not found, Angular injects
nullinstead of throwing an error
constructor(@Optional() private logger?: LoggerService) {}2.
@Self()- Tells Angular to look only in the current injector
- Throws an error if the service is not found locally
constructor(@Self() private localService: LocalService) {}3.
@SkipSelf()- Skips the current injector and looks only in parent injectors
- Useful to avoid using a service provided at the current component level
constructor(@SkipSelf() private parentService: ParentService) {}15. How can you share data between distant components in a large application?
In large Angular applications, distant components (not parent-child) can share data using services with observables or signals.
1. Using a Shared Service with RxJS
import { Injectable } from '@angular/core';import { BehaviorSubject } from 'rxjs';@Injectable({ providedIn: 'root' })export class SharedService {private messageSource = new BehaviorSubject<string>('Hello');currentMessage$ = this.messageSource.asObservable();updateMessage(msg: string) {this.messageSource.next(msg);}}Component A (sender):
this.sharedService.updateMessage('New Message');Component B (receiver):
this.sharedService.currentMessage$.subscribe((msg) => console.log(msg));2. Using Signals (Angular 16+)
import { signal, effect } from '@angular/core';export const sharedSignal = signal('Hello');// Component AsharedSignal.set('New Message');// Component Beffect(() => {console.log(sharedSignal());});16. What is the purpose of an
InjectionToken, and when would you use it?An
InjectionTokenis a unique token used to inject non-class values (e.g., strings, objects) into Angular's DI system.Example:
import { InjectionToken, Inject } from '@angular/core';export const API_URL = new InjectionToken<string>('API_URL');@NgModule({providers: [{ provide: API_URL, useValue: 'https://api.example.com' }],})export class AppModule {}@Component({/* ... */})export class ApiService {constructor(@Inject(API_URL) private apiUrl: string) {}}Use for: Configuration objects, strings, functions, or any non-class dependencies.
17. How do you test components that depend on
HttpClientor routing modules?Testing Components with
HttpClientor RoutingUse Angular's testing modules to mock HTTP requests and routes without real calls.
HttpClient
import {HttpClientTestingModule,HttpTestingController,} from '@angular/common/http/testing';TestBed.configureTestingModule({imports: [HttpClientTestingModule],});Use
HttpTestingControllerto mock requests and provide test data.Routing
import { RouterTestingModule } from '@angular/router/testing';TestBed.configureTestingModule({imports: [RouterTestingModule.withRoutes([{ path: 'home', component: MyComponent }]),],});Use
RouterTestingModuleto simulate navigation and test route-related logic.18. What are pure vs. impure pipes? Which one is better for performance?
Pipes transform data in templates and can be pure or impure.
- Pure Pipes (default)
- Run only when input reference changes
- Better performance
@Pipe({ name: 'pureExample', pure: true })export class PureExamplePipe implements PipeTransform {transform(value: string) {return value.toUpperCase();}}- Impure Pipes
- Run on every change detection cycle, regardless of input changes
- Use sparingly due to performance impact
@Pipe({ name: 'impureExample', pure: false })export class ImpureExamplePipe implements PipeTransform {transform(value: string) {return value.toUpperCase();}}19. Explain the difference between structural and attribute directives.
Directives in Angular modify the DOM or element behavior. They are of two types: structural and attribute.
Structural Directives
- Change the DOM structure by adding or removing elements
- Use
*syntax - Examples:
*ngIf,*ngFor
<p *ngIf="isVisible">Visible only when isVisible is true</p>Attribute Directives
- Change the appearance or behavior of an element
- Examples:
ngClass,ngStyle, custom directives
<div [ngClass]="{ active: isActive }">Content</div>20. How would you identify and fix a performance bottleneck in a large Angular app?
Identifying and Fixing Performance Bottlenecks in Angular
1. Identify Bottlenecks
- Use Chrome DevTools Performance tab to profile rendering and scripts
- Enable Angular DevTools to check change detection cycles and component re-renders
- Look for:
- Components updating too frequently
- Large lists without virtualization
- Unnecessary API calls or computations in templates
2. Fix Bottlenecks
- Use OnPush change detection for components
- Implement trackBy in
*ngForfor large lists - Lazy load modules and components
- Move heavy computations to pure pipes or services.
- Debounce frequent events (e.g.,
input,scroll) - Optimize RxJS streams using operators like
shareReplay,take,debounceTime
Example: OnPush with trackBy
@Component({selector: 'app-list',template: `<div *ngFor="let item of items; trackBy: trackById">{{ item.name }}</div>`,changeDetection: ChangeDetectionStrategy.OnPush,})export class ListComponent {@Input() items: Item[] = [];trackById(index: number, item: Item) {return item.id;}}Regular profiling and change detection strategy adjustments help maintain smooth performance in large Angular apps.
21. What's the significance of
trackByin*ngFor, and how does it improve rendering?trackBy helps Angular identify which items changed, preventing unnecessary DOM re-rendering.
@Component({template: `<div *ngFor="let user of users; trackBy: trackByUserId">{{ user.name }}</div>`,})export class UserListComponent {users = [{ id: 1, name: 'John' },{ id: 2, name: 'Jane' },];// Only re-renders changed items instead of recreating all DOM nodestrackByUserId(index: number, user: User): number {return user.id;}}Benefits: Reduces DOM manipulation, improves performance for large lists, preserves component state during updates.
22. Compare
combineLatest,withLatestFrom, andforkJoinin RxJS.These operators handle multiple observables differently:
combineLatest- emits latest values from all observables whenever any emits
combineLatest([obs1, obs2]).subscribe(([a, b]) => console.log(a, b));withLatestFrom- emits when the source observable emits, combining it with the latest from other observables
obs1.pipe(withLatestFrom(obs2)).subscribe(([a, b]) => console.log(a, b));forkJoin- waits for all observables to complete, then emits the last values as an array
forkJoin([obs1, obs2]).subscribe(([a, b]) => console.log(a, b));Use:
combineLatestfor real-time updates,withLatestFromto combine with source events,forkJoinfor parallel one-time operations.23. What are Signals effects, and when should you use them?
Signal effects are reactive side-effects that run automatically whenever a signal value changes similar to
useEffectin React. They let you respond to state changes outside the template.Example
import { signal, effect } from '@angular/core';const count = signal(0);effect(() => {console.log(`Count changed: ${count()}`);});count.set(1); // Triggers effect, logs "Count changed: 1"When to use:
- Respond to signal changes with side-effects (e.g., logging, calling services)
- Keep component templates pure while performing reactive actions
24. How do you debug a "Expression has changed after it was checked" error?
This error occurs when Angular detects a change to a value after change detection has run.
Steps to Debug
- Identify the source: Check the component/template causing the error
- Check lifecycle hooks: Avoid updating bound values in
ngAfterViewInitorngAfterContentInitdirectly - Use
setTimeoutorPromise: Delay updates to the next microtask cycle if necessary
ngAfterViewInit() {setTimeout(() => {this.value = newValue; // Updates safely after change detection});}- Consider OnPush strategy: Ensures Angular only checks the component when inputs change
- Avoid changing inputs during rendering: Keep bound values stable during a single change detection cycle
The key is to update values before or after change detection, not during.
25. What is the role of
NgZoneand how do you optimize applications usingrunOutsideAngular()?NgZonemanages Angular's change detection, automatically triggering it when async tasks (e.g., timers, events) complete.Optimizing Performance
- Use
runOutsideAngular()to execute code without triggering change detection, e.g., for high-frequency events like scrolling or animations.
import { Component, NgZone } from '@angular/core';@Component({ selector: 'app-scroll', template: `<div>Scroll Demo</div>` })export class ScrollComponent {constructor(private ngZone: NgZone) {this.ngZone.runOutsideAngular(() => {window.addEventListener('scroll', this.onScroll);});}onScroll() {console.log('Scrolling...');}}This reduces unnecessary change detection cycles, improving performance in heavy or frequently updating scenarios.
Angular scenario-based interview questions
These Angular scenario-based interview questions for experienced professionals test problem-solving in real-world situations.
1. Performance issue: The app is slow due to frequent change detection. How do you debug and fix this?
When an Angular app becomes slow because of frequent change detection, you can debug and optimize using the following steps.
1. Debugging
- Angular DevTools: Check which components trigger many change detection cycles
- Chrome Performance Tab: Profile JS execution and rendering
- Look for patterns: Large lists, heavy computations in templates, frequent event emissions (scroll, input)
2. Fixing / Optimization
- Use OnPush Change Detection
@Component({selector: 'app-list',templateUrl: './list.component.html',changeDetection: ChangeDetectionStrategy.OnPush,})export class ListComponent {}- Component only checks for changes when inputs or signals change.
- Implement trackBy in *ngFor
<div *ngFor="let item of items; trackBy: trackById">{{ item.name }}</div>- Prevents unnecessary DOM updates by tracking items by unique identifiers
- runOutsideAngular()
- For high-frequency events like scroll or mousemove:
this.ngZone.runOutsideAngular(() => {window.addEventListener('scroll', this.onScroll);});- Move heavy computations to pipes or services
- Avoid calculations directly in templates
- Lazy load modules and components
- Reduce initial bundle size and unnecessary checks
2. Migration: You're migrating an Angular 12 app using RxJS to Signals. How would you plan it?
Migrating from RxJS to Angular Signals requires careful planning to maintain reactivity and performance while reducing boilerplate.
1. Audit Current App
- Identify all RxJS streams (
BehaviorSubject,Observable,Subject) in components and services - Determine which streams are local state vs. async external data (HTTP, WebSocket)
2. Decide Scope
- Local component state → convert to signals
- Service-level shared state → consider using signal stores or keep RxJS if complex async flows are involved
3. Refactor Local State
- Replace
BehaviorSubject/Observableused for UI state with signals:
import { signal } from '@angular/core';export class CounterComponent {count = signal(0);increment() {this.count.set(this.count() + 1);}}4. Convert Derived State
- Use computed signals for derived or calculated values:
import { computed } from '@angular/core';total = computed(() => this.items().reduce((sum, i) => sum + i.value, 0));5. Replace Subscriptions
- Remove
.subscribe()in templates and components - Use effects or computed signals to react to state changes
import { effect } from '@angular/core';effect(() => {console.log('Count changed:', this.count());});6. Keep complex Async as RxJS (if needed)
- For multi-step streams, operators like
mergeMap,combineLatest, keep RxJS to avoid complex refactors - Gradually migrate where simpler
7. Test thoroughly
- Ensure UI updates correctly after signal migration
- Verify performance improvements and no memory leaks
3. State management: How would you architect a shared dashboard state using services or NgRx?
You can manage shared state using services with RxJS/Signals or NgRx depending on app complexity.
1. Using a Shared Service
- Simple and lightweight for small to medium apps.
- Use
BehaviorSubject/signalto hold state and provide getters/setters.
@Injectable({ providedIn: 'root' })export class DashboardService {// RxJSprivate widgetsSubject = new BehaviorSubject<Widget[]>([]);widgets$ = this.widgetsSubject.asObservable();updateWidgets(widgets: Widget[]) {this.widgetsSubject.next(widgets);}// Signals (Angular 16+)widgets = signal<Widget[]>([]);}Usage in components:
this.dashboardService.widgets$.subscribe(widgets => { ... });// orthis.dashboardService.widgets.set(newWidgets);2. Using NgRx Store
- Best for large apps with complex state and multiple actions
- Define actions, reducers, selectors for dashboard state
// Actionexport const loadWidgets = createAction('[Dashboard] Load Widgets');// Reducerexport const dashboardReducer = createReducer(initialState,on(loadWidgets, (state) => ({ ...state, loading: true })),);// Selectorexport const selectWidgets = (state: AppState) => state.dashboard.widgets;Components: Subscribe via
store.select(selectWidgets)and dispatch actions to update state.4. Security: Design a system to prevent unauthorized access using route guards and interceptors.
1. Route Guards
- Use
CanActivateto restrict routes based on authentication or roles
@Injectable({ providedIn: 'root' })export class AuthGuard implements CanActivate {constructor(private auth: AuthService,private router: Router,) {}canActivate(): boolean {if (this.auth.isLoggedIn()) return true;this.router.navigate(['/login']);return false;}}Usage in routing module:
{ path: 'dashboard', component: DashboardComponent, canActivate: [AuthGuard] }2. HTTP Interceptors
- Automatically attach tokens and handle unauthorized responses
@Injectable()export class AuthInterceptor implements HttpInterceptor {constructor(private auth: AuthService) {}intercept(req: HttpRequest<any>, next: HttpHandler) {const token = this.auth.getToken();const authReq = req.clone({setHeaders: { Authorization: `Bearer ${token}` },});return next.handle(authReq);}}Register interceptor:
providers: [{ provide: HTTP_INTERCEPTORS, useClass: AuthInterceptor, multi: true },];5. Build Time Optimization: The production build is 3MB; what steps do you take to reduce it?
If your Angular app's production build is large (e.g., 3MB), you can optimize it using these strategies:
1. Lazy Loading
- Split modules and load them only when needed.
{ path: 'dashboard', loadChildren: () => import('./dashboard/dashboard.module').then(m => m.DashboardModule) }2. Remove Unused Code
- Use tree-shakable providers and remove unused libraries or components
3. Enable Build Optimizations
ng build --prod --optimization --build-optimizer4. Minify & Compress Assets
- Enable Terser for JS and gzip/brotli for server delivery
5. Use OnPush & Signals
- Optimize change detection to avoid heavy runtime processing
6. Externalize Large Libraries
- Load heavy libraries (e.g., lodash, moment) via CDN or import only required functions
Combining lazy loading, tree-shaking, and asset optimization can significantly reduce bundle size.
6. SEO & SSR: You're asked to add Server-Side Rendering (SSR) to an existing Angular SPA. How would you do it?
To add Server-Side Rendering (SSR) to an existing Angular Single Page Application (SPA), I would use Angular Universal, which enables SSR for Angular apps. The steps are:
- Add Angular Universal: Use the Angular CLI to add SSR support:
ng add @nguniversal/express-engineThis sets up a server-side app module (
app.server.module.ts) and configures an Express server (server.ts) to render Angular on the server.- Update App for SSR Compatibility:
- Ensure that browser-specific APIs like
window,document, andlocalStorage- are only used in the browser context - Wrap such code using
isPlatformBrowserfrom@angular/common
- Build and Serve SSR: Build both client and server bundles:
npm run build:ssrnpm run serve:ssrThis serves the pre-rendered HTML from the server, improving SEO and initial load performance.
- Optional Enhancements:
- Implement lazy loading and pre-rendering for critical routes to boost SEO
- Add meta tags dynamically using
MetaandTitleservices for better indexing
Result: Users and search engines receive fully rendered HTML on the first request, improving SEO, performance, and crawlability of the Angular app.
7. Modularization: How do you break down a monolithic Angular app into feature modules?
To break down a monolithic Angular app into feature modules, I would follow these steps:
- Identify Features: Analyze the app and group related functionality (components, services, and routes) into logical features like
UserModule,DashboardModule,ProductsModule, etc. - Create Feature Modules: Use the Angular CLI or manually create modules:
ng generate module feature-name --route feature-name --module app.moduleThis sets up lazy-loaded feature modules if needed.
- Move Components, Services, and Routing:
- Move all components, directives, and pipes related to the feature into the module
- Move feature-specific services into the module (consider
providedIn: FeatureModuleif appropriate) - Create a feature routing module (
feature-name-routing.module.ts) to handle internal routes
- Lazy Loading: Update the main app routing to lazy load feature modules:
{ path: 'dashboard', loadChildren: () => import('./dashboard/dashboard.module').then(m => m.DashboardModule) }- Shared and Core Modules:
- Extract reusable components, directives, and pipes into a
SharedModule - Keep singleton services in a
CoreModuleimported only once inAppModule
- Test and Refactor: Ensure each module works independently and routes/services are correctly wired. This improves maintainability, code reusability, and enables lazy loading for better performance
8. Testing strategy: How do you structure unit tests for complex component hierarchies?
When structuring unit tests for complex component hierarchies, I follow these practices:
- Test Components in Isolation:
- Use Angular's
TestBedto create a testing module for the component - Mock child components, directives, and services to isolate the component under test
- Use Shallow Testing for Parents:
- Replace child components with stubs or mocks to focus on parent component behavior without testing children's internal logic
- Test Inputs, Outputs, and DOM Interactions:
- Verify
@Input()bindings,@Output()events, template rendering, and user interactions - Ensure component reacts correctly to input changes and emits expected events
- Service Dependencies:
- Use spies or mock services for any external dependencies to control behavior and avoid side effects
- Organize Tests Logically:
- Group tests by functionality (rendering, events, service calls) using
describeblocks - Keep tests small, focused, and maintainable, mirroring the component's structure
Result: This approach ensures each component's behavior is tested reliably while keeping tests fast, maintainable, and isolated from unrelated parts of the hierarchy.
Advanced Angular interview questions
These questions push beyond fundamentals - they're frequent in senior developer and tech lead interviews.
1. How does the Angular DI lifecycle differ across lazy-loaded and eagerly-loaded modules?
Angular creates a single root injector for eagerly-loaded code, while each lazy-loaded route gets its own child injector.
- Eager providers (AppModule) → singletons app-wide
- Lazy module providers → new instance per lazy boundary (scoped to that route tree)
providedIn: 'root'→ one instance in root;providedIn: 'any'→ one per injector (root and each lazy)
@Injectable({ providedIn: 'any' })export class FeatureService {}// Eager context and each lazy module will get different instancesconstructor(private s: FeatureService) {}This scoping helps isolate features and avoid cross-feature state leaks while keeping true singletons in root.
2. Explain hydration in Angular and how partial rehydration improves SSR speed.
Hydration attaches Angular runtime to server-rendered HTML without re-rendering it. The DOM remains; Angular wires up event listeners and state.
- Faster TTI: skip initial client re-render
- Fewer layout thrashes vs CSR
- Partial hydration (deferred/fragment hydration) hydrates only critical views first and defers the rest until visible or interacted
// main.ts (standalone app)bootstrapApplication(AppComponent, {providers: [provideClientHydration()],});// Template: defer non-critical islands to reduce hydration cost@defer (on viewport) {<heavy-widget />} @placeholder { Loading... }3. How does standalone component architecture simplify Angular dependency graphs?
Standalone components remove NgModule indirection-dependencies are imported where used, and providers are scoped closer to usage.
- Fewer module graphs to reason about; imports are explicit per component
- Better tree-shaking; simpler incremental adoption
- Component-level
providersreduce accidental singletons
@Component({standalone: true,selector: 'user-card',imports: [CommonModule],template: `{{ user.name }}`,providers: [UserLocalLogger],})export class UserCard {@Input() user!: User;}bootstrapApplication(AppComponent, {providers: [provideRouter(routes)],});4. What are the differences between zone-full and zone-less change detection setups?
- Zone-full (default): Zone.js patches async APIs and triggers global change detection automatically. Simpler dev ergonomics; higher runtime overhead
- Zone-less: Disable Zone.js and use push-based patterns (Signals, OnPush, manual triggers). Lower overhead; you opt in to updates
// Zoneless bootstrap (no global auto change detection)bootstrapApplication(AppComponent, { ngZone: 'noop' });@Component({ changeDetection: ChangeDetectionStrategy.OnPush })export class Cmp {// Prefer Signals or async pipe; call cdr.markForCheck() when bridging imperative codeconstructor(private cdr: ChangeDetectorRef) {}}Use zoneless with Signals and
asyncpipe for most UI; userunOutsideAngular()for high-frequency events.5. Explain how to implement custom preloading strategies in routing.
Implement
PreloadingStrategyto decide per-route preloading (e.g., based on flags or network conditions).@Injectable({ providedIn: 'root' })export class SelectivePreloading implements PreloadingStrategy {preload(route: Route, load: () => Observable<any>) {return route.data?.['preload'] ? load() : of(null);}}const routes: Routes = [{path: 'admin',loadChildren: () => import('./admin/admin.routes'),data: { preload: true },},{ path: 'reports', loadChildren: () => import('./reports/reports.routes') },];provideRouter(routes, withPreloading(SelectivePreloading));You can enrich logic with
navigator.connection, user roles, or time-based delays.6. How do you leverage the build optimizer, budgets, and
source-map-analyzerto cut bundle sizes?- Build optimizer: enabled by default in production; ensures better tree-shaking and Terser minification
- Budgets: enforce caps to catch regressions during CI
- Source map analysis: find large deps and heavy modules
// angular.json (excerpt){"configurations": {"production": {"budgets": [{ "type": "initial", "maximumWarning": "500kb", "maximumError": "2mb" },{ "type": "anyComponentStyle", "maximumWarning": "150kb" }]}}}Workflow:
- Build with stats:
ng build --configuration production --stats-json - Analyze:
npx source-map-explorer dist/**/*.js(or webpack bundle analyzer) - Act: lazy-load, split routes, replace heavy libs (e.g., date-fns over moment), use
providedIn: 'root'/tree-shakable APIs
7. What Common RxJS pitfalls (like unhandled subscriptions) can cripple Angular scalability?
- Leaks from manual
subscribe()without unsubscribe → preferasyncpipe ortakeUntilDestroyed() - Nested subscribes → use flattening operators (
switchMap,concatMap) - Re-executed HTTP on every subscription → share results (
shareReplay({ refCount: true, bufferSize: 1 })) - Missing error handling →
catchErrorwith fallbacks
import { takeUntilDestroyed } from '@angular/core/rxjs-interop';this.form.valueChanges.pipe(debounceTime(300),switchMap((v) => this.api.search(v)),takeUntilDestroyed(this.destroyRef),).subscribe((result) => this.results.set(result));Prefer
asyncpipe in templates; for shared streams, cache withshareReplay(1).8. Describe how to implement CI/CD for an Angular app (testing, linting, SSR build, deployment pipelines).
Core stages: install → lint → test → build (SPA/SSR) → artifact → deploy.
# .github/workflows/ci.yml (simplified)name: Angular CIon: [push, pull_request]jobs:build:runs-on: ubuntu-lateststeps:- uses: actions/checkout@v4- uses: actions/setup-node@v4with: { node-version: 20, cache: npm }- run: npm ci- run: npm run lint- run: npm test -- --watch=false --browsers=ChromeHeadless- run: npm run build:ssr # e.g., ng build && ng run app:server- uses: actions/upload-artifact@v4with: { name: dist, path: dist/ }# Deploy job can download artifact and push to hosting (Firebase, Vercel, Azure, etc.)Include budgets in CI to block regressions; for SSR, validate hydration with e2e smoke tests before deploy.
Best practices & optimization tips
- Use OnPush strategy for pure components
- Track lists using
trackByin*ngForto minimize DOM re-renders - Use Signals for local reactive patterns; keep global state in NgRx or Akita
- Always unsubscribe or leverage
asyncpipe ortakeUntilDestroyed() - Avoid deep component hierarchies; use standalone components where possible
- Compress assets and enable AOT Compilation for production builds
- Use
Renderer2for cross-platform DOM-safe operations - Keep the codebase modular with feature-based folder organization
Following these keeps senior developers' Angular apps maintainable and performant in large-scale setups
Continue Learning
Here are a few resources to expand your prep:
Angular has matured rapidly with standalone APIs, fine-grained reactivity using Signals, and better SSR tooling. Interviewers now test practical knowledge - not syntax, but design reasoning and architectural excellence.
If your goal is to ace Angular Experienced Interview Questions, practice code samples, profile performance, and be ready to justify your design choices like a senior engineer.
Ready to practice with real Angular interview questions?
Level up your Angular interview prep with our carefully curated collection of Angular interview questions at GreatFrontEnd. Practice real UI questions from top tech companies and compare your approach with official solutions from experts.
- Top Angular Basic Interview QuestionsPrepare for Angular interviews with 20 essential basic questions covering components, services, directives, data binding, routing, and more with concise answers and code examples.作者GreatFrontEnd Team14 分钟阅读Oct 14, 2025
Got an Angular interview coming up? Whether you're new to Angular or brushing up before your Angular interview, this post is for you.
This post is part of our comprehensive Angular Interview Questions and Answers Guide, covering fundamental Angular concepts about - components, services, data binding, routing - and a few modern essentials like Signals and standalone components.
If you're looking for Angular basic interview questions or preparing for Angular interview questions for freshers, you're in the right place.
Let's jump in.
Top 20 Angular basic interview questions and answers
1. What is Angular?
Angular is a modern, open-source framework developed by Google using TypeScript that allows developers to build dynamic, modern single-page web applications.
It provides:
- Modularity via NgModules
- Reusable UI components
- Two-way data binding
- Dependency injection for clean architecture
- Routing for single-page navigation
2. What are Components in Angular?
Angular components are the core building blocks of any Angular application. Each component manages a specific section of the user interface called a view.
A component is made up of three key parts:
- Template - defines the HTML structure
- Class - written in TypeScript, holds data and logic
- Metadata - defined using
@Component, links the class with its template, selector, and styles
Components are self-contained, reusable, and testable, forming a tree of nested components that make up the entire application.
Code example:
import { Component } from '@angular/core';@Component({selector: 'app-welcome',template: `<h2>Welcome, {{ name }}!</h2>`,styles: [`h2 {color: #1976d2;}`,],})export class WelcomeComponent {name = 'Angular Developer';}Common follow-up: What's the difference between a component's template and templateUrl?
3. What is a Module in Angular?
NgModule is a class decorated with
@NgModulethat defines an Angular module - a container grouping related components, directives, pipes, and services into a cohesive unit.It helps:
- Organize the app into logical sections
- Configure the compiler and dependency injector
- Control visibility of declarations across modules
Key properties in
@NgModuleinclude:declarations- components, directives, and pipes in this moduleimports- other modules to use their featuresproviders- services available for dependency injectionexports- elements made available to other modules
Code example:
import { NgModule } from '@angular/core';import { BrowserModule } from '@angular/platform-browser';import { AppComponent } from './app.component';import { WelcomeComponent } from './welcome.component';@NgModule({declarations: [AppComponent, WelcomeComponent],imports: [BrowserModule],providers: [],bootstrap: [AppComponent],})export class AppModule {}Since Angular 14, standalone components can work without NgModules, but modules remain useful for organizing imports and providing services.
4. What is Data Binding in Angular?
Data binding in Angular connects the component's data with the template (view), keeping them in sync. It lets you display values, respond to user input, and update the UI automatically.
There are two main types:
1. One-way data binding
Data flows in one direction - either from component → view or view → component.
- Interpolation:
{{ value }}- shows data - Property Binding:
[property]="value"- binds DOM properties - Event Binding:
(event)="handler()"- listens to user actions
<h3>{{ title }}</h3><!-- Interpolation --><img [src]="imageUrl" /><!-- Property binding --><button (click)="onClick()">Click</button><!-- Event binding -->2. Two-way data binding
Data flows both ways - updates in the view reflect in the component and vice versa.
Uses the
[(ngModel)]directive (requiresFormsModule).<input [(ngModel)]="username" /><p>Hello, {{ username }}!</p>export class AppComponent {title = 'Data Binding Example';imageUrl = 'logo.png';username = '';onClick() {alert(`Hello ${this.username || 'Angular Dev'}!`);}}5. What is a Directive in Angular?
Directives in Angular are classes that add behavior to elements. They let you manipulate the DOM, change appearance, or modify structure.
Types of directives:
- Component directives - have a template; act as custom elements.
- Structural directives - modify DOM layout. Prefixed with *. Examples: *ngIf, *ngFor.
- Attribute directives - change element appearance or behavior. Examples: NgClass, NgStyle.
Code example:
<!-- Component Directive --><app-greeting [name]="userName"></app-greeting><!-- Structural Directive --><div *ngIf="isVisible">Visible content</div><!-- Attribute Directive --><div [ngClass]="{'highlight': isHighlighted}">Styled content</div>// Parent Componentimport { Component } from '@angular/core';@Component({selector: 'app-example',templateUrl: './example.component.html',})export class ExampleComponent {userName = 'Nitesh';isVisible = true;isHighlighted = false;}// Child Component (Component Directive)@Component({selector: 'app-greeting',template: `<p>Hello, {{ name }}!</p>`,})export class GreetingComponent {name = '';}6. What is a Service in Angular?
A Service is a class decorated with
@Injectable()that contains business logic and data operations shared across multiple components.Key features:
- Singleton pattern - one instance shared app-wide
- Dependency injection - injected into components via constructor
- Separation of concerns - keeps business logic out of components
Common uses:
- API calls and HTTP requests
- Data sharing between components
- Business logic and calculations
Code example:
import { Injectable } from '@angular/core';import { HttpClient } from '@angular/common/http';@Injectable({providedIn: 'root',})export class DataService {constructor(private http: HttpClient) {}getData() {return this.http.get('/api/data');}}Usage in component:
export class MyComponent {constructor(private dataService: DataService) {}loadData() {this.dataService.getData().subscribe((data) => {// Handle data});}}Common follow-up: What's the difference between providedIn: 'root' and adding a service to the providers array in a module?
7. What is Dependency Injection in Angular?
Dependency Injection (DI) is a design pattern where Angular automatically provides dependencies (like services) to components instead of components creating them manually.
Key benefits:
- Loose coupling - components don't create their own dependencies
- Testability - easy to mock dependencies for testing
- Reusability - same service instance shared across components
How it works:
- Register services using
@Injectable()andprovidedIn - Inject dependencies via constructor parameters
- Angular's injector creates and manages instances
Code example:
// Service@Injectable({providedIn: 'root', // Makes the service a singleton available throughout the app})export class AuthService {isLoggedIn(): boolean {return true;}}// Componentexport class HeaderComponent {constructor(private authService: AuthService) {// authService is now an instance provided by Angular's DI}checkAuth() {return this.authService.isLoggedIn();}}Angular creates the
AuthServiceinstance automatically and injects it into any component that needs it.Common follow-up: What are the benefits of using Dependency Injection?
8. What is TypeScript and why does Angular use it?
TypeScript is a superset of JavaScript that adds static typing and modern features. Angular is built with TypeScript by default.
Benefits for Angular:
- Type safety - catch errors at compile time
- Better IDE support - autocomplete, refactoring
- Object-oriented features - classes, interfaces, decorators
- Modern JavaScript features - async/await, modules
Example:
interface User {id: number;name: string;email: string;}export class UserComponent {user: User = {id: 1,name: 'John Doe',email: 'john@example.com',};}9. What is Angular Router?
Angular Router enables navigation between different views/components in a single-page application.
Key concepts:
- Routes - map URLs to components
- Router outlet - placeholder for routed components
- Navigation - programmatic and declarative routing
Basic setup:
// app-routing.module.tsconst routes: Routes = [{ path: 'home', component: HomeComponent },{ path: 'about', component: AboutComponent },{ path: '', redirectTo: '/home', pathMatch: 'full' },];<!-- app.component.html --><nav><a routerLink="/home">Home</a><a routerLink="/about">About</a></nav><router-outlet></router-outlet>10. What are Angular Pipes?
Pipes transform data in templates without changing the original data. They're used for formatting display values.
Built-in pipes:
- DatePipe - format dates
- CurrencyPipe - format currency
- UpperCasePipe - convert to uppercase
- JsonPipe - display objects as JSON
Usage:
<p>{{ today | date:'short' }}</p><p>{{ price | currency:'USD' }}</p><p>{{ name | uppercase }}</p><p>{{ user | json }}</p>Custom pipe example:
import { Pipe, PipeTransform } from '@angular/core';@Pipe({ name: 'reverse' })export class ReversePipe implements PipeTransform {transform(value: string): string {return value.split('').reverse().join('');}}Usage:
<p>{{ 'Angular' | reverse }}</p>outputs "ralugnA"11. What are Angular Lifecycle Hooks?
Lifecycle hooks are methods that Angular calls at specific moments in a component's lifecycle.
Common hooks:
- ngOnInit - after component initialization
- ngOnDestroy - before component destruction
- ngOnChanges - when input properties change
- ngAfterViewInit - after view initialization
Example:
export class MyComponent implements OnInit, OnDestroy {ngOnInit() {console.log('Component initialized');}ngOnDestroy() {console.log('Component destroyed');// Cleanup subscriptions}}Common follow-up: When should you use ngOnDestroy to clean up resources?
12. What is Event Binding in Angular?
Event binding listens to DOM events and responds to user actions like clicks, key presses, or mouse movements.
Syntax:
(event)="handler()"Examples:
<button (click)="onClick()">Click me</button><input (keyup)="onKeyUp($event)" /><div (mouseenter)="onMouseEnter()">Hover me</div>export class MyComponent {onClick() {console.log('Button clicked!');}onKeyUp(event: any) {console.log('Key pressed:', event.target.value);}onMouseEnter() {console.log('Mouse entered!');}}13. What is Property Binding in Angular?
Property binding sets DOM element properties dynamically using component data.
Syntax:
[property]="expression"Examples:
<img [src]="imageUrl" [alt]="imageAlt" /><button [disabled]="isDisabled">Submit</button><div [class.active]="isActive">Content</div><input [value]="inputValue" />export class MyComponent {imageUrl = 'logo.png';imageAlt = 'Company Logo';isDisabled = false;isActive = true;inputValue = 'Default text';}14. What is Interpolation in Angular?
Interpolation displays component data in templates using double curly braces
{{ }}.Features:
- Data display - show component properties
- Expression evaluation - simple calculations
- Method calls - display method results
Examples:
<h1>{{ title }}</h1><p>Welcome, {{ user.name }}!</p><p>Total: {{ price * quantity }}</p><p>Current time: {{ getCurrentTime() }}</p>export class MyComponent {title = 'My App';user = { name: 'John' };price = 10;quantity = 2;getCurrentTime() {return new Date().toLocaleTimeString();}}15. What are Signals in Angular?
Signals (introduced in Angular 16) are a reactive primitive for managing state and change detection. They provide a simpler, more performant way to handle reactive data.
Key features:
- Fine-grained reactivity - only updates what changes
- Better performance - optimized change detection
- Simpler syntax - easier to read and write
- Computed values - automatically derived from other signals
Basic usage:
import { Component, signal, computed } from '@angular/core';@Component({selector: 'app-counter',template: `<p>Count: {{ count() }}</p><p>Double: {{ doubleCount() }}</p><button (click)="increment()">Increment</button>`,})export class CounterComponent {// Create a signalcount = signal(0);// Computed signal - automatically updatesdoubleCount = computed(() => this.count() * 2);increment() {// Update signal valuethis.count.update((value) => value + 1);}}Signals improve Angular's reactivity model and are the future direction of the framework.
16. What are Standalone Components in Angular?
Standalone components (introduced in Angular 14+) are components that don't require NgModules. They simplify Angular applications by allowing components to be self-contained.
Key benefits:
- No NgModule needed - components work independently
- Simpler imports - import dependencies directly in the component
- Better tree-shaking - smaller bundle sizes
- Modern Angular approach - recommended for new projects
Example:
import { Component } from '@angular/core';import { CommonModule } from '@angular/common';import { FormsModule } from '@angular/forms';@Component({selector: 'app-user',standalone: true,imports: [CommonModule, FormsModule],template: `<h2>{{ userName }}</h2><input [(ngModel)]="userName" />`,})export class UserComponent {userName = 'John';}17. What is Angular's new Control Flow Syntax?
Angular 17+ introduced a new built-in control flow syntax with
@if,@for, and@switchto replace structural directives like*ngIfand*ngFor.Key features:
- Better performance - optimized by the compiler
- Cleaner syntax - more readable and intuitive
- Type-safe - better TypeScript support
- Built-in - no imports needed
Examples:
<!-- Conditional rendering with @if -->@if (isLoggedIn) {<p>Welcome back!</p>} @else {<p>Please log in</p>}<!-- Loop with @for -->@for (user of users; track user.id) {<div>{{ user.name }}</div>} @empty {<p>No users found</p>}<!-- Switch statement -->@switch (status) { @case ('pending') { <span>Pending...</span> } @case('complete') { <span>Done!</span> } @default { <span>Unknown</span> } }export class MyComponent {isLoggedIn = true;users = [{ id: 1, name: 'Alice' },{ id: 2, name: 'Bob' },];status = 'pending';}18. What is Angular Forms?
Angular Forms handle user input, validation, and form submission. There are two approaches:
Template-driven forms:
- Simpler syntax using directives
- Good for basic forms
- Uses
FormsModule
Reactive forms:
- More control and flexibility
- Better for complex forms
- Uses
ReactiveFormsModule
Template-driven example:
<form #userForm="ngForm" (ngSubmit)="onSubmit(userForm)"><input name="username" [(ngModel)]="user.username" required /><button type="submit" [disabled]="!userForm.valid">Submit</button></form>export class MyComponent {user = { username: '' };onSubmit(form: any) {if (form.valid) {console.log(this.user);}}}Reactive forms example:
import { FormBuilder, Validators } from '@angular/forms';export class MyComponent {userForm = this.fb.group({username: ['', Validators.required],email: ['', [Validators.required, Validators.email]],});constructor(private fb: FormBuilder) {}onSubmit() {if (this.userForm.valid) {console.log(this.userForm.value);}}}19. What are @Input and @Output decorators?
@Input and @Output decorators enable communication between parent and child components.
@Input - passes data from parent to child:
// Child Componentexport class ChildComponent {@Input() userName: string = '';}<!-- Parent Template --><app-child [userName]="parentName"></app-child>@Output - sends events from child to parent:
// Child Componentexport class ChildComponent {@Output() notify = new EventEmitter<string>();sendMessage() {this.notify.emit('Hello from child!');}}<!-- Parent Template --><app-child (notify)="handleMessage($event)"></app-child>// Parent ComponenthandleMessage(message: string) {console.log(message);}20. What are Observables in Angular?
Observables are a key part of Angular's reactive programming approach, used extensively for handling asynchronous operations.
Key concepts:
- Stream of data - emit values over time
- Lazy - don't execute until subscribed
- Used in Angular - HTTP requests, event handling, routing
- RxJS library - provides operators for transforming data
Basic example:
import { Observable } from 'rxjs';export class DataComponent {constructor(private http: HttpClient) {}getData(): void {// HTTP returns an Observablethis.http.get('/api/users').subscribe({next: (data) => console.log(data),error: (error) => console.error(error),complete: () => console.log('Request completed'),});}}Common RxJS operators:
map,filter,switchMap,debounceTimeRemember: Always unsubscribe from Observables in
ngOnDestroyto prevent memory leaks (except for HTTP requests which auto-complete).Common beginner mistakes in Angular interviews
Avoid these common pitfalls that can cost you in interviews:
1. Confusing Components and Modules
- Mistake: Saying "components and modules are the same thing"
- Reality: Components control views; modules organize and group components, services, and other features.
2. Not understanding change detection
- Mistake: Not knowing when Angular updates the view
- Reality: Angular uses zone.js to detect changes. Modern Angular uses Signals for more efficient reactivity.
3. Forgetting to unsubscribe from Observables
- Mistake: Creating subscriptions without cleaning them up
- Reality: Always unsubscribe in
ngOnDestroyto prevent memory leaks (except HTTP calls).
// ❌ BadngOnInit() {this.dataService.getData().subscribe(data => this.data = data);}// ✅ Goodsubscription: Subscription;ngOnInit() {this.subscription = this.dataService.getData().subscribe(data => this.data = data);}ngOnDestroy() {this.subscription?.unsubscribe();}4. Using wrong binding syntax
- Mistake: Mixing up
[],(), and{{}}syntax - Reality:
{{ }}for interpolation[property]for property binding(event)for event binding[(ngModel)]for two-way binding
5. Not knowing the difference between providedIn: 'root' and providers[]
- Mistake: Unable to explain where services are registered
- Reality:
providedIn: 'root'creates app-wide singleton;providers[]creates instance per module/component.
6. Ignoring modern Angular features
- Mistake: Only knowing old syntax like
*ngIfand*ngFor - Reality: Angular 17+ uses
@if,@for, and standalone components are now standard.
7. Not understanding the component lifecycle
- Mistake: Putting initialization logic in the constructor
- Reality: Use
ngOnInitfor initialization, constructor only for dependency injection.
Quick concept recap
Here's a rapid-fire review of key concepts:
Concept Key point Components Building blocks with template, class, and metadata Modules Container for organizing related components (less common with standalone) Data Binding One-way ( {{ }},[],()) and two-way ([()])Services Reusable business logic, injected via DI Dependency Injection Angular provides dependencies automatically Directives Add behavior to DOM elements Pipes Transform data in templates Lifecycle Hooks ngOnInit,ngOnDestroy,ngOnChanges, etc.Router Navigate between views in SPA Forms Template-driven (simple) vs Reactive (complex) Observables Handle async operations with RxJS Signals Modern reactive primitive (Angular 16+) Standalone Components without NgModules (Angular 14+) Control Flow @if,@for,@switchsyntax (Angular 17+)Before your interview
- ✅ Practice explaining each concept in 2-3 sentences
- ✅ Write code examples for components, services, and data binding
- ✅ Build a small app to demonstrate understanding
- ✅ Review your code and be ready to discuss design decisions
- ✅ Know the why - understand reasoning behind Angular patterns
Remember, every Angular developer started exactly where you are now. The fact that you're here preparing shows you're already ahead of the curve. Take a deep breath, trust in the work you've put in, and let your passion for learning shine through in your interview. You've got this! 🚀
Ready to practice with real Angular interview questions?
Level up your Angular interview prep with our carefully curated collection of Angular interview questions at GreatFrontEnd. Practice real UI questions from top tech companies and compare your approach with official solutions from experts.
- 100+ React Interview Questions Straight from Ex-interviewers (2026)100+ React interview questions and answers, prepared by senior engineers and ex-FAANG interviewers. Updated for 2026 with React 19 coverage including Actions, Server Components, the use hook, and the React Compiler.作者GreatFrontEnd Team69 分钟阅读Sep 8, 2026

Preparing for a React interview can be daunting, but having access to the right questions can make all the difference. We've created a prioritized list of 150 questions and solutions, covering essential topics like React fundamentals, React Hooks, React Router, internationalization in React, testing of React apps, and the latest React 19 features.
The questions are grouped into Freshers, Experienced, and Senior sections. This comprehensive guide is designed to help you prepare effectively, boost your confidence, and ensure you make a strong impression during your interview.
If you're looking for more in-depth React interview preparation materials, also check out these resources:
- React Interview Playbook
- Practice React coding interview questions
- Practice React quiz interview questions
Freshers
Freshers with 0–2 years of experience: practice explaining component behavior, writing simple interactions, and testing the visible result.
Components and JSX
1. What is React, and what are its main features?
React is a JavaScript library developed by Facebook for creating user interfaces, particularly in single-page applications. It enables the use of reusable components that manage their own state. Key advantages include a component-driven architecture, optimized updates through the virtual DOM, a declarative approach for better readability, and robust community backing.
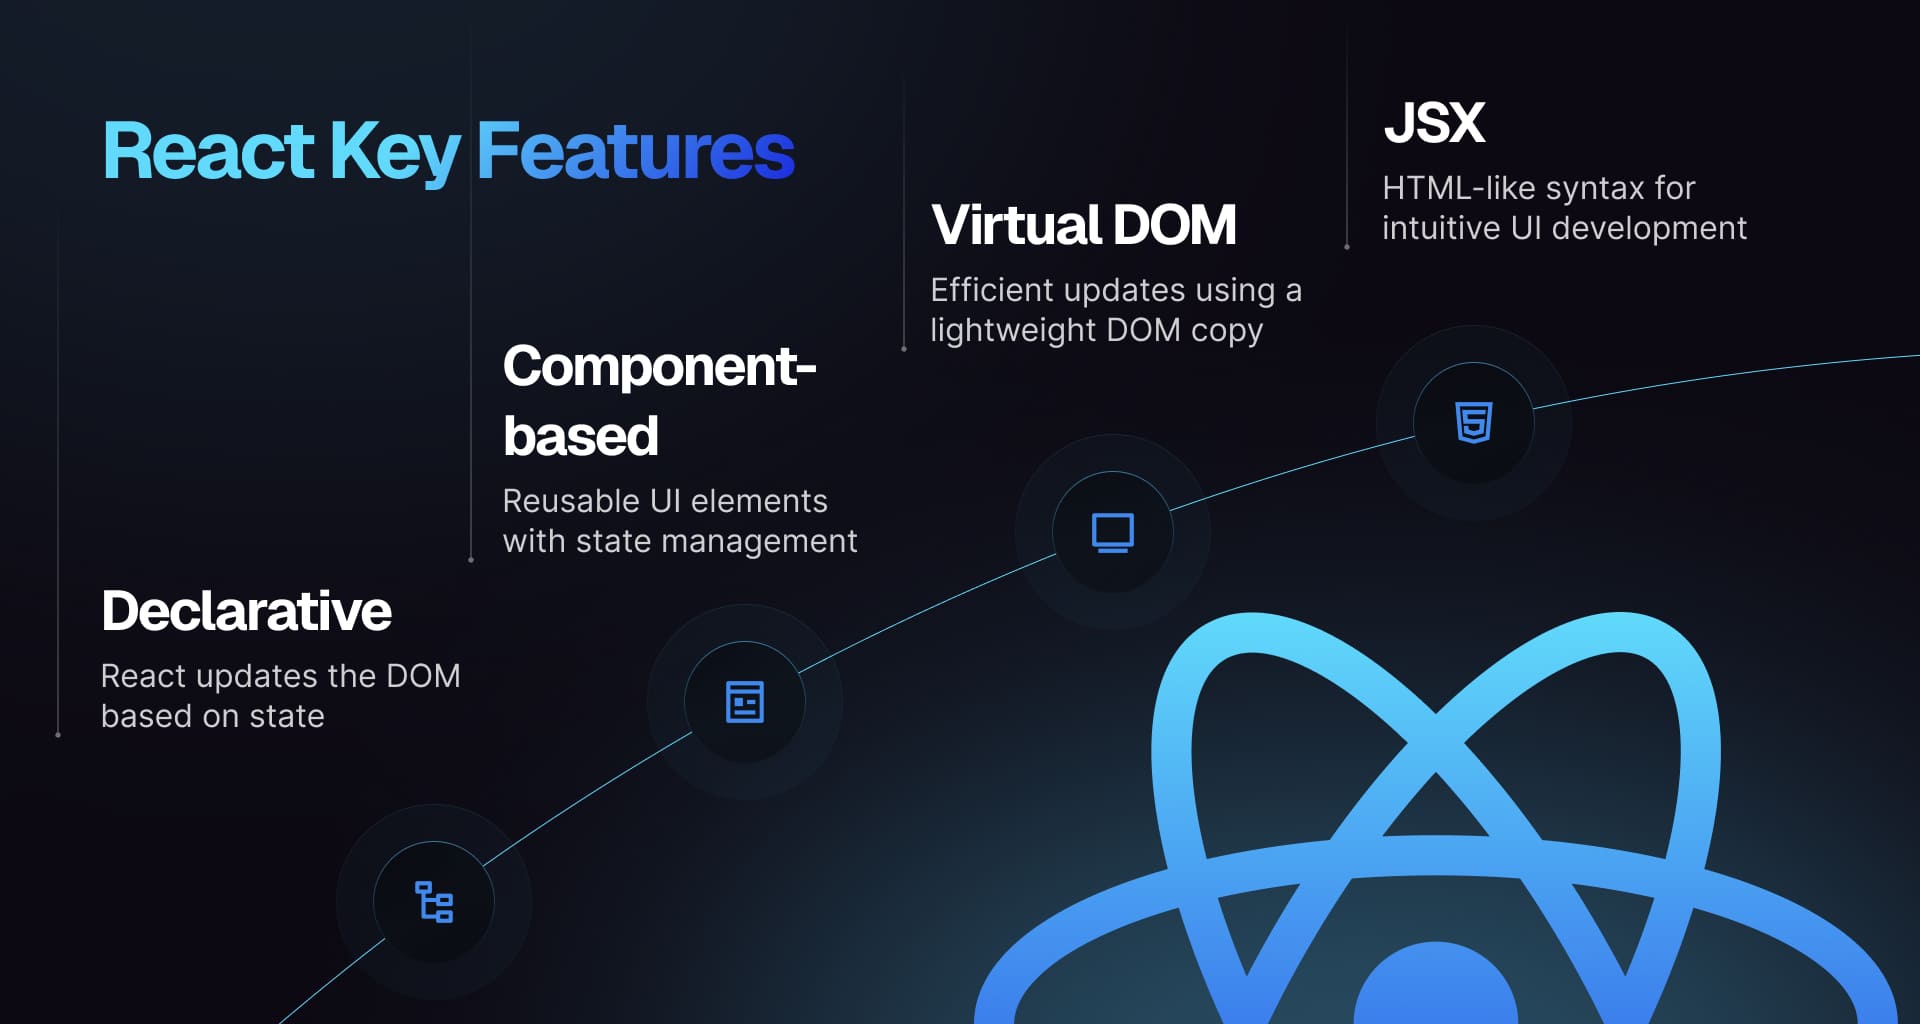
Find in-depth explanations and track study progress here ->
2. What is JSX and how does it work?
JSX, short for JavaScript XML, is a syntax extension for JavaScript that allows you to write HTML-like code within JavaScript. It makes building React components easier. JSX gets converted into JavaScript function calls, often by Babel. For instance,
<div>Hello, world!</div>is transformed intoReact.createElement('div', null, 'Hello, world!').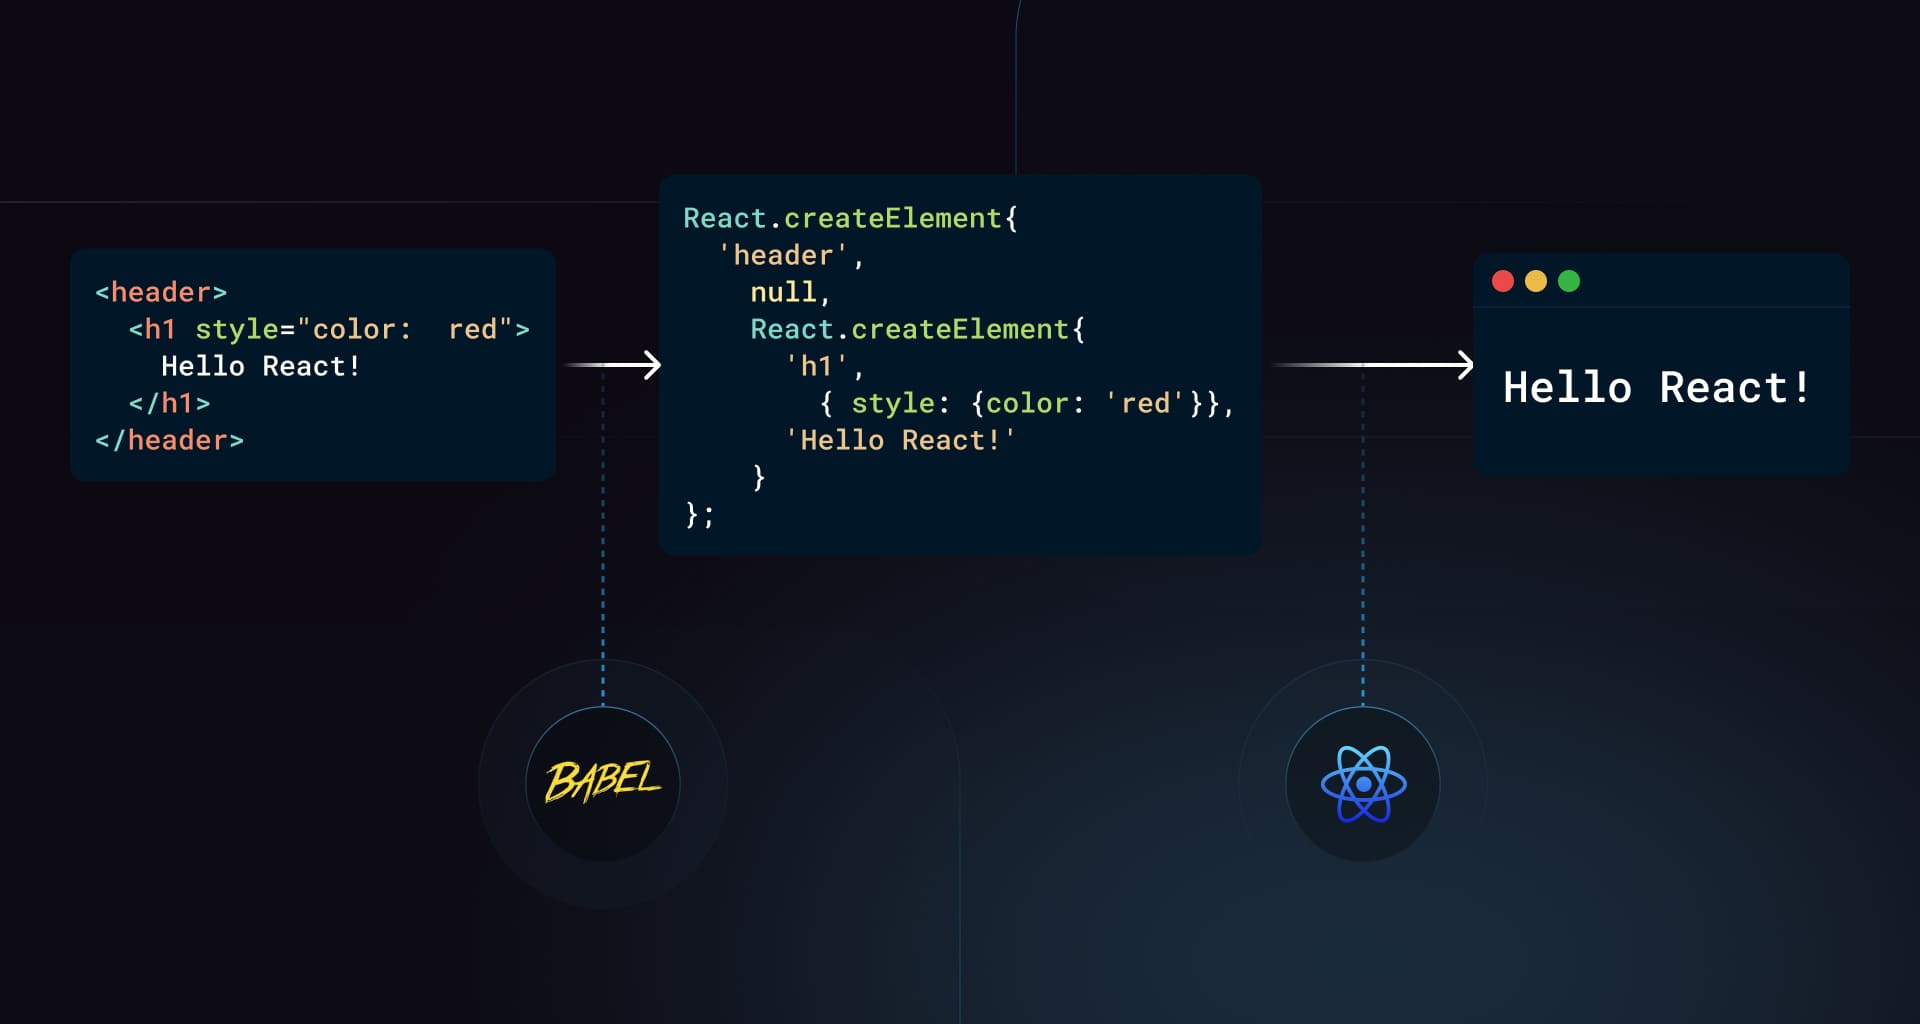
Find in-depth explanations and track study progress here ->
3. Explain the concept of the Virtual DOM in React.
The virtual DOM is a simplified version of the actual DOM used by React. It allows for efficient UI updates by comparing the virtual DOM to the real DOM and making only the necessary changes through a process known as reconciliation.
Find in-depth explanations and track study progress here ->
4. What is the difference between Shadow DOM and Virtual DOM?
The Shadow DOM is a web standard that encapsulates a part of the DOM, isolating it from the rest of the document. It's used for creating reusable, self-contained components without affecting the global styles or scripts.
The Virtual DOM is an in-memory representation of the actual DOM used to optimize rendering. It compares the current and previous states of the UI, updating only the necessary parts of the DOM, which improves performance.
5. What is the difference Between React Node, React Element, and React Component?
A React Node refers to any unit that can be rendered in React, such as an element, string, number, or
null. A React Element is an immutable object that defines what should be rendered, typically created using JSX orReact.createElement. A React Component is either a function or class that returns React Elements, enabling the creation of reusable UI components.Find in-depth explanations and track study progress here ->
6. What are React Fragments used for?
React Fragments allow you to group multiple elements without adding extra nodes to the DOM. They are particularly useful when you need to return multiple elements from a component but don't want to wrap them in a container element. You can utilize shorthand syntax
<>...</>orReact.Fragment.return (<><ChildComponent1 /><ChildComponent2 /></>);Find in-depth explanations and track study progress here ->
7. What are props in React? How are they different from state?
Props (short for properties) are inputs to React components that allow you to pass data from a parent component to a child component. They are immutable and are used to configure a component. In contrast, state is internal to a component and can change over time, typically due to user interactions or other events.
Find in-depth explanations and track study progress here ->
8. What is the difference between React's class components and functional components?
Class components are ES6 classes that extend
React.Componentand rely on lifecycle methodscomponentDidMount,componentDidUpdate, etc.) andthis.state. Function components are plain functions that take props as input and return JSX, and use hooks (useState,useEffect,useRef, etc.) for state and side effects. Since hooks landed in React 16.8, function components are the default for new code; class components are kept for backward compatibility and are no longer the recommended pattern.9. What are stateless components?
Stateless components in React are components that do not manage or hold any internal state. They simply receive data via props and render UI based on that data. These components are often functional components and are used for presentational purposes.
Key points:
- Do not use
this.state - Render UI based on
props - Focused on displaying information, not managing behavior
Stateless components are simpler, easier to test, and often more reusable. With the introduction of hooks, React components are mostly written using functions and can contain state via thefunction StatelessComponent({ message }) {return <div>{message}</div>;}useStatehook.10. What are stateful components?
Stateful components in React are components that manage and hold their own internal state. They can modify their state in response to user interactions or other events and re-render themselves when the state changes.
Key points:
- Use
this.state(in class components) oruseState(in functional components) - Can update state using event handlers or lifecycle methods
- Handle logic and data management
function StatefulComponent() {const [count, setCount] = React.useState(0);return (<div><p>{count}</p><button onClick={() => setCount(count + 1)}>Increment</button></div>);}Stateful components are essential for handling dynamic and interactive UIs.
11. What is the role of
PropTypesin React?PropTypes was React's runtime prop type-checker. You declared expected types, and React would warn in the console when a mismatch occurred in development.
import PropTypes from 'prop-types';function MyComponent({ name, age }) {return (<div>{name} is {age} years old</div>);}MyComponent.propTypes = {name: PropTypes.string.isRequired,age: PropTypes.number.isRequired,};PropTypesis deprecated as of React 19 and no longer ships from thereactpackage. Use TypeScript instead; it catches the same mismatches at compile time and integrates with editor tooling.12. What are the recommended ways for type checking of React component props?
Use TypeScript. It catches prop mismatches at compile time, integrates with editor tooling (autocomplete, refactors, jump-to-definition), and is the default in most React project templates.
type MyComponentProps = {name: string;age: number;};function MyComponent({ name, age }: MyComponentProps) {return (<div>{name} is {age} years old</div>);}The older alternative was
PropTypes, a runtime checker that warned in dev mode when prop types didn't match. It is deprecated as of React 19 and no longer ships from thereactpackage. If you're maintaining a codebase that still usesprop-types, migrate to TypeScript.13. Why can
count && <Badge />unexpectedly render a zero?The
&&expression returns its left operand when that operand is falsy. Withcountequal to0, the expression returns0, and React renders that number.Use a boolean condition, such as
count > 0 && <Badge />, or an explicit ternary that returnsnull. This matters when a badge disappears but an unexplained zero remains in the UI. See conditional rendering.14. What is the difference between
onClick={save}andonClick={save()}?onClick={save}passes a function for React to call when the event happens.onClick={save()}calls it during render and passes its return value as the handler, which is usually a bug and can cause repeated updates.To pass an argument, use
onClick={() => save(record.id)}. Rendering should calculate UI, while event handlers perform work caused by that interaction. See responding to events.State, lists, and events
15. What is the purpose of the
keyprop in React?In React, the
keyprop is used to uniquely identify elements in a list, allowing React to optimize rendering by updating and reordering items more efficiently. Without unique keys, React might re-render elements unnecessarily, causing performance problems and potential bugs.{items.map((item) => <ListItem key={item.id} value={item.value} />);}Find in-depth explanations and track study progress here ->
16. What is the consequence of using array indices as keys in React?
Using array indices as
keys can lead to performance issues and unexpected behavior, especially when reordering or deleting items. React relies on keys to identify elements uniquely, and using indices can cause components to be re-rendered unnecessarily or display incorrect data.Find in-depth explanations and track study progress here ->
17. What is the difference between Controlled and Uncontrolled React components?
In controlled components, form data is managed through the component's state, making it the definitive source of truth. Input value changes are handled by event handlers. In uncontrolled components, the form state is managed internally and accessed via refs. Controlled components provide more control and are easier to test, while uncontrolled components are simpler for basic use cases.
Example of a controlled component:
function ControlledInput() {const [value, setValue] = React.useState('');return (<inputtype="text"value={value}onChange={(e) => setValue(e.target.value)}/>);}Example of an uncontrolled component:
function UncontrolledInput() {const inputRef = React.useRef();return <input type="text" ref={inputRef} />;}Find in-depth explanations and track study progress here ->
18. How would you lift the state up in a React application, and why is it necessary?
Lifting state up in React involves moving the state from child components to their nearest common ancestor. This pattern is used to share state between components that don't have a direct parent-child relationship. By lifting state up, you can avoid prop drilling and simplify the management of shared data.
// Lifting state upconst Parent = () => {const [counter, setCounter] = useState(0);return (<div><Child1 counter={counter} /><Child2 setCounter={setCounter} /></div>);};const Child1 = ({ counter }) => <h1>{counter}</h1>;const Child2 = ({ setCounter }) => (<button onClick={() => setCounter((prev) => prev + 1)}>Increment</button>);In this example, the state is managed in the
Parentcomponent, and both child components access it via props.19. Why does React recommend against mutating state?
React advises against mutating state as it can lead to unexpected behaviors and bugs. State immutability helps efficiently determine when components need re-rendering; direct mutations may prevent React from detecting changes.
Find in-depth explanations and track study progress here ->
20. What does re-rendering mean in React?
In React, re-rendering refers to the process of updating the user interface (UI) in response to changes in the component's state or props. When the state or props of a component change, React re-renders the component to reflect the updated data in the UI.
This involves:
- Recalculating the JSX returned by the component
- Comparing the new JSX with the previous one (using the Virtual DOM)
- Updating the real DOM with only the differences (efficient rendering)
- Re-rendering ensures that the UI stays in sync with the component's state and props
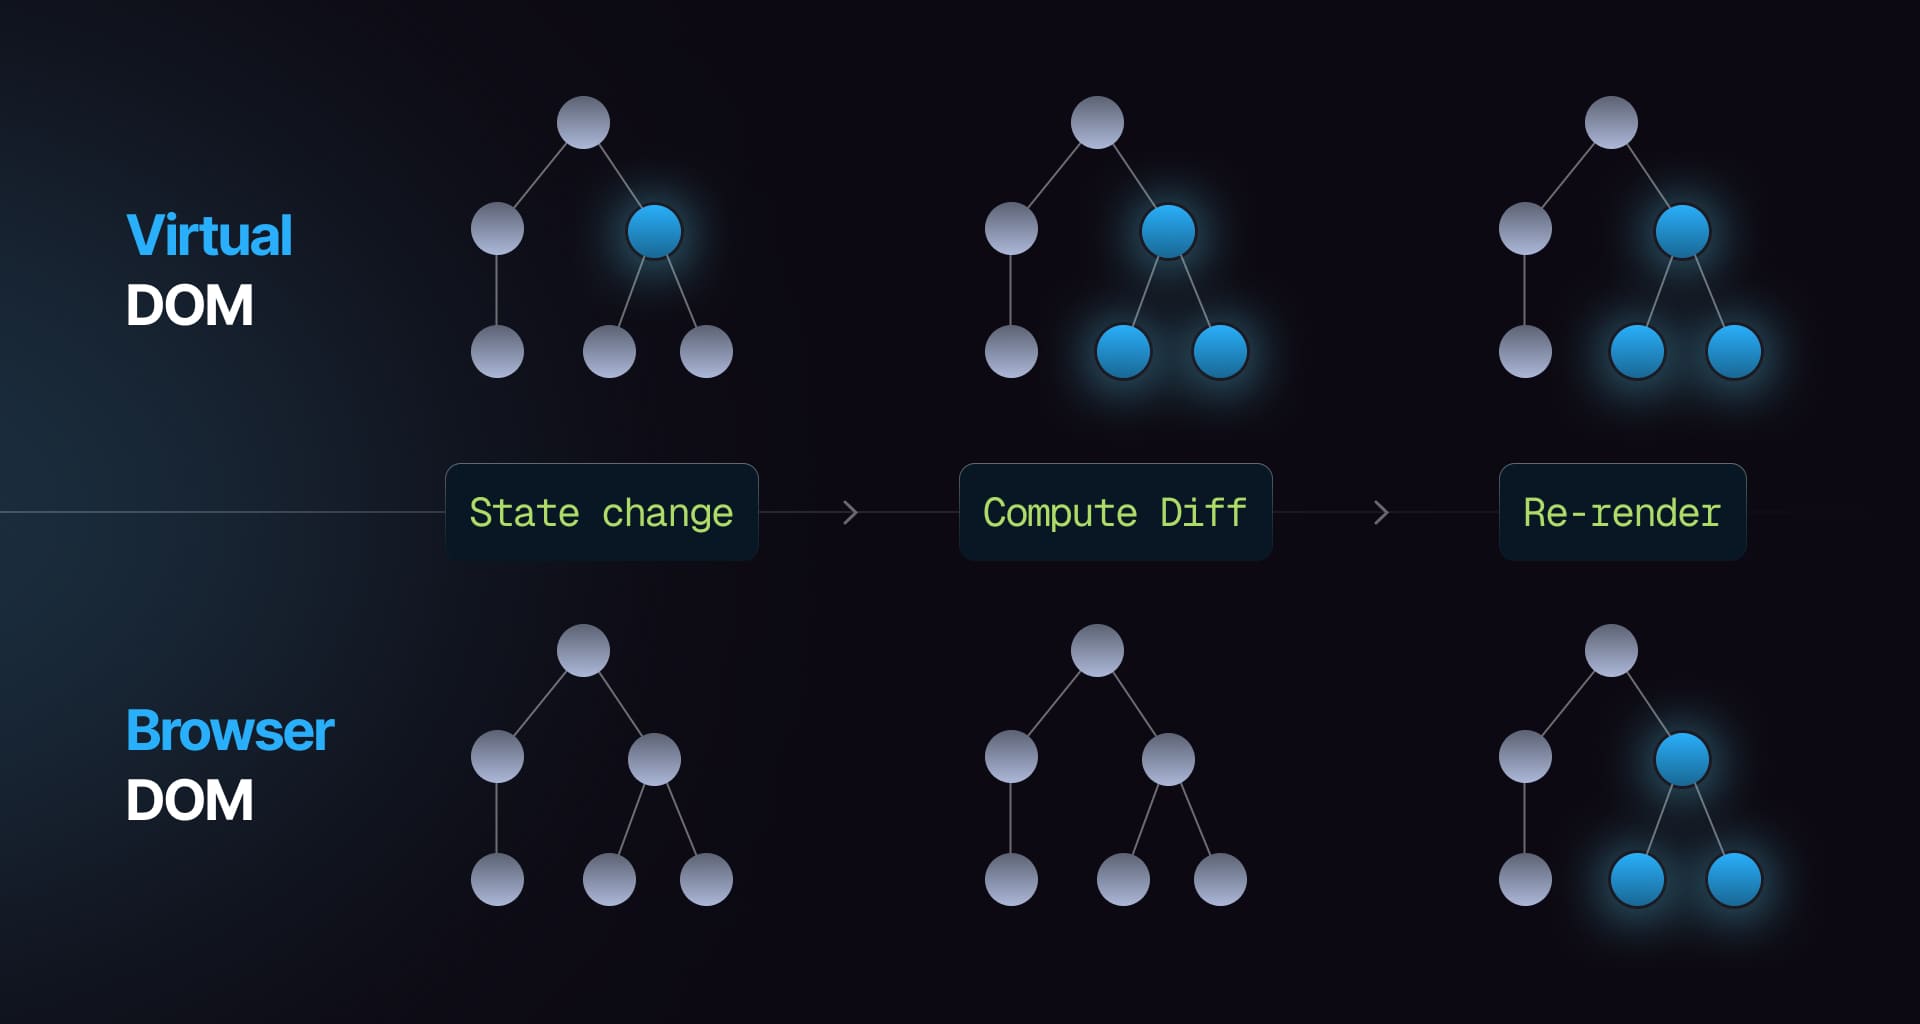
Find in-depth explanations and track study progress here ->
21. Explain one-way data flow of React
In React, one-way data flow means data moves from parent to child components through props.
- Parent to child: The parent passes data to the child
- State updates: To change data, the child calls a function passed down by the parent
Example:
function Parent() {const [count, setCount] = React.useState(0);return <Child count={count} increment={() => setCount(count + 1)} />;}function Child({ count, increment }) {return <button onClick={increment}>Count: {count}</button>;}This ensures data flows in one direction, making the app more predictable.
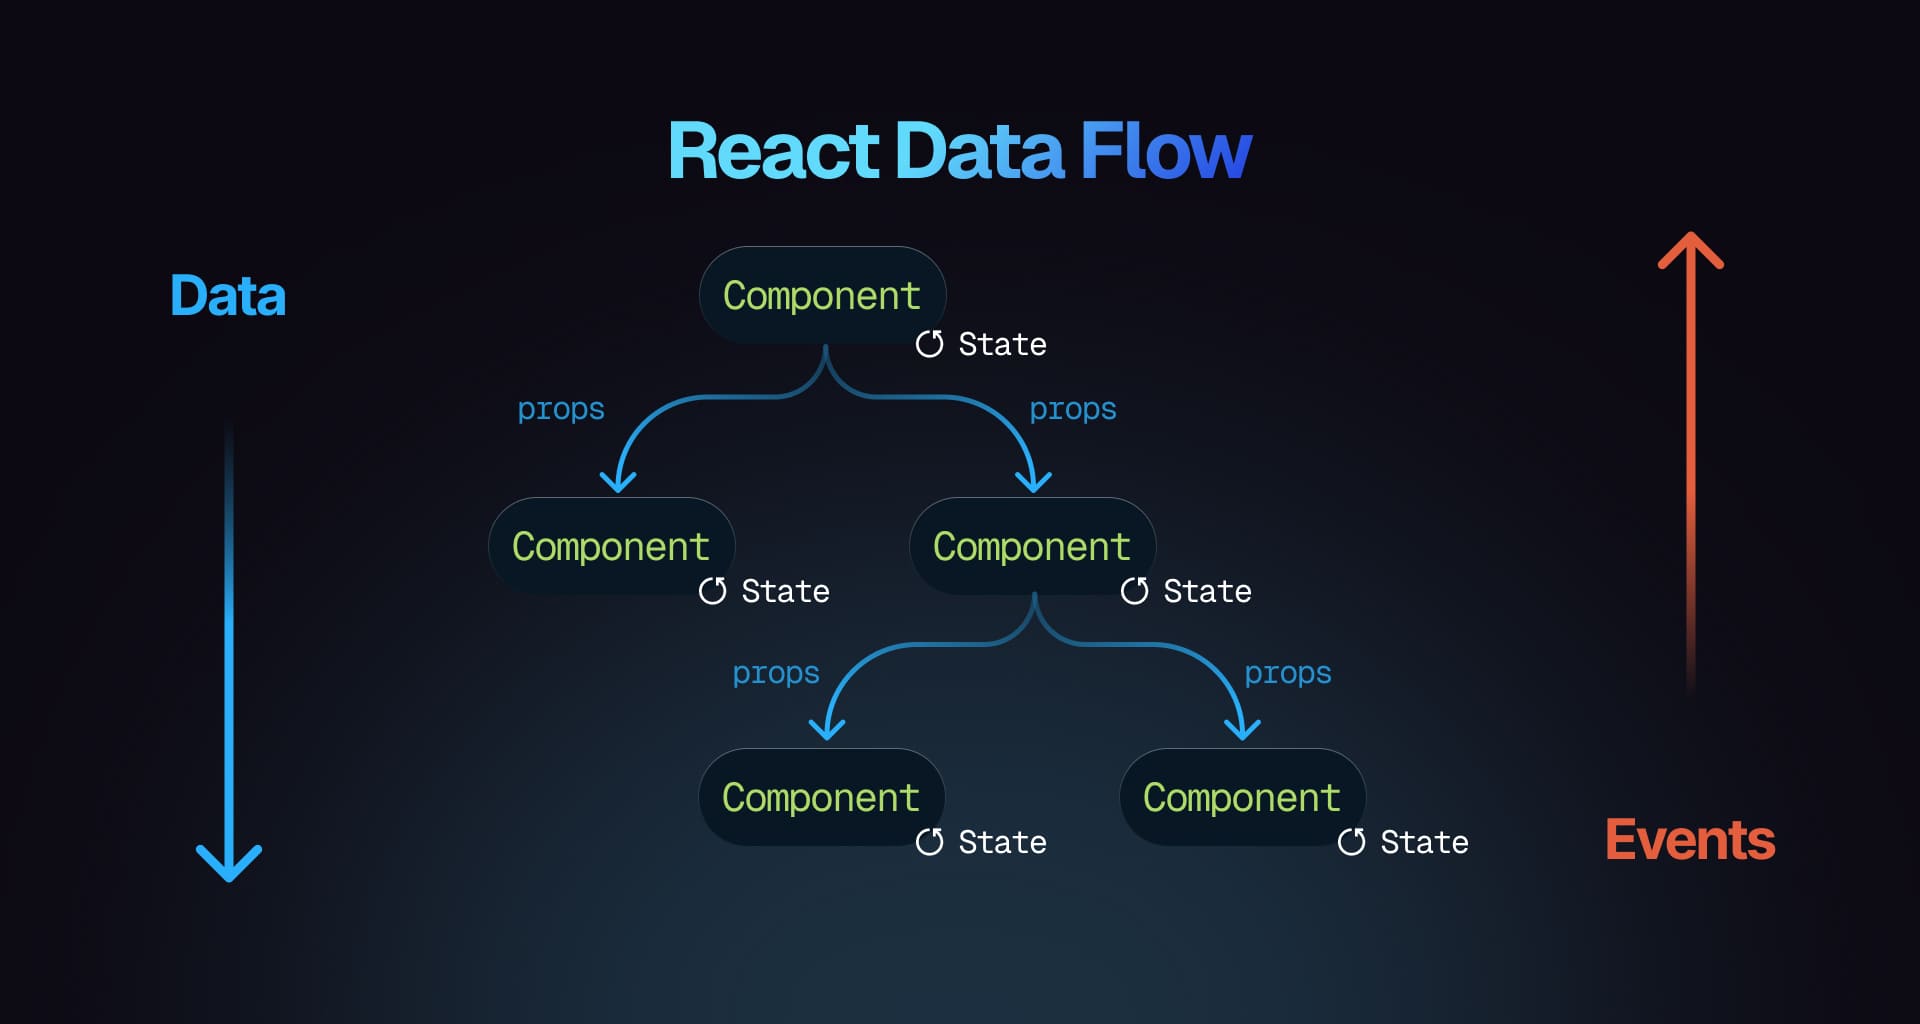
Find in-depth explanations and track study progress here ->
22. Explain what happens when
setStateis called in React?When
setStateis called in React:- State update: It updates the component's state, triggering a re-render of the component
- Batching: React may batch multiple setState calls into a single update for performance optimization
- Re-render: React re-renders the component (and its child components if needed) with the new state
- Asynchronous: State updates may be asynchronous, meaning React doesn't immediately apply the state change; it schedules it for later to optimize performance
Example:
function Counter() {const [count, setCount] = React.useState(0);const increment = () => {setCount(count + 1); // Calls setState to update state};return <button onClick={increment}>Count: {count}</button>;}In this example, calling
setState(viasetCount) triggers a re-render with the updatedcount.23. Explain prop drilling
Prop drilling is when you pass data from a parent component to a deeply nested child component through props, even if intermediate components don't use it.
Example:
function Grandparent() {const data = 'Hello from Grandparent';return <Parent data={data} />;}function Parent({ data }) {return <Child data={data} />;}function Child({ data }) {return <p>{data}</p>;}In this example,
datais passed through multiple components, even though only theChildcomponent uses it. Prop drilling is acceptable for small applications where the component hierarchy is shallow. When global state is needed to be accessed in deeper levels of the app, using context and/or external state managers might be better.24. Discuss synthetic events in React
Synthetic events in React are a wrapper around native DOM events that ensure consistent behavior across browsers. They normalize the way events are handled, providing a unified API for React applications.
These events are wrapped in the
SyntheticEventobject and expose the usual methods likepreventDefault()andstopPropagation(). Since React 17, the root event listener is attached to the React root container (notdocument), which makes nested React trees work correctly together.Example:
function MyComponent() {const handleClick = (event) => {event.preventDefault();console.log('Button clicked');};return <button onClick={handleClick}>Click me</button>;}Older sources mention event pooling, where React reused the event object after the handler ran, which made the event unusable in async code. Event pooling was removed in React 17, so you can read or pass the event object asynchronously without calling
event.persist().25. What happens when you call a state setter three times in one click handler?
Starting at zero, three calls to
setCount(count + 1)all request the value1because the handler reads one render's snapshot. Three calls tosetCount(c => c + 1)queue three updater functions and produce3.Do not use
await setCount(...)to wait for rendering: the setter does not return a completion Promise. See updater queues.Practice the related React quiz →
26. How would you update one field in a nested state object?
Copy each object along the changed path while retaining unchanged branches:
setProfile((previous) => ({...previous,address: { ...previous.address, city: nextCity },}));This assumes
profile.addressexists. Mutatingprevious.address.cityafter only copyingpreviousstill mutates existing state. For deeply nested models, flatten the structure or use a library that produces immutable updates. See nested state updates.Practice the related React quiz →
27. Why does
useState(props.name)not follow later prop changes?The argument initializes state; React does not overwrite that state every time the prop changes. This is useful for an editable draft but surprising if the UI is meant to always reflect the parent.
If no independent draft is needed, read the prop directly. If the parent should own edits, make the value controlled. If a different record starts a new editing session, a record key can reset it. See avoiding mirrored props.
Practice the related React quiz →
28. How do you fix an uncontrolled-to-controlled input warning?
An input that starts with
value={undefined}and later receives a string switches from uncontrolled to controlled. Initialize controlled text state to'', or usevalue={name ?? ''}when the data may be missing.For checkboxes, use a boolean
checkedvalue. Keep an input controlled or uncontrolled for its entire lifetime, and update controlled state synchronously fromonChange. See input troubleshooting.Practice the related React quiz →
Hooks and composition basics
29. What are the benefits of using hooks in React?
Hooks enable the use of state and other React features in functional components, replacing the need for class components. They streamline code by reducing the reliance on lifecycle methods, enhance readability, and facilitate the reuse of stateful logic across components.
Popular hooks like
useStateanduseEffectare used for managing state and side effects.Find in-depth explanations and track study progress here ->
30. What are the rules of React hooks?
React hooks should be called at the top level of a function, not inside loops, conditions, or nested functions. They must only be used within React function components or custom hooks. These guidelines ensure proper state management and lifecycle behavior.
Find in-depth explanations and track study progress here ->
31. What does the dependency array of
useEffectaffect?The dependency array of
useEffectcontrols when the effect re-runs:- If it's empty, the effect runs only once after the initial render.
- If it contains variables, the effect re-runs whenever any of those variables change.
- If omitted, the effect runs after every render.
Find in-depth explanations and track study progress here ->
32. What is the
useRefhook in React and when should it be used?The
useRefhook creates a mutable object that persists through renders, allowing direct access to DOM elements, storing mutable values without causing re-renders, and maintaining references to values.For instance,
useRefcan be utilized to focus on an input element:import React, { useRef, useEffect } from 'react';function TextInputWithFocusButton() {const inputEl = useRef(null);useEffect(() => {inputEl.current.focus();}, []);return <input ref={inputEl} type="text" />;}Find in-depth explanations and track study progress here ->
33. What is the
useIdhook in React and when should it be used?The
useIdhook generates unique IDs for elements within a component, which is crucial for accessibility by dynamically creating ids that can be used for linking form inputs and labels. It guarantees unique IDs across the application even if the component renders multiple times.import { useId } from 'react';function MyComponent() {const id = useId();return (<div><label htmlFor={id}>Name:</label><input id={id} type="text" /></div>);}Find in-depth explanations and track study progress here ->
34. Can you explain how to create and use custom hooks in React?
To create and use custom hooks in React:
- Create a function that starts with use and uses built-in hooks like
useStateoruseEffect - Return the values or functions you want to share.
Example:
function useForm(initialState) {const [formData, setFormData] = useState(initialState);const handleChange = (e) =>setFormData({ ...formData, [e.target.name]: e.target.value });return [formData, handleChange];}Use the Hook:
function MyForm() {const [formData, handleChange] = useForm({ name: '', email: '' });return <input name="name" value={formData.name} onChange={handleChange} />;}Custom hooks let you reuse logic across components, keeping your code clean.
35. Explain the composition pattern in React.
The composition pattern in React involves building components by combining smaller, reusable ones instead of using inheritance. This encourages creating complex UIs by passing components as children or props.
function WelcomeDialog() {return (<Dialog><h1>Welcome</h1><p>Thank you for visiting our spacecraft!</p></Dialog>);}function Dialog(props) {return <div className="dialog">{props.children}</div>;}Find in-depth explanations and track study progress here ->
36. Do two components calling the same custom Hook share state?
If
useCounter()owns state throughuseState, calling it in two components creates independent state for each invocation. Sharing a function shares logic, not the state stored by React for that call.To share a value, lift its state to a common owner, distribute it through context, or subscribe both components to an external store. A custom Hook can wrap those mechanisms, but the shared ownership must be explicit. See custom Hook state isolation.
Practice the related React quiz →
Routing and testing basics
37. What is a React Router?
React Router is a popular routing library for React applications that enables navigation between different components based on the URL. It provides declarative routing, allowing you to define routes and their corresponding components in a straightforward manner.
38. How does React Router work, and how do you implement dynamic routing?
React Router maps URL paths to components, enabling navigation in single-page apps. Dynamic routing allows you to use URL parameters to render components based on dynamic values.
import { BrowserRouter, Routes, Route, useParams } from 'react-router-dom';function UserPage() {const { id } = useParams(); // Access dynamic parameterreturn <h1>User ID: {id}</h1>;}export default function App() {return (<BrowserRouter><Routes><Route path="/user/:id" element={<UserPage />} /> {/* Dynamic path */}</Routes></BrowserRouter>);}Key features:
- Dynamic Segments:
:idcaptures dynamic data from the URL. useParamsHook: Accesses these dynamic values for rendering.
39. How do you navigate programmatically in React Router?
In React Router v6, you can navigate programmatically by using the
useNavigatehook. First, importuseNavigatefromreact-router-domand call it to get the navigate function. Then, you can usenavigate('/new-page')to navigate to a different route.For example:
import { useNavigate } from 'react-router-dom';function MyComponent() {const navigate = useNavigate();const goToPage = () => navigate('/new-page');return <button onClick={goToPage}>Go to New Page</button>;}In React Router v5, the
useHistoryhook provides access to the history object, which you can use to push a new route. For example,history.push('/new-page')will navigate to the specified route.For example:
import { useHistory } from 'react-router-dom';function MyComponent() {const history = useHistory();const goToPage = () => history.push('/new-page');return <button onClick={goToPage}>Go to New Page</button>;}Both methods allow you to navigate programmatically in React Router.
40. How do you manage the active route state in a multi-page React application?
Use the useLocation hook to get the current route, and conditionally apply styles for the active state.
Example:
import { useLocation } from 'react-router-dom';function NavBar() {const location = useLocation();return (<nav><ul><li className={location.pathname === '/home' ? 'active' : ''}>Home</li><li className={location.pathname === '/about' ? 'active' : ''}>About</li></ul></nav>);}41. How to get query parameters in React Router?
In React Router v6, you can use the
useSearchParamshook to access query parameters from the URL.Example:
import { useSearchParams } from 'react-router-dom';function MyComponent() {const [searchParams] = useSearchParams();const queryParam = searchParams.get('paramName');return <div>Query Param: {queryParam}</div>;}This hook allows you to retrieve and manipulate query parameters in React Router v6.
42. How do you pass props to a route component in React Router?
In React Router v6, you can pass props to a route component using the
elementprop in the<Route>component.Example:
import { Routes, Route } from 'react-router-dom';function MyComponent({ propValue }) {return <div>Prop Value: {propValue}</div>;}function App() {return (<Routes><Route path="/my-route" element={<MyComponent propValue="Hello" />} /></Routes>);}In this example, the
propValueprop is passed to theMyComponentcomponent when rendering the/my-routeroute.43. How do you test React applications?
Testing React applications can be done using Jest and React Testing Library. Jest serves as the testing framework while React Testing Library provides utilities for testing components similarly to user interactions.
Find in-depth explanations and track study progress here ->
44. What is Jest and how is it used for testing React applications?
Jest is a JavaScript testing framework that provides a test runner, assertion library, and mocking support. It's commonly used for testing React applications due to its simplicity and integration with tools like React Testing Library.
45. What is React Testing Library and how is it used for testing React components?
React Testing Library is a testing utility for React that helps test components in a way that resembles how users interact with the application. It provides functions to render components, interact with them, and assert on the rendered output.
46. How do you test React components using React Testing Library?
To test React components using React Testing Library, you can:
- Render the component using
render. - Interact with the component (e.g., clicking buttons, entering text).
- Assert on the rendered output using queries like
getByText,queryByRole, etc.
Example:
import { render, screen, fireEvent } from '@testing-library/react';import MyComponent from './MyComponent';test('renders component', () => {render(<MyComponent />);const button = screen.getByRole('button');fireEvent.click(button);expect(screen.getByText('Clicked!')).toBeInTheDocument();});In this example, the test renders
MyComponent, clicks a button, and asserts that the text 'Clicked!' is present.47. How do
getBy,queryBy, andfindBydiffer in component tests?getByreturns an existing match and throws if none is found.queryByreturnsnullwhen no match exists, useful for asserting absence.findByreturns a Promise that retries until a match appears or times out.The singular variants require exactly one match: synchronous queries throw on multiple matches, while
findByretries and rejects if that condition still fails at the timeout. Use theAllByversions when multiple elements are expected. Choose the query based on whether the UI should exist now, be absent, or appear later. See query types.Practice the related React quiz →
Experienced
Experienced developers with 2–5 years of experience: practice diagnosing bugs, coordinating async UI, and choosing patterns for features you can own end to end.
Effects, refs, and state patterns
48. What is the difference between
useEffectanduseLayoutEffectin React?useEffectanduseLayoutEffectboth handle side effects in React functional components but differ in when they run:useEffectruns asynchronously after the DOM has rendered, making it suitable for tasks like data fetching or subscriptions.useLayoutEffectruns synchronously after DOM updates but before the browser paints, ideal for tasks like measuring DOM elements or aligning the UI with the DOM. Example:
import React, { useEffect, useLayoutEffect, useRef } from 'react';function Example() {const ref = useRef();useEffect(() => {console.log('useEffect: Runs after DOM paint');});useLayoutEffect(() => {console.log('useLayoutEffect: Runs before DOM paint');console.log('Element width:', ref.current.offsetWidth);});return <div ref={ref}>Hello</div>;}Find in-depth explanations and track study progress here ->
49. What is the purpose of callback function argument format of
setState()in React class components and when should it be used?This applies to class components, which are no longer the recommended pattern. The function-component equivalent (the updater form of
useState) is shown at the end.The callback (updater) form of
setState()ensures state updates are based on the most current state and props. This matters when the new state depends on the previous state, because React may batch multiple updates and thethis.stateyou'd read directly could be stale.this.setState((prevState, props) => ({counter: prevState.counter + props.increment,}));The function-component equivalent uses the updater form of
useState:const [counter, setCounter] = useState(0);setCounter((prev) => prev + props.increment);Find in-depth explanations and track study progress here ->
50. Explain the React component lifecycle methods in class components.
Class lifecycle methods only apply to class components, which are no longer the recommended pattern. The function-component equivalents (using
useEffect) are shown at the end.React class components have lifecycle methods for different phases:
Mounting:
constructor: Initializes state or binds methodscomponentDidMount: Runs after the component mounts, useful for API calls or subscriptions
componentDidMount() {console.log('Component mounted');}Updating:
shouldComponentUpdate: Determines if the component should re-rendercomponentDidUpdate: Runs after updates, useful for side effects
Unmounting:
componentWillUnmount: Cleans up (e.g., removing event listeners).
componentWillUnmount() {console.log('Component will unmount');}In function components, all of the above are expressed with
useEffect:useEffect(() => {// componentDidMount + componentDidUpdateconsole.log('Mounted or updated');return () => {// componentWillUnmountconsole.log('Will unmount');};},[/* deps */],);51. What are Pure Components?
Pure Components in React are components that only re-render when their props or state change. They use shallow comparison to check if the props or state have changed, preventing unnecessary re-renders and improving performance.
- Class components can extend
React.PureComponentto become pure - Functional components can use
React.memofor the same effect
const PureFunctionalExample = React.memo(function ({ value }) {return <div>{value}</div>;});With the React Compiler, manual memoization with
React.memo,useMemo, anduseCallbackis rarely needed; the compiler inserts equivalent memoization automatically.52. What is the
useCallbackhook in React and when should it be used?The
useCallbackhook memoizes functions to prevent their recreation on every render. This is especially beneficial when passing callbacks to optimized child components that depend on reference equality to avoid unnecessary renders. Use it when a function is passed as a prop to a memoized child component.const memoizedCallback = useCallback(() => {doSomething(a, b);}, [a, b]);With the React Compiler enabled, you rarely need
useCallbackmanually; the compiler inserts equivalent memoization automatically.Find in-depth explanations and track study progress here ->
53. What is the
useMemohook in React and when should it be used?The
useMemohook memoizes costly calculations, recomputing them only when dependencies change. This enhances performance by avoiding unnecessary recalculations. It should be used for computationally intensive functions that don't need to run on every render.const memoizedValue = useMemo(() => computeExpensiveValue(a, b), [a, b]);With the React Compiler enabled, you rarely need
useMemomanually; the compiler memoizes derived values automatically.Find in-depth explanations and track study progress here ->
54. What is the
useReducerhook in React and when should it be used?The
useReducerhook manages complex state logic in functional components, serving as an alternative touseState. It's ideal when state has multiple fields (and there are constraints around how they should be mutated), or when the next state relies on the previous one.The
useReducerhook accepts a reducer function + an initial state. Thereducerfunction is passed the currentstateandactionand returns a new state.const [state, dispatch] = useReducer(reducer, initialState);Find in-depth explanations and track study progress here ->
55. What is
forwardRef()in React used for?Before React 19, function components didn't accept
refas a regular prop, soforwardRef()was used to pass arefthrough to a child DOM element.// Pre-React 19import React, { forwardRef } from 'react';const MyComponent = forwardRef((props, ref) => <input ref={ref} {...props} />);In React 19,
refis a regular prop on function components andforwardRefis deprecated. Destructure it from props:function MyComponent({ ref, ...props }) {return <input ref={ref} {...props} />;}Find in-depth explanations and track study progress here ->
56. When should you use a class component over a function component?
Default to function components. Class components are legacy: new APIs like Suspense data fetching, the
usehook, Actions, Server Components, and the React Compiler are designed for function components only. The one remaining reason to write a class today is implementing an error boundary, which still requiresstatic getDerivedStateFromError/componentDidCatch.57. What is the difference between
createElementandcloneElement?The difference between createElement and cloneElement in React is as follows:
createElement:- Used to create a new React element.
- It takes the type of the element (e.g., 'div', a React component), props, and children, and returns a new React element.
- Commonly used internally by JSX or when dynamically creating elements. Example:
React.createElement('div', { className: 'container' }, 'Hello World');cloneElement:- Used to clone an existing React element and optionally modify its props.
- It allows you to clone a React element and pass new props or override the existing ones, keeping the original element's children and state.
- Useful when you want to manipulate an element without recreating it. Example:
const element = <button className="btn">Click Me</button>;const clonedElement = React.cloneElement(element, { className: 'btn-primary' });58. What is React strict mode and what are its benefits?
React Strict Mode is a development feature in React that activates extra checks and warnings to help identify potential issues in your app.
- Detects unsafe lifecycles: Warns about deprecated lifecycle methods
- Identifies side effects: Highlights components with side effects in render methods
- Warns about unexpected state changes: Catches unexpected state mutations
- Enforces best practices: Flags potential problems, encouraging modern practices
<React.StrictMode><App /></React.StrictMode>Wrapping components in
<React.StrictMode>activates these development checks without affecting production builds.59. What are some React anti-patterns?
React anti-patterns are practices that can lead to inefficient or hard-to-maintain code. Common examples include:
- Directly mutating state instead of using the state setter
- Using
useEffectto derive state from props (compute it during render instead) - Putting data into state that you can compute from other state or props
- Not using keys in lists, or using the array index as a key for reorderable lists
- Effects with missing or stale dependencies
- Deeply nested state; prefer flat shapes with
useReduceror a state library - Reading or writing refs during render (do it in effects or event handlers)
- Using
useStatefor values that don't drive rendering (useuseRefinstead) - Calling hooks conditionally or inside loops (breaks the Rules of Hooks)
The older class-component anti-patterns (using
componentWillMountfor data fetching or relying oncomponentWillReceiveProps) refer to APIs that were renamed toUNSAFE_*and no longer apply to function-component code.Find in-depth explanations and track study progress here ->
60. What are higher-order components in React?
Higher-order components (HOCs) are functions that take a component and return a new one with added props or behavior, facilitating logic reuse across components.
const withExtraProps = (WrappedComponent) => {return (props) => <WrappedComponent {...props} extraProp="value" />;};const EnhancedComponent = withExtraProps(MyComponent);HOCs were the dominant pattern for cross-cutting logic (auth, data fetching, theming) before hooks. Custom hooks cover almost all of those use cases now without the wrapper-component nesting. HOCs still appear in older codebases and some libraries (e.g.,
connectfromreact-redux), but new code should prefer a custom hook.Find in-depth explanations and track study progress here ->
61. Explain the presentational vs container component pattern in React
The presentational vs container pattern split components into two roles: presentational components handled rendering (markup, styling) and received data via props, while container components handled state, data fetching, and behavior, then passed data down.
// Container: handles state/datafunction UserListContainer() {const [users, setUsers] = useState([]);useEffect(() => {fetchUsers().then(setUsers);}, []);return <UserList users={users} />;}// Presentational: pure renderingfunction UserList({ users }) {return (<ul>{users.map((u) => (<li key={u.id}>{u.name}</li>))}</ul>);}This pattern was popular before hooks; its original author (Dan Abramov) has since said it's no longer worth following as a hard rule. With hooks, the same separation is usually expressed by extracting a custom hook (e.g.,
useUsers()) rather than a wrapper component. New code typically blends the two roles into a single component plus a custom hook.Find in-depth explanations and track study progress here ->
62. What are render props in React?
Render props in React allow code sharing between components through a prop that is a function. This function returns a React element, enabling data to be passed to child components.
function DataFetcher({ url, render }) {const [data, setData] = useState(null);useEffect(() => {fetch(url).then((res) => res.json()).then(setData);}, [url]);return render(data);}// Usage<DataFetcherurl="/api/data"render={(data) => <div>{data ? data.name : 'Loading...'}</div>}/>;Like HOCs, render props were a pre-hooks solution for sharing stateful logic. Most of those use cases are now solved with a custom hook (
const data = useFetch(url)), which composes more naturally and avoids the render-prop pyramid. Render props are still useful in narrow cases where the consumer needs to control what to render based on parent-managed state (e.g., headless component libraries).Find in-depth explanations and track study progress here ->
63. How do you re-render the view when the browser is resized?
To re-render the view on browser resize, use the
useEffecthook to listen for the resize event and update state.Example:
import React, { useState, useEffect } from 'react';function ResizeComponent() {const [windowWidth, setWindowWidth] = useState(window.innerWidth);useEffect(() => {const handleResize = () => setWindowWidth(window.innerWidth);window.addEventListener('resize', handleResize);return () => window.removeEventListener('resize', handleResize);}, []);return <div>Window width: {windowWidth}px</div>;}export default ResizeComponent;This updates the state and re-renders the component whenever the window is resized.
64. How can a key reset a form when the selected record changes?
Render
<Editor key={record.id} record={record} />when switching records should discard the editor's local draft. A changed key makes React create a new component instance rather than preserve the old state.Use this deliberately: remounting also resets focus, refs, and Effects. If drafts should survive switching records, store them by record ID outside the remounted editor. See resetting state with a key.
Practice the related React quiz →
65. When should you calculate a value during render instead of using an Effect?
If a value is derived entirely from current props or state, compute it during render:
const fullName = firstName + ' ' + lastName. Setting it from an Effect adds another render and permits inconsistent intermediate state.Use an Effect when synchronizing with something outside React, such as a connection. Memoize a derived calculation only when its cost warrants it. See removing unnecessary Effects.
Practice the related React quiz →
66. What should happen to a subscription when an Effect dependency changes?
If an Effect connects to
roomId, changing that ID should disconnect the old room before connecting the new one. Return cleanup from setup and include the reactive inputs the connection uses.Test the sequence “connect A, disconnect A, connect B, disconnect B on unmount.” Cleanup must mirror setup, including when development checks exercise it more than once. See Effect lifecycle.
Practice the related React quiz →
67. How would you prevent an old request from overwriting newer search results?
Give each Effect execution a cleanup guard or request identity and ignore obsolete responses. Abort supported requests too, but do not assume abort reverses server work.
useEffect(() => {let active = true;const controller = new AbortController();setResult({ status: "loading" });async function load() {try {const response = await fetch(`/api/search?q=${encodeURIComponent(query)}`,{signal: controller.signal,},);if (!response.ok) throw new Error(`HTTP ${response.status}`);const data = await response.json();if (active) setResult({ status: "success", data });} catch (error) {if (active) setResult({ status: "error", error });}}load();return () => {active = false;controller.abort();};}, [query]);This excerpt belongs inside a component with
queryandresultstate. See request cancellation.Practice the related React quiz →
68. Why does an interval sometimes keep reading the initial state?
The interval callback closes over values from the render that created it. An Effect with
[]will not install a new callback when those values change.For a counter, use
setCount(c => c + 1)inside the interval and clear it in cleanup. If the subscription truly depends on another value, include that dependency. Do not suppress the linter to hide stale data. See removing Effect dependencies.Practice the related React quiz →
69. When would you use
useImperativeHandle?Use it to expose a small imperative API through a ref, such as
focus()orscrollToItem(), instead of exposing every detail of an internal DOM node. Include reactive values used by the handle in its dependencies.Prefer props for declarative behavior such as whether a panel is open. In React 19, a function component can receive the ref as a prop; older versions require
forwardRef. See useImperativeHandle.Practice the related React quiz →
70. How can TypeScript prevent impossible component prop combinations?
Use a discriminated union so each mode has its own required props:
type FieldProps =| { mode: "editable"; value: string; onChange: (value: string) => void }| { mode: "readonly"; value: string; onChange?: never };After checking
props.mode, TypeScript narrows the allowed properties. This communicates the component contract better than making every property optional. Runtime data still requires validation. See TypeScript discriminated unions.Rendering, data loading, and React 19 forms
71. How does virtual DOM in React work? What are its benefits and downsides?
The virtual DOM in React is an in-memory representation of the real DOM. When state or props change, React creates a new virtual DOM tree, compares it to the previous one using a diffing algorithm, and efficiently updates only the parts of the real DOM that changed.
- Benefits: It improves performance by reducing costly direct DOM manipulations and makes UI updates declarative and predictable.
- Downsides: There's some overhead from diffing and extra memory usage, and in very dynamic UIs, it may not always outperform manual optimizations.
Find in-depth explanations and track study progress here ->
72. What is reconciliation?
Reconciliation is the process by which React updates the DOM to match the virtual DOM efficiently. It involves comparing the new virtual DOM tree with the previous one and determining the minimum number of changes required to update the actual DOM. This process ensures optimal performance by avoiding unnecessary re-renders.
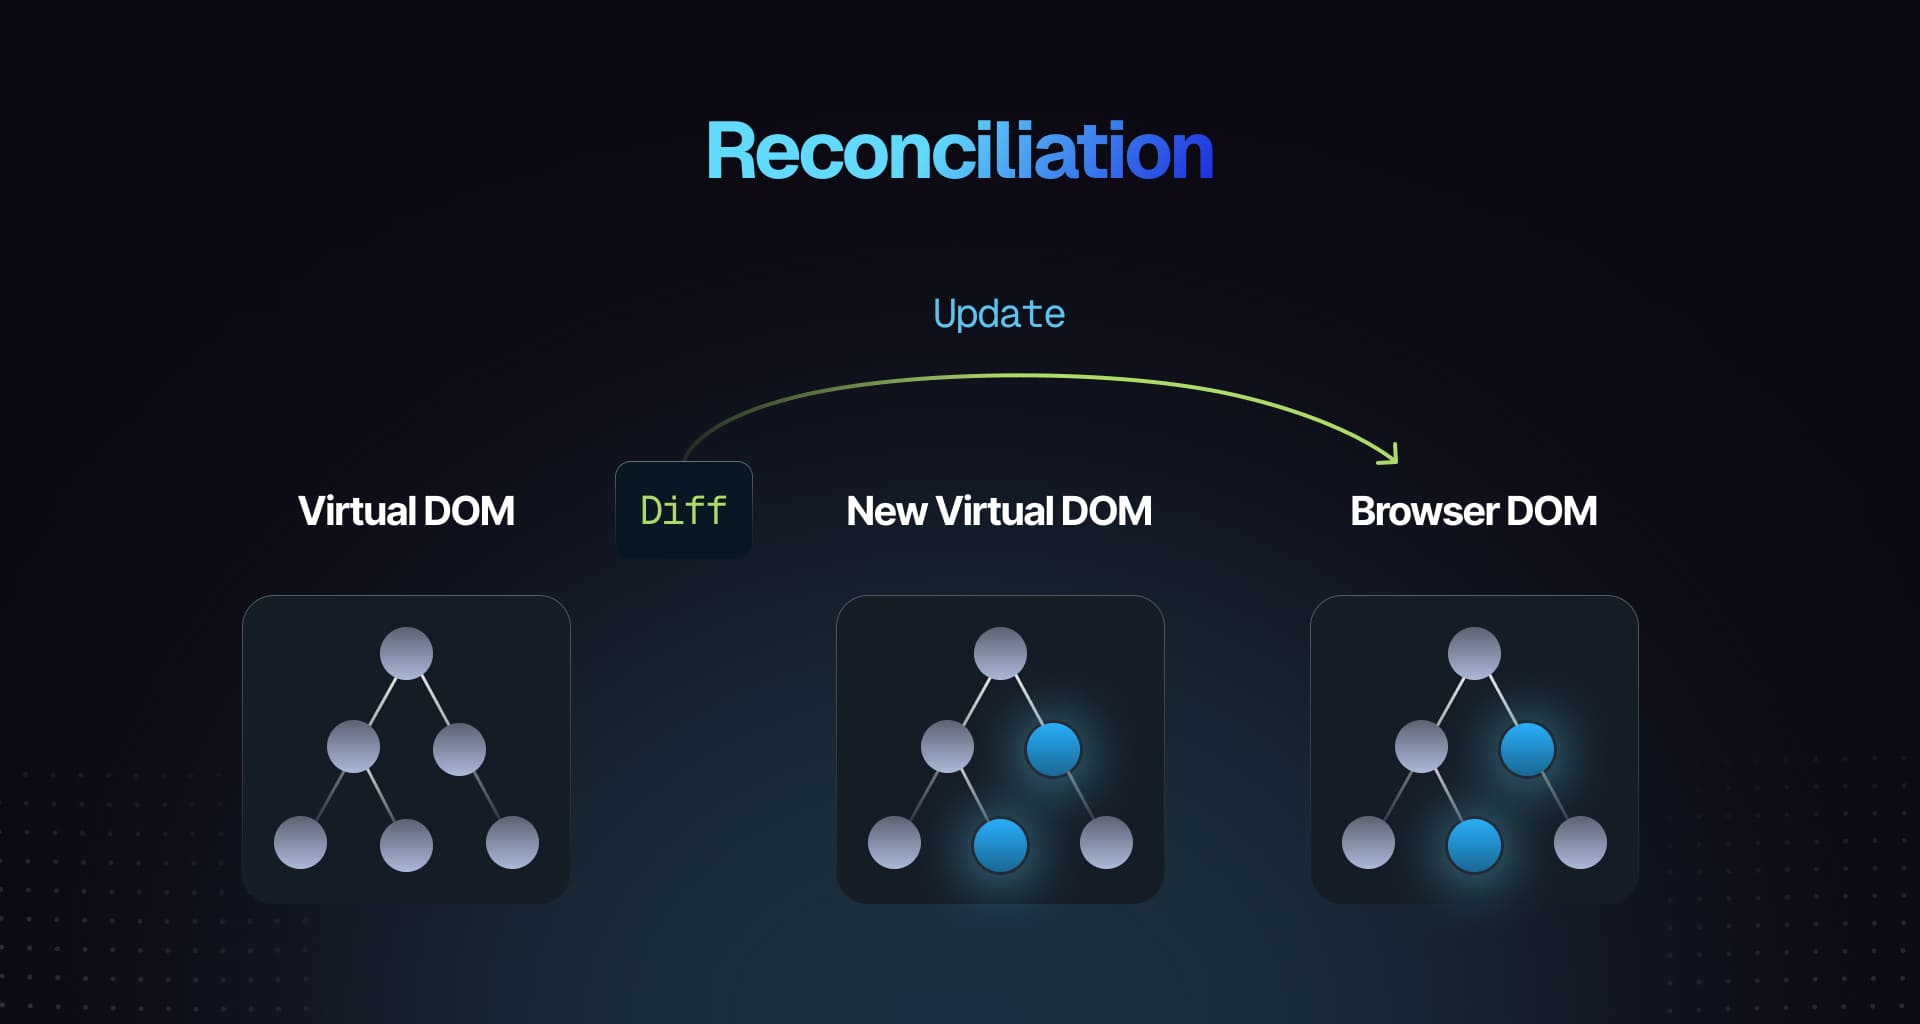
Find in-depth explanations and track study progress here ->
73. What are error boundaries in React for?
Error boundaries catch JavaScript errors in their child components, log them, and display fallback UI instead of crashing the application. They utilize
componentDidCatchandstatic getDerivedStateFromErrormethods but do not catch errors in event handlers or asynchronous code.Find in-depth explanations and track study progress here ->
74. What is React Suspense?
React Suspense allows handling asynchronous operations more elegantly within components. It provides fallback content while waiting for resources like data or code to load. You can use it alongside
React.lazy()for code splitting.const LazyComponent = React.lazy(() => import('./LazyComponent'));function MyComponent() {return (<React.Suspense fallback={<div>Loading...</div>}><LazyComponent /></React.Suspense>);}Find in-depth explanations and track study progress here ->
75. What is code splitting in a React application?
Code splitting enhances performance by dividing code into smaller chunks loaded on demand, thereby reducing initial load times. This can be achieved through dynamic import() statements or using React's React.lazy and Suspense.
// Using React.lazy and Suspenseconst LazyComponent = React.lazy(() => import('./LazyComponent'));function App() {return (<React.Suspense fallback={<div>Loading...</div>}><LazyComponent /></React.Suspense>);}Find in-depth explanations and track study progress here ->
76. Describe lazy loading in React
Lazy loading in React is a technique where components are loaded only when they are needed, rather than at the initial page load. This helps reduce the initial load time and improve performance by splitting the code into smaller chunks.
Example:
import React, { Suspense, lazy } from 'react';const LazyComponent = lazy(() => import('./LazyComponent'));function App() {return (<Suspense fallback={<div>Loading...</div>}><LazyComponent /></Suspense>);}In this example,
LazyComponentis loaded only when it's rendered, and while loading, a fallback UI (Loading...) is displayed.77. How do you handle asynchronous data loading in React applications?
Asynchronous data loading uses
useEffectalongsideuseStatehooks; fetching data insideuseEffectupdates state with fetched results ensuring re-renders occur with new data.import React, { useState, useEffect } from 'react';const FetchAndDisplayData = () => {const [info, updateInfo] = useState(null);const [isLoading, toggleLoading] = useState(true);useEffect(() => {const retrieveData = async () => {try {const res = await fetch('https://api.example.com/data');const data = await res.json();updateInfo(data);} catch (err) {console.error('Error fetching data:', err);} finally {toggleLoading(false);}};retrieveData();}, []);return (<div>{isLoading ? (<p>Fetching data, please wait...</p>) : (<pre>{JSON.stringify(info, null, 2)}</pre>)}</div>);};export default FetchAndDisplayData;Find in-depth explanations and track study progress here ->
78. What are some common pitfalls when doing data fetching in React?
Common pitfalls in data fetching with React include failing to handle loading and error states, neglecting to clean up subscriptions which can cause memory leaks, and improperly using lifecycle methods or hooks. Always ensure proper handling of these states, clean up after components, and utilize
useEffectfor side effects in functional components.Find in-depth explanations and track study progress here ->
79. What's new in React 19?
React 19 adds:
- Actions: functions that wrap async work and produce pending/error/data state via new hooks.
- The
usehook: reads promises and context during render. - Stable React Server Components and Server Actions.
- Native support for
<form action={fn}>. refas a regular prop on function components (no moreforwardRef).- Hoisting of
<title>,<meta>, and stylesheets out of JSX. - The React Compiler: an opt-in build-time optimizer that auto-memoizes.
Together, these move data mutations and async UI state into React itself, instead of leaving them as patterns each app reinvents.
80. What are Actions in React 19?
By convention, an Action is an async function passed to a React API that runs it inside a transition:
useActionState,startTransition(fromuseTransition), or a<form action={...}>prop. React tracks pending state, surfaces errors, and applies updates inside a transition so the UI stays responsive. This removes the usual boilerplate of toggling a loading flag, wrapping in try/catch, and managing error and data state separately.import { useActionState } from 'react';async function updateName(prevState, formData) {const name = formData.get('name');const error = await saveName(name);if (error) return { error };return { name };}function NameForm() {const [state, dispatchAction, isPending] = useActionState(updateName, {name: '',});return (<form action={dispatchAction}><input name="name" defaultValue={state.name} /><button disabled={isPending}>Save</button>{state.error && <p>{state.error}</p>}</form>);}81. What does the
useActionStatehook do?useActionStatetakes an action function and an initial state, and returns[state, dispatchAction, isPending]. CallingdispatchAction(usually by passing it to<form action>) runs the action, marksisPendingtrue, and replaces the state with the action's return value when it resolves. One hook covers what you'd otherwise write as three separateuseStatecalls for data, loading, and error.82. What does
useOptimisticdo?useOptimisticrenders an optimistic version of state immediately while an action is in flight, then automatically reverts to the real state when the action settles. Useful for chat messages, likes, list reordering, or anywhere the network round-trip would feel laggy.import { useOptimistic } from 'react';function MessageList({ messages, sendMessage }) {const [optimisticMessages, addOptimistic] = useOptimistic(messages,(state, newMessage) => [...state, { text: newMessage, sending: true }],);async function handleSend(formData) {const text = formData.get('text');addOptimistic(text);await sendMessage(text);}return (<>{optimisticMessages.map((m, i) => (<p key={i} style={{ opacity: m.sending ? 0.5 : 1 }}>{m.text}</p>))}<form action={handleSend}><input name="text" /></form></>);}83. What is the
usehook and how is it different fromuseEffect+ fetch?usereads the value of a Promise or Context during render. When given a Promise, it suspends the component until the promise resolves (handled by the nearest<Suspense>boundary) and then returns the resolved value. UnlikeuseEffect,usecan be called conditionally and inside loops, and the resolved data is available synchronously after suspension, so there's noloadingstate to thread through the tree.import { use, Suspense } from 'react';function Profile({ userPromise }) {const user = use(userPromise); // suspends until resolvedreturn <h1>{user.name}</h1>;}// Server Component: render runs once per request, so the promise is stable.// In a Client Component, create the promise outside render (or via `cache()`)// to avoid making a new one on every re-render.async function Page() {const userPromise = fetchUser();return (<Suspense fallback={<p>Loading...</p>}><Profile userPromise={userPromise} /></Suspense>);}84. How does the new form
actionprop work in React 19?React 19 lets you pass a function directly to
<form action>(and<button formAction>). React calls the function with aFormDataargument when the form is submitted, runs it inside a transition, and resets uncontrolled inputs on success. Combine it withuseActionStateoruseFormStatusfor pending state and error handling without manualonSubmitplumbing.import { useFormStatus } from 'react-dom';function SubmitButton() {const { pending } = useFormStatus();return <button disabled={pending}>{pending ? 'Saving...' : 'Save'}</button>;}function ProfileForm() {async function save(formData) {await updateProfile(Object.fromEntries(formData));}return (<form action={save}><input name="name" /><SubmitButton /></form>);}85. Why might
useFormStatusalways reportpending: false?The Hook reads the status of a parent form. Calling it in the same component that returns the form does not subscribe to that form; move it into a child rendered inside the form.
import { useFormStatus } from "react-dom";function SubmitButton() {const { pending } = useFormStatus();return (<button type="submit" disabled={pending}>{pending ? "Saving…" : "Save"}</button>);}Render this beneath
<form action={save}>. See useFormStatus.86. How do deferred rendering and debouncing differ for search?
A deferred value lets React prioritize urgent UI while preparing results for a newer value. It has no fixed delay and does not by itself reduce the number of network requests.
Debouncing waits for a quiet interval before starting work, which can reduce requests but adds intentional latency. Use request cancellation or stale-response protection with either approach; keeping typing responsive does not guarantee that the latest response wins. See deferred values and requests.
Routing and navigation behavior
87. How do you handle nested routes and route parameters in React Router?
Nested routes allow you to create hierarchies of components, and
useParamshelps access dynamic route parameters.Key techniques:
<Outlet>: Renders child routes within a parent layoutuseParams: Retrieves route parameters for dynamic routing
import {BrowserRouter,Routes,Route,Outlet,useParams,} from 'react-router-dom';function UserProfile() {const { userId } = useParams();return <h2>User ID: {userId}</h2>;}function App() {return (<BrowserRouter><Routes><Route path="user/:userId" element={<Outlet />}><Route path="profile" element={<UserProfile />} /></Route></Routes></BrowserRouter>);}88. What is the difference between BrowserRouter and HashRouter?
- BrowserRouter: Uses the HTML5 History API to manage navigation, enabling clean URLs without the hash (
#). It requires server-side configuration to handle routes correctly, especially for deep linking. - HashRouter: Uses the hash (
#) portion of the URL to simulate navigation. It doesn't require server-side configuration, as the hash is never sent to the server. This makes it suitable for environments where server-side routing isn't possible (e.g., static hosting).
89. How React Router is different from the history library?
React Router is a routing library for React that provides a declarative API for defining routes and handling navigation. It manages components and URLs.
History library is a lower-level utility that only manages browser history (e.g., pushing and popping history entries). It doesn't handle UI rendering or routing, making it more generic and not React-specific.
React Router uses the history library internally but adds additional features like routing and component management.
90. What are the
<Router>components of React Router v6?In React Router v6, the key
<Router>components are:<BrowserRouter>: Uses the HTML5 history API to keep the UI in sync with the URL. It's commonly used for web applications.<HashRouter>: Uses URL hash fragments (#) to manage routing, making it suitable for static file hosting or legacy browsers that don't support the HTML5 history API.<MemoryRouter>: Keeps the URL in memory (no address bar changes), useful for non-browser environments like tests or embedded apps.<StaticRouter>: Used for server-side rendering (SSR), where routing is handled without a browser, typically in Node.js environments.
Each of these routers serves different use cases but provides the same routing functionality within a React app.
91. What is the purpose of the push and replace methods of history?
The push and replace methods of the history library are used to manage the browser's history stack and control navigation.
push:- Adds a new entry to the history stack, which means the user can navigate back to it using the browser's back button.
- Example:
history.push('/new-page')
replace:- Replaces the current entry in the history stack with a new one, meaning the user cannot go back to the previous page using the back button.
- Example:
history.replace('/new-page')
92. How would you implement route guards or private routes in React?
To implement private routes, create a component that checks if the user is authenticated before rendering the desired route.
Example:
import { Navigate } from 'react-router-dom';function PrivateRoute({ children }) {return isAuthenticated ? children : <Navigate to="/login" />;}PrivateRoute: Checks authentication and either renders the children (protected routes) or redirects to the login page.<Navigate>: Replaces the deprecated<Redirect>for redirecting in React Router v6+.
93. How do you handle 404 errors or page not found in React Router?
To handle 404 errors or page not found in React Router, create a catch-all route at the end of your route configuration that renders a custom 404 component.
Example:
import { Routes, Route } from 'react-router-dom';function NotFound() {return <h1>404 - Page Not Found</h1>;}function App() {return (<Routes><Route path="/" element={<Home />} /><Route path="/about" element={<About />} /><Route path="*" element={<NotFound />} /></Routes>);}In this example, the
NotFoundcomponent is rendered when no other routes match the URL, indicating a 404 error.94. How do you perform an automatic redirect after login in React Router?
To perform an automatic redirect after login in React Router, use the
useNavigatehook to navigate to the desired route after successful authentication.Example:
import { useNavigate } from 'react-router-dom';function Login() {const navigate = useNavigate();const handleLogin = () => {// Perform login logicnavigate('/dashboard');};return (<div><button onClick={handleLogin}>Login</button></div>);}In this example, the
handleLoginfunction navigates to the/dashboardroute after successful login.95. Which state belongs in the URL rather than only in React state?
Put shareable, navigable choices such as search terms, filters, sorting, and pagination in the URL when Back, refresh, and copied links should reproduce the view. Keep transient interaction details such as hover or an unfinished password outside it.
Parse and validate values, supply defaults, and choose push versus replace based on the desired history behavior. Avoid duplicating URL state into local state without a clear synchronization policy. See React Router state management.
96. How do React Router declarative, data, and framework modes differ?
Declarative mode supplies URL matching and navigation through components such as
BrowserRouter. Data mode adds route loaders, actions, and pending-state coordination through a data router. Framework mode adds build integration and route-module conventions, including rendering strategy support.Choose the mode before proposing a loader or server-rendering API. A component under plain
BrowserRouterdoes not gain data-router capabilities simply by calling a data Hook. See choosing a mode.Internationalization and accessible interfaces
97. What are React Portals used for?
React Portals allow rendering children into a DOM node outside the parent component's hierarchy. This is useful for modals or tooltips that need to escape parent overflow or z-index constraints.
Find in-depth explanations and track study progress here ->
98. How do you localize React applications?
Localization typically involves libraries like react-i18next or react-intl. Set up translation files for different languages and configure the library within your app using provided hooks or components.
// Example using react-i18nextimport { useTranslation } from 'react-i18next';const MyComponent = () => {const { t } = useTranslation();return <p>{t('welcome_message')}</p>;};Find in-depth explanations and track study progress here ->
99. What is
react-intl?react-intlis a library that provides internationalization (i18n) support for React applications. It helps in formatting numbers, dates, strings, and handling translation/localization. It integrates with theIntlAPI in JavaScript to provide locale-specific data and translation management.100. What are the main features of
react-intl?- Formatted text: Helps in formatting messages and strings with placeholders.
- Number formatting: Allows for formatting numbers, currencies, and percentages according to the locale.
- Date and time formatting: Helps in formatting dates and times in various formats based on the locale.
- Plural and gender support: Provides plural and gender-aware string formatting.
101. What are the two ways of formatting in
react-intl?- Component-based formatting: Using React components like
<FormattedMessage />,<FormattedNumber />,<FormattedDate />, etc., to format content. - Hook-based formatting: Using hooks like
useIntlfor formatting messages, numbers, or dates imperatively within components.
102. How to use
FormattedMessageas a placeholder usingreact-intl?You can use the
FormattedMessagecomponent to handle placeholders within strings. Placeholders are replaced dynamically with variables in the translated string.import { FormattedMessage } from 'react-intl';function WelcomeMessage() {return (<FormattedMessageid="welcome"defaultMessage="Hello, {name}!"values={{ name: 'John' }}/>);}Here,
{name}is a placeholder, andJohnwill replace it.103. How to access the current locale with React Intl?
You can access the current locale using the
useIntlhook or theIntlProvider'slocaleprop.Using
useIntl:import { useIntl } from 'react-intl';function LocaleDisplay() {const intl = useIntl();return <div>Current locale: {intl.locale}</div>;}Using
IntlProvider:<IntlProvider locale="en" messages={messages}><MyComponent /></IntlProvider>Here,
locale="en"defines the current locale.104. How to format date using
react-intl?You can format dates using the
<FormattedDate />component or theuseIntlhook'sformatDatemethod.Using
<FormattedDate />component:import { FormattedDate } from 'react-intl';function DateComponent() {return (<FormattedDatevalue={new Date()}year="numeric"month="long"day="2-digit"/>);}Using
useIntlhook:import { useIntl } from 'react-intl';function DateComponent() {const intl = useIntl();const formattedDate = intl.formatDate(new Date(), {year: 'numeric',month: 'long',day: '2-digit',});return <div>{formattedDate}</div>;}These methods allow you to format the date in a locale-sensitive manner.
105. What makes a portal-based modal accessible?
Use a native modal dialog or appropriate
role="dialog"andaria-modal="true"semantics. Give the dialog an accessible name, move focus inside when it opens, keep keyboard focus within a modal, support Escape, and restore focus appropriately when it closes. Prevent interaction with background content while the modal is active.A portal only changes DOM placement. Prefer a tested dialog primitive, then verify its keyboard behavior and labeling in the actual application. See the WAI-ARIA modal dialog pattern.
Practice the related React quiz →
106. How would you make form validation usable with a keyboard and screen reader?
Use visible labels connected to controls, associate error text with its input using
aria-describedby, and setaria-invalidwhen a value is invalid. Preserve entered data after failure and provide clear guidance for correction.On submission failure, consider an error summary or moving focus to the first invalid field. Do not communicate errors through color alone, and avoid announcing every keystroke as an urgent alert. See WAI form notifications.
Testing asynchronous behavior
107. How do you test asynchronous code in React components?
To test asynchronous code in React components, you can use
async/awaitwithwaitForfrom React Testing Library to handle asynchronous operations like data fetching or API calls.Example:
import { render, screen, waitFor } from '@testing-library/react';import MyComponent from './MyComponent';test('fetches data and renders it', async () => {render(<MyComponent />);await waitFor(() => {expect(screen.getByText('Data loaded')).toBeInTheDocument();});});In this example, the test waits for the data to be loaded before asserting that the text 'Data loaded' is present.
108. How do you mock API calls in React component tests?
To mock API calls in React component tests, you can use Jest's
jest.mockto mock the API module and return mock data. This allows you to simulate API responses without making actual network requests.Example:
import { render, screen } from '@testing-library/react';jest.mock('./api', () => ({fetchData: jest.fn(() => Promise.resolve('mocked data')),}));import MyComponent from './MyComponent';test('fetches data and renders it', async () => {render(<MyComponent />);expect(screen.getByText('Loading...')).toBeInTheDocument();expect(await screen.findByText('mocked data')).toBeInTheDocument();});In this example, the
fetchDatafunction from theapimodule is mocked to return 'mocked data' for testing purposes.109. How do you test React hooks in functional components?
Render the hook inside a test using
renderHookfrom@testing-library/react, then callactto drive any state updates.import { renderHook, act } from '@testing-library/react';import useCounter from './useCounter';test('increments counter', () => {const { result } = renderHook(() => useCounter());act(() => {result.current.increment();});expect(result.current.count).toBe(1);});Older sources import
renderHookfrom@testing-library/react-hooks. That package was deprecated and merged into@testing-library/reactin v13; use the import shown above.110. How do you test custom hooks in React?
Same approach as above: render the hook with
renderHookand assert onresult.current. For hooks that depend on context (e.g., a router or theme provider), pass awrapperoption.import { renderHook, act } from '@testing-library/react';import useCustomHook from './useCustomHook';test('hook behavior', () => {const { result } = renderHook(() => useCustomHook());act(() => {result.current.doSomething();});expect(result.current.value).toBe('expected value');});// With a context provider:const wrapper = ({ children }) => (<MyProvider value="test">{children}</MyProvider>);const { result } = renderHook(() => useCustomHook(), { wrapper });111. What is Snapshot Testing in React?
Snapshot Testing in React is a testing technique that captures the rendered output of a component and saves it as a snapshot. Subsequent test runs compare the current output with the saved snapshot to detect any unexpected changes. If the output differs from the snapshot, the test fails, indicating that the component's output has changed.
Here's an example of using Snapshot Testing with Jest:
import React from 'react';import renderer from 'react-test-renderer';import MyComponent from './MyComponent';test('renders correctly', () => {const tree = renderer.create(<MyComponent />).toJSON();expect(tree).toMatchSnapshot();});In this example, the
renderer.createfunction renders theMyComponentand converts it to a JSON tree. ThetoMatchSnapshotfunction saves the snapshot of the component's output. Subsequent test runs compare the current output with the saved snapshot, ensuring the component's output remains consistent.112. How do you test React components that use context?
To test React components that use context, you can wrap the component in a context provider with the desired context values for testing. This allows you to simulate the context values and test the component's behavior based on those values.
Example:
import { render } from '@testing-library/react';import { MyContextProvider } from './MyContextProvider';import MyComponent from './MyComponent';test('renders correctly with context', () => {const { getByText } = render(<MyContextProvider value="test value"><MyComponent /></MyContextProvider>,);expect(getByText('test value')).toBeInTheDocument();});In this example, the
MyComponentis wrapped in aMyContextProviderwith a specific context value for testing. The test verifies that the component renders correctly with the provided context value.113. How do you test React components that use Redux?
To test React components that use Redux, you can use the
redux-mock-storelibrary to create a mock store with the desired state for testing. This allows you to simulate the Redux store and test the component's behavior based on the state.Example:
import { render } from '@testing-library/react';import configureStore from 'redux-mock-store';import { Provider } from 'react-redux';import MyComponent from './MyComponent';const mockStore = configureStore([]);test('renders correctly with Redux state', () => {const store = mockStore({ counter: 0 });const { getByText } = render(<Provider store={store}><MyComponent /></Provider>,);expect(getByText('Counter: 0')).toBeInTheDocument();});In this example, the
MyComponentis wrapped in aProviderwith a mock Redux store containing the initial state{ counter: 0 }for testing. The test verifies that the component renders correctly with the provided Redux state.114. How would you test a debounced input without waiting in real time?
Enable the runner's fake timers, type through
user-event, and advance the relevant delay insideactwhen it triggers React updates. ConfigureuserEvent.setup({ advanceTimers: jest.advanceTimersByTime })for Jest so its own scheduled work advances correctly.Assert that no request occurs before the delay and that the final value is submitted afterward. Flush pending timers and restore real timers during cleanup. See Testing Library fake timers.
Practice the related React quiz →
Senior
Senior developers with 5+ years of experience: practice evaluating architecture, performance, failure recovery, and migration trade-offs across a React application.
Rendering, concurrency, and performance
115. What is React Fiber?
React Fiber is a complete rewrite of the React core algorithm, designed to improve performance and enable new features like async rendering, error boundaries, and incremental rendering. It breaks down the rendering process into smaller chunks, allowing React to pause, abort, or prioritize updates as needed.
Find in-depth explanations and track study progress here ->
116. How would one optimize the performance of React contexts to reduce rerenders?
Optimizing context performance involves memoizing context values with useMemo, splitting contexts for isolated state changes, and employing selectors to rerender only necessary components.
const value = useMemo(() => ({ state, dispatch }), [state, dispatch]);Find in-depth explanations and track study progress here ->
117. What are concurrent features in React, and how do they improve rendering performance?
Concurrent features were introduced in React 18 (the experimental "Concurrent Mode" branding from React 17 is no longer used). They let React pause, interrupt, and resume rendering work instead of running it as a single blocking pass. This keeps the UI responsive: urgent updates like typing or clicks can preempt slower work like rendering a large list or filtering search results.
The features are opt-in via specific APIs (
useTransition,useDeferredValue, and<Suspense>for data fetching), not a global mode switch.118. How does React handle concurrent rendering with multiple updates and prioritize them?
React's scheduler assigns priority to updates based on how they're triggered. Updates from direct user interaction (click, input, focus) are treated as urgent and rendered synchronously. Updates wrapped in
startTransitionor read throughuseDeferredValueare non-urgent: React can interrupt them to handle a more urgent update, then resume. That's what allows a heavy filter or list render to coexist with typing into a search box without blocking it.119. How would you handle long-running tasks or expensive computations in React applications without blocking the UI?
To avoid blocking the UI, use Web Workers,
setTimeout, orrequestIdleCallbackfor offloading heavy computations. Alternatively, break tasks into smaller parts and use React's Suspense or useMemo to only recompute when necessary.Example using
setTimeoutfor deferring computation:const [data, setData] = useState(null);useEffect(() => {setTimeout(() => {const result = computeExpensiveData();setData(result);}, 0);}, []);120. What is the React Compiler?
The React Compiler is an opt-in build-time tool that analyzes your components and automatically inserts memoization equivalent to
useMemo,useCallback, andReact.memowhere it's safe. It removes the need for manual memoization in most cases. It enforces the Rules of React strictly: if your code violates them (e.g., mutating props, calling hooks conditionally), the compiler skips that component instead of producing incorrect output.121. What's the difference between
useTransitionanduseDeferredValue?Both mark updates as non-urgent so React can keep the UI responsive. The difference is where you put the control:
useTransitionwraps the state setter at the call site. You decide when a particular update should be a transition (e.g., a search submit).useDeferredValuewraps a value at the consumer. It hands you a lagging copy of the value that updates after urgent renders, useful when the data source isn't under your control (e.g., a value coming through props).
// useTransition: control at the dispatch siteconst [isPending, startTransition] = useTransition();startTransition(() => setQuery(input));// useDeferredValue: control at the read siteconst deferredQuery = useDeferredValue(query);return <ExpensiveResults query={deferredQuery} />;122. What problem does
useSyncExternalStoresolve?It connects React to mutable state outside React through
subscribe,getSnapshot, and optionallygetServerSnapshot. It helps keep store reads consistent with React's rendering lifecycle.Return a stable snapshot while the store is unchanged and a new immutable snapshot when it changes. For SSR, the server snapshot and initial hydration snapshot must agree. Returning a new object on every read can cause repeated updates. See useSyncExternalStore.
123. Why does wrapping an expensive calculation in
startTransitionstill freeze typing?The transition callback executes immediately. Running a long synchronous calculation inside it still blocks the main thread; only the state updates it marks receive transition scheduling.
Move CPU-bound computation to a worker or break it into yielding chunks. For expensive React rendering, isolate the dependent subtree so React can schedule it separately. Also remember that React 19 state updates after
awaitcurrently need anotherstartTransitionto be marked as transitions. See transition caveats.124. How would you investigate a React page that feels slow?
Reproduce a specific interaction on representative hardware and data. Use browser performance tools to separate network delays, long JavaScript tasks, layout, and paint from React rendering work. Use React DevTools or
<Profiler>to identify costly component commits.Measure before and after a targeted change. A render-count reduction is not enough if interaction latency remains unchanged, and development checks can distort measurements. See React Profiler.
Practice the related React quiz →
125. When should you virtualize a long list, and what can it break?
Virtualization mounts a moving window of rows rather than every item, reducing rendering and DOM costs for large lists. Consider it when measurement shows list size is the bottleneck, not simply because a list exists.
Handle stable item keys, variable heights, scroll position, and focus when rows leave the window. Unmounted content may be unavailable to browser find or crawlers, and accessibility needs testing. See TanStack Virtual.
126. How would you introduce React Compiler into an existing application?
First fix violations of the Rules of React and establish behavior tests and performance baselines. Enable the compiler in a controlled scope, inspect diagnostics, and compare representative interactions before expanding.
Do not delete every manual memoization call as the first step. Some code may rely incorrectly on identity, and some components may not compile. Confirm build configuration and library compatibility. See incremental compiler adoption.
127. Why can a component wrapped in
React.memostill re-render?By default,
memocompares each prop with its previous value usingObject.is. A newly created object, array, or callback counts as a changed prop even if its contents look the same. Updates to the component's own state or a context it reads can also trigger a render.Start by identifying the changed input. Prefer simple props and local state; use
useMemooruseCallbackwhen stable references would avoid measured work. A custom comparator must account for every prop, including functions, or an event handler can keep an old closure. Memoization is a performance optimization, not a guarantee that React will never render the component. See React memo behavior and pitfalls.Practice the related React quiz →
128. How do render and commit differ, and why must rendering stay pure?
During render, React calls components to calculate the next UI. During commit, React applies the required changes to the DOM. A component can render without causing a DOM change, and concurrent rendering can restart or discard unfinished render work before commit.
For example, sending an analytics request from a component's body can report an event for UI that never appeared. Put interaction-specific work in event handlers and synchronization in Effects, with cleanup where needed. Rendering should not mutate props, state, or pre-existing external objects. See render and commit and component purity.
Practice the related React quiz →
Server rendering and data architecture
129. Explain what React hydration is?
Hydration involves attaching event listeners and making server-rendered HTML interactive on the client side. After server-side rendering, React initializes dynamic behavior by attaching event handlers.
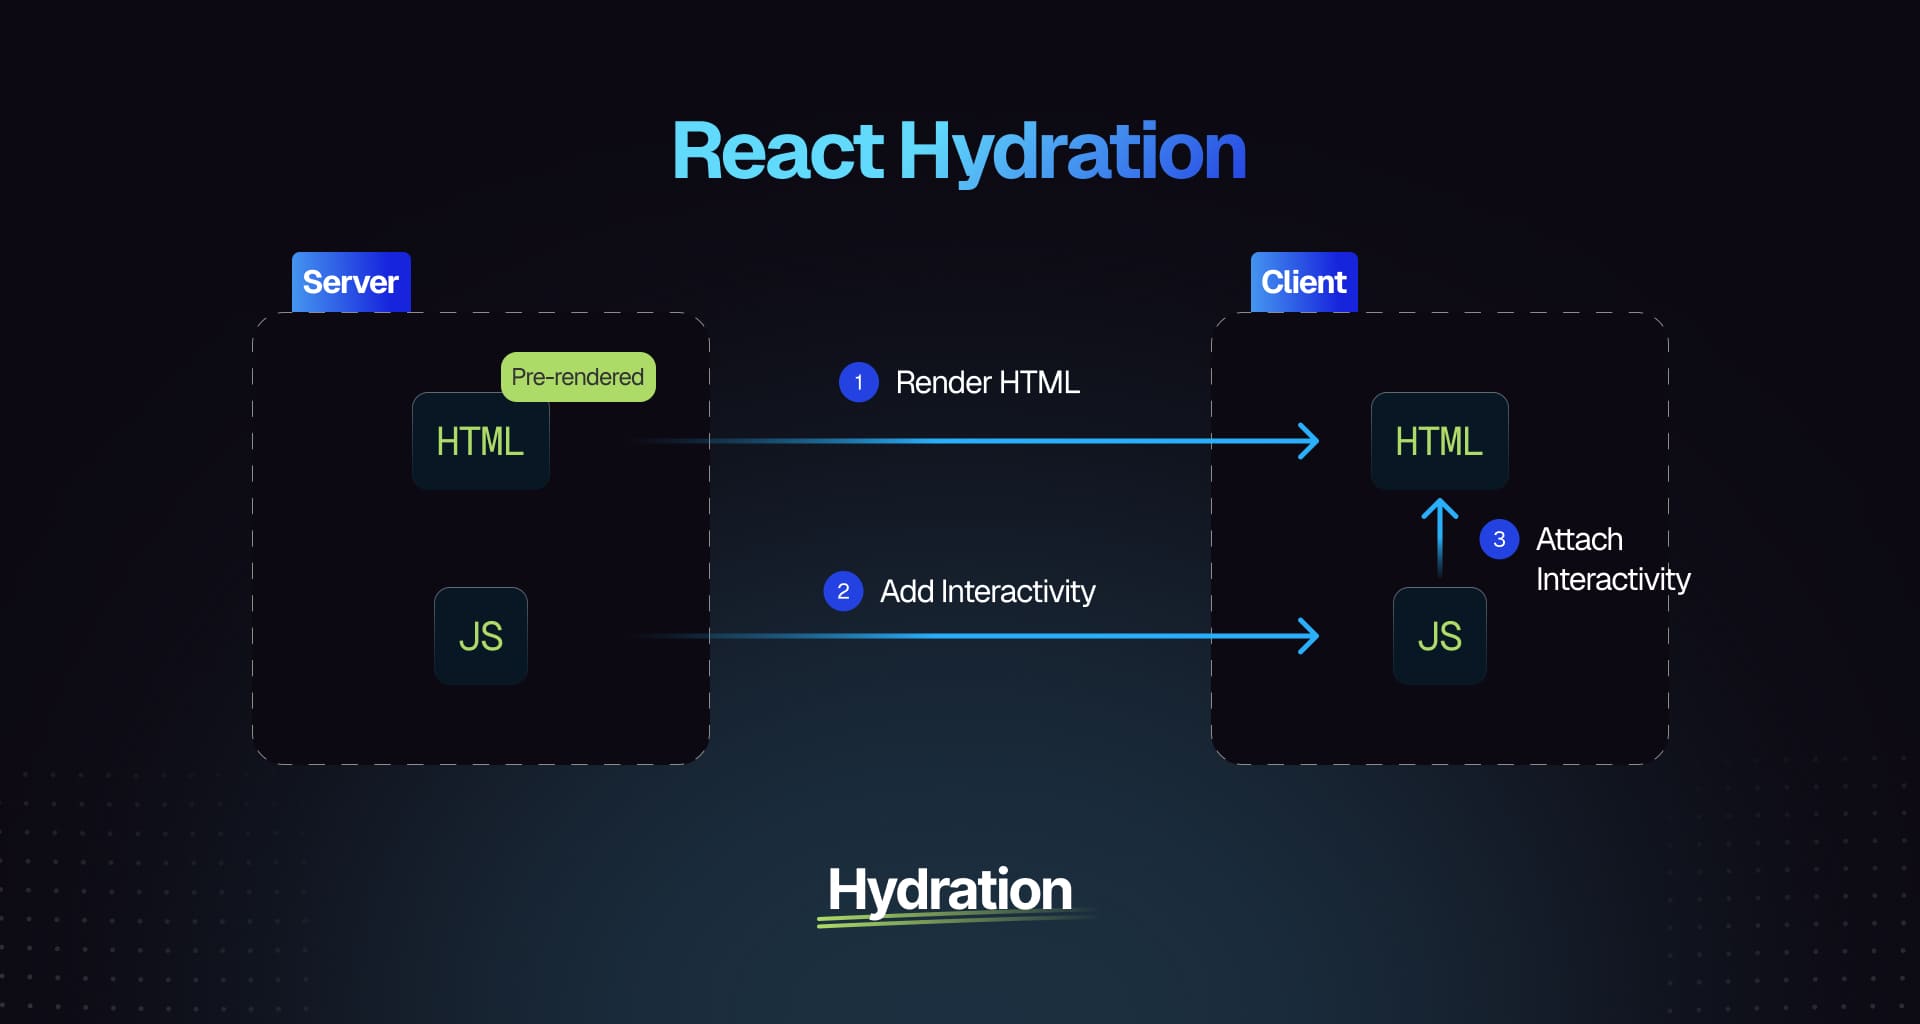
Find in-depth explanations and track study progress here ->
130. How do you decide between using React state, context, and external state managers?
Choosing between React state, context, and external state managers depends on your application's complexity. Use React state for local component state, context for global state shared across multiple components, and external managers like Redux or MobX for complex state management requiring advanced features like optimizing re-renders.
Find in-depth explanations and track study progress here ->
131. Explain server-side rendering of React applications and its benefits
Server-side rendering (SSR) involves rendering components on the server before sending fully rendered HTML to clients, improving initial load times and SEO through efficient hydration processes.
Find in-depth explanations and track study progress here ->
132. Explain static generation of React applications
Static generation pre-renders HTML at build time instead of runtime; this approach enhances performance by delivering static content quickly while improving SEO outcomes.
Find in-depth explanations and track study progress here ->
133. What are React Server Components?
Server Components render on the server and stream their output to the client. They never ship JavaScript to the browser, can
awaitdata directly (nouseEffectround-trip), and can access server-only resources like the database or filesystem. They cannot use hooks likeuseStateoruseEffect, attach event handlers, or use browser-only APIs; those still belong in Client Components (files marked'use client').134. What's the difference between Server Components and Client Components?
Server Component Client Component Where it runs Server (build or request time) Browser (after hydration) JS shipped None Yes State / effects Not allowed Allowed Event handlers Not allowed Allowed Can awaitdata directlyYes No (use useor fetch in effect)Can import the other Yes (renders Client Components) No (cannot import Server Components, only receive them as props/children) Server Components are typically the outer shell that fetches data; Client Components are the interactive leaves marked with
'use client'.135. How would you diagnose a hydration mismatch?
Compare the server HTML and first client render using the same data. Check invalid HTML nesting, random IDs, current timestamps, locale or time-zone differences, and render branches that depend on
window.Make initial output deterministic, then apply browser-specific changes after hydration if needed.
suppressHydrationWarningis a narrow escape hatch for unavoidable differences, not a repair strategy. See hydration troubleshooting.Practice the related React quiz →
136. How would you choose Suspense boundary locations for a dashboard?
Group content that should appear together, then give independently useful regions their own boundaries. For example, show the account summary while a slower activity feed loads, with a placeholder that reserves space.
One boundary around the entire page can hide useful content; one around every small element can create distracting reveal sequences. Decide how already-visible content behaves during navigation and pair loading boundaries with error recovery. See revealing nested content.
Practice the related React quiz →
137. What can cross a Server Component to Client Component boundary?
Props must use React-supported serializable values. The protocol supports more than JSON, including certain built-ins and React elements, but arbitrary class instances and ordinary function closures cannot cross as general props. Server Function references are a supported special case.
Keep database clients and secrets on the server. Passing rendered server content as children is different from importing a server implementation into client code. See serializable boundary types.
138. What must a Server Function validate before changing data?
Treat arguments as untrusted input. Authenticate the caller, authorize the specific operation and resource, and validate the payload on the server. A disabled button or hidden client route provides none of those guarantees.
Also design duplicate-submission and retry behavior for the operation, especially payments or record creation. A Server Function is reachable through a network boundary and should be reviewed like an endpoint. See Server Function security.
139. How is server state different from local UI state?
Server state represents remotely owned data that can become stale or change outside the current browser. Its data layer needs policies for caching, refetching, request deduplication, and invalidation after writes.
Local UI state includes things like an open menu or an unsaved draft. Copying cached server data into a second global store creates competing sources of truth unless the copy has an explicit purpose, such as a draft with conflict handling. See TanStack Query's overview.
Practice the related React quiz →
140. How would you handle overlapping optimistic edits to the same record?
Track pending operations by identity and derive optimistic output from the confirmed base plus those operations. On success, reconcile the server result; on failure, remove or compensate for the failed operation without undoing newer edits.
Avoid restoring one old snapshot after a failure because it can erase a later success. Consider server versions or operation ordering for conflicts.
useOptimistichelps display pending changes, but persistence and conflict policy remain application responsibilities. See useOptimistic.141. Why can a Redux selector cause re-renders after unrelated actions?
React Redux's
useSelectorcompares the selected result with the previous result using strict===equality by default. A selector that creates a new object or array whenever it runs can therefore trigger a render even when the fields the component uses have not changed.// A new object whenever the selector runs:const summary = useSelector((state) => ({ count: state.counter.count }));// Select the primitive value directly when that is all the UI needs:const count = useSelector((state) => state.counter.count);These are alternative selections inside a component beneath a Redux
Provider, withuseSelectorimported fromreact-redux. For several fields, use separate selections, a memoized selector, orshallowEqualwhen a shallow comparison matches the data. A stable result avoids store-triggered renders for unchanged selections; it does not stop renders caused by parents, local state, or context. See selector equality comparisons.142. How would you remove a data-fetching waterfall across nested components?
Draw the dependency graph first. If requests are independent, start them together in a route loader or server data layer instead of waiting for each child to mount. Preload genuinely likely next-step data where the framework supports it.
Keep truly dependent requests sequential, and use separate loading boundaries where partial results are useful. Moving the same waterfall to the server may reduce round trips but does not eliminate serial dependencies. See parallel and sequential fetching.
Practice the related React quiz →
143. How would you choose between static generation, SSR, and client rendering?
Choose per route using freshness, personalization, discovery, and interaction requirements. A public reference article may suit static HTML; personalized request-time content may need SSR; a private tool may accept client loading behind authentication.
Compare operational cost, cacheability, first useful content, and hydration work. Server Components are a separate architectural capability that can complement server rendering; they are not another name for SSR. See React Router rendering strategies.
Practice the related React quiz →
Component contracts and legacy migrations
144. What is the Flux pattern?
The Flux pattern manages application state through unidirectional data flow, simplifying debugging and enhancing maintainability with clear separation of concerns between Dispatcher, Stores, Actions, and Views.
Find in-depth explanations and track study progress here ->
145. What are some pitfalls of using context in React?
Context in React can lead to performance issues if not handled carefully, causing unnecessary re-renders of components that consume the context, even if only part of the context changes. Overusing context for state management can also make the code harder to maintain and understand. It's best to use context sparingly and consider other state management solutions like Redux or Zustand for more complex scenarios.
Find in-depth explanations and track study progress here ->
146. What is Shallow Renderer in React testing?
Shallow rendering renders a component one level deep: its children are not rendered, only referenced as React elements. The intent was to isolate the component under test from its children.
The two implementations were
react-test-renderer/shallow(a low-level API) and Enzyme'sshallow()(a popular wrapper around it).// Enzyme-style example (historical)import { shallow } from 'enzyme';const wrapper = shallow(<Button label="Click Me" />);expect(wrapper.text()).toBe('Click Me');Don't use shallow rendering in new code. Enzyme is unmaintained and has no official React 17+ adapter. The React docs recommend React Testing Library, which renders components the way users see them and asserts on accessible output, so tests don't break on internal refactors. Use RTL's
renderwithscreen.getByRole/getByTextinstead.147. What are the key differences between shallow rendering and full DOM rendering in React tests?
- Shallow Rendering: Renders only the component being tested, without rendering its child components. Useful for isolated unit testing.
- Full DOM Rendering: Mounts the entire component tree, including children, providing a complete DOM structure. Ideal for integration tests.
148. What is the TestRenderer package in React?
react-test-rendererwas a utility for rendering React components to a plain JS object tree (rather than the DOM), useful for snapshot testing without a browser environment.import TestRenderer from 'react-test-renderer';import MyComponent from './MyComponent';const renderer = TestRenderer.create(<MyComponent />);const tree = renderer.toJSON();expect(tree).toMatchSnapshot();react-test-rendereris deprecated as of React 19, and the React team recommends migrating off it. For component tests, use React Testing Library with a DOM environment (jsdomfor Jest, or built-in for Vitest). For snapshot tests, serialize the DOM produced by RTL'srender:import { render } from '@testing-library/react';const { container } = render(<MyComponent />);expect(container).toMatchSnapshot();149. Why can defining a component inside another component reset its state?
Each parent render creates a new function for the nested component definition. When React encounters that function as an element type, it sees a different component type at the same position, so it can replace the subtree and reset its state.
Move component definitions to module scope and pass the values they need through props. This also avoids repeatedly losing input focus and restarting Effects. The problem is using a newly created function as a component type, not merely creating an event-handler closure inside a component. See why nested component definitions reset state.
Practice the related React quiz →
150. How would you design a reusable component that supports both controlled and uncontrolled usage?
Define who owns the value: a controlled API supplies
valueandonValueChange; an uncontrolled API supplies an initialdefaultValueand lets the component own subsequent updates. Keep that mode stable for the instance's lifetime.Specify callback timing, reset behavior, accessible naming, and how refs are exposed. Avoid an Effect that repeatedly copies a controlled prop into internal state. Test both modes through the public API, including parent-driven updates. See controlled and uncontrolled components.
Practice the related React quiz →
Conclusion
These 150 questions should give you a good idea on what to expect in React interviews. If you're looking for more in-depth React interview preparation materials, check out these:
- React Interview Playbook
- Practice React coding interview questions
- Practice React quiz interview questions
You can also explore the Top ReactJS Interview Questions repo - a collection of 50 commonly asked questions compiled from real interview experiences.
- 50+ Must-know JavaScript Interview Questions by Ex-interviewers (2026)50+ JavaScript interview questions for 2026, with code examples and answers curated by ex-FAANG interviewers. Covers ES2025: immutable array methods, new Set methods (union/intersection), structuredClone, and modern async patterns.作者GreatFrontEnd Team49 分钟阅读May 20, 2026

JavaScript is an essential skill for anyone pursuing a career in web development, but securing a job in this field can be particularly challenging for newcomers. A critical part of the hiring process is the technical interview, where your JavaScript expertise will be thoroughly evaluated.
To support your preparation and build your confidence, we've put together a list of the top 75+ must-know JavaScript interview questions and answers frequently encountered in interviews.
What's new in the May 2026 update
25 new questions on modern JavaScript: optional chaining, nullish coalescing,Promise.allSettled/Promise.any,AbortController, generators,error.cause, immutable array methods (toSorted/toReversed),Object.groupBy, Setunion/intersection/difference, iterator helpers,structuredClone, private class fields, and more; see the Modern JavaScript (ES2020+) section below.If you're looking for additional JavaScript interview preparation materials, also check out these resources:
- Front End Interview Playbook
- Practice JavaScript coding interview questions
- Practice JavaScript quiz interview questions
1. What is Debouncing in JavaScript?
Debouncing is a smart way to handle events that fire repeatedly within a short time, such as typing in a search box or resizing a window. Instead of executing a function every single time the event is triggered, debouncing ensures the function runs only after the event stops firing for a specified time.
Why is it important?
It prevents performance bottlenecks by reducing the number of unnecessary function calls, making your app smoother and more efficient.
How does it work?
The
debouncemethod delays a function's execution until after a defined "waiting period" has passed since the last event. Let's see an example using Lodash:import { debounce } from 'lodash';const searchInput = document.getElementById('search-input');const debouncedSearch = debounce(() => {// Perform the search operation hereconsole.log('Searching for:', searchInput.value);}, 300);searchInput.addEventListener('input', debouncedSearch);Key features of debouncing
- Delay-based execution: Runs the function after user activity has stopped
- Improves performance: Prevents excessive computations or network calls during rapid events
- Flexible configurations: Supports leading (immediate) and trailing (delayed) execution, and even a maximum wait time
How is it different from throttling?
While debouncing waits until user activity stops, throttling ensures the function runs at fixed intervals, regardless of how often the event occurs. Each technique suits specific use cases, such as search boxes (debouncing) versus scroll events (throttling).
Practice implementing a Debounce function on GreatFrontEnd ->
2. Understanding
Promise.all()Promise.all()is a powerful method in JavaScript that allows you to handle multiple asynchronous tasks simultaneously. It takes an array of promises and returns a single promise that resolves when all the promises resolve, or rejects if any one of them fails.This method is perfect when you need to wait for several independent asynchronous tasks to finish before proceeding, like fetching data from multiple APIs.
Here's how
Promise.all()works with multiple API requests:const promise1 = fetch('https://api.example.com/data/1');const promise2 = fetch('https://api.example.com/data/2');const promise3 = fetch('https://api.example.com/data/3');Promise.all([promise1, promise2, promise3]).then((responses) => {// Executes only when all promises are resolved.console.log('All responses:', responses);}).catch((error) => {// Catches any error from any promise.console.error('Error:', error);});Key Features of
Promise.all- Concurrency: Runs multiple asynchronous tasks in parallel, improving performance.
- All-or-nothing resolution: The promise resolves only when all tasks succeed, or it rejects if any one fails.
- Simplifies workflows: Ideal for managing interdependent or independent tasks efficiently.
Practice implementing a
Promise.allfunction on GreatFrontEnd ->3. What is Deep Equal?
Deep equality involves comparing two objects or arrays to determine if they are structurally identical. Unlike shallow equality, which only checks if object references are the same, deep equality examines whether all nested values are equal.
Here's a simple
deepEqualimplementation:function deepEqual(obj1, obj2) {if (obj1 === obj2) return true;if (obj1 == null ||typeof obj1 !== 'object' ||obj2 == null ||typeof obj2 !== 'object')return false;let keys1 = Object.keys(obj1);let keys2 = Object.keys(obj2);if (keys1.length !== keys2.length) return false;for (let key of keys1) {if (!keys2.includes(key) || !deepEqual(obj1[key], obj2[key])) return false;}return true;}// Example usageconst object1 = {name: 'John',age: 30,address: {city: 'New York',zip: '10001',},};const object2 = {name: 'John',age: 30,address: {city: 'New York',zip: '10001',},};console.log(deepEqual(object1, object2)); // trueThis function uses recursion to check nested properties, ensuring all values match in both objects or arrays. It's a critical concept for comparing complex data structures in frontend development.
Practice implementing Deep Equal on GreatFrontEnd ->
4. Understanding Event Emitters
An EventEmitter is a utility that enables objects to listen for and emit events. It implements the observer pattern, allowing you to subscribe to actions or changes and handle them when triggered. This concept is fundamental in both JavaScript and Node.js for managing event-driven programming.
const eventEmitter = new EventEmitter();// Subscribe to an eventeventEmitter.on('customEvent', (data) => {console.log('Event emitted with data:', data);});// Emit the eventeventEmitter.emit('customEvent', { message: 'Hello, world!' });EventEmitter allows flexible communication between components, making it useful in scenarios like state management, logging, or real-time updates.
Practice implementing an Event Emitter on GreatFrontEnd ->
5. What is
Array.prototype.reduce()?Array.prototype.reduce()is a versatile method for iterating through an array and reducing it to a single value. It processes each element with a callback function, carrying over an accumulator to build the final result. Common use cases include summing numbers, flattening arrays, or even building complex objects.const numbers = [1, 2, 3, 4, 5];const sum = numbers.reduce(function (accumulator, currentValue) {return accumulator + currentValue;}, 0);console.log(sum); // Output: 15Why Use
reduce?- Flexibility: Handles various operations, from aggregations to transformations.
- Functional programming: Encourages declarative and clean code.
- Powerful: Can replace loops or multiple utility methods in a single chain.
Practice implementing
Array.protoype.reduceon GreatFrontEnd ->6. Simplifying arrays – Flattening
Flattening transforms a nested array into a single-level array, making it more manageable. Since ES2019, JavaScript provides the
Array.prototype.flat()method for this.const nestedArray = [1, [2, [3, [4, [5]]]]];const flatArray = nestedArray.flat(Infinity);console.log(flatArray); // Output: [1, 2, 3, 4, 5]Here,
.flat(Infinity)ensures the entire array is flattened, no matter how deep. For less deeply nested arrays, you can specify the depth.Before ES2019, custom solutions were common:
// Custom recursive array flattenerfunction flattenArray(arr) {return arr.reduce((acc, val) =>Array.isArray(val) ? acc.concat(flattenArray(val)) : acc.concat(val),[],);}const nestedArray = [1, [2, [3, [4, [5]]]]];const flatArray = flattenArray(nestedArray);console.log(flatArray); // Output: [1, 2, 3, 4, 5]Practice implementing a flatten function on GreatFrontEnd ->
7. Merging data structures
Merging data is crucial when handling complex structures. JavaScript provides efficient ways to combine objects or arrays.
Merging objects
Using the spread operator
The spread operator is concise and intuitive for merging objects:
const obj1 = { a: 1, b: 2 };const obj2 = { b: 3, c: 4 };const mergedObj = { ...obj1, ...obj2 };console.log(mergedObj); // Output: { a: 1, b: 3, c: 4 }Using
Object.assign()Another approach is
Object.assign():const obj1 = { a: 1, b: 2 };const obj2 = { b: 3, c: 4 };const mergedObj = Object.assign({}, obj1, obj2);console.log(mergedObj); // Output: { a: 1, b: 3, c: 4 }Merging arrays
Using the spread operator
const array1 = [1, 2, 3];const array2 = [4, 5, 6];const mergedArray = [...array1, ...array2];console.log(mergedArray); // Output: [1, 2, 3, 4, 5, 6]Using
Array.concat()const array1 = [1, 2, 3];const array2 = [4, 5, 6];const mergedArray = array1.concat(array2);console.log(mergedArray); // Output: [1, 2, 3, 4, 5, 6]Deep merging
For nested objects, you'll need custom logic or libraries:
function deepMerge(target, source) {for (const key in source) {if (source[key] instanceof Object && key in target) {Object.assign(source[key], deepMerge(target[key], source[key]));}}Object.assign(target || {}, source);return target;}const obj1 = { a: 1, b: { x: 10, y: 20 } };const obj2 = { b: { y: 30, z: 40 }, c: 3 };const mergedObj = deepMerge(obj1, obj2);console.log(mergedObj); // Output: { a: 1, b: { x: 10, y: 30, z: 40 }, c: 3 }Alternatively, libraries like Lodash simplify deep merging:
const _ = require('lodash');const obj1 = { a: 1, b: { x: 10, y: 20 } };const obj2 = { b: { y: 30, z: 40 }, c: 3 };const mergedObj = _.merge({}, obj1, obj2);console.log(mergedObj); // Output: { a: 1, b: { x: 10, y: 30, z: 40 }, c: 3 }Practice implementing a deep merge function on GreatFrontEnd ->
8. Selecting DOM Elements –
getElementsByClassNamegetElementsByClassNamefetches elements matching a specific class and returns them as a liveHTMLCollection.// Fetch and loop through elementsconst elements = document.getElementsByClassName('example');for (let i = 0; i < elements.length; i++) {console.log(elements[i].textContent);}Multiple classes
You can combine class names for more specific selections:
const elements = document.getElementsByClassName('class1 class2');Live collections
HTMLCollectionupdates automatically if DOM elements are added or removed.For more complex selectors, use
querySelectorAll:const elements = document.querySelectorAll('.example');Practice Using
getElementsByClassNameon GreatFrontEnd ->9. Avoiding redundant computations with memoization
Memoization saves computed results to avoid redundant calculations.
function expensiveOperation(n) {console.log('Calculating for', n);return n * 2;}// Memoize functionfunction memoize(func) {const cache = {};return function (n) {if (cache[n] !== undefined) {console.log('From cache for', n);return cache[n];}const result = func(n);cache[n] = result;return result;};}const memoizedExpensiveOperation = memoize(expensiveOperation);console.log(memoizedExpensiveOperation(5)); // Calculating for 5, 10console.log(memoizedExpensiveOperation(5)); // From cache for 5, 10Libraries like Lodash also provide a
memoizeutility.Practice implementing a memoize function on GreatFrontEnd ->
10. Safer nested property access:
getAccessing nested object properties risk errors if any property is undefined. Tools like Lodash's
getor JavaScript's optional chaining (?.) help mitigate this.const user = { address: { city: 'New York' } };console.log(_.get(user, 'address.city')); // 'New York'console.log(user.address?.city); // 'New York'These methods safely retrieve nested properties without crashing the program.
Practice implementing a
getfunction on GreatFrontEnd ->11. Hoisting in JavaScript
Hoisting refers to how JavaScript moves variable and function declarations to the top of their scope during compilation. While only the declaration is hoisted (not the initialization), understanding hoisting helps in writing cleaner and bug-free code.
Hoisting with
varVariables declared with
varare hoisted and initialized asundefined. Accessing them before initialization results inundefined.console.log(foo); // undefinedvar foo = 1;console.log(foo); // 1Hoisting with
let,const, andclassVariables declared with
let,const, andclassare hoisted but exist in a "temporal dead zone" until their declaration is reached, causing aReferenceErrorif accessed early.console.log(y); // ReferenceErrorlet y = 'local';Function hoisting
Function declarations
Both the declaration and definition of functions are hoisted, allowing them to be called before their declaration.
foo(); // 'FOOOOO'function foo() {console.log('FOOOOO');}Function expressions
For function expressions, only the variable is hoisted, not the function itself.
console.log(bar); // undefinedbar(); // TypeError: bar is not a functionvar bar = function () {console.log('BARRRR');};Import statements
Imports are hoisted, making them available throughout the module. However, their initialization happens before the module code executes.
foo.doSomething(); // Works fineimport foo from './modules/foo';Best practices
Modern JavaScript uses
letandconstto avoid hoisting pitfalls. Declare variables at the top of their scope for better readability and use tools like ESLint to enforce best practices:By following these practices, you can write robust, maintainable code.
Read more about the concept of "Hoisting" on GreatFrontEnd ->
12. What are the differences between JavaScript variables created using
let,var, andconst?In JavaScript,
let,var, andconstare used to declare variables, but they differ in scope, initialization, redeclaration, reassignment, and behavior when accessed before declaration.Scope
Variables declared with
varare function-scoped or global, whileletandconstare block-scoped (confined to the nearest{}block).if (true) {var foo = 1;let bar = 2;const baz = 3;}console.log(foo); // 1console.log(bar); // ReferenceErrorconsole.log(baz); // ReferenceErrorInitialization
varandletcan be declared without initialization, butconstrequires an initial value.var a; // Validlet b; // Validconst c; // SyntaxError: Missing initializerRedeclaration
Variables declared with
varcan be redeclared, butletandconstcannot.var x = 10;var x = 20; // Allowedlet y = 10;let y = 20; // SyntaxError: Identifier 'y' has already been declaredReassignment
varandletallow reassignment, whileconstdoes not.let a = 1;a = 2; // Allowedconst b = 1;b = 2; // TypeError: Assignment to constant variableAccess before declaration
All variables are hoisted, but
varinitializes toundefined, whereasletandconstexist in a "temporal dead zone" until the declaration is reached.console.log(foo); // undefinedvar foo = 'foo';console.log(bar); // ReferenceErrorlet bar = 'bar';Best practices
- Use
constfor variables that don't change to ensure immutability. - Use
letwhen reassignment is needed. - Avoid
vardue to its hoisting and scoping issues. - Use tools like ESLint to enforce modern best practices
Read more about the differences between
let,var,andconston GreatFrontEnd ->13. Explain the difference between
==and===in JavaScript?The
==operator checks for equality after performing type conversion, while===checks for strict equality without type conversion.Loose equality (
==)==allows type coercion, which means JavaScript converts values to the same type before comparison. This can lead to unexpected results.42 == '42'; // true0 == false; // truenull == undefined; // trueStrict equality (
===)===checks both value and type, avoiding the pitfalls of type coercion.42 === '42'; // false0 === false; // falsenull === undefined; // falseUse cases
- Prefer
===for most comparisons as it avoids implicit type conversion and makes code more predictable. - Use
==only when comparingnullorundefinedfor simplicity. -
let x = null;console.log(x == null); // trueconsole.log(x == undefined); // trueBonus:
Object.is()Object.is()is similar to===but treats-0and+0as distinct and considersNaNequal to itself.console.log(Object.is(-0, +0)); // falseconsole.log(Object.is(NaN, NaN)); // trueConclusion
- Use
===for strict comparisons to avoid bugs caused by type coercion. - Rely on
Object.is()for nuanced comparisons like distinguishing-0and+0.
Explore the differences between
==and===on GreatFrontEnd ->14. Understanding the Event Loop in JavaScript
The event loop is the backbone of JavaScript's asynchronous behavior, enabling single-threaded execution without blocking.
Key components
- Call stack: Tracks function executions in a Last-In-First-Out (LIFO) order
- Web APIs/Node.js APIs: Handle asynchronous tasks like
setTimeoutand HTTP requests on separate threads - Task queue (Macrotask queue): Queues tasks like
setTimeoutand UI events - Microtask queue: Prioritizes tasks like
Promisecallbacks, executed before macrotasks
How it works
- Synchronous code execution: Functions are pushed and popped from the call stack.
- Asynchronous tasks: Offloaded to APIs for processing.
- Task completion: Completed tasks are queued.
- Event loop execution: Executes microtasks until the queue is empty. Processes one macrotask and checks the microtask queue again.
console.log('Start');setTimeout(() => console.log('Timeout 1'), 0);Promise.resolve().then(() => console.log('Promise 1'));setTimeout(() => console.log('Timeout 2'), 0);console.log('End');Output:
StartEndPromise 1Timeout 1Timeout 2Explanation:
- Synchronous logs (
Start,End) run first. - Microtasks (
Promise 1) follow. - Macrotasks (
Timeout 1,Timeout 2) run last.
Explore the event loop in JavaScript on GreatFrontEnd ->
15. What is Event Delegation in JavaScript?
Event delegation is an efficient way to manage events for multiple elements by attaching a single event listener to their common parent.
How it works
- Attach a listener: Add an event listener to a parent element instead of each child.
- Event bubbling: Events triggered on children bubble up to the parent.
- Identify target: Use
event.targetto determine the clicked element. - Perform action: Execute logic based on the event target.
// HTML:// <ul id="item-list">// <li>Item 1</li>// <li>Item 2</li>// </ul>const itemList = document.getElementById('item-list');itemList.addEventListener('click', (event) => {if (event.target.tagName === 'LI') {console.log(`Clicked on ${event.target.textContent}`);}});Benefits
- Efficiency: Reduces the number of event listeners, improving performance.
- Dynamic content: Automatically handles new elements added to the DOM.
Explore event delegation in JavaScript on GreatFrontEnd ->
16. How
thisworks in JavaScriptThe value of
thisdepends on how a function is called. Let's explore its different behaviors.Scenarios
- Using
new: When creating objects,thisrefers to the newly created object.function Person(name) {this.name = name;}const person = new Person('Alice');console.log(person.name); // 'Alice' - Using
apply,call, orbind: Explicitly setsthisto a specified object.function greet() {console.log(this.name);}const person = { name: 'Alice' };greet.call(person); // 'Alice' - Method call:
thisrefers to the object the method is called on.const obj = {name: 'Alice',greet() {console.log(this.name);},};obj.greet(); // 'Alice' - Free function call: Defaults to the global object (
windowin browsers) orundefinedin strict mode.function greet() {console.log(this); // global object or undefined}greet(); - Arrow functions: Capture
thisfrom their enclosing scope.const obj = {name: 'Alice',greet: () => {console.log(this.name); // Inherits `this` from enclosing scope},};obj.greet(); // undefined
ES6 and
thisArrow functions simplify usage by capturing
thisfrom their lexical scope.function Timer() {this.seconds = 0;setInterval(() => {this.seconds++;console.log(this.seconds);}, 1000);}const timer = new Timer();Explore how
thisworks in JavaScript on GreatFrontEnd ->17. What sets Cookies,
sessionStorage, andlocalStorageapart?When it comes to client-side storage, cookies,
localStorage, andsessionStorageserve distinct roles:Cookies
- Function: Stores small pieces of data sent along with HTTP requests to the server.
- Limit: Roughly 4KB per domain.
- Lifetime: Can persist or expire after a set time. Session cookies disappear when the browser closes.
- Scope: Accessible across pages and subdomains for a single domain.
- Security: Features like HttpOnly and Secure flags add extra security.
// Set a cookie with an expiry datedocument.cookie = 'userId=12345; expires=Fri, 31 Dec 2025 23:59:59 GMT; path=/';// Read all cookiesconsole.log(document.cookie);// Delete a cookiedocument.cookie = 'userId=; expires=Thu, 01 Jan 1970 00:00:00 GMT; path=/';localStorage- Function: Allows persistent data storage on the client side.
- Limit: About 5MB per origin.
- Lifetime: Data stays until explicitly removed.
- Scope: Shared across all tabs and windows for the same origin.
- Security: Accessible by JavaScript within the same origin.
// Store data in localStoragelocalStorage.setItem('username', 'john_doe');// Retrieve dataconsole.log(localStorage.getItem('username'));// Remove an itemlocalStorage.removeItem('username');// Clear all localStorage datalocalStorage.clear();sessionStorage- Function: Stores data for the duration of a page session.
- Limit: Similar to
localStorage(around 5MB). - Lifetime: Cleared when the tab or browser closes.
- Scope: Data is confined to the current tab or window.
- Security: Accessible by JavaScript on the same origin.
// Store data in sessionStoragesessionStorage.setItem('sessionId', 'abcdef');// Retrieve dataconsole.log(sessionStorage.getItem('sessionId'));// Remove an itemsessionStorage.removeItem('sessionId');// Clear all sessionStorage datasessionStorage.clear();Learn more about cookies,
sessionStorage, andlocalStorageon GreatFrontEnd ->18. How do
<script>,<script async>, and<script defer>differ?<script>When using the
<script>tag without attributes, it fetches and executes the script immediately, pausing HTML parsing.Use case: Critical scripts needed before page rendering.
<script src="main.js"></script><script async>With
async, the script loads in parallel to HTML parsing and executes as soon as it's ready.Use case: Independent scripts like analytics or ads.
<script async src="analytics.js"></script><script defer>When using
defer, the script loads alongside HTML parsing but only executes after the HTML is fully parsed.Use Case: Scripts that rely on a complete DOM structure.
<script defer src="deferred.js"></script>Discover more about
<script>,<script async>, and<script defer>on GreatFrontEnd ->19. What's the difference between
null,undefined?Undeclared
Variables not defined using
var,let, orconstare considered undeclared and can cause global scope issues.undefinedA declared variable that hasn't been assigned a value is
undefined.nullRepresents the intentional absence of any value. It's an explicit assignment. Example Code:
let a;console.log(a); // undefinedlet b = null;console.log(b); // nulltry {console.log(c); // ReferenceError: c is not defined} catch (e) {console.log('c is undeclared');}Read more about
null,undefined, and undeclared variables on GreatFrontEnd ->20. What's the difference between
.call()vs.apply()?Both
.calland.applylet you invoke a function with a specifiedthisvalue. The key difference lies in how arguments are passed:.call: Accepts arguments as a comma-separated list..apply: Accepts arguments as an array.
Memory aid:
- C for call = comma-separated
- A for apply = array
function sum(a, b) {return a + b;}console.log(sum.call(null, 1, 2)); // 3console.log(sum.apply(null, [1, 2])); // 3Learn more about
.calland.applyon GreatFrontEnd ->21. How does
Function.prototype.bindwork?The
bindmethod is used to create a new function with a specificthisvalue and, optionally, preset arguments. This ensures that the function always has the correctthiscontext, regardless of how or where it's called.Key uses of
bind:- Maintaining Context: Ensures that
thisis correctly set for the function. - Preset Arguments: Allows you to predefine arguments for a function.
- Borrowing Methods: Enables you to use methods from one object in another.
const john = {age: 42,getAge: function () {return this.age;},};console.log(john.getAge()); // 42const unboundGetAge = john.getAge;console.log(unboundGetAge()); // undefinedconst boundGetAge = john.getAge.bind(john);console.log(boundGetAge()); // 42const mary = { age: 21 };const boundGetAgeMary = john.getAge.bind(mary);console.log(boundGetAgeMary()); // 21Explore
Function.prototype.bindon GreatFrontEnd ->22. Why use arrow functions in constructors?
Using arrow functions for methods in constructors automatically binds the
thiscontext to the constructor, avoiding the need to manually bind it. This eliminates issues caused bythisreferring to unexpected contexts.const Person = function (name) {this.name = name;this.sayName1 = function () {console.log(this.name);};this.sayName2 = () => {console.log(this.name);};};const john = new Person('John');const dave = new Person('Dave');john.sayName1(); // Johnjohn.sayName2(); // Johnjohn.sayName1.call(dave); // Davejohn.sayName2.call(dave); // JohnArrow functions are particularly useful in React class components, ensuring methods maintain the correct context when passed to child components.
Explore the advantage for using the arrow syntax for a method in a constructor on GreatFrontEnd ->
23. How does prototypal inheritance work?
Prototypal inheritance is a way for objects to share properties and methods through their prototype chain.
Key concepts:
- Prototypes: Each object has a prototype, from which it inherits properties and methods.
- Prototype chain: JavaScript looks for properties/methods up the chain until it finds them or reaches
null. - Constructor functions: Functions used with
newto create objects.
function Animal(name) {this.name = name;}Animal.prototype.sayName = function () {console.log(`My name is ${this.name}`);};function Dog(name, breed) {Animal.call(this, name);this.breed = breed;}Dog.prototype = Object.create(Animal.prototype);Dog.prototype.bark = function () {console.log('Woof!');};let fido = new Dog('Fido', 'Labrador');fido.bark(); // "Woof!"fido.sayName(); // "My name is Fido"Explore how prototypal inheritance works on GreatFrontEnd ->
24. Differences between:
function Person(){},const person = Person(), andconst person = new Person()?Key differences:
function Person(){}: A function declaration, typically used for constructors if written in PascalCase.const person = Person(): Calls the function normally and assigns the result toperson. No object creation happens unless explicitly returned.const person = new Person(): Invokes the function as a constructor, creating a new object and setting its prototype toPerson.prototype.
25. Function declarations vs. Function expressions
Function declarations:
- Syntax:
function foo() {} - Hoisting: Fully hoisted; can be called before its definition.
foo(); // "Hello!"function foo() {console.log('Hello!');}Function expressions:
- Syntax:
var foo = function() {} - Hoisting: Only the variable is hoisted, not the function body.
foo(); // TypeError: foo is not a functionvar foo = function () {console.log('Hello!');};26. What are the different ways to create objects in JavaScript?
Here are various approaches to creating objects in JavaScript:
- Object literals: The simplest and most common way to create an object is using curly braces
{}with key-value pairs.const person = {firstName: 'John',lastName: 'Doe',}; Objectconstructor: Use the built-inObjectconstructor with thenewkeyword.const person = new Object();person.firstName = 'John';person.lastName = 'Doe';Object.create()method: Create an object with a specific prototype.const personPrototype = {greet() {console.log(`Hello, my name is ${this.name}.`);},};const person = Object.create(personPrototype);person.name = 'John';person.greet(); // Hello, my name is John.- ES2015 classes: Define objects using the
classsyntax for a blueprint-like structure.class Person {constructor(name, age) {this.name = name;this.age = age;}greet() {console.log(`Hi, I'm ${this.name} and I'm ${this.age} years old.`);}}const john = new Person('John', 30);john.greet(); // Hi, I'm John and I'm 30 years old. - Constructor functions: Use a function as a template for creating multiple objects.function Person(name, age) {this.name = name;this.age = age;}const john = new Person('John', 30);console.log(john.name); // John
Explore various ways to create objects in JavaScript on GreatFrontEnd ->
27. What is a higher-order function?
A higher-order function is a function that either:
- Accepts another function as an argument:function greet(name) {return `Hello, ${name}!`;}function greetUser(greeter, name) {console.log(greeter(name));}greetUser(greet, 'Alice'); // Hello, Alice!
- Returns another function:function multiplier(factor) {return function (num) {return num * factor;};}const double = multiplier(2);console.log(double(4)); // 8
Explore the definition of a higher-order function on GreatFrontEnd ->
28. How do ES2015 classes differ from ES5 constructor functions?
ES5 constructor functions use function constructors and prototypes for object creation and inheritance.
function Person(name, age) {this.name = name;this.age = age;}Person.prototype.greet = function () {console.log(`Hi, I'm ${this.name} and I'm ${this.age} years old.`);};const john = new Person('John', 30);john.greet(); // Hi, I'm John and I'm 30 years old.ES2015 Classes use the
classkeyword for cleaner and more intuitive syntax.class Person {constructor(name, age) {this.name = name;this.age = age;}greet() {console.log(`Hi, I'm ${this.name} and I'm ${this.age} years old.`);}}const john = new Person('John', 30);john.greet(); // Hi, I'm John and I'm 30 years old.Key differences:
- Syntax: ES2015 classes are more readable and concise.
- Static methods: Easier to define using
staticin ES2015. - Inheritance: Simpler with the
extendsandsuperkeywords in ES2015.
Explore differences between ES2015 classes and ES5 constructor functions on GreatFrontEnd ->
29. What is event bubbling?
Event bubbling is the process where an event triggers on the target element and then propagates upwards through its ancestors in the DOM.
const parent = document.getElementById('parent');const child = document.getElementById('child');parent.addEventListener('click', () => {console.log('Parent clicked');});child.addEventListener('click', () => {console.log('Child clicked');});Clicking the child element will log both "Child clicked" and "Parent clicked" due to bubbling.
Prevent bubbling:
Use
event.stopPropagation()to prevent the event from propagating upwards.child.addEventListener('click', (event) => {event.stopPropagation();console.log('Child clicked only');});Explore event bubbling on GreatFrontEnd ->
30. What is event capturing?
Event capturing, also called "trickling", is the reverse of bubbling. The event propagates from the root element down to the target element.
Enable event capturing
Capturing is enabled by passing
{ capture: true }toaddEventListener()as the third argument.const parent = document.getElementById('parent');const child = document.getElementById('child');parent.addEventListener('click',() => {console.log('Parent capturing');},{ capture: true },);child.addEventListener('click', () => {console.log('Child clicked');});Clicking the child will log "Parent capturing" first, followed by "Child clicked".
Explore event capturing on GreatFrontEnd ->
31. How do
mouseenterandmouseoverdiffer?mouseenter- Does not bubble up the DOM tree.
- Triggered only when the mouse pointer enters the element itself, excluding its children.
- Fires a single event when entering the target element.
mouseover- Bubbles up the DOM tree.
- Triggered when the mouse pointer enters the target element or any of its children.
- Fires multiple events when moving over child elements.
Explore the differences between
mouseenterandmouseoveron GreatFrontEnd ->32. What's the difference between synchronous and asynchronous functions?
Synchronous functions
- Execute tasks in a sequential, blocking manner.
- Program execution halts until the current task completes.
- Easier to debug due to their predictable flow.
const fs = require('fs');const data = fs.readFileSync('file.txt', 'utf8');console.log(data); // Blocks until the file is fully readconsole.log('Program ends');Asynchronous functions
- Perform tasks without blocking program execution.
- Other operations can run while waiting for the task to finish.
- Commonly used for I/O operations, network requests, and timers.
console.log('Start');fetch('https://api.example.com/data').then((response) => response.json()).then((data) => console.log(data)) // Non-blocking.catch((error) => console.error(error));console.log('End');Explore the difference between synchronous and asynchronous functions on GreatFrontEnd ->
33. What is AJAX?
AJAX (Asynchronous JavaScript and XML) is a technique that allows web pages to fetch and send data asynchronously, enabling dynamic updates without reloading the entire page.
Key points
- Asynchronous: Updates parts of a page without reloading.
- Data formats: Initially XML, now primarily JSON due to its simplicity.
- APIs: Traditionally used
XMLHttpRequest;fetch()is the modern alternative.
Using
XMLHttpRequest:let xhr = new XMLHttpRequest();xhr.onreadystatechange = function () {if (xhr.readyState === XMLHttpRequest.DONE) {if (xhr.status === 200) {console.log(xhr.responseText);} else {console.error('Request failed');}}};xhr.open('GET', 'https://jsonplaceholder.typicode.com/todos/1', true);xhr.send();Using
fetch():fetch('https://jsonplaceholder.typicode.com/todos/1').then((response) => response.json()).then((data) => console.log(data)).catch((error) => console.error('Fetch error:', error));Explore AJAX in detail on GreatFrontEnd ->
34. What are the pros and cons of using AJAX?
Advantages
- Enhances user experience by enabling seamless updates.
- Reduces server load by fetching only necessary data.
- Keeps the user on the same page while updating content.
Disadvantages
- Relies on JavaScript, so functionality may break if it's disabled.
- SEO challenges with dynamically loaded content.
- Bookmarking specific page states becomes difficult.
Explore the advantages and disadvantages of using AJAX on GreatFrontEnd ->
35. What are the differences between
XMLHttpRequestandfetch()?XMLHttpRequest- Syntax: Event-driven; requires listeners for response handling.
- Progress tracking: Supports progress tracking via
onprogress. - Error handling: Uses
onerrorevent.
let xhr = new XMLHttpRequest();xhr.open('GET', 'https://example.com/api', true);xhr.onload = function () {if (xhr.status === 200) {console.log(xhr.responseText);}};xhr.send();fetch()- Syntax: Promise-based; simpler and more readable.
- Error handling: Uses
.catch()for better error management. - Modern features: Built-in support for
AbortControllerfor cancellations.
fetch('https://example.com/api').then((response) => response.json()).then((data) => console.log(data)).catch((error) => console.error(error));Key differences
fetch()has cleaner syntax and better Promise integration.XMLHttpRequestsupports progress tracking, whichfetch()does not.
Explore the differences between
XMLHttpRequestandfetch()on GreatFrontEnd ->36. What are the various data types in JavaScript?
JavaScript features a mix of primitive and non-primitive (reference) data types.
Primitive data types
- Number: Includes integers and floating-point values.
- String: Text values enclosed in single, double quotes, or backticks.
- Boolean: Represents
trueorfalse. - Undefined: A declared variable that hasn't been assigned a value.
- Null: Indicates an intentional lack of value.
- Symbol: A unique and immutable identifier often used as object property keys.
- BigInt: Handles large integers with arbitrary precision.
Non-primitive data types
- Object: Collections of key-value pairs.
- Array: Ordered lists of elements.
- Function: First-class objects that can be assigned, passed, and returned.
- Date: Represents date and time values.
- RegExp: For pattern matching in strings.
- Map: A collection of key-value pairs, allowing any type of key.
- Set: Stores unique values, whether primitive or object references.
Tip: Use the
typeofoperator to determine the type of a variable.Explore the various data types in JavaScript on GreatFrontEnd ->
37. How do you iterate over object properties and array items?
JavaScript provides multiple ways to iterate over objects and arrays.
Iterating over objects
1.
for...inLoops over all enumerable properties, including inherited ones.
for (const property in obj) {if (Object.hasOwn(obj, property)) {console.log(property);}}2.
Object.keys()Retrieves an array of an object's own enumerable properties.
Object.keys(obj).forEach((key) => console.log(key));3.
Object.entries()Returns an array of
[key, value]pairs.Object.entries(obj).forEach(([key, value]) => console.log(`${key}: ${value}`));4.
Object.getOwnPropertyNames()Includes both enumerable and non-enumerable properties.
Object.getOwnPropertyNames(obj).forEach((prop) => console.log(prop));Iterating over arrays
1.
forLoopClassic approach for iterating through arrays:
for (let i = 0; i < arr.length; i++) {console.log(arr[i]);}2.
Array.prototype.forEach()Executes a callback for each array item.
arr.forEach((element, index) => console.log(element, index));3.
for...ofIdeal for looping through iterable objects like arrays.
for (const element of arr) {console.log(element);}4.
Array.prototype.entries()Iterates with both index and value.
for (const [index, element] of arr.entries()) {console.log(index, ':', element);}Explore iteration techniques on GreatFrontEnd ->
38. What are the benefits of spread syntax, and how is it different from rest syntax?
Spread syntax (
...)The spread operator is used to expand elements of arrays or objects.
- Copying arrays/objects:const array = [1, 2, 3];const newArray = [...array]; // [1, 2, 3]
- Merging arrays/objects:const arr1 = [1, 2];const arr2 = [3, 4];const mergedArray = [...arr1, ...arr2]; // [1, 2, 3, 4]
- Passing function arguments:const nums = [1, 2, 3];console.log(Math.max(...nums)); // 3
Rest syntax (
...)The rest operator collects multiple elements into an array or object.
- Function parameters:function sum(...numbers) {return numbers.reduce((a, b) => a + b);}sum(1, 2, 3); // 6
- Destructuring:const [first, ...rest] = [1, 2, 3];console.log(rest); // [2, 3]
Explore spread and rest syntax on GreatFrontEnd ->
39. What are the differences between Maps vs. Plain objects?
Map- Keys can be any type.
- Maintains the insertion order.
- Has a
sizeproperty. - Directly iterable.
const map = new Map();map.set('key', 'value');console.log(map.size); // 1Plain objects
- Keys are strings or symbols.
- Iteration requires
Object.keys(),Object.values(), orObject.entries(). - No direct
sizeproperty.
const obj = { key: 'value' };console.log(Object.keys(obj).length); // 1Explore the difference between Map and plain objects on GreatFrontEnd ->
40. What are the differences between
Map/SetandWeakMap/WeakSet- Key Types:
WeakMapandWeakSetkeys must be objects, whileMapandSetaccept any data type. - Memory Management:
WeakMapandWeakSetallow garbage collection of keys, making them useful for managing memory. - Size: Only
MapandSethave asizeproperty. - Iteration:
WeakMapandWeakSetare not iterable.
// Map Exampleconst map = new Map();map.set({}, 'value');console.log(map.size); // 1// WeakMap Exampleconst weakMap = new WeakMap();let obj = {};weakMap.set(obj, 'value');obj = null; // Key is garbage-collectedExplore the differences between Map/Set and WeakMap/WeakSet on GreatFrontEnd ->
41. What are practical use cases for arrow functions?
Arrow functions simplify function syntax, making them ideal for inline callbacks.
// Traditional function syntaxconst numbers = [1, 2, 3, 4, 5];const doubledNumbers = numbers.map(function (number) {return number * 2;});console.log(doubledNumbers); // [2, 4, 6, 8, 10]// Arrow function syntaxconst doubledWithArrow = numbers.map((number) => number * 2);console.log(doubledWithArrow); // [2, 4, 6, 8, 10]Explore a use case for the new arrow function syntax on GreatFrontEnd ->
42. What are callback functions in asynchronous operations?
A callback is a function passed as an argument to another function, executed after the completion of an asynchronous task.
function fetchData(callback) {setTimeout(() => {const data = { name: 'John', age: 30 };callback(data);}, 1000);}fetchData((data) => {console.log(data); // { name: 'John', age: 30 }});Explore the concept of a callback function in asynchronous operations on GreatFrontEnd ->
43. What is debouncing and throttling?
Debouncing delays execution of a function until a specified time has elapsed since its last invocation.
function debounce(func, delay) {let timeoutId;return (...args) => {clearTimeout(timeoutId);timeoutId = setTimeout(() => func.apply(this, args), delay);};}Throttling ensures a function executes at most once within a set time interval.
function throttle(func, limit) {let inThrottle;return (...args) => {if (!inThrottle) {func.apply(this, args);inThrottle = true;setTimeout(() => (inThrottle = false), limit);}};}Explore the concept of debouncing and throttling on GreatFrontEnd ->
44. How does destructuring assignment work?
Destructuring simplifies extracting values from arrays or objects into individual variables.
// Array destructuringconst [a, b] = [1, 2];// Object destructuringconst { name, age } = { name: 'John', age: 30 };Explore the concept of destructuring assignment on GreatFrontEnd ->
45. What is function hoisting?
Hoisting moves function declarations to the top of their scope during the compilation phase. However, function expressions and arrow functions do not get hoisted in the same way.
// Function declarationhoistedFunction(); // Works finefunction hoistedFunction() {console.log('This function is hoisted');}// Function expressionnonHoistedFunction(); // Throws an errorvar nonHoistedFunction = function () {console.log('This function is not hoisted');};Explore the concept of hoisting on GreatFrontEnd ->
46. How does inheritance work in ES2015 classes?
Classes in ES2015 use
extendsfor inheritance andsuperto access parent constructors and methods.class Animal {constructor(name) {this.name = name;}speak() {console.log(`${this.name} makes a noise.`);}}class Dog extends Animal {constructor(name, breed) {super(name);this.breed = breed;}speak() {console.log(`${this.name} barks.`);}}const dog = new Dog('Rex', 'German Shepherd');dog.speak(); // Rex barks.Explore the concept of inheritance in ES2015 classes on GreatFrontEnd ->
47. What is lexical scoping?
Lexical scoping determines variable access based on where functions are defined, not where they're called.
function outerFunction() {let outerVariable = 'I am outside!';function innerFunction() {console.log(outerVariable); // I am outside!}innerFunction();}outerFunction();Explore the concept of lexical scoping on GreatFrontEnd ->
48. What are scopes in JavaScript?
JavaScript has three main types of scope: global, function, and block.
// Global scopevar globalVar = 'I am global';function myFunction() {// Function scopevar functionVar = 'I am in a function';if (true) {// Block scopelet blockVar = 'I am in a block';console.log(blockVar); // Accessible here}// console.log(blockVar); // Error}Explore the concept of scope in JavaScript on GreatFrontEnd ->
49. What is the spread operator?
The spread operator (
...) expands elements of an iterable (like arrays) or properties of objects into individual elements.// Copying an arrayconst arr1 = [1, 2, 3];const arr2 = [...arr1];// Merging arraysconst mergedArray = [...arr1, [4, 5]];// Copying an objectconst obj1 = { a: 1, b: 2 };const obj2 = { ...obj1 };// Passing as function argumentsconst sum = (x, y, z) => x + y + z;const nums = [1, 2, 3];sum(...nums); // 6Explore the spread operator on GreatFrontEnd ->
50. How does
thiswork in event handlers?In JavaScript,
thisin event handlers refers to the element that triggered the event. Its context can be explicitly bound usingbind(), arrow functions, or direct assignment.const button = document.querySelector('button');button.addEventListener('click', function () {console.log(this); // Refers to the button});const obj = {handleClick: function () {console.log(this); // Refers to obj},};button.addEventListener('click', obj.handleClick.bind(obj));Explore the concept of
thisin event handlers on GreatFrontEnd ->Modern JavaScript (ES2020+)
The next 25 questions cover ES2020–ES2025 additions that come up in modern JavaScript interviews.
51. What does optional chaining (
?.) do, and where does it short-circuit?Optional chaining (
?.) returnsundefinedif the value to its left isnullorundefined, instead of throwing. It works on property access, function calls, and array indexing.const user = { profile: null };console.log(user.profile?.name); // undefined, no throwconsole.log(user.callbacks?.onSave?.()); // undefinedconsole.log(user.tags?.[0]); // undefinedImportant: it short-circuits the rest of the chain the moment any
?.operand is nullish, souser?.a.b.cwill short-circuit atuser?and never evaluate.a.b.c. It does not protect against0,'',false, orNaN; those are not nullish.52. What is nullish coalescing (
??) and how does it differ from||???returns its right-hand side only when the left side isnullorundefined.||returns the right-hand side for any falsy value:0,'',false,NaN,null,undefined.const port = 0;console.log(port || 3000); // 3000, 0 is falsyconsole.log(port ?? 3000); // 0, 0 is not nullishconst name = '';console.log(name || 'Anonymous'); // 'Anonymous'console.log(name ?? 'Anonymous'); // ''Use
??when "no value provided" is the only case you want to replace.||is right when any falsy value should be treated as "missing", like defaulting a flag.53. What are logical assignment operators (
||=,&&=,??=)?ES2021's logical assignment operators combine a logical check with assignment, assigning only when the check passes.
const config = { retries: 0, host: '' };config.host ||= 'localhost'; // assigns, '' is falsyconfig.retries ??= 3; // does NOT assign, 0 is not nullishconfig.debug &&= 'verbose'; // does NOT assign, debug is undefineda ||= b→ assignsbonly ifais falsy.a &&= b→ assignsbonly ifais truthy.a ??= b→ assignsbonly ifais nullish.
They're short-circuiting: the right side runs only when the assignment will happen.
54. What does this print, and why? (
varvsletin asetTimeoutloop)for (var i = 0; i < 3; i++) {setTimeout(() => console.log(i), 0);}// 3, 3, 3varis function-scoped, so all three callbacks close over the samei. By the time the timers fire (after the synchronous loop finishes),iis3.Swap
varforlet:for (let i = 0; i < 3; i++) {setTimeout(() => console.log(i), 0);}// 0, 1, 2letcreates a fresh binding per iteration, so each callback captures its owni.Pre-
let, the workaround was an IIFE:for (var i = 0; i < 3; i++) {(function (j) {setTimeout(() => console.log(j), 0);})(i);}55. How does
Promise.allSettled()differ fromPromise.all()?Promise.all()rejects as soon as any input promise rejects, and you lose the results of the others.Promise.allSettled()waits for every promise to settle and returns an array describing each outcome:{ status: 'fulfilled', value }or{ status: 'rejected', reason }.const results = await Promise.allSettled([fetch('/api/a'),fetch('/api/b'),fetch('/api/c'),]);for (const result of results) {if (result.status === 'fulfilled') {console.log('ok:', result.value);} else {console.error('failed:', result.reason);}}Use
allSettledwhen you want every result regardless of failures, e.g., loading multiple independent widgets where one failure shouldn't blank the page.Explore the difference between
Promise.allandPromise.allSettledon GreatFrontEnd ->56. What is
Promise.any()and how does it handle rejections?Promise.any()resolves with the value of the first promise to fulfill. It only rejects if all input promises reject, and the rejection is anAggregateErrorcontaining every individual reason.try {const fastest = await Promise.any([fetch('https://mirror-1.example.com/data'),fetch('https://mirror-2.example.com/data'),fetch('https://mirror-3.example.com/data'),]);console.log('first to respond:', fastest);} catch (err) {console.error(err.errors); // array of all rejection reasons}Use it for racing mirrors, fallbacks, or "first response wins" patterns.
57. How do you cancel a
fetchrequest withAbortController?AbortControllerexposes asignalyou pass to any abort-aware API (fetch,addEventListener, streams, observers). Calling.abort()cancels the operation and rejects the associated promise with anAbortError.const controller = new AbortController();const promise = fetch('/api/slow', { signal: controller.signal });// Cancel after 5 secondssetTimeout(() => controller.abort(), 5000);try {const res = await promise;console.log(await res.json());} catch (err) {if (err.name === 'AbortError') {console.log('Request cancelled');}}Common uses: cancelling in-flight requests when a component unmounts, debouncing search-as-you-type, and timing out long requests. You can also pass the same signal to multiple operations to cancel them as a group.
Explore aborting web requests with AbortController on GreatFrontEnd ->
58. What's the difference between
async/awaitand raw Promises?async/awaitis syntactic sugar over Promises. Both run the same machinery; the difference is readability and control flow.// Raw promise chainfunction loadUser(id) {return fetch(`/users/${id}`).then((res) => res.json()).then((user) => fetch(`/orgs/${user.orgId}`)).then((res) => res.json());}// async/await equivalentasync function loadUser(id) {const user = await (await fetch(`/users/${id}`)).json();const org = await (await fetch(`/orgs/${user.orgId}`)).json();return org;}async/awaitlets you usetry/catch, regularif/for, and reads top-to-bottom. Raw Promises shine when you want parallelism (Promise.all) or compose pipelines functionally.Explore how
async/awaitsimplifies asynchronous code on GreatFrontEnd ->59. What are generators, and how is
async/awaitrelated to them?A generator (
function*) is a function that can pause and resume. Eachyieldsuspends execution and returns a value to the caller;next()resumes it.function* counter() {yield 1;yield 2;yield 3;}const c = counter();console.log(c.next()); // { value: 1, done: false }console.log(c.next()); // { value: 2, done: false }console.log(c.next()); // { value: 3, done: true }You can also send values back in via
next(value), making generators bidirectional coroutines:function* dialog() {const name = yield 'What is your name?';yield `Hello, ${name}!`;}const d = dialog();d.next(); // { value: 'What is your name?', done: false }d.next('Ada'); // { value: 'Hello, Ada!', done: false }async/awaitis sugar over generators; anasyncfunction is a generator that yields promises, with the runtime calling.next()when each resolves.redux-sagauses generators directly to make async control flow testable.60. What is
error.causeand why is it useful?error.cause(ES2022) is a standard way to attach the underlying error when re-throwing, preserving the original error and its stack without string-mashing.async function loadUser(id) {try {return await fetchUser(id);} catch (originalError) {throw new Error(`Failed to load user ${id}`, { cause: originalError });}}try {await loadUser(42);} catch (err) {console.error(err.message); // 'Failed to load user 42'console.error(err.cause); // the original network error, with full stack}Before
cause, the inner error was usually stringified into the outer message (new Error('Failed: ' + e.message)), losing the inner stack. Withcause, devtools,console.error, and logging libraries (Sentry, Pino) walk the chain automatically.Use it at every boundary where you wrap a low-level error into a higher-level one.
61. What are the immutable array methods (
toSorted,toReversed,toSpliced,with)?ES2023 added four methods that return a new array instead of mutating the original. They mirror their classic counterparts but are safe with frozen data, React state, or any place where mutation causes bugs.
const arr = [3, 1, 2];const sorted = arr.toSorted(); // [1, 2, 3], arr unchangedconst reversed = arr.toReversed(); // [2, 1, 3], arr unchangedconst spliced = arr.toSpliced(1, 1, 9, 9); // [3, 9, 9, 2]const replaced = arr.with(0, 99); // [99, 1, 2]console.log(arr); // [3, 1, 2], still originalBefore these methods, you had to write
[...arr].sort()orarr.slice().reverse()to avoid mutating. They make immutable-style code one call shorter and clearer.62. What does
Array.prototype.findLast()do?findLast()(ES2023) returns the last element that matches a predicate.findLastIndex()returns its index. They're the mirror offind()/findIndex().const events = [{ type: 'click', t: 100 },{ type: 'scroll', t: 200 },{ type: 'click', t: 300 },];const lastClick = events.findLast((e) => e.type === 'click');console.log(lastClick); // { type: 'click', t: 300 }The pre-2023 alternative was
[...arr].reverse().find(...): O(n) extra work and harder to read.63. What is
Object.groupBy()/Map.groupBy()?Object.groupBy()andMap.groupBy()(ES2024) group an iterable's items by the return value of a callback.Object.groupByuses string keys;Map.groupByallows any value as a key.const people = [{ name: 'Ada', team: 'eng' },{ name: 'Lin', team: 'design' },{ name: 'Rao', team: 'eng' },];const byTeam = Object.groupBy(people, (p) => p.team);// { eng: [{Ada}, {Rao}], design: [{Lin}] }const teamObj = { id: 1 };const byRef = Map.groupBy(people, (p) => (p.team === 'eng' ? teamObj : null));// Map { teamObj => [{Ada}, {Rao}], null => [{Lin}] }They replace the
reduce((acc, x) => ...)grouping pattern.64. What are the new Set methods (
union,intersection,difference)?ES2025 added set-algebra methods to
Set. They take any iterable on the right side (not just anotherSet) and always return a newSet.const a = new Set([1, 2, 3]);const b = new Set([3, 4, 5]);a.union(b); // Set { 1, 2, 3, 4, 5 }a.intersection(b); // Set { 3 }a.difference(b); // Set { 1, 2 }a.symmetricDifference(b); // Set { 1, 2, 4, 5 }a.isSubsetOf(b); // falsea.isSupersetOf(b); // falsea.isDisjointFrom(b); // falseBefore this, an intersection was
new Set([...a].filter(x => b.has(x))). The native methods are also faster, because implementations iterate the smaller side.65. What are iterator helpers (
.map,.filter,.takeon iterators)?ES2025 iterator helpers add
.map,.filter,.take,.drop,.flatMap,.reduce,.some,.every,.find, and.toArraydirectly to iterators (and generators). Unlike array methods, they're lazy, so values flow through one at a time.function* naturals() {let n = 1;while (true) yield n++;}const firstFiveSquares = naturals().map((n) => n * n).take(5).toArray();console.log(firstFiveSquares); // [1, 4, 9, 16, 25]Laziness means infinite sequences don't allocate everything, and pipelines don't materialize intermediate arrays.
AsyncIterator.prototype.mapand friends do the same overfor await...ofsources.66. What is
Array.fromAsync?Array.fromAsync(ES2024) is the async counterpart ofArray.from. It awaits each value from an async iterable (or a sync iterable of promises) and collects them into an array.async function* fetchPages(urls) {for (const url of urls) {const res = await fetch(url);yield await res.json();}}const allPages = await Array.fromAsync(fetchPages(['/api/p/1', '/api/p/2', '/api/p/3']),);Pages are fetched sequentially. For parallel fetching, use
Promise.all(urls.map(fetch))instead.Array.fromAsyncfits when each step depends on the previous, or when you just want to materialize an async iterable.67. How do you make a custom iterable with
Symbol.iterator?Any object with a
[Symbol.iterator]()method becomes iterable and usable withfor...of, spread, destructuring, andArray.from. The method must return an iterator (an object withnext()returning{ value, done }).The easy way is to delegate to a generator:
class Range {constructor(from, to) {this.from = from;this.to = to;}*[Symbol.iterator]() {for (let n = this.from; n <= this.to; n++) yield n;}}const r = new Range(1, 4);for (const n of r) console.log(n); // 1 2 3 4console.log([...r]); // [1, 2, 3, 4]const [first, ...rest] = r; // 1, [2, 3, 4]For async sources, implement
[Symbol.asyncIterator]()instead and consume withfor await...of.NodeList,Map,Set, and Node streams all expose themselves through this same protocol.68. What's the difference between shallow and deep copy?
A shallow copy duplicates the top level only; nested objects are shared by reference. A deep copy recursively duplicates everything.
const original = { user: { name: 'Ada' }, tags: ['x'] };// Shallow copies, nested refs sharedconst a = { ...original };const b = Object.assign({}, original);a.user.name = 'Lin';console.log(original.user.name); // 'Lin', mutation leaked// Deep copiesconst c = JSON.parse(JSON.stringify(original)); // lossyconst d = structuredClone(original); // preferredPick by use case:
{...obj}/Object.assign: fast, fine when you only mutate the top level.JSON.parse(JSON.stringify(...)): deep but lossy:undefined, functions,Date,Map,Set,RegExp, cycles all break. Avoid in 2026.structuredClone: deep, preservesDate/Map/Setand cycles. Default deep-copy choice.- Library
cloneDeep(lodash): handles thingsstructuredClonedoesn't (functions, prototypes), but at the cost of bundle size.
The classic React bug,
setState({ ...state, list: state.list })followed by mutatingstate.list, is shallow-copy leakage.69. What is
structuredClone()and how is it different fromJSON.parse(JSON.stringify(...))?structuredClone()is a built-in that deep-clones a value using the structured clone algorithm. Unlike theJSONround-trip, it handlesDate,Map,Set,RegExp,ArrayBuffer, typed arrays, and cyclic references correctly.const original = {date: new Date(),map: new Map([['k', 'v']]),set: new Set([1, 2, 3]),};original.self = original; // cycleconst copy = structuredClone(original);console.log(copy.date instanceof Date); // trueconsole.log(copy.map instanceof Map); // trueconsole.log(copy.self === copy); // true, cycle preservedIt does not clone functions, DOM nodes, or prototypes. For plain-data deep copies, prefer
structuredCloneover the JSON trick; it's safer and faster.70. What are private class fields (
#field)?Private fields, prefixed with
#, are accessible only inside the class that declares them. They're enforced by the language, not a naming convention like_field.class Counter {#count = 0;increment() {this.#count++;}get value() {return this.#count;}}const c = new Counter();c.increment();console.log(c.value); // 1console.log(c.#count); // SyntaxErrorSubclasses can't reach private fields of their parents, and
Object.keys()/for...inwon't enumerate them. Use them when you need true encapsulation: internal state that consumers (or future subclasses) must not touch.71. ES Modules vs CommonJS: what's the difference?
CommonJS (
require/module.exports) is Node.js's legacy module system. ES Modules (import/export) are the standard, supported in browsers and modern Node.js.// CommonJSconst fs = require('fs');module.exports = { foo: 1 };// ES Modulesimport fs from 'node:fs';export const foo = 1;Key differences:
- Loading: CommonJS is synchronous and runtime-resolved. ES Modules are statically analyzed, asynchronous, and support top-level
await. - Bindings: CommonJS exports are values (copies). ES Module exports are live bindings, so importers see updates.
- Tree-shaking: ESM's static structure lets bundlers eliminate unused exports; CommonJS generally can't.
- Interop: Node lets ESM
importfrom CommonJS, but a CommonJSrequireof ESM needsawait import().
New code should default to ESM. Use CommonJS only when targeting old Node or legacy tooling.
Explore the differences between CommonJS and ES Modules on GreatFrontEnd ->
72. What is dynamic
import()and when would you use it?Dynamic
import()is a function-like syntax that loads a module at runtime and returns a promise resolving to its namespace object. Unlike staticimport, it can take a variable specifier and run conditionally.button.addEventListener('click', async () => {const { default: Chart } = await import('./Chart.js');new Chart(document.getElementById('canvas')).render();});Common uses:
- Code splitting: defer loading large dependencies until needed (charts, editors, modals).
- Conditional loading: pick between modules based on locale, feature flag, or platform.
- Polyfills: load only when the target lacks a feature.
Most bundlers (webpack, Vite, esbuild) treat dynamic
import()as a code-split boundary automatically.73. What are tagged template literals?
A tagged template literal lets a function process a template string. The tag function receives the static string parts as its first argument and the interpolated values as the rest.
function html(strings, ...values) {return strings.reduce((out, str, i) => {const safe = values[i] != null ? escapeHtml(values[i]) : '';return out + str + safe;}, '');}const name = '<script>alert(1)</script>';const out = html`<p>Hello, ${name}!</p>`;// "<p>Hello, <script>alert(1)</script>!</p>"Use them for safe HTML/SQL building, i18n message formatting, GraphQL queries (
` gql...` ``), or styled-components-style CSS-in-JS.Explore tagged templates on GreatFrontEnd ->
74. What does
String.prototype.replaceAll()do?replaceAll()(ES2021) replaces every occurrence of a substring or pattern. Before it,replacewith a string argument only replaced the first match, forcing a global regex (/.../g) for the common case.const s = 'cat, cat, cat';console.log(s.replace('cat', 'dog')); // 'dog, cat, cat'console.log(s.replaceAll('cat', 'dog')); // 'dog, dog, dog'console.log(s.replaceAll(/CAT/gi, 'dog')); // 'dog, dog, dog'If you pass a regex, it must have the
gflag; otherwisereplaceAllthrows. The function form of the second argument is supported, same asreplace.75. What is
BigIntand when should you use it?BigIntis a primitive type for integers of arbitrary size, written with annsuffix or viaBigInt(...). Standardnumberloses precision beyond2^53 - 1(Number.MAX_SAFE_INTEGER);BigIntdoes not.const big = 9007199254740993n;console.log(big + 1n); // 9007199254740994nconsole.log(Number.MAX_SAFE_INTEGER + 2); // 9007199254740992, wrongCaveats: you can't mix
BigIntandNumberin arithmetic (1n + 1throws),Math.*doesn't acceptBigInt, andJSON.stringifythrows onBigInt. Reach for it when handling 64-bit IDs, monetary values in minor units, cryptography, or timestamps in nanoseconds: anywhere2^53is a real ceiling.Conclusion
That's the list. The next step is practice: work through each question until you can explain the concept and write the code from scratch without looking.
More JavaScript interview prep:
- Front End Interview Playbook
- Practice JavaScript coding interview questions
- Practice JavaScript quiz interview questions
A broader set of +190 JavaScript interview questions is also available in our GitHub repo.
- 30 Basic to Advanced React Interview Questions with Solutions30 React interview questions and solutions, covering basic to advanced topics. Ideal for developers preparing for their next job interview in 2025作者GreatFrontEnd Team10 分钟阅读Jul 1, 2025
Preparing for React developer interviews can be daunting, especially with so many questions to choose from. With a wealth of resources available, it's crucial to identify the most relevant topics that will give you the best return on your time investment.
React interviews often emphasize a mix of core concepts and practical skills, such as state management, hooks, performance optimization, etc. To enhance your preparation, focus on the most commonly asked questions and those that integrate multiple skills for a comprehensive understanding.
In this list, we've compiled 30 essential React interview questions that are essential for your success.
If you're looking for more in-depth React interview preparation materials, also check out these resources:
- React Interview Playbook
- Practice React coding interview questions
- Practice React quiz interview questions
Basic Level Questions
1. What is React?
React is an open-source JavaScript library developed by Facebook for building user interfaces, particularly single-page applications (SPAs). It allows developers to create reusable UI components that manage their own state. Key benefits include a component-based structure, efficient updates with the virtual DOM, declarative UI for readability, and strong community support.
2. What is JSX?
JSX stands for JavaScript XML and is a syntax extension for JavaScript that lets you write HTML-like code within JavaScript. It simplifies creating React components. JSX is transformed into JavaScript function calls, usually by Babel. For example,
<div>Hello, world!</div>becomesReact.createElement('div', null, 'Hello, world!').3. Difference Between React Node, Element, and Component
A React Node is any renderable unit in React, like an element, string, number, or
null. A React Element is an immutable object describing what to render, created withJSXorReact.createElement. A React Component is a function or class that returns React Elements, allowing for reusable UI pieces.4. What are fragments in React?
Fragments allow grouping multiple elements without adding extra nodes to the DOM, helping keep the markup clean and efficient.
return (<><h1>Title</h1><p>Description</p></>);5. What is the virtual DOM?
The virtual DOM is a lightweight copy of the real DOM. React uses it to optimize rendering by updating only the parts of the DOM that have changed, rather than re-rendering the entire tree.
6. What is the purpose of the key Prop in React?
The key prop in React uniquely identifies elements in a list, helping React optimize rendering by efficiently updating and reordering items. Without unique keys, React may unnecessarily re-render elements, leading to performance issues and bugs.
{items.map((item) => <ListItem key={item.id} value={item.value} />);}7. What are the implications of using array indices as
keys in React?Using array indices as
keys in React can lead to performance problems and unexpected behavior. When the order of items in an array changes, React might struggle to accurately determine which items have been modified. This can result in unnecessary re-renders or incorrect updates to the UI. To ensure efficient DOM management, it is advisable to use unique identifiers for keys instead of relying on array indices.Intermediate Level Questions
8. What are the rules of React hooks?
React hooks must be called at the top level of a function, never inside loops, conditions, or nested functions. They should only be called from React function components or custom hooks. These rules help maintain correct state and lifecycle behavior.
9. How do state and props differ in React?
- State: State is an internal data structure managed within a component. It is mutable, meaning that it can be updated and changed over time, allowing the component to respond to user interactions or other events dynamically.
- Props: Props, short for properties, are external data passed from parent components to child components. They are immutable within the child component, meaning that once set, they cannot be altered by the child. This ensures a clear flow of data and helps maintain the integrity of the component hierarchy.
10. What are controlled components?
Controlled components are form elements whose values are controlled by React state, allowing for more predictable behavior and easier validation.
function MyForm() {const [inputValue, setInputValue] = useState('');const handleChange = (e) => {setInputValue(e.target.value);};return <input type="text" value={inputValue} onChange={handleChange} />;}11. Explain hooks in React.
Hooks are functions that allow developers to use state and other React features without writing a class. Common hooks include useState for managing state and useEffect for side effects.
12. What distinguishes
useEffectfromuseLayoutEffectin React?useEffectanduseLayoutEffectare both hooks utilized for managing side effects in React functional components, but they differ in terms of execution timing:useEffect: This hook runs asynchronously after the DOM has been updated and painted. It is well-suited for operations like data fetching or setting up subscriptions, as it does not block the rendering process.useLayoutEffect: In contrast,useLayoutEffectexecutes synchronously immediately after DOM mutations but before the browser has a chance to paint. This makes it ideal for tasks that require immediate access to the DOM, such as measuring element sizes or synchronizing the UI with the current DOM state.
Code Example:
import React, { useEffect, useLayoutEffect, useRef } from 'react';function Example() {const ref = useRef();useEffect(() => {console.log('useEffect: Runs after DOM paint');});useLayoutEffect(() => {console.log('useLayoutEffect: Runs before DOM paint');console.log('Element width:', ref.current.offsetWidth);});return <div ref={ref}>Hello</div>;}13. What does the dependency array of
useEffectaffect?The dependency array of
useEffectcontrols when the effect re-runs:- If it's empty, the effect runs only once after the initial render.
- If it contains variables, the effect re-runs whenever any of those variables change.
- If omitted, the effect runs after every render.
Advanced Level Questions
14. What is Redux?
Redux is a predictable state management library often used with React to manage application state through actions and reducers, promoting a unidirectional data flow.
15. Explain prop drilling.
Prop drilling occurs when you pass data through multiple layers of components, even if some intermediate components don't need that data. This can make your code cumbersome and harder to maintain.
// ParentComponent.jsimport React from 'react';import ChildComponentA from './ChildComponentA';function ParentComponent() {const data = 'Hello from Parent';return <ChildComponentA data={data} />;}// ChildComponentA.jsimport React from 'react';import ChildComponentB from './ChildComponentB';function ChildComponentA({ data }) {return <ChildComponentB data={data} />;}// ChildComponentB.jsimport React from 'react';import ChildComponentC from './ChildComponentC';function ChildComponentB({ data }) {return <ChildComponentC data={data} />;}// ChildComponentC.jsimport React from 'react';function ChildComponentC({ data }) {return <h1>{data}</h1>;}export default ChildComponentC;In the example above,
datais passed fromParentComponenttoChildComponentCthroughChildComponentAandChildComponentB, which don't use it. This unnecessary passing exemplifies prop drilling. To avoid this, consider using the Context API for more efficient data sharing.16. What are higher-order components (HOCs)?
HOCs are functions that take a component and return a new component, allowing for code reuse and abstraction of common functionality.
function withLogging(WrappedComponent) {return function EnhancedComponent(props) {console.log('Rendering:', WrappedComponent.name);return <WrappedComponent {...props} />;};}17. Describe lazy loading in React.
Lazy loading is an optimization technique where components or modules are loaded only when they are needed, improving application performance.
const LazyComponent = React.lazy(() => import('./LazyComponent'));function App() {return (<React.Suspense fallback={<div>Loading...</div>}><LazyComponent /></React.Suspense>);}18. What is Context API?
The Context API provides a way to share values (like global state) between components without having to explicitly pass props through every level of the tree.
19. How do you optimize performance in React applications?
Techniques include:
- Using
React.memofor functional components. - Implementing
shouldComponentUpdatefor class components. - Utilizing lazy loading for code splitting.
20. Explain error boundaries in React.
Error boundaries are special components that catch JavaScript errors anywhere in their child component tree, log those errors, and display a fallback UI instead of crashing the whole application.
class ErrorBoundary extends React.Component {constructor(props) {super(props);this.state = { hasError: false };}static getDerivedStateFromError(error) {return { hasError: true };}componentDidCatch(error, info) {console.error('Error caught:', error);}render() {if (this.state.hasError) {return <h1>Something went wrong.</h1>;}return this.props.children;}}21. What are custom hooks?
Custom hooks allow developers to extract component logic into reusable functions, promoting cleaner code and better organization.
function useFetch(url) {const [data, setData] = useState(null);useEffect(() => {fetch(url).then((response) => response.json()).then((data) => setData(data));}, [url]);return data;}22. How does React handle forms?
Forms can be controlled or uncontrolled; controlled forms use state to manage input values while uncontrolled forms rely on DOM elements directly.
23. What is server-side rendering (SSR)?
Server-side rendering (SSR) involves rendering components on the server before sending fully rendered HTML to clients, improving initial load times and SEO through efficient hydration processes.
24. How do you test React applications?
Testing React applications can be done using Jest and React Testing Library. Jest serves as the testing framework while React Testing Library provides utilities for testing components similarly to user interactions.
25. Discuss synthetic events in React.
Synthetic events are cross-browser wrappers around native events that provide consistent behavior across different browsers while maintaining performance optimizations.
26. Describe
useReducerhook in React.The
useReducerhook is an alternative touseStatefor managing complex state logic by using reducers similar to Redux patterns.const initialState = { count: 0 };function reducer(state, action) {switch (action.type) {case 'increment':return { count: state.count + 1 };case 'decrement':return { count: state.count - 1 };default:throw new Error();}}function Counter() {const [state, dispatch] = useReducer(reducer, initialState);return (<>Count: {state.count}<button onClick={() => dispatch({ type: 'increment' })}>+</button><button onClick={() => dispatch({ type: 'decrement' })}>-</button></>);}27. Explain what React hydration is.
Hydration involves attaching event listeners and making server-rendered HTML interactive on the client side. After server-side rendering, React initializes dynamic behavior by attaching event handlers.
28. What are some React anti-patterns?
React anti-patterns are practices that can lead to inefficient or hard-to-maintain code. Common examples include:
- Directly mutating state instead of using setState
- Using componentWillMount for data fetching
- Overusing componentWillReceiveProps
- Not using keys in lists
- Excessive inline functions in render
- Deeply nested state
29. Explain how you would implement routing in a React application using React Router?
You can implement routing using react-router-dom. Here's an example:
import { BrowserRouter as Router, Route, Switch } from 'react-router-dom';function App() {return (<Router><Switch><Route path="/" exact component={Home} /><Route path="/about" component={About} /><Route path="/contact" component={Contact} /></Switch></Router>);}30. How do you localize React applications?
Localization typically involves libraries like react-i18next or react-intl. Set up translation files for different languages and configure the library within your app using provided hooks or components.
// Example using react-i18nextimport { useTranslation } from 'react-i18next';const MyComponent = () => {const { t } = useTranslation();return <p>{t('welcome_message')}</p>;};Conclusion
If you're looking for more in-depth React interview preparation materials, also check out these resources:
- 50 Must-know HTML, CSS and JavaScript Interview Questions by Ex-interviewersDiscover fundamental HTML, CSS, and JavaScript knowledge with these expert-crafted interview questions and answers. Perfect for freshers preparing for junior developer roles.作者GreatFrontEnd Team63 分钟阅读Jun 28, 2025

HTML, CSS, and JavaScript are fundamental skills for any aspiring web developer, and securing a job in this field can be a challenging endeavor, especially for beginners. A critical part of the interview process is the technical interview, where your proficiency in these core web technologies is thoroughly assessed.
To help you prepare and boost your confidence, we’ve compiled a list of the top 50 essential interview questions and answers covering HTML, CSS, and JavaScript that are frequently asked in interviews. These are followed by two supplementary sections: additional HTML-focused questions that are increasingly common in modern front-end rounds, and integration questions that examine how HTML, CSS, and JavaScript interact in practice. Where relevant, questions include what interviewers look for in a strong answer, as well as nuances that are commonly overlooked in surface-level explanations.
If you're looking for additional JavaScript interview preparation materials, also check out these resources:
- Front End Interview Playbook
- Practice JavaScript interview questions
- Practice HTML interview questions
- Practice CSS interview questions
1. What Is Hoisting in JavaScript?
Hoisting refers to JavaScript's behavior of moving variable and function declarations to the top of their scope during the compilation phase. While declarations are hoisted, initializations are not.
console.log(foo); // undefinedvar foo = 1;console.log(foo); // 1Visualized as:
var foo;console.log(foo); // undefinedfoo = 1;console.log(foo); // 1Variables Declared with
let,const, andclassThese are hoisted but remain uninitialized, leading to a
ReferenceErrorif accessed before declaration.console.log(bar); // ReferenceErrorlet bar = 'value';Function Declarations vs. Expressions
Function declarations are fully hoisted (both declaration and definition), while function expressions are only partially hoisted (declaration without initialization).
console.log(declared()); // Worksfunction declared() {return 'Declared function';}console.log(expr); // undefinedconsole.log(expr()); // TypeError: expr is not a functionvar expr = function () {return 'Function expression';};Imports
Import statements are hoisted, making imported modules available throughout the file.
import foo from './foo';foo.doSomething(); // AccessibleExplore the concept of "hoisting" in JavaScript on GreatFrontEnd
2. How Do
let,var, andconstDiffer?1. Scope:
var: Function-scoped or globally scoped.letandconst: Block-scoped, confined to their nearest enclosing block.
function test() {var a = 1;let b = 2;const c = 3;}console.log(a); // ReferenceErrorconsole.log(b); // ReferenceErrorconsole.log(c); // ReferenceError2. Initialization:
varandlet: Can be declared without initialization.const: Must be initialized during declaration.
var a;let b;const c; // SyntaxError: Missing initializer3. Redeclaration:
var: Allows redeclaration in the same scope.letandconst: Redeclaration is not allowed.
var x = 1;var x = 2; // Validlet y = 1;let y = 2; // SyntaxError4. Reassignment:
varandlet: Reassignment is allowed.const: Reassignment is not allowed.
const z = 1;z = 2; // TypeError5. Hoisting:
var: Hoisted and initialized toundefined.letandconst: Hoisted but not initialized, causing aReferenceErrorif accessed before declaration.
console.log(a); // undefinedvar a = 1;console.log(b); // ReferenceErrorlet b = 2;Explore the differences between
let,var, andconston GreatFrontEnd3. What Is the Difference Between
==and===?Equality Operator (
==):- Converts operands to a common type before comparison.
- May produce unexpected results due to type coercion.
42 == '42'; // true0 == false; // truenull == undefined; // trueStrict Equality Operator (
===):- No type conversion; checks both value and type.
- Ensures accurate comparisons.
42 === '42'; // false0 === false; // falsenull === undefined; // falseBest Practice:
Prefer
===to avoid unexpected behavior caused by type coercion, except when comparing againstnullorundefined.var value = null;console.log(value == null); // trueconsole.log(value === null); // trueExplore the difference between
==and===on GreatFrontEnd4. What Is the Event Loop in JavaScript?
The event loop allows JavaScript to handle asynchronous tasks on a single thread, ensuring smooth execution without blocking.
Components:
- Call Stack: Tracks function calls in a LIFO order.
- Web APIs: Handle asynchronous tasks like timers and HTTP requests.
- Task Queue: Stores tasks like
setTimeoutand UI events. - Microtask Queue: Handles high-priority tasks like
Promisecallbacks.
Execution Order:
- Synchronous code executes first (call stack).
- Microtasks are processed next.
- Macrotasks are executed afterward.
console.log('Start');setTimeout(() => console.log('Timeout'), 0);Promise.resolve().then(() => console.log('Promise'));console.log('End');Output:
StartEndPromiseTimeoutExplore the event loop in JavaScript on GreatFrontEnd
5. What Is Event Delegation?
Event delegation uses a single event listener on a parent element to manage events on its child elements. This approach takes advantage of event bubbling, improving efficiency.
- Reduces memory usage by limiting the number of listeners.
- Dynamically handles added or removed child elements.
document.getElementById('parent').addEventListener('click', (event) => {if (event.target.tagName === 'BUTTON') {console.log(`Clicked ${event.target.textContent}`);}});Explore event delegation in JavaScript on GreatFrontEnd
6. How Does
thisWork in JavaScript?The value of
thisdepends on how a function is invoked:- Default Binding: Refers to the global object (
windowin browsers) in non-strict mode. In strict mode, which is the default inside ES modules and class bodies, the default binding isundefined. - Implicit Binding: Refers to the object before the dot.
- Explicit Binding: Defined using
call,apply, orbind. - Arrow Functions: Lexically inherit
thisfrom the surrounding scope.
const obj = {name: 'Alice',greet() {console.log(this.name);},};obj.greet(); // AliceExplore how
thisworks in JavaScript on GreatFrontEnd7. How Do Cookies,
localStorage, andsessionStorageDiffer?Cookies:
- Sent with every HTTP request.
- Limited to 4KB per domain.
- Can be set to expire.
document.cookie = 'token=abc123; expires=Fri, 31 Dec 2025 23:59:59 GMT; path=/';console.log(document.cookie);localStorage:- Persistent storage (until manually cleared).
- 5MB limit per origin.
localStorage.setItem('key', 'value');console.log(localStorage.getItem('key'));sessionStorage:- Data cleared when the tab or browser is closed.
- Limited to 5MB.
sessionStorage.setItem('key', 'value');console.log(sessionStorage.getItem('key'));Explore the difference between cookies,
localStorage, andsessionStorageon GreatFrontEnd8. What Are
<script>,<script async>, and<script defer>?<script>:- Blocks HTML parsing until the script loads and executes.
<script async>:- Loads scripts asynchronously.
- Executes as soon as the script is ready, potentially before HTML parsing completes.
<script defer>:- Loads scripts asynchronously.
- Executes only after the HTML parsing is complete.
<script src="main.js"></script><script async src="async.js"></script><script defer src="defer.js"></script>Explore the difference between
<script>,<script async>, and<script defer>on GreatFrontEnd9. How Do
null,undefined, and Undeclared Variables Differ?null:Explicitly represents no value. Use
===to check.undefined:Indicates a variable has been declared but not assigned a value.
Undeclared:
Variables not declared will throw a
ReferenceError.let a;console.log(a); // undefinedlet b = null;console.log(b); // nullExplore the difference between
null,undefined, and undeclared variables on GreatFrontEnd10. What Is the Difference Between
.calland.apply?.call:Accepts arguments as a comma-separated list.
.apply:Accepts arguments as an array.
function sum(a, b) {return a + b;}console.log(sum.call(null, 1, 2)); // 3console.log(sum.apply(null, [1, 2])); // 3Explore the difference between
.calland.applyon GreatFrontEnd11. What Is
Function.prototype.bindand Why Is It Useful?The
Function.prototype.bindmethod allows you to create a new function with a specificthiscontext and optional preset arguments. It’s particularly useful for ensuring a function has the correctthiscontext when passed to another function or used as a callback.const john = {age: 42,getAge: function () {return this.age;},};console.log(john.getAge()); // 42const unboundGetAge = john.getAge;console.log(unboundGetAge()); // undefinedconst boundGetAge = john.getAge.bind(john);console.log(boundGetAge()); // 42const mary = { age: 21 };const boundGetAgeMary = john.getAge.bind(mary);console.log(boundGetAgeMary()); // 21Common Uses:
- Binding
this:bindis often used to fix thethisvalue for a method, ensuring it always refers to the intended object. - Partial Application: You can predefine some arguments for a function using
bind. - Method Borrowing:
bindallows methods from one object to be used on another object.
Explore
Function.prototype.bindon GreatFrontEnd12. Why Use Arrow Functions in Constructors?
Arrow functions automatically bind the
thisvalue to the surrounding lexical scope, which eliminates issues with context in methods. This behavior makes code more predictable and easier to debug.const Person = function (name) {this.name = name;this.sayName1 = function () {console.log(this.name);};this.sayName2 = () => {console.log(this.name);};};const john = new Person('John');const dave = new Person('Dave');john.sayName1(); // Johnjohn.sayName2(); // Johnjohn.sayName1.call(dave); // Davejohn.sayName2.call(dave); // JohnWhen to Use:
- Whenever a method defined on an object or class instance needs to retain the original
thiswhen passed as a callback, such as event handlers assigned to DOM elements or methods passed to third-party APIs. While modern React favors functional components with hooks, this pattern is still relevant in class-based components, Web Components, and plain JavaScript modules.
Explore the advantage of using the arrow syntax for a method in a constructor on GreatFrontEnd
13. How Does Prototypal Inheritance Work?
Prototypal inheritance allows objects to inherit properties and methods from other objects through the prototype chain.
Key Concepts:
1. Prototypes:
Every JavaScript object has a prototype, which is another object from which it inherits properties.
function Person(name, age) {this.name = name;this.age = age;}Person.prototype.sayHello = function () {console.log(`Hello, my name is ${this.name} and I am ${this.age} years old.`);};const john = new Person('John', 30);john.sayHello(); // Hello, my name is John and I am 30 years old.2. Prototype Chain:
JavaScript looks for properties and methods on the object and continues up the chain until it finds the property or reaches
null.3. Constructor Functions:
Used with
newto create objects and set their prototype.function Animal(name) {this.name = name;}Animal.prototype.sayName = function () {console.log(`My name is ${this.name}`);};function Dog(name, breed) {Animal.call(this, name);this.breed = breed;}Dog.prototype = Object.create(Animal.prototype);Dog.prototype.bark = function () {console.log('Woof!');};const fido = new Dog('Fido', 'Labrador');fido.sayName(); // My name is Fidofido.bark(); // Woof!Explore how prototypal inheritance works on GreatFrontEnd
14. What’s the Difference Between
function Person(){},const person = Person(), andconst person = new Person()?Function Declaration:
function Person() {}is a standard function declaration. When written in PascalCase, it conventionally represents a constructor function.Function Call:
const person = Person()calls the function and executes its code but does not create a new object.Constructor Call:
const person = new Person()creates a new object, setting its prototype toPerson.prototype.15. How Do Function Declarations and Expressions Differ?
Function Declarations:
function foo() {console.log('Function declaration');}- Hoisted with their body.
- Can be invoked before their definition.
Function Expressions:
const foo = function () {console.log('Function expression');};- Only the variable is hoisted, not the function body.
- Cannot be invoked before their definition.
Explore the differences between function declarations and expressions on GreatFrontEnd
16. How Can You Create Objects in JavaScript?
- Object Literals:
const person = { firstName: 'John', lastName: 'Doe' };-
Object()Constructor:
const person = new Object();person.firstName = 'John';person.lastName = 'Doe';-
Object.create():
const proto = {greet() {console.log('Hello!');},};const person = Object.create(proto);person.greet(); // Hello!- ES2015 Classes:
class Person {constructor(name, age) {this.name = name;this.age = age;}}Explore ways to create objects in JavaScript on GreatFrontEnd
17. What Are Higher-Order Functions?
Higher-order functions either:
- Take other functions as arguments.
- Return functions.
function multiplier(factor) {return function (number) {return number * factor;};}const double = multiplier(2);console.log(double(5)); // 10Explore higher-order functions on GreatFrontEnd
18. Differences Between ES2015 Classes and ES5 Constructors
ES5 Constructor:
function Person(name) {this.name = name;}Person.prototype.greet = function () {console.log(`Hello, I’m ${this.name}`);};ES2015 Class:
class Person {constructor(name) {this.name = name;}greet() {console.log(`Hello, I’m ${this.name}`);}}Key Differences:
- Syntax: Classes are easier to read and write.
- Inheritance: Classes use
extendsandsuper.
Explore ES2015 classes and ES5 constructors on GreatFrontEnd
19. What Is Event Bubbling?
Event bubbling is when an event starts at the target element and propagates up through its ancestors.
parent.addEventListener('click', () => console.log('Parent clicked'));child.addEventListener('click', () => console.log('Child clicked'));Clicking the child triggers both handlers.
Explore event bubbling on GreatFrontEnd
20. What Is Event Capturing?
Event capturing is when an event starts at the root and propagates down to the target element.
Enabling Capturing:
parent.addEventListener('click', () => console.log('Parent capturing'), true);Explore event capturing on GreatFrontEnd
21. How Do the
mouseenterandmouseoverEvents Differ in JavaScript and Browsers?mouseenter- Does not propagate through the DOM tree
- Fires solely when the cursor enters the element itself, excluding its child elements
- Triggers only once upon entering the parent element, regardless of its internal content
mouseover- Propagates upwards through the DOM hierarchy
- Activates when the cursor enters the element or any of its descendant elements
- May lead to multiple event callbacks if there are nested child elements
22. Can You Differentiate Between Synchronous and Asynchronous Functions?
Synchronous Functions
- Execute operations in a sequential, step-by-step manner
- Block the program's execution until the current task completes
- Adhere to a strict, line-by-line execution order
- Are generally easier to comprehend and debug due to their predictable flow
- Common use cases include reading files synchronously and iterating over large datasets
Example:
const fs = require('fs');const data = fs.readFileSync('large-file.txt', 'utf8');console.log(data); // Blocks until file is readconsole.log('End of the program');Asynchronous Functions
- Allow the program to continue running without waiting for the task to finish
- Enable other operations to proceed while waiting for responses or the completion of time-consuming tasks
- Are non-blocking, facilitating concurrent execution and enhancing performance and responsiveness
- Commonly used for network requests, file I/O, timers, and animations
Example:
console.log('Start of the program');fetch('https://api.example.com/data').then((response) => response.json()).then((data) => console.log(data)) // Non-blocking.catch((error) => console.error(error));console.log('End of program');Understand the distinctions between synchronous and asynchronous functions on GreatFrontEnd
23. Provide a Comprehensive Explanation of AJAX
AJAX (Asynchronous JavaScript and XML) encompasses a collection of web development techniques that utilize various client-side technologies to build asynchronous web applications. Unlike traditional web applications where every user interaction results in a complete page reload, AJAX enables web apps to send and retrieve data from a server asynchronously. This allows for dynamic updates to specific parts of a web page without disrupting the overall page display and behavior.
Key Highlights:
- Asynchronous Operations: AJAX allows parts of a web page to update independently without reloading the entire page.
- Data Formats: Initially utilized XML, but JSON has become more prevalent due to its seamless compatibility with JavaScript.
- APIs: Traditionally relied on
XMLHttpRequest, thoughfetch()is now the preferred choice for modern web development.
XMLHttpRequestAPIExample:
let xhr = new XMLHttpRequest();xhr.onreadystatechange = function () {if (xhr.readyState === XMLHttpRequest.DONE) {if (xhr.status === 200) {console.log(xhr.responseText);} else {console.error('Request failed: ' + xhr.status);}}};xhr.open('GET', 'https://jsonplaceholder.typicode.com/todos/1', true);xhr.send();- Process: Initiates a new
XMLHttpRequest, assigns a callback to handle state changes, opens a connection to a specified URL, and sends the request.
fetch()APIExample:
fetch('https://jsonplaceholder.typicode.com/todos/1').then((response) => {if (!response.ok) {throw new Error('Network response was not ok');}return response.json();}).then((data) => console.log(data)).catch((error) => console.error('Fetch error:', error));- Process: Starts a fetch request, processes the response with
.then()to parse JSON data, and handles errors using.catch().
How AJAX Operates with
fetch1. Initiating a Request
fetch()starts an asynchronous request to obtain a resource from a given URL.- Example:fetch('https://api.example.com/data', {method: 'GET', // or 'POST', 'PUT', 'DELETE', etc.headers: {'Content-Type': 'application/json',},});
2. Promise-Based Response
fetch()returns a Promise that resolves to aResponseobject representing the server's reply.
3. Managing the Response
- The
Responseobject provides methods to handle the content, such as.json(),.text(), and.blob(). - Example:fetch('https://api.example.com/data').then((response) => response.json()).then((data) => console.log(data)).catch((error) => console.error('Error:', error));
4. Asynchronous Nature
fetch()operates asynchronously, allowing the browser to perform other tasks while awaiting the server's response.- Promises (
.then(),.catch()) are processed in the microtask queue as part of the event loop.
5. Configuring Request Options
- The optional second parameter in
fetch()allows configuration of various request settings, including HTTP method, headers, body, credentials, and caching behavior.
6. Handling Errors
- Errors such as network failures or invalid responses are captured and managed through the Promise chain using
.catch()ortry/catchwithasync/await.
Learn how to explain AJAX in detail on GreatFrontEnd
24. What Are the Pros and Cons of Utilizing AJAX?
AJAX (Asynchronous JavaScript and XML) facilitates the asynchronous exchange of data between web pages and servers, enabling dynamic content updates without necessitating full page reloads.
Advantages
- Enhanced User Experience: Updates content seamlessly without refreshing the entire page.
- Improved Performance: Reduces server load by fetching only the required data.
- Maintains State: Preserves user interactions and client-side states within the page.
Disadvantages
- Dependency on JavaScript: Functionality can break if JavaScript is disabled or fails to load in the browser.
- Bookmarking and Navigation: Dynamic content updates require explicit use of the History API (
pushState,replaceState) to keep URLs in sync with application state; otherwise, users cannot bookmark or share specific views. - SEO Considerations: Although modern search engines such as Googlebot render JavaScript and can index client-side content, rendering is deferred and adds latency to indexing. Server-side rendering, static generation, or hydration are often preferred for content that must be discoverable immediately.
- Performance on Low-End Devices: Processing AJAX responses and re-rendering the DOM can be resource-intensive, potentially slowing down performance on devices with limited CPU or memory.
Explore the benefits and drawbacks of using AJAX on GreatFrontEnd
25. How Do
XMLHttpRequestandfetch()Differ?Both
XMLHttpRequest (XHR)andfetch()facilitate asynchronous HTTP requests in JavaScript, but they vary in syntax, handling mechanisms, and features.Syntax and Implementation
- XMLHttpRequest: Utilizes an event-driven approach, requiring event listeners to manage responses and errors.
- fetch(): Employs a Promise-based model, offering a more straightforward and intuitive syntax.
Setting Request Headers
- XMLHttpRequest: Headers are set using the
setRequestHeadermethod. - fetch(): Headers are provided as an object within the options parameter.
Sending the Request Body
- XMLHttpRequest: The request body is sent using the
sendmethod. - fetch(): The
bodyproperty within the options parameter is used to include the request body.
Handling Responses
- XMLHttpRequest: Uses the
responseTypeproperty to manage different response formats. - fetch(): Offers a unified
Responseobject with.thenmethods for accessing data.
Managing Errors
- XMLHttpRequest: Errors are handled via the
onerrorevent. - fetch(): Errors are managed using the
.catchmethod.
Controlling Caching
- XMLHttpRequest: Managing cache can be cumbersome and often requires workaround strategies.
- fetch(): Directly supports caching options through its configuration.
Canceling Requests
- XMLHttpRequest: Requests can be aborted using the
abort()method. - fetch(): Utilizes
AbortControllerfor canceling requests.
Tracking Progress
- XMLHttpRequest: Supports progress tracking with the
onprogressevent. - fetch(): Lacks native support for tracking progress.
Choosing Between Them:
fetch()is generally favored for its cleaner syntax and Promise-based handling, thoughXMLHttpRequestremains useful for specific scenarios like progress tracking.Discover the distinctions between
XMLHttpRequestandfetch()on GreatFrontEnd26. What Are the Different Data Types in JavaScript?
JavaScript encompasses a variety of data types, which are categorized into two main groups: primitive and non-primitive (reference) types.
Primitive Data Types
- Number: Represents both integer and floating-point numbers.
- String: Denotes sequences of characters, enclosed in single quotes, double quotes, or backticks.
- Boolean: Logical values with
trueorfalse. - Undefined: A variable that has been declared but not assigned a value.
- Null: Signifies the intentional absence of any object value.
- Symbol: A unique and immutable value used primarily as object property keys.
- BigInt: Allows representation of integers with arbitrary precision, useful for very large numbers.
Non-Primitive Data Types
- Object: Stores collections of data and more complex entities.
- Array: An ordered list of values.
- Function: Functions are treated as objects and can be defined using declarations or expressions.
- Date: Represents dates and times.
- RegExp: Used for defining regular expressions for pattern matching within strings.
- Map: A collection of keyed data items, allowing keys of any type.
- Set: A collection of unique values.
Identifying Data Types: JavaScript is dynamically typed, meaning variables can hold different types of data at various times. The
typeofoperator is used to determine a variable's type.Explore the variety of data types in JavaScript on GreatFrontEnd
27. What Constructs Do You Use to Iterate Over Object Properties and Array Elements?
Looping through object properties and array items is a fundamental task in JavaScript, and there are multiple methods to accomplish this. Below are some of the common approaches:
Iterating Over Objects
1.
for...inLoopIterates over all enumerable properties of an object, including inherited ones.
for (const property in obj) {if (Object.hasOwn(obj, property)) {console.log(property);}}2.
Object.keys()Returns an array containing the object's own enumerable property names.
Object.keys(obj).forEach((property) => console.log(property));3.
Object.entries()Provides an array of the object's own enumerable string-keyed
[key, value]pairs.Object.entries(obj).forEach(([key, value]) => console.log(`${key}: ${value}`));4.
Object.getOwnPropertyNames()Returns an array of all properties (including non-enumerable ones) directly found on the object.
Object.getOwnPropertyNames(obj).forEach((property) => console.log(property));Iterating Over Arrays
1.
forLoopA traditional loop for iterating over array elements.
for (let i = 0; i < arr.length; i++) {console.log(arr[i]);}2.
Array.prototype.forEach()Executes a provided function once for each array element.
arr.forEach((element, index) => console.log(element, index));3.
for...ofLoopIterates over iterable objects like arrays.
for (let element of arr) {console.log(element);}4.
Array.prototype.entries()Provides both the index and value of each array element within a
for...ofloop.for (let [index, elem] of arr.entries()) {console.log(index, ': ', elem);}28. What Are the Advantages of Using Spread Syntax, and How Does It Differ from Rest Syntax?
Spread Syntax
Introduced in ES2015, the spread syntax (
...) is a powerful feature for copying and merging arrays and objects without altering the originals. It's widely used in functional programming, Redux, and RxJS.- Cloning Arrays/Objects: Creates shallow copies.const array = [1, 2, 3];const newArray = [...array]; // [1, 2, 3]const obj = { name: 'John', age: 30 };const newObj = { ...obj, city: 'New York' }; // { name: 'John', age: 30, city: 'New York' }
- Combining Arrays/Objects: Merges them into a new entity.const arr1 = [1, 2, 3];const arr2 = [4, 5, 6];const mergedArray = [...arr1, ...arr2]; // [1, 2, 3, 4, 5, 6]const obj1 = { foo: 'bar' };const obj2 = { qux: 'baz' };const mergedObj = { ...obj1, ...obj2 }; // { foo: 'bar', qux: 'baz' }
- Passing Function Arguments: Spreads array elements as individual arguments.const numbers = [1, 2, 3];Math.max(...numbers); // Equivalent to Math.max(1, 2, 3)
- Array vs. Object Spreads: Only iterables can be spread into arrays, while arrays can also be spread into objects.const array = [1, 2, 3];const obj = { ...array }; // { 0: 1, 1: 2, 2: 3 }
Rest Syntax
The rest syntax (
...) collects multiple elements into an array or object, functioning as the opposite of spread syntax.- Function Parameters: Gathers remaining arguments into an array.function addFiveToNumbers(...numbers) {return numbers.map((x) => x + 5);}const result = addFiveToNumbers(4, 5, 6, 7); // [9, 10, 11, 12]
- Array Destructuring: Collects remaining elements into a new array.const [first, second, ...remaining] = [1, 2, 3, 4, 5];// first: 1, second: 2, remaining: [3, 4, 5]
- Object Destructuring: Gathers remaining properties into a new object.const { e, f, ...others } = { e: 1, f: 2, g: 3, h: 4 };// e: 1, f: 2, others: { g: 3, h: 4 }
- Rest Parameter Rules: Must be the final parameter in a function.function addFiveToNumbers(arg1, ...numbers, arg2) {// Error: Rest element must be last element.}
Understand the benefits of spread syntax and how it differs from rest syntax on GreatFrontEnd
29. How Does a
MapObject Differ from a Plain Object in JavaScript?Map Object
- Key Flexibility: Allows keys of any type, including objects, functions, and primitives.
- Order Preservation: Maintains the order in which keys are inserted.
- Size Property: Includes a
sizeproperty to easily determine the number of key-value pairs. - Iteration: Directly iterable with methods like
forEach,keys(),values(), andentries(). - Performance: Typically offers better performance for larger datasets and frequent modifications.
Plain Object
- Key Types: Primarily uses strings or symbols as keys. Non-string keys are converted to strings.
- Order: Does not guarantee the order of key insertion.
- Size Tracking: Lacks a built-in property to determine the number of keys; requires manual counting.
- Iteration: Not inherently iterable. Requires methods like
Object.keys(),Object.values(), orObject.entries()to iterate. - Performance: Generally faster for small datasets and simple operations.
// Mapconst map = new Map();map.set('key1', 'value1');map.set({ key: 'key2' }, 'value2');console.log(map.size); // 2, the object reference is preserved as a distinct key// Plain Objectconst obj = { key1: 'value1' };obj[{ key: 'key2' }] = 'value2';console.log(Object.keys(obj)); // ['key1', '[object Object]']// The object key has been coerced to the string "[object Object]"Discover the differences between a
Mapobject and a plain object in JavaScript on GreatFrontEnd30. What Are the Differences Between
Map/SetandWeakMap/WeakSet?The primary distinctions between
Map/SetandWeakMap/WeakSetin JavaScript are outlined below:- Key Types:
MapandSetaccept keys of any type, including objects, primitives, and functions.WeakMapandWeakSetexclusively use objects as keys, disallowing primitive values like strings or numbers.
- Memory Management:
MapandSetmaintain strong references to their keys and values, preventing their garbage collection.WeakMapandWeakSetuse weak references for keys (objects), allowing garbage collection if there are no other strong references.
- Key Enumeration:
MapandSethave enumerable keys that can be iterated over.WeakMapandWeakSetdo not allow enumeration of keys, making it impossible to retrieve lists of keys or values directly.
- Size Property:
MapandSetprovide asizeproperty indicating the number of elements.WeakMapandWeakSetlack asizeproperty since their size can change due to garbage collection.
- Use Cases:
MapandSetare suitable for general-purpose data storage and caching.WeakMapandWeakSetare ideal for storing metadata or additional object-related information without preventing the objects from being garbage collected when they are no longer needed.
Learn about the differences between
Map/SetandWeakMap/WeakSeton GreatFrontEnd31. What is a Practical Scenario for Using the Arrow
=>Function Syntax?One effective application of JavaScript's arrow function syntax is streamlining callback functions, especially when concise, inline function definitions are needed. Consider the following example:
Scenario: Doubling Array Elements with
mapImagine you have an array of numbers and you want to double each number using the
mapmethod.// Traditional function syntaxconst numbers = [1, 2, 3, 4, 5];const doubledNumbers = numbers.map(function (number) {return number * 2;});console.log(doubledNumbers); // Output: [2, 4, 6, 8, 10]By utilizing arrow function syntax, the same outcome can be achieved more succinctly:
// Arrow function syntaxconst numbers = [1, 2, 3, 4, 5];const doubledNumbers = numbers.map((number) => number * 2);console.log(doubledNumbers); // Output: [2, 4, 6, 8, 10]Explore a use case for the new arrow => function syntax on GreatFrontEnd
32. How Do Callback Functions Operate in Asynchronous Tasks?
In the realm of asynchronous programming, a callback function is passed as an argument to another function and is executed once a particular task completes, such as data retrieval or handling input/output operations. Here's a straightforward explanation:
function fetchData(callback) {setTimeout(() => {const data = { name: 'John', age: 30 };callback(data);}, 1000);}fetchData((data) => {console.log(data); // { name: 'John', age: 30 }});Explore the concept of a callback function in asynchronous operations on GreatFrontEnd
33. Can You Describe Debouncing and Throttling Techniques?
Debouncing and throttling are techniques used to control the rate at which functions are executed, optimizing performance and managing event-driven behaviors in JavaScript applications.
- Debouncing: Delays the execution of a function until a specified period has elapsed since its last invocation. This is particularly useful for scenarios like handling search input where you want to wait until the user has finished typing before executing a function.function debounce(func, delay) {let timeoutId;return (...args) => {clearTimeout(timeoutId);timeoutId = setTimeout(() => func.apply(this, args), delay);};}
- Throttling: Restricts a function to be executed no more than once within a given timeframe. This is beneficial for handling events that fire frequently, such as window resizing or scrolling.function throttle(func, limit) {let inThrottle;return (...args) => {if (!inThrottle) {func.apply(this, args);inThrottle = true;setTimeout(() => (inThrottle = false), limit);}};}
These strategies help in enhancing application performance by preventing excessive function calls.
Explore the concept of debouncing and throttling on GreatFrontEnd
34. How Does Destructuring Assignment Work for Objects and Arrays?
Destructuring assignment in JavaScript provides a concise way to extract values from arrays or properties from objects into individual variables.
// Array destructuringconst [a, b] = [1, 2];// Object destructuringconst { name, age } = { name: 'John', age: 30 };This syntax employs square brackets for arrays and curly braces for objects, allowing for streamlined variable assignments directly from data structures.
Explore the concept of destructuring assignment for objects and arrays on GreatFrontEnd
35. What is Hoisting in the Context of Functions?
Hoisting in JavaScript refers to the behavior where function declarations are moved to the top of their containing scope during the compilation phase. This allows functions to be invoked before their actual definition in the code. Conversely, function expressions and arrow functions must be defined prior to their invocation to avoid errors.
// Function declarationhoistedFunction(); // Works finefunction hoistedFunction() {console.log('This function is hoisted');}// Function expressionnonHoistedFunction(); // Throws an errorvar nonHoistedFunction = function () {console.log('This function is not hoisted');};Explore the concept of hoisting with regards to functions on GreatFrontEnd
36. How Does Inheritance Work in ES2015 Classes?
In ES2015, JavaScript introduces the
classsyntax with theextendskeyword, enabling one class to inherit properties and methods from another. Thesuperkeyword is used to access the parent class's constructor and methods.class Animal {constructor(name) {this.name = name;}speak() {console.log(`${this.name} makes a noise.`);}}class Dog extends Animal {constructor(name, breed) {super(name);this.breed = breed;}speak() {console.log(`${this.name} barks.`);}}const dog = new Dog('Rex', 'German Shepherd');dog.speak(); // Output: Rex barks.In this example, the
Dogclass inherits from theAnimalclass, demonstrating how classes facilitate inheritance and method overriding in JavaScript.Explore the concept of inheritance in ES2015 classes on GreatFrontEnd
37. What is Lexical Scoping?
Lexical scoping in JavaScript determines how variable names are resolved based on their location within the source code. Nested functions have access to variables from their parent scopes, enabling them to utilize and manipulate these variables.
function outerFunction() {let outerVariable = 'I am outside!';function innerFunction() {console.log(outerVariable); // 'I am outside!'}innerFunction();}outerFunction();In this scenario,
innerFunctioncan accessouterVariablebecause of lexical scoping rules, which allow inner functions to access variables defined in their outer scope.Explore the concept of lexical scoping on GreatFrontEnd
38. What is Scope in JavaScript?
Scope in JavaScript defines the accessibility of variables and functions in different parts of the code. There are three primary types of scope:
- Global Scope: Variables declared outside any function or block are accessible throughout the entire code.
- Function Scope: Variables declared within a function are accessible only within that function.
- Block Scope: Introduced in ES6, variables declared with
letorconstwithin a block (e.g., within{}) are accessible only within that block.
// Global scopevar globalVar = 'I am global';function myFunction() {// Function scopevar functionVar = 'I am in a function';if (true) {// Block scopelet blockVar = 'I am in a block';console.log(blockVar); // Accessible here}// console.log(blockVar); // Throws an error}console.log(globalVar); // Accessible here// console.log(functionVar); // Throws an errorIn this example,
globalVaris accessible globally,functionVaris confined tomyFunction, andblockVaris restricted to theifblock.Explore the concept of scope in JavaScript on GreatFrontEnd
39. What is the Spread Operator and How is it Used?
The spread operator (
...) in JavaScript allows iterable elements (like arrays or objects) to be expanded into individual elements. It's versatile and can be used for copying, merging, and passing array elements as function arguments.// Copying an arrayconst arr1 = [1, 2, 3];const arr2 = [...arr1];// Merging arraysconst arr3 = [4, 5, 6];const mergedArray = [...arr1, ...arr3];// Copying an objectconst obj1 = { a: 1, b: 2 };const obj2 = { ...obj1 };// Merging objectsconst obj3 = { c: 3, d: 4 };const mergedObject = { ...obj1, ...obj3 };// Passing array elements as function argumentsconst sum = (x, y, z) => x + y + z;const numbers = [1, 2, 3];console.log(sum(...numbers)); // Output: 6The spread operator simplifies operations such as copying arrays or objects, merging multiple arrays or objects into one, and spreading elements of an array as individual arguments to functions.
Explore the concept of the spread operator and its uses on GreatFrontEnd
40. How Does
thisBinding Work in Event Handlers?In JavaScript, the
thiskeyword refers to the object that is executing the current piece of code. Within event handlers,thistypically points to the DOM element that triggered the event. However, its value can change depending on how the handler is defined and invoked. To ensurethisreferences the intended context, techniques like usingbind(), arrow functions, or explicitly setting the context are employed.These methods help maintain the correct reference for
thiswithin event handling functions, ensuring consistent and predictable behavior across various event-driven scenarios in JavaScript applications.Explore the concept of
thisbinding in event handlers on GreatFrontEnd41. What is a Block Formatting Context (BFC) and How Does It Function?
A Block Formatting Context (BFC) is a pivotal concept in CSS that influences how block-level elements are rendered and interact on a webpage. It creates an isolated environment where block boxes are laid out, ensuring that elements like floats, absolutely positioned elements,
inline-blocks,table-cells,table-captions, and those with anoverflowvalue other thanvisible(except when propagated to the viewport) establish a new BFC.Grasping how to initiate a BFC is essential because, without it, the containing box might fail to encompass floated child elements. This issue is akin to collapsing margins but is often more deceptive, causing entire boxes to collapse unexpectedly.
A BFC is formed when an HTML box satisfies at least one of the following criteria:
- The
floatproperty is set to a value other thannone. - The
positionproperty is assigned a value that is neitherstaticnorrelative. - The
displayproperty is set totable-cell,table-caption,inline-block,flex,inline-flex,grid, orinline-grid. - The
overflowproperty is set to a value other thanvisible.
Within a BFC, each box's left outer edge aligns with the left edge of its containing block (or the right edge in right-to-left layouts). Additionally, vertical margins between adjacent block-level boxes within a BFC collapse into a single margin.
Discover Block Formatting Context (BFC) and its Operation on GreatFrontEnd
42. What is
z-indexand How is a Stacking Context Created?The
z-indexproperty in CSS manages the vertical stacking order of overlapping elements. It only influences positioned elements: those with apositionvalue other thanstatic, and their descendants or flex items.In the absence of a
z-indexvalue, elements stack based on their order in the Document Object Model (DOM), with elements appearing later in the HTML markup rendered on top of earlier ones at the same hierarchy level. Positioned elements (those with non-static positioning) and their children will always overlay elements with default static positioning, regardless of their order in the HTML structure.A stacking context is essentially a group of elements that share a common stacking order. Within a local stacking context, the
z-indexvalues of child elements are relative to that context rather than the entire document. Elements outside of this context, such as sibling elements of a local stacking context, cannot interpose between layers within it. For instance, if element B overlays element A, a child of element A, element C, cannot surpass element B in the stacking order even if it has a higherz-indexthan element B.Each stacking context operates independently; after stacking its child elements, the entire context is treated as a single entity within the parent stacking context's order. Certain CSS properties, like an
opacityless than 1, afilterthat isn'tnone, or atransformthat isn'tnone, can trigger the creation of a new stacking context.Learn about
z-indexand Stacking Contexts on GreatFrontEnd43. How Does a Browser Match Elements to a CSS Selector?
This topic relates to writing efficient CSS, specifically how browsers interpret and apply CSS selectors. Browsers process selectors from right to left, starting with the most specific (the key selector) and moving outward. They first identify all elements that match the rightmost part of the selector and then traverse up the DOM tree to verify if those elements meet the remaining parts of the selector.
For example, consider the selector
p span. Browsers will first locate all<span>elements and then check each span's ancestor chain to determine if it is within a<p>element. Once a<p>ancestor is found for a given<span>, the browser confirms that the<span>matches the selector and ceases further traversal for that element.The efficiency of selector matching is influenced by the length of the selector chain. The shorter the chain, the quicker the browser can verify matches.
Understand How Browsers Match CSS Selectors on GreatFrontEnd
44. What is the Box Model in CSS and How Can You Control Its Rendering?
The CSS box model is a fundamental concept that describes the rectangular boxes generated for elements in the document tree, determining how they are laid out and displayed. Each box comprises a content area (such as text or images) surrounded by optional
padding,border, andmarginareas.The box model is responsible for calculating:
- The total space a block element occupies.
- Whether borders and margins overlap or collapse.
- The overall dimensions of a box.
Box Model Rules
- Dimensions Calculation: A block element's size is determined by its
width,height,padding, andborder. - Automatic Height: If no
heightis specified, a block element's height adjusts to its content pluspadding(unless floats are involved). - Automatic Width: If no
widthis set, a non-floated block element expands to fit its parent's width minuspadding, unless amax-widthis specified.- Certain block-level elements like
table,figure, andinputhave inherent width values and may not expand fully. - Inline elements like
spando not have a default width and will not expand to fit.
- Certain block-level elements like
- Content Dimensions: An element's
heightandwidthare determined by its content. - Box-Sizing: By default (
box-sizing: content-box),paddingandborderare not included in an element'swidthandheight.
Note: Margins do not contribute to the actual size of the box; they affect the space outside the box. The box's area is confined to the
borderand does not extend into themargin.Additional Considerations
Understanding the
box-sizingproperty is crucial as it alters how an element'sheightandwidthare calculated.box-sizing: content-box: The default behavior where only the content size is considered.box-sizing: border-box: Includespaddingandborderin the element's totalwidthandheight, excludingmargin.
Many CSS frameworks adopt
box-sizing: border-boxglobally for a more intuitive sizing approach.Explore the Box Model and Its Control in CSS on GreatFrontEnd
45. How Do You Utilize the CSS
displayProperty? Provide Examples.The
displayproperty in CSS dictates how an element is rendered in the document flow. Common values includenone,block,inline,inline-block,flex,grid,table,table-row,table-cell, andlist-item.Description:
noneHides the element; it does not occupy any space in the layout. All child elements are also hidden. The element is treated as if it does not exist in the DOM.
blockThe element occupies the full width available, starting on a new line.
inlineThe element does not start on a new line and only occupies as much width as necessary.
inline-blockCombines characteristics of both
inlineandblock. The element flows with text but can havewidthandheightset.flexDefines the element as a flex container, enabling the use of flexbox layout for its children.
gridDefines the element as a grid container, allowing for grid-based layout of its children.
tableMakes the element behave like a
<table>element.table-rowMakes the element behave like a
<tr>(table row) element.table-cellMakes the element behave like a
<td>(table cell) element.list-itemMakes the element behave like a
<li>(list item) element, enabling list-specific styling such aslist-style-typeandlist-style-position.For a comprehensive list of
displayproperty values, refer to the CSS Display | MDN.Understand the CSS
displayProperty with Examples on GreatFrontEnd46. How Do
relative,fixed,absolute,sticky, andstaticPositioning Differ?In CSS, an element's positioning is determined by its
positionproperty, which can be set torelative,fixed,absolute,sticky, orstatic. Here's how each behaves:static: The default positioning. Elements flow naturally within the document. Thetop,right,bottom,left, andz-indexproperties have no effect.relative: The element is positioned relative to its normal position. Adjustments usingtop,right,bottom, orleftmove the element without affecting the layout of surrounding elements, leaving a gap where it would have been.absolute: The element is removed from the normal document flow and positioned relative to its nearest positioned ancestor (an ancestor with apositionother thanstatic). If no such ancestor exists, it positions relative to the initial containing block. Absolutely positioned elements do not affect the position of other elements and can havewidthandheightspecified.fixed: Similar toabsolute, but the element is positioned relative to the viewport, meaning it stays in the same place even when the page is scrolled.sticky: A hybrid ofrelativeandfixed. The element behaves likerelativeuntil it crosses a specified threshold (e.g., scroll position), after which it behaves likefixed, sticking to its position within its parent container.
Understanding these positioning schemes is vital for controlling the layout and behavior of elements, especially in responsive and dynamic designs.
Learn About Positioning Schemes in CSS on GreatFrontEnd
47. What Should You Consider When Designing for Multilingual Websites?
Designing and developing for multilingual websites involves various considerations to ensure accessibility and usability across different languages and cultures. This process is part of internationalization (i18n).
Search Engine Optimization (SEO)
- Language Attribute: Use the
langattribute on the<html>tag to specify the page's language. - Locale in URLs: Include locale identifiers in URLs (e.g.,
en_US,zh_CN). - Alternate Links: Utilize
<link rel="alternate" hreflang="other_locale" href="url_for_other_locale">to inform search engines about alternate language versions of the page. - Fallback Pages: Provide a fallback page for unmatched languages using
<link rel="alternate" href="url_for_fallback" hreflang="x-default" />.
Locale vs. Language
- Locale: Controls regional settings like number formats, dates, and times, which may vary within a language.
- Language Variations: Recognize that widely spoken languages have different dialects and regional variations (e.g.,
en-USvs.en-GB,zh-CNvs.zh-TW).
Locale Prediction and Flexibility
- Automatic Detection: Servers can detect a visitor's locale using HTTP
Accept-Languageheaders and IP addresses. - User Control: Allow users to easily change their preferred language and locale settings to account for inaccuracies in automatic detection.
Text Length and Layout
- Variable Lengths: Be aware that translations can alter text length, potentially affecting layout and causing overflow issues.
- Design Flexibility: Avoid rigid designs that cannot accommodate varying text lengths, especially for headings, labels, and buttons.
Reading Direction
- Left-to-Right (LTR) vs. Right-to-Left (RTL): Accommodate different text directions, such as Hebrew and Arabic, by designing flexible layouts that can adapt to both LTR and RTL orientations.
Avoid Concatenating Translated Strings
- Dynamic Content: Instead of concatenating strings (e.g.,
"The date today is " + date), use template strings with parameter substitution to accommodate different grammar structures across languages. Example:// Englishconst message = `I will travel on ${date}`;// Chineseconst message = `我会在${date}出发`;
Formatting Dates and Currencies
- Regional Formats: Adapt date and currency formats to match regional conventions (e.g., "May 31, 2012" in the U.S. vs. "31 May 2012" in Europe).
Text in Images
- Scalability Issues: Avoid embedding text within images, as it complicates translation and accessibility. Use text elements styled with CSS instead to allow for easier localization.
Cultural Perceptions of Color
- Color Sensitivity: Be mindful that colors can carry different meanings and emotions across cultures. Choose color schemes that are culturally appropriate and inclusive.
Understand Multilingual Design Considerations on GreatFrontEnd
48. How Do
block,inline, andinline-blockDisplay Types Differ?The
displayproperty in CSS determines how elements are rendered on the page. Theblock,inline, andinline-blockvalues have distinct behaviors and use cases:Property blockinline-blockinlineSize Fills up the width of its parent container. Depends on content. Depends on content. Positioning Start on a new line and tolerates no HTML elements next to it (except when you add float)Flows along with other content and allows other elements beside it. Flows along with other content and allows other elements beside it. Can specify widthandheightYes Yes No. Will ignore if being set. Can be aligned with vertical-alignNo Yes Yes Margins and paddings All sides respected. All sides respected. Only horizontal sides respected. Vertical sides, if specified, do not affect layout. Vertical space it takes up depends on line-height, even though theborderandpaddingappear visually around the content.Float - - Becomes like a blockelement where you can set vertical margins and paddings.Use Cases Layout elements like <div>,<p>,<section>.Used for buttons, images, and form fields that need custom sizes but stay in line with text. Links <a>, text formatting<span>, text styling - bold<b>, italics<i>.Learn the Differences Between
block,inline, andinline-blockon GreatFrontEnd49. When Would You Prefer
translate()Over Absolute Positioning, or Vice Versa?The
translate()function is a part of the CSStransformproperty and offers a different approach to positioning compared toabsolutepositioning. Here's why you might choose one over the other:- Using
translate(): - Flow Preservation: Elements remain in their original position within the document flow, similar to
position: relative. - Performance Benefits: Modifying
transformoropacitydoes not trigger browser reflows or repaints; instead, it initiates a composition layer. This results in smoother and more efficient animations, astranslate()leverages the GPU for rendering. - Layout Stability: The surrounding layout remains unaffected since the element's space is preserved.
.element {transform: translateX(50px);}- Flow Preservation: Elements remain in their original position within the document flow, similar to
- Using
absolutePositioning: - Flow Removal: The element is taken out of the normal document flow, and its position is calculated relative to the nearest positioned ancestor or the viewport.
- Reflow Trigger: Changing an element's absolute position can cause the browser to recalculate the layout (reflow), which is more CPU-intensive.
- Overlapping Control: Useful for precise placement of elements without affecting other elements' positions.
.element {position: absolute;top: 20px;left: 30px;}
Why Choose
translate()?For animations and dynamic movements where performance and smoothness are critical,
translate()is more efficient. It avoids the costly reflows associated with changing layout-affecting properties liketopandleft.Why Choose
absolutePositioning?When you need to position elements precisely without regard to their original place in the document flow,
absolutepositioning is the way to go. It's essential for creating overlays, modals, and tooltips that need to appear in specific locations on the screen.Understand When to Use
translate()vs. Absolute Positioning on GreatFrontEnd50. What Does
* { box-sizing: border-box; }Do and What Are Its Advantages?Applying
* { box-sizing: border-box; }in your CSS ensures that all elements on the page use theborder-boxmodel for calculating theirwidthandheight.What It Does
By default, elements use
box-sizing: content-box, where thewidthandheightonly account for the content area. When you setbox-sizing: border-box, thewidthandheightproperties include the element'spaddingandborder, but not themargin.Comparison Table
Property box-sizing: content-box(default)box-sizing: border-boxcontent Yes Yes paddingNo Yes borderNo Yes marginNo No Advantages
- Intuitive Sizing: Including
paddingandborderwithin thewidthandheightmakes it easier to calculate the size of elements, aligning more closely with designers' expectations. - Simplified Layouts: Prevents unexpected sizing issues, especially when adding
paddingorborderto elements, as it doesn't alter the total size. - Consistency Across Frameworks: Many CSS frameworks like Bootstrap, Tailwind, and Bulma set
box-sizing: border-boxglobally to maintain consistency and predictability in element sizing.
Explore What
* { box-sizing: border-box; }Does and Its Benefits on GreatFrontEndAdditional HTML Interview Questions
The following HTML-focused topics are among the most frequently asked in front-end interviews. They cover semantic markup, HTML5 features, meta tags, form validation, and link security, all foundational areas where a precise answer often distinguishes a strong candidate from one with only surface-level familiarity.
51. What Is Semantic HTML, and Why Does It Matter?
Semantic HTML is the practice of using HTML elements that describe the meaning of their content, rather than relying on generic containers styled to resemble specific structures. Elements such as
<header>,<nav>,<main>,<article>,<section>,<aside>, and<footer>convey the role of the content they contain, while<div>and<span>are non-semantic and carry no inherent meaning.<!-- Non-semantic: the purpose of each container is not expressed in the markup --><div class="header"><div class="nav">...</div></div><div class="main"><div class="article">...</div></div><div class="footer">...</div><!-- Semantic: the markup itself describes the page structure --><header><nav>...</nav></header><main><article>...</article></main><footer>...</footer>Benefits of semantic HTML include:
- Accessibility: Screen readers use semantic elements to build a navigable outline of the page. Users can jump directly to
<nav>,<main>, or landmark regions using assistive-technology shortcuts. - SEO: Search engines rely on semantic structure to understand the hierarchy and importance of content, which supports more accurate indexing.
- Maintainability: Semantic markup is self-documenting, making code easier to read, review, and refactor.
- Default behavior: Many semantic elements come with built-in behavior.
<button>, for example, is keyboard-accessible, submits forms, and respects the operating system's focus styles without additional JavaScript or CSS.
What interviewers look for: A strong answer names concrete semantic elements and explains their impact on assistive technology and SEO, rather than describing semantic HTML as simply "cleaner code". Awareness that
<div>and<span>remain the correct choice when no semantic element applies is equally important; overusing semantic tags where they do not fit is as problematic as avoiding them.Commonly overlooked nuance: Semantic HTML is not only about choosing the right tag; it is about the accessibility tree the browser constructs from the markup. A
<div role="button">is semantically a button to assistive technology but loses native keyboard activation, focus styling, and form-submission behavior, making<button>strictly preferable whenever it applies.52. What Are the Key Features of HTML5, and Why Is the Doctype So Simple?
HTML5 became the current W3C standard in 2014 and has continued to evolve as part of the WHATWG HTML Living Standard. It introduced several major improvements over earlier versions of HTML.
The simplified
<!DOCTYPE html>HTML5 decouples the doctype from the legacy SGML and XHTML DTD system. A single line,
<!DOCTYPE html>, is all that is required at the top of every HTML5 document and instructs the browser to render the page in standards mode.<!DOCTYPE html><html lang="en"><head><meta charset="UTF-8" /><meta name="viewport" content="width=device-width, initial-scale=1" /><title>Document</title></head><body>...</body></html>Key HTML5 features
- Semantic elements:
<header>,<nav>,<main>,<article>,<section>,<aside>,<footer>,<figure>,<time>, and others. - Native multimedia:
<audio>and<video>elements remove the need for browser plugins such as Flash. - Graphics:
<canvas>for bitmap rendering and native SVG support for vector graphics. - Form enhancements: New input types (
email,url,number,date,color,range,tel,search) and validation attributes (required,pattern,min,max). - Storage APIs:
localStorageandsessionStoragefor client-side key-value storage. - Offline and networking: Service Workers and the Cache API for offline-capable applications, and the Fetch API for HTTP requests.
- Concurrency: Web Workers for running scripts on background threads.
- Additional browser capabilities: Geolocation, Drag and Drop, and the History API, which are features that previously required third-party libraries.
What interviewers look for: A strong answer groups features by category rather than listing them at random, and demonstrates awareness that HTML is now a Living Standard maintained by the WHATWG rather than a versioned specification. Candidates who can tie features to practical use cases, for example, "
<canvas>for interactive graphics,<video>for native playback", demonstrate applied understanding rather than rote memorization.Commonly overlooked nuance: The
<!DOCTYPE html>declaration is case-insensitive but must still appear as the very first content in the document. Any whitespace or markup before it can trigger quirks mode in some browsers, producing subtle layout and box-model differences that are difficult to debug after the fact.53. How Do HTML Meta Tags Work, and Which Ones Matter Most for SEO and Responsive Design?
Meta tags are instructions placed within the
<head>of an HTML document that describe the page to browsers, search engines, and social platforms. They are not visible to users directly but significantly influence how the page is rendered, discovered, and shared.<head><meta charset="UTF-8" /><meta name="viewport" content="width=device-width, initial-scale=1" /><metaname="description"content="A concise summary of the page, typically 150-160 characters." /><meta name="robots" content="index, follow" /><!-- Open Graph for social sharing --><meta property="og:title" content="Page Title" /><metaproperty="og:description"content="Description shown when the page is shared." /><meta property="og:image" content="https://example.com/preview.png" /><meta property="og:type" content="website" /><!-- Twitter Card --><meta name="twitter:card" content="summary_large_image" /></head>Key meta tags and their purpose:
charset="UTF-8"declares the character encoding. It must appear within the first 1024 bytes of the document, so it is conventionally the first element in the<head>.name="viewport"controls layout on mobile devices. Without it, mobile browsers fall back to a desktop-width rendering and zoom out. The canonical value iswidth=device-width, initial-scale=1.name="description"provides the summary that search engines may display in result listings. It does not directly influence rankings, but a compelling description improves click-through rate.name="robots"instructs crawlers whether to index the page and follow its links. Common values includeindex,noindex,follow, andnofollow.- Open Graph (
og:*) and Twitter Card tags control how the page appears when shared on social platforms, including the preview title, description, and image.
What interviewers look for: A strong answer separates the viewport meta tag (critical for responsive rendering) from SEO-focused tags (
description,robots) and social-sharing tags (Open Graph, Twitter). Distinguishingname="description"(a search-engine hint) fromog:description(a social-sharing hint) demonstrates practical familiarity with the ecosystem.Commonly overlooked nuance: The
keywordsmeta tag has been ignored by major search engines, including Google, since 2009; citing it as an SEO tool is a signal of outdated material. The viewport meta tag is also load-bearing for Core Web Vitals; an incorrect value can regress Cumulative Layout Shift on mobile devices even when the page appears visually correct.54. How Does HTML5 Form Validation Work Without JavaScript?
HTML5 introduced native, browser-provided form validation through a combination of input types, attributes, and the Constraint Validation API. This allows basic client-side validation to be expressed declaratively in markup, with no JavaScript required for common cases.
<form><label>Email<input type="email" name="email" required /></label><label>Password (8+ characters, at least one number)<inputtype="password"name="password"requiredminlength="8"pattern="^(?=.*\d).{8,}$" /></label><label>Age (18-100)<input type="number" name="age" min="18" max="100" required /></label><label>Website (optional)<input type="url" name="website" /></label><button type="submit">Sign up</button></form>Native validation features include:
- Input types that apply their own format checks:
email,url,number,tel,date,color,range. - Constraint attributes:
required,minlength,maxlength,min,max,step, andpattern(a regular expression). - The Constraint Validation API, which exposes JavaScript hooks such as
element.checkValidity(),element.reportValidity(), andelement.setCustomValidity(message)for customising error messages without replacing the native behavior. - The
:valid,:invalid,:required, and:optionalpseudo-classes, which allow styling based on validation state directly from CSS.
What interviewers look for: A strong answer distinguishes between the three layers: input types (which enforce a format), constraint attributes (which enforce bounds), and the Constraint Validation API (which allows programmatic customization without sacrificing native behavior). Applying
novalidateon the form and reimplementing everything in JavaScript is a common anti-pattern worth identifying.Commonly overlooked nuance: Native validation messages are localized to the user's browser language, styled consistently with the operating system, and positioned near the offending field. These benefits are difficult to replicate with a custom JavaScript solution. Client-side validation also never replaces server-side validation; it is a user-experience enhancement, not a security measure, because tampering with the DOM trivially bypasses any client-side check.
55. Why Should
target="_blank"Links Includerel="noopener noreferrer"?Opening a link in a new tab using
target="_blank"has historically introduced both security and performance concerns. Modern best practice addresses them by adding therel="noopener noreferrer"attribute.<!-- Always use noopener (and typically noreferrer) with target="_blank" --><ahref="https://external-site.example"target="_blank"rel="noopener noreferrer">External site</a>What each keyword does:
noopenerprevents the newly opened page from accessing the original page throughwindow.opener. Without it, the destination page can redirect the opener to a phishing site viawindow.opener.location = '...', a technique known as reverse tabnabbing.noreferrerprevents the browser from sending theRefererheader to the destination, and also impliesnoopener. It is useful when the originating URL should not be disclosed to the third-party site.
Modern browser defaults:
All major browsers (Chrome, Firefox, Safari, and Edge) now set
rel="noopener"implicitly whentarget="_blank"is used. This change was rolled out progressively between 2020 and 2022. However, explicitly declaringrel="noopener noreferrer"remains recommended because:- It preserves protection for users of older browsers and embedded WebView components that may not have adopted the default.
- It makes the security intent explicit and documents why the attribute exists for other developers.
noreferrermust still be added explicitly when theRefererheader should be suppressed.
What interviewers look for: A strong answer clearly explains the reverse-tabnabbing attack and distinguishes the roles of
noopenerandnoreferrer. Awareness of the modern implicit default demonstrates currency with the platform without treating the explicit attribute as optional.Commonly overlooked nuance:
rel="noopener"only affects the opener relationship. It does not prevent the destination page from performing other actions, such as opening popups, attempting fingerprinting, or tracking the user. Stronger cross-origin isolation at the tab level requires additional mechanisms, such as theCross-Origin-Opener-PolicyHTTP header.56. What Are the Differences Between
<article>,<section>, and<div>?Although these three elements can render identically by default, they convey distinct semantic meanings that influence the accessibility tree and the document outline.
<article>represents a self-contained, independently distributable piece of content, such as a blog post, product card, or comment. A helpful test is to consider whether the content would still make sense when syndicated or displayed in isolation.<section>represents a thematic grouping of content that belongs under a heading. A<section>without an accompanying heading is almost always the wrong element.<div>is a generic container with no semantic meaning, intended as a styling or scripting hook when no semantic element applies.
<article><h2>How the event loop works</h2><section><h3>The call stack</h3><p>...</p></section><section><h3>The microtask queue</h3><p>...</p></section></article>What interviewers look for: A strong answer considers whether a
<section>has an appropriate heading before using it. Using<section>in place of<nav>, or applying<article>to decorative UI, indicates the element names have been memorized without an understanding of how assistive technologies interpret them.Commonly overlooked nuance: These elements are frequently described as interchangeable semantic containers, but a
<section>without an accessible name produces a generic region with no navigational value. Nesting<article>within another<article>also implicitly demotes the inner element within the document outline.HTML, CSS, and JavaScript Integration Questions
Front-end interviews increasingly focus on how the three core technologies interact rather than on any one in isolation. The following questions examine the boundaries where HTML, CSS, and JavaScript meet: subtle behaviors of one affect the others in ways that can surface as hard-to-diagnose bugs in production.
57. Why Is It Generally a Good Idea to Place CSS
<link>Tags in<head>and JavaScript<script>Tags Just Before</body>?The placement of stylesheet and script tags directly affects how quickly a browser can display content to the user. The guidance traces back to the browser's rendering pipeline and the distinction between render-blocking and parser-blocking resources.
CSS in
<head>- The browser cannot paint any content until it has constructed both the DOM (from HTML) and the CSSOM (from CSS). Referencing stylesheets as early as possible allows the CSSOM to be built in parallel with HTML parsing.
- Placing CSS at the top prevents a flash of unstyled content, a brief moment when the browser renders the page using default styles before the author stylesheet loads.
- Modern browsers block the first paint on any CSS referenced in the
<head>, so delaying CSS also delays the visible render.
JavaScript just before
</body>- Classic
<script>tags are parser-blocking. When the browser encounters one during HTML parsing, it must pause parsing, download the script, execute it, and only then resume. - Placing scripts at the end of
<body>allows the entire document to be parsed and the initial paint to occur before any script runs. - Scripts placed at the end also have immediate access to the DOM elements they may query; earlier placement risks running before the target elements exist in the document.
Modern alternatives with
asyncanddefer<head><!-- CSS blocks rendering, so load as early as possible --><link rel="stylesheet" href="styles.css" /><!-- defer: downloads in parallel, runs after parsing completes, preserves order --><script src="app.js" defer></script><!-- async: downloads in parallel, runs as soon as available (order not guaranteed) --><script src="analytics.js" async></script></head>With
defer, scripts can safely be placed in the<head>because they are guaranteed to run only after HTML parsing completes, in document order. This is the preferred modern approach for application scripts.What interviewers look for: A strong answer connects placement to the critical rendering path. The rationale is not stylistic, but about enabling parallel downloads and reducing first-paint time. Awareness of
deferandasyncas modern alternatives indicates that the classic rule is a fallback for when those attributes are not an option, not an absolute requirement.Commonly overlooked nuance:
asyncscripts run as soon as they are downloaded, which can occur mid-parse. If oneasyncscript depends on another, their execution order is undefined. For ordered execution, for example, a library before a script that uses it,deferis the correct choice.58. What Is the Critical Rendering Path?
The critical rendering path is the sequence of steps the browser performs to convert HTML, CSS, and JavaScript into pixels on the screen. Understanding it is foundational to diagnosing performance issues, interpreting Core Web Vitals, and writing code that does not unnecessarily block rendering.
The five stages
- DOM construction: The browser parses HTML into a tree of nodes called the Document Object Model.
- CSSOM construction: The browser parses all referenced CSS into a tree of style rules called the CSS Object Model.
- Render tree: The DOM and CSSOM are combined into a render tree that contains only the visible elements along with their computed styles. Elements hidden with
display: noneare excluded from the render tree; elements hidden withvisibility: hiddenremain in it. - Layout (reflow): The browser calculates the exact position and dimensions of each element in the render tree.
- Paint: The browser fills in pixels for each element: text, colors, images, borders, and shadows. Complex visual effects may be split across compositor layers for efficient re-rendering.
How HTML, CSS, and JavaScript each affect the path
- HTML parsing can be paused by synchronous
<script>tags until each script has downloaded and executed. - CSS is render-blocking: the browser cannot paint until all CSS in the
<head>is downloaded and parsed. CSS is also parser-blocking for any scripts that follow, because scripts may query computed styles. - JavaScript is parser-blocking by default, but
asyncanddeferallow parallel downloading.deferpreserves ordering and runs beforeDOMContentLoaded;asyncruns as soon as the download completes, in any order.
Strategies for optimizing the critical rendering path
- Minimize the number and size of critical resources (HTML, CSS, and blocking JavaScript).
- Inline critical CSS for the initial viewport and defer the rest using
<link rel="preload">or themediaattribute. - Use
deferorasyncon scripts that do not need to run synchronously. - Apply
<link rel="preconnect">and<link rel="preload">hints to give the browser early information about which resources will be needed.
What interviewers look for: A strong answer names the five stages in order and identifies which resources block which stages. Connecting the critical rendering path to Core Web Vitals, particularly Largest Contentful Paint, demonstrates an understanding of the practical impact on measurable performance metrics.
Commonly overlooked nuance: Layout and paint are triggered not only during the initial load but on almost every JavaScript-driven style or DOM change. Reading
offsetHeightimmediately after every write forces a condition called layout thrashing, which can cause significant jank. Batching reads and writes, or scheduling work insiderequestAnimationFrame, avoids the issue.59. How Do
display: none,visibility: hidden, andopacity: 0Differ for JavaScript APIs and Accessibility?All three techniques hide content visually, but they have substantially different effects on layout, interactivity, and assistive technology.
Technique Occupies layout space Focusable via Tab Exposed to screen readers getBoundingClientRectdimensionsdisplay: noneNo No No All zeros visibility: hiddenYes No No Actual dimensions opacity: 0Yes Yes Yes Actual dimensions `aria-hidden="true"`* Yes Yes No Actual dimensions *
aria-hiddenaffects only the accessibility tree; it does not hide the element visually or remove it from the focus order. Combiningaria-hidden="true"withtabindex="-1"is often required to fully remove an element from assistive-technology interaction.Key implications for JavaScript and accessibility:
- An element with
opacity: 0remains fully interactive: it still receives pointer events, still enters the tab order, and is still read aloud by screen readers. Using it alone as a hiding technique is a frequent source of accessibility bugs. - An element with
display: nonecannot be measured throughgetBoundingClientRectoroffsetWidth, and scroll positions cannot be computed while it is hidden. A common pattern when measurement is required before display is to temporarily applyvisibility: hidden(which retains layout) rather thandisplay: none. - Removing keyboard focusability and removing accessibility exposure are independent concerns:
tabindex="-1"addresses focus only, whilearia-hidden="true"addresses the accessibility tree only.
What interviewers look for: Recognition that "hidden" is not a single concept. Strong answers distinguish between visual rendering, layout occupation, focusability, and accessibility-tree exposure, and select a technique that matches the intent. For transient hiding of an actionable element, the
hiddenattribute ordisplay: noneis usually correct; for visual-only transitions, pairingopacitywithvisibilityat the end of the transition is safer.Commonly overlooked nuance: Combining
opacity: 0withpointer-events: noneaddresses pointer input but does not remove the element from keyboard focus or screen-reader output. Accessible hiding requires attention to all four dimensions, not only visual appearance.60. Why Does Updating
innerHTMLBreak Event Listeners Attached to Child Elements?This is a classic question at the intersection of HTML and JavaScript, and its failure mode is particularly subtle: no error is thrown, and the affected listeners simply stop firing.
When a value is assigned to
innerHTML, the browser performs the following steps:- Parses the string as HTML.
- Discards the existing descendant DOM nodes, along with all associated state: event listeners, dataset entries, and custom properties.
- Inserts newly created nodes that happen to match the provided markup.
const list = document.getElementById('list');list.querySelector('.item').addEventListener('click', handleClick);// The listener is still attached and functional at this point.list.innerHTML += '<li class="item">New item</li>';// The original <li> has been destroyed and replaced; the listener no longer fires.Recommended approaches, in order of preference:
- Event delegation on a stable parent element:list.addEventListener('click', (e) => {if (e.target.closest('.item')) handleClick(e);});
- DOM methods that preserve existing nodes, such as
appendChild,insertAdjacentHTML, orreplaceChildren. - Re-attaching listeners after each
innerHTMLupdate, which is fragile and generally discouraged.
What interviewers look for: Recognition that reassigning
innerHTMLdestroys existing descendants rather than simply updating the DOM. Adopting event delegation as the primary solution demonstrates senior-level understanding, whereas relying on re-attaching listeners after each update reflects a reactive rather than architectural approach.61. How Does Focus Management Change When JavaScript Dynamically Inserts New Content?
Single-page applications, modals, toasts, and client-side route transitions all share a common challenge: the user's focus and the screen reader's reading context do not follow DOM changes automatically. They must be managed explicitly.
Three common scenarios illustrate the distinction:
- Route transitions in a single-page application. Following navigation, focus should be moved to the new page's primary heading (
<h1>) or to a<main tabindex="-1">, and the new page title should be announced through a live region. Without this, a screen reader user may remain positioned at the previous page's footer with no indication that the view has changed.router.afterEach(() => {document.querySelector('main').focus();document.title = newTitle;}); - Modals and dialogs. Focus should be trapped inside the dialog while it is open and returned to the triggering element when the dialog closes. The native
<dialog>element manages this behavior automatically; custom modal implementations must replicate it manually.const trigger = document.activeElement;dialog.showModal();dialog.addEventListener('close', () => trigger.focus()); - Inline content insertion, such as form validation errors, search results, or toast notifications. Focus should generally remain with the user, who is often in the middle of typing. Instead, a live region (
aria-live="polite"for results,role="alert"for errors) should be used to announce the update without disrupting the current interaction.
What interviewers look for: A strong answer distinguishes between types of DOM changes rather than applying a uniform rule. Moving focus on every DOM change is as disruptive as moving it on none. Senior-level responses separate navigational context changes (move focus), user-initiated overlays (trap focus and return it on close), and ambient updates such as toasts or search results (announce via a live region without moving focus).
62. What Is the Difference Between Progressive Enhancement and Graceful Degradation?
Both concepts address the same underlying challenge: making a website usable across a range of browsers, devices, and network conditions. They approach the problem from opposite directions.
Progressive enhancement
A bottom-up approach that starts with a minimal, functional baseline of HTML and then layers on enhancements as the browsing environment supports them.
- The HTML must convey the core content and functionality on its own: forms submit via standard requests, links navigate, content is readable.
- CSS is layered on to improve presentation without being required for basic usability.
- JavaScript is layered on to improve interactivity, not to provide essential functionality.
<!-- Functional without JavaScript: the form submits via a standard GET request --><form action="/search" method="GET"><input type="search" name="q" required /><button type="submit">Search</button></form><script>// JavaScript enhances the experience with inline results, but the non-JS// baseline still works if the script fails to load or execute.document.querySelector('form').addEventListener('submit', async (e) => {e.preventDefault();const results = await fetchResults(e.target.q.value);renderResults(results);});</script>Graceful degradation
A top-down approach that starts with a fully-featured modern experience and ensures the site remains usable when features are missing.
- The site is built with modern capabilities assumed to be available.
- Fallbacks are added for older browsers or degraded environments, often through feature detection,
<noscript>blocks, or polyfills. - A minimum acceptable baseline defines what the site must still do when advanced features are unavailable.
When each approach applies
- Progressive enhancement is generally recommended for new projects, particularly for content-driven sites, e-commerce, and forms. It prioritizes accessibility and reliability: the baseline continues to work when JavaScript fails, CSS is blocked by a content filter, or the connection drops mid-load.
- Graceful degradation is often appropriate when retrofitting an existing modern codebase to support older environments, or when the product is inherently interactive (real-time editors, games, dashboards) and cannot function as static content.
What interviewers look for: A strong answer identifies both approaches as strategies for resilience rather than ideological opposites. Candidates who can describe scenarios in which each is appropriate, rather than asserting that one is universally correct, demonstrate the judgment expected of a senior front-end engineer.
Commonly overlooked nuance: Progressive enhancement is often mischaracterized as "making the site work without JavaScript". The more useful framing is layered functionality: the CSS layer should still work if JavaScript fails, the HTML layer should still work if CSS fails, and the text content should still be readable if all styling fails. This layered view applies equally within a JavaScript-heavy single-page application, where the initial server-rendered HTML can provide a usable baseline before hydration completes.
Conclusion
Congratulations on reaching the end of our comprehensive collection of HTML, CSS, and JavaScript interview questions and answers! We hope this resource has equipped you with the confidence and skills needed to excel in your upcoming interviews. Remember, consistent practice is essential, so keep coding and revisiting these concepts until they become second nature.
If you prefer GitHub, our open source repo contains all +190 JavaScript interview questions. You’re welcome to explore, fork, or contribute to the collection.
- 50 React.js Interview Questions for Experienced Developers50 React JS interview questions for experienced developers. Explore detailed solutions to enhance your preparation for 2025 job interviews作者GreatFrontEnd Team20 分钟阅读Jun 22, 2025
For experienced frontend developers, React interviews often focus on advanced concepts that evaluate both problem-solving abilities and architectural knowledge. With over a decade of React experience, you're expected to have a strong grasp of the framework's core principles, as well as its more sophisticated patterns and performance optimization strategies.
To help you shine in these interviews, we've compiled a list of 50 React JS interview questions. These questions cover everything from React's lifecycle and hooks to context management, error boundaries, and performance bottlenecks, ensuring you're well-prepared to demonstrate your expertise in handling complex challenges and building scalable applications.
If you're looking for more in-depth React interview preparation materials, also check out these resources:
- React Interview Playbook
- Practice React coding interview questions
- Practice React quiz interview questions
1. Can you explain how React's Virtual DOM works and its benefits?
The Virtual DOM (VDOM) is a lightweight, in-memory representation of the real DOM. When a React component's state or props change, React first updates the VDOM instead of the actual DOM. Then, React performs a "diffing" algorithm to calculate the minimum number of changes required to update the real DOM, ensuring efficient UI rendering.
Benefits:
- Performance: Minimizes direct DOM manipulations, which are expensive.
- Declarative UI: Developers describe "what" the UI should look like, and React manages "how" to update it.
- Cross-browser Compatibility: React abstracts browser quirks when manipulating the DOM.
function Counter() {const [count, setCount] = React.useState(0);return (<button onClick={() => setCount(count + 1)}>Clicked {count} times</button>);}2. How does React's reconciliation algorithm work to update the UI efficiently?
React's reconciliation algorithm identifies changes in the VDOM tree and updates only the affected parts of the real DOM. It uses the following steps:
- Diffing: Compares the previous and current VDOM tree to find changes.
- Key Comparison: Uses
keyprops to identify stable elements across renders. - Batch Updates: Minimizes updates by batching multiple state changes into a single DOM operation.
3. What is the difference between React's class components and functional components?
Class Components
- Use ES6 classes
- Manage state and lifecycle using class methods like
componentDidMount - Verbose and harder to test
Functional Components
- Simpler functions.
- Use hooks (
useState,useEffect, etc.) for state and lifecycle - Encouraged in modern React due to their simplicity and performance benefits
4. Explain the Fiber architecture and how it improves React's rendering process.
The Fiber architecture is a re-implementation of React's reconciliation algorithm designed to improve rendering. It breaks rendering into units of work that can be paused and resumed, allowing React to prioritize high-priority tasks (e.g., user input).
Benefits:
- Non-blocking rendering
- Improved responsiveness for animations and transitions
5. What are React fragments, and when would you use them instead of a wrapper element?
React Fragments allow grouping child elements without adding an extra DOM node.
When to use:
- Avoiding unnecessary
<div>elements in the DOM, which can cause layout or CSS issues
function List() {return (<><li>Item 1</li><li>Item 2</li></>);}6. What is the difference between props and state in React?
- Props are immutable and passed from a parent component to a child component. They allow components to be dynamic by providing external values.
- State is mutable and managed within the component itself. It can change over time, usually in response to user actions or network responses. Example:
// Parent component passes propsconst Parent = () => {return <Child name="John" />;};// Child component receives propsconst Child = ({ name }) => {return <h1>Hello, {name}</h1>;};7. How would you lift state up in a React application, and why is it necessary?
Lifting state up means moving the state to the nearest common ancestor of the components that need to access it. This is necessary for sharing state between sibling components.
Example:
// Lifting state upconst Parent = () => {const [counter, setCounter] = useState(0);return (<div><Child1 counter={counter} /><Child2 setCounter={setCounter} /></div>);};const Child1 = ({ counter }) => <h1>{counter}</h1>;const Child2 = ({ setCounter }) => (<button onClick={() => setCounter((prev) => prev + 1)}>Increment</button>);In this example, the state is managed in the
Parentcomponent, and both child components access it via props.8. Can you explain how you would manage deeply nested state in React?
To manage deeply nested state, you can use one of the following techniques:
useState: For simpler state updates in nested structures.useReducer: More useful for complex or deeply nested state, where actions and reducers help keep state changes predictable.- Context API: For shared deep state across multiple components.
- Immutable updates: Use libraries like Immer for easier state updates when working with nested data. Example with useReducer:
const initialState = { user: { name: 'John', age: 30 } };function reducer(state, action) {switch (action.type) {case 'UPDATE_NAME':return { ...state, user: { ...state.user, name: action.payload } };default:return state;}}const Component = () => {const [state, dispatch] = useReducer(reducer, initialState);return (<button onClick={() => dispatch({ type: 'UPDATE_NAME', payload: 'Jane' })}>Update Name</button>);};9. How do controlled and uncontrolled components differ in React?
- Controlled Components: React is responsible for managing the form element's value via state. Any change to the value is handled by React through the onChange handler.
- Uncontrolled Components: React does not manage the form value directly. Instead, the DOM itself handles the state, and React uses refs to access the current value. Example:
// Controlled componentconst ControlledInput = () => {const [value, setValue] = useState('');return <input value={value} onChange={(e) => setValue(e.target.value)} />;};// Uncontrolled componentconst UncontrolledInput = () => {const inputRef = useRef();return <input ref={inputRef} />;};10. What are some common methods to prevent unnecessary re-renders of a component in React?
Here are some ways to prevent unnecessary re-renders:
- React.memo: Memoizes a component, preventing re-renders when props haven't changed.
- useMemo: Memoizes values, useful for expensive calculations.
- useCallback: Memoizes functions, ensuring that they don't get recreated on every render.
- shouldComponentUpdate: A lifecycle method that determines if a component should re-render (for class components).
- PureComponent: Extends React.Component and only re-renders when props or state change.
- Key Prop in Lists: Using a proper key for list items can help React efficiently update only the necessary DOM elements. Example:
// Using React.memoconst MyComponent = React.memo(({ name }) => {return <h1>{name}</h1>;});// Using useMemoconst computedValue = useMemo(() => expensiveComputation(a, b), [a, b]);// Using useCallbackconst memoizedCallback = useCallback(() => {console.log('This function is memoized');}, []);11. How do hooks improve React components?
Hooks allow using state and lifecycle features in functional components, making them concise, reusable, and easier to test.
12. What is the purpose of the
useEffecthook, and how do you manage dependencies in it?The
useEffecthook handles side effects like fetching data, updating the DOM, or setting up subscriptions in functional components. Dependencies, specified as the second argument ([]), control when the effect runs:- Empty array (
[]): Runs only after the initial render - No array provided: Runs after every render
- Specific dependencies (
[dep1, dep2]): Runs when any dependency changes
13. What is the difference between
useMemoanduseCallback?The key difference between
useMemoanduseCallbacklies in what they cache:useMemo: Caches the result of a computation to avoid re-computing it unless its dependencies change. Useful for optimizing expensive calculations.useCallback: Caches a function instance to avoid unnecessary re-creation unless its dependencies change. Useful for preventing child components from re-rendering when passed as props.
const memoizedValue = useMemo(() => computeValue(a, b), [a, b]);const memoizedCallback = useCallback(() => callback(a, b), [a, b]);14. What is the
useReducerhook in React and when should it be used?The
useReducerhook manages complex state logic in functional components, serving as an alternative touseState. It's ideal when state has multiple sub-values or when the next state relies on the previous one. It accepts a reducer function and an initial state.const [state, dispatch] = useReducer(reducer, initialState);15. What is the difference between
useEffectanduseLayoutEffectin React?useEffectanduseLayoutEffectare both used for handling side effects in React functional components but differ in timing:useEffectruns asynchronously after the DOM has painted, ideal for tasks like data fetching or subscriptions.useLayoutEffectruns synchronously after DOM mutations but before the browser paints, useful for tasks like measuring DOM elements or synchronizing the UI with the DOM.
Example:
import React, { useEffect, useLayoutEffect, useRef } from 'react';function Example() {const ref = useRef();useEffect(() => {console.log('useEffect: Runs after DOM paint');});useLayoutEffect(() => {console.log('useLayoutEffect: Runs before DOM paint');console.log('Element width:', ref.current.offsetWidth);});return <div ref={ref}>Hello</div>;}16. Explain the React component lifecycle methods in class components.
React class components have lifecycle methods for different phases:
Mounting:
constructor: Initializes state or binds methodscomponentDidMount: Runs after the component mounts, useful for API calls or subscriptions
componentDidMount() {console.log('Component mounted');}Updating:
shouldComponentUpdate: Determines if the component should re-rendercomponentDidUpdate: Runs after updates, useful for side effects
Unmounting:
componentWillUnmount: Cleans up (e.g., removing event listeners).
componentWillUnmount() {console.log('Component will unmount');}These methods allow you to manage component behavior throughout its lifecycle.
17. How do
shouldComponentUpdateandReact.memooptimize re-renders?shouldComponentUpdate: A lifecycle method in class components. Return false to prevent unnecessary renders.React.memo: A higher-order component for functional components to prevent re-renders unless props change.
const MemoizedComponent = React.memo(({ prop }) => <div>{prop}</div>);18. What is the purpose of the
keyprop in lists, and how does React use it to optimize rendering?The
keyprop uniquely identifies elements in a list, enabling React to efficiently update the DOM by matching keys during the reconciliation process. Without unique keys, React may unnecessarily re-render elements, leading to performance issues and bugs.{items.map((item) => <ListItem key={item.id} value={item.value} />);}19. Can you explain how to use
React.PureComponentand when it should be used?React.PureComponentis a class component that performs a shallow comparison of props and state to determine if the component should re-render. Use it when the component's render output depends solely on its props and state.20. How do you avoid or handle performance bottlenecks in a large-scale React application?
- Code Splitting: Use
React.lazyandSuspenseto load components only when needed, improving initial load time - Memoization: Use
useMemoandReact.memoto memoize expensive calculations and components, preventing unnecessary re-renders - Debouncing/Throttling: Limit frequent updates (like search inputs) with debouncing or throttling to optimize performance
- Pagination and Infinite Scroll: Load data in chunks with pagination or infinite scroll to reduce rendering large datasets at once
21. What are higher-order components in React?
Higher-order components (HOCs) are functions that take a component and return a new one with added props or behavior, facilitating logic reuse across components.
const withExtraProps = (WrappedComponent) => {return (props) => <WrappedComponent {...props} extraProp="value" />;};const EnhancedComponent = withExtraProps(MyComponent);22. Explain how React's Context API works and when to use it
The Context API allows sharing state across the component tree without prop drilling. You create a context with
React.createContext(), wrap your app with a Provider to supply the state, and access it withuseContext()in any component.When to use:
Use the Context API for global state (like themes, user data) that needs to be accessed by multiple components, avoiding prop drilling. Example:
const ThemeContext = React.createContext();const App = () => {const [theme, setTheme] = useState('light');return (<ThemeContext.Provider value={{ theme, setTheme }}><SomeComponent /></ThemeContext.Provider>);};23. What are the benefits and limitations of using React's Context API for state management?
Benefits:
- Simplifies State Sharing: Allows easy sharing of state across components without prop drilling.
- Eliminates Prop Drilling: Avoids passing props through multiple layers, making the code more maintainable.
Limitations:
- Inefficient for Frequent Updates: Re-renders all components that consume the context on state changes, which can be inefficient for frequent updates.
- Not Suitable for Large-Scale State Management: For complex or large applications with deep state needs, consider using state management libraries like Redux or Zustand for better performance and scalability.
24. How do you implement lazy loading in React, and what is the role of
React.lazyandSuspense?React.lazydynamically loads a component only when needed.Suspensedisplays a fallback UI while loading.const LazyComponent = React.lazy(() => import('./LazyComponent'));function App() {return (<Suspense fallback={<div>Loading...</div>}><LazyComponent /></Suspense>);}25. Can you explain how to create and use custom hooks in React?
Custom hooks are functions that encapsulate reusable logic.
function useCounter(initialValue = 0) {const [count, setCount] = React.useState(initialValue);const increment = () => setCount((prev) => prev + 1);return { count, increment };}26. How do you manage forms in React?
Controlled Components:
Use
useStateto manage form data, where the form elements' values are controlled by React state. This allows for easy validation and manipulation of form inputs.const [value, setValue] = useState('');const handleChange = (e) => setValue(e.target.value);return <input value={value} onChange={handleChange} />;Uncontrolled Components:
Use
useRefto directly access DOM elements and their values, which can be useful for simple forms or when you want to avoid managing state.const inputRef = useRef();const handleSubmit = () => console.log(inputRef.current.value);return <input ref={inputRef} />;Controlled components offer more flexibility and control, while uncontrolled components can be simpler and more efficient for certain use cases.
27. What is the role of
useRefin form validation, and how would you implement it?useRefallows direct access to DOM elements, which is useful for form validation in uncontrolled components or when you need to interact with form fields without managing their state. It can also be used to store values or functions without causing re-renders.Implementation: You can use useRef to reference input elements and then access their values for validation when the form is submitted.
const inputRef = useRef();function handleSubmit() {const value = inputRef.current.value;if (value.trim() === '') {console.log('Input is required!');} else {console.log('Input value:', value);}}return <input ref={inputRef} />;28. How would you handle form validation in React?
For robust form validation, use libraries like Formik or React Hook Form, which handle validation and error management efficiently.
For simple forms, use
useStateto track input values and validation errors:const [value, setValue] = useState('');const [error, setError] = useState('');const handleSubmit = () => {if (!value) setError('Field is required');else console.log('Form submitted:', value);};Use libraries for complex forms, and
useStatefor basic validation.29. How do you handle dynamic form fields in React?
To handle dynamic form fields, use state arrays to manage and update the fields as they are added or removed.
Example:
const [fields, setFields] = useState(['']);const addField = () => setFields([...fields, '']);const removeField = (index) => setFields(fields.filter((_, i) => i !== index));return (<>{fields.map((_, index) => (<input key={index} />))}<button onClick={addField}>Add Field</button></>);This approach allows you to dynamically add or remove form fields while keeping the state updated.
30. Can you explain the debouncing technique for form inputs in React?
Debouncing delays execution of an action (e.g., API call) until a specified time has elapsed since the last input.
const handleInput = debounce((value) => console.log(value), 300);31. How would you test a React component using Jest and React Testing Library?
- Write tests to ensure proper rendering, interaction, and output.
- Use
render,fireEvent, andscreenfor assertions.
test('renders button', () => {render(<button>Click Me</button>);expect(screen.getByText('Click Me')).toBeInTheDocument();});32. What is the purpose of snapshot testing in React?
Snapshot testing captures a component's rendered output (DOM structure) at a specific point in time and compares it to a saved baseline to detect unintended changes. It helps ensure UI consistency by alerting you to unexpected modifications.
33. How do you handle asynchronous testing in React components?
Use
async/awaitandwaitForfrom React Testing Library to wait for updates after async operations.Example:
import { render, screen, waitFor } from '@testing-library/react';import MyComponent from './MyComponent';test('displays data after fetching', async () => {render(<MyComponent />);await waitFor(() =>expect(screen.getByText(/fetched data/i)).toBeInTheDocument(),);});This ensures the test waits for async updates before making assertions.
34. What are the key differences between shallow rendering and full DOM rendering in React tests?
- Shallow Rendering: Renders only the component being tested, without rendering its child components. Useful for isolated unit testing.
- Full DOM Rendering: Mounts the entire component tree, including children, providing a complete DOM structure. Ideal for integration tests.
35. How would you mock API calls in a React test?
Mock API calls using Jest's
jest.mockor libraries like Axios Mock Adapter to simulate responses and test components in isolation.Example:
import axios from 'axios';import { render, screen, waitFor } from '@testing-library/react';import MyComponent from './MyComponent';jest.mock('axios');test('displays fetched data', async () => {axios.get.mockResolvedValue({ data: { message: 'Hello, World!' } });render(<MyComponent />);await waitFor(() =>expect(screen.getByText('Hello, World!')).toBeInTheDocument(),);});Key Points: -
jest.mock: Replaces the actual module with a mock. 0 Mock Responses: UsemockResolvedValueormockRejectedValueto simulate API behavior.36. How does React Router work, and how do you implement dynamic routing?
React Router maps URL paths to components, enabling navigation in single-page apps. Dynamic routing allows you to use URL parameters to render components based on dynamic values.
Example:
import { BrowserRouter, Routes, Route, useParams } from 'react-router-dom';function UserPage() {const { id } = useParams(); // Access dynamic parameterreturn <h1>User ID: {id}</h1>;}export default function App() {return (<BrowserRouter><Routes><Route path="/user/:id" element={<UserPage />} /> {/* Dynamic path */}</Routes></BrowserRouter>);}Key Features:
- Dynamic Segments:
:idcaptures dynamic data from the URL. useParamsHook: Accesses these dynamic values for rendering.
37. How do you handle nested routes and route parameters in React Router?
Nested routes allow you to create hierarchies of components, and
useParamshelps access dynamic route parameters.Key Techniques:
<Outlet>: Renders child routes within a parent layoutuseParams: Retrieves route parameters for dynamic routing
import {BrowserRouter,Routes,Route,Outlet,useParams,} from 'react-router-dom';function UserProfile() {const { userId } = useParams();return <h2>User ID: {userId}</h2>;}function App() {return (<BrowserRouter><Routes><Route path="user/:userId" element={<Outlet />}><Route path="profile" element={<UserProfile />} /></Route></Routes></BrowserRouter>);}38. What is the difference between BrowserRouter and HashRouter?
- BrowserRouter: Uses the HTML5 History API to manage navigation, enabling clean URLs without the hash (
#). It requires server-side configuration to handle routes correctly, especially for deep linking. - HashRouter: Uses the hash (
#) portion of the URL to simulate navigation. It doesn't require server-side configuration, as the hash is never sent to the server. This makes it suitable for environments where server-side routing isn't possible (e.g., static hosting).
39. How would you implement route guards or private routes in React?
To implement private routes, create a component that checks if the user is authenticated before rendering the desired route.
Example:
import { Navigate } from 'react-router-dom';function PrivateRoute({ children }) {return isAuthenticated ? children : <Navigate to="/login" />;}PrivateRoute: Checks authentication and either renders the children (protected routes) or redirects to the login page.<Navigate>: Replaces the deprecated<Redirect>for redirecting in React Router v6+.
40. How do you manage the active route state in a multi-page React application?
Use the useLocation hook to get the current route, and conditionally apply styles for the active state.
Example:
import { useLocation } from 'react-router-dom';function NavBar() {const location = useLocation();return (<nav><ul><li className={location.pathname === '/home' ? 'active' : ''}>Home</li><li className={location.pathname === '/about' ? 'active' : ''}>About</li></ul></nav>);}41. What are error boundaries in React, and how do they help handle errors in the component tree?
Error boundaries are React components that catch JavaScript errors anywhere in the component tree and log those errors, preventing the entire app from crashing. They display a fallback UI instead of the component tree that crashed.
class ErrorBoundary extends React.Component {state = { hasError: false };static getDerivedStateFromError() {return { hasError: true };}componentDidCatch(error, info) {console.log(error, info);}render() {if (this.state.hasError) {return <h1>Something went wrong!</h1>;}return this.props.children;}}42. Can you explain how to implement global error handling in a React application?
To implement global error handling, you can use Error Boundaries at a top level in your application (such as wrapping your entire app or specific routes). This ensures that even if a component crashes, the rest of the app continues to function.
43. How do you handle asynchronous errors in React?
For asynchronous errors (like API calls), use
try-catchwithinasyncfunctions, and handle them using state to show error messages. You can also integrate error boundaries to catch these errors in components.const fetchData = async () => {try {const data = await fetch('/api/data');const result = await data.json();} catch (error) {setError(error.message);}};44. How would you show a fallback UI in case of errors or slow network requests?
Use React Suspense for async components, and display a fallback UI such as a loading spinner or error message when the component or data is still loading.
<Suspense fallback={<Loading />}><MyComponent /></Suspense>You can also combine error boundaries with loading states to handle network failures.
45. Can you describe a strategy for handling large-scale error logging and monitoring in React?
For large-scale applications, use external error logging services such as Sentry or LogRocket. Integrate these tools into your app to automatically capture and monitor errors in production. Additionally, maintain custom error boundaries and provide meaningful error messages for debugging.
46. What are React portals, and in what scenarios would you use them?
React portals provide a way to render children outside the parent component's DOM hierarchy. They are useful for modals, tooltips, or any UI element that needs to break out of the regular DOM flow but remain part of the React tree.
ReactDOM.createPortal(<Modal />, document.getElementById('modal-root'));47. Can you explain the concept of React Suspense, and how does it help in data fetching?
React Suspense is a feature that allows components to "wait" for something (like data or a code-split chunk) before rendering. It improves user experience by showing a fallback UI until the data is ready.
<Suspense fallback={<Loading />}><DataFetchingComponent /></Suspense>48. What is Concurrent Mode in React, and how does it improve rendering performance?
Concurrent Mode allows React to work on multiple tasks simultaneously without blocking the main UI thread. It enables React to prioritize updates and provide smoother rendering for complex applications.
49. How does React handle concurrent rendering with multiple updates and prioritize them?
React uses the priority system in Concurrent Mode to schedule updates. It can break up large updates into smaller chunks and give priority to user interactions (like clicks or input) to ensure the app remains responsive.
50. How would you handle long-running tasks or expensive computations in React applications without blocking the UI?
To avoid blocking the UI, use Web Workers,
setTimeout, orrequestIdleCallbackfor offloading heavy computations. Alternatively, break tasks into smaller parts and use React's Suspense or useMemo to only recompute when necessary.Example using
setTimeoutfor deferring computation:const [data, setData] = useState(null);useEffect(() => {setTimeout(() => {const result = computeExpensiveData();setData(result);}, 0);}, []); - 30 Essential React Hooks Interview Questions You Must KnowPrepare with 30 key React Hooks interview questions you must know. Comprehensive guide for developers seeking success in job interviews.作者GreatFrontEnd Team9 分钟阅读Jun 13, 2025
React hooks have transformed the way developers build components, offering a simpler and more maintainable approach to managing state and side effects. With React's widespread adoption, understanding hooks has become a key focus in developer interviews. Whether you're gearing up for an interview or brushing up on your skills, these 30 essential React hooks questions will guide you through both foundational concepts and advanced use cases.
If you're looking for more in-depth React interview preparation materials, also check out these resources:
- React Interview Playbook
- Practice React coding interview questions
- Practice React quiz interview questions
1. What are React hooks?
React hooks are functions that allow developers to use state and other React features in functional components. Prior to hooks, these features were only available in class components. Hooks like
useState,useEffect, anduseContextare now central to modern React development.2. What are the benefits of using hooks in React?
Hooks allow you to use state and other React features in functional components, eliminating the need for classes. They simplify code by reducing reliance on lifecycle methods, improve code readability, and make it easier to reuse stateful logic across components. Common hooks like useState and useEffect help manage state and side effects.
3. What are the rules of React hooks?
React hooks must be called at the top level of a function, never inside loops, conditions, or nested functions. They should only be called from React function components or custom hooks. These rules help maintain correct state and lifecycle behavior.
4. What is the purpose of
useState?The
useStatehook allows you to add state to functional components. It returns an array with two elements: the current state value and a function to update it.5. How does
useStatetrigger re-renders?When the state update function from
useStateis called, React schedules the component to re-render. This re-render updates the Virtual DOM, compares it with the previous version, and applies the necessary changes to the actual DOM, ensuring the UI reflects the new state efficiently.6. Can you pass a function to
setStateinuseState?Yes, you can pass a function to setState in useState. The function receives the previous state value and returns the new state.
setState((prevState) => prevState + 1);7. Explain how
useEffectworksThe useEffect hook handles side effects like data fetching or DOM updates. It runs after rendering and is controlled by a dependencies array:
- No dependencies: Runs after every render.
- Empty array: Runs once after the initial render.
- With dependencies: Runs when specified dependencies change.
useEffect(() => {console.log('Effect ran');return () => console.log('Cleanup logic'); // Runs on unmount or dependency change}, [dependency]);8. What are the different types of dependencies in
useEffect?- Empty array (
[]): The effect runs only once, after the initial render. - Dependencies array (
[a, b]): The effect runs whenever the specified dependencies change. - No dependencies: The effect runs after every render, which can lead to performance issues.
9. How would you fetch data in
useEffect?You can use
useEffectto fetch data by calling an async function within the effect. Remember to handle loading and error states.useEffect(() => {const fetchData = async () => {const response = await fetch('url');const data = await response.json();setData(data);};fetchData();}, []);10. How do you handle cleanup in
useEffect?To handle cleanup, return a function from the
useEffectcallback. This cleanup function is called when the component unmounts or when the dependencies change.useEffect(() => {// Setup codereturn () => {// Cleanup code};}, [dependencies]);11. What is the purpose of
useRef?The
useRefhook creates a mutable object that persists through renders, allowing direct access to DOM elements, storing mutable values without causing re-renders, and maintaining references to values. For instance, useRef can be utilized to focus on an input element:import React, { useRef, useEffect } from 'react';function TextInputWithFocusButton() {const inputEl = useRef(null);useEffect(() => {inputEl.current.focus();}, []);return <input ref={inputEl} type="text" />;}12. What is the difference between
useEffectandcomponentDidMount?useEffectruns after the initial render, whilecomponentDidMountruns once after the component is mounted. However,useEffectis more flexible as it can handle dependencies.13. What is the purpose of
useContext?The
useContexthook allows you to access the value of a context in a functional component. It eliminates the need to pass props down multiple layers.14. What is the
useIdhook in React and when should it be used?The
useIdhook generates unique IDs for elements within a component, which is crucial for accessibility by linking form inputs with labels. It guarantees unique IDs across the application even if the component renders multiple times.import { useId } from 'react';function MyComponent() {const id = useId();return (<div><label htmlFor={id}>Name:</label><input id={id} type="text" /></div>);}15. What are custom hooks in React?
Custom hooks are JavaScript functions that allow you to reuse stateful logic across multiple components. They can use built-in hooks like
useState,useEffect, etc., and encapsulate logic that can be shared.16. What are some use cases for
useReduceroveruseState?useReduceris helpful when managing complex state logic, especially when the state depends on previous values or when state updates are tied to specific actions.17. How does
useMemowork?The
useMemohook is used to memoize expensive calculations so they only rerun when specific dependencies change. This can improve performance, especially in large applications.const memoizedValue = useMemo(() => computeExpensiveValue(a, b), [a, b]);18. What is the difference between
useMemoanduseCallback?useMemois used to memoize the result of a function, whileuseCallbackis used to memoize the function itself. Both are useful for preventing unnecessary re-renders.19. When should you use
useMemooveruseCallback?Use
useMemoto memoize the results of calculations, and useuseCallbackto memoize the function itself.useMemois used for computations, whileuseCallbackis used for functions passed down as props.20. What is the
useImperativeHandlehook used for?useImperativeHandlecustomizes the instance value that is exposed to parent components when usingref. This allows you to control which methods or properties are available when the parent component accesses theref.21. How does
useDeferredValueimprove UI responsiveness?useDeferredValuedefers updates to a value, prioritizing smoother UI interactions.22. What is
useTransition?useTransitionmanages state transitions with a lower priority, useful for rendering smooth updates.23. What are the pitfalls of incorrect dependency management in hooks?
- Stale state: Forgetting dependencies can cause the effect to use outdated values.
- Infinite loops: Incorrect dependencies can cause effects to run repeatedly.
24. What is the difference between
useEffectanduseLayoutEffect?useEffectanduseLayoutEffectare both used for handling side effects in React functional components but differ in timing:useEffectruns asynchronously after the DOM has painted, ideal for tasks like data fetching or subscriptions.useLayoutEffectruns synchronously after DOM mutations but before the browser paints, useful for tasks like measuring DOM elements or synchronizing the UI with the DOM.
Code Example:
import React, { useEffect, useLayoutEffect, useRef } from 'react';function Example() {const ref = useRef();useEffect(() => {console.log('useEffect: Runs after DOM paint');});useLayoutEffect(() => {console.log('useLayoutEffect: Runs before DOM paint');console.log('Element width:', ref.current.offsetWidth);});return <div ref={ref}>Hello</div>;}25. What is the purpose of
useCallback?useCallbackis used to memoize functions so that they don't get recreated on every render. This is especially useful when passing callbacks to child components to prevent unnecessary re-renders.const memoizedCallback = useCallback(() => {doSomething(a, b);}, [a, b]);26. How does
useReducerwork?The
useReducerhook is an alternative to useState for handling more complex state logic. It works similarly to Redux reducers, where an action is dispatched to update the state.const [state, dispatch] = useReducer(reducer, initialState);27. What is the
useLayoutEffect?useLayoutEffectis used for DOM mutations that need to be applied before the paint, ensuring that the component is fully updated before the browser renders the changes.28. How can you prevent unnecessary re-renders in React?
To prevent unnecessary re-renders:
- Use
React.memoto memoize functional components. - Use
useMemoto memoize calculations. - Use
useCallbackto memoize event handlers. - Properly manage state and minimize the number of state updates.
29. When would you use custom hooks?
Custom hooks allow you to encapsulate and reuse stateful logic. For example, a
useFetchhook could handle data fetching logic for multiple components.const useFetch = (url) => {const [data, setData] = useState(null);useEffect(() => {fetch(url).then((res) => res.json()).then(setData);}, [url]);return data;};30. What is the purpose of callback function argument format of
setState()in React and when should it be used?The callback function format of
setState()in React ensures that state updates are based on the most current state and props. This is essential when the new state depends on the previous state. Instead of passing an object directly tosetState(), you provide a function that takes the previous state and props as arguments, returning the updated state.this.setState((prevState, props) => ({counter: prevState.counter + props.increment,}));Using this approach helps avoid issues related to asynchronous updates, ensuring that your state reflects the latest values accurately.
To continue your preparation beyond Hooks, explore our Top ReactJS Interview Questions GitHub repo - featuring 50 frequently asked questions covering core concepts, components, and advanced topics.
- 50 Essential React.js Interview Questions by Ex-Interviewers50 React interview questions and answers prioritized by senior engineers and ex-interviewers from leading tech companies作者GreatFrontEnd Team17 分钟阅读Jun 9, 2025

React has become a cornerstone of modern web development, and acing a React interview requires more than just surface-level knowledge. Interviewers often look for candidates who can confidently navigate concepts like hooks, the Virtual DOM, state management, and performance optimizations, while also demonstrating a deep understanding of React's core principles and advanced patterns.
To help you stand out, we've compiled 50 essential React JS interview questions that cover everything from foundational topics to intricate real-world scenarios.
If you're looking for more in-depth React interview preparation materials, also check out these resources:
- React Interview Playbook
- Practice React coding interview questions
- Practice React quiz interview questions
1. What is React and its benefits?
React is a JavaScript library by Facebook for building user interfaces, especially in single-page apps. It allows reusable components with their own state. Key benefits include a component-based structure, efficient updates with the virtual DOM, declarative UI for readability, and strong community support.
2. Difference Between React Node, Element, and Component
A React Node is any renderable unit in React, like an element, string, number, or
null. A React Element is an immutable object describing what to render, created with JSX orReact.createElement. A React Component is a function or class that returns React Elements, allowing for reusable UI pieces.3. What is JSX and how does it work?
JSX stands for JavaScript XML and is a syntax extension for JavaScript that lets you write HTML-like code within JavaScript. It simplifies creating React components. JSX is transformed into JavaScript function calls, usually by Babel. For example,
<div>Hello, world!</div>becomesReact.createElement('div', null, 'Hello, world!').4. Difference between state and props in React
In React,
stateis local data managed within a component that can change over time, whilepropsare read-only attributes passed from a parent to a child component.stateis used for data that changes within a component, whereaspropsare used to pass data and event handlers to child components.5. What is the purpose of the
keyProp in React?The
keyprop in React uniquely identifies elements in a list, helping React optimize rendering by efficiently updating and reordering items. Without unique keys, React may unnecessarily re-render elements, leading to performance issues and bugs.{items.map((item) => <ListItem key={item.id} value={item.value} />);}6. What is the consequence of using array indices as keys in React?
Using array indices as
keys in React can cause performance issues and bugs. When the order of items changes, React may fail to correctly identify which items have changed, leading to unnecessary re-renders or incorrect updates. It's better to use unique identifiers for keys to ensure efficient DOM management.7. What is the difference between Controlled and Uncontrolled React components?
In controlled components, form data is managed by the component's state, making it the single source of truth. Changes to input values are handled via event handlers. In uncontrolled components, the form state is internal and accessed through refs. Controlled components offer more control and are easier to test, while uncontrolled components are simpler to implement for basic cases.
Example of controlled component:
function ControlledInput() {const [value, setValue] = React.useState('');return (<inputtype="text"value={value}onChange={(e) => setValue(e.target.value)}/>);}Example of uncontrolled component:
function UncontrolledInput() {const inputRef = React.useRef();return <input type="text" ref={inputRef} />;}8. What are some pitfalls of using context in React?
Context in React can lead to performance issues if not handled carefully, causing unnecessary re-renders of components that consume the context, even if only part of the context changes. Overusing context for state management can also make the code harder to maintain and understand. It's best to use context sparingly and consider other state management solutions like Redux or Zustand for more complex scenarios.
9. What are the benefits of using hooks in React?
Hooks allow you to use state and other React features in functional components, eliminating the need for classes. They simplify code by reducing reliance on lifecycle methods, improve code readability, and make it easier to reuse stateful logic across components. Common hooks like useState and useEffect help manage state and side effects.
10. What are the rules of React hooks?
React hooks must be called at the top level of a function, never inside loops, conditions, or nested functions. They should only be called from React function components or custom hooks. These rules help maintain correct state and lifecycle behavior.
11. What is the difference between useEffect and useLayoutEffect in React?
useEffectanduseLayoutEffectare both used for handling side effects in React functional components but differ in timing:useEffectruns asynchronously after the DOM has painted, ideal for tasks like data fetching or subscriptions.useLayoutEffectruns synchronously after DOM mutations but before the browser paints, useful for tasks like measuring DOM elements or synchronizing the UI with the DOM.
Code Example:
import React, { useEffect, useLayoutEffect, useRef } from 'react';function Example() {const ref = useRef();useEffect(() => {console.log('useEffect: Runs after DOM paint');});useLayoutEffect(() => {console.log('useLayoutEffect: Runs before DOM paint');console.log('Element width:', ref.current.offsetWidth);});return <div ref={ref}>Hello</div>;}12. What does the dependency array of
useEffectaffect?The dependency array of
useEffectcontrols when the effect re-runs:- If it's empty, the effect runs only once after the initial render.
- If it contains variables, the effect re-runs whenever any of those variables change.
- If omitted, the effect runs after every render.
13. What is the
useRefhook in React and when should it be used?The
useRefhook creates a mutable object that persists through renders, allowing direct access to DOM elements, storing mutable values without causing re-renders, and maintaining references to values. For instance,useRefcan be utilized to focus on an input element:import React, { useRef, useEffect } from 'react';function TextInputWithFocusButton() {const inputEl = useRef(null);useEffect(() => {inputEl.current.focus();}, []);return <input ref={inputEl} type="text" />;}14. What is the purpose of callback function argument format of
setState()in React and when should it be used?The callback function format of
setState()in React ensures that state updates are based on the most current state and props. This is essential when the new state depends on the previous state. Instead of passing an object directly tosetState(), you provide a function that takes the previous state and props as arguments, returning the updated state.this.setState((prevState, props) => ({counter: prevState.counter + props.increment,}));Using this approach helps avoid issues related to asynchronous updates, ensuring that your state reflects the latest values accurately.
15. What is the
useCallbackhook in React and when should it be used?The
useCallbackhook memoizes functions to prevent their recreation on every render. This is especially beneficial when passing callbacks to optimized child components that depend on reference equality to avoid unnecessary renders. Use it when a function is passed as a prop to a child component.const memoizedCallback = useCallback(() => {doSomething(a, b);}, [a, b]);16. What is the
useMemohook in React and when should it be used?The
useMemohook memoizes costly calculations, recomputing them only when dependencies change. This enhances performance by avoiding unnecessary recalculations. It should be used for computationally intensive functions that don't need to run on every render.const memoizedValue = useMemo(() => computeExpensiveValue(a, b), [a, b]);17. What is the
useReducerhook in React and when should it be used?The
useReducerhook manages complex state logic in functional components, serving as an alternative to useState. It's ideal when state has multiple sub-values or when the next state relies on the previous one. It accepts a reducer function and an initial state.const [state, dispatch] = useReducer(reducer, initialState);18. What is the
useIdhook in React and when should it be used?The useId hook generates unique IDs for elements within a component, which is crucial for accessibility by linking form inputs with labels. It guarantees unique IDs across the application even if the component renders multiple times.
import { useId } from 'react';function MyComponent() {const id = useId();return (<div><label htmlFor={id}>Name:</label><input id={id} type="text" /></div>);}19. What does re-rendering mean in React?
Re-rendering refers to updating a component's output in the DOM due to changes in state or props. When these changes occur, React triggers a re-render to ensure the UI reflects current data by calling the render method again.
20. What are React Fragments used for?
React Fragments group multiple elements without adding extra nodes to the DOM. This allows returning multiple elements from a component's render method without wrapping them in an additional HTML element. You can utilize shorthand syntax
<>...</>orReact.Fragment.return (<><ChildComponent1 /><ChildComponent2 /></>);21. What is
forwardRef()in React used for?forwardRef()allows passing a ref through a component to one of its children. This is useful for accessing a DOM element or child component's instance directly from a parent.import React, { forwardRef } from 'react';const MyComponent = forwardRef((props, ref) => <input ref={ref} {...props} />);22. How do you reset a component's state in React?
To reset state in React, set it back to its initial value using the
setStatefunction. For example:const [state, setState] = useState(initialState);setState(initialState);23. Why does React recommend against mutating state?
React advises against mutating state as it can lead to unexpected behaviors and bugs. State immutability helps efficiently determine when components need re-rendering; direct mutations may prevent React from detecting changes.
24. What are error boundaries in React for?
Error boundaries catch JavaScript errors in their child components, log them, and display fallback UI instead of crashing the application. They utilize
componentDidCatchandstatic getDerivedStateFromErrormethods but do not catch errors in event handlers or asynchronous code.25. How do you test React applications?
Testing React applications can be done using Jest and React Testing Library. Jest serves as the testing framework while React Testing Library provides utilities for testing components similarly to user interactions.
26. Explain what React hydration is
Hydration involves attaching event listeners and making server-rendered HTML interactive on the client side. After server-side rendering, React initializes dynamic behavior by attaching event handlers.
27. What are React Portals used for?
React Portals allow rendering children into a DOM node outside the parent component's hierarchy. This is useful for modals or tooltips that need to escape parent overflow or z-index constraints.
28. How do you debug React applications?
Debugging can be done using the React Developer Tools extension for inspecting component hierarchies and states along with
console.logstatements for logging data and errors.29. What is React strict mode and what are its benefits?
React strict mode helps identify potential issues by activating additional checks and warnings without affecting production builds. Benefits include highlighting unsafe lifecycle methods and detecting unexpected side effects.
30. How do you localize React applications?
Localization typically involves libraries like
react-i18nextorreact-intl. Set up translation files for different languages and configure the library within your app using provided hooks or components.// Example using react-i18nextimport { useTranslation } from 'react-i18next';const MyComponent = () => {const { t } = useTranslation();return <p>{t('welcome_message')}</p>;};31. What is code splitting in a React application?
Code splitting enhances performance by dividing code into smaller chunks loaded on demand, thereby reducing initial load times. This can be achieved through dynamic
import()statements or using React'sReact.lazyandSuspense.// Using React.lazy and Suspenseconst LazyComponent = React.lazy(() => import('./LazyComponent'));function App() {return (<React.Suspense fallback={<div>Loading...</div>}><LazyComponent /></React.Suspense>);}32. How would one optimize the performance of React contexts to reduce rerenders?
Optimizing context performance involves memoizing context values with
useMemo, splitting contexts for isolated state changes, and employing selectors to rerender only necessary components.const value = useMemo(() => ({ state, dispatch }), [state, dispatch]);33. What are higher-order components in React?
Higher-order components (HOCs) are functions that take a component and return a new one with added props or behavior, facilitating logic reuse across components.
const withExtraProps = (WrappedComponent) => {return (props) => <WrappedComponent {...props} extraProp="value" />;};const EnhancedComponent = withExtraProps(MyComponent);34. What is the Flux pattern?
The Flux pattern manages application state through unidirectional data flow, simplifying debugging and enhancing maintainability with clear separation of concerns between Dispatcher, Stores, Actions, and Views.
35. Explain one-way data flow of React
One-way data flow means data moves from parent to child components only, making it predictable and easier to debug while enhancing maintainability and performance.
36. How do you handle asynchronous data loading in React applications?
Asynchronous data loading uses
useEffectalongsideuseStatehooks; fetching data insideuseEffectupdates state with fetched results ensuring re-renders occur with new data.import React, { useState, useEffect } from 'react';const FetchAndDisplayData = () => {const [info, updateInfo] = useState(null);const [isLoading, toggleLoading] = useState(true);useEffect(() => {const retrieveData = async () => {try {const res = await fetch('https://api.example.com/data');const data = await res.json();updateInfo(data);} catch (err) {console.error('Error fetching data:', err);} finally {toggleLoading(false);}};retrieveData();}, []);return (<div>{isLoading ? (<p>Fetching data, please wait...</p>) : (<pre>{JSON.stringify(info, null, 2)}</pre>)}</div>);};export default FetchAndDisplayData;37. Explain server-side rendering of React applications and its benefits
Server-side rendering (SSR) involves rendering components on the server before sending fully rendered HTML to clients, improving initial load times and SEO through efficient hydration processes.
38. Explain static generation of React applications
Static generation pre-renders HTML at build time instead of runtime; this approach enhances performance by delivering static content quickly while improving SEO outcomes.
39. Explain the presentational vs container component pattern in React
In React, the presentational vs container component pattern distinguishes between components that focus on appearance (presentational components) and those that manage logic and state (container components). Presentational components render HTML and CSS, while container components handle data and behavior. This separation leads to a cleaner and more organized codebase.
40. What are some common pitfalls when doing data fetching in React?
Common pitfalls in data fetching with React include failing to handle loading and error states, neglecting to clean up subscriptions which can cause memory leaks, and improperly using lifecycle methods or hooks. Always ensure proper handling of these states, clean up after components, and utilize
useEffectfor side effects in functional components.41. What are render props in React?
Render props in React allow code sharing between components through a prop that is a function. This function returns a React element, enabling data to be passed to child components. This technique facilitates logic reuse without relying on higher-order components or hooks.
class DataFetcher extends React.Component {state = { data: null };componentDidMount() {fetch(this.props.url).then((response) => response.json()).then((data) => this.setState({ data }));}render() {return this.props.render(this.state.data);}}// Usage<DataFetcherurl="/api/data"render={(data) => <div>{data ? data.name : 'Loading...'}</div>}/>;42. What are some React anti-patterns?
React anti-patterns are practices that can lead to inefficient or hard-to-maintain code. Common examples include:
- Directly mutating state instead of using setState
- Using componentWillMount for data fetching
- Overusing componentWillReceiveProps
- Not using keys in lists
- Excessive inline functions in render
- Deeply nested state
43. How do you decide between using React state, context, and external state managers?
Choosing between React state, context, and external state managers depends on your application's complexity. Use React state for local component state, context for global state shared across multiple components, and external managers like Redux or MobX for complex state management requiring advanced features.
44. Explain the composition pattern in React
The composition pattern in React involves building components by combining smaller, reusable ones instead of using inheritance. This encourages creating complex UIs by passing components as children or props.
function WelcomeDialog() {return (<Dialog><h1>Welcome</h1><p>Thank you for visiting our spacecraft!</p></Dialog>);}function Dialog(props) {return <div className="dialog">{props.children}</div>;}45. What is virtual DOM in React?
The virtual DOM is a lightweight representation of the actual DOM used by React. It enables efficient UI updates by comparing the virtual DOM with the real DOM and applying only necessary changes through a process called reconciliation.
46. How does virtual DOM in React work? What are its benefits and downsides?
The virtual DOM works by creating a new tree whenever a component's state changes and comparing it with the previous tree through "reconciliation". This allows only the differences to be updated in the actual DOM, enhancing performance. Benefits include improved efficiency and a declarative UI management style, while downsides may include added complexity for simple applications.
47. What is React Fiber and how is it an improvement over the previous approach?
React Fiber is a complete rewrite of React's reconciliation algorithm introduced in version 16. It enhances rendering by breaking tasks into smaller units, allowing React to pause and resume work, which improves UI responsiveness. This enables features like time slicing and suspense that weren't possible before.
48. What is reconciliation in React?
Reconciliation is the process where React updates the DOM to match changes in the virtual DOM. When a component's state or props change, a new virtual DOM tree is created and compared with the previous one through "diffing," allowing efficient updates to only changed parts of the actual DOM.
49. What is React Suspense?
React Suspense allows handling asynchronous operations more elegantly within components. It provides fallback content while waiting for resources like data or code to load. You can use it alongside React.lazy for code splitting.
const LazyComponent = React.lazy(() => import('./LazyComponent'));function MyComponent() {return (<React.Suspense fallback={<div>Loading...</div>}><LazyComponent /></React.Suspense>);}50. Explain what happens when
setStateis called in ReactWhen
setStateis invoked, it schedules an update to the component's state object. React merges the new state with the current one and triggers a re-render of the component. This process is asynchronous; thus, changes may not occur immediately, and multiplesetStatecalls can be batched for performance optimization.Conclusion
If you're looking for more in-depth React interview preparation materials, also check out these resources:
- React Interview Playbook
- Practice React coding interview questions
- Practice React quiz interview questions
You can also explore our Top ReactJS Interview Questions repository - a curated list of around 50 real-world React interview questions compiled from actual company interviews and continuously updated for 2025.
- Practice 50 React Coding Interview Questions with SolutionsPractice 50 React coding interview questions with solutions. Essential for front end developers aiming to excel in their 2025 job interviews作者GreatFrontEnd Team7 分钟阅读May 30, 2025
React has become the go-to library for building modern web applications, and mastering it requires more than just reading documentation: you need hands-on practice. Whether you're a beginner or an experienced developer, coding questions can help sharpen your React skills and reinforce core concepts.
GreatFrontEnd offers a curated list of interactive React coding questions designed to test your UI development skills. These questions range from simple UI components to complex interactive elements, all helping you level up as a React developer.
If you're looking for more in-depth React interview preparation materials, also check out these resources:
- React Interview Playbook
- Practice React coding interview questions
- Practice React quiz interview questions
Why practice React coding questions?
React coding interview questions are possibly the most important round in the front end developer job interview process across every seniority. Interviewers want to see candidates with the following skills:
- Problem solving: Tackle real-world UI problems
- Component-based thinking: How you structure and optimize React components
- State management: Work with React's state and hooks in practical scenarios
- Strong foundation: Ability to create reusable and accessible UI components
Here's a sneak peek at some of the most popular React coding questions available on our platform:
Beginner-friendly questions
1. Accordion
Build an accordion component that a displays a list of vertically stacked sections with each containing a title and content snippet.
Practice question on GreatFrontEnd ->
2. Contact Form
Build a contact form which submits user feedback and contact details to a back end API.
Practice question on GreatFrontEnd ->
3. Holy Grail
Build the famous holy grail layout consisting of a header, 3 columns, and a footer.
Practice question on GreatFrontEnd ->
4. Progress Bars
Build a list of progress bars that fill up gradually when they are added to the page.
Practice question on GreatFrontEnd ->
5. Mortgage Calculator
Build a calculator that computes the monthly mortgage for a loan.
Practice question on GreatFrontEnd ->
6. Flight Booker
Build a component that books a flight for specified dates.
Practice question on GreatFrontEnd ->
7. Generate Table
Generate a table of numbers given the rows and columns.
Practice question on GreatFrontEnd ->
8. Progress Bar
Build a progress bar component that shows the percentage completion of an operation.
Practice question on GreatFrontEnd ->
9. Temperature Converter
Build a temperature converter widget that converts temperature values between Celsius and Fahrenheit.
Practice question on GreatFrontEnd ->
10. Tweet
Build a component that resembles a Tweet from Twitter.
Practice question on GreatFrontEnd ->
Intermediate questions
11. Tabs
Build a tabs component that displays a list of tab elements and one associated panel of content at a time.
Practice question on GreatFrontEnd ->
12. Data Table
Build a users data table with pagination features.
Practice question on GreatFrontEnd ->
13. Dice Roller
Build a dice roller app that simulates the results of rolling 6-sided dice.
Practice question on GreatFrontEnd ->
14. File Explorer
Build a file explorer component to navigate files and directories in a tree-like hierarchical viewer.
Practice question on GreatFrontEnd ->
15. Like Button
Build a Like button that changes appearance based on the states.
Practice question on GreatFrontEnd ->
16. Modal Dialog
Build a reusable modal dialog component that can be opened and closed.
Practice question on GreatFrontEnd ->
17. Star Rating
Build a star rating component that shows a row of star icons for users to select the number of filled stars corresponding to the rating.
Practice question on GreatFrontEnd ->
18. Todo List
Build a Todo list that lets users add new tasks and delete existing tasks.
Practice question on GreatFrontEnd ->
19. Traffic Light
Build a traffic light where the lights switch from green to yellow to red after predetermined intervals and loop indefinitely.
Practice question on GreatFrontEnd ->
20. Digital Clock
Build a 7-segment digital clock that shows the current time.
Practice question on GreatFrontEnd ->
21. Tic-tac-toe
Build a tic-tac-toe game that is playable by two players.
Practice question on GreatFrontEnd ->
22. Image Carousel
Build an image carousel that displays a sequence of images.
Practice question on GreatFrontEnd ->
23. Job Board
Build a job board that displays the latest job postings from Hacker News.
Practice question on GreatFrontEnd ->
24. Stopwatch
Build a stopwatch widget that can measure how much time has passed.
Practice question on GreatFrontEnd ->
25. Transfer List
Build a component that allows transferring of items between two lists.
Practice question on GreatFrontEnd ->
26. Accordion II
Build an accessible accordion component that has the right ARIA roles, states, and properties.
Practice question on GreatFrontEnd ->
27. Accordion III
Build a fully accessible accordion component that has keyboard support according to ARIA specifications.
Practice question on GreatFrontEnd ->
28. Analog Clock
Build an analog clock where the hands update and move like a real clock.
Practice question on GreatFrontEnd ->
29. Data Table II
Build a users data table with sorting features.
Practice question on GreatFrontEnd ->
30. File Explorer II
Build a semi-accessible file explorer component that has the right ARIA roles, states, and properties.
Practice question on GreatFrontEnd ->
31. File Explorer III
Build a file explorer component using a flat DOM structure.
Practice question on GreatFrontEnd ->
32. Grid Lights
Build a grid of lights where the lights deactivate in the reverse order they were activated.
Practice question on GreatFrontEnd ->
33. Modal Dialog II
Build a semi-accessible modal dialog component that has the right ARIA roles, states, and properties.
Practice question on GreatFrontEnd ->
34. Modal Dialog III
Build a moderately-accessible modal dialog component that supports common ways to close the dialog.
Practice question on GreatFrontEnd ->
35. Progress Bars II
Build a list of progress bars that fill up gradually in sequence, one at a time.
Practice question on GreatFrontEnd ->
36. Tabs II
Build a semi-accessible tabs component that has the right ARIA roles, states, and properties.
Practice question on GreatFrontEnd ->
37. Tabs III
Build a fully accessible tabs component that has keyboard support according to ARIA specifications.
Practice question on GreatFrontEnd ->
38. Progress Bars III
Build a list of progress bars that fill up gradually concurrently, up to a limit of 3.
Practice question on GreatFrontEnd ->
39. Birth Year Histogram
Build a widget that fetches birth year data from an API and plot it on a histogram.
Practice question on GreatFrontEnd ->
40. Connect Four
Build a game for two players who take turns to drop colored discs from the top into a vertically suspended board/grid.
Practice question on GreatFrontEnd ->
41. Image Carousel II
Build an image carousel that smoothly transitions between images.
Practice question on GreatFrontEnd ->
Advanced questions
42. Nested Checkboxes
Build a nested checkboxes component with parent-child selection logic.
Practice question on GreatFrontEnd ->
43. Auth Code Input
Build an auth code input component that allows users to enter a 6-digit authorization code.
Practice question on GreatFrontEnd ->
44. Progress Bars IV
Build a list of progress bars that fill up gradually concurrently, up to a limit of 3 and allows for pausing and resuming.
Practice question on GreatFrontEnd ->
45. Data Table III
Build a generalized data table with pagination and sorting features.
Practice question on GreatFrontEnd ->
46. Modal Dialog IV
Build a fully-accessible modal dialog component that supports all required keyboard interactions.
Practice question on GreatFrontEnd ->
47. Selectable Cells
Build an interface where users can drag to select multiple cells within a grid.
Practice question on GreatFrontEnd ->
48. Wordle
Build Wordle, the word-guessing game that took the world by storm.
Practice question on GreatFrontEnd ->
49. Tic-tac-toe II
Build an N x N tic-tac-toe game that requires M consecutive marks to win.
Practice question on GreatFrontEnd ->
50. Image Carousel III
Build an image carousel that smoothly transitions between images that has a minimal DOM footprint.
Practice question on GreatFrontEnd ->
If you found these 50 questions useful, you'll also like our Top ReactJS Interview Questions repository - a focused set of 50 real interview questions, curated to help you go even deeper.
- Advanced JavaScript Interview Questions for 10+ Years of ExperienceExplore advanced JavaScript interview questions and answers designed for engineers with 10+ years of experience, curated by big tech senior engineers.作者GreatFrontEnd Team15 分钟阅读Apr 26, 2025
For seasoned frontend engineers with over a decade of experience, interviews delve into sophisticated topics that test problem-solving skills and architectural expertise. To help you excel in these interviews, we've curated a definitive list of 20 advanced JavaScript questions. These questions cover intricate concepts like microtask queues, closures, async/await, and more, designed to showcase your deep understanding and ability to navigate complex challenges.
If you're looking for additional JavaScript interview preparation materials, also check out these resources:
- Front End Interview Playbook
- Practice JavaScript coding interview questions
- Practice JavaScript quiz interview questions
1. Explain the concept of a microtask queue?
The microtask queue in JavaScript is where tasks like promise callbacks (
thenandcatch),asyncfunctions, and certain APIs likeMutationObserverare queued for execution. It's separate from the regular task queue and has higher priority, ensuring microtasks are processed immediately after the current execution context is clear. This queue follows FIFO (First In, First Out) order, ensuring predictable handling of asynchronous operations in JavaScript applications.Explore the concept of a microtask queue on GreatFrontEnd
2. What are the potential pitfalls of using closures?
Potential pitfalls of using closures in JavaScript include:
- Memory Leaks: Closures can unintentionally keep outer function scopes alive, causing memory leaks.
- Variable Sharing: They can lead to unexpected variable sharing between closures.
- Performance Issues: Overuse can impact performance due to increased memory usage.
- Debugging Complexity: Understanding and debugging code with closures can be challenging due to the complexity of the scope chain.
Explore the potential pitfalls of using closures on GreatFrontEnd
3. What is the typical use case for anonymous functions?
Anonymous functions offer a concise way to define functions, especially for simple operations or callbacks. They are commonly used in Immediately Invoked Function Expressions (IIFEs) to encapsulate code within a local scope, preventing variables from leaking into the global scope:
(function () {var x = 10;console.log(x); // 10})();// x is not accessible hereconsole.log(typeof x); // undefinedAnonymous functions are also effective as callbacks, enhancing code readability by defining handlers inline:
setTimeout(() => {console.log('Hello world!');}, 1000);Moreover, they are utilized with higher-order functions like
map(),filter(), andreduce()in functional programming:const arr = [1, 2, 3];const double = arr.map((el) => el * 2);console.log(double); // [2, 4, 6]In event handling, anonymous functions are widely employed in frameworks like React to define inline callback functions:
function App() {return <button onClick={() => console.log('Clicked!')}>Click Me</button>;}These uses showcase how anonymous functions streamline code by keeping logic concise and scoped appropriately.
Explore the typical use case for anonymous functions on GreatFrontEnd
4. What are some advantages and disadvantages of using TypeScript with JavaScript?
Languages that compile to JavaScript, like TypeScript or CoffeeScript, offer advantages such as improved syntax, type safety, and better tooling. These languages enhance code readability, provide robust error checking, and support advanced IDE features.
However, using such languages also introduces challenges. Developers may face additional build steps and increased complexity in their workflow. There could be potential performance overhead compared to writing directly in JavaScript. Moreover, adapting to new syntax and learning the intricacies of these languages can pose a learning curve initially.
5. What is the Event Loop in JavaScript? How does it handle asynchronous operations?
The event loop in JavaScript manages asynchronous operations to prevent blocking the single-threaded execution:
Parts of the Event Loop:
- Call Stack: Tracks and executes functions in a Last In, First Out (LIFO) manner.
- Web APIs/Node.js APIs: Handle asynchronous tasks like setTimeout(), HTTP requests, and file I/O on separate threads.
- Task Queue (Macrotask Queue/Callback Queue): Stores callbacks from completed asynchronous tasks.
- Microtasks Queue: Executes higher-priority tasks immediately after the current script finishes.
Event Loop Order:
- JavaScript executes synchronous code, adding tasks to the call stack.
- Asynchronous tasks are delegated to APIs for background processing.
- Completed task callbacks are queued in the task or microtasks queue.
- When the call stack is empty:
- Microtasks queue is processed first.
- Then, tasks in the macrotask queue are executed in order.
This cycle ensures JavaScript remains responsive by handling both synchronous and asynchronous tasks efficiently.
Explore the Event Loop and how it handles asynchronous operations on GreatFrontEnd
6. Explain the concept of data binding in JavaScript?
Data binding in JavaScript automates the synchronization of data between the model (data source) and the view (UI). It ensures changes in one are immediately reflected in the other, enhancing application interactivity and reducing manual updates. There are two types:
- One-way Data Binding: Updates in the model reflect in the view.
- Two-way Data Binding: Changes in the model update the view and vice versa. This approach is common in frameworks like Angular, React with state management, and Vue.js, simplifying UI updates and user interactions.
Explore the concept of data binding in JavaScript on GreatFrontEnd
7. What are the potential issues caused by hoisting?
Hoisting in JavaScript can cause unexpected outcomes because variable and function declarations are lifted to the top of their scope during compilation. This behavior can lead to variables being accessed before their declaration, resulting in
undefinedvalues. It can also create confusion between function declarations and expressions. For instance:console.log(a); // undefinedvar a = 5;console.log(b); // ReferenceError: b is not definedlet b = 10;In the example above,
ais hoisted and initialized asundefinedbefore it's assigned5. However,bthrows aReferenceErrorbecauseletvariables aren't hoisted likevarvariables are.Explore the potential issues caused by hoisting on GreatFrontEnd
8. What is async/await and how does it simplify asynchronous code?
async/awaitis a contemporary feature in JavaScript designed to streamline the handling of promises. When you declare a function with the async keyword, you can utilize the await keyword within that function to halt execution until a promise resolves. This approach aligns asynchronous code structure more closely with synchronous code, enhancing readability and maintainability.Example usage:
async function fetchData() {try {const response = await fetch('https://api.example.com/data');const data = await response.json();console.log(data);} catch (error) {console.error('Error fetching data:', error);}}In this example:
- The async function fetchData() uses await to fetch data from an API endpoint.
- Using await ensures that each asynchronous operation completes before proceeding, simplifying error handling within the try...catch block.
Explore async/await and how it simplifies asynchronous code on GreatFrontEnd
9. What are iterators and generators in JavaScript and what are they used for?
In JavaScript, iterators and generators offer flexible ways to manage data sequences and control execution flow.
Iterators define a sequence and terminate with a potential return value. They require a
next()method that returns an object withvalue(next sequence value) anddone(boolean indicating completion) properties.Example of an iterator:
const iterator = {current: 0,last: 5,next() {if (this.current <= this.last) {return { value: this.current++, done: false };} else {return { value: undefined, done: true };}},};let result = iterator.next();while (!result.done) {console.log(result.value); // Logs 0, 1, 2, 3, 4, 5result = iterator.next();}Generators are special functions using
function*syntax andyieldkeyword to control execution flow. They return an iterator object, allowing pausing and resuming execution.Example of a generator:
function* numberGenerator() {let num = 0;while (num <= 5) {yield num++;}}const gen = numberGenerator();console.log(gen.next()); // { value: 0, done: false }console.log(gen.next()); // { value: 1, done: false }console.log(gen.next()); // { value: 2, done: false }console.log(gen.next()); // { value: 3, done: false }console.log(gen.next()); // { value: 4, done: false }console.log(gen.next()); // { value: 5, done: false }console.log(gen.next()); // { value: undefined, done: true }Generators are efficient for creating iterators on-demand, useful for lazy evaluation, custom data structures, and asynchronous data handling.
Explore iterators and generators in JavaScript and their uses on GreatFrontEnd
10. What are Web Workers and how can they be used to improve performance?
Web Workers enable JavaScript code to run in the background, separate from the main execution thread of a web application. They handle intensive computations without freezing the user interface. Here's a concise example:
main.js:
const worker = new Worker('worker.js');worker.postMessage('Hello, worker!');worker.onmessage = (event) => console.log('Message from worker:', event.data);worker.js:
onmessage = (event) => {console.log('Message from main script:', event.data);postMessage('Hello, main script!');};Web Workers boost performance by offloading heavy tasks, ensuring smoother user interaction in web applications.
Explore Web Workers and how they improve performance on GreatFrontEnd
11. Explain the concept of memoization in JavaScript and how it can be implemented.
Memoization in JavaScript is a technique used to optimize functions by caching the results of expensive function calls and returning the cached result when the same inputs occur again. This can significantly improve performance by avoiding redundant calculations.
It is particularly useful for functions that are computationally expensive but deterministic, meaning they always produce the same output for the same input.
Here's a concise implementation example using a Fibonacci function:
function memoize(fn) {const cache = {};return function (...args) {const key = JSON.stringify(args);return cache[key] || (cache[key] = fn.apply(this, args));};}function fibonacci(n) {if (n <= 1) return n;return fibonacci(n - 1) + fibonacci(n - 2);}const memoizedFibonacci = memoize(fibonacci);console.log(memoizedFibonacci(6)); // Output: 8console.log(memoizedFibonacci(7)); // Output: 13console.log(memoizedFibonacci(6)); // Output: 8 (retrieved from cache)12. How can you optimize DOM manipulation for better performance?
To optimize performance and reduce reflows and repaints, follow these strategies:
- Minimize DOM Manipulations: Reduce direct changes to the DOM by batching updates whenever possible.
- Batch DOM Changes: Use techniques like
DocumentFragmentorinnerHTMLto insert multiple DOM nodes at once. - Use CSS Classes: Apply style changes using CSS classes rather than manipulating styles directly with JavaScript.
- Avoid Complex CSS Selectors: Simplify CSS selectors to improve rendering performance.
- Use
requestAnimationFrame: Schedule animations and layout changes usingrequestAnimationFramefor smoother rendering. - Optimize with
will-change: Mark elements that will undergo frequent changes with thewill-changeCSS property to optimize rendering. - Separate Read and Write Operations: Avoid layout thrashing by reading from the DOM separately from writing to it, minimizing reflows.
Implementing these practices helps ensure that your web application performs efficiently, maintaining smooth user interactions and responsive UI updates.
Explore how to optimize DOM manipulation for better performance on GreatFrontEnd
13. What are JavaScript polyfills for?
JavaScript polyfills are code snippets designed to replicate the behavior of modern JavaScript features on browsers that do not natively support them. They detect the absence of a specific feature and provide an alternative implementation using existing JavaScript capabilities.
How Polyfills Operate
For instance, consider the
Array.prototype.includes()method, which verifies if an array contains a particular element. This method isn't supported in older browsers such as Internet Explorer 11. To address this gap, a polyfill forArray.prototype.includes()can be implemented as follows:// Polyfill for Array.prototype.includes()if (!Array.prototype.includes) {Array.prototype.includes = function (searchElement) {for (var i = 0; i < this.length; i++) {if (this[i] === searchElement) {return true;}}return false;};}Steps to Implement Polyfills
- Identify the missing feature: Determine if the feature is supported by the target browsers using methods like
typeof,in, orwindow. - Create the fallback implementation: Develop a custom solution that mimics the behavior of the missing feature using JavaScript code.
- Test and integrate: Thoroughly test the polyfill across various browsers to ensure consistent functionality and integrate it into your project.
Considerations
- Selective loading: Load polyfills only when necessary to optimize performance and minimize unnecessary code execution.
- Feature detection: Use feature detection techniques to avoid overwriting native browser implementations and ensure seamless integration.
Popular Polyfill Tools
- core-js: A versatile library offering polyfills for a wide array of ECMAScript features.
import 'core-js/actual/array/flat-map'; // Example: polyfill for Array.prototype.flatMap[1, 2].flatMap((it) => [it, it]); // Output: [1, 1, 2, 2]- Polyfill.io: A service that dynamically serves polyfills based on browser capabilities and specified feature requirements.
<script src="https://polyfill.io/v3/polyfill.min.js"></script>JavaScript polyfills play a crucial role in ensuring cross-browser compatibility and enabling the adoption of modern JavaScript features in environments with varying levels of browser support.
Explore what JavaScript polyfills are for on GreatFrontEnd
14. What are the benefits of using a module bundler?
Module bundlers like Webpack, Parcel, and Rollup offer key benefits for web development:
- Dependency Management: Efficiently manage dependencies between JavaScript modules.
- Code Optimization: Bundle and optimize code for production, including minification and tree shaking.
- Browser Compatibility: Handle compatibility across different browsers and environments, including transpiling for older browsers.
- Performance: Improve performance by reducing HTTP requests and supporting caching and lazy loading.
- Integration: Integrate well with build tools, preprocessors, testing frameworks, and deployment workflows.
Module bundlers streamline code organization, enhance performance, ensure compatibility, and integrate seamlessly with development tools, essential for modern web development.
Explore the benefits of using a module bundler on GreatFrontEnd
15. Explain the concept of tree shaking in module bundling?
Tree shaking is a module bundling technique that removes dead code, meaning code that's never used or executed, from the final bundle. This optimization reduces bundle size and enhances application performance. Tools like Webpack and Rollup support tree shaking primarily with ES6 module syntax (
import/export), analyzing the code's dependency graph to eliminate unused exports efficiently.Explore the concept of tree shaking in module bundling on GreatFrontEnd
16. What are some common performance bottlenecks in JavaScript applications?
Common performance bottlenecks in JavaScript applications often stem from inefficient DOM manipulation, excessive global variables, blocking the main thread with heavy computations, memory leaks, and improper use of asynchronous operations.
To address these challenges, employing techniques such as debouncing and throttling for event handling, optimizing DOM updates with batch processing, and utilizing web workers for offloading heavy computations can significantly enhance application responsiveness and efficiency. These approaches help mitigate the impact of these bottlenecks on user experience and overall application performance.
Explore common performance bottlenecks in JavaScript applications on GreatFrontEnd
17. Explain the difference between unit testing, integration testing, and end-to-end testing
Unit Testing:
- Focus: Tests individual functions or methods in isolation.
- Purpose: Ensures each unit of code behaves as expected.
- Scope: Doesn't interact with external dependencies.
- Tools: Jest, Mocha, Jasmine.
Integration Testing:
- Focus: Tests interactions between integrated units.
- Purpose: Validates units work together correctly.
- Scope: Includes databases, APIs, or external services.
- Tools: Selenium, Postman, custom scripts.
End-to-End Testing:
- Focus: Tests the entire application workflow.
- Purpose: Checks application behavior in real-world scenarios.
- Scope: Includes UI, backend, and external dependencies.
- Tools: Cypress, Puppeteer, Selenium WebDriver.
Each type of testing plays a crucial role in ensuring software quality across different levels of application functionality and integration.
18. What are some tools and techniques for identifying security vulnerabilities in JavaScript code?
Tools:
- Static Analysis: ESLint with security plugins, SonarQube, CodeQL.
- Dynamic Analysis: OWASP ZAP, Burp Suite.
- Dependency Scanning: npm Audit, Snyk.
- Browser Tools: Chrome DevTools, Firefox Developer Tools.
Techniques:
- Secure Coding Practices: Input validation, output encoding, error handling.
- Penetration Testing: Manual or automated tests to simulate attacks.
- Regular Audits: Periodic reviews to detect and fix vulnerabilities.
- Security Headers: Implementing headers like Content Security Policy.
Using these tools and techniques helps ensure JavaScript applications are secure against common vulnerabilities.
19. Explain the concept of Content Security Policy (CSP) and how it enhances security
Content Security Policy (CSP) is a critical security feature designed to mitigate vulnerabilities like Cross-Site Scripting (XSS) and data injection attacks. By defining a whitelist of trusted sources for content such as scripts, stylesheets, and images, CSP restricts which resources a browser can load and execute on a webpage. This is typically set using HTTP headers or
<meta>tags in HTML. For instance, theContent-Security-Policyheader can specify that only scripts from the same origin ('self') are allowed to execute:content-security-policy: script-src 'self';This approach ensures that only trusted scripts from specified sources can run, enhancing the security of web applications by preventing unauthorized script execution and protecting against malicious code injection attempts.
Explore the concept of Content Security Policy (CSP) and how it enhances security on GreatFrontEnd
20. When would you use
document.write()?document.write()is rarely used in modern web development because if called after the page has loaded, it can overwrite the entire document. It's typically reserved for simple tasks during initial page load, such as for educational purposes or quick debugging. Instead, it's generally recommended to use safer methods likeinnerHTML,appendChild(), or modern frameworks/libraries for more controlled and secure DOM manipulation.Explore when to use
document.write()on GreatFrontEndConclusion
Well done, you've reached the end! These questions serve as a comprehensive guide to showcasing your breadth and depth of knowledge in JavaScript. If you're already familiar with all of them, that's fantastic! If not, don't be disheartened; view this as an opportunity to dive deeper into these intricate topics. Mastering these concepts will not only prepare you for advanced JavaScript interviews but also strengthen your overall technical expertise.
Alongside this guide, we’ve also published the complete set of +190 JavaScript interview questions in our open source GitHub repo. It’s ideal if you prefer browsing or practicing straight from GitHub.
- JavaScript Interview Questions for 5+ Years of ExperienceExplore advanced JavaScript interview questions and answers designed for engineers with 5+ years of experience, curated by big tech senior engineers.作者GreatFrontEnd Team24 分钟阅读Apr 17, 2025
If you have 5+ years of JavaScript under your belt, the bar in interviews shifts. You're expected to know the language well, but what gets you hired is judgment: knowing which tradeoffs matter in production, where the language gets weird, and how the framework you use is built on top of it.
This article covers 20 questions that come up in senior and lead engineer loops at large tech companies, plus three open-ended scenarios that test depth rather than recall.
If you're looking for additional JavaScript interview preparation materials, also check out these resources:
- Front End Interview Playbook
- Practice JavaScript coding interview questions
- Practice JavaScript quiz interview questions
Production scenario questions
Three open-ended scenarios that come up in senior loops. Unlike recall questions, there's no single right answer; what's being evaluated is how you decompose the problem.
Scenario A: A long-lived React app is leaking memory
"Your team's dashboard runs in a browser tab for 6+ hours per day. Users report it grows to ~1 GB of memory usage. Walk me through your debugging approach".
A solid answer walks through the layers:
- Reproduce and quantify: Chrome DevTools → Memory → take a heap snapshot at startup, use the app for 30 minutes, take another snapshot. Use the comparison view to find which constructor counts grew.
- Form a hypothesis from the deltas. A growing count of
Detached HTMLDivElementpoints to DOM nodes still referenced from JavaScript after they were removed from the tree (typical cause: an event listener onwindow/documentthat captured the node in a closure and was never removed). A growing count of plain Objects often points to an unbounded cache orMapthat nothing evicts. - Use the Performance panel to record over a longer window and look at the JS heap line: sawtooth means GC is keeping up; monotonically rising means a true leak.
- Check the usual culprits:
setIntervalnot cleared on unmount,addEventListeneronwindow/documentwithout cleanup, observers (IntersectionObserver,MutationObserver,ResizeObserver) not disconnected, subscriptions to external stores not unsubscribed. - Fix and verify by re-snapshotting until the leaked constructor count no longer grows over time.
What separates a strong answer is naming specific tools and constructor names, rather than just listing "common causes of memory leaks".
Scenario B: Three API calls: two can run in parallel, one depends on the result of the first
"Write the minimum-latency code for this dependency graph. Why might
Promise.allbe the wrong tool?"async function loadCheckout(userId) {// Step 1 must complete before Step 3 because Step 3 needs the cart id.const cart = await getCart(userId);// Steps 2 and 3 are independent and can run concurrently.const [user, lineItems] = await Promise.all([getUser(userId),getCartItems(cart.id),]);return { cart, user, lineItems };}Wrapping all three in
Promise.alldoesn't work;getCartItemsneedscart.id, which isn't known untilgetCartresolves.Promise.allonly parallelizes inputs that are already independent. When there's a dependency chain,awaitthe dependency first, thenPromise.allthe leaves. (For a deeper comparison, see Promise.all vs Promise.allSettled.)Scenario C: A junior wrote
setInterval(updateUI, 16)for an animation: what's wrong with this?Three issues:
- It misses frames. The browser paints roughly every 16.67 ms (on a 60 Hz display), but
setIntervaldoesn't synchronize with paint. You'll drift in and out of phase with the refresh cycle, getting visible stutter.requestAnimationFrameschedules work to run right before the next paint. - It keeps running in inactive tabs.
setIntervalis throttled in background tabs (Chrome drops to ~1 Hz, then to ~1/min under "intensive throttling" after 5 minutes hidden), but it still fires.requestAnimationFramesimply pauses while the tab is hidden, saving CPU and battery. - It doesn't degrade gracefully. If a callback occasionally takes longer than the interval,
setIntervalwill fire as soon as the previous one finishes, with no breathing room.rAFnaturally skips a frame and resumes on the next paint.
For animations driven from JS,
requestAnimationFrameis the default. For purely declarative timing (e.g. fading in an element from 0 to 1 opacity over 300 ms), the Web Animations API or CSS transitions are usually a better fit since they run off the main thread.How the same question gets graded differently at junior vs senior level
For the questions below, what separates a passing answer from a strong one is rarely correctness; it's the depth of the connection drawn between the language feature and its real-world consequence:
Question Surface answer Deeper answer "What is a closure?" "A function that remembers its scope" "Functions retain access to their lexical environment after the outer function returns. This is what makes React hooks work; each useStatecall closes over a specific slot on the fiber. The flip side is that closures pin their captured variables in memory, which is why stale-closure bugs inuseEffecthappen when the deps array is wrong"."How do Promises work?" "They have .thenand.catch""Promises are state machines: pending → fulfilled or rejected, with handlers scheduled as microtasks (so they run before the next macrotask but after the current synchronous block). awaitdesugars to.then, which is whyawaitin a loop runs sequentially whilePromise.allruns concurrently. Unhandled rejections fire anunhandledrejectionevent you can listen for globally to catch missing.catchpaths"."What does thisrefer to?""The object that called the function" "It depends on the call site, not where the function was defined: for a regular function it's the receiver, for arrow functions it's the lexical thisfrom the enclosing scope, fornewit's the new instance, and in strict mode it'sundefinedfor an unbound call. Class fields with arrow functions are commonly used specifically to avoidthisgetting lost when a method is passed as a callback".The deeper answer in each case ties the language feature to a specific failure mode and, where it applies, to where the consequence shows up in a framework like React.
1. What's a typical use case for anonymous functions in JavaScript?
Anonymous functions provide a concise way to define functions, especially useful for simple operations or callbacks. They are commonly used in:
- Immediate execution: Encapsulate code within a local scope using Immediately Invoked Function Expressions (IIFEs).
- Callbacks: Define handlers directly where they are called without having to search elsewhere.
- Higher-order functions: Use as arguments to functions like
map(),filter(), andreduce(). - Event Handling: Common in React for inline event handling.
Some examples:
// Encapsulating Code using IIFE(function () {// Some code here.})();// CallbackssetTimeout(function () {console.log('Hello world!');}, 1000);// Functional programming constructsconst arr = [1, 2, 3];const double = arr.map(function (el) {return el * 2;});console.log(double); // [2, 4, 6]Explore a typical use case for anonymous functions in JavaScript on GreatFrontEnd
2. What is a closure in JavaScript, and why would you use one?
A closure is a function that retains access to variables from its enclosing scope even after the outer function has finished executing. The function effectively carries its original environment with it.
function outerFunction() {const outerVar = 'I am outside of innerFunction';function innerFunction() {console.log(outerVar); // `innerFunction` can still access `outerVar`.}return innerFunction;}const inner = outerFunction(); // `inner` now holds a reference to `innerFunction`.inner(); // "I am outside of innerFunction"// Even though `outerFunction` has completed execution, `inner` still has access to variables defined inside `outerFunction`.Closures are useful for:
- Data encapsulation: Create private variables and functions that can't be accessed from outside the closure.
- Maintaining state: Particularly in functional programming and React hooks.
- Event handlers and callbacks: Retain access to variables when handlers are defined.
Explore what a closure is in JavaScript, and why you would use one on GreatFrontEnd
3. What are the pros and cons of using Promises instead of callbacks in JavaScript?
Pros:
- Avoid callback hell: Promises simplify nested callbacks.// Callback hellgetData1((data) => {getData2(data, (data) => {getData3(data, (result) => {console.log(result);});});});
- Sequential code: Easier to write and read using
.then(). - Parallel code: Simplifies managing multiple promises with
Promise.all().Promise.all([getData1(), getData2(), getData3()]).then((results) => {console.log(results);}).catch((error) => {console.error('Error:', error);});
Cons:
- Can be slightly more complex to understand initially.
Explore the pros and cons of using Promises instead of callbacks in JavaScript on GreatFrontEnd
4. How do you abort a web request using
AbortControllerin JavaScript?AbortControllerallows you to cancel ongoing asynchronous operations like fetch requests. To use it:- Create an instance:
const controller = new AbortController();2.Pass the signal: Add the signal to the fetch request options. - Abort the request: Call
controller.abort()to cancel the request.
Here is an example of how to use
AbortControllers with thefetch()API:const controller = new AbortController();const signal = controller.signal;fetch('YOUR API', { signal }).then((response) => {// Handle response}).catch((error) => {if (error.name === 'AbortError') {console.log('Request aborted');} else {console.error('Error:', error);}});// Call abort() to abort the requestcontroller.abort();Some of its use cases can be:
- Cancel a
fetch()request on a user action - Prioritize latest requests in a race condition
- Cancel requests that are no longer needed
Explore how to abort a web request using
AbortControllerin JavaScript on GreatFrontEnd5. Why is extending built-in JavaScript objects not a good idea?
In JavaScript it's very easy to extend a built-in/native object. You can simply extend a built-in object by adding properties and functions to its
prototype.String.prototype.reverseString = function () {return this.split('').reverse().join('');};console.log('hello world'.reverseString()); // Outputs 'dlrow olleh'// Instead of extending the built-in object, write a pure utility function to do it.function reverseString(str) {return str.split('').reverse().join('');}console.log(reverseString('hello world')); // Outputs 'dlrow olleh'While this may seem like a good idea at first, it is dangerous in practice. Imagine your code uses a few libraries that both extend the
Array.prototypeby adding the samecontainsmethod, the implementations will overwrite each other and your code will have unpredictable behavior if these two methods do not work the same way.Extending built-in objects can lead to issues such as:
- Future-proofing: Risk of conflicts with future implementations.
- Collisions: Potential clashes with other libraries.
- Maintenance: Difficult for other developers to understand.
- Performance: Potential negative impact.
- Security: Risk of introducing vulnerabilities.
- Compatibility: Issues across different environments.
Explore why extending built-in JavaScript objects is not a good idea on GreatFrontEnd
6. Why is it, in general, a good idea to leave the global JavaScript scope of a website as-is and never touch it?
In the browser, the global scope refers to the top-level context where variables, functions, and objects are accessible throughout the code. This scope is represented by the window object. Variables and functions declared outside of any function or block (excluding modules) are added to the window object, making them globally accessible.
For example:
// This runs in the global scope, not within a module.let globalVar = 'Hello, world!';function greet() {console.log('Greetings from the global scope!');}console.log(window.globalVar); // 'Hello, world!'window.greet(); // 'Greetings from the global scope!'In this example, globalVar and greet are attached to the window object and can be accessed from anywhere in the global scope.
Generally, it's advisable to avoid polluting the global namespace unless necessary. Key reasons include:
- Naming conflicts: Multiple scripts sharing the global scope can lead to conflicts and bugs when new global variables or changes are introduced.
- Cluttered global namespace: Minimizing the global namespace helps keep the codebase manageable and maintainable.
- Scope leaks: Accidental references to global variables in closures or event handlers can result in memory leaks and performance issues.
- Modularity and encapsulation: Good design practices involve keeping variables and functions within specific scopes, improving organization, reusability, and maintainability.
- Security concerns: Global variables are accessible by all scripts, including potentially malicious ones, posing security risks, especially if they contain sensitive data.
- Compatibility and portability: Relying heavily on global variables reduces code portability and complicates integration with other libraries or frameworks.
7. Explain the differences between CommonJS modules and ES modules in JavaScript?
In JavaScript, modules are reusable pieces of code that encapsulate functionality, making it easier to manage, maintain, and structure your applications. Modules allow you to break down your code into smaller, manageable parts, each with its own scope.
CommonJS is an older module system that was initially designed for server-side JavaScript development with Node.js. It uses the
require()function to load modules and themodule.exportsorexportsobject to define the exports of a module.// my-module.jsconst value = 42;module.exports = { value };// main.jsconst myModule = require('./my-module.js');console.log(myModule.value); // 42ES Modules (ECMAScript Modules) are the standardized module system introduced in ES6 (ECMAScript 2015). They use the
importandexportstatements to handle module dependencies.// my-module.jsexport const value = 42;// main.jsimport { value } from './my-module.js';console.log(value); // 42Explore the differences between CommonJS modules and ES modules in JavaScript on GreatFrontEnd
8. Explain the difference between mutable and immutable objects in JavaScript
Immutability is a core principle in functional programming but it has lots to offer to object-oriented programs as well.
Mutable objects
Mutable objects in JavaScript allow for modifications to their properties and values after creation. This behavior is default for most objects.
let mutableObject = {name: 'John',age: 30,};// Modify the objectmutableObject.name = 'Jane';console.log(mutableObject); // Output: { name: 'Jane', age: 30 }Mutable objects like
mutableObjectabove can have their properties changed directly, making them flexible for dynamic updates.Immutable objects
In contrast, immutable objects cannot be modified once created. Any attempt to change their content results in the creation of a new object with the updated values.
const immutableObject = Object.freeze({name: 'John',age: 30,});// Attempting to modify the objectimmutableObject.name = 'Jane'; // This change won't affect the objectconsole.log(immutableObject); // Output: { name: 'John', age: 30 }Here,
immutableObjectremains unchanged after creation due toObject.freeze(), which prevents modifications to its properties.The primary difference lies in modifiability. Mutable objects allow changes to their properties directly, while immutable objects ensure the integrity of their initial state by disallowing direct modifications.
constvs immutable objectsA common confusion is that declaring a variable using
constmakes the value immutable, which is not true at all.Using
constprevents the reassignment of variables but doesn't make non-primitive values immutable.// Using constconst person = { name: 'John' };person = { name: 'Jane' }; // Error: Assignment to constant variableperson.name = 'Jane'; // Allowed, person.name is now 'Jane'// Using Object.freeze() to create an immutable objectconst frozenPerson = Object.freeze({ name: 'John' });frozenPerson.name = 'Jane'; // Silently ignored in sloppy mode; throws TypeError in strict modefrozenPerson = { name: 'Jane' }; // Error: Assignment to constant variableIn the first example with
const, reassigning a new object topersonis not allowed, but modifying thenameproperty is permitted. In the second example,Object.freeze()makes thefrozenPersonobject immutable, preventing any changes to its properties.Explore the difference between mutable and immutable objects in JavaScript on GreatFrontEnd
9. Why might you want to create static class members in JavaScript?
Static class members in JavaScript, denoted by the
statickeyword, are accessed directly on the class itself, not on instances. They serve multiple purposes:- Namespace Organization: They help organize constants or configuration values within the class, preventing naming conflicts.
class Config {static API_KEY = 'your-api-key';static FEATURE_FLAG = true;}console.log(Config.API_KEY); // Output: 'your-api-key'console.log(Config.FEATURE_FLAG); // Output: true- Helper Functions: Static methods act as utility functions for the class or its instances, improving code readability.
class Arithmetic {static add(a, b) {return a + b;}static subtract(a, b) {return a - b;}}console.log(Arithmetic.add(2, 3)); // Output: 5console.log(Arithmetic.subtract(5, 2)); // Output: 3- Singleton Pattern: They can facilitate the singleton pattern, ensuring only one instance of a class exists.
class Singleton {static instance;static getInstance() {if (!this.instance) {this.instance = new Singleton();}return this.instance;}}const singleton1 = Singleton.getInstance();const singleton2 = Singleton.getInstance();console.log(singleton1 === singleton2); // Output: true- No per-instance copy: Static members live on the class itself rather than each instance, so utility constants and pure helpers don't bloat individual objects.
Explore why you might want to create static class members in JavaScript on GreatFrontEnd
10. What are
Symbols used for in JavaScript?Symbols in JavaScript, introduced in ES6, are unique and immutable identifiers primarily used as object property keys to avoid name collisions. They can be created using the
Symbol()function, ensuring each Symbol value is unique even if descriptions are identical. Symbol-keyed properties are skipped byfor...in,Object.keys(),Object.getOwnPropertyNames(), andJSON.stringify(), which makes them useful as quasi-private property keys (they're still retrievable viaObject.getOwnPropertySymbols()andReflect.ownKeys()).const sym1 = Symbol();const sym2 = Symbol('uniqueKey');console.log(typeof sym1); // "symbol"console.log(sym1 === sym2); // false, each symbol is uniqueconst obj = {};const sym = Symbol('uniqueKey');obj[sym] = 'value';console.log(obj[sym]); // "value"Key characteristics include:
- Uniqueness: Each Symbol value is unique.
- Immutability: Symbol values cannot be changed.
- Hidden from standard enumeration: Symbol-keyed properties don't show up in
for...in,Object.keys(),Object.getOwnPropertyNames(), orJSON.stringify(), but they're still accessible viaObject.getOwnPropertySymbols().
Global Symbols can be created using
Symbol.for('key'), allowing reuse across different parts of codebases:const globalSym1 = Symbol.for('globalKey');const globalSym2 = Symbol.for('globalKey');console.log(globalSym1 === globalSym2); // trueconst key = Symbol.keyFor(globalSym1);console.log(key); // "globalKey"There are some well known
Symbolin JavaScript like:Symbol.iterator: Defines the defaultiteratorfor an object.Symbol.toStringTag: Used to create a string description for an object.Symbol.hasInstance: Used to determine if an object is an instance of a constructor.
Explore what
Symbols are used for in JavaScript on GreatFrontEnd11. What are JavaScript object getters and setters for?
JavaScript object getters and setters are essential for controlling access to object properties, offering customization when getting or setting values.
const user = {_firstName: 'John',_lastName: 'Doe',get fullName() {return `${this._firstName} ${this._lastName}`;},set fullName(value) {const parts = value.split(' ');this._firstName = parts[0];this._lastName = parts[1];},};console.log(user.fullName); // Output: 'John Doe'user.fullName = 'Jane Smith';console.log(user.fullName); // Output: 'Jane Smith'Getters (
fullName) compute values based on internal properties (_firstNameand_lastName), while setters (fullName) update these properties based on assigned values ('Jane Smith'). These mechanisms enhance data encapsulation and allow for custom data handling in JavaScript objects.Explore what JavaScript object getters and setters are for on GreatFrontEnd
12. What tools and techniques do you use for debugging JavaScript code?
Tools and techniques for debugging JavaScript code vary depending on the context:
- JavaScript
- Chrome Devtools: Provides a comprehensive set of debugging tools including breakpoints, stepping through code, watching variables, profiling performance, etc. You can learn more about it here.
debuggerstatement: Insertingdebugger;in code triggers breakpoints when Devtools are open, pausing execution for inspection.- Traditional
console.log()debugging: Usingconsole.log()statements to output variable values and debug messages.
- React and Redux
- React Devtools: Inspect the React component tree, props, state, and hooks; profile renders.
- Redux Devtools: Time-travel through dispatched actions, inspect state diffs, and replay history.
- Vue
- Vue Devtools: Component inspection, reactive state visualization, Pinia/Vuex stores, and event tracking.
Explore what tools and techniques are used for debugging JavaScript code on GreatFrontEnd
13. Can you give an example of a curry function and why this syntax offers an advantage?
Currying in JavaScript is a functional programming technique where a function with multiple arguments is transformed into a sequence of nested functions, each taking a single argument. This allows for partial application of the function's arguments, meaning you can fix some arguments ahead of time and then apply the remaining arguments later.
Here's a simple example of a curry function and why this syntax offers an advantage:
// Example of a curry functionfunction curry(fn) {return function curried(...args) {if (args.length >= fn.length) {return fn(...args);} else {return function (...moreArgs) {return curried(...args, ...moreArgs);};}};}// Example function to be curriedfunction multiply(a, b, c) {return a * b * c;}// Currying the multiply functionconst curriedMultiply = curry(multiply);// Applying curried functionsconst step1 = curriedMultiply(2); // partially apply 2const step2 = step1(3); // partially apply 3const result = step2(4); // apply the final argumentconsole.log(result); // Output: 24Advantages of Curry Syntax:
- Partial Application: You can create specialized versions of functions by fixing some arguments, making it easier to reuse and compose functions.
- Modularity and Reusability: Encourages modular programming by breaking down functions into smaller, reusable parts.
- Flexibility: Allows for function chaining and incremental application of arguments, which can improve code readability and maintainability.
Currying enhances the functional programming paradigm in JavaScript by enabling concise, composable, and reusable functions, promoting cleaner and more modular code.
Explore examples of a curry function and why this syntax offers an advantage on GreatFrontEnd
14. What is the difference between the document
loadevent and the documentDOMContentLoadedevent?The
DOMContentLoadedevent is triggered once the initial HTML document has been fully loaded and parsed, without waiting for stylesheets, images, and subframes to finish loading.In contrast, the window's
loadevent is fired only after the DOM and all dependent resources, such as stylesheets, images, and subframes, have completely loaded.15. How would you design a request-deduplication layer for a React app?
If three components in the same render tree call
useUser(123), you don't want three identical network requests. A reasonable design has three parts:- An in-flight cache keyed by the request URL (or a stable tuple of arguments). The first caller starts the request and stores the promise; concurrent callers receive the same promise.const inFlight = new Map();function dedupedFetch(key, requestFn) {if (inFlight.has(key)) return inFlight.get(key);const promise = requestFn().finally(() => inFlight.delete(key));inFlight.set(key, promise);return promise;}
- A short-lived response cache so quick re-renders or navigations don't re-fetch. TTL depends on data freshness requirements: longer for reference data, shorter for user state.
- A revalidation strategy so stale data eventually refreshes. The common pattern is "stale-while-revalidate": serve the cached value immediately, then fetch in the background and update the cache when the new data arrives.
This is what SWR, TanStack Query, and Apollo Client provide out of the box. Rolling your own makes sense for small apps with simple needs and tight bundle budgets; adopting a library is usually the right call once you need cache invalidation, retries, or devtools support.
A useful follow-up: what if two callers pass slightly different arguments that should produce the same response? The fix is to normalize the cache key (sort query params, canonicalize the URL) before lookup.
16. Explain the same-origin policy with regard to JavaScript.
The same-origin policy restricts how scripts loaded from one origin can interact with resources from another origin. An origin is the combination of URI scheme, hostname, and port:
https://example.comandhttps://api.example.comare different origins.A key nuance: the SOP doesn't usually block a cross-origin request from being sent; it blocks JavaScript from reading the response (and from accessing the DOM of cross-origin frames). That's why a cross-origin
fetchwill still hit the server, but the response body is hidden from your script unless the server opts in via CORS headers. This prevents malicious scripts from silently exfiltrating data the user is authorized to see on another site.Explore how JSONP works (and how it's not really Ajax) on GreatFrontEnd
17. Explain what a single page app is and how to make one SEO-friendly.
Single Page Apps (SPAs) are highly interactive web applications that load a single HTML page and dynamically update content as the user interacts with the app. Unlike traditional server-side rendering, SPAs use client-side rendering, fetching new data via AJAX without full-page refreshes. This approach makes the app more responsive and reduces the number of HTTP requests.
Pros:
- Improved responsiveness with no full-page refreshes.
- Fewer HTTP requests, as assets are reused.
- Clear separation between client and server, allowing independent updates.
Cons:
- Heavier initial load due to loading all necessary assets upfront.
- Requires server configuration to route all requests to a single entry point.
- Slower time-to-content for the user's first visit, since rendering waits on JS to download, parse, and execute.
On SEO: Googlebot has run an evergreen Chromium-based renderer for years and indexes JS-rendered content, but rendering can be deferred (sometimes by days), some non-Google crawlers and AI bots don't render JS at all, and social media link previews rely on initial HTML. The standard approaches:
- Server-side rendering (e.g. Next.js, Remix, Nuxt): generate HTML per request on the server.
- Static generation / prerendering: generate HTML at build time, or run a headless browser at request time (services like Prerender) to serve static HTML to crawlers.
Explore what a single page app is and how to make one SEO-friendly on GreatFrontEnd
18. How do you organize your code?
In the past, developers often used Backbone for models, promoting an OOP approach by creating Backbone models and attaching methods to them.
While the module pattern remains useful, modern development often favors React/Redux, which employs a single-directional data flow based on the Flux architecture. Here, app data models are typically represented using plain objects, with utility pure functions to manipulate these objects. State changes are handled using actions and reducers, following Redux principles.
Avoid classical inheritance when possible. If you must use it, adhere to best practices and guidelines.
Explore how to organize your code on GreatFrontEnd
19. How do you handle race conditions in async code?
The classic example is a search-as-you-type input that fires
fetch(query)on every keystroke. A slower earlier request can resolve after a faster later one, overwriting the correct results with stale data. Three approaches, in increasing order of how well they handle it:- Token check: capture an id at the start of each call and only commit the result if the id is still the latest:let latestRequestId = 0;async function search(query) {const myRequestId = ++latestRequestId;const results = await fetch(`/search?q=${query}`).then((r) => r.json());if (myRequestId === latestRequestId) {setResults(results);}}
AbortController: cancel the previous request before starting a new one. The fetch rejects with anAbortError, which you can ignore:let controller;async function search(query) {controller?.abort();controller = new AbortController();try {const results = await fetch(`/search?q=${query}`, {signal: controller.signal,}).then((r) => r.json());setResults(results);} catch (e) {if (e.name === 'AbortError') return;throw e;}}- A query layer (TanStack Query, SWR): handles deduplication, cancellation, stale-while-revalidate, and result ordering for you. Worth adopting once you have more than a handful of async data needs.
Token check is the simplest fallback and works in any environment, but the in-flight request still completes and consumes server resources.
AbortControllercloses the connection on the client, which lets the browser stop downloading the response, though whether the server stops processing depends on whether the handler is wired to listen for the disconnect.In React, the natural place to call
controller.abort()is the cleanup function returned fromuseEffect, so a request started by an effect is cancelled when the component unmounts or the effect re-runs.20. What's the difference between an "attribute" and a "property"?
Attributes: Defined in HTML tags, they provide initial info for the browser (like "Hello" in
<input type="text" value="Hello">).Properties: Belong to the DOM (JavaScript's view of the page), allowing you to access and change element info after the page loads (like updating the text field value).
Explore the difference between an "attribute" and a "property" on GreatFrontEnd
Conclusion
At the senior level, the questions don't get harder so much as the answers get deeper. You're expected to know the language, but what differentiates a strong candidate is connecting the language to its consequences: knowing where the sharp edges are, how the framework you use leans on them, and which tradeoffs you'd defend in a code review.
Prefer GitHub? You can explore all +190 JavaScript interview questions directly in our open source repo.
- JavaScript Interview Questions for 2 Years of ExperienceExplore a list of JavaScript interview questions and answers tailored for engineers with 2 years of experience, curated by big tech senior engineers.作者GreatFrontEnd Team16 分钟阅读Apr 12, 2025
As a JavaScript developer with 2 years of experience, you've already demonstrated your skills in building robust and scalable applications. However, the interview process can still be daunting, especially when faced with tricky technical questions.
To help you prepare and showcase your expertise, we've curated a list of 30 JavaScript interview questions that are tailored to your level of experience. These questions cover advanced topics such as performance optimization, design patterns, and more, and are designed to help you demonstrate your skills and confidence in your next interviews.
If you're looking for additional JavaScript interview preparation materials, also check out these resources:
- Front End Interview Playbook
- Practice JavaScript coding interview questions
- Practice JavaScript quiz interview questions
1. Explain the concept of caching and how it can be used to improve performance
Caching involves storing copies of files or data temporarily to speed up access times. It enhances performance by minimizing the frequency of fetching data from its original source. In web development, caching techniques include utilizing browser caches, service workers, and HTTP headers such as
Cache-Controlto effectively implement this optimization.Explore the concept of caching and how it can be used to improve performance on GreatFrontEnd
2. Explain the concept of lazy loading and how it can improve performance
Lazy loading is a design approach that defers the loading of resources until they are required. This can notably enhance performance by decreasing initial load times and conserving bandwidth. For instance, in web development, images can be lazily loaded, ensuring they are fetched only when they enter the viewport. This is facilitated using techniques like the HTML
loading="lazy"attribute or through JavaScript libraries designed for this purpose.<img src="image.jpg" loading="lazy" alt="Lazy loaded image" />Explore the concept of lazy loading and how it can improve performance on GreatFrontEnd
3. What are design patterns and why are they useful?
Design patterns offer reusable solutions to typical software design challenges, serving as a blueprint for solving problems across various contexts. They are beneficial as they guide developers in sidestepping common issues, enhancing code clarity, and simplifying the maintenance and scalability of applications.
Explore what design patterns are and why they are useful on GreatFrontEnd
4. Explain the concept of the Prototype pattern
The Prototype pattern is a creational pattern used to create new objects by copying an existing object, known as the prototype. This pattern is advantageous when creating a new object is more resource-intensive than cloning an existing one. In JavaScript, you can implement this pattern using methods like
Object.createor by utilizing theprototypeproperty of a constructor functions.const prototypeObject = {greet() {console.log('Hello, world!');},};const newObject = Object.create(prototypeObject);newObject.greet(); // Outputs: Hello, world!This pattern allows objects to inherit properties and methods from a prototype, promoting code reuse and maintaining a clear structure in object-oriented programming.
Explore the concept of the Prototype pattern on GreatFrontEnd
5. Explain the concept of the Singleton pattern
The Singleton pattern ensures that a class has only one instance and provides a global access point to that instance. It is beneficial when you need precisely one object to manage tasks or resources system-wide. In JavaScript, you can implement the Singleton pattern using closures or ES6 classes to ensure there is only one instance of a class.
class Singleton {constructor() {if (!Singleton.instance) {Singleton.instance = this;}return Singleton.instance;}}const instance1 = new Singleton();const instance2 = new Singleton();console.log(instance1 === instance2); // trueThis pattern is useful in scenarios like managing configurations, logging, and resource sharing across an application, ensuring consistency and preventing multiple instances from being created unnecessarily.
Explore the concept of the Singleton pattern on GreatFrontEnd
6. What is the Factory pattern and how is it used?
The Factory pattern in software design enables object creation without specifying their exact class upfront. It encapsulates complex instantiation logic and is ideal for situations where object types are determined dynamically at runtime. In JavaScript, this pattern can be implemented using a factory function to create various objects based on conditions:
function createAnimal(type) {if (type === 'dog') {return { sound: 'woof' };} else if (type === 'cat') {return { sound: 'meow' };}}const dog = createAnimal('dog');const cat = createAnimal('cat');This approach promotes code flexibility and modularity by centralizing object creation logic.
Explore the Factory pattern and how it is used on GreatFrontEnd
7. Explain the Observer pattern and its use cases
The Observer pattern is a design pattern where an object, called the subject, maintains a list of its dependents, known as observers, and notifies them of any state changes. This pattern facilitates loose coupling between objects, making it useful for implementing event-driven architectures, real-time updates in user interfaces, and data synchronization across different parts of an application. It enables components to react dynamically to changes without explicitly knowing each other, promoting flexibility and maintainability in software design.
Explore the Observer pattern and its use cases on GreatFrontEnd
8. What is the Decorator pattern and how is it used?
The Decorator pattern is a structural design pattern that allows behavior to be added to objects without affecting other instances of the same class. It wraps objects with additional functionality, extending their capabilities. For example:
class Car {drive() {return 'Driving';}}class CarDecorator {constructor(car) {this.car = car;}drive() {return this.car.drive();}}class GPSDecorator extends CarDecorator {drive() {return `${super.drive()} with GPS`;}}const myCar = new Car();const myCarWithGPS = new GPSDecorator(myCar);console.log(myCarWithGPS.drive()); // Outputs: "Driving with GPS"Here,
CarDecoratorandGPSDecoratordynamically add features like GPS to a basicCarobject, demonstrating how decorators can extend object functionalities.Explore the Decorator pattern and how is it used on GreatFrontEnd
9. Explain the concept of the Strategy pattern
The Strategy pattern is a behavioral design pattern that allows you to encapsulate different algorithms into separate classes that are interchangeable. It enables the selection of algorithms at runtime without modifying client code. Here’s a concise example:
class Context {constructor(strategy) {this.strategy = strategy;}execute(data) {return this.strategy.algorithm(data);}}class ConcreteStrategyA {algorithm(data) {// Implementation of algorithm Areturn data.sort(); // Example: sorting algorithm}}class ConcreteStrategyB {algorithm(data) {// Implementation of algorithm Breturn data.reverse(); // Example: reverse algorithm}}// Usageconst context = new Context(new ConcreteStrategyA());const data = [3, 1, 2];console.log(context.execute(data)); // Outputs: [1, 2, 3]context.strategy = new ConcreteStrategyB();console.log(context.execute(data)); // Outputs: [3, 2, 1]In this pattern,
Contextmanages the selectedstrategyobject, which performs its specificalgorithmondata. This approach allows flexible algorithm switching and enhances code maintainability by separating algorithms from client code.Explore the concept of the Strategy pattern on GreatFrontEnd
10. What is the Command pattern and how is it used?
The Command pattern is a behavioral design pattern that turns a request into a stand-alone object containing all information about the request. This transformation allows for parameterization of methods with different requests, queuing of requests, and logging of the requests. It also supports undoable operations. In JavaScript, it can be implemented by creating command objects with
executeandundomethods.class Command {execute() {}undo() {}}class LightOnCommand extends Command {constructor(light) {super();this.light = light;}execute() {this.light.on();}undo() {this.light.off();}}class Light {on() {console.log('Light is on');}off() {console.log('Light is off');}}const light = new Light();const lightOnCommand = new LightOnCommand(light);lightOnCommand.execute(); // Light is onlightOnCommand.undo(); // Light is offExplore the Command pattern and how it is used on GreatFrontEnd
11. What is the Module pattern and how does it help with encapsulation?
The Module pattern in JavaScript is a design pattern used to create self-contained modules of code. It helps with encapsulation by allowing you to define private and public members within a module. Private members are not accessible from outside the module, while public members are exposed through a returned object. This pattern helps in organizing code, avoiding global namespace pollution, and maintaining a clean separation of concerns.
var myModule = (function () {var privateVar = 'I am private';function privateMethod() {console.log(privateVar);}return {publicMethod: function () {privateMethod();},};})();myModule.publicMethod(); // Logs: I am privateExplore the Module pattern and how it helps with encapsulation on GreatFrontEnd
12. How can you avoid problems related to hoisting?
To avoid issues related to hoisting in JavaScript, use
letorconstto declare variables instead ofvar. Unlikevar,letandconstare block-scoped, meaning they are only accessible within the block they are defined in and are not hoisted to the top of the scope. Additionally, ensure functions are declared before they are called to prevent any unexpected behavior due to function hoisting.// Use let or constlet x = 10;const y = 20;// Declare functions before calling themfunction myFunction() {console.log('Hello, world!');}myFunction();Explore how you can avoid problems related to hoisting on GreatFrontEnd
13. How can you share code between JavaScript files?
To share code between JavaScript files, you can use modules. In modern JavaScript, ES6 modules with
exportandimportstatements are commonly used. Here's how you can export a function from one file and import it into another:Using ES6 Modules:
// file1.jsexport function greet() {console.log('Hello, world!');}// file2.jsimport { greet } from './file1.js';greet();Alternatively, in Node.js, you can use
module.exportsandrequire:Using CommonJS Modules (Node.js):
// file1.jsmodule.exports = function greet() {console.log('Hello, world!');};// file2.jsconst greet = require('./file1.js');greet();Explore you can share code between JavaScript files on GreatFrontEnd
14. How do you get the query string values of the current page in JavaScript?
To retrieve query string values from the current page's URL in JavaScript using
URLSearchParams, you can follow these steps:// Assuming the URL is: http://example.com/page?key=value&foo=bar// Create a URLSearchParams object from the current page's query stringconst params = new URLSearchParams(window.location.search);// Retrieve specific query parameter valuesconst keyValue = params.get('key'); // 'value'const fooValue = params.get('foo'); // 'bar'// Example usageconsole.log(keyValue); // Outputs: 'value'console.log(fooValue); // Outputs: 'bar'This approach allows you to easily access and manipulate query string parameters directly from the browser's URL.
Explore how to get the query string values of the current page in JavaScript on GreatFrontEnd
15. How do you handle errors in asynchronous operations?
Handling errors in asynchronous operations can be done effectively with both
async/awaitand Promises:Using
async/awaitwithtry...catch:async function fetchData() {try {const response = await fetch('https://api.example.com/data');if (!response.ok) throw new Error('Failed to fetch data');const data = await response.json();console.log(data);} catch (error) {console.error('Error fetching data:', error.message);}}Using Promises with
.catch()method:fetch('https://api.example.com/data').then(response => {if (!response.ok) throw new Error('Failed to fetch data');return response.json();}).then(data => console.log(data)).catch(error => console.error('Error fetching data:', error.message));These methods ensure that errors, such as network failures or failed requests, are caught and handled appropriately, maintaining robust error management in your JavaScript applications.
Explore how to handle errors in asynchronous operations on GreatFrontEnd
16. How do you manipulate CSS styles using JavaScript?
You can manipulate CSS styles in JavaScript by directly accessing an element's
styleproperty for specific changes like background color or font size:// Changing background colordocument.getElementById('myDiv').style.backgroundColor = 'blue';You can also add, remove, or toggle CSS classes using the
classListproperty:document.getElementById('myDiv').classList.add('newClass');document.getElementById('myDiv').classList.remove('oldClass');document.getElementById('myDiv').classList.toggle('toggleClass');Explore how to manipulate CSS styles using JavaScript on GreatFrontEnd
17. What are the common pitfalls of using the
thiskeyword?Using the
thiskeyword can be tricky because its value depends on the function's invocation context. Common pitfalls include losingthiscontext when passing methods as callbacks, usingthisinside nested functions, and misunderstandingthisin arrow functions. To address these issues, developers often use methods like.bind(), arrow functions, or storethiscontext in a variable.Explore common pitfalls of using the
thiskeyword on GreatFrontEnd18. What is the DOM and how is it structured?
The DOM, or Document Object Model, is a programming interface for web documents. It represents the page so that programs can change the document structure, style, and content. The DOM is structured as a tree of objects, where each node represents part of the document, such as elements, attributes, and text nodes.
Explore what the DOM is and how it is structured on GreatFrontEnd
19. What do you think of AMD vs CommonJS?
AMD (Asynchronous Module Definition) and CommonJS are JavaScript module systems. AMD focuses on asynchronous loading, ideal for browsers, using
define()andrequire(). CommonJS, geared towards server-side environments like Node.js, employsmodule.exportsandrequire()for synchronous module loading.Explore AMD vs CommonJS on GreatFrontEnd
20. What are the different ways to make an API call in JavaScript?
In JavaScript, there are several methods to make API calls. The traditional way is using
XMLHttpRequest, which is more verbose.fetchis a modern approach that returns promises, making it easier to handle responses. Alternatively, Axios is a widely-used third-party library that simplifies API calls and offers additional features.Explore different ways to make an API call in JavaScript on GreatFrontEnd
21. What are some tools that can be used for JavaScript testing?
For JavaScript testing, tools like Jest, Mocha, Jasmine, and Cypress are commonly used. Jest is praised for its simplicity and built-in functionalities. Mocha offers flexibility and can be integrated with various libraries. Jasmine is known for its straightforward setup and behavior-driven development (BDD) approach. Cypress excels in end-to-end testing, emphasizing real browser interactions.
Explore some tools that can be used for JavaScript testing on GreatFrontEnd
22. What is the difference between
event.preventDefault()andevent.stopPropagation()?event.preventDefault()prevents the default action of an event, like stopping a form submission whereasevent.stopPropagation()prevents the event from bubbling up to parent elements.Explore the difference between
event.preventDefault()andevent.stopPropagation()on GreatFrontEnd23. What is the difference between
innerHTMLandtextContent?innerHTMLreturns or sets the HTML markup inside an element, allowing HTML tags to be parsed and rendered whereastextContentretrieves or sets the text content inside an element, rendering HTML tags as plain text.// Example of innerHTMLelement.innerHTML = '<strong>Bold Text</strong>'; // Renders as bold text// Example of textContentelement.textContent = '<strong>Bold Text</strong>'; // Renders as plain text: <strong>Bold Text</strong>Explore the difference between
innerHTMLandtextContenton GreatFrontEnd24. What is the difference between the
windowobject and thedocumentobject?The
windowobject represents the browser window, offering methods to control it (e.g., opening new windows, or accessing browser history). Thedocumentobject represents the web page's content within the window, providing methods to manipulate the DOM (e.g., selecting elements, and modifying content).Explore the difference between the
windowobject and thedocumentobject on GreatFrontEnd25. What is the difference between
setTimeout(),setImmediate(), andprocess.nextTick()?setTimeout()schedules a callback to run after a minimum delay.setImmediate()schedules a callback to run after the current event loop completes.process.nextTick()schedules a callback to run before the next event loop iteration begins.setTimeout(() => console.log('setTimeout'), 0);setImmediate(() => console.log('setImmediate'));process.nextTick(() => console.log('nextTick'));In this example,
process.nextTick()executes first, followed by eithersetTimeout()orsetImmediate()depending on the environment.Explore the difference between
setTimeout(),setImmediate(), andprocess.nextTick()on GreatFrontEnd26. How do you use
window.historyAPI?The
window.historyAPI allows you to manipulate the browser's session history. You can usehistory.pushState()to add a new entry to the history stack,history.replaceState()to modify the current entry, andhistory.back(),history.forward(), andhistory.go()to navigate through the history.// Add a new entry to the historyhistory.pushState({ page: 1 }, 'title 1', '?page=1');// Replace the current history entryhistory.replaceState({ page: 2 }, 'title 2', '?page=2');// Navigate back, forward, or to a specific point in historyhistory.back(); // Go back one stephistory.forward(); // Go forward one stephistory.go(-2); // Go back two stepsExplore how to use
window.historyAPI on GreatFrontEnd27. What are the pros and cons of using Promises instead of callbacks in JavaScript?
Pros of Promises over Callbacks:
- Avoids Callback Hell: Promises provide a more linear and readable structure compared to deeply nested callbacks.
- Sequential Execution: Easily write sequential asynchronous code using
.then(), improving readability and maintainability. - Parallel Execution: Use
Promise.all()for parallel asynchronous operations, handling multiple promises concisely.
Cons:
- Slightly More Complex: Some developers find promises marginally more complex compared to straightforward callbacks.
Explore the pros and cons of using Promises instead of callbacks in JavaScript on GreatFrontEnd
28. What are the metadata fields of a module?
Metadata fields of a module often include the module's name, version, description, author, license, and dependencies. These fields are commonly found in a package.json file in JavaScript projects.
Example:
{"name": "my-module","version": "1.0.0","description": "A sample module","author": "John Doe","license": "MIT","dependencies": {"express": "^4.17.1"}}These fields provide essential information about the module and its requirements.
Explore what the metadata fields of a module are on GreatFrontEnd
29. What are the different types of errors in JavaScript?
In JavaScript, there are three main types of errors:
- Syntax Errors: Occur when the code violates the language's grammar rules, like missing a parenthesis.
- Runtime Errors: Happen during code execution, such as trying to access a property of
undefined. - Logical Errors: Mistakes in the code's logic that lead to incorrect results without throwing an error.
Explore different types of errors in JavaScript on GreatFrontEnd
30. Explain the concept of error propagation in JavaScript
Error propagation in JavaScript refers to the process of passing errors up the call stack. When an error occurs in a function, it can be caught and handled with try...catch blocks. If not caught, the error moves up the call stack until it is either caught or causes the program to terminate. For example:
function a() {throw new Error('An error occurred');}function b() {a();}try {b();} catch (e) {console.error(e.message); // Outputs: An error occurred}In this example, the error thrown in function
apropagates to functionband is caught in thetry...catchblock.Explore the concept of error propagation in JavaScript on GreatFrontEnd
Conclusion
You've reached the end of our list of 30 JavaScript interview questions! We hope these questions have helped you identify areas for improvement and solidify your understanding of advanced JavaScript concepts. Remember, the key to acing an interview is not just about knowing the answers, but also about demonstrating your thought process, problem-solving skills, and ability to communicate complex ideas simply.
Alongside this guide, we’ve also published the complete set of +190 JavaScript interview questions in our open source GitHub repo. Perfect if you prefer browsing or practicing straight from GitHub.
- Basic JavaScript Interview Questions and Answers For FreshersBrush up on fundamental JavaScript skills with these essential interview questions and answers. Perfect for freshers preparing for junior developer roles.作者GreatFrontEnd Team51 分钟阅读Apr 5, 2025
JavaScript fundamentals make up the bulk of any junior front-end interview, and most freshers lose points on the basics rather than the hard questions.
Below are 50 commonly-asked basic JavaScript interview questions with concise, interview-ready answers, preceded by the scenario-style questions and presentation pitfalls that decide most fresher rounds.
If you're looking for additional JavaScript interview preparation materials, also check out these resources:
- Front End Interview Playbook
- Practice JavaScript coding interview questions
- Practice JavaScript quiz interview questions
5 scenario-based questions you'll see in junior JavaScript interviews
Beyond definitions, interviewers often hand juniors a small piece of broken code and watch how they reason. These five scenarios show up in entry-level rounds at companies of all sizes, and they reward candidates who can talk through the why, not just type the fix.
Scenario 1: The classic
var-in-for-loop withsetTimeout"What do you expect this to log, and how would you fix it?"
for (var i = 0; i < 3; i++) {setTimeout(() => console.log(i), 0);}// Logs: 3, 3, 3The interviewer is checking whether you can: (1) spot that
varis function-scoped, so all three callbacks close over the sameiwhich is3by the time the timers fire; (2) propose two fixes: replacevarwithlet(block-scoped, each iteration gets its owni), or wrap the body in an IIFE that captures the current value. Bonus points: connect it back to closures and the event loop.Scenario 2: Why is my counter logging
NaN?"I wired up a click handler on a
Counterclass. Each click logsNaNinstead of incrementing. What did I miss?"class Counter {constructor() {this.count = 0;}handleClick() {this.count++;console.log(this.count);}}const counter = new Counter();document.querySelector('button').addEventListener('click', counter.handleClick);// Logs: NaN, `this` is the button, not the CounteraddEventListenerinvokes the handler withthisset to the element the listener is attached to, not theCounterinstance. Sothis.countreadsundefinedfrom the button; the++then setsbutton.count = NaN(yes, on the button), and the log showsNaN. The Counter'scountis never touched. Fix it withc.handleClick.bind(c)or, more idiomatically, by defining the handler as an arrow class field sothisis captured from the enclosing scope. Bonus points: name both fixes and explain the tradeoff (.bind()returns a new function each call, so if you don't store the bound reference you can't laterremoveEventListenerit; arrow class fields auto-bind but live on each instance instead of the prototype, so you pay one function object per instance).Scenario 3: A helper function "changed my array"
"I passed my array into a helper to get its new length. The helper returned a number, but my original array now has the new item in it too. What's going on?"
function addItem(items, x) {items.push(x);return items.length;}const cart = ['apple'];const newLength = addItem(cart, 'banana');console.log(cart); // ['apple', 'banana'], the caller's array changedObjects and arrays aren't copied when passed to a function, the function gets a reference to the same array. Inside
addItem,itemsand the outercartpoint to the same array, so.pushmutates what the caller sees. The fix is either to return a new array (return [...items, x]) and have the caller assign it back, or to make the mutation obvious in the function name (e.g.,pushAndGetLength). Bonus points: contrast with primitives (numbers, strings, booleans), which are copied; that's whyfunction inc(n) { n++; }doesn't change the caller's variable.Scenario 4:
.then()runs before the previous.then()"finishes"fetch('/api/data').then((response) => {response.json();}).then((data) => {console.log(data); // undefined});The first
.thendoesn'treturn response.json(), so the chain receivesundefinedfrom the implicit return. Promise chains pass values through the return value of each handler, and forgetting toreturn(or using a{}-bodied arrow when you meant a single-expression one) is a frequent async bug in junior code. Bonus points: suggestasync/await, which sidesteps the issue becauseawaitmakes the value the result of the expression directly.Scenario 5:
.sort()returns the wrong order for numbers"I called
.sort()on[10, 2, 1, 100, 20]and got[1, 10, 100, 2, 20]. Is this a bug in V8?"[10, 2, 1, 100, 20].sort();// [1, 10, 100, 2, 20]Array.prototype.sortconverts each element to a string and compares them lexicographically by default, so"10"comes before"2"for the same reason"banana"comes before"car". The fix is to pass a comparator:arr.sort((a, b) => a - b)for ascending numeric order. Bonus points: mention that the default also breaks for dates and currency strings, that.sort()mutates in place (so combine with[...arr].sort(...)if you need a new array), and thatlocaleCompareis the right tool for human-readable string sorting.Common mistakes freshers make in JavaScript interviews
Most freshers don't lose interviews on missing knowledge. They lose them on presentation patterns that drag the score down even when the answer is right. The most common ones:
1. Giving a surface-level answer
Saying "a closure is when a function remembers its scope" is technically correct, but it's the kind of one-line definition you'd find on the first page of a tutorial, and interviewers can tell when there's nothing behind it. A better answer: "a closure is a function that retains access to its lexical environment even after the outer function returns," followed by why that matters, private state, partial application, callbacks that need access to creation-time data. Pair every definition with a concrete use case.
2. Not asking clarifying questions
When the interviewer says "implement debounce," strong candidates ask: "Should it fire on the leading edge, the trailing edge, or both? Should the eventual call use the first arguments or the latest ones? Do you want a
cancelto drop a pending call?" Weak candidates start coding immediately. The clarifying questions are part of the rubric, because they signal you've seen the gotchas before.3. Coding silently
Coding for several minutes without explaining what you're doing is a common reason "good coder" candidates still fail. Narrate: "I'll handle the empty case first… now I'll add the recursion… I'm using a
Maphere because lookups are O(1)…" If you're stuck, say so out loud, because interviewers can hint, but only if they know where you are.4. Skipping edge cases
Juniors often write the happy path, run it on one input, see it pass, and stop. Stronger candidates finish a function, then list 3–5 edge cases out loud and try them: empty input, very large input, negative numbers,
null/undefined, single-element collections. The interviewer is grading you on this, so if you don't volunteer it, points are left on the table.5. Confusing
==with===Using
==in interview code is fine if you can defend it ("==is fine here because we explicitly want type coercion to handle the form input as a string-or-number"). Using==and being unable to explain the coercion rules signals you don't understand the language. Default to===and only reach for==with a reason. (For the actual coercion rules, see==vs===.)6. Reaching for libraries when JavaScript already has the API
A junior who answers "how would you debounce?" with "use Lodash" misses the point, because the interviewer wants the implementation. Same with "how would you flatten an array?" Saying
array.flat(Infinity)is great as a follow-up, but the interview question is almost always "implement it yourself first". Native APIs are the bonus answer, not the primary one. (See our Flatten implementation challenge for the full set of approaches.)7. Not testing your code before declaring "done"
After writing a function, walk through it with one or two example inputs, or better, actually run it if the platform allows. Submitting without trying anything leaves easy points on the table; the interviewer is watching whether you verify your own work before declaring done.
Top 50 JavaScript interview questions for freshers
The questions below cover the fundamentals you're most likely to be asked in a junior or entry-level JavaScript interview. Each question is paired with a concise answer and links to a deeper quiz on GreatFrontEnd where you can practice the topic.
1. Explain the concept of "hoisting" in JavaScript
Hoisting describes the behavior of variable declarations in JavaScript. Declarations using
varare "moved" to the top of their scope during compilation. Only the declaration is hoisted, not the initialization.Example with
var:console.log(foo); // undefinedvar foo = 1;console.log(foo); // 1Visualized as:
var foo;console.log(foo); // undefinedfoo = 1;console.log(foo); // 1Variables with
let,const, andclass:These are also hoisted but not initialized. Accessing them before declaration results in a
ReferenceError.console.log(y); // ReferenceError: Cannot access 'y' before initializationlet y = 'local';console.log(z); // ReferenceError: Cannot access 'z' before initializationconst z = 'local';console.log(Foo); // ReferenceError: Cannot access 'Foo' before initializationclass Foo {constructor() {}}Function Expressions:
Only the declaration is hoisted.
console.log(bar); // undefinedbar(); // Uncaught TypeError: bar is not a functionvar bar = function () {console.log('BARRRR');};Function Declarations:
Both declaration and definition are hoisted.
console.log(foo); // [Function: foo]foo(); // 'FOOOOO'function foo() {console.log('FOOOOO');}Import Statements:
Imports are hoisted, making them available throughout the module, with side effects occurring before other code runs.
foo.doSomething(); // Works normally.import foo from './modules/foo';Explore the concept of "hoisting" in JavaScript on GreatFrontEnd
2. What are the differences between JavaScript variables created using
let,varorconst?Scope
var: Function-scoped or globally scoped.letandconst: Block-scoped (only accessible within the nearest set of curly braces).
Example:
function foo() {var bar = 1;let baz = 2;const qux = 3;console.log(bar); // 1console.log(baz); // 2console.log(qux); // 3}console.log(bar); // ReferenceErrorconsole.log(baz); // ReferenceErrorconsole.log(qux); // ReferenceErrorif (true) {var bar = 1;let baz = 2;const qux = 3;}console.log(bar); // 1console.log(baz); // ReferenceErrorconsole.log(qux); // ReferenceErrorInitialization
varandlet: Can be declared without an initial value.const: Must be initialized at the time of declaration.
Example:
var foo; // Oklet bar; // Okconst baz; // SyntaxErrorRedeclaration
var: Allows redeclaration.letandconst: Do not allow redeclaration.
Example:
var foo = 1;var foo = 2; // Oklet baz = 3;let baz = 4; // SyntaxErrorReassignment
varandlet: Allow reassignment.const: Does not allow reassignment.
Example:
var foo = 1;foo = 2; // Oklet bar = 3;bar = 4; // Okconst baz = 5;baz = 6; // TypeErrorAccessing before declaration
var: Variables are hoisted and initialized toundefined.letandconst: Variables are hoisted but not initialized, causing aReferenceErrorif accessed before declaration.
Example:
console.log(foo); // undefinedvar foo = 'foo';console.log(baz); // ReferenceErrorlet baz = 'baz';console.log(bar); // ReferenceErrorconst bar = 'bar';3. What is the difference between
==and===in JavaScript?Equality Operator (
==)- Performs type coercion, converting values to a common type before comparison.
- Can yield unintuitive results due to type conversion.
Examples:
42 == '42'; // true0 == false; // truenull == undefined; // true[] == false; // true'' == false; // trueStrict Equality Operator (
===)- Does not perform type coercion.
- Both value and type must be the same for the comparison to return
true.
Examples:
42 === '42'; // false0 === false; // falsenull === undefined; // false[] === false; // false'' === false; // falseBest Practices
- Use
==only when comparing againstnullorundefinedfor convenience.var a = null;console.log(a == null); // trueconsole.log(a == undefined); // true - Prefer
===for all other comparisons to avoid pitfalls of type coercion and ensure both value and type are the same.
Explore the difference between
==and===in JavaScript on GreatFrontEnd4. What is the event loop in JavaScript?
The event loop is crucial for handling asynchronous operations in JavaScript, allowing single-threaded execution without blocking.
Components
1. Call Stack:
- Tracks function execution in LIFO order.
- Functions are added and removed as they are called and complete.
2. Web APIs/Node.js APIs:
- Handle asynchronous tasks (
setTimeout(), HTTP requests) on separate threads.
3. Task Queue (Macrotask Queue):
- Holds tasks like
setTimeout(),setInterval(), and UI events.
4. Microtask Queue:
- Contains high-priority tasks (e.g.,
Promisecallbacks). - Executes after the current script but before the next macrotask.
Execution Order
- Script Execution:
- Synchronous tasks are placed on the call stack.
- Asynchronous Operations:
- Offloaded to Web APIs/Node.js APIs.
- Task Completion:
- Completed tasks are queued in the appropriate task or microtask queue.
- Event Loop Monitoring:
- Executes tasks from the call stack.
- When the stack is empty:
- Processes the microtask queue until empty.
- Processes one macrotask, then checks the microtask queue again.
- Repeats indefinitely.
console.log('Start');setTimeout(() => {console.log('Timeout 1');}, 0);Promise.resolve().then(() => {console.log('Promise 1');});setTimeout(() => {console.log('Timeout 2');}, 0);console.log('End');Console Output:
StartEndPromise 1Timeout 1Timeout 2Explanation:
StartandEndare logged first (synchronous).Promise 1is logged next (microtask).Timeout 1andTimeout 2are logged last (macrotasks).
Understanding the event loop helps write efficient, non-blocking JavaScript code.
Explore the event loop in JavaScript on GreatFrontEnd
5. Explain event delegation in JavaScript
Event delegation is an efficient way to handle events on multiple child elements by attaching a single event listener to a common parent element. This is useful for managing events on many similar elements, like list items.
How Event Delegation Works
- Attach Listener to Ancestor:
- Attach one listener to a parent element instead of individual listeners on each child.
- Event Bubbling:
- When an event occurs on a child, it bubbles up to the parent, where the listener can handle it.
- Determine the Target:
- Use
event.targetto identify the actual element that triggered the event.
- Use
- Perform Action:
- Execute actions based on the target element.
Benefits of Event Delegation
- Efficiency: Fewer event listeners improve memory and performance.
- Dynamic Elements: Automatically handles new or removed child elements.
// HTML:// <ul id="item-list">// <li>Item 1</li>// <li>Item 2</li>// <li>Item 3</li>// </ul>const itemList = document.getElementById('item-list');itemList.addEventListener('click', (event) => {if (event.target.tagName === 'LI') {console.log(`Clicked on ${event.target.textContent}`);}});A single click listener on
<ul>handles clicks on any<li>due to event bubbling.Use Cases
- Dynamic Content:const buttonContainer = document.getElementById('button-container');const addButton = document.getElementById('add-button');buttonContainer.addEventListener('click', (event) => {if (event.target.tagName === 'BUTTON') {console.log(`Clicked on ${event.target.textContent}`);}});addButton.addEventListener('click', () => {const newButton = document.createElement('button');newButton.textContent = `Button ${buttonContainer.children.length + 1}`;buttonContainer.appendChild(newButton);});
- Simplifying Code:const userForm = document.getElementById('user-form');userForm.addEventListener('input', (event) => {const { name, value } = event.target;console.log(`Changed ${name}: ${value}`);});
Explore event delegation in JavaScript on GreatFrontEnd
6. Explain how
thisworks in JavaScriptThe
thiskeyword in JavaScript can be quite confusing as its value depends on how a function is called. Here are the main rules that determine the value ofthis:1. Using the
newKeywordCreates a new object and sets
thisto that object.function Person(name) {this.name = name;}const person = new Person('Alice');console.log(person.name); // 'Alice2. Using
apply,call, orbindExplicitly sets
thisto a specified object.function greet() {console.log(this.name);}const person = { name: 'Alice' };greet.call(person); // 'Alice'3. Method Call
thisis bound to the object the method is called on.const obj = {name: 'Alice',greet: function () {console.log(this.name);},};obj.greet(); // 'Alice'4. Free Function Invocation
In non-strict mode, defaults to the global object (
windowin browsers); in strict mode, defaults toundefined.function greet() {console.log(this); // global object or undefined}greet();5. Arrow Functions (ES6):
Inherit
thisfrom their lexical enclosing scope.const obj = {name: 'Alice',greet: () => {console.log(this.name); // `this` refers to the enclosing scope},};obj.greet(); // undefinedES2015 (ES6) and
thisES2015 introduced arrow functions which capture
thisfrom their lexical scope. This can simplify code but requires caution when integrating with libraries expecting traditional function context.Example:
function Timer() {this.seconds = 0;setInterval(() => {this.seconds++; // `this` refers to the Timer instanceconsole.log(this.seconds);}, 1000);}const timer = new Timer();Explore how
thisworks in JavaScript on GreatFrontEnd7. Describe the difference between a cookie,
sessionStorageandlocalStorage.Cookies, localStorage, and sessionStorage are key client-side storage mechanisms in web applications, each serving distinct purposes:
Cookies
- Purpose: Stores small data pieces sent to the server with HTTP requests.
- Capacity: Limited to around 4KB per domain.
- Lifespan: Can have expiration dates; session cookies are cleared when the browser closes.
- Access: Domain-specific; accessible across pages and subdomains.
- Security: Supports HttpOnly and Secure flags to restrict JavaScript access and ensure HTTPS transmission.
- Example Usage:// Set a cookie with an expirydocument.cookie ='auth_token=abc123def; expires=Fri, 31 Dec 2024 23:59:59 GMT; path=/';// Read all cookies (no direct method for specific cookies)console.log(document.cookie);// Delete a cookiedocument.cookie ='auth_token=; expires=Thu, 01 Jan 1970 00:00:00 GMT; path=/';
localStorage- Purpose: Stores data persistently on the client-side.
- Capacity: Around 5MB per origin.
- Lifespan: Data remains until explicitly cleared.
- Access: Available across all tabs and windows within the same origin.
- Security: All JavaScript on the page can access localStorage values.
- Example Usage:// Set an item in localStoragelocalStorage.setItem('key', 'value');// Get an item from localStorageconsole.log(localStorage.getItem('key'));// Remove an item from localStoragelocalStorage.removeItem('key');// Clear all data in localStoragelocalStorage.clear();
sessionStorage- Purpose: Stores session-specific data that persists until the browser or tab is closed.
- Capacity: Similar to localStorage, around 5MB per origin.
- Lifespan: Cleared when the tab or browser closes; reloading the page retains data.
- Access: Limited to the current tab or window.
- Security: All JavaScript on the page can access sessionStorage values.
- Example Usage:// Set an item in sessionStoragesessionStorage.setItem('key', 'value');// Get an item from sessionStorageconsole.log(sessionStorage.getItem('key'));// Remove an item from sessionStoragesessionStorage.removeItem('key');// Clear all data in sessionStoragesessionStorage.clear();
Explore the difference between a cookie,
sessionStorageandlocalStorageon GreatFrontEnd8. Describe the difference between
<script>,<script async>and<script defer><script>TagThe
<script>tag is used to include JavaScript in a web page. When used withoutasyncordeferattributes:- Behavior: HTML parsing halts while the script is fetched and executed immediately.
- Usage: Suitable for critical scripts required for initial page rendering.
Example:
<!doctype html><html><head><title>Regular Script</title></head><body><h1>Regular Script Example</h1><p>This content appears before the script executes.</p><script src="regular.js"></script><p>This content appears after the script executes.</p></body></html><script async>Tag- Behavior: Downloads the script asynchronously while HTML parsing continues. Executes the script as soon as it's available, potentially before HTML parsing completes.
- Usage: Suitable for independent scripts like analytics or ads.
Example:
<!doctype html><html><head><title>Async Script</title></head><body><h1>Async Script Example</h1><p>This content appears before the async script executes.</p><script async src="async.js"></script><p>This content may appear before or after the async script executes.</p></body></html><script defer>Tag:- Behavior: Downloads the script asynchronously while HTML parsing proceeds. Executes the script after the HTML document is fully parsed but before
DOMContentLoaded. - Usage: Ideal for scripts dependent on a fully-parsed DOM structure.
Example:
<!doctype html><html><head><title>Deferred Script</title></head><body><h1>Deferred Script Example</h1><p>This content appears before the deferred script executes.</p><script defer src="deferred.js"></script><p>This content appears before the deferred script executes.</p></body></html>Explore the difference between
<script>,<script async>and<script defer>on GreatFrontEnd9. What's the difference between a variable that is:
null,undefinedor undeclared?Undeclared: A variable that is not declared using
var,let, orconstwill be created globally and can cause errors. Avoid them by usingtry/catchblocks to detect them.undefined: A declared variable without an assigned value isundefined. Use===ortypeofto check forundefined. Note that==will also returntruefornull.null: A variable explicitly assignednullrepresents no value. Use===to check fornull. Don't use==as it will also returntrueforundefined.Best Practices:
- Always declare variables before using them.
- Assign
nullto variables if you don't intend to use them yet. - Use static analysis tools like ESLint or TypeScript Compiler to detect undeclared variables.
Explore the difference between a variable that is:
null,undefinedor undeclared on GreatFrontEnd10. What's the difference between
.calland.applyin JavaScript?.calland.applyare used to invoke functions, settingthiswithin the function. The difference lies in how they handle arguments:- .call: Takes comma-separated arguments.
- .apply: Takes an array of arguments.
Memory Aid:
- C for call and comma-separated.
- A for apply and array.
Example:
function add(a, b) {return a + b;}console.log(add.call(null, 1, 2)); // 3console.log(add.apply(null, [1, 2])); // 3// ES6 with spread operatorconsole.log(add.call(null, ...[1, 2])); // 3Explore the difference between
.calland.applyin JavaScript on GreatFrontEnd11. Explain
Function.prototype.bindFunction.prototype.bindcreates a new function with a specificthiscontext and optionally preset arguments. It's useful for maintaining the correctthisvalue in methods passed to other functions.Example:
const john = {age: 42,getAge: function () {return this.age;},};console.log(john.getAge()); // 42const unboundGetAge = john.getAge;console.log(unboundGetAge()); // undefinedconst boundGetAge = john.getAge.bind(john);console.log(boundGetAge()); // 42const mary = { age: 21 };const boundGetAgeMary = john.getAge.bind(mary);console.log(boundGetAgeMary()); // 21Its main purposes are:
- Binding
thisto preserve context: The primary function ofbindis to attach thethisvalue of a function to a specific object. When you usefunc.bind(thisArg), it generates a new function with the same code asfunc, but withthispermanently set tothisArg. - Partial application of arguments:
bindalso enables you to pre-set arguments for the new function. Any arguments provided tobindafterthisArgwill be prepended to the argument list when the new function is invoked. - Method borrowing:
bindallows you to borrow methods from one object and use them on another object, even if the methods were not initially designed for that object.
Explore
Function.prototype.bindon GreatFrontEnd12. What advantage is there for using the arrow syntax for a method in a constructor?
The advantage of using the arrow syntax for a method in a constructor is that it automatically binds the
thisvalue to the constructor'sthiscontext. This means that when the method is called, it will always refer to the constructor'sthiscontext, rather than the global scope or some other unexpected context.In traditional function expressions, the
thisvalue is determined by how the function is called, which can lead to unexpected behavior if not properly bound. By using an arrow function, you can ensure that thethisvalue is always bound to the constructor'sthiscontext, making your code more predictable and easier to maintain.For example, in the code snippet:
const Person = function (name) {this.name = name;this.sayName1 = function () {console.log(this.name);};this.sayName2 = () => {console.log(this.name);};};const john = new Person('John');const dave = new Person('Dave');john.sayName1(); // Johnjohn.sayName2(); // John// `this` can change for regular functions but not for arrow functionsjohn.sayName1.call(dave); // Davejohn.sayName2.call(dave); // JohnThe
sayName1method uses a traditional function expression, which means itsthisvalue is determined by how it's called. If you calljohn.sayName1.call(dave), thethisvalue will bedave, and the method will logDaveto the console.On the other hand, the
sayName2method uses an arrow function, which means itsthisvalue is automatically bound to the constructor'sthiscontext. If you calljohn.sayName2.call(dave), thethisvalue will still bejohn, and the method will logJohnto the console.This can be particularly helpful in React class components, where you often need to pass methods as props to child components. By using arrow functions, you can ensure that the methods always refer to the correct
thiscontext, without having to manually bindthisin the constructor.Explore the advantage for using the arrow syntax for a method in a constructor on GreatFrontEnd
13. Explain how prototypal inheritance works
Prototypical inheritance allows objects to inherit properties and methods from other objects using a prototype-based model.
Key Concepts
1. Prototypes
- Every object has a prototype, another object it inherits from.
- Access or modify prototypes using
Object.getPrototypeOf()andObject.setPrototypeOf().
function Person(name, age) {this.name = name;this.age = age;}Person.prototype.sayHello = function () {console.log(`Hello, my name is ${this.name} and I am ${this.age} years old.`,);};let john = new Person('John', 30);john.sayHello(); // "Hello, my name is John and I am 30 years old."2. Prototype Chain
JavaScript looks for properties/methods on the object, then its prototype, and so on up the chain until
null.3. Constructor Functions
Functions used with
newto create objects, setting their prototype to the constructor'sprototype.function Animal(name) {this.name = name;}Animal.prototype.sayName = function () {console.log(`My name is ${this.name}`);};function Dog(name, breed) {Animal.call(this, name);this.breed = breed;}Dog.prototype = Object.create(Animal.prototype);Dog.prototype.bark = function () {console.log('Woof!');};let fido = new Dog('Fido', 'Labrador');fido.bark(); // "Woof!"fido.sayName(); // "My name is Fido"4.
Object.create()Creates a new object with a specified prototype.
let proto = {greet: function () {console.log(`Hello, my name is ${this.name}`);},};let person = Object.create(proto);person.name = 'John';person.greet(); // "Hello, my name is John"Explore how prototypal inheritance works on GreatFrontEnd
14. Difference between:
function Person(){},const person = Person(), andconst person = new Person()?Function Declaration
function Person(){}is a standard function declaration in JavaScript. When written in PascalCase, it follows the convention for functions intended to be used as constructors.Function Call
const person = Person()simply calls the function and executes its code. If no return value is specified,personwill beundefined. This is not a constructor call and does not create a new object.Constructor Call
const person = new Person()creates a new object using thePersonconstructor function. Thenewkeyword creates a new object and sets its prototype toPerson.prototype. Thethiskeyword inside the constructor function refers to the new object being created.15. Explain the differences on the usage of
foobetweenfunction foo() {}andvar foo = function() {}Function Declarations
- Syntax:
function foo() {} - Description: Defines a named function that can be called throughout the enclosing scope.
- Example:function foo() {console.log('FOOOOO');}
Function Expressions
- Syntax:
var foo = function() {} - Description: Defines a function and assigns it to a variable, often used in specific contexts.
- Example:var foo = function () {console.log('FOOOOO');};
Key Differences
Hoisting:
- Function Declarations: The entire function is hoisted; can be called before its definition.foo(); // 'FOOOOO'function foo() {console.log('FOOOOO');}
- Function Expressions: Only the variable is hoisted, not the function body; calling it before definition results in an error.foo(); // Uncaught TypeError: foo is not a functionvar foo = function () {console.log('FOOOOO');};
Name Scope:
- Function Expressions: These can be named internally, but the name is only accessible within the function.const myFunc = function namedFunc() {console.log(namedFunc); // Works};console.log(namedFunc); // undefined
Usage Recommendations
Function Declarations:
- Use for reusable functions available throughout the scope.
Function Expressions:
- Use for functions needed only in specific contexts to limit the scope.
16. What are the various ways to create objects in JavaScript?
Here are the various ways to create objects in JavaScript:
- Object Literals (
{}): Simplest way to create objects using key-value pairs within curly braces.const person = {firstName: 'John',lastName: 'Doe',}; - Object() Constructor: Using the
newkeyword with the built-inObjectconstructor to create an object.const person = new Object();person.firstName = 'John';person.lastName = 'Doe'; - Object.create() Method: Creating a new object using an existing object as a prototype.const personPrototype = {greet() {console.log(`Hello, my name is ${this.name} and I'm ${this.age} years old.`,);},};const person = Object.create(personPrototype);person.name = 'John';person.age = 30;person.greet(); // Output: Hello, my name is John and I'm 30 years old.
- ES2015 Classes: Defining a blueprint for objects using classes, similar to other programming languages.class Person {constructor(name, age) {this.name = name;this.age = age;}greet = function () {console.log(`Hello, my name is ${this.name} and I'm ${this.age} years old.`,);};}const person = new Person('John', 30);person.greet(); // Output: Hello, my name is John and I'm 30 years old.
- Constructor Functions: Reusable blueprints for objects, using the
newkeyword to create instances.// Constructor functionfunction Person(name, age) {this.name = name;this.age = age;this.greet = function () {console.log(`Hello, my name is ${this.name} and I'm ${this.age} years old.`,);};}const person = new Person('John', 30);person.greet(); // Output: Hello, my name is John and I'm 30 years old.
Note: Constructor functions are less commonly used now that ES2015 classes are widely supported.
Explore various ways to create objects in JavaScript on GreatFrontEnd
17. What is the definition of a higher-order function?
A higher-order function is a function that:
- Takes another function as an argument: A function that accepts another function as a parameter.function greet(name) {return `Hello, ${name}!`;}function greetName(greeter, name) {console.log(greeter(name));}greetName(greet, 'Alice'); // Output: Hello, Alice!
- Returns a function as its result: A function that returns another function as its output.function multiplier(factor) {return function (num) {return num * factor;};}const double = multiplier(2);console.log(double(5)); // Output: 10
In other words, a higher-order function is a function that operates on other functions, either by taking them as input or by producing them as output.
Explore the definition of a higher-order function on GreatFrontEnd
18. What are the differences between ES2015 classes and ES5 function constructors?
ES5 Function Constructors
Uses function constructors and prototypes.
- Example:function Person(name, age) {this.name = name;this.age = age;}Person.prototype.greet = function () {console.log('Hello, my name is ' +this.name +' and I am ' +this.age +' years old.',);};var person1 = new Person('John', 30);person1.greet(); // Hello, my name is John and I am 30 years old.
ES2015 Classes
Uses the
classsyntax, making code more readable and adding features.- Example:class Person {constructor(name, age) {this.name = name;this.age = age;}greet() {console.log(`Hello, my name is ${this.name} and I am ${this.age} years old.`,);}}const person1 = new Person('John', 30);person1.greet(); // Hello, my name is John and I am 30 years old.
Key differences
Syntax and Readability
- ES5: Function constructors and prototypes
- ES2015:
classkeyword, more concise and easier to understand
Static Methods
- ES5: Added directly to the constructor function
- ES2015: Defined within the class using
statickeyword
Inheritance
- ES5: Using
Object.create()and manual prototype chain setting - ES2015: Using
extendskeyword, simpler and more intuitive
- ES5: Using
Super Calls
- ES5: Manual parent constructor function call
- ES2015: Using
superkeyword to call parent class's constructor and methods
Explore differences between ES2015 classes and ES5 function constructors on GreatFrontEnd
19. Describe event bubbling
Event bubbling is a mechanism in the DOM (Document Object Model) where an event, such as a click, is first triggered on the target element and then propagates upward through the DOM tree to the root of the document.
Bubbling Phase:
- Description: During the bubbling phase, the event starts at the target element and bubbles up through its ancestors in the DOM hierarchy. Event handlers attached to the target element and its ancestors can all potentially receive and respond to the event.
- Example:// HTML:// <div id="parent">// <button id="child">Click me!</button>// </div>const parent = document.getElementById('parent');const child = document.getElementById('child');parent.addEventListener('click', () => {console.log('Parent element clicked');});child.addEventListener('click', () => {console.log('Child element clicked');});
When you click the
Click me!button, both the child and parent event handlers will be triggered due to event bubbling.Stopping Event Bubbling:
- Method: Use
stopPropagation()to stop the event from bubbling up the DOM tree. - Example:child.addEventListener('click', (event) => {console.log('Child element clicked');event.stopPropagation();});
Explore event bubbling on GreatFrontEnd
20. Describe event capturing
Event capturing is a propagation mechanism in the DOM where an event, such as a click, is first triggered at the root of the document and then flows down through the DOM tree to the target element.
Event Propagation Phases:
- Capturing Phase: The event moves down from the root to the target element.
- Target Phase: The event reaches the target element.
- Bubbling Phase: The event bubbles up from the target element back to the root.
Enabling Event Capturing:
- Event capturing is disabled by default.
- Enable it by passing
{ capture: true }as the third argument toaddEventListener().
Example:
// HTML:// <div id="parent">// <button id="child">Click me!</button>// </div>const parent = document.getElementById('parent');const child = document.getElementById('child');parent.addEventListener('click',() => {console.log('Parent element clicked (capturing)');},true, // Enable capturing phase);child.addEventListener('click', () => {console.log('Child element clicked');});When you click the
Click me!button, the parent element's capturing handler will be triggered before the child element's handler.Stopping Propagation:
- Use
stopPropagation()to prevent the event from traveling further down the DOM tree during the capturing phase. - Example:parent.addEventListener('click',(event) => {console.log('Parent element clicked (capturing)');event.stopPropagation(); // Stop event propagation},true,);child.addEventListener('click', () => {console.log('Child element clicked');});
In this example, only the parent event listener will be called when you click the "Click me!" button, as the event propagation is stopped at the parent element.
Explore event capturing on GreatFrontEnd
21. What is the difference between
mouseenterandmouseoverevent in JavaScript and browsers?mouseenter- Does not bubble
- Triggered only when the mouse pointer enters the element itself, not its descendants
- Only triggered once upon entry of parent element, without regard for its contents
mouseover- Bubbles up the DOM tree
- Triggered when the mouse pointer enters the element or one of its descendants
- Can result in multiple event callbacks fired if there are child elements
22. Explain the difference between synchronous and asynchronous functions
Synchronous Functions
- Execute in a sequential order, one after the other
- Blocking, meaning the program execution halts until the current operation finishes
- Follow a strict sequence, executing instructions line by line
- Easier to understand and debug since the flow is predictable
- Examples: reading files synchronously, looping over large datasets
Example:
const fs = require('fs');const data = fs.readFileSync('large-file.txt', 'utf8');console.log(data); // Blocks until file is readconsole.log('End of the program');Asynchronous Functions
- Do not block the execution of the program
- Allow other operations to continue while waiting for a response or completion of a time-consuming task
- Non-blocking, enabling concurrent execution and improving performance and responsiveness
- Commonly used for tasks like network requests, file I/O, and timers
- Examples: network requests, user input and events, timers, and animations
Example:
console.log('Start of the program');fetch('https://api.example.com/data').then((response) => response.json()).then((data) => console.log(data)) // Non-blocking.catch((error) => console.error(error));console.log('End of program');Explore the difference between synchronous and asynchronous functions on GreatFrontEnd
23. Explain AJAX in as much detail as possible
AJAX is a set of web development techniques using various web technologies on the client side to create asynchronous web applications. Unlike traditional web applications where each user interaction triggers a full page reload, AJAX allows web applications to send data to and retrieve data from a server asynchronously without interfering with the display and behavior of the existing page. This enables dynamic updates to the web page without the need to reload it.
Key Points:
- Asynchronous: AJAX enables web applications to update parts of a web page without reloading the whole page.
- Data Formats: Initially used XML, but JSON is now more common due to its compatibility with JavaScript.
- APIs: Traditionally used
XMLHttpRequest, butfetch()is now preferred for modern web applications.
XMLHttpRequestAPIExample:
let xhr = new XMLHttpRequest();xhr.onreadystatechange = function () {if (xhr.readyState === XMLHttpRequest.DONE) {if (xhr.status === 200) {console.log(xhr.responseText);} else {console.error('Request failed: ' + xhr.status);}}};xhr.open('GET', 'https://jsonplaceholder.typicode.com/todos/1', true);xhr.send();- Flow: Creates a new
XMLHttpRequest, sets up a callback function to handle state changes, opens a request to a URL, and sends the request.
fetch()APIExample:
fetch('https://jsonplaceholder.typicode.com/todos/1').then((response) => {if (!response.ok) {throw new Error('Network response was not ok');}return response.json();}).then((data) => console.log(data)).catch((error) => console.error('Fetch error:', error));- Flow: Initiates a fetch request, handles the response with
.then()to parse JSON data, and manages errors with.catch().
How AJAX Works with
fetch1. Making a Request
fetch()initiates an asynchronous request to fetch a resource from a URL.- Example:
fetch('https://api.example.com/data', {method: 'GET', // or 'POST', 'PUT', 'DELETE', etc.headers: {'Content-Type': 'application/json',},});
2. Return a Promise
fetch()returns a Promise that resolves to aResponseobject representing the server's response.
3. Handling the Response
- The
Responseobject offers methods to handle the body content, such as.json(),.text(),.blob(). - Example:
fetch('https://api.example.com/data').then((response) => response.json()).then((data) => console.log(data)).catch((error) => console.error('Error:', error));- The
4. Asynchronous Nature
fetch()is asynchronous, allowing the browser to continue executing other tasks while waiting for the server response.- Promises (
.then(),.catch()) are handled in the microtask queue as part of the event loop.
5. Request Options
- The optional second argument to
fetch()configures various request aspects, such as HTTP method, headers, body, credentials, and caching.
- The optional second argument to
6. Error Handling
- Errors (e.g., network failures, invalid responses) are caught and propagated through the Promise chain using
.catch()ortry/catchwithasync/await.
- Errors (e.g., network failures, invalid responses) are caught and propagated through the Promise chain using
Explore how to explain AJAX in as much detail as possible on GreatFrontEnd
24. What are the advantages and disadvantages of using AJAX?
AJAX (Asynchronous JavaScript and XML) enables web pages to send and retrieve data asynchronously, allowing for dynamic updates without full page reloads.
Advantages
- AJAX provides a seamless user experience by updating content without full page reloads.
- It reduces server load and improves performance by only fetching necessary data.
- AJAX maintains user interactions and client states within the page.
Disadvantages
- AJAX relies on JavaScript, which can break functionality if disabled.
- Dynamic content makes bookmarking specific page states challenging.
- Search engines may struggle to index dynamic content, posing SEO challenges.
- Processing AJAX data on low-end devices can be slow, raising performance concerns.
Explore the advantages and disadvantages of using AJAX on GreatFrontEnd
25. What are the differences between
XMLHttpRequestandfetch()?Both
XMLHttpRequest (XHR)andfetch()enable asynchronous HTTP requests in JavaScript, but differ in syntax, handling, and features.Syntax and Usage
- XMLHttpRequest: Event-driven, requiring event listeners to handle responses and errors.
- fetch(): Promise-based, offering simpler and more intuitive syntax.
Request Headers
- XMLHttpRequest: Set headers using the
setRequestHeadermethod. - fetch(): Pass headers as an object in the options parameter.
Request Body
- XMLHttpRequest: Send body with the
sendmethod. - fetch(): Use the
bodyproperty in the options parameter.
Response Handling
- XMLHttpRequest: Use
responseTypeto handle different formats. - fetch(): Provides a unified Response object with
.thenfor accessing data.
Error Handling
- XMLHttpRequest: Handle errors with
onerrorevent. - fetch(): Handle errors using the
.catchmethod.
Caching Control
- XMLHttpRequest: Difficult to manage, often requiring workaround methods.
- fetch(): Supports caching options directly.
Cancellation
- XMLHttpRequest: Use the
abort()method. - fetch(): Use
AbortControllerfor request cancellation.
Progress Support
- XMLHttpRequest: Supports tracking progress with the
onprogressevent. - fetch(): Does not support native progress tracking.
Choosing Between Them:
fetch()is generally preferred due to its cleaner syntax and promise-based handling, butXMLHttpRequestmay still be useful for specific cases like progress tracking.Explore the differences between
XMLHttpRequestandfetch()on GreatFrontEnd26. What are the various data types in JavaScript?
JavaScript has various data types categorized into two groups: primitive and non-primitive (reference) types.
Primitive Data Types
- Number: Represents both integers and floating-point numbers.
- String: Represents sequences of characters, enclosed in single, double quotes, or backticks.
- Boolean: Logical entities with values
trueorfalse. - Undefined: A declared variable without an assigned value.
- Null: Represents the intentional absence of value.
- Symbol: A unique, immutable value used as object property keys.
- BigInt: Represents integers with arbitrary precision, useful for very large numbers.
Non-Primitive Data Types
- Object: Used to store collections of data and more complex entities.
- Array: An ordered collection of data.
- Function: Functions are objects and can be defined using declarations or expressions.
- Date: Represents dates and times.
- RegExp: Represents regular expressions for pattern matching in strings.
- Map: A collection of keyed data items, allowing keys of any type.
- Set: A collection of unique values.
Determining Data Types: JavaScript is dynamically typed, meaning variables can hold different data types over time. Use the
typeofoperator to determine a variable's type.Explore the various data types in JavaScript on GreatFrontEnd
27. What language constructions do you use for iterating over object properties and array items?
Iterating over object properties and arrays is very common in JavaScript and we have various ways to achieve this. Here are some of the ways to do it:
Iterating over object
1.
for...inStatementLoops over all enumerable properties of an object, including inherited ones.
for (const property in obj) {if (Object.hasOwn(obj, property)) {console.log(property);}}2.
Object.keys()Returns an array of an object's own enumerable property names.
Object.keys(obj).forEach((property) => console.log(property));3.
Object.entries()Returns an array of a given object's own enumerable string-keyed property [key, value] pairs.
Object.entries(obj).forEach(([key, value]) =>console.log(`${key}: ${value}`),);4.
Object.getOwnPropertyNames()Returns an array of all properties (including non-enumerable ones) found directly upon a given object.
Object.getOwnPropertyNames(obj).forEach((property) =>console.log(property),);Iterating Over Arrays
1.
forLoopTraditional loop over array elements.
for (let i = 0; i < arr.length; i++) {console.log(arr[i]);}2.
Array.prototype.forEach()Executes a provided function once for each array element.
arr.forEach((element, index) => console.log(element, index));3.
for...ofStatementLoops over iterable objects like arrays.
for (let element of arr) {console.log(element);}4.
Array.prototype.entries()Provides both the index and value of each array element in a
for...ofloop.for (let [index, elem] of arr.entries()) {console.log(index, ': ', elem);}28. What are the benefits of using spread syntax and how is it different from rest syntax?
Spread Syntax
Introduced in ES2015, the spread syntax (
...) is useful for copying and merging arrays and objects without modifying the originals. It's commonly used in functional programming, Redux, and RxJS.- Copying Arrays/Objects: Creates shallow copies.const array = [1, 2, 3];const newArray = [...array]; // [1, 2, 3]const obj = { name: 'John', age: 30 };const newObj = { ...obj, city: 'New York' }; // { name: 'John', age: 30, city: 'New York' }
- Merging Arrays/Objects: Merges them into a new one.const arr1 = [1, 2, 3];const arr2 = [4, 5, 6];const mergedArray = [...arr1, ...arr2]; // [1, 2, 3, 4, 5, 6]const obj1 = { foo: 'bar' };const obj2 = { qux: 'baz' };const mergedObj = { ...obj1, ...obj2 }; // { foo: 'bar', qux: 'baz' }
- Function Arguments: Passes array elements as individual arguments.const numbers = [1, 2, 3];Math.max(...numbers); // Same as Math.max(1, 2, 3)
- Array vs. Object Spreads: Only iterables can be spread into arrays; arrays can be spread into objects.const array = [1, 2, 3];const obj = { ...array }; // { 0: 1, 1: 2, 2: 3 }
Rest Syntax
The rest syntax (
...) gathers multiple elements into an array or object, the inverse of the spread syntax.- Function Parameters: Collects remaining arguments into an array.function addFiveToNumbers(...numbers) {return numbers.map((x) => x + 5);}const result = addFiveToNumbers(4, 5, 6, 7); // [9, 10, 11, 12]
- Array Destructuring: Collects remaining elements into a new array.const [first, second, ...remaining] = [1, 2, 3, 4, 5];// first: 1, second: 2, remaining: [3, 4, 5]
- Object Destructuring: Collects remaining properties into a new object.const { e, f, ...others } = { e: 1, f: 2, g: 3, h: 4 };// e: 1, f: 2, others: { g: 3, h: 4 }
- Rest Parameter Rules: Must be the last parameter.function addFiveToNumbers(arg1, ...numbers, arg2) {// Error: Rest element must be last element.}
29. What is the difference between a
Mapobject and a plain object in JavaScript?Map Object
- Key Types: Allows keys of any type (objects, functions, primitives).
- Order: Maintains the insertion order of keys.
- Size: Provides a
sizeproperty to get the number of key-value pairs. - Iteration: Directly iterable, using methods like
forEach,keys(),values(), andentries(). - Performance: Generally better for larger datasets and frequent additions/deletions.
Plain Object
- Key Types: Keys are typically strings or symbols. Non-string keys are converted to strings.
- Order: Insertion order is not guaranteed.
- Size: No built-in property to get the size. Must manually count the number of keys.
- Iteration: Not directly iterable. Use methods like
Object.keys(),Object.values(), orObject.entries()for iteration. - Performance: Faster for small datasets and simple operations.
// Mapconst map = new Map();map.set('key1', 'value1');map.set({ key: 'key2' }, 'value2');console.log(map.size); // 2// Plain Objectconst obj = { key1: 'value1' };obj[{ key: 'key2' }] = 'value2';console.log(Object.keys(obj).length); // 1 (keys are strings)Explore the difference between a
Mapobject and a plain object in JavaScript on GreatFrontEnd30. What are the differences between
Map/SetvsWeakMap/WeakSet?The main distinctions between
Map/SetandWeakMap/WeakSetin JavaScript are as follows:- Key types:
MapandSetaccept keys of any type (objects, primitive values), whereasWeakMapandWeakSetexclusively use objects as keys, excluding primitive values like strings or numbers. - Memory management:
MapandSetretain strong references to their keys and values, preventing their disposal by garbage collection. In contrast,WeakMapandWeakSetemploy weak references for keys (objects), allowing these objects to be collected by garbage collection if no other strong references persist. - Key enumeration: Keys in
MapandSetare enumerable and can be iterated over, while those inWeakMapandWeakSetare non-enumerable, precluding retrieval of key or value lists directly from them. - Size property:
MapandSetpossess asizeproperty that indicates the number of elements they contain. In contrast,WeakMapandWeakSetlack asizeproperty because their size may vary as a result of garbage collection. - Use cases:
MapandSetserve well as general-purpose data structures and for caching purposes. Conversely,WeakMapandWeakSetare primarily suited for storing metadata or additional object-related data without impeding the object's potential garbage collection when no longer needed.
Explore the differences between
Map/SetvsWeakMap/WeakSeton GreatFrontEnd31. Can you offer a use case for the new arrow => function syntax?
One practical use case for the arrow function syntax in JavaScript is simplifying callback functions, particularly in scenarios where you need concise, inline function definitions. Here's an example:
Use Case: Mapping an Array
Suppose you have an array of numbers and you want to double each number using the
mapfunction.// Traditional function syntaxconst numbers = [1, 2, 3, 4, 5];const doubledNumbers = numbers.map(function (number) {return number * 2;});console.log(doubledNumbers); // Output: [2, 4, 6, 8, 10]Using arrow function syntax, you can achieve the same result more succinctly:
// Arrow function syntaxconst numbers = [1, 2, 3, 4, 5];const doubledNumbers = numbers.map((number) => number * 2);console.log(doubledNumbers); // Output: [2, 4, 6, 8, 10]Explore a use case for the new arrow => function syntax on GreatFrontEnd
32. Explain the concept of a callback function in asynchronous operations
In asynchronous programming, a callback function is passed as an argument to another function and invoked when a task completes, such as fetching data or handling I/O operations. Here's a concise explanation:
function fetchData(callback) {setTimeout(() => {const data = { name: 'John', age: 30 };callback(data);}, 1000);}fetchData((data) => {console.log(data); // { name: 'John', age: 30 }});Explore the concept of a callback function in asynchronous operations on GreatFrontEnd
33. Explain the concept of debouncing and throttling
Debouncing delays function execution until a specified time has passed since its last call, useful for tasks like search input handling.
function debounce(func, delay) {let timeoutId;return (...args) => {clearTimeout(timeoutId);timeoutId = setTimeout(() => func.apply(this, args), delay);};}Throttling limits function execution to at most once within a specified interval, beneficial for tasks like handling frequent events such as window resizing or scrolling.
function throttle(func, limit) {let inThrottle;return (...args) => {if (!inThrottle) {func.apply(this, args);inThrottle = true;setTimeout(() => (inThrottle = false), limit);}};}These techniques optimize performance and manage event-driven behaviors effectively in JavaScript applications.
Explore the concept of debouncing and throttling on GreatFrontEnd
34. Explain the concept of destructuring assignment for objects and arrays
Destructuring assignment simplifies extracting values from arrays or properties from objects into separate variables:
// Array destructuringconst [a, b] = [1, 2];// Object destructurinconst { name, age } = { name: 'John', age: 30 };This syntax uses square brackets for arrays and curly braces for objects, enabling concise variable assignment directly from data structures.
Explore the concept of destructuring assignment for objects and arrays on GreatFrontEnd
35. Explain the concept of hoisting with regards to functions
Hoisting moves function declarations to the top of their scope during compilation, allowing them to be called before their actual placement in the code. Function expressions and arrow functions, however, must be defined before they are called to avoid errors.
// Function declarationhoistedFunction(); // Works finefunction hoistedFunction() {console.log('This function is hoisted');}// Function expressionnonHoistedFunction(); // Throws an errorvar nonHoistedFunction = function () {console.log('This function is not hoisted');};Explore the concept of hoisting with regards to functions on GreatFrontEnd
36. Explain the concept of inheritance in ES2015 classes
In ES2015, classes use
extendsto enable one class to inherit properties and methods from another. Thesuperkeyword accesses the parent class's constructor and methods.class Animal {constructor(name) {this.name = name;}speak() {console.log(`${this.name} makes a noise.`);}}class Dog extends Animal {constructor(name, breed) {super(name);this.breed = breed;}speak() {console.log(`${this.name} barks.`);}}const dog = new Dog('Rex', 'German Shepherd');dog.speak(); // Output: Rex barks.Here,
Doginherits fromAnimal, showcasing how classes streamline inheritance and method overriding in JavaScript.Explore the concept of inheritance in ES2015 classes on GreatFrontEnd
37. Explain the concept of lexical scoping
Lexical scoping in JavaScript determines variable access based on its position in the source code. Nested functions can access variables from their outer scope.
function outerFunction() {let outerVariable = 'I am outside!';function innerFunction() {console.log(outerVariable); // 'I am outside!'}innerFunction();}outerFunction();Here,
innerFunctioncan accessouterVariabledue to lexical scoping rules.Explore the concept of lexical scoping on GreatFrontEnd
38. Explain the concept of scope in JavaScript
Scope in JavaScript determines the visibility of variables and functions within different parts of the code. There are three main types: global scope, function scope, and block scope.
// Global scopevar globalVar = 'I am global';function myFunction() {// Function scopevar functionVar = 'I am in a function';if (true) {// Block scopelet blockVar = 'I am in a block';console.log(blockVar); // Accessible here}// console.log(blockVar); // Throws an error}console.log(globalVar); // Accessible here// console.log(functionVar); // Throws an errorGlobal scope variables are accessible throughout the code, while function scope variables are limited to the function they are declared in. Block scope, introduced in ES6, confines variables to the block they are declared within (e.g., within curly braces {}).
Explore the concept of scope in JavaScript on GreatFrontEnd
39. Explain the concept of the spread operator and its uses
The spread operator (...) in JavaScript expands elements of an iterable (like arrays or objects) into individual elements. It's used for copying arrays or objects, merging them, and passing array elements as function arguments.
// Copying an arrayconst arr1 = [1, 2, 3];const arr2 = [...arr1];// Merging arraysconst arr3 = [4, 5, 6];const mergedArray = [...arr1, ...arr3];// Copying an objectconst obj1 = { a: 1, b: 2 };const obj2 = { ...obj1 };// Merging objectsconst obj3 = { c: 3, d: 4 };const mergedObject = { ...obj1, ...obj3 };// Passing array elements as function argumentsconst sum = (x, y, z) => x + y + z;const numbers = [1, 2, 3];console.log(sum(...numbers)); // Output: 6The spread operator simplifies tasks like copying, merging, and function argument handling by expanding iterable elements into individual components.
Explore the concept of the spread operator and its uses on GreatFrontEnd
40. Explain the concept of
thisbinding in event handlersIn JavaScript, the
thiskeyword refers to the object executing the current code. In event handlers,thisusually points to the element that triggered the event. However, its value can vary based on how the handler is defined and invoked. To ensurethisrefers correctly, methods likebind(), arrow functions, or explicit context assignment are used.These approaches help maintain the intended context for
thiswithin event handling functions, ensuring predictable behavior across different event-triggering scenarios in JavaScript applications.Explore the concept of
thisbinding in event handlers on GreatFrontEnd41. Explain the difference between classical inheritance and prototypal inheritance
Classical Inheritance: In languages like Java and C++, classes inherit from other classes through a hierarchical structure. Instances are created from classes using constructors.
Prototypal Inheritance: In JavaScript, objects inherit directly from other objects. Objects serve as prototypes, and new objects are created based on existing ones.
Classical inheritance uses classes for instantiation, while prototypal inheritance leverages object linkage for property and behavior inheritance, highlighting JavaScript's unique approach to object-oriented programming.
Explore the difference between classical inheritance and prototypal inheritance on GreatFrontEnd
42. Explain the difference between
document.querySelector()anddocument.getElementById()document.querySelector()selects elements using CSS selectors and returns the first match.const element = document.querySelector('.my-class');document.getElementById()selects an element by its ID attribute and returns the element with that specific ID.const elementById = document.getElementById('my-id');While
document.querySelector()offers flexibility with CSS selectors,document.getElementById()is straightforward for selecting elements by their unique IDs in the DOM.43. Explain the difference between dot notation and bracket notation for accessing object properties
Dot Notation: Concise and straightforward, it accesses object properties using valid identifiers.
const obj = { name: 'Alice', age: 30 };console.log(obj.name); // AliceBracket Notation: Flexible, it accesses properties using strings, suitable for names with special characters or dynamic properties.
const obj = { name: 'Alice', 'favorite color': 'blue' };console.log(obj['favorite color']); // blueDot notation is clear for standard properties, while bracket notation handles special cases like dynamic or non-standard property names effectively.
44. Explain the difference between global scope, function scope, and block scope
Global Scope
Accessible from anywhere in the code.
var globalVar = "I'm global"; // Global scopeFunction Scope
Limited to the function where it's declared.
function myFunction() {var functionVar = "I'm in a function"; // Function scope}Block Scope
Restricted to the block where
letorconstis used.function myFunction() {if (true) {let blockVar = "I'm in a block"; // Block scopeconsole.log(blockVar); // Accessible here}// console.log(blockVar); // ReferenceError: blockVar is not defined}These scopes define where variables can be accessed, from global access throughout the code to specific function or block-level access for better control and encapsulation of variables.
Explore the difference between global scope, function scope, and block scope on GreatFrontEnd
45. Explain the difference between shallow copy and deep copy
Shallow Copy
Duplicates top-level properties; nested objects remain referenced.
let obj1 = { a: 1, b: { c: 2 } };let shallowCopy = Object.assign({}, obj1);shallowCopy.b.c = 3;console.log(obj1.b.c); // 3Deep Copy
Duplicates all levels, creating independent nested objects.
let deepCopy = JSON.parse(JSON.stringify(obj1));deepCopy.b.c = 4;console.log(obj1.b.c); // 2Shallow copies share references to nested objects, while deep copies create entirely new instances, ensuring independent modifications.
Explore the difference between shallow copy and deep copy on GreatFrontEnd
46. Explain the difference in hoisting between
var,let, andconstvar:**- Hoisted to the top of its scope.
- Initialized with undefined.
- Can be used before its declaration without throwing an error.
console.log(myVar); // undefinedvar myVar = 'Hello';letandconst:**- Hoisted to the top of their scope.
- Not initialized (temporal dead zone).
- Accessing them before declaration results in a ReferenceError.
console.log(myLet); // ReferenceError: Cannot access 'myLet' before initializationlet myLet = 'World';console.log(myConst); // ReferenceError: Cannot access 'myConst' before initializationconst myConst = '!';const:**- Requires an initial value at declaration.
- Once assigned, its value cannot be changed (immutable).
const PI = 3.14;PI = 3.14159; // TypeError: Assignment to constant variable.Explore the difference in hoisting between
var,let, andconston GreatFrontEnd47. How can closures be used to create private variables?
Closures in JavaScript provide a mechanism to create private variables by encapsulating them within a function scope. Here's how closures can be used to achieve this:
function createCounter() {let count = 0;return {increment: () => ++count,decrement: () => --count,getCount: () => count,};}const counter = createCounter();console.log(counter.increment()); // 1console.log(counter.getCount()); // 1console.log(counter.count); // undefinedExplore how closures can be used to create private variables on GreatFrontEnd
48. How do
Sets andMaps handle equality checks for objects?Sets andMaps in JavaScript determine the equality of objects based on reference equality, not by comparing their contents. This means objects are considered equal only if they point to the same memory location. For instance:const set = new Set();const obj1 = { a: 1 };const obj2 = { a: 1 };set.add(obj1);set.add(obj2);console.log(set.size); // Output: 2In this example,
obj1andobj2are treated as separate entries in the Set because they are distinct objects, despite having identical properties. Therefore, Sets and Maps rely on object references to determine equality, not their internal values.Explore how
Sets andMaps handle equality checks for objects on GreatFrontEnd49. How do you access the index of an element in an array during iteration?
To access the index of an element in an array during iteration, you can utilize methods like forEach, map, for...of with entries, or a traditional for loop. Here's an example using forEach:
const array = ['a', 'b', 'c'];array.forEach((element, index) => {console.log(index, element);});Explore how to access the index of an element in an array during iteration on GreatFrontEnd
50. How do you check the data type of a variable?
To determine the type of a variable in JavaScript, you use
typeoffollowed by the variable name. It returns a string indicating the variable's type: "string", "number", "boolean", "object", "function", "undefined", or "symbol". For arrays, useArray.isArray(variableName), and for null, checkvariableName === null.Explore how to check the data type of a variable on GreatFrontEnd
Conclusion
You've made it to the end of our extensive list of JavaScript interview questions and answers! We hope this guide has helped you gain the confidence and skills you need to ace your next JavaScript interview. Remember, practice is key, so keep coding and reviewing the concepts until they become second nature.
- 10+ Must-know JavaScript Coding Interview Questions10+ essential JavaScript coding interview questions with solutions, organized by interview level (junior, mid, senior). Curated by senior engineers and former interviewers from leading tech companies.作者GreatFrontEnd Team18 分钟阅读Mar 28, 2025
These 18 questions cover what front-end interviewers ask in JavaScript coding rounds, from junior screens to senior onsites. Every question includes a full working implementation you can study and adapt, plus a link to a practice page on GreatFrontEnd where you can solve it in our IDE with test cases.
If you're looking for additional JavaScript interview preparation materials, also check out:
- Front End Interview Playbook
- Practice JavaScript coding interview questions
- Practice JavaScript quiz interview questions
What gets asked at which level
Different interview rounds reach for different questions. Use this table to plan what to focus on first based on the role you're targeting.
Level What you'll be asked Questions in this guide Junior / new grad Foundational JS, array methods, basic timing utilities 1-6: Debounce, Throttle, Array.map,Array.filter,Array.reduce, FlattenMid-level Object manipulation, real production patterns, common utilities 7-13: Deep Equal, Deep Clone, Data Merging, classnames, Once, Memoize, GetSenior / staff Async patterns, OOP design, functional composition, DOM internals 14-18: Event Emitter, Promise.all,Promise.allSettled, Curry,getElementsByClassNameJunior questions still come up in senior rounds. The bar shifts to whether you can discuss edge cases (leading vs trailing edge, memory leaks, async ordering) rather than just produce working code.
Junior level
1. Debounce
Debouncing delays a function's execution until a certain amount of time has passed since the last call. Every new call resets the timer. The function ultimately runs once, after the burst of calls has stopped.
The classic use case is a search input: you only want to fire a request once the user pauses typing, not on every keystroke.
function debounce(fn, wait) {let timeoutId;return function (...args) {clearTimeout(timeoutId);timeoutId = setTimeout(() => fn.apply(this, args), wait);};}// Usageconst handleSearch = debounce((query) => {console.log('Search:', query);}, 300);document.getElementById('search').addEventListener('input', (e) => {handleSearch(e.target.value);});The key details to mention if asked: forwarding
thisandargscorrectly so the wrapped function's call site behaves normally; remembering to expose acancel()method for React unmount cleanup; and the difference between leading-edge and trailing-edge debounce (Lodash defaults to trailing only).Practice implementing Debounce on GreatFrontEnd →
2. Throttle
Throttling caps how often a function can run: at most once per time interval, regardless of how many times it's called. Calls during the cooldown are dropped (or in better implementations, coalesced into a trailing call).
Throttle is the right tool for
scroll,mousemove,resize: events where you want regular updates during a continuous interaction.function throttle(fn, limit) {let inThrottle = false;let lastArgs = null;return function (...args) {if (!inThrottle) {fn.apply(this, args);inThrottle = true;setTimeout(() => {inThrottle = false;if (lastArgs) {fn.apply(this, lastArgs);lastArgs = null;}}, limit);} else {lastArgs = args;}};}// Usageconst handleScroll = throttle(() => {console.log('Scroll position:', window.scrollY);}, 100);window.addEventListener('scroll', handleScroll);For anything that paints to the screen, mention
requestAnimationFramethrottling instead.rAFaligns with the browser's paint cycle and stops firing entirely in background tabs.setTimeoutdoesn't align with paint, and while modern browsers throttle it in background tabs (Chrome and Firefox cap it at roughly 1Hz), it keeps firing.Practice implementing Throttle on GreatFrontEnd →
3.
Array.prototype.mapmapreturns a new array of the same length, with each element transformed by the callback. It's the most-used array method in modern JavaScript and a common ask for "implement a polyfill for X" interview rounds.Array.prototype.myMap = function (callback, thisArg) {const result = new Array(this.length);for (let i = 0; i < this.length; i++) {if (i in this) {result[i] = callback.call(thisArg, this[i], i, this);}}return result;};// Usage[1, 2, 3].myMap((x) => x * 2); // [2, 4, 6]Two details that separate junior from senior answers: handling sparse arrays correctly (the
if (i in this)check skips holes, matching native behavior), and accepting the optionalthisArgsecond parameter that controls the callback'sthis.Practice implementing
Array.prototype.mapon GreatFrontEnd →4.
Array.prototype.filterfilterreturns a new array containing only the elements for which the callback returns truthy. Likemap, it preserves order and skips sparse-array holes.Array.prototype.myFilter = function (callback, thisArg) {const result = [];for (let i = 0; i < this.length; i++) {if (i in this && callback.call(thisArg, this[i], i, this)) {result.push(this[i]);}}return result;};// Usage[1, 2, 3, 4].myFilter((x) => x % 2 === 0); // [2, 4]A classic interview follow-up: "implement filter in terms of reduce". Worth knowing; it tests whether you understand how the array methods relate.
function filterViaReduce(arr, fn) {return arr.reduce((acc, x, i) => (fn(x, i, arr) ? [...acc, x] : acc), []);}Practice implementing
Array.prototype.filteron GreatFrontEnd →5.
Array.prototype.reducereduceapplies a function against an accumulator and each element to reduce the array to a single value. It's the most general of the array methods;mapandfiltercan both be expressed in terms ofreduce.Array.prototype.myReduce = function (callback, initialValue) {let accumulator;let startIndex;if (arguments.length >= 2) {accumulator = initialValue;startIndex = 0;} else {if (this.length === 0) {throw new TypeError('Reduce of empty array with no initial value');}accumulator = this[0];startIndex = 1;}for (let i = startIndex; i < this.length; i++) {if (i in this) {accumulator = callback(accumulator, this[i], i, this);}}return accumulator;};// Usage[1, 2, 3, 4].myReduce((sum, x) => sum + x, 0); // 10Common interview gotchas to mention: the difference between providing and omitting the initial value (without it, the first element becomes the initial accumulator and iteration starts from index 1); the four parameters the callback receives (accumulator, current value, index, array); and the
TypeErrorthrown when reducing an empty array with no initial value.Practice implementing
Array.prototype.reduceon GreatFrontEnd →6. Flatten
Flatten converts a nested array into a single-level array. Modern JavaScript provides
Array.prototype.flat(depth)for this, but implementing it from scratch is a recurring interview ask.function flatten(arr) {return arr.reduce((acc, val) => acc.concat(Array.isArray(val) ? flatten(val) : val),[],);}// Usageflatten([1, [2, [3, [4, [5]]]]]); // [1, 2, 3, 4, 5]For production code, use
arr.flat(Infinity); it's more readable and handles edge cases. For the interview, the recursivereduceversion above is the clean answer. A senior follow-up to be ready for: "what if the nesting is so deep that recursion overflows the stack?" Answer: use an iterative stack-based approach (push a copy of the array onto a stack, thenpopand expand sub-arrays in place). Avoidarr.shift()for this; it's O(n) per call, which makes the whole traversal O(n²).Practice implementing Flatten on GreatFrontEnd →
Mid-level
7. Deep Equal
Deep equal recursively compares two values for structural equality. Unlike
===, which compares object references, deep equal walks both structures and compares values at every depth.function deepEqual(a, b) {if (a === b) return true;if (a == null || b == null) return false;if (typeof a !== 'object' || typeof b !== 'object') return false;if (Array.isArray(a) !== Array.isArray(b)) return false;const keysA = Object.keys(a);const keysB = Object.keys(b);if (keysA.length !== keysB.length) return false;for (const key of keysA) {if (!keysB.includes(key) || !deepEqual(a[key], b[key])) return false;}return true;}// UsagedeepEqual({ a: 1, b: { c: 2 } }, { a: 1, b: { c: 2 } }); // truedeepEqual([1, [2, 3]], [1, [2, 3]]); // trueThe basic version above handles the common case. Senior follow-ups: handling
Date,RegExp,Map,Set(each needs a type-specific comparison),NaN(should be considered equal to itself, even thoughNaN === NaNisfalse), and circular references (track visited pairs in aWeakMapto avoid infinite recursion).Practice implementing Deep Equal on GreatFrontEnd →
8. Deep Clone
Deep clone creates a fully independent copy of a value, where modifying the clone never affects the original at any depth.
function deepClone(value) {if (value === null || typeof value !== 'object') return value;if (Array.isArray(value)) {return value.map(deepClone);}const result = {};for (const key of Object.keys(value)) {result[key] = deepClone(value[key]);}return result;}// Usageconst original = { a: 1, nested: { b: 2 } };const copy = deepClone(original);copy.nested.b = 99;console.log(original.nested.b); // 2 (unaffected)For production code in modern environments, prefer the built-in
structuredClone(value); it handlesDate,RegExp,Map,Set,ArrayBuffer, typed arrays, and circular references correctly. It throws aDataCloneErroron functions, Symbols, and most DOM nodes. It also silently strips custom prototypes, so a class instance comes back as a plain object with the own properties copied.For the interview, the recursive version above is the standard answer. Be ready to discuss why
JSON.parse(JSON.stringify(...))is a common but buggy alternative: it dropsundefinedand functions, turnsDateinto a string, turnsNaNandInfinityintonull, and throws on circular references.Practice implementing Deep Clone on GreatFrontEnd →
9. Data Merging
Merging combines multiple objects (or arrays) into one. JavaScript provides several built-in approaches; the right choice depends on whether you need shallow or deep merging.
// Shallow merge with spread (modern, idiomatic)const merged = { ...obj1, ...obj2 }; // obj2's keys overwrite obj1's// Shallow merge with Object.assign (older API, same result)const merged2 = Object.assign({}, obj1, obj2);// Deep merge: recursivefunction deepMerge(target, source) {if (typeof target !== 'object' || typeof source !== 'object') return source;const result = { ...target };for (const key of Object.keys(source)) {if (result[key] &&typeof result[key] === 'object' &&!Array.isArray(result[key]) &&typeof source[key] === 'object' &&!Array.isArray(source[key])) {result[key] = deepMerge(result[key], source[key]);} else {result[key] = source[key];}}return result;}// UsagedeepMerge({ a: 1, b: { x: 10, y: 20 } }, { b: { y: 30, z: 40 }, c: 3 });// { a: 1, b: { x: 10, y: 30, z: 40 }, c: 3 }The interview gotcha is array merging: should
[1, 2]merged with[3, 4]produce[1, 2, 3, 4](concatenation) or[3, 4](replacement)? There's no universally correct answer; ask the interviewer for the contract before coding.Practice implementing Data Merging on GreatFrontEnd →
10.
classnamesEvery React project (and most projects in other frameworks) needs a utility for conditionally combining CSS class names. The
classnamespackage on npm is the de facto standard, and "implement classnames" is a frequent interview question.function classnames(...args) {const classes = [];for (const arg of args) {if (!arg) continue;if (typeof arg === 'string' || typeof arg === 'number') {classes.push(arg);} else if (Array.isArray(arg)) {const inner = classnames(...arg);if (inner) classes.push(inner);} else if (typeof arg === 'object') {for (const key of Object.keys(arg)) {if (arg[key]) classes.push(key);}}}return classes.join(' ');}// Usageclassnames('btn', 'btn-primary'); // 'btn btn-primary'classnames('btn', { 'btn-disabled': isDisabled }); // 'btn' or 'btn btn-disabled'classnames('btn', ['btn-large', { active: isActive }]); // 'btn btn-large active'classnames(null, undefined, false, '', 0, 'btn'); // 'btn'All falsy values (
null,undefined,false,'',0,NaN) are skipped, which matches the publishedclassnamespackage; its top-of-loopif (!arg) continuefilters them out uniformly. If the interviewer wants0treated as a valid class, swap the falsy guard for an explicit nullish/empty check.Practice implementing
classnameson GreatFrontEnd →11. Once
oncewraps a function so it only ever runs the first time it's called. Subsequent calls return the cached first-call result without invoking the wrapped function.function once(fn) {let called = false;let result;return function (...args) {if (!called) {called = true;result = fn.apply(this, args);}return result;};}// Usageconst init = once(() => {console.log('Initializing...');return { timestamp: Date.now() };});init(); // Logs "Initializing..." and returns { timestamp: ... }init(); // Returns the same object, doesn't logA small question that covers a lot: closures (the
calledandresultvariables persist between calls),this/argsforwarding, and why caching the result matters (so the second caller gets the same value, notundefined). Common follow-up: "make it so the wrapped function can be reset": add a.reset()method that clearscalledandresult.Practice implementing Once on GreatFrontEnd →
12. Memoize
Memoize wraps an expensive function and caches its results by argument, so repeated calls with the same input return the cached value instead of recomputing.
function memoize(fn) {const cache = new Map();return function (...args) {const key = JSON.stringify(args);if (cache.has(key)) {return cache.get(key);}const result = fn.apply(this, args);cache.set(key, result);return result;};}// Usageconst slowSquare = (n) => {console.log('Computing', n);return n * n;};const fastSquare = memoize(slowSquare);fastSquare(5); // Logs "Computing 5", returns 25fastSquare(5); // Returns 25 from cache (no log)fastSquare(6); // Logs "Computing 6", returns 36Two interview gotchas worth raising before the interviewer does:
JSON.stringifyis a brittle key strategy: functions in arguments are dropped (replaced withnull), circular references throw, and{a: 1, b: 2}and{b: 2, a: 1}produce different keys despite being structurally equivalent (modern engines preserve insertion order in stringification). For real production code, accept a customresolverfunction (Lodash's API) or use aWeakMapkeyed by the first argument when arguments are objects.- Memoize leaks memory: the cache grows unbounded. Add an LRU eviction policy or a
Mapwith a max size for any function called with many distinct inputs.
Practice implementing Memoize on GreatFrontEnd →
13. Get (safely access nested properties)
getreads a property at a nested path on an object, returning a fallback if any part of the path is missing. Before optional chaining landed in JavaScript, this was one of Lodash's most reached-for utilities.function get(obj, path, defaultValue) {const keys = Array.isArray(path) ? path : path.split('.');let result = obj;for (const key of keys) {if (result == null) return defaultValue;result = result[key];}return result === undefined ? defaultValue : result;}// Usageconst user = { profile: { name: 'Alice', address: { city: 'NYC' } } };get(user, 'profile.name'); // 'Alice'get(user, 'profile.address.zip'); // undefinedget(user, 'profile.address.zip', 'unknown'); // 'unknown'Modern JavaScript usually doesn't need this; optional chaining (
user?.profile?.address?.city ?? 'unknown') is more readable and built into the language. The interview value is showing you understand both the historical reason for the function and the modern equivalent. A common follow-up: "what if the path includes array indices likeusers[0].name?" Thesplit('.')approach above doesn't handle bracket notation; you'd need a regex split or a tokenizer for full Lodash compatibility.Practice implementing Get on GreatFrontEnd →
Senior level
14. Event Emitter
An EventEmitter is a publish-subscribe primitive: listeners subscribe to named events, the emitter triggers all listeners for an event when
emitis called. Node.js has a built-inEventEmitter; browsers haveEventTarget. Implementing one tests your grasp of OOP, closures, and array manipulation.class EventEmitter {constructor() {this.events = new Map();}on(event, listener) {if (!this.events.has(event)) this.events.set(event, []);this.events.get(event).push(listener);return this;}off(event, listener) {const listeners = this.events.get(event);if (!listeners) return this;this.events.set(event,listeners.filter((l) => l !== listener),);return this;}emit(event, ...args) {const listeners = this.events.get(event);if (!listeners || listeners.length === 0) return false;// Snapshot so listeners that unsubscribe themselves don't break iteration.[...listeners].forEach((listener) => listener.apply(this, args));return true;}}// Usageconst emitter = new EventEmitter();const handler = (data) => console.log('Got:', data);emitter.on('message', handler);emitter.emit('message', { text: 'hello' }); // Logs "Got: { text: 'hello' }"emitter.off('message', handler);emitter.emit('message', { text: 'world' }); // No logThe bug interviewers love to test is the listener-self-unsubscribe case: if a listener calls
emitter.off(...)for itself insideemit, the array gets modified mid-iteration and the next listener is skipped. The[...listeners]snapshot above prevents it. Mention this without being asked.Practice implementing Event Emitter on GreatFrontEnd →
15.
Promise.allPromise.alltakes an iterable of promises and returns a promise that fulfills with all results in input order, or rejects on the first rejection.function promiseAll(promises) {return new Promise((resolve, reject) => {const results = new Array(promises.length);let remaining = promises.length;if (remaining === 0) {resolve(results);return;}promises.forEach((promise, index) => {Promise.resolve(promise).then((value) => {results[index] = value;remaining--;if (remaining === 0) resolve(results);},(reason) => reject(reason),);});});}// Usageconst results = await promiseAll([Promise.resolve(1),42,new Promise((r) => setTimeout(() => r('foo'), 100)),]);console.log(results); // [1, 42, 'foo']A few specifics to mention even if not asked:
Promise.all([])resolves with[](NOT rejects); non-promise values in the input array are wrapped viaPromise.resolveand included in order; on first rejection, the other promises keep running but their results are discarded. JS promises themselves aren't cancellable; if you need to cancel the underlying work (afetch, for example), pass anAbortControllersignal to it. For the full comparison withPromise.allSettled, see the next question.Practice implementing
Promise.allon GreatFrontEnd →16.
Promise.allSettledPromise.allSettledresolves once all input promises have settled, with an array of{ status, value }or{ status, reason }objects. UnlikePromise.all, it never rejects, even when individual inputs reject.function promiseAllSettled(promises) {return new Promise((resolve) => {const results = new Array(promises.length);let remaining = promises.length;if (remaining === 0) {resolve(results);return;}promises.forEach((promise, index) => {Promise.resolve(promise).then((value) => {results[index] = { status: 'fulfilled', value };remaining--;if (remaining === 0) resolve(results);},(reason) => {results[index] = { status: 'rejected', reason };remaining--;if (remaining === 0) resolve(results);},);});});}// Usageconst results = await promiseAllSettled([Promise.resolve(1),Promise.reject(new Error('boom')),Promise.resolve(3),]);// [// { status: 'fulfilled', value: 1 },// { status: 'rejected', reason: Error('boom') },// { status: 'fulfilled', value: 3 }// ]The when-to-use distinction matters: reach for
Promise.allwhen partial success is invalid (transactional sequences, prefetches that gate a render). Reach forPromise.allSettledwhen partial results are still useful (dashboard widgets where one slow endpoint shouldn't blank the screen, bulk operations with per-row UX). The common mistake is wrappingPromise.allintry/catchto "handle" individual failures; that catches the first rejection but loses the rest of the results. UseallSettledinstead.Practice implementing
Promise.allSettledon GreatFrontEnd →17. Curry
Currying transforms a function of N arguments into a sequence of N functions of 1 argument each. The classic example is
curry(add3)letting you calladd3(1)(2)(3),add3(1, 2)(3), oradd3(1)(2, 3)interchangeably.function curry(fn) {return function curried(...args) {if (args.length >= fn.length) {return fn.apply(this, args);}return function (...nextArgs) {return curried.apply(this, [...args, ...nextArgs]);};};}// Usageconst add = (a, b, c) => a + b + c;const curriedAdd = curry(add);curriedAdd(1)(2)(3); // 6curriedAdd(1, 2)(3); // 6curriedAdd(1)(2, 3); // 6curriedAdd(1, 2, 3); // 6The trick is using
fn.lengthto know how many arguments the original function expects. The recursion incurriedcollects arguments across calls until the count is reached. Common follow-up: "implement curry that supports a placeholder for skipping arguments"; that's a separate variant (Curry II in our practice catalog) and a good test of whether you can extend a clean recursion to handle more state.Practice implementing Curry on GreatFrontEnd →
18.
getElementsByClassNamegetElementsByClassNamereturns a liveHTMLCollectionof elements that match one or more class names. The interview challenge is implementing it from scratch using DOM traversal, which is a real test of recursion and attribute matching.function getElementsByClassName(root, classNames) {const targetClasses = classNames.trim().split(/\s+/);const results = [];function traverse(node) {if (node.nodeType !== 1) return; // Only Element nodes.const nodeClasses = (node.getAttribute('class') || '').trim().split(/\s+/);if (targetClasses.every((cls) => nodeClasses.includes(cls))) {results.push(node);}for (const child of node.children) {traverse(child);}}for (const child of root.children) {traverse(child);}return results;}// Usage// Given <div><span class="a"><i class="a b"/></span><i class="a"/></div>getElementsByClassName(document.body, 'a b'); // [<i class="a b">]The key gotchas: the input class string can contain multiple space-separated class names, and the element must have ALL of them (not any); the comparison is on the parsed class list, so
class="ab"is not a match for"a b"; the implementation should NOT include the root element itself, only its descendants. The nativegetElementsByClassNamereturns a LIVE collection that updates as the DOM changes; most interview implementations return a static array, which is acceptable as long as you mention the difference.Practice implementing
getElementsByClassNameon GreatFrontEnd →How to use this guide
If you have a week before an interview, work through questions 1-6 (the junior set) twice: once writing them from a blank file, once reviewing the senior follow-ups. If you have a month, do all 18 in order. The questions are arranged so the patterns build on each other: closures appear in Debounce, Throttle, Once, and Memoize; recursion appears in Flatten, Deep Equal, Deep Clone, and
getElementsByClassName; promise composition appears inPromise.all,Promise.allSettled, and is a common follow-up to Event Emitter (replacing callbacks with promises).Practice each one on the linked GreatFrontEnd page; the IDE runs the same kinds of test cases real interviewers use, so edge cases surface before the interview does.
If you'd like to go beyond these 18 questions, check out our open-source GitHub repo featuring +190 JavaScript interview questions with detailed answers and test cases.
- 20 Must-know Advanced JavaScript Interview Questions for Experienced EngineersGet ready for your senior front end engineer role with these top 20 advanced JavaScript interview questions and answers, curated by ex-interviewers for experienced developers.作者GreatFrontEnd Team16 分钟阅读Feb 15, 2025
JavaScript interviews for experienced engineers demand more than just a basic understanding of syntax and concepts. They require a deep dive into advanced topics that demonstrate your ability to solve complex problems and architect robust solutions. Whether you're aiming to advance your career or secure a new role, mastering these 20 advanced JavaScript interview questions will not only enhance your technical prowess but also set you apart from others.
If you're looking for additional JavaScript interview preparation materials, also check out these resources:
- Front End Interview Playbook
- Practice JavaScript coding interview questions
- Practice JavaScript quiz interview questions
1. Explain why the following doesn't work as an IIFE:
function foo(){ }();. What needs to be changed to properly make it an IIFE?IIFE stands for Immediately Invoked Function Expressions. The JavaScript parser reads
function foo(){ }();asfunction foo(){ }and();, where the former is a function declaration and the latter is an attempt at calling a function without a name. This results in aSyntaxError.To fix this, wrap the function in parentheses:
(function foo(){ })(). This turns it into a function expression, allowing it to be executed immediately.2. What are iterators and generators in JavaScript and what are they used for?
In JavaScript, iterators and generators are powerful tools for managing sequences of data and controlling the flow of execution in a more flexible way.
Iterators
Iterators are objects that define a sequence and provide a
next()method to access the next value in the sequence. They are used to iterate over data structures like arrays, strings, and custom objects.Creating a custom iterator for a range of numbers
In JavaScript, we can provide a default implementation for iterator by implementing
[Symbol.iterator]()in any custom object.class Range {constructor(start, end) {this.start = start;this.end = end;}[Symbol.iterator]() {let current = this.start;const end = this.end;return {next() {if (current <= end) {return { value: current++, done: false };} elsereturn { value: undefined, done: true };}},};}}const range = new Range(1, 3);for (const number of range) {console.log(number); // 1, 2, 3}Generators
Generators are a special kind of function that can pause and resume their execution, allowing them to generate a sequence of values on-the-fly. They are commonly used to create iterators but have other applications as well.
Creating an iterator using a generator function
We can rewrite our
Rangeexample to use a generator function:class Range {constructor(start, end) {this.start = start;this.end = end;}*[Symbol.iterator]() {let current = this.start;while (current <= this.end) {yield current++;}}}const range = new Range(1, 3);for (const number of range) {console.log(number); // 1, 2, 3}Iterating over data streams
Generators are well-suited for iterating over data streams, such as fetching data from an API or reading files.
function* fetchDataInBatches(url, batchSize = 10) {let startIndex = 0;while (true) {const response = await fetch(`${url}?start=${startIndex}&limit=${batchSize}`);const data = await response.json();if (data.length === 0) break;yield data;startIndex += batchSize;}}const dataGenerator = fetchDataInBatches('https://api.example.com/data');for await (const batch of dataGenerator) {console.log(batch);}Explore what iterators and generators are in JavaScript and what they are used for on GreatFrontEnd
3. What are JavaScript object property flags and descriptors?
Property flags and descriptors in JavaScript manage how object properties behave, allowing control over property access, modification, and inheritance.
Property Flags
Property flags are used to specify the behavior of a property on an object. Here are the available flags:
writable: Can the property be written to? Default istrue.enumerable: Is the property enumerable? Default istrue.configurable: Can the property be deleted or reconfigured? Default istrue.
When we create a property the usual way, all of them are
true. But we also can change them anytime.Property Descriptors
Property descriptors provide detailed information about a property, including its value and flags. Use
Object.getOwnPropertyDescriptor()to retrieve andObject.defineProperty()to set them.Example:
let user = { name: 'John Doe' };let descriptor = Object.getOwnPropertyDescriptor(user, 'name');console.log(descriptor); // {value: "John Doe", writable: true, enumerable: true, configurable: true}Manipulating Property Flags
writable: Controls if a property can be written to. Iffalse, writing fails silently in non-strict mode and throwsTypeErrorin strict mode.const obj = {};Object.defineProperty(obj, 'name', { writable: false, value: 'John Doe' });console.log(obj.name); // John Doeobj.name = 'Jane Doe'; // TypeError in strict modeenumerable: Controls if a property is visible infor...inloops.const obj = {};Object.defineProperty(obj, 'name', {enumerable: false,value: 'John Doe',});for (const prop in obj) console.log(prop); // No outputconfigurable: Controls if a property can be deleted or reconfigured. Iffalse, deleting or altering fails silently in non-strict mode and throwsTypeErrorin strict mode.const obj = {};Object.defineProperty(obj, 'name', {configurable: false,value: 'John Doe',});delete obj.name; // TypeError in strict mode
Explore what javascript object property flags and descriptors are on GreatFrontEnd
4. What are JavaScript polyfills for?
Polyfills are scripts that enable modern JavaScript features in older browsers that lack support, allowing developers to use the latest language features while maintaining compatibility.
How Polyfills Work
Polyfills detect missing features and provide custom implementations using existing JavaScript. For example,
Array.prototype.includes()is not supported in older browsers like Internet Explorer 11:if (!Array.prototype.includes) {Array.prototype.includes = function (searchElement) {for (var i = 0; i < this.length; i++) {if (this[i] === searchElement) return true;}return false;};}Implementing Polyfills
- Identify the Missing Feature: Detect support using
typeof,in, orwindow. - Write the Fallback: Create a custom implementation.
- Test the Polyfill: Ensure it works across browsers.
- Apply the Polyfill: Use feature detection to selectively apply the polyfill.
Considerations
- Selective Loading: Load only for browsers that need them.
- Feature Detection: Avoid unnecessary polyfills.
- Size and Performance: Minimize bundle size.
- Use Libraries: Leverage comprehensive polyfill libraries.
Libraries and Services
core-js: Provides polyfills for many ECMAScript features.import 'core-js/actual/array/flat-map';[1, 2].flatMap((it) => [it, it]); // => [1, 1, 2, 2]- Polyfill.io: Serves polyfills based on requested features and user agents.<script src="https://polyfill.io/v3/polyfill.min.js"></script>
Polyfills ensure modern JavaScript features work across all browsers, enhancing compatibility and functionality.
Explore what JavaScript polyfills are for on GreatFrontEnd
5. What are server-sent events?
Server-Sent Events (SSE) is a standard that allows servers to push updates to web clients over a single, long-lived HTTP connection. This enables real-time updates without the client constantly polling the server for new data.
How SSE Works:
- Client Setup: The client creates an
EventSourceobject, providing the URL of the server-side script that generates the event stream. - Server Response: The server sets headers to indicate an event stream and starts sending events to the client.
- Event Format: Each event follows a specific format with fields like
event,data, andid. - Client Handling: The
EventSourceobject receives events and dispatches them as browser events, which can be handled using event listeners. - Reconnection: The
EventSourceautomatically handles reconnection if the connection is lost, resuming the stream from the last received event ID.
Key Features:
- Unidirectional: Only the server can send data to the client.
- Retry Mechanism: The client retries the connection if it fails.
- Text-only Data: SSE transmits text data only.
- Built-in Browser Support: Supported by most modern browsers.
- Event Types: SSE supports custom event types for message categorization.
Last-Event-Id: The client sends theLast-Event-Idheader when reconnecting, allowing the server to resume the stream.
Implementing SSE:
Client:
const eventSource = new EventSource('/sse');eventSource.onmessage = (event) => console.log('New message:', event.data);Server (Node.js):
const http = require('http');http.createServer((req, res) => {if (req.url === '/sse') {// Set headers for SSEres.writeHead(200, {'Content-Type': 'text/event-stream','Cache-Control': 'no-cache',Connection: 'keep-alive',});// Function to send a messageconst sendMessage = (message) => {res.write(`data: ${message}\n\n`); // Messages are delimited with double line breaks.};// Send a message every 5 secondsconst intervalId = setInterval(() => {sendMessage(`Current time: ${new Date().toLocaleTimeString()}`);}, 5000);// Handle client disconnectreq.on('close', () => {clearInterval(intervalId);res.end();});} else {res.writeHead(404);res.end();}}).listen(8080, () => {console.log('SSE server running on port 8080');});SSE provides an efficient and straightforward way to push updates from a server to a client in real-time. It is well-suited for applications requiring continuous data streams but not full bidirectional communication.
Explore what server-sent events are on GreatFrontEnd
6. What are workers in JavaScript used for?
JavaScript workers run scripts in background threads, offloading intensive tasks to keep the user interface responsive. There are three main types of workers in JavaScript: Web Workers / Dedicated Workers, Service Workers and Shared Workers.
Web Workers / Dedicated Workers
- Purpose: Handle CPU-intensive tasks (e.g., data processing, computations).
- Communication: Use
postMessage()andonmessage. - Security: No direct DOM access.
- Termination: Ends when the main script unloads or explicitly terminated.
Example: Creating a Web Worker
main.js:// Check if the browser supports workersif (window.Worker) {// Create a new Workerconst myWorker = new Worker('worker.js');// Post a message to the workermyWorker.postMessage('Hello, Worker!');// Listen for messages from the workermyWorker.onmessage = function (event) {console.log('Message from Worker:', event.data);};// Error handlingmyWorker.onerror = function (error) {console.error('Error from Worker:', error);};}worker.js:// Listen for messages from the main scriptonmessage = function (event) {console.log('Message from Main Script:', event.data);// Perform a task (e.g., some computation)const result = event.data + ' - Processed by Worker';// Post the result back to the main scriptpostMessage(result);};Service Workers
- Purpose: Act as a network proxy, handle requests, and cache resources.
- Capabilities: Enable offline functionality and push notifications.
- Lifecycle: Managed by the browser (install, activate, update).
- Security: No direct DOM access.
Example: Creating a Service Worker
main.js:if ('serviceWorker' in navigator) {navigator.serviceWorker.register('/service-worker.js').then((registration) => {console.log('Service Worker registered:', registration);}).catch((err) => {console.log('Service Worker registration failed:', err);});}service-worker.js:self.addEventListener('fetch', (event) => {event.respondWith(caches.match(event.request).then((response) => {return response || fetch(event.request);}),);});Shared Workers
- Purpose: Shared across multiple scripts in different windows/tabs/iframes.
- Use Case: State sharing across multiple browser contexts.
Considerations and Limitations
- Same-Origin Policy: Workers must comply with the same-origin policy.
- No DOM Access: Communicate with the main thread via messages.
- Performance: Managing workers incurs overhead; use judiciously.
- Error Handling: Implement proper error handling mechanisms.
Explore what workers in JavaScript are used for on GreatFrontEnd
7. What is
"use strict";? What are the advantages and disadvantages to using it?"use strict";is a directive from ECMAScript 5 (ES5) that enforces stricter parsing and error handling in JavaScript, making code more secure and less error-prone.How to Use Strict Mode
- Global Scope: Add at the beginning of a JavaScript file.'use strict';function add(a, b) {return a + b;}
- Local Scope: Add at the beginning of a function.function myFunction() {'use strict';// Strict mode only within this function}
Key Features of Strict Mode
- Error Prevention:
- Disallows undeclared variables.
- Prevents assignment to non-writable properties.
- Restricts use of reserved keywords as identifiers.
- Improved Security:
- Disallows deprecated features like
arguments.caller. - Restricts
eval()to prevent variable declarations in the calling scope.
- Disallows deprecated features like
- Compatibility:
- Ensures future-proofing with JavaScript updates.
Example of preventing global variables:
// Without strict modefunction defineNumber() {count = 123;}defineNumber();console.log(count); // Logs: 123// With strict mode('use strict');function strictFunc() {strictVar = 123; // ReferenceError}strictFunc();console.log(strictVar); // ReferenceErrorIs It Necessary?
- Modules: ES6 and Node.js modules are automatically in strict mode.
- Classes: Code within class definitions is also in strict mode.
While
"use strict";is not mandatory in these contexts, it is still recommended for older code and broader compatibility.Explore what "use strict" is and its advantages and disadvantages on GreatFrontEnd
8. How can you implement secure authentication and authorization in JavaScript applications?
To secure authentication and authorization in JavaScript applications, use HTTPS to encrypt data in transit and store sensitive data like tokens securely with
localStorageorsessionStorage. Employ token-based authentication using JWTs, validating tokens server-side. Utilize libraries like OAuth for third-party authentication and enforce role-based access control (RBAC) for proper authorization.9. How can you optimize DOM manipulation for better performance?
Minimize direct DOM access by batching changes, using
documentFragment, and leveraging virtual DOM libraries like React. UserequestAnimationFramefor animations and avoid layout thrashing by separating DOM reads and writes.Explore how to optimize DOM manipulation for better performance on GreatFrontEnd
10. How can you optimize network requests for better performance?
Minimize the number of requests, use caching, compress data, and leverage HTTP/2 and service workers. Combine CSS files, use
Cache-Controlheaders for static assets, and enable Gzip compression to reduce data size.Explore how to optimize network requests for better performance on GreatFrontEnd
11. How can you prevent clickjacking attacks?
Prevent clickjacking by using the X-Frame-Options HTTP header set to DENY or SAMEORIGIN to control iframe embedding. Additionally, use the Content-Security-Policy header with the frame-ancestors directive to specify allowed origins.
X-Frame-Options: DENYContent-Security-Policy: frame-ancestors 'self'Explore how to prevent clickjacking attacks on GreatFrontEnd
12. How do you validate form elements using the Constraint Validation API?
Use the Constraint Validation API with properties like
validityandvalidationMessage, and methods likecheckValidity()andsetCustomValidity(). For example:const input = document.querySelector('input');if (input.checkValidity()) {console.log('Input is valid');} else {console.log(input.validationMessage);}Explore how to validate form elements using the Constraint Validation API on GreatFrontEnd
13. How does hoisting affect function declarations and expressions?
In JavaScript, hoisting moves function declarations to the top of their scope, making them callable before their definition. Function expressions are not hoisted similarly; the variable is hoisted, but its assignment is not.
// Function declarationconsole.log(foo()); // Works finefunction foo() {return 'Hello';}// Function expressionconsole.log(bar()); // Throws TypeError: bar is not a functionvar bar = function () {return 'Hello';};Explore how hoisting affects function declarations and expressions on GreatFrontEnd
14. How does JavaScript garbage collection work?
JavaScript uses automatic garbage collection to reclaim memory from objects and variables no longer in use. The two main algorithms are mark-and-sweep and generational garbage collection.
Mark-and-Sweep
- Marking phase: The garbage collector starts from root objects (global variables, currently executing functions) and marks all reachable objects as "in-use".
- Sweeping phase: It then removes unmarked objects, freeing up memory.
Generational Garbage Collection Modern engines divide objects into generations based on age and usage. Frequently accessed objects stay in younger generations, while less-used objects move to older generations, optimizing garbage collection by focusing on short-lived objects.
Different JavaScript engines may use different garbage collection strategies.
Explore how JavaScript garbage collection works on GreatFrontEnd
15. What are mocks and stubs and how are they used in testing?
Mocks and stubs simulate real objects in testing. Stubs provide predefined responses to function calls, isolating the code being tested from external dependencies. Mocks are more complex, verifying interactions like whether a function was called and with what arguments. Stubs focus on isolating functionality, while mocks ensure correct interaction with dependencies.
Explore what mocks and stubs are and how they are used in testing on GreatFrontEnd
16. What are proxies in JavaScript used for?
A proxy in JavaScript is an intermediary object that intercepts and customizes operations on another object, such as property access, assignment, and function invocation.
Example:
const myObject = {name: 'John',age: 42,};const handler = {get: function (target, prop) {console.log(`Accessed property "${prop}"`);return target[prop];},};const proxiedObject = new Proxy(myObject, handler);console.log(proxiedObject.name); // Logs: 'John'// Accessed property "name"console.log(proxiedObject.age); // Logs: 42// Accessed property "age"Use cases:
- Property access interception: Customize behavior when properties are accessed.
- Property assignment validation: Validate values before setting properties.
- Logging and debugging: Log interactions with objects for debugging.
- Creating reactive systems: Trigger updates when properties change.
- Data transformation: Modify data being set or retrieved.
- Mocking and stubbing in tests: Create mock objects for testing.
- Function invocation interception: Cache and optimize frequently called methods.
- Dynamic property creation: Define properties on-the-fly with default values.
Explore what proxies in JavaScript are used for on GreatFrontEnd
17. What are some of the advantages/disadvantages of writing JavaScript code in a language that compiles to JavaScript?
Using languages like TypeScript or CoffeeScript, which compile to JavaScript, has several pros and cons.
Advantages:
- Improved syntax and readability
- Type safety and error checking
- Better tooling and editor support
Disadvantages:
- Added build steps and complexity
- Potential performance overhead
- Learning curve for new syntax
18. What are some techniques for reducing reflows and repaints?
- Minimize DOM manipulations and batch changes.
- Use CSS classes instead of direct style updates.
- Simplify CSS selectors to optimize rendering.
- Use
requestAnimationFramefor synchronized animations. - Apply
will-changeto elements that change frequently. - Separate DOM reads and writes to avoid layout thrashing.
Explore techniques for reducing reflows and repaints on GreatFrontEnd
19. What are some tools that can be used to measure and analyze JavaScript performance?
Tools such as Chrome DevTools, Lighthouse, WebPageTest, and JSPerf are commonly used for this purpose. Chrome DevTools includes a Performance panel for profiling, Lighthouse provides performance audits, WebPageTest offers detailed performance testing, and JSPerf aids in comparing JavaScript snippet performance.
Explore tools to measure and analyze JavaScript performance on GreatFrontEnd
20. What are Web Workers and how can they be used to improve performance?
Web Workers enable running JavaScript in the background, independent of the main execution thread of a web application. This is beneficial for handling intensive computations without blocking the user interface. Web Workers are created using the
Workerconstructor and communication with them is facilitated through thepostMessageandonmessagemethods.Explore what Web Workers are and how they can be used to improve performance on GreatFrontEnd
Conclusion
Preparing yourself to answer these questions in an interview setting will certainly help you stand out from the crowd. It's not just about knowing the answers; it's about understanding the underlying concepts and applying them effectively in real-world scenarios. Mastering these advanced JavaScript topics will not only boost your confidence during technical interviews but also equip you to build scalable and efficient web applications.
- Top 30 React Interview Questions and Answers to Get Hired in 202530 essential React interview questions and answers to help you prepare for front-end job interviews in 2025作者GreatFrontEnd Team16 分钟阅读Jan 29, 2025

As the demand for skilled front-end developers rises in 2025, proficiency in React has become essential. This JavaScript library is widely used for building dynamic user interfaces, and mastering it requires a solid understanding of its core principles and advanced features.
To help you prepare for your upcoming interviews, we've compiled 30 essential React interview questions and answers that cover a range of topics from fundamental concepts to advanced techniques. Whether you're an experienced developer or new to React, this guide will equip you with the knowledge needed to excel in interviews.
If you're looking for more in-depth React interview preparation materials, also check out these resources:
- React Interview Playbook
- Practice React coding interview questions
- Practice React quiz interview questions
1. What is the difference between React Node, Element, and Component?
React Node, Element, and Component are three fundamental concepts in React.
- Node: A React Node is any renderable unit in React, like an element, string, number, or
null. - Element: An element is a plain object that represents a DOM element or a component. It describes what you want to see on the screen. Elements are immutable and are used to create React components.
- Component: A component is a reusable piece of UI that can contain one or more elements. Components can be either functional or class-based. They accept inputs called props and return React elements that describe what should appear on the screen.
2. What are React Fragments used for?
React Fragments are a feature introduced in React 16.2 that allows you to group multiple children elements without adding extra nodes to the DOM. Fragments are useful when you need to return multiple elements from a component but don't want to wrap them in a parent element. They help keep the DOM structure clean and avoid unnecessary div wrappers.
Here's an example of using React Fragments:
function App() {return (<><Header /><Main /><Footer /></>);}In this example, the
<>...</>syntax is a shorthand for declaring a React Fragment. It allows you to group theHeader,Main, andFootercomponents without adding an extra div to the DOM.3. What is the purpose of the
keyprop in React?The
keyprop is a special attribute used in React to uniquely identify elements in a list. When rendering a list of elements, React uses thekeyprop to keep track of each element's identity and optimize the rendering process. Thekeyprop helps React identify which items have changed, been added, or been removed, allowing it to update the DOM efficiently.4. What is the consequence of using array indices as keys in React?
Using array indices as keys in React can lead to performance issues and unexpected behavior. When you use array indices as keys, React uses the index to identify elements and track changes. However, this approach can cause problems when the array is modified, as React may not be able to differentiate between elements with the same key.
For example, consider the following code:
function App() {const items = ['A', 'B', 'C'];return (<ul>{items.map((item, index) => (<li key={index}>{item}</li>))}</ul>);}If you add or remove items from the
itemsarray, React may not update the DOM correctly because it relies on the index as the key. To avoid this issue, it's recommended to use unique IDs or keys that are stable across renders.5. What is the difference between Controlled and Uncontrolled React components?
Controlled and Uncontrolled components are two common patterns used in React to manage form inputs and state.
- Controlled Components: In a controlled component, form data is handled by React state and is updated via state changes. The input value is controlled by React, and any changes to the input are handled by React event handlers. Controlled components provide more control over form inputs and allow you to validate and manipulate the input data before updating the state.
- Uncontrolled Components: In an uncontrolled component, form data is handled by the DOM itself, and React does not control the input value. The input value is managed by the DOM, and you can access the input value using a ref. Uncontrolled components are useful for integrating with third-party libraries or when you need to access the input value imperatively.
Example of controlled component:
function ControlledInput() {const [value, setValue] = React.useState('');return (<inputtype="text"value={value}onChange={(e) => setValue(e.target.value)}/>);}Example of uncontrolled component:
function UncontrolledInput() {const inputRef = React.useRef();return <input type="text" ref={inputRef} />;}6. How would you lift the state up in a React application, and why is it necessary?
Lifting state up in React involves moving the state from child components to their nearest common ancestor. This pattern is used to share state between components that don't have a direct parent-child relationship. By lifting state up, you can avoid prop drilling and simplify the management of shared data. Example:
const Parent = () => {const [counter, setCounter] = useState(0);return (<div><Child1 counter={counter} /><Child2 setCounter={setCounter} /></div>);};const Child1 = ({ counter }) => <h1>{counter}</h1>;const Child2 = ({ setCounter }) => (<button onClick={() => setCounter((prev) => prev + 1)}>Increment</button>);7. What are Pure Components?
Pure Components are a type of React component that extends
React.PureComponentor uses theReact.memohigher-order component. Pure Components are optimized for performance and implement ashouldComponentUpdatemethod that performs a shallow comparison of props and state to determine if the component should re-render. If the props and state of a Pure Component have not changed, React skips the re-rendering process, improving performance.Pure Components are useful when you have components that render the same output given the same input and don't rely on external state or side effects. By using Pure Components, you can prevent unnecessary re-renders and optimize your React application.
8. What is the difference between
createElementandcloneElement?createElement: Used to create a new React element by specifying its type (e.g., 'div', a React component), props, and children.
React.createElement('div', { className: 'container' }, 'Hello World');cloneElement: Used to clone an existing React element and optionally modify its props while keeping the original element's children and state.
const element = <button className="btn">Click Me</button>;const clonedElement = React.cloneElement(element, { className: 'btn-primary' });9. What is the role of PropTypes in React?
PropTypes is a library used in React to validate the props passed to a component. PropTypes help you define the types of props a component expects and provide warnings in the console if the props are of the wrong type. PropTypes are useful for documenting component APIs, catching bugs early, and ensuring that components receive the correct data.
Here's an example of using PropTypes:
import PropTypes from 'prop-types';const Greeting = ({ name }) => <h1>Hello, {name}!</h1>;Greeting.propTypes = {name: PropTypes.string.isRequired,};In this example, the
Greetingcomponent expects a prop namednameof typestring. If thenameprop is not provided or is not a string, a warning will be displayed in the console.10. What are stateless components?
Stateless components do not manage internal state; they receive data via props and focus solely on rendering UI based on that data.
Example:
function StatelessComponent({ message }) {return <div>{message}</div>;}11. What are stateful components?
Stateful components manage their own internal state and can update their UI based on user interactions or other events.
Example:
function StatefulComponent() {const [count, setCount] = React.useState(0);return (<div><p>{count}</p><button onClick={() => setCount(count + 1)}>Increment</button></div>);}12. What are the benefits of using hooks in React?
Hooks allow you to use state and other React features in functional components, eliminating the need for classes. They simplify code by reducing reliance on lifecycle methods, improve code readability, and make it easier to reuse stateful logic across components. Common hooks like
useStateanduseEffecthelp manage state and side effects.13. What are the rules of React hooks?
React hooks follow a set of rules to ensure they are used correctly:
- Only call hooks at the top level: Hooks should only be called from the top level of a functional component or from custom hooks. They should not be called inside loops, conditions, or nested functions.
- Only call hooks from React functions: Hooks should only be called from React components or custom hooks. They should not be called from regular JavaScript functions.
- Use hooks in the same order: Hooks should be called in the same order on every render to ensure the component's state is consistent.
- Don't call hooks conditionally: Hooks should not be called conditionally based on a condition. They should always be called in the same order on every render.
14. What is the difference between
useEffectanduseLayoutEffectin React?useEffect: Runs after the browser has painted the screen and is used for side effects that don't block the browser's painting process. It's asynchronous and runs after the render is committed to the DOM.useLayoutEffect: Runs synchronously after the DOM has been updated but before the browser has painted the screen. It's used for side effects that require the DOM to be updated synchronously.
In most cases, you should use
useEffectunless you need to perform a synchronous side effect that requires the DOM to be updated immediately.Example:
import React, { useEffect, useLayoutEffect, useRef } from 'react';function Example() {const ref = useRef();useEffect(() => {console.log('useEffect: Runs after DOM paint');});useLayoutEffect(() => {console.log('useLayoutEffect: Runs before DOM paint');console.log('Element width:', ref.current.offsetWidth);});return <div ref={ref}>Hello</div>;}15. What does the dependency array of
useEffectaffect?The dependency array of
useEffectspecifies the values that the effect depends on. When the values in the dependency array change, the effect is re-run. If the dependency array is empty, the effect runs only once after the initial render.Example:
useEffect(() => {// Effect code}, [value1, value2]);In this example, the effect will run whenever
value1orvalue2changes. If the dependency array is omitted ([]), the effect will run only once after the initial render.16. What is the
useRefhook in React and when should it be used?The
useRefhook in React creates a mutable reference that persists across renders. It can be used to store references to DOM elements, manage focus, or store mutable values that don't trigger re-renders.Example:
function TextInputWithFocusButton() {const inputRef = useRef(null);const handleClick = () => {inputRef.current.focus();};return (<><input ref={inputRef} type="text" /><button onClick={handleClick}>Focus Input</button></>);}In this example, the
inputRefis used to store a reference to the input element, and thehandleClickfunction focuses the input when the button is clicked.17. Why does React recommend against mutating state?
React recommends against mutating state directly because it can lead to unexpected behavior and bugs. When you mutate state directly, React may not detect the changes, causing the UI to become out of sync with the application's state. To ensure that React detects state changes correctly, you should always update state using the
setStatefunction or hooks likeuseState.18. What is reconciliation in React?
Reconciliation is the process by which React updates the DOM to match the virtual DOM after a component's state or props change. React compares the previous virtual DOM with the new virtual DOM and determines the minimum number of changes needed to update the DOM efficiently. Reconciliation is an essential part of React's performance optimization strategy and helps minimize the number of DOM manipulations required.
19. What is hydration in React?
Hydration is the process by which React attaches event listeners and updates the DOM to match the virtual DOM on the client side. Hydration is necessary for server-side rendered React applications to ensure that the client-side rendered content is interactive and matches the server-rendered content. During hydration, React reconciles the server-rendered HTML with the client-side virtual DOM and updates the DOM to match the virtual DOM structure.
20. Explain higher-order components (HOCs).
Higher-order components (HOCs) are functions that take a component as an argument and return a new component with enhanced functionality. HOCs are used to share code between components, add additional props or behavior to components, and abstract common logic into reusable functions.
Example:
const withLogger = (WrappedComponent) => {return (props) => {console.log('Component rendered:', WrappedComponent.name);return <WrappedComponent {...props} />;};};const EnhancedComponent = withLogger(MyComponent);In this example, the
withLoggerHOC logs the name of the component every time it renders. TheEnhancedComponentis a new component that includes the logging functionality.21. What are some common performance optimization techniques in React?
Some common performance optimization techniques in React include:
- Memoization: Use memoization techniques like
useMemoanduseCallbackto cache expensive computations and prevent unnecessary re-renders. - Code Splitting: Split your code into smaller chunks and load them dynamically to reduce the initial bundle size and improve loading times.
- Lazy Loading: Use lazy loading to load components or resources only when they are needed, reducing the initial load time of your application.
- Virtualization: Implement virtualization techniques like windowing or infinite scrolling to render only the visible elements in long lists or tables, improving performance.
- Server-Side Rendering: Use server-side rendering to pre-render your React components on the server and send the HTML to the client, reducing the time to first paint.
22. What is the purpose of the
useReducerhook in React?The
useReducerhook in React is used to manage complex state logic in functional components. It is an alternative touseStateand allows you to update state based on the previous state and an action.useReduceris useful for managing state transitions that depend on the current state and require more complex logic than simple updates.Example:
const initialState = { count: 0 };const reducer = (state, action) => {switch (action.type) {case 'increment':return { count: state.count + 1 };case 'decrement':return { count: state.count - 1 };default:return state;}};const Counter = () => {const [state, dispatch] = useReducer(reducer, initialState);return (<div>Count: {state.count}<button onClick={() => dispatch({ type: 'increment' })}>Increment</button><button onClick={() => dispatch({ type: 'decrement' })}>Decrement</button></div>);};In this example, the
useReducerhook is used to manage the state of a counter component based on different actions.23. How do you test a React application?
Testing React applications can be done using Jest and React Testing Library. Jest serves as the testing framework while React Testing Library provides utilities for testing components similarly to user interactions.
24. What is server-side rendering (SSR)?
Server-side rendering (SSR) is a technique used to pre-render React components on the server and send the HTML to the client. SSR improves the performance of React applications by reducing the time to first paint and making the content accessible to search engines and users with slow internet connections.
25. What is Static site generation (SSG)?
Static site generation (SSG) is a technique used to pre-render static HTML pages at build time. SSG generates static HTML files for each page of a website, which can be served directly to users without the need for server-side rendering. SSG improves performance, reduces server load, and simplifies hosting and deployment.
26. What is lazy loading in React?
Lazy loading is a technique used to load components or resources only when they are needed. Lazy loading helps reduce the initial load time of your application by deferring the loading of non-essential components until they are required. React provides a
React.lazyfunction andSuspensecomponent to implement lazy loading in your application.27. What is the purpose of the
useContexthook in React?The
useContexthook in React is used to access the value of a context provider in a functional component. It allows you to consume context values without using a consumer component.useContextis useful for accessing global data or settings in your application without passing props down the component tree.Example:
const ThemeContext = React.createContext('light');const ThemeProvider = ({ children }) => {return <ThemeContext.Provider value="dark">{children}</ThemeContext.Provider>;};const ThemeConsumer = () => {const theme = React.useContext(ThemeContext);return <div>Theme: {theme}</div>;};In this example, the
ThemeConsumercomponent uses theuseContexthook to access the value of theThemeContextprovider.28. What is the purpose of the
useMemohook in React?The
useMemohook in React is used to memoize expensive computations and cache the result to prevent unnecessary re-renders.useMemotakes a function and an array of dependencies and returns the memoized value. The memoized value is recalculated only when the dependencies change.Example:
const memoizedValue = useMemo(() => computeExpensiveValue(a, b), [a, b]);In this example, the
computeExpensiveValuefunction is memoized, and the result is cached until theaorbdependencies change.29. What is the purpose of the
useCallbackhook in React?The
useCallbackhook in React is used to memoize callback functions and prevent unnecessary re-renders of components that depend on those callbacks.useCallbacktakes a function and an array of dependencies and returns a memoized version of the function. The memoized function is only recalculated when the dependencies change.Example:
const memoizedCallback = useCallback(() => {doSomething(a, b);}, [a, b]);In this example, the
doSomethingfunction is memoized, and the memoized callback is cached until theaorbdependencies change.30. What is the purpose of the
useImperativeHandlehook in React?The
useImperativeHandlehook in React is used to customize the instance value that is exposed to parent components when usingReact.forwardRef. It allows you to define which properties or methods of a child component's instance should be accessible to parent components when using a ref.Example:
const ChildComponent = React.forwardRef((props, ref) => {const inputRef = useRef(null);useImperativeHandle(ref, () => ({focus: () => {inputRef.current.focus();},}));return <input ref={inputRef} />;});const ParentComponent = () => {const childRef = useRef(null);const handleClick = () => {childRef.current.focus();};return (<><ChildComponent ref={childRef} /><button onClick={handleClick}>Focus Input</button></>);};In this example, the
useImperativeHandlehook is used to expose thefocusmethod of theinputRefto the parent component when using a ref.If you'd like to explore more React interview problems beyond these 30, check out our Top ReactJS Interview Questions repository - a curated list of around 50 real-world questions sourced from actual interview experiences.
- Tips and Lessons from Jordan Cutler's Rapid Career GrowthAn exclusive interview with Jordan Cutler, Senior Engineer at Pinterest, on his career journey, mentorship, and strategies for professional growth.作者GreatFrontEnd Team9 分钟阅读Aug 16, 2024

If you have used LinkedIn recently, you are sure to have seen posts from Jordan Cutler, who often shares bite-sized tips regarding software engineering career growth on the platform. Jordan is currently a Senior Frontend Engineer at Pinterest and runs the popular newsletter, "High Growth Engineer".
If you missed it, Jordan also contributed the popular blog article Top 5 CSS Mistakes made by Front End Engineers.
The GreatFrontEnd team recently had the pleasure of interviewing him.
Welcome, Jordan! We're thrilled to have you here. To kick things off, can you share a bit about yourself? What are your hobbies, and what's your go-to comfort food?
Hey there 👋 and yeah! I'd love to. A few things I like to do are train my cats (one can do a high-five), play frisbee, and spend time with my girlfriend. My go-to comfort food would be french toast or pancakes. I love ALL breakfast food.
Your newsletter, "High Growth Engineer", has a large following. What inspired you to start it, and how do you manage your time between the newsletter, your work, and other commitments?
Even though I started my newsletter last year, it goes back to my time working at Gusto ~4 years ago.
Part of what led to me growing to Senior Engineer quickly was being so public about what I was learning.
I did demos, presentations, and learning posts in Slack sharing what I knew. That helped me become better and grow others.
When I wanted to learn frontend more, I made a Slack channel called
#jordans-frontend-learnings. In it, I shared tiny snippets of frontend knowledge I was learning. Other people could join and learn, and since the channel was called#jordans-frontend-learnings, I didn't feel bad about spamming.Eventually, over 50 people joined, and it became a community of people sharing their learnings, so we changed the name to
#frontend-learning.From starting that channel, a few things happened:
- I created more connections across the org that made life better at work
- I became known as a frontend voice people could get guidance from
- I realized my learning skyrocketed from sharing and discussing with people
That 3rd point is so key to my newsletter and writing online.
I still remember exact posts I wrote in the
#frontend-learningchannel to this day. It's not the same as reading an article and moving on.Below is a pyramid showing how much you retain from each learning method.
You retain 90% of what you teach others, compared to 5% from a lecture.
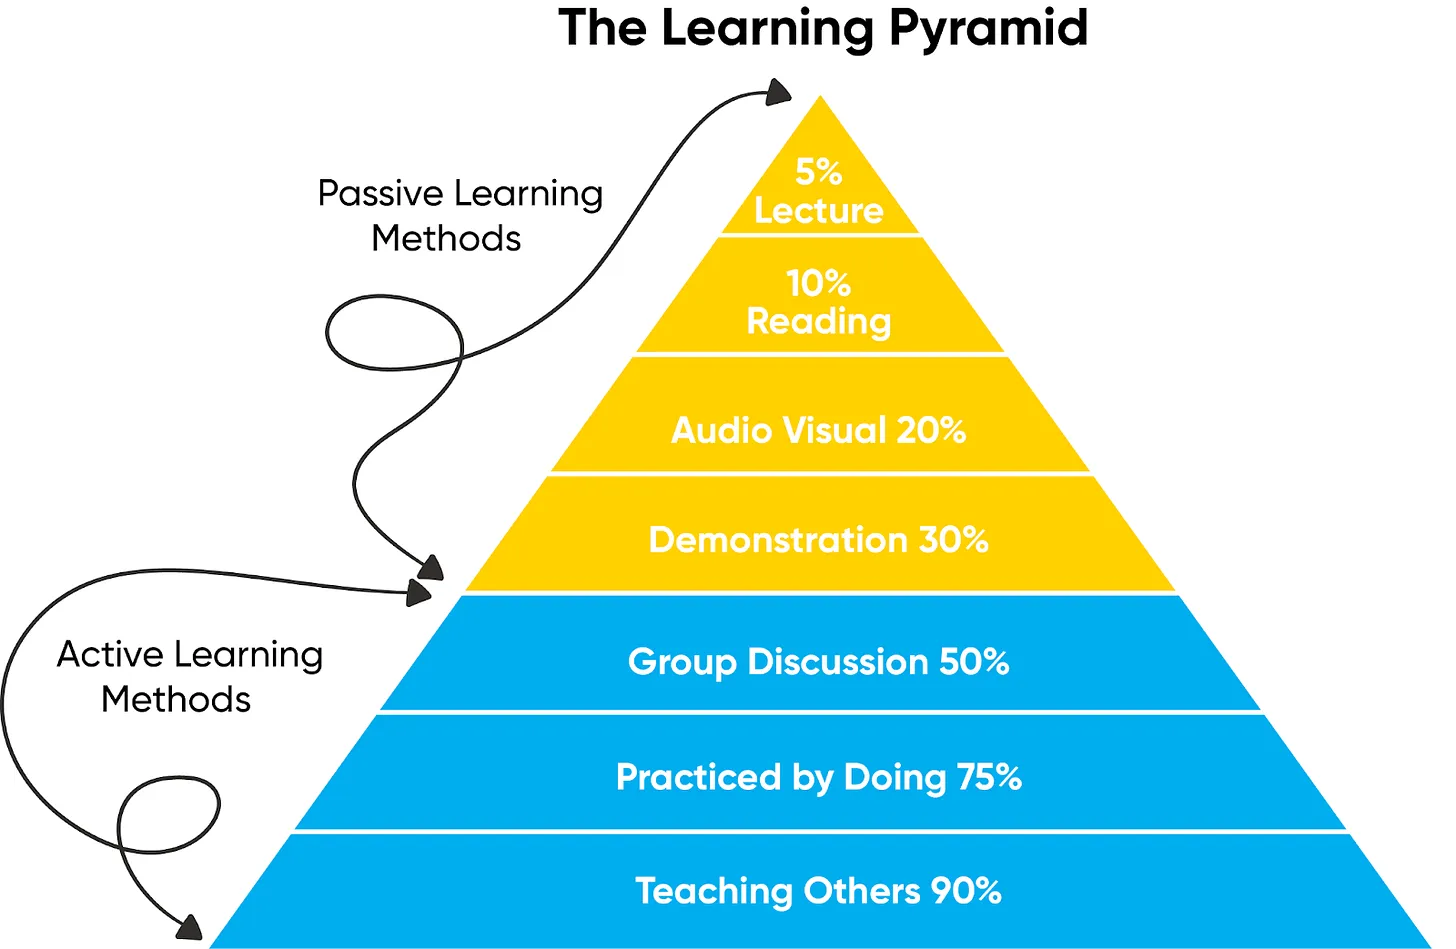
When I switched roles to Qualified, I thought, "What if I did something like what I did at Gusto, but broader? Post online rather than only internally?"
So I gave it a shot. This was my first LinkedIn post, 375 days ago:
That post led to more LinkedIn posts, which led to expanding to a newsletter.
Over a year later, after writing a newsletter each week, I'm still here, constantly learning.
Can you share some specific lessons or trends you've identified through writing your newsletter that have significantly impacted your approach to front end engineering or mentorship?
The biggest mistake I've seen, especially as most people work remotely now, is dismissing the importance of being visible.
There's a common claim: "Your work should speak for itself".
I agree. But that's not how it works in reality. And people don't have the time for your work to speak for itself. You need to advocate and make the impact clear to others.
At this point, people think, "Ok, so I need to brag". That's also not true!
Every time you share about your work, it should give value to whoever you are sharing it with. Most of the time, this comes down to teaching and celebrating others. You can do this through sharing documentation, teaching via a presentation, or making a launch announcement and celebrating who helped make it happen.
For a full list of how you can be visible while giving value, check my article on becoming a go-to person.
As a mentor to many engineers, with several advancing in their careers under your guidance, what qualities do you believe make an effective mentor, and how can engineers build successful mentoring relationships?
First: Empathy. A mentor needs to relate to their mentee.
That's why the best mentors are 1-3 years ahead of you, not 10+ years. For example, I'd have difficulty mentoring someone graduating college because things have probably changed a lot.
Empathy allows you to create a strong bond with your mentee and prevents them from feeling judged. Your mentee will feel comfortable talking about anything with you.
Second: Experience.
A good mentor has a wide variety of experiences to draw from and remembers what worked, what didn't, and why. They help their mentees navigate challenges they experienced before and set them up for success.
You've developed a course on Maven – "Mid-level to Senior for high-growth engineers". What gaps did you aim to fill with your course, and what feedback have you received from participants?
Each cohort has about 25 engineers in who are on the cusp of Senior Engineer, but feel stuck. I teach the course I wish I had when I was at mid-level trying to get to Senior.
We cover 5 modules:
- Leading Projects
- Becoming a go-to person
- Getting your manager to want to advocate for you
- Becoming a trusted mentor
- Writing Senior-level code
In each module, I cover the principles behind why the lessons work. Those principles stick with you as you go beyond the senior level.
Feedback-wise, it's been amazing! Across 2 cohorts, I received 33 ratings, averaging to 4.8/5 stars.
This is one of my favorite reviews:
This course was the missing link between my growth as an engineer and being promoted. I wish I had taken this course earlier in my career to have implemented the mindset and practices taught in this course. I believe I would have had more success if I had. This course is great because it doesn't focus on teaching you the answers but rather the right questions to ask yourself so that you can navigate your career – mindsets not prescriptions. Jordan is a relatable, enthusiastic, and kind teacher. He takes the time to understand his students and their questions and will provide you with 1:1 time during office hours or over Slack to make sure you're fully taking advantage of the material.
If you want a preview of the full course, I recently release the "Becoming a go-to person" module on Taro.
Great to hear that you're now a Senior Front End Engineer at Pinterest. What unique challenges and opportunities have you encountered in this role?
Since joining Pinterest, I feel like I'm more behind my peers than ever 😅. My peers get a lot done in a day. They're experienced, strong communicators, and excel technically.
To keep up with them, I create systems for myself. One system that's made a huge difference for me is planning my week and estimating how long I'll spend on each task. I also assign "important" and "urgent" scores to each task to help myself prioritize. This plan sets me up for success because I can start the day working on the biggest priority rather than playing email or Slack whack-a-mole.
At the end of the week, I reflect on how much I accomplished compared to my plan and adjust for the future. I'll also use my reflections as a "brag sheet" for my performance review.
Sometimes, I worry the planning and reflection take too much time.
But here's the math: 2 hours of planning and reflection = 5% of a 40-hour workweek.
So if that plan and reflection makes you at least 5% more efficient, it's worth it. For me, it saves me time by cutting out unimportant work. Plus, I know exactly what I need to work on at any time. It's more than worth it.
As Abraham Lincoln says: "Give me six hours to chop down a tree and I will spend the first four sharpening the axe".
For GreatFrontEnd users looking to fast track their careers, what strategies or steps would you recommend to accelerate their professional growth and reach senior positions faster?
Invest in yourself early in your career. The first 5 years of your career are the most important. After that, the expectations rise. You're expected to know a lot and grow others. You'll never stop growing, but putting the work in for those first 5 years will make the rest smoother when the expectations increase.
To put this into action, I recommend investing in courses, books, newsletters, and platforms like GreatFrontEnd. Structure is key, and these resources provide it.
You have a sizable LinkedIn following and presence, where you share insights and advice often. How has engaging with the community on social media influenced your career and personal growth, and what tips do you have for leveraging social media for career advancement?
So. Many. Benefits. I encourage everyone to learn in public and write online.
The top 3 benefits I experience are:
- Learning: I retain what I write 10x better than what I read
- Opportunities: I receive offers to speak or get access to free benefits. For example, I recently hosted a roundtable at Plato Elevate in San Francisco, an honor typically only available to Senior managers, Directors, and VPs.
- Mentorship: I become a better mentor for my mentees. I can send them a curated set of posts or articles that I've saved up to help them with their situation.
Start with 1 LinkedIn post and go from there. Get better every time and be consistent. Do what is sustainable for you.
Follow Jordan Cutler on LinkedIn, check out his newsletter and Maven course "Mid-level to Senior for high-growth engineers".
- Leveraging Actions in React 19 for Enhanced Form HandlingDive into the new actions hooks in React 19 to improve how we can write forms in React.标签作者Vikas Yadav9 分钟阅读Aug 10, 2024
If you have used Next.js, you have probably heard of Server Actions as a new way to handle form submissions and data mutations in Next.js applications. Server Actions have both server-side and client-side aspects to them and Actions, the client-side APIs are landing in React 19! React Actions are not specific to Next.js or data fetching – they can be used with other server-side frameworks for any asynchronous operations.
In this post, we will elaborate on what React Actions are and how to use the new hooks like
useActionStateanduseFormStatusto build form submission experiences the modern way.Note: As of writing, React 19 has not been published and the API can be prone to updates, so you should always refer to the latest version of the documentation.
Actions in HTML forms
Before we dive deeper into React Actions, we should first understand the
actionproperty in native HTML forms. Before JavaScript was introduced, the common way to send the data to the server was via theactionattribute on<form>s.When we define a
<form>element, we can also set anactionattribute to a URI which will be used as the endpoint to send the data to the server. Theactionattribute is often combined withmethodattribute which can be set to HTTP methods likeGETorPUT.<form action="/user" method="POST"><input name="name" id="name" value="" /><div><button type="submit">Save</button></div></form>When a user clicks on the "Save" button, the browser will make a HTTP request to the
/userendpoint using the specified HTTP method. This is a very powerful pattern that does not rely on JavaScript, however there are downsides of this approach:- It results in a full-page refresh
- Form states like loading and error cannot be displayed
Form submissions in React
Submitting forms in React is straightforward. It can be done by utilizing the
onSubmitprop andfetchAPI. We can show loading and error states through usage of theuseStatehook andonSubmitprop.import { useState } from 'react';export default function UserForm() {const [isPending, setIsPending] = useState(false);const [error, setError] = useState(null);const handleSubmit = async (event) => {event.preventDefault();const data = new FormData(event.target);try {setError(false);setIsPending(true);await fetch('/user', {method: 'POST',body: JSON.stringify(data),});event.target.reset();} catch (err) {setError(err.message);} finally {setIsPending(false);}};return (<form onSubmit={handleSubmit}><input id="name" name="name" />{error && <p>{error}</p>}<button type="submit">{isPending ? 'Saving...' : 'Save'}</button></form>);}Client-side form submissions and updates offer several advantages, particularly in terms of user experience and performance:
- Server requests made without a full-page refresh, which results in faster feedback.
- Show different form states like loading and error – better user experience.
While client-side form submissions and updates provide numerous benefits, there are also potential problems and pitfalls that we should be aware of:
- Need to remember to use
event.preventDefaultotherwise the browser will do a full page refresh on submission of the form. - Boilerplate code is required to manually manage the form state.
- Requires JavaScript to run.
React Actions
Enter the era of new React APIs! With the introduction of Actions in React 19, we can harness the power of form actions on the client side as well.
How to use React Actions in forms
Typically, HTML
<form>s support URI strings for values to theactionattribute. However,<form>'s in React 19 accept functions as valid values for theactionprop! We can even pass inasyncfunctions to the action. When a string is passed to theaction, the<form>will behave like native HTML forms, however if a function is passed, the form will be enhanced by React.<form action={actionFunction}>Let's convert the form above to use React 19's Actions:
import { useState } from 'react';export default function UserForm() {const [isPending, setIsPending] = useState(false);const [error, setError] = useState(null);async function createUserAction(formData) {setError(false);setIsPending(true);try {await fetch('/user', {method: 'POST',body: JSON.stringify({ name: formData.get('name') }),});alert('User has been created successfully');} catch (err) {setError(err.message);} finally {setIsPending(false);}}return (<form action={createUserAction}><input id="name" name="name" />{error && <p>{error}</p>}<button type="submit">{isPending ? 'Saving...' : 'Save'}</button></form>);}React does a few special things under the hood when we pass a function to
action:- We do not need to worry about calling
event.preventDefault(), React does this automatically if a function is passed toaction - The action function will receive
FormDataas a parameter, so we do not need to construct form data ourselves vianew FormData(event.target) - Uncontrolled input components within the
<form>will be reset upon action success
That's useful, but do we still have to maintain the pending and error state variables ourselves? Not at all, React also has a solution for them. These issues are addressed by the introduction of new hooks –
useActionStateanduseFormStatus. Let's look at these two new hooks.useActionStatehookThe
useActionStatehook helps make the common cases easier for Actions.useActionStatehook accepts multiple parameters:actionFn: A function which will be used as action for the form.actionFnaccepts two parameters:previousStateandformDatainitialState: Value to be used as the initial state. It is ignored after the action is first invokedpermalink(optional): A string containing the unique page URI that this form modifies
The
useActionStatehook returns an array containing two values:formState: A value which will be derived from return value of action function. Defaults toinitialStateformAction: Reference to action function which was passed to the<form>'saction
const [state, formAction] = useActionState(actionFn, initialState);Let's rewrite our earlier form example using the
useActionStatehook:import { useActionState } from 'react';async function createUserAction(prevState, formData) {try {await fetch('/user', {method: 'POST',body: JSON.stringify({ name: formData.get('name') }),});} catch (err) {return {success: false,message: err.message,};}return {success: true,message: 'User created successfully!',};}export default function UserForm() {const [formState, formAction] = useActionState(createUserAction, null);return (<form action={formAction}><input id="name" name="name" />{formState?.success === true && (<p className="success">{formState?.message}</p>)}{formState?.success === false && (<p className="error">{formState?.message}</p>)}<button type="submit">Save</button></form>);}A little better! We no longer need a state just for the error message, it is now part of the action state. Astute readers will notice that this new example does not handle the pending/loading states. That's where the
useFormStatushook comes in.useFormStatushookThe
useFormStatushook provides status information of the last form submission, which can be used by components to render pending states (e.g. loading indicators, disabling buttons and inputs).It does not accept any parameters and returns a
statusobject with the following properties:pending: Abooleanvalue that indicates whether the parent<form>is pending submissiondata: AFormDataobject containing data of the parent<form>. It isnullif there is no submission or no parent<form>method: A string value of eithergetorpost. This tells us whether the form is getting submitted usingGETorPOSTaction: A reference to theactionprop on the parent<form>. It isnullif there is no parent<form>or if a string URI value provided to theactionprop
const { pending, data, method, action } = useFormStatus();Using the
useFormStatushook comes with a caveat –useFormStatus()will only return status information for a parent<form>. It will not return status information for any<form>rendered in that same component or children components. Hence theuseFormStatushook must be called from a component that is rendered inside a<form>.Let's rewrite our example to use
useFormStatusfor handling pending states:import { useActionState } from 'react';import { useFormStatus } from 'react-dom';async function createUserAction(prevState, formData) {try {await fetch('/user', {method: 'POST',body: JSON.stringify({ name: formData.get('name') }),});} catch (err) {return {success: false,message: err.message,};}return {success: true,message: 'User created successfully!',};}// In order for `useFormStatus` to work we have to extract the button// into a separate component so the <form> is now a parent component.function SubmitButton() {const { pending } = useFormStatus();return <button type="submit">{pending ? 'Saving...' : 'Save'}</button>;}export default function UserForm() {const [formState, formAction] = useActionState(createUserAction, null);return (<form action={formAction}><div><input id="name" name="name" /></div>{formState?.success === true && (<p className="success">{formState?.message}</p>)}{formState?.success === false && (<p className="error">{formState?.message}</p>)}<SubmitButton /></form>);}In order for
useFormStatushook to work, we have to extract the<button>into a separate component so the<form>is now a parent component.By using the new
useActionStateanduseFormStatushooks:- There is no need to manually maintain
pendingstatus. We can utilize thependingfield from the return value ofuseFormStatus. There is no need to do prop drilling or use context for passing the pending state. - The returned state can contain
successanderrorfields from theactionfunction and be used to display success and error messages.
React Actions gotchas
- When a
<form>action succeeds, React will automatically reset the form for uncontrolled components. If you need to reset the<form>manually, a newrequestFormResetReact DOM API is available. - When a function is passed as the
actionorformActionprops of<form>,<input>, and<button>elements, the HTTP method will bePOSTregardless of the value of themethodprop. - The
actionprop can be overridden by aformActionprop on a<button>or<input>component as these support theformActionprop.
Conclusion
The new React Actions, along with the
useActionStateanduseFormStatushooks provide apps with a new way to write form submissions in React efficiently and can easily manage the form's pending, success, and error states.Say goodbye to form boilerplate code!
We also maintain an open-source Top ReactJS Interview Questions GitHub repository - featuring 50 authentic, community-contributed questions that help you master both new React 19 features and timeless React fundamentals.
- Image Performance TechniquesImprove your website's speed and user experience through these image performance techniques.作者Feilin Liangga Putri5 分钟阅读Jun 3, 2024
Other than front end performance techniques, image performance is also crucial in developing a web application, especially if your website contains a lot of them. This article contains multiple ways we can do to make image loading more efficient and thus, reduce the time needed to display.
Content Delivery Network
Content delivery network (CDN) saves a copy of our web content on many servers around the world. This is to allow content to be delivered to users from their nearest server.
Benefits
- Reduce latency
- Enhance reliability and scalability
Implementation
- Choose a CDN provider.
- Set up the CDN by pointing it to the website's static content ie. images.
- Update to show images from the CDN's URLs.
Resources
- What is a CDN (Content Delivery Network)? | AWS
- What is a content delivery network (CDN)? How do CDNs work? | Cloudflare
Optimal Image Formats
Having optimal image formats, such as WebP or AVIF, can reduce sizes while maintaining quality. These formats use advanced compression techniques, making web pages load faster.
Benefits
- Reduce image sizes significantly
- Maintain high quality
Implementation
- Convert the images to modern formats like WebP or AVIF using conversion tools.
- Use
<picture>to provide multiple sources in different formats, letting the browser choose the most compatible and efficient one.
Resources
- Which is the Best Image Format for Your Website? | ImageKit
- 13 Best Image Formats and When to Use Them | Hostinger
Responsive Images
To have responsive images, where images adjust their own size to the current display size, we can provide multiple sources for the image, allowing the browser to select the most appropriate version.
Benefits
- Save bandwidth on smaller devices
- Improve visual quality on larger screens
Implementation
- Define different image sizes for various screen resolutions and save them.
- Use srcset in
<img>to list these image sources of different sizes to match various display sizes.
Resources
Adaptive Images
Adaptive images involve detecting network speed and serving different image qualities accordingly. Users with slower connections will receive lower-quality images as compared to those with faster connections.
Benefits
- Enhance user experience on slow networks
- Reduce unnecessary data usage
Implementation
- Implement JS to detect the network condition using the Network Information API.
- Based on the network speed, dynamically load and display images of appropriate quality by modifying the source attributes.
Resources
Offscreen Image
Images that are offscreen, or not in the viewport, are not loaded until they are needed. This means that the images are only loaded when they are about to become visible / nearing the viewport.
Benefits
- Improve initial page load time
- Save bandwidth by not loading hidden images
Implementation
- Identify images that are initially offscreen when the page loads.
- Use JS or CSS to delay loading these images until they are near the viewport.
Resources
- How to Defer Offscreen Images (With and Without Plugins) | Cloudways
- Defer offscreen images | Chrome for Developers
Lazy Loading
With lazy loading, similar to offscreen images, images and iframes are loaded only as they approach the user's viewport. This can significantly reduce initial page load times and save bandwidth.
Benefits
- Reduce initial page weight
- Improve initial load time, especially pages with many images
Implementation
- Add
loading="lazy"to<img>and<iframe>.
Resources
Progressive JPEGs
Progressive JPEGs load in layers, improving in clarity and detail with each layer, so that users see a low-quality version of the image almost immediately, which progressively improves until the image fully loads. This enhances the user experience by providing visual content faster.
Benefits
- Improve perceived load time
- Enhance user engagement with immediate visual feedback
Implementation
- Convert JPEG to progressive format using editing tools or conversion software.
Resources
- Progressive JPEG images: What Is It and How It Can Improve Website Performance | Hostinger
- Progressive jpegs (PJPEG): the key to loading images faster on your website | ImageKit
Preloading
Preloading allows us to specify which images should be loaded early, even before the browser encounters the image tags. This is particularly useful for images that are crucial to the user experience but might be discovered late by the browser, such as later sections of the page or carousels.
Benefits
- Ensure important images are loaded early
- Improve performance of above-the-fold content
Implementation
- Identify critical images that should be loaded early in the page life cycle.
- Use the
<link rel="preload">in<head>to specify these images, settingas="image".
Resources
Compression
Compression reduces file sizes by getting rid of unnecessary data, speeding up loading times. Effective compression balances size and quality, allowing images to load quickly without an obvious loss in quality.
Benefits
- Reduce image sizes
- Speed up loading times
Implementation
- Use compression tools.
Resources
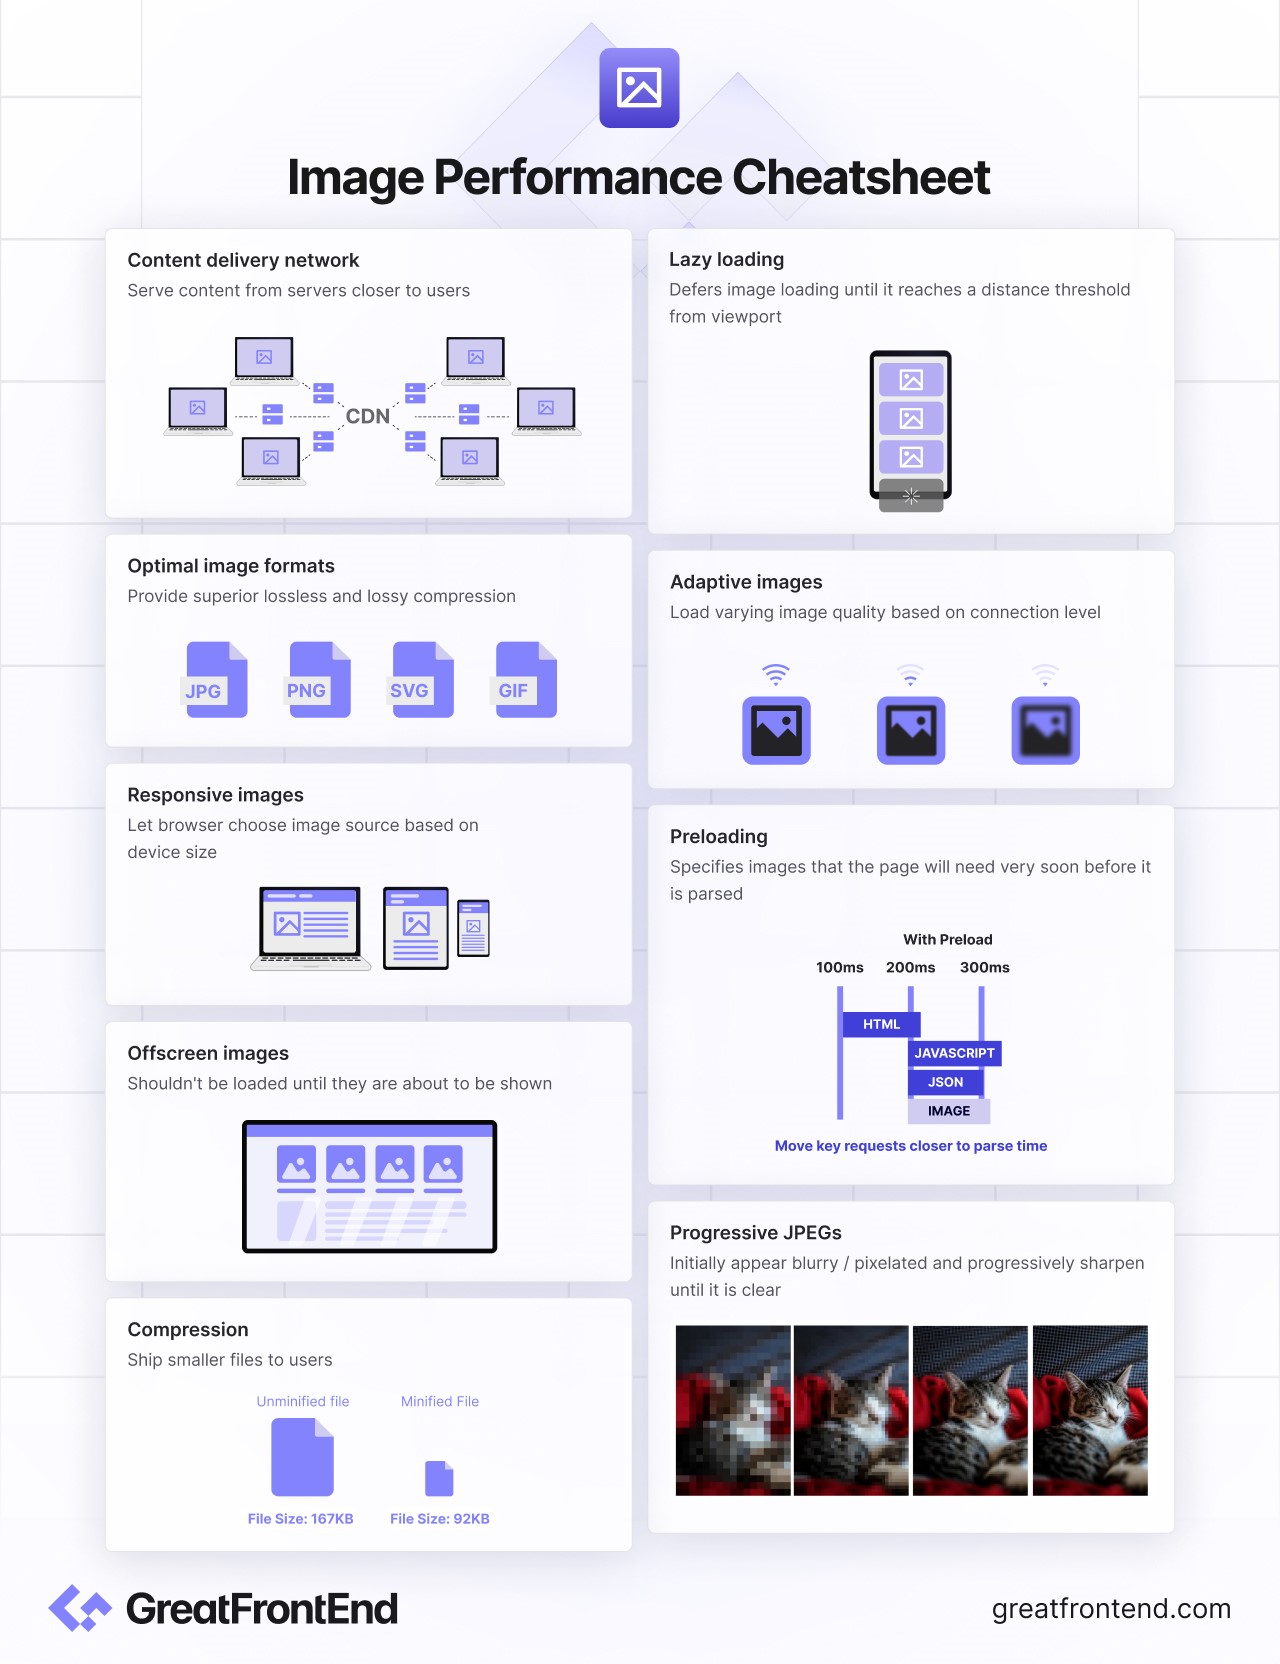
Enhancing image performance requires the combination of various techniques. By applying the above techniques, we can significantly improve the loading speed and efficiency of our web applications. Ultimately, staying updated of the latest trends in image optimization and web standards is essential for remaining competitive in web development.
- Announcing GreatFrontEnd Projects – A real world projects platform for front end engineersBuild real world projects to learn with hands-on practice, or to stand out with an awesome portfolio.作者Yangshun Tay10 分钟阅读Apr 30, 2024
After months of working hard on this, we are thrilled to finally announce the beta launch of GreatFrontEnd Projects! 🥳️
At GreatFrontEnd, we strive to create a platform for front end engineers to learn, grow and connect with one another.
Through scouring countless forums frequented by front end engineers and speaking to our users, we've discovered a common need for a platform where you can develop well-crafted real-world projects – be it to learn something new through hands-on practice, or to build up your portfolio of projects.
We wanted to build the very best version of such a platform while listening to your needs. We believe we are close to achieving this, and we're excited for you to experience it firsthand.
What exactly is GreatFrontEnd Projects?
GreatFrontEnd Projects is a platform for front end engineers to build real-world projects.
In essence, we provide you with tons of real-world project challenges that you can build.
For each challenge, you'll have access to everything you need to start coding right away – including professional designs, API specs, starter code and image files.
Just click "Start project", open up your IDE and start coding!
After you're done, host your project on any service and submit your GitHub repo and site url. This will be published for other users to give you code reviews and feedback.
We will pull your code from GitHub directly onto the platform for instant code reviews by the community, allowing you to receive feedback for your work and gain experience points ("reputation") to track your progress.
By using the platform, you can:
- Learn: Learn new skills through hands-on practice
- Showcase: Build portfolio-worthy projects like no other.
- Build faster: Accumulate a toolkit of reusable components for future personal projects.
Budget-savvy users will also be happy to know that we are predominantly free, with 80% of our challenges accessible for no cost. We believe in providing the basics for free, including multi-page apps and breakpoint management. You won't be charged for essential features like taking screenshots.
Our premium charges only apply to advanced features that go beyond the basics, offering an extra boost to your learning and development. Find out more →
Why should you use GreatFrontEnd Projects?
1. Designed to help you learn any front end skill faster
Whether you're a complete beginner hoping to learn front end from scratch, or a senior engineer hoping to learn more modern stacks, our platform was designed to assist you in your learning goals.
Beginner-friendly to nightmare-level challenges.
We offer a range of starter level challenges that are specifically designed for beginners. You can begin with these and gradually progress to more advanced challenges as you gain confidence and experience.
Extensive learning resources while building
As you embark on each challenge, you'll have access to a wealth of resources to support your learning journey. These include detailed guides, solutions, references from fellow users, and community forums. These resources are carefully curated to assist you in understanding and mastering the concepts behind each challenge.
While other platforms might leave you relying solely on community feedback, our premium plan provides you with practical development guides and solutions written by experienced senior engineers from top tech companies. You'll learn best practices and supercharge your learning by referencing professionally-written code derived from years of experience.
Complete beginners will also be happy to find guides to help you get started with the very basics, such as starting up your IDE and code repository, or building UI with figma.
Every project builds specific skills
Every challenge on our platform is detailed with the skills that you would be able to learn after building them. Starting from the simplest challenges, you may find yourself learning basic HTML and CSS. As you move along, you start to learn more advanced skills, such as using UI frameworks like React or Svelte.
Structured learning with skills roadmap
We also offer a skills roadmap on our platform, which serves as a step-by-step guide to acquire all the fundamental skills required for front-end development, from the very basics to advanced topics.
For each skill, it provides you with a list of curated resources, as well as a recommended order of projects to build.
Feedback and code reviews
After completing a project, you'll have the opportunity to receive feedback and code reviews from the community. This feedback is invaluable for your growth as it helps you identify areas for improvement and refine your coding skills.
We make code reviews easy by displaying your code directly on our platform, eliminating the need for community members to go elsewhere to review your work. This convenience encourages more feedback and collaboration, which means you can expect to receive more feedback for your work.
Gamification and progress tracking
Our platform includes an advanced gamification system that encourages you to track your progress and take on more challenges. Every productive action you undertake towards building projects or learning new skills will be rewarded with reputation points, continuously motivating you to stay engaged and make steady progress in your learning journey.
Real world project specs
Our projects were designed with real world project specs meant for professional software engineers. This includes project specs and user stories written by professional product managers, and fully specified UI UX designs by high-end designers.
This means that whatever you build from day 1 will resemble the kind of work you would be expected to do in a full-time front end engineer job. Moreover, you can be sure that every project you spend time building will form a professional application that can be reused for future projects, or used as part of your portfolio. Learn while building something useful!
2. The most impressive collection of portfolio projects in the market – without building the same as others
If you're looking to build your portfolio – we've built our platform to ensure that you are well taken care of.
Professional designs by high-end designers
For developers seeking to build their portfolios or embark on side projects, our platform allows you to build stunning portfolio projects that were professionally designed by high-end designers. Design is hard – and you'd be able to focus solely on the technical execution.
Personalized portfolio projects
Furthermore, unlike other challenge platforms, you'd be able to easily construct personalized portfolio projects instead of building the same thing as everyone else.
Each project within our platform is made up of reusable components which adhere to the same design system, making them inherently modular and compatible with one another. This means you can seamlessly combine components from various projects to construct unique and customized applications for your portfolio. These components cover a diverse range of applications, including Marketing, E-Commerce, Web Apps, Games, and even Portfolios, which means you'd be able to compose a wide variety of apps from them.
Build entire component libraries or design systems to impress recruiters
Additionally, we offer Component Tracks, which are collections of projects that form component libraries or design systems. This can leave a strong impression on potential employers and recruiters, showcasing your expertise and versatility in building a variety of components for common use cases, which is much more impressive than building individual projects.
3. Every challenge is a reusable, modular component that add to your permanent toolkit for future projects
If you enjoy dedicating your spare time to creating side projects, our platform will be beneficial for you as well. Each challenge you complete contributes to a growing collection of professionally designed, reusable components, allowing you to seamlessly integrate them into any of your personal side projects.
What are the differences between Free and Premium?
We provide all of the essentials for free. You will be able to complete 80% of our challenges and even some advanced features that other platforms make premium, such as multi-page apps, breakpoint management and screenshot taking.
Here are the advanced features you can enjoy as a Premium member:
1. Access to practical development guides and official solutions
Each guide and solution was written by big tech senior engineers with best practices derived from years of experience, allowing you to learn techniques and patterns early on in your learning, setting up for a strong foundation.
2. Access to professionally designed figma files
Learning how to use design tools like Figma is an important skill for any professional front end developer. Moreover, using the design file helps you in building a more precise solution using design details like font sizes, spacing and colors, eliminating the time that would otherwise be spent on guesswork.
3. Access to the entire skills roadmap
Without knowing the domain well, it's hard to know which projects you should build in order to train different aspects of a skill. Our skills roadmap solves that problem by providing a structured roadmap of projects to build to train all the core skills required for front end engineers, all the way from beginner to advanced. While the free plan lets you access only the foundational skills in the skills roadmap, you will get full access to all nodes in the skills roadmap once you purchase any premium plan. This helps you learn skills efficiently without the guesswork.
4. Access to all component tracks
Our component tracks are a unique feature where each track is a collection of projects that form a component library or even design system. By building entire component tracks, you showcase your abilities and versatility in building a variety of components for common use cases, which is much more impressive than building individual projects. Moreover, one of our component tracks is a design system, which means you get to build the underlying design system behind all of the projects on our platform, serving as a good foundation for your toolkit of reusable components.
5. Access to our most impressive projects
Some of our most impressive projects were designed to teach you (and allow you to showcase) complex and / or modern techniques like full stack or artificial intelligence skills. These are the projects you'd want to reference when building your portfolio to stand out from the crowd of applications.
With these premium features, you'll save considerable time and effort towards building accurate designs and becoming a highly skilled front-end developer.
Refer to our pricing plan here for a free vs premium comparison table →
Beta testers, attention!
With our Beta launch underway, we're eager to collect insights from our beta testers to enhance our platform further. Should you wish to report a bug or propose new features, feel free to reach out via email at feedback@greatfrontend.com or share your thoughts through our feedback widget ("Chat with us!" on the side of the page).
Thank You
This was a significant milestone for such a huge project spanning several months. We would like to express our gratitude to the team that helped make this happen, including:
- Yangshun Tay for leading the engineering design and efforts, as well as all the engineers who contributed directly to the project – Nitesh Seram, Vikas Yadav, Neo Wei Qing, and Jeff Sieu.
- Fariz Maulana for leading the very challenging design efforts on the projects platform and projects challenges, as well as designers Chew Kia Hwee, Layo Studio, and Tay Yang Heng.
- Gina Ng for leading the product planning and roadmap, as well as project managing and Feilin Liangga Putri for QA testing the platform.
- Nikki Gunarso and Seth Gerald for leading the marketing efforts for product launch.
- All the community members for making valuable code contributions, improving our documentation, and answering questions on Discord.
- Front End Performance TechniquesImprove your website's speed and user experience through these front end performance techniques.作者Feilin Liangga Putri5 分钟阅读Mar 26, 2024
A good website is not only just about aesthetic user interface, optimizing its front end performance is equally as important, and in certain domains like e-commerce, checkout conversion performance is highly dependent on website performance.
This article presents a collection of underutilized yet effective strategies that you can use to improve your website's speed and user experience. These are useful concepts to know for front end system interviews as well as for your day-to-day work!
List virtualization
List virtualization is an optimization technique where only the currently visible items in a long list or large dataset are rendered. This method dynamically loads and unloads elements based on the scroll position.
Benefits
- Reduce memory usage
- Reduce initial load time and subsequent
- Smoother scrolling and interaction, as the browser is not overloaded
Implementation
- Install a virtualization library like
react-virtualized. - Wrap list in the virtualization component.
- Set the item count and provide a function to render each visible item based on the scroll position.
Resources
Bundle/code splitting
Both bundle and code splitting are optimization techniques in web development that involve dividing a large codebase into smaller chunks, loading only the necessary chunks at any point of time. This can significantly enhance the performance and efficiency of applications, especially those with extensive codebases or complex dependencies.
Benefits
- Allow browsers to cache parts of the application independently, reducing the need to re-fetch unchanged code
- Faster load times and smoother and more responsive application
Implementation
- Use a bundler like Webpack or Vite.
- Identify split points (e.g., routes or features).
- Use
import()for dynamic imports at these points.
Resources
Dynamic imports / lazy loading
By implementing dynamic imports, we import code only on interaction, visibility, or navigation. Similar to that, lazy loading is also a popular design pattern that delays the initialization of an object until when it is actually needed by users. These can help to improve efficiency, especially at times where costly resources are not always utilized.
Benefits
- Reduce initial load time
- Save bandwidth as unnecessary code or resources are not loaded upfront
- More responsive applications as the browser's workload is much less
Implementation
- Identify components for lazy loading.
- Replace their imports with dynamic
import()calls. - Use placeholders while components load.
Resources
Optimize loading sequence
Optimal loading sequence prioritizes the loading of essential resources, like CSS, fonts, and above-the-fold content. This method carefully orders the loading process, so critical elements are rendered first, enhancing perceived performance. By doing this, non-essential items are deferred, largely boosting efficiency and user satisfaction, especially during page initialization.
Benefits
- Faster perceived load time
- Efficient use of network and browser resources by loading only what's essential upfront, leading to streamlined resource utilization
Implementation
- Identify critical resources for the initial view.
- Use
<link rel="preload">for these resources in the HTML head. - Lazy load non-critical resources.
Resources
Prefetching
Through the prefetching technique, resources are loaded in the background before they are requested by users. This strategy aims to reduce perceived latency and improve responsiveness by fetching resources ahead of time, based on user behavior patterns or predictive algorithms.
Benefits
- Reduce latency
- Smoother transition between pages or actions
- Ensure resources are ready before they are needed
Implementation
- Identify resources for future use.
- Use
<link rel="prefetch">to instruct the browser to load these in idle time. - Monitor and adjust based on user behavior.
Resources
Preloading
Preloading is where specific resources are identified and loaded early in the page's life cycle, even before the browser requires them. This ensures that critical assets such as scripts, stylesheets, and images are readily available by the time they're needed.
Unlike prefetching, which depends on future navigation, preloading focuses on the current page, strategically accelerating the availability of high-priority resources that are crucial for the immediate next steps. This is particularly useful for resources that are essential for the initial view or interactive features of a page, ensuring a smoother and faster user experience.
Benefits
- Immediate availability of critical resources
- Enhance performance and improve reliability of critical resources loading process
Implementation
- Determine essential resources for the next steps.
- Use
<link rel="preload">for these resources, specifying the type withas.
Resources
Compression
Compression is a method that reduces file sizes for faster user delivery by eliminating redundant data. This not only quickens load times for web pages and apps but also cuts down on bandwidth and associated costs, similar to how tree shaking, which will be explained below, removes unused code to streamline bundles.
Benefits
- Faster data transfer
- Reduce bandwidth consumption
- Lower costs
Implementation
- Enable compression on the web server (e.g., Gzip, Brotli).
- Compress static assets during the build process.
- Ensure compressed files are served with correct headers.
Resources
Tree shaking
Tree shaking is an optimization technique used to eliminate unused code from the final bundle before deployment. By analyzing the import and export statements in a module structure, static analysis tools can determine which modules and lines of code are not being utilized and remove them.
Benefits
- Smaller bundles enhance load times and performance, using fewer resources overall
- Better maintainability with a cleaner codebase
Implementation
- Use a bundler that supports tree shaking (e.g., Webpack).
- Write code in ES6 modules.
- Enable production mode in the bundler to remove unused code.
Resources
Optimizing front end performance is important in providing a fast, efficient, and enjoyable user experience. Techniques mentioned above are often powerful yet often underutilized. By carefully implementing these strategies, we can ensure that our applications perform optimally, keeping users engaged and satisfied.
- Top 5 CSS Mistakes made by Front End Engineers5 most common CSS mistakes Front End Engineers make and how to avoid them.标签作者Jordan Cutler10 分钟阅读Mar 5, 2024
This is a guest post by Jordan Cutler, Senior Frontend Engineer at Pinterest and author of the High Growth Engineer Newsletter.
I've seen a lot of CSS.
Unfortunately, there aren't great resources on doing it right.
In my experience as a Senior Frontend Engineer, I see 5 common mistakes that I'll go over in this article and how to avoid them.
Recognizing and avoiding these mistakes will help you write CSS that:
- Works across devices, not just your laptop
- Works the first time you try it
- Makes you less frustrated with CSS
Let's dive in!
Mistake 1: Using
widthandheightproperties incorrectlyOne of the most common mistakes comes at the cost of responsiveness.
It's the overuse of
widthandheight.Luckily, there are easy fixes to this.
In general:
- Use
max-widthalongsidewidth - Swap
heightformin-height
Using
widthandheightcan be ok in certain scenarios. If you are using them, you should know what you're doing and be cautious.Some examples where
widthandheightmake more sense:- An icon that should only be displayed at a particular fixed size.
- A fixed element on the page, like a sticky nav, footer, or sidebar.
- A set of elements that you want to become scrollable if the screen is too small by also setting
overflow: autoon their parent.
HTML is responsive by default. Our CSS is what often breaks the responsiveness. When we add styles, we need to keep our page responsive.
Using
widthandheightis dangerous because they are restrictive.It says: "You must be this size no matter what".
For example: If we use
width: 900pxon an element, what happens if we are on mobile?It would overflow off the screen.
If you do need to use a fixed width value, make it flexible. My preferred way for doing that is adding
max-width: 100%.
A common example I see in the real world is defining a fixed
widthvalue on<input>elements.Here's what it looks like when an
<input>is400pxinside a container that was shrunk to250px.
Once we apply
max-width: 100%the issue goes away.
Similarly, we run into the same issue with
height.If we define a fixed
height: 250pxand our content size is greater than 250px, we see this happen:
However, the fix is easy. We can use
min-height: 250pxinstead.Now, our container will always be at least
250px, but can become larger if it needs to fit the content inside.
Mistake 2: Misunderstanding "layout elements" and "content elements"
CSS is often considered difficult to maintain.
A large reason for this is mixing responsibilities in CSS.
In the same way that you don't want a function to be doing 10 different things, we can apply that principle to our CSS.
How? By dividing each element we apply CSS to into either a "layout element" or a "content element".
Here are examples of content elements:
- A button
- A text input
- A paragraph
- A link in the navbar
- A card
Essentially, they are isolated items that hold content.
In comparison, "layout elements" define the layout those "content elements" should be placed in.
They define the structure via flexbox, grid, gap, and margin.
Layout elements are all the elements you don't see.
Here's an example:
Let's look at the Tailwind landing page and see how it is structured by adding a
border: 1px solid redto everything.
You can already start to see where the "content" elements are vs the "layout elements". The content elements are the buttons, text inputs, paragraph text, icon buttons in the navbar, etc.
Let's focus on the bottom row with the "Get started" button:
The "Get started" button and "Quick search" input are wrapped in a
<div>which is the layout element.It defines
display: flex,margin-top, andjustify-content: center.With that, it created the skeleton where content elements can just be plopped into the correct location.
In your CSS, you should aim to use this pattern too.
A common mistake would be applying
margin-topon one or both of these buttons, rather than letting the layout element do it.Mistake 3: Choosing between padding, margin, gap incorrectly
Question: In the below image, would you use
padding,margin, orgapto add space between these tags?
Hopefully, your answer is
gap.Often, I see something like:
<style>.tag {margin-left: 8px;}.tag:first-child {margin-left: 0;}</style><div class="tag">All</div><div class="tag">Music</div><div class="tag">JavaScript</div>...<div class="tag">Sales</div>While this "works", it breaks separation of responsibilities.
The
.tagshould just be concerned with rendering itself and its content.Instead, we can do:
<style>.tagRow {display: flex;gap: 8px;}.tag {// The CSS that controls the tag appearance}</style><div class="tagRow"><div class="tag">All</div><div class="tag">Music</div><div class="tag">JavaScript</div>...<div class="tag">Sales</div></div>This defines a wrapper around the
.tags. Any element inside that tag wrapper will receive a space around them that is8pxwide. The.tagdoesn't know anything about and should not bother with the context it's in. It's just a tag being placed in a pre-defined layout.What about padding?
Think of
paddingas bubble wrap inside a package. It's part of the package, but not the contents.Padding is just whitespace that is part of the element itself and prevents the content from being too tightly packed.
Padding gets applied to "content elements".
What about margin?
Think of margin as a restraining order. You have to be a minimum distance away.
I don't like to apply
marginto "content elements".Instead, I create a wrapping element that applies the margin.
For example, let's say we have a button at the bottom of a form like this:
<form><input /><input />...<button type="submit">Submit</button></form>If we want to add a minimum amount of space above the button and any other content, I'd create a wrapper
divaround the button to apply that margin.<form><input /><input />...<div class="submitButtonWrapper"><button type="submit">Submit</button></div></form><style>.submitButtonWrapper {margin-top: 16px;}</style>Technically, you could add the margin to the submit
<button>directly. I don't prefer this though.In practice, your buttons will usually be abstracted away in a component library that usually prevents style overrides, for good reason.
By creating this wrapper element, the separation of responsibilities is clearer.
One more note for a good use of margin: Typography elements.
Headings and paragraphs are good uses of margin, since there will usually be varying amounts of spacing between these and they usually aren't wrapped in a container where
gapmakes sense.Mistake 4: Not knowing about layout modes
Let's say we have 2
<div>elements and some CSS like this:<style>div {width: 100px;height: 100px;}.blue {z-index: 5000;background-color: blue;}.red {z-index: 4000;background-color: red;// Just to get both divs on top of each othermargin-top: -100px;}</style><div class="blue"></div><div class="red"></div>Do you know which one will be displayed on top?
…
The answer is… red.
Why?
If you answered blue, you might have thought it was because the
z-indexof the.bluediv was higher.While that is true,
z-indexisn't doing anything here.It's not doing anything because
z-indexonly works in certain "layout modes".Because it isn't doing anything, the element that appears in the DOM later is rendered at the top. In this case, since the
.reddiv element comes later, it will appear above the other.How do we fix this?
The default layout mode for most elements is called "flow".
z-indexisn't implemented in the "flow" layout mode.The MDN docs call this out in the
position: staticarea which is the default for elements.
But it is implemented in "positioned" layout mode.

To enter positioned layout for an element, we can apply
position: relative,position: absolute,position: fixed, orposition: stickyIn this case, the easiest way to get
z-indexto work is to useposition: relative.<style>div {width: 100px;height: 100px;}.blue {position: relative;z-index: 5000;background-color: blue;}.red {position: relative;z-index: 4000;background-color: red;// Just to get both divs on top of each othermargin-top: -100px;}</style><div class="blue"></div><div class="red"></div>Since both elements are in the "positioned" layout mode,
z-indexwill work and the.bluediv will be displayed on top.You probably knew this without realizing it
If you've instinctively used
gaponly when you adddisplay: flexordisplay: grid, you probably knew this without realizing it.Why don't you just add
gapwithout addingdisplay: flex?Because
gapisn't implemented in the default layout mode: flow.But it is in the "flex" layout mode! Which you get when you do
display: flex.Some more quick examples
- Using
top,left,right,bottomonly works in "positioned" layout mode. - Margin collapsing only works in "flow" layout mode.
grid-template-areasonly works in "grid" layout mode.
Mistake 5: Using only grid or only flex
The final common mistake is overusing only
display: gridor onlydisplay: flex.Although many
display: flexcases can usedisplay: gridand vice-versa, each of these excel in their own areas.CSS Grid is great for 2-dimensional layouts. I often see good CSS grid use cases when building a page-level layout structure.
For example, Una Kravetz shares how to build the classic holy grail layout using CSS Grid.
 .parent {display: grid;grid-template: auto 1fr auto / auto 1fr auto;}header {grid-column: 1 / 4;}.left-side {grid-column: 1 / 2;}main {grid-column: 2 / 3;}.right-side {grid-column: 3 / 4;}footer {grid-column: 1 / 4;}
Flexbox is great for stacking items side by side or on top of each other in 1 dimension.
A great example of this is something like nav items that should be equally spaced apart.
Here is an example on Tailwind's home page.
Here's one more example on Airbnb.
In general, I use Flexbox more than CSS Grid, but they both have their use cases and its important to use the correct one for your use case.
To learn more about Flexbox and CSS Grid on a fundamental level, I recommend Josh Comeau's Interactive Flexbox Guide and his Interactive CSS Grid Guide.
Conclusion
These are the top 5 CSS mistakes I've seen in my experience, but I'm sure there are others we can all learn from.
If you have other mistakes you see the most, feel free to drop me a DM on LinkedIn.
You can also check out my newsletter, High Growth Engineer, where I share how to grow faster as a software engineer to 50k+ engineers weekly.
See you there!
- Top Open Source Design Systems by Tech Companies You Can Use Right AwayExplore some of the best open source design systems provided by tech companies.作者Feilin Liangga Putri5 分钟阅读Feb 28, 2024
Open source design systems by tech companies provide a wealth of knowledge and insights into best practices, innovative solutions, and collaborative processes between designers and developers. Here are some of our favorite by popular tech companies:
Gestalt by Pinterest
Gestalt by Pinterest is a design system designed to enhance UI consistency and quality. Its set of components and rules are tailored to fit Pinterest's specific look and how it works. It's also great at creating easy-to-use interfaces, paying special attention to making sure everyone can use them easily, no matter their abilities.
By the numbers (accurate as of 26th Feb 2024):
- GitHub stars: ~4.2k
Material Design by Google
Material Design by Google is a system for design that helps in developing consistent, visually pleasing, and effective UI for various platforms and devices. It includes grid-based layouts, responsive animations, transitions, and many more. All these are made by using a minimalist design approach.
By the numbers (accurate as of 26th Feb 2024):
- GitHub stars: ~8.2k
Blueprint by Palantir
Next, Blueprint by Palantir is a collection of reusable components, interactive documentation, and accessibility features for the web, built on React. Its emphasis on growing easily and being interactive makes it especially good for big company apps in fields that need to handle a lot of complex information.
By the numbers (accurate as of 26th Feb 2024):
- GitHub stars: ~20.3k
Polaris by Shopify
Polaris, created by Shopify, is a design system that assures a consistent user experience on its platform. It has detailed guidelines on various components that follow Shopify's design standards. This allows for it to have easy-to-use and readily available shopping experiences for both sellers and buyers.
By the numbers (accurate as of 26th Feb 2024):
- GitHub stars: ~5.6k
Lightning by Salesforce
Lightning by Salesforce provides ready-to-use HTML and CSS UI elements that can be used to develop Salesforce experiences. It explains the visual design values and attributes that ensure branding and UI consistency at scale.
By the numbers (accurate as of 26th Feb 2024):
- GitHub stars: ~3.5k
Primer by GitHub
Primer by GitHub contains guidelines, principles, and patterns for designing UI at GitHub, with the aim of ensuring consistency and usability across GitHub's platforms. It includes design guidelines, components, and tools that reflect GitHub's specific needs for collaborative coding environments, which is particularly important to ensure clarity and efficiency in complex interfaces.
By the numbers (accurate as of 26th Feb 2024):
- GitHub stars: ~2.9k
Spectrum by Adobe
Spectrum, Adobe's design system, is engineered to enhance user experience across its diverse platforms. By focusing on being flexible and creative, it can become really good at being easy to use and looking great, setting a high bar for how user interfaces should look.
By the numbers (accurate as of 26th Feb 2024):
- GitHub stars: ~11.1k
Carbon by IBM

Carbon by IBM is an open source design system for products and digital experiences, based on the IBM Design Language. With its comprehensive set of design guidelines and development components, Carbon is designed to facilitate the creation of intuitive and efficient user interfaces, particularly for complex enterprise solutions requiring scalability and integration.
By the numbers (accurate as of 26th Feb 2024):
- GitHub stars: ~7.4k
Ring UI by JetBrains
Ring UI by JetBrains is a collection of UI components for web-based products built inside JetBrains or third-party plugins for JetBrains’ products. It's designed to help developers build consistent, responsive, and attractive interfaces quickly. Ring UI emphasizes productivity and user experience, reflecting JetBrains' expertise in development tools.
By the numbers (accurate as of 26th Feb 2024):
- GitHub stars: ~3.5k
Base Web by Uber
In addition, Base Web by Uber is a React component library that offers a robust suite of components out of the box. It offers an extreme level of customization through the Overrides API and configurable Themes. Its scalability and wide-ranging component library make it appropriate for various web applications, such as large-scale enterprise systems or basic web projects.
By the numbers (accurate as of 26th Feb 2024):
- GitHub stars: ~8.6k
Atlassian Design System
Atlassian Design System offers direction, elements, and materials for creating interfaces that match Atlassian's products like Jira and Confluence. It highlights teamwork, variation, and a unique visual design to support Atlassian's dedication to team productivity software.
By the numbers (accurate as of 26th Feb 2024):
- GitHub stars: -
Backpack by Skyscanner
Backpack by Skyscanner consists of design tools, components, and guidelines that focus on providing a positive user experience on the Skyscanner website. Promoting modularity, scalability, and accessibility helps designers and developers quickly develop cohesive and user-friendly interfaces.
By the numbers (accurate as of 26th Feb 2024):
- GitHub stars: 480
Fluent by Microsoft
Fluent by Microsoft is a collection of UX frameworks designed for developing web and mobile applications with the same appearance and function as Microsoft products.It emphasizes on motion and material-inspired interfaces for smooth and intuitive user experiences on Microsoft platforms and devices.
By the numbers (accurate as of 26th Feb 2024):
- GitHub stars: ~17.4k
Protocol by Mozilla
Finally, Protocol by Mozilla is a design system for Mozilla and Firefox websites that provides a common design language, reusable code components, and high level guidelines for content and accessibility. It prioritizes web standards and open-source principles, making it a versatile choice for web projects aiming for clarity and user-friendliness.
By the numbers (accurate as of 26th Feb 2024):
- GitHub stars: 251
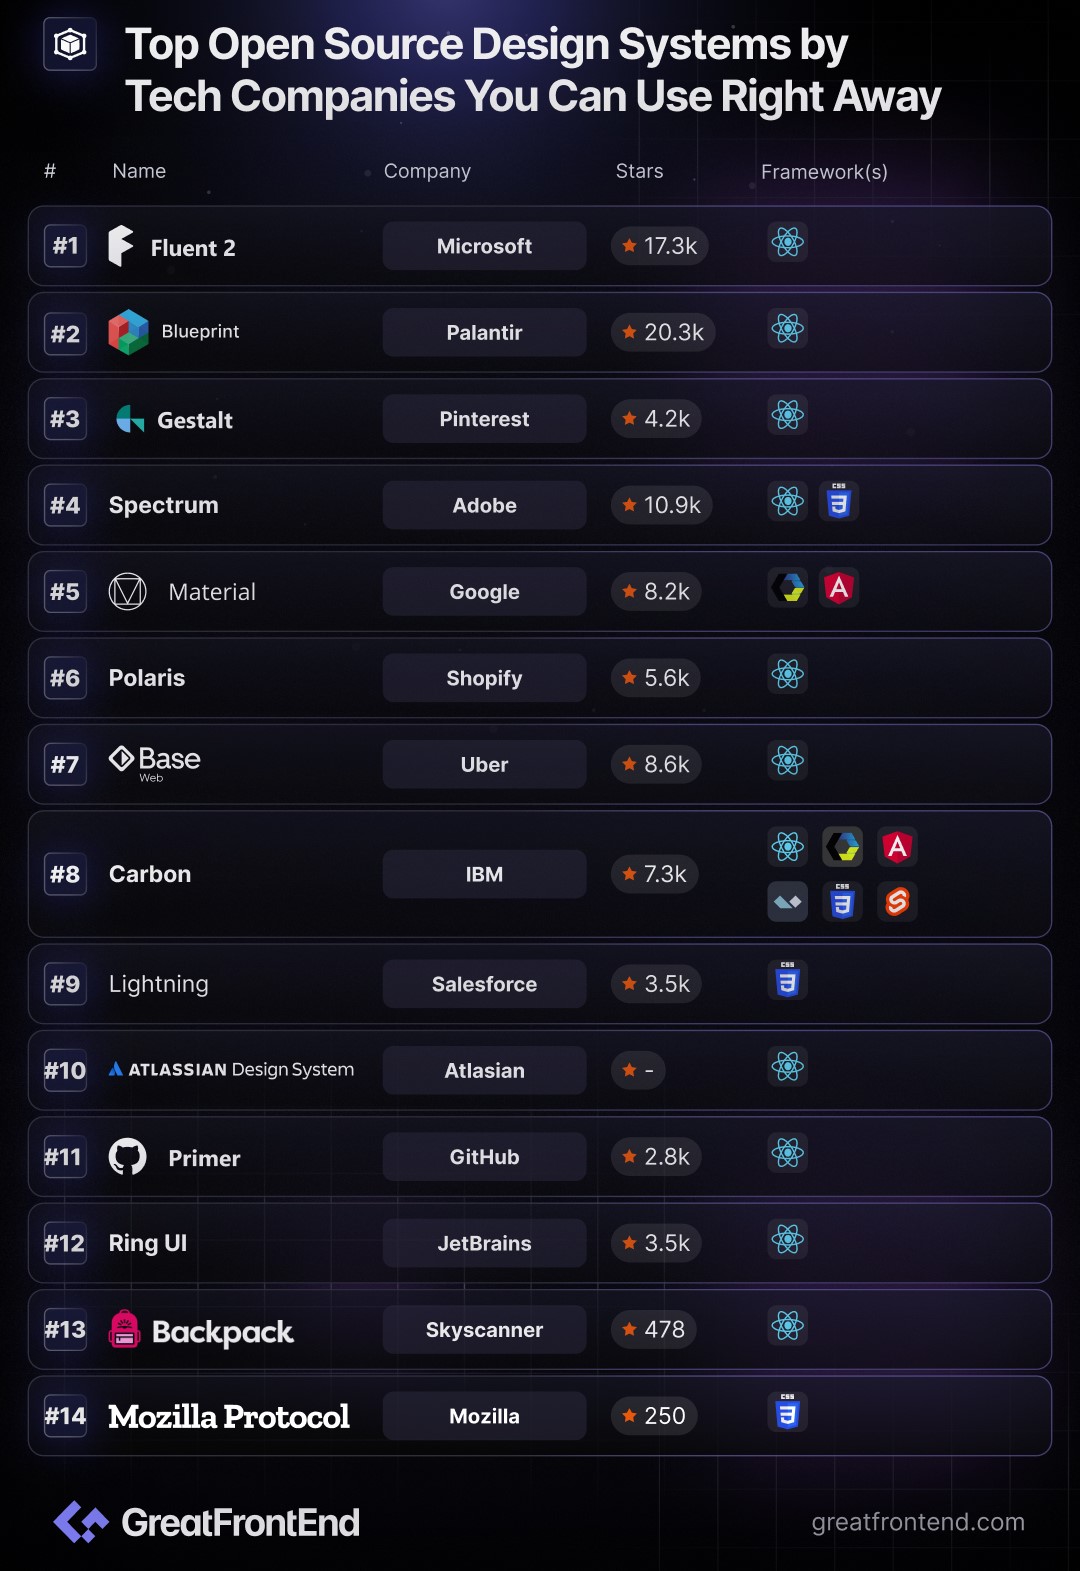
Design systems from top tech companies that everyone can use are a huge help for both designers and developers. They help make digital interfaces consistent, easy to use, and innovative. Each system has its own special features and ideas, showing how varied and vibrant the tech world is today.
- Most Useful and Impactful React Ecosystem LibrariesExplore some of the most useful and impactful React ecosystem libraries.作者Feilin Liangga Putri5 分钟阅读Feb 27, 2024
One of the best things about React is the rich ecosystem of libraries and tools that helps developers build apps quickly. Here, we list some enduring and widely favored React ecosystem libraries.
Next.js
Next.js, a full-stack React framework, is utilized by some of the biggest companies globally to build top-notch web applications. It offers automatic optimizations, data fetching, routing, server functions, API endpoints, and more, solidifying its position as a robust full-stack React framework.
By the numbers (accurate as of 26th Feb 2024):
- GitHub stars: ~119k
Remix
Remix is a full stack React framework with a focus on web fundamentals and modern web app UX, enabling developers to build better websites with faster and smoother user experiences. It allows data loading, code splitting, and UI transitions to be handled by the URL segments, resulting in snappy page loads and instant transitions. Furthermore, it supports HTML forms, handles both the server and client side, has built-in error handling, and supports route error boundaries. Its abundance of features allow it to stand-out as one of the most impactful React libraries.
By the numbers (accurate as of 26th Feb 2024):
- GitHub stars: ~26.7k
React Query
Additionally, React Query is a library that provides declarative, always-up-to-date auto-managed queries and mutations for data fetching in React applications. It handles caching, background updates, stale data, and many more with zero-configuration. It simplifies data fetching logic, improves developer and user experiences, supports complex workflows, and works with any backend.
By the numbers (accurate as of 26th Feb 2024):
- GitHub stars: ~38.7k
Docusaurus
Docusaurus is a react-based static website generator. It includes customization, localization, versioning, search, and dark mode features to improve user experience and aid in documentation creation.
By the numbers (accurate as of 26th Feb 2024):
- GitHub stars: ~51.5k
React Hook Form
React Hook Form allows for better form state management and validation as it is a library for building forms in React with less code and better performance. It offers a feature-complete API, a constraint-based validation system, a small package size, minimal re-renders, easy adoption, and consistent validation strategies.
By the numbers (accurate as of 26th Feb 2024):
- GitHub stars: ~38.9k
React Router
React Router is instrumental in implementing declarative routing within React applications. Its approach simplifies the creation of dynamic, single-page applications, allowing developers to manage navigation and view transitions with ease. The library's popularity and utility in the React ecosystem are evident from its GitHub stars, underscoring its role in shaping modern web application development.
By the numbers (accurate as of 26th Feb 2024):
- GitHub stars: ~51.7k
Redux / React Redux
Redux / React Redux is a predictable state management for JavaScript apps in a consistent, predictable, and testable way. It enables powerful features like undo/redo, state persistence, and more. One of its features, Redux DevTools, can debug and trace state changes, with time-travel and error reporting capabilities. Most importantly, Redux works with any UI layer and has a large ecosystem of addons to fit different needs.
By the numbers (accurate as of 26th Feb 2024):
- GitHub stars: ~60.3k
Framer Motion
Meanwhile, Framer Motion is an open source, production-ready animation and gesture library for React on the web. Possessing straightforward syntax, robust capabilities, and optimized performance make it one of the most valuable libraries in the React ecosystem.
By the numbers (accurate as of 26th Feb 2024):
- GitHub stars: ~21.4k
React Testing Library
React Testing Library is one of the best choices for testing React components that emphasizes user experience, providing easy-to-use APIs for different frameworks such as Angular, Vue, and React. It also includes extensions for Cypress and React Native, which further displays its versatility and effectiveness.
By the numbers (accurate as of 26th Feb 2024):
- GitHub stars: ~18.5k
React Email

React Email consists of high-quality, unstyled components for creating beautiful emails using React. The components are responsive, accessible, customizable, and compatible with most email clients. They also back server-side rendering and CSS inclining, making it a valuable tool in the React ecosystem for creating impactful email campaigns.
By the numbers (accurate as of 26th Feb 2024):
- GitHub stars: ~11.7k
React Use
Last but not least, React Use is a large library of React hooks, ported from libreact, that provide various functionalities for React components. This shows how it can be a valuable resource for developers seeking to enhance their applications with custom hooks, as reflected in its GitHub stars.
By the numbers (accurate as of 26th Feb 2024):
- GitHub stars: ~39.8k
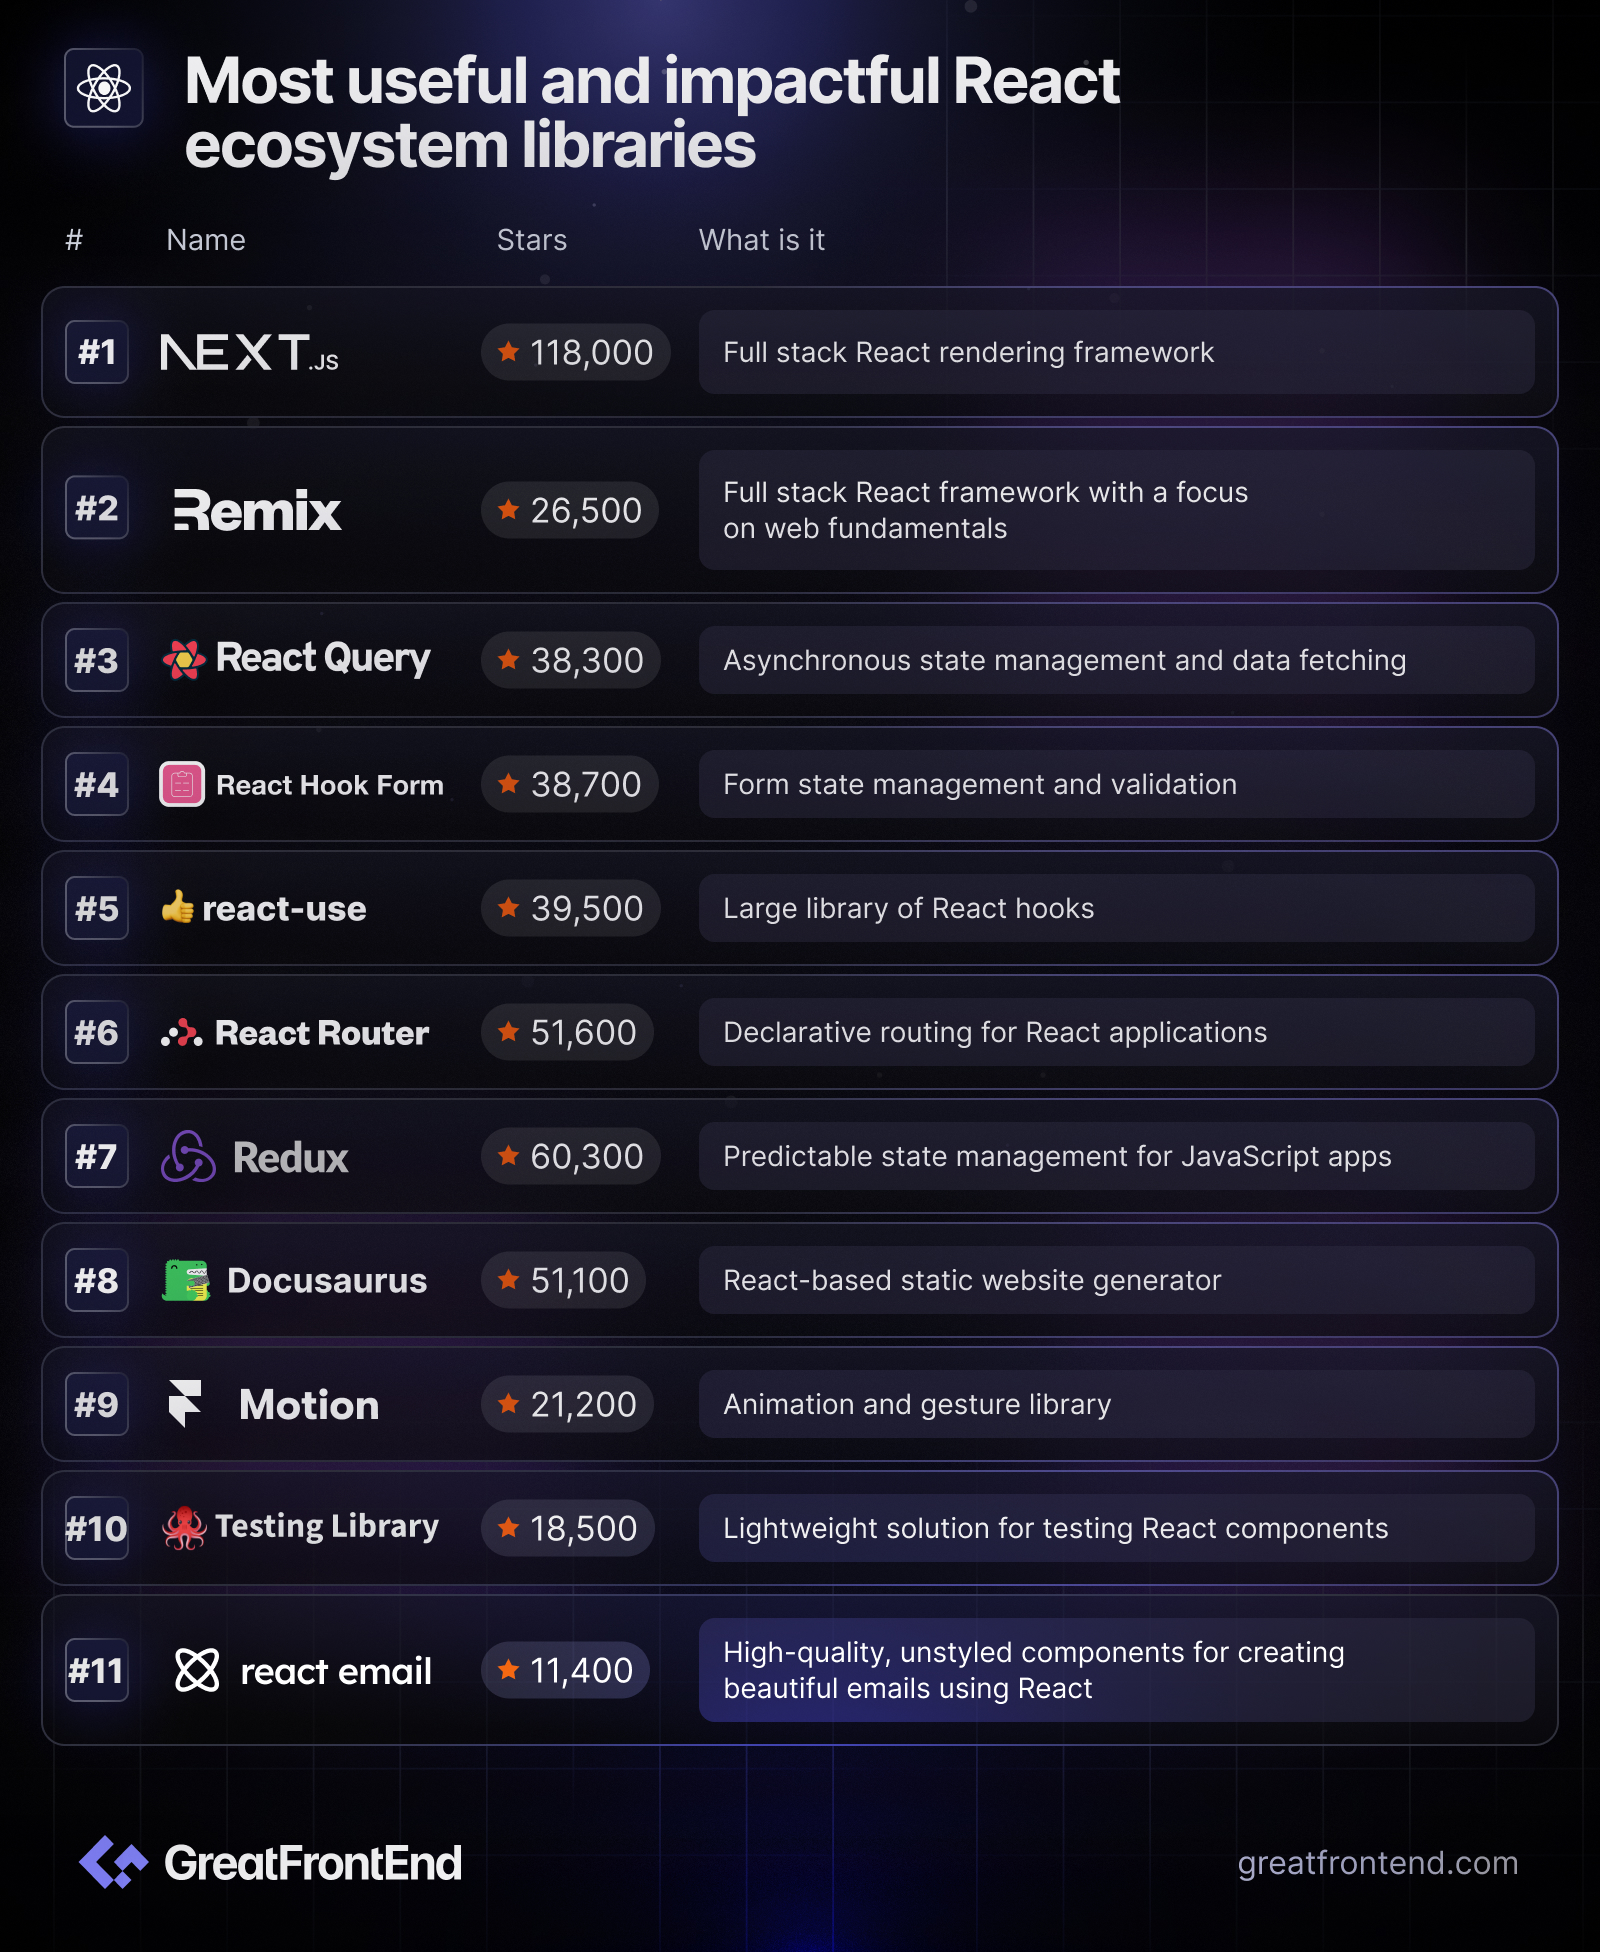
The React ecosystem consists of countless libraries that streamline web development and tackle many different challenges. Each of the libraries mentioned have a crucial role in improving the quality and efficiency of web apps development. With strong community support, the React ecosystem is a dynamic and invaluable resource for developers.
Want to better understand how these libraries connect to real React concepts? Explore our Top ReactJS Interview Questions GitHub repo - featuring 50 frequently asked questions that help you apply theory to practice.
- Top React UI Component Libraries in 2024Explore some of the most popular React UI component libraries.作者Feilin Liangga Putri5 分钟阅读Feb 26, 2024
UI component libraries improve developer efficiency by enabling consistent design and code reuse. As the top JavaScript frameworks, React offers a wide range of UI component libraries. This article will delve into some of the most popular and robust options available.
MUI (formerly Material UI)
MUI, previously known as Material UI, provides React developers with a range of free UI tools including a diverse component library, customizable themes, and production-ready components, all in line with Google's Material Design principles. This makes it an excellent option for creating visually appealing and powerful web applications.
By the numbers (accurate as of 22nd Feb 2024):
- GitHub stars: ~90.8k
- npm downloads (weekly): ~2,900,000
Ant Design
Ant Design uses CSS-in-JS technology to provide dynamic and mixed theme ability, and also improves the performance of the application by using component level CSS-in-JS solution. It is commonly used in the development of complex and large scale enterprise applications.
By the numbers (accurate as of 22nd Feb 2024):
- GitHub stars: ~89.4k
- npm downloads (weekly): ~1,100,000
Shadcn UI
Shadcn UI consists of beautifully designed components built using Radix UI and Tailwind CSS, which are accessible, customizable, and open source. They cover a wide variety of use cases such as dashboard, tasks, forms, music, and authentication.
By the numbers (accurate as of 22nd Feb 2024):
- GitHub stars: ~49.2k
- npm downloads (weekly): -
Chakra UI
Next, Chakra UI is a simple, modular and accessible component library for building React applications. It offers accessible, themeable, composable and light/dark UI components, as well as developer experience and community support, making it an excellent choice for developers who prioritize inclusivity and flexibility in their web applications. Its emphasis on composition and ease of styling allows for rapid development of attractive and accessible web interfaces.
By the numbers (accurate as of 22nd Feb 2024):
- GitHub stars: ~36k
- npm downloads (weekly): ~457,000
Mantine
Mantine is a React components library that offers more than 100 customizable components and 50 hooks for building accessible web applications faster. It supports visual customizations with props, styles overriding, and flexible theming with colors, fonts, shadows, and more – providing developers with a versatile toolkit for building responsive and visually appealing web applications.
By the numbers (accurate as of 22nd Feb 2024):
- GitHub stars: ~23.5k
- npm downloads (weekly): ~257,000
React Bootstrap
Additionally, React Bootstrap is a library that replaces the Bootstrap JavaScript with React components, without unneeded dependencies like jQuery. As one of the original React libraries, React-Bootstrap has grown alongside React, making it a great option.
By the numbers (accurate as of 22nd Feb 2024):
- GitHub stars: ~22.1k
- npm downloads (weekly): ~1,318,000
Next UI
Next UI is a beautiful, fast and modern React UI library that provides a plugin to customize default themes, a fully-typed API, and accessibility support. Its focus on design and user experience, along with a developer-friendly attitude, makes it a top pick for web developers.
By the numbers (accurate as of 22nd Feb 2024):
- GitHub stars: ~18.4k
- npm downloads (weekly): ~57,000
Semantic UI
Semantic UI is the official React integration for Semantic UI, a development framework that helps create beautiful, responsive layouts using human-friendly HTML. Semantic UI React is jQuery free, declarative, and has a rich set of components and subcomponents. It also supports augmentation, shorthand props, and auto controlled state.
By the numbers (accurate as of 22nd Feb 2024):
- GitHub stars: ~13.2k
- npm downloads (weekly): ~217,000
PrimeReact
Last but not least, PrimeReact includes advanced components like Data Tables, Trees, and more – offering a vast collection of widgets to build rich user interfaces. Its emphasis on theme customization and a wide array of components makes it suitable for applications demanding a high level of visual customization and functionality.
By the numbers (accurate as of 22nd Feb 2024):
- GitHub stars: ~5.3k
- npm downloads (weekly): ~104,000
Bonus: Untitled UI
Untitled UI React is new addition to open-source Tailwind CSS libraries. Launched in July 2025, it's the world's largest collection of open-source React components built with Tailwind CSS v4.1, TypeScript, and React Aria.
It's consistent, professionally designed, and includes pretty much everything you need to design and develop modern, beautiful, responsive interfaces and websites in one neatly organized package. Untitled UI React is based on Untitled UI Figma, the world's most popular Figma UI kit, so design and code are always in sync if your team uses Figma for prototyping.
Installation is easy and this library comes with a custom CLI tool and starter kits for Next.js, Bolt.new, Vite, and more. It's ideal for teams already using Tailwind CSS who want production-ready, modern, accessible React components out of the box that don't rely on external dependencies.
By the numbers (accurate as of 30th Jul 2025):
- GitHub stars: 866
- npm downloads (weekly): -
React UI component libraries in 2024 offer a variety of choices to meet different development needs and design preferences. These libraries cater to visual appeal, performance, and inclusivity. Their popularity, shown by GitHub stars and npm downloads, highlights their importance in the React ecosystem. As web development trends rapidly evolve, these libraries will likely continue evolving and taking an important part in web applications.
To complement your understanding of React UI libraries, visit our Top ReactJS Interview Questions repository - a handpicked collection of 50 React interview questions that cover component design, state management, and real-world implementation patterns.
- Best Large Open Source Next.js Projects to StudyUnderstand how large scale web apps are structured by studying these Next.js projects.作者Feilin Liangga Putri6 分钟阅读Feb 19, 2024
One of the most effective ways to grow as a developer is by studying real-world projects. In this article, we've curated a list of extensive Next.js projects for you to dive into and dissect. By exploring the architecture and codebase of these large-scale web applications, you'll gain invaluable insights into best practices, project structure, and advanced techniques.
Whether you're a beginner looking to understand the fundamentals or an experienced developer aiming to refine your skills, these projects serve as valuable resources to elevate your proficiency and tackle complex challenges with confidence.
Supabase
Supabase is an open-source alternative to Firebase that offers a full PostgreSQL database, real-time functionality, simplified authentication, seamless storage integration, and additional features. It empowers developers to build scalable and secure web applications while maintaining compatibility with existing tools and extensions.
Beyond the basics, Supabase offers additional features like embedding vectors (great for geospatial data), real time subscriptions, edge functions (serverless compute), migration guides, project management tools, a command-line interface (CLI), and integrations with other services.
By the numbers (accurate as of 15th Feb 2024):
- GitHub stars: ~62.9k
- Technologies: Tailwind, Radix, React Query, Valtio, Yup
Cal.com
Cal.com is an open-source scheduling tool that allows users to control their own data, workflow, and appearance. It is a successor of Calendly that is self-hosted or hosted by Cal.com, Inc. and can be deployed on the user's own domain.
What's great about Cal.com is that it integrates with various services such as Google Calendar, Zoom, Daily.co, HubSpot, and more. It also supports customization, white-labeling, and API access. It has a built-in app store where users can add or remove integrations as they wish.
By the numbers (accurate as of 15th Feb 2024):
- GitHub stars: ~27.2k
- Technologies: Tailwind, React Hook Form, Radix, Zod, tRPC, Prisma
Infisical

Infisical is an open-source secret management platform that teams use to centralize their secrets like API keys, database credentials, and configurations. It offers a user-friendly dashboard, client SDKs, CLI, API, native integrations, Kubernetes operator, agent, self-hosting, secret versioning, role-based access controls, secret scanning, and more. The wide range of features offers ample opportunities for learning and experimentation within the Next.js ecosystem.
By the numbers (accurate as of 15th Feb 2024):
- GitHub stars: ~11k
- Technologies: Tailwind, Emotion, Radix UI, React Hook Form, Redux, React Query, Yup, Zod, Zustand, i18next
Dub.co
Dub.co is an open-source link management tool for modern marketing teams to create, share, and track short links. One most important feature is you can host Dub.co on your own server for more control over your data and design as an opportunity to experiment with Next.js.
By the numbers (accurate as of 15th Feb 2024):
- GitHub stars: ~14.7k
- Technologies: Tailwind, SWR, Prisma, PlanetScale
Twenty
Compared to alternatives, Twenty is great for the fact that it offers full control, freedom, and the ability to contribute, self-host, and fork, breaking away from vendor lock-in and allowing users to shape the open future of CRM. This is while also prioritizing data accessibility and visualization from various sources without retrofitting, and providing an effortlessly intuitive interface inspired by Notion.
By the numbers (accurate as of 15th Feb 2024):
- GitHub stars: ~8.5k
- Technologies: Chakra UI, React Hook Form, Zod, Apollo, GraphQL
Inbox Zero
Inbox Zero is an open-source email app that helps users reach inbox zero fast with AI assistance. Its unique feature is that it involves AI to help users manage their email subscriptions, automate their replies, block cold emails, and analyze their inbox.
What's more, the AI lets users instruct the app in plain English to reply, forward, or archive emails based on certain rules. Users can also use planning mode to review the AI's suggestions before applying them.
By the numbers (accurate as of 15th Feb 2024):
- GitHub stars: ~1.4k
- Technologies: Tailwind, React Hook Form, Radix, SWR, Prisma, Zod
Rallly
Rallly is a web application that allows users to schedule group meetings with friends, colleagues and teams by creating meeting polls based on participants' availability. With the convenience of not having to sign up/login, users only have to simply enter their name and email to join a poll. Hence, this allows Rallly to have multiple advantages over alternatives, including its simplicity, privacy and customisation.
By the numbers (accurate as of 15th Feb 2024):
- GitHub stars: ~2.8k
- Technologies: Tailwind, Radix, React Hook Form, React Query, tRPC, Prisma
Formbricks
Formbricks is a free and open source survey platform that allows users to gather feedback from various channels and integrate with other tools. Users can create surveys with a no-code editor, launch and target surveys to specific user groups, invite team members to collaborate, and leverage Formbricks Insight Platform or build their own data analysis capabilities.
By the numbers (accurate as of 15th Feb 2024):
- GitHub stars: ~5k
- Technologies: Tailwind, Radix, React Hook Form
Civitai
Civitai is an open-source platform where people can share, collaborate, and learn from each other's stable diffusion models, which are techniques to customize AI generations. Users can also leave comments and feedback on each other's models to facilitate collaboration and knowledge sharing.
By the numbers (accurate as of 15th Feb 2024):
- GitHub stars: ~5.2k
- Technologies: Mantine, tRPC, Prisma
Plane
Plane is an open source project management tool that helps you track your issues, epics, and product roadmaps in the simplest way possible. As a platform used by over a thousand companies across countries, it offers a minimalist and intuitive interface, a powerful query language, a flexible workflow system, and integrations with popular tools like GitHub, Slack, and Figma.
By the numbers (accurate as of 15th Feb 2024):
- GitHub stars: ~22.5k
- Technologies: Tailwind, SWR, MobX
Daily.dev
Last but not least, Daily.dev is a professional network for developers to learn, collaborate, and grow together. Its feature involves customizing your feed, bookmarking articles, syncing across devices, and joining a community of developers.
Its web app utilizes the brand new incremental static generation feature of Next.js to deliver pages fast, which makes it interesting to explore. This is used to deliver the latest programming news from top tech publications on any topic you want so that you can stay updated on the latest trends, learn new skills, and discover new opportunities in the tech industry.
By the numbers (accurate as of 15th Feb 2024):
- GitHub stars: 604
- Technologies: Tailwind, React Query, GraphQL
This collection of large-scale Next.js projects offers a rich learning environment for those seeking to deepen their understanding and hone their skills. By dissecting and exploring these real-world applications, we can gain valuable insights into advanced techniques, project structures, and best practices. Whether you're looking to master the fundamentals or refine your expertise, immersing yourself in these projects provides a hands-on opportunity to elevate your proficiency and tackle complex challenges with confidence. So, dive in, explore, and embark on a journey of continuous learning and growth within the Next.js ecosystem!
- Core Web Vitals Metrics in 5 MinutesUnderstand how to quantify good user experience in web pages.作者Feilin Liangga Putri5 分钟阅读Feb 16, 2024
As developers, we often wonder what kind of web page gives good user experience. The problem arises when we try to quantify it. Enter 'Core Web Vitals' – a set of key metrics provided by Google that constitute unified guidance for quality signals. It measures real-world user experience for loading performance, interactivity, and visual stability of the page.
In this short article, we will summarize the most important things you should know about these metrics and provide you with links to learn more should you desire.
Largest Contentful Paint
The first metric to consider is the Largest Contentful Paint (LCP). LCP is a metric that measures the loading performance of a page. Specifically, it marks the point in the page load timeline from a user's perspective when the main/largest content (such as images or videos) has likely loaded.
LCP is represented in seconds, where anything under 2.5 seconds is great. It is extremely crucial as it represents how quickly users can access the main content of a web page. The faster it is, the better user engagement, satisfaction, and retention. To monitor, platforms such as Google's PageSpeed Insights or Lighthouse can be used.
LCP is affected by several factors: Server response times, network latency, render-blocking resources, and the complexity of the web page's layout. Optimizing these factors can help improve LCP and overall loading performance.
Examples of such optimization techniques include:
- Optimizing images and videos: Compressing images, using modern image formats, and lazy loading techniques
- Minimizing render-blocking resources: Minimize synchronous stylesheets/scripts or long tasks
- Prioritizing critical content: Preloading critical resources, optimizing server response times (reduce time to first byte), and prioritizing above-the-fold content
- Implementing efficient caching: Leveraging browser caching, Content Delivery Networks (CDNs), and optimizing cache policies
Useful links
- Largest Contentful Paint (LCP) | web.dev
- Optimize Largest Contentful Paint (LCP) | web.dev
- Largest Contentful Paint (LCP): What It Is & How to Improve It
First Input Delay
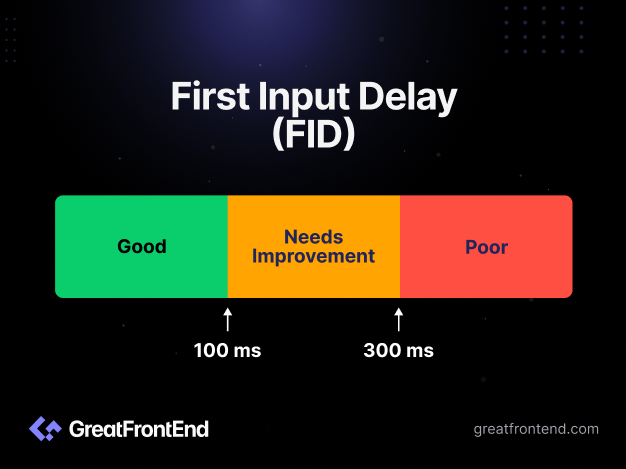
First Input Delay (FID) is also an important metric that assesses the responsiveness of a web page. Different from LCP, FID evaluates the interactivity of a page by quantifying the time taken between users' first action (such as clicking a button or tapping on a link) and how long the browser takes to respond to that.
A low FID (under 100 milliseconds) indicates that the page is highly interactive and responsive to user input, contributing to a positive user experience. Similar to LCP, FID is measured using performance monitoring tools like Google's PageSpeed Insights, Lighthouse, or web analytics platforms.
As FID is affected by code execution time, main thread activity and the presence of long tasks that block the browser's responsiveness, the following methods will help in improving it:
- Optimizing asset loading: Utilizing asynchronous loading for scripts, leveraging browser caching, and optimizing resource delivery
- Prioritizing critical rendering path: Prioritizing above-the-fold content, optimizing server response times, and minimizing layout shifts
- Avoid long tasks: Identify and optimize long tasks that monopolize the main thread by breaking up long tasks into smaller, more manageable chunks using techniques like code splitting, web workers, or offloading computation to background threads
- Reduce third-party impact: Minimize the use of third-party scripts/services or implement lazy loading or asynchronous loading for non-essential third-party resources
Useful links
- First Input Delay (FID) | web.dev
- Optimize First Input Delay (FID) | web.dev
- First Input Delay (FID): A complete guide to optimizing FID
Cumulative Layout Shift
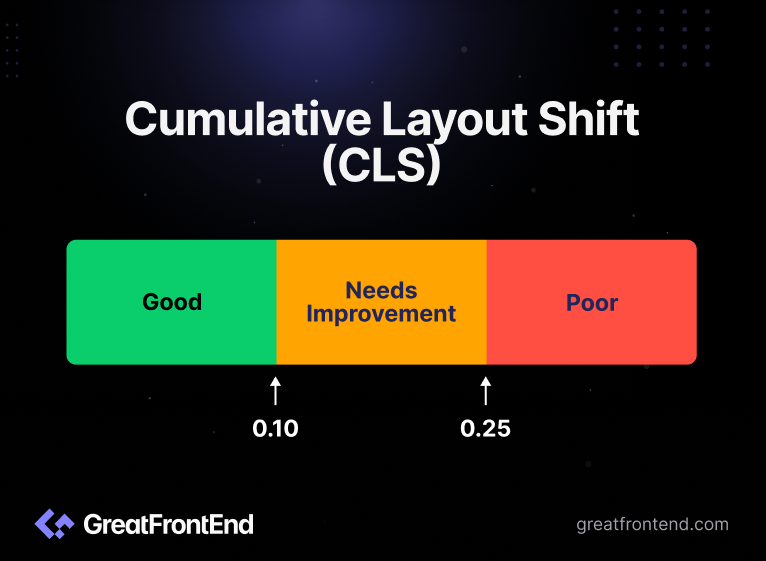
Lastly, Cumulative Layout Shift (CLS) measures visual stability by quantifying how much visible content moves around on the screen while loading and the total of all individual layout movement scores (ranging from 0 to 1) that happens while the page remains active. Layout shifts happen when visible elements on a page unexpectedly move to a different position, causing content to reorganize and disrupt user experience. A low CLS (under 0.1) means that the page's layout remains stable and consistent with minimum disruption for users.
CLS is affected by the following factors:
- Images without dimensions: Images that load without specified dimensions can cause layout shifts when they render and occupy space on the page
- Ads and embedded content: Third-party ads, iframes, or dynamically loaded content can trigger layout shifts as they load and display on the page
- Font loading: Changes in font size or style during page rendering can lead to text reflow and layout shifts
- Dynamic content: Content that loads asynchronously or dynamically, such as user-generated content or live updates, can cause layout shifts as it appears on the page
Hence, to reduce CLS, developers can try the following techniques:
- Specifying image dimensions
- Preloading and lazy loading
- Reserving space for ads and embeds
- Avoiding dynamically injected content
Useful links
- Cumulative Layout Shift | web.dev
- Optimizing Cumulative Layout Shift (CLS) | web.dev
- Cumulative Layout Shift (CLS): How (and Why) to measure it?
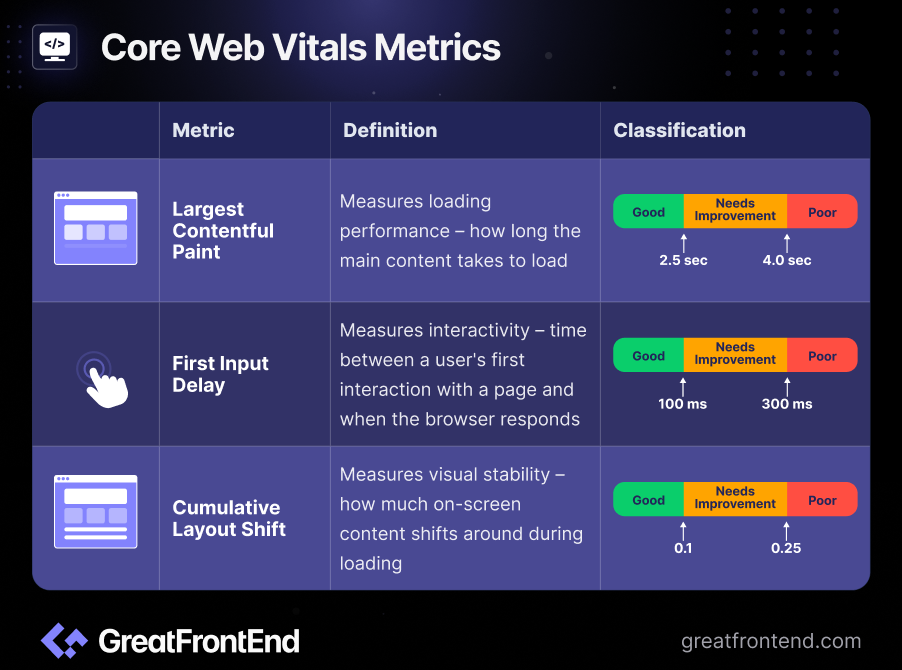
Understanding and optimizing Core Web Vitals metrics are essential for developers looking to improve user experience and website performance. Multiple research shows that only about 40% of web pages pass these metrics. By focusing on them, developers can easily quantify the scores and performance of their web pages, giving users a great experience while visiting the website.
- 10 Best Free Tailwind-based UI Component Libraries and UI KitsBuild your next project quickly with these Tailwind-based UI libraries.作者Yangshun Tay7 分钟阅读Jan 19, 2024

Tailwind CSS' "write only atomic classes in your HTML approach" has long been regarded as a controversial and radical approach to styling since its inception. Over the years, the industry has started to see its benefits and Tailwind has since gained immense popularity.
In this article, we explore the diverse range of free UI components and libraries that leverage Tailwind CSS, empowering front end developers to build modern and aesthetically pleasing user interfaces without compromising on efficiency or flexibility.
Whether you're a seasoned developer or just venturing into the realm of Tailwind-powered design, this article is your compass to discover the most valuable and freely available UI component libraries that can elevate your websites to new heights.
Sailboat UI
Sailboat UI is a modern UI component library specifically designed for Tailwind CSS. It offers over 150 open source components, and uses Alpine.js for some interactive components. However, the important part of the examples is the Tailwind classes used, so you can easily integrate it with your favorite headless UI library in a framework of your choice.
What is great about Sailboat is that it offers a few variants of each component. For example, Accordions are offered in multiple styles like simple, bordered, with background, etc, so you can choose a variant that suits your theme and brand.
By the numbers (accurate as of 18th Jan 2024):
- Components: 28
- Sections/blocks: N/A
- GitHub stars: 1,076
- Mode of usage: Copy/paste HTML and CSS
- Framework integrations: Alpine.js
HyperUI
HyperUI is a collection of free copy-pastable Tailwind CSS components that has been around since 2021. It is very similar to Tailwind UI in that both contain components and sections for application, marketing, and e-commerce websites. Since it's pure copy pasting of HTML/CSS, there's nothing to install and you can integrate it with any headless UI library.
By the numbers (accurate as of 18th Jan 2024):
- Components: 27
- Sections/blocks: 20
- GitHub stars: 6,949
- Mode of usage: Copy/paste HTML and CSS
- Framework integrations: N/A
Preline UI
The most outstanding thing about Preline is its vast library of components and sections. At over 60 components and 170 sections, it is the largest free set of Tailwind component examples out there. The examples are all very well-built and look very polished. Last but not least, all the examples have full support for dark mode.
By the numbers (accurate as of 18th Jan 2024):
- Components: 60
- Sections/blocks: 171
- GitHub stars: 3,200
- Mode of usage: Copy/paste HTML and CSS
- Framework integrations: N/A
daisyUI
daisyUI is one of the first Tailwind-based UI component libraries in existence. The library takes a unique approach where it provides a Tailwind plugin that injects its own higher-level classes that are composed of Tailwind utility classes. This somewhat defeats the purpose of Tailwind's atomic classes approach as developers are using pre-built CSS classes, similar to Bootstrap. Nevertheless, with 28.5k stars, it's a wildly popular library that boasts a vast library of over 50 components with multiple variants and classes.
By the numbers (accurate as of 18th Jan 2024):
- Components: 56
- Sections/blocks: N/A
- GitHub stars: 28,494
- Mode of usage: Import CSS from npm package
- Framework integrations: N/A
Tremor
While many libraries are aimed at more general usage of marketing and e-commerce, Tremor is focused on dashboard and data visualization components. Beyond the standard UI components of accordion, button, forms, Tremor includes multiple visualization components – area chart, bar chart, donut chart, line chart, scatter chart, you name it, they have it.
By the numbers (accurate as of 18th Jan 2024):
- Components: 29
- Sections/blocks: 5
- GitHub stars: 14,227
- Mode of usage: Import React components from npm package
- Framework integrations: React
NextUI
Despite the name, NextUI has nothing to do with Next.js, the popular React metaframework. Since v2.0, Next UI is built on top of Tailwind CSS and React Aria and is one of the fastest growing UI libraries based on Tailwind. Like Tremor, to use Next UI, import React components from the npm package
@nextui-org/reactand use the components within your application.By the numbers (accurate as of 18th Jan 2024):
- Components: 38
- Sections/blocks: N/A
- GitHub stars: 17,879
- Mode of usage: Import React components from npm package
- Framework integrations: React
shadcn/ui
If there was one library that took the world by storm in 2023, it'd be shadcn/ui, which is built on top of Tailwind CSS and Radix UI. While many other Tailwind UI libraries make developers copy the HTML/CSS or install the library as an npm dependency, shadcn takes an approach where you copy and paste any required component code into your projects; you have full ownership and control over the code. This approach has both merits and drawbacks. While you have full control over the components, the obvious downside is that you won't receive updates automatically and have to remember to sync any changes. This approach is best used by teams who have strong front end developers who have a need for customizing component appearance as well as the capability to maintain the components in the long term.
By the numbers (accurate as of 18th Jan 2024):
- Components: 46
- Sections/blocks: N/A
- GitHub stars: 44,449
- Mode of usage: Copy/paste React components (manually or via CLI)
- Framework integrations: React (but community forks available in Vue and Svelte)
Park UI
Park UI is a relatively new Tailwind library but is a strong contender to shadcn/ui. Park UI's usage approach is similar to shadcn/ui,
Where shadcn/ui is coupled with Tailwind and Radix UI, Park UI is way more versatile. It has first class support for both Tailwind CSS and Panda CSS (another atomic CSS library that uses a JavaScript-first approach) and also integrates with React, Vue, and Solid via Ark UI, a headless UI library that has first party implementations with React, Vue, and Solid.
By the numbers (accurate as of 18th Jan 2024):
- Components: 40
- Sections/blocks: N/A
- GitHub stars: 842
- Mode of usage: Copy/paste React components (manually or via CLI)
- Framework integrations: React, Vue, Solid
Pines UI
Pines UI is a UI library built on top of Tailwind CSS and Alpine.js and offers multiple variants for each component. With black as its primary color, the default appearance of the components highly resemble shadcn/ui and Park UI.
By the numbers (accurate as of 18th Jan 2024):
- Components: 26
- Sections/blocks: 34 (more than a hundred available for Pro subscribers)
- GitHub stars: 1,696
- Mode of usage: Copy/paste components
- Framework integrations: React
Aceternity UI
Last but not least, we have Aceternity UI. Built by the amazing Manu Arora, Aceternity UI is unlike the typical common UI component libraries introduced above. It is a collection of bespoke and carefully crafted UI sections built on top of Tailwind CSS and Framer Motion.
Some of our favorite examples include the Hero Parallax, 3D Card Effect, and the Wavy Background. It's an extremely fast way to elevate your website's design and add a "wow" factor! We recommend using it along another UI component library of your choice.
By the numbers (accurate as of 18th Jan 2024):
- Components: N/A
- Sections/blocks: 36
- GitHub stars: Not open sourced
- Mode of usage: Copy/paste components
- Framework integrations: React
Bonus: Untitled UI
Untitled UI React is a new addition to open source Tailwind CSS libraries. Launched in July 2025, it's the world's largest collection of open-source React components built with Tailwind CSS v4.1, TypeScript, and React Aria.
It's consistent, professionally designed, and includes pretty much everything you need to design and develop modern, beautiful, responsive interfaces and websites in one neatly organized package. Untitled UI React is based on Untitled UI Figma, the world's most popular Figma UI kit, so design and code are always in sync if your team uses Figma for prototyping.
Installation is easy and this library comes with a custom CLI tool and starter kits for Next.js, Bolt.new, Vite, and more. It's ideal for teams already using Tailwind CSS who want production-ready, modern, accessible React components out of the box that don't rely on external dependencies.
By the numbers (accurate as of 30th Jul 2025):
- Base components: 30
- Sections/blocks/pages: 250+
- GitHub stars: 866
- Mode of usage: Copy/paste React components (manually or via CLI)
- Framework integrations: React
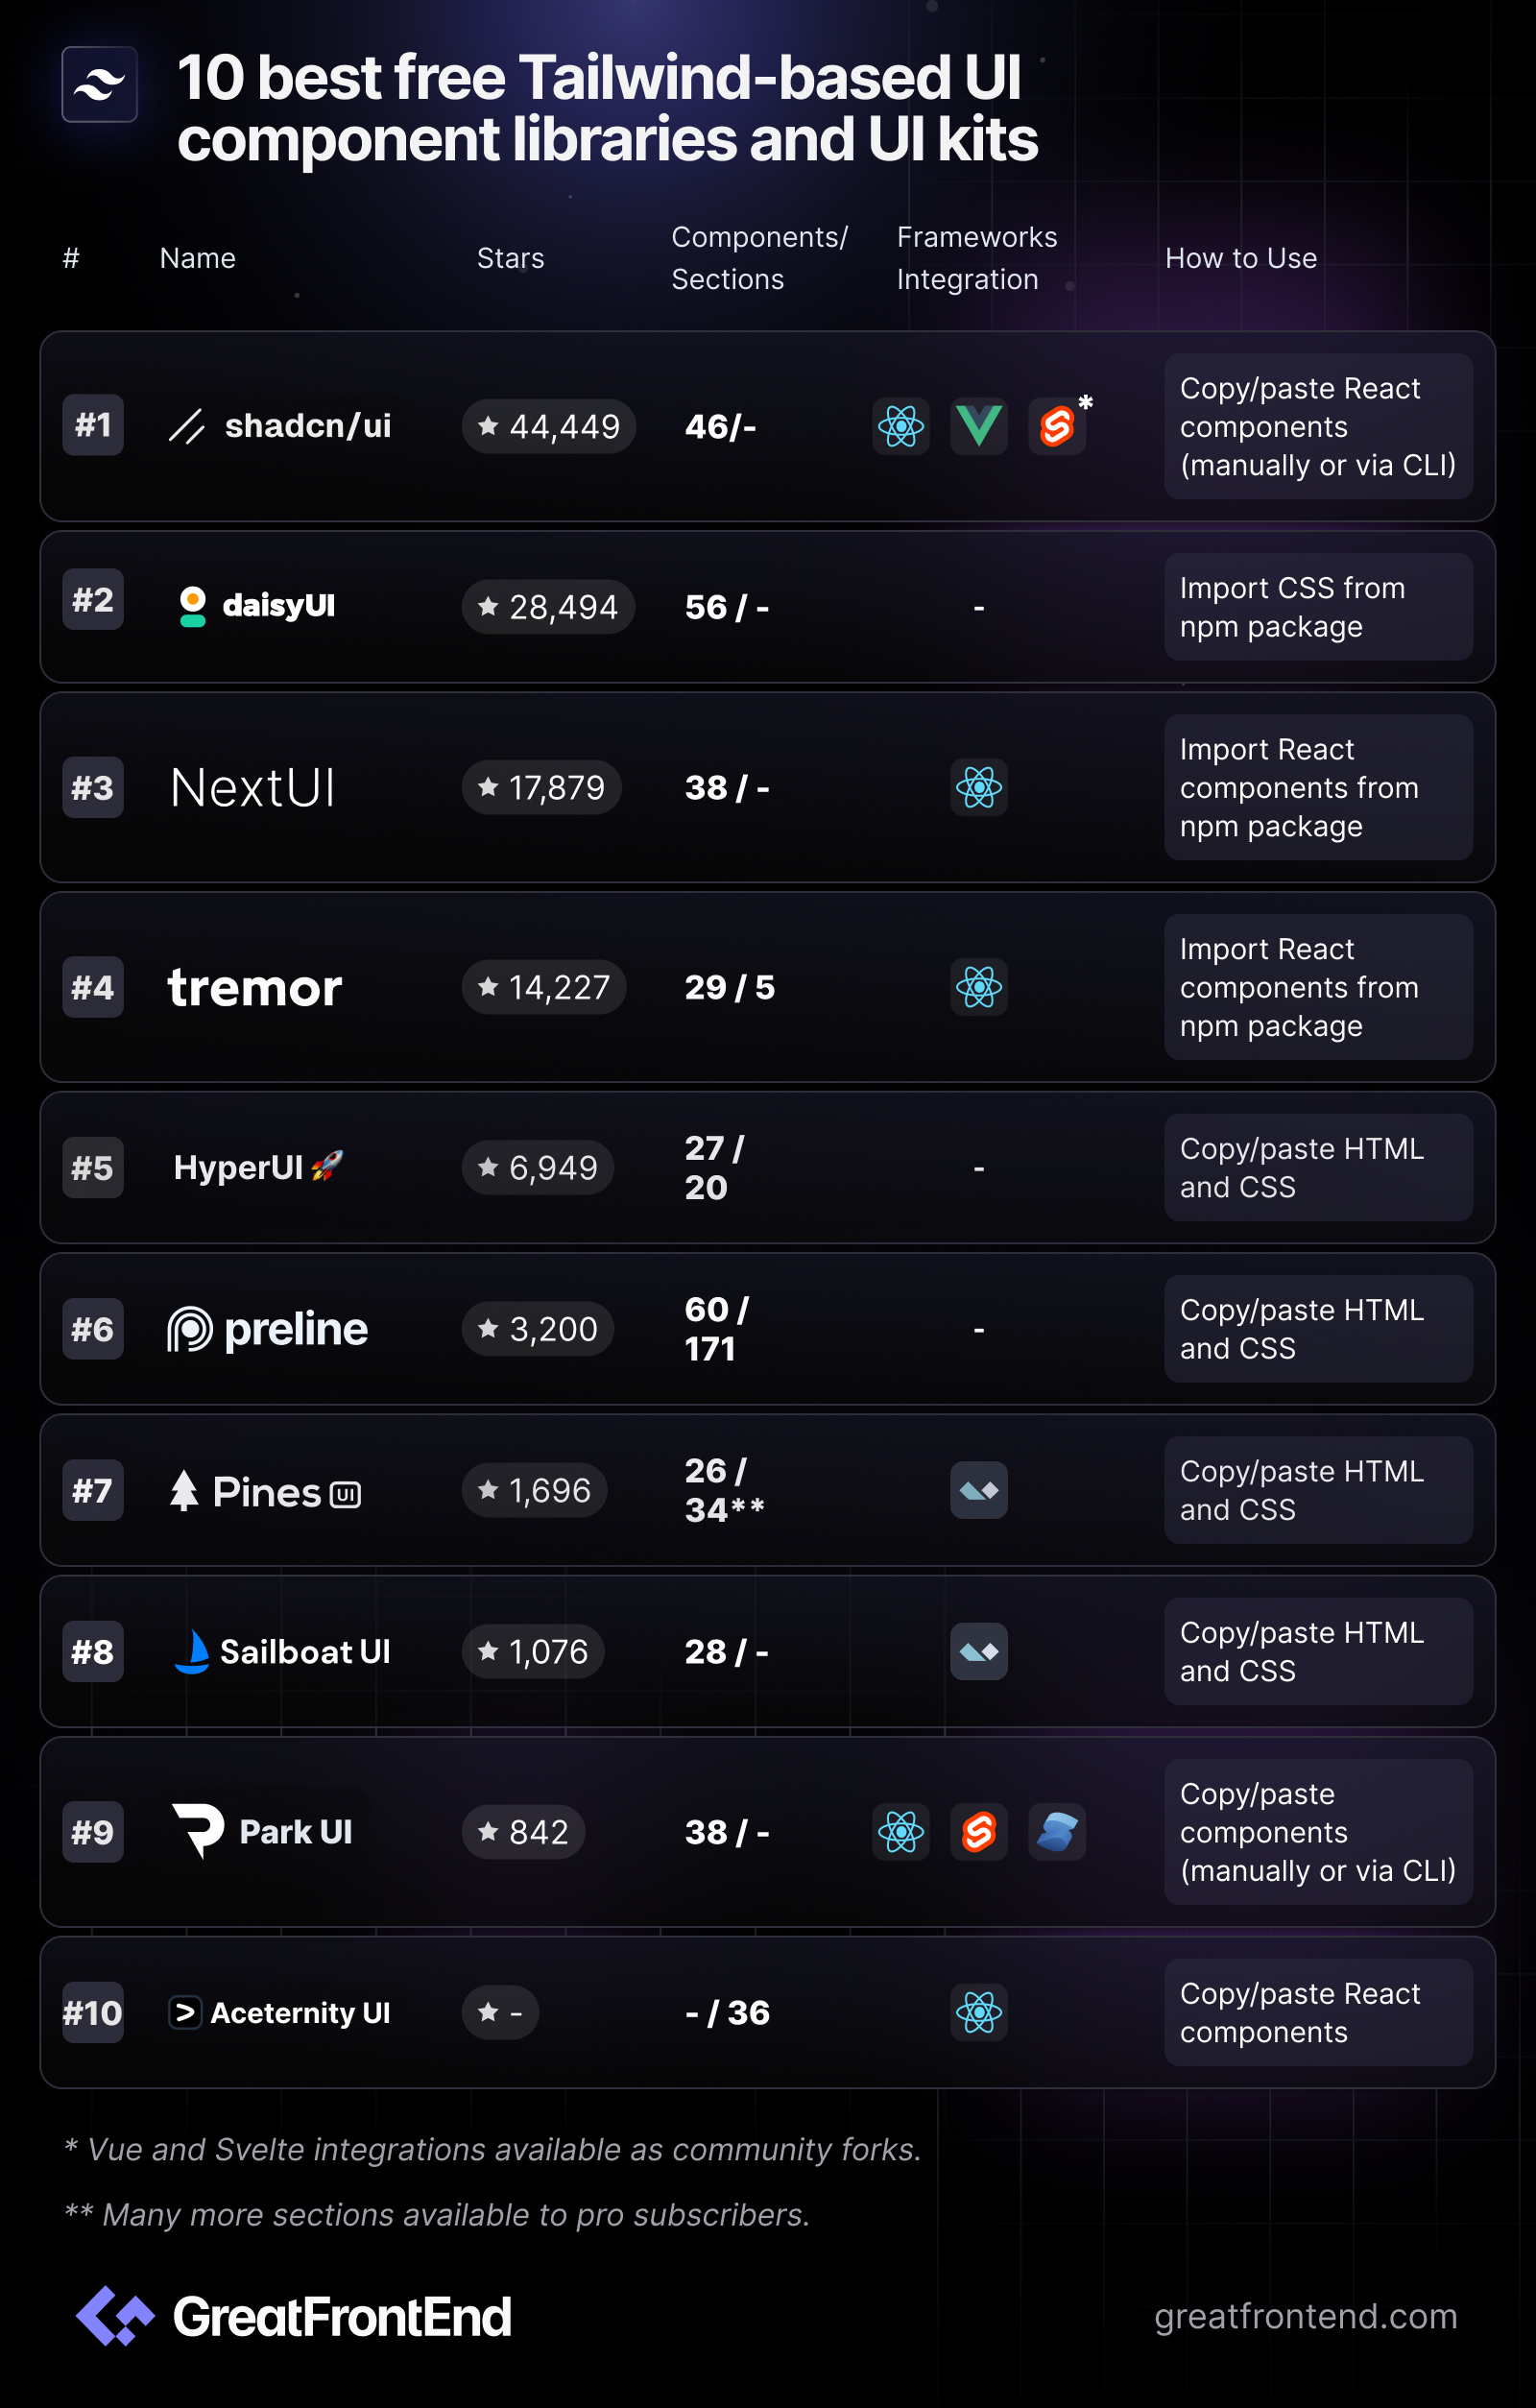
- User Interface Components at ScaleHow thousands of engineers at big tech companies build user interface components.作者Yangshun Tay4 分钟阅读Dec 23, 2023
Now that we know how Meta writes JavaScript and CSS, let's see how they're used to build UI components.
Standardize on a UI library/framework
Naturally the company that created React will build all their applications using React. You won't find Angular, Vue, or Svelte in Meta's codebase and Meta is all-in on React. By focusing on a single UI framework, tooling, knowledge and expertise can be shared and transferred more easily. Moreover, any issues faced by Meta engineers can be solved in-house, by consulting the React team. Longer term larger issues can be addressed in React's roadmap.
Component documentation
To easily build and test React components, Meta engineers can write example files for these components to demonstrate how the component looks and behaves when using a certain combination of props, similar to stories in Storybook.
All React components in the codebase that have example files are easily searchable within an internal tool and can be interacted with right within the browser. It is super handy for discovering common components and seeing how they are being used.
Testing
Unit testing of component interaction and behavior can be done using Jest and React Testing Library. Snapshot tests and screenshot tests can also be conveniently generated from the component examples.
Headless components
Each product Meta builds has its own design system with a React implementation of the UI components. Many UI components (e.g. buttons, dropdowns, modals, etc) have the same underlying logic, functionality, and accessibility features built in and that layer can be shared between UI components belonging to different design systems. Each design system only has to care about customizing the appearance. This shared logic and accessibility layer is known as headless UI components. Naturally, Meta has built its own headless components to be reused across product design systems.
Companies looking to accelerate their UI components development should pick up one of the popular headless UI component libraries. For React, there's Radix UI, React Aria, and Aria Kit.
Component analytics
Meta also has internal tools to gain insights on how big a component's file size is (bytes) and analytics, e.g. which modules are depending on the component (importing the component) and how many times they are being used in the codebase. This is useful for tracking progress when deprecating components.
Monorepo perils
In a monorepo, it becomes too easy to import components from anywhere in the codebase. However, this is bad when a component is still under development and not ready to be used widely or when a component is meant to be deprecated. To prevent unwarranted usage of components, lint rules can be used to flag usages of the components outside of directories they are not allowed to be used in.
Design-to-code
An emerging technology trend / workflow is “Design to code”, meaning you turn designs from your designer into code that you can use directly within your app. Since Figma is the industry standard for designing digital products these days, a forward-looking styling approach will be one that's integrated with Figma and can support exporting of UI markup and styles from Figma designs. Companies like Builder.io and Locofy offer such solutions.
Conclusion
Over the years, new UI libraries offering different reactive approaches have emerged (e.g. Qwik and Solid). React may no longer be the most performant library, but in terms of the overall ecosystem, learning resources, financial backing, availability of developers proficient in it, React is still one of the safest choices. Moreover, React is still constantly innovating and improving, with projects like React Server Components and an optimizing compiler. However, it is more important to decide on a company-wide blessed framework that the team is comfortable with, than to choose the most trendy UI framework.
For component examples and visual testing, Chromatic (by the maintainers of Storybook) and Percy are the leading choices available in the market.
UI components scalability checklist
- Company-wide recommendation for UI framework/library (e.g. React, Vue, Angular, Svelte)
- Documentation of components
- Testing of components (unit, screenshot, accessibility)
- Use a headless UI component library
- Component analytics
- Design-to-code (optional)
- CSS at ScaleHow thousands of engineers at big tech companies write CSS.作者Yangshun Tay7 分钟阅读Dec 22, 2023
Writing CSS at scale, particularly in large and complex projects, can present several challenges. Here are some common problems associated with scaling CSS:
- Global namespace: CSS operates in a global scope, which can lead to naming collisions and unintended style overrides. As a project grows, managing the global namespace becomes increasingly challenging, and conflicts between styles become more likely.
- Specificity issues: CSS specificity determines which styles apply to an element. As the project scales, managing and understanding specificity can become complex, leading to unexpected styling outcomes and difficulties in maintaining a consistent design.
- Unclear dependencies: CSS classes can be created on the fly, and you can't be sure where a style is being used and whether it's still being used.
- Huge stylesheets: When it is hard to determine whether certain styles are still being used, stylesheets become “add-only”. This leads to redundant or unused styles, as well as overly specific selectors, which contribute to larger file sizes and slower loading and rendering times.
CSS approach
CSS uses a global namespace, which causes many problems at scale when many developers are building into the same web application. Since the 2010s, Meta has been writing CSS using an approach called CSS modules, which solves some of the problems with CSS at scale – global namespace, including styles only on pages that use them, dead code elimination (only including the selectors that are still being referenced), and some others. Meta's CSS modules implementation is not open sourced but bundlers like webpack add support for something similar.
In 2014, Christopher Chedeau gave an insightful talk about writing CSS within your JS. In 2018, Meta started their rewrite of facebook.com and announced a new way of writing CSS in JS, which is called StyleX. StyleX's API resembles CSS-in-JS libraries like Aphrodite and Glamor, and has these key features:
- Generated atomic CSS stylesheet: An atomic CSS stylesheet has a logarithmic (flatter) growth curve because it's proportional to the number of unique style declarations rather than to the number of styles and features written. Hence the stylesheet does not grow as fast as the number of features and the file size will stay relatively similar even with thousands of features and pages. The cost is being paid by each page as the HTML size is now larger.
- Type-safe: Property keys can be checked for typo mistakes as only a recognized set of keys are allowed (e.g. margin, padding, color, etc.). Components can decide which CSS properties they want to allow to be passed in as props (e.g. only margins allowed). This prevents users of your components from customizing in ways you don't want them to.
- No runtime: The styles are extracted into a static CSS file at build time. Little/no JavaScript needs to be run to inject the styles. This is important to prevent Flash of Unstyled Content and instances where JavaScript is not executed or supported.
- No specificity issues: Each atomic class declaration only contains one property and is not nested.
- Determinism: With atomic classes, each class on a DOM element specifies a different underlying property, and you won't run into the issue of non-deterministic result which depends on the order of the classes in the stylesheet.
The team responsible for rebuilding facebook.com gave a talk about StyleX during React Conf 2019 and also at React Finland. The process of open sourcing StyleX has been a long one and as of Nov 2023, StyleX is finally open sourced. A caveat about StyleX is that it needs extra configuration to work in UI frameworks that use custom file formats like Vue and Svelte.
In the open source ecosystem, Tailwind CSS is the rage. Like StyleX, Tailwind also uses atomic CSS approach so they also share a similar benefit of a CSS stylesheet file that plateaus. However, since Tailwind CSS is just a set of atomic classes, you can use it within both JavaScript and HTML and even server-side Ruby templates. Out-of-the-box, the default Tailwind config provides a set of predefined classes (similar to design tokens) whereas StyleX does not.
Panda CSS is a new atomic CSS-in-JS library by the creators of Chakra UI and it is the middleground of StyleX (library calls are compiled away, type-safe) and Tailwind (inline style declarations, provides some default styling tokens).
The advent of React Server Components means that a whole category of styling libraries that relied on context for theming and runtime injection without any static stylesheet extraction will cease to work. Thankfully Tailwind and Panda CSS generate styles at build time and are fully-compatible with React Server Components.
If you don't mind seeing multiple classes in your HTML or building only with HTML and CSS (or non-JavaScript templating approach), Tailwind CSS will be my recommendation. If you prefer a JavaScript-first approach for styling and type-safety is important to you, use Panda CSS. Panda CSS is similar to StyleX but has a larger community maintaining it.
CSS preprocessing
Just like how developers can use the latest language features of JavaScript by using Babel, developers can also use the latest CSS features by using a CSS preprocessor like PostCSS to automate routine CSS operations, utilize future CSS syntax, and enhance CSS's functionality.
Using Tailwind and Panda removes the need for writing CSS directly, so you might not actually need to use PostCSS in your applications at all. By the way, Tailwind and Panda use PostCSS under-the-hood so you will still be using PostCSS, just not directly.
Linting
Because Meta uses StyleX for authoring styles, linting is done in JavaScript, which means ESLint and Flow. StyleX's type-safety features allow components to restrict styling props to be of only certain allowed properties (e.g. margin) and only allowed values (e.g. multiples of 4).
Teams using Tailwind CSS should install the official Tailwind CSS Intellisense plugin which offers autocomplete, linting and previews for a class' underlying styles.
If you're writing plain CSS or CSS modules, stylelint is the recommended linter.
Design tokens
Design tokens are essentially variables used to store design decisions such as colors, fonts, border radii, spacings, animations, and more. These tokens can be simple values like a number, color hex code, or more complex information like a typography scale (font size, line height, letter spacing).
By using design tokens, teams can ensure consistency across their product. As the design system evolves, changes made to the tokens automatically propagate throughout the product, ensuring uniformity and reducing the risk of inconsistencies.
On the web, design tokens can be implemented using CSS variables, or an object in JavaScript. Meta uses CSS variables for color tokens so that dark mode is essentially another set of color tokens. For spacing, border radii and other kinds of numerical values, tokens are not being exposed to developers because most design choices have been abstracted behind UI components built by the product's design system team.
In my opinion, UI components don't capture every design requirement and it's useful to make design tokens available for product engineers to use. Your company's product design team would probably already have selected design tokens and used them in their design system.
If you are using Tailwind or Panda CSS, the default configuration includes tokens for spacing, colors, typography, etc but they can be configured for custom design tokens. If you are not using Tailwind or Panda CSS and don't have a design system but want a similar default set of tokens, Open Props offers a good set of design tokens in the form of CSS variables.
Conclusion
An Atomic stylesheet is the recommended approach for styling on the web because the stylesheet size does not grow proportionately to the number of features/developers/products. Tailwind CSS and Panda CSS are modern libraries to achieve atomic stylesheet generation in a futureproof fashion that's compatible with React Server Components and a server-first component era.
Styling scalability checklist
- Use Atomic CSS to keep the stylesheet size small.
- Use CSS preprocessors to enable the latest CSS language features.
- Use CSS linters to standardize on practices.
- Use standardized design tokens.
- JavaScript at ScaleHow thousands of engineers at big tech companies write JavaScript.作者Yangshun Tay9 分钟阅读Dec 21, 2023
As web development continued to evolve, the demand for more advanced and modern features led to the development of ECMAScript 6 (ES6), also known as ECMAScript 2015. Released in June 2015, ES6 introduced a range of new features, including arrow functions, classes, template literals, and destructuring assignments, among others.
Today, JavaScript is a ubiquitous language used not only for client-side web development but also for server-side development (Node.js) and mobile app development (React Native). The language continues to evolve, with ongoing efforts to enhance performance, introduce new features, and address the needs of modern web development.
Use latest (stable) language features
After the release of ES2015 / ES6, the ECMAScript specification transitioned to a yearly release cycle, allowing for a more agile development process and quicker incorporation of new features. Subsequent releases, such as ECMAScript 2016 (ES7), ECMAScript 2017 (ES8), and so on, brought additional improvements and features to the language.
Using the latest JavaScript language features in web development is crucial for several reasons. First and foremost, it ensures compatibility with modern browsers and leverages performance improvements introduced in newer language versions. This not only enhances the user experience but also aligns development efforts with the evolving standards of the JavaScript ecosystem. Furthermore, modern features contribute to enhanced productivity, readability, and maintainability of code. Syntax improvements, abstractions, and functionalities like arrow functions, async/await, and class syntax make code more concise, organized, and easier to understand. By staying current, developers gain access to a broader ecosystem of APIs, libraries, and community support, fostering a better development experience and future-proofing their code. Keep your developers happy by enabling the latest technologies and language features.
A combination of JavaScript compilers and polyfills allow developers to use the latest ECMAScript features. JavaScript compilers like Babel transpile newer language syntax into an older version while polyfills like core-js provide implementations for newer JavaScript APIs and they work together so that older browsers that do not support the features can still run the code. Google uses their homegrown Google Closure Compiler while Meta uses a combination of Babel and Flow.
TypeScript, which offers type checking on top of enabling modern language features, is both a compiler and type checker, so you might not need Babel at all. Read on to find out more.
Type-safety first
Type-safety is extremely important in large companies and large codebase. Type-safety helps to eliminate an entire class of bugs during development that will not make it into production.
Meta places such a high importance in type-safety that they have developed type-safe versions of / type checkers for every dynamic-typed language they use:
Other big tech companies like Microsoft have developed TypeScript and Google has developed Dart, which further highlights the importance of using type-safe languages when developing at scale. These languages / type checkers are open sourced and available for all to use.
Beyond catching and preventing type errors, type-safe languages are also easier to read and maintain. In VS Code, you can hover over a symbol to know its type. After all, code is read much more than it is written! The benefits of increased readability and clarity outweighs the learning curve in the long term. IDEs can also improve the developer experience by providing better autocompletion suggestions, and showing type errors inline.
Although Flow is open sourced, the Flow team has publicly stated that open source support is not a priority. In the open source ecosystem, there are other alternatives for writing type-safe web applications like ReScript and Reason, which also have their roots in Meta, but they have lost traction in recent years.
Automate via linters and formatters
There are multiple ways to write and format code, and in a large codebase built by a large team, inconsistent coding styles across different files and developers make the code difficult to read and maintain. This lack of standardization can also hinder collaboration and slow down development, as more time is spent understanding and debugging the code instead of adding new features or improvements.
Linting is the automated process of analyzing source code to detect errors, enforce coding conventions, and identify potential issues. Linters, or linting tools, play a crucial role in improving code quality by catching syntax errors, promoting consistent coding styles, and enforcing best practices. They contribute to error prevention, enhance code readability, and establish a uniform coding style across a project.
Meta uses ESLint with eslint-plugin-flowtype for linting JavaScript. If you're using TypeScript, the recommendation would be ESLint with typescript-eslint. Configuring ESLint rules individually can be a chore, so it is recommended to use popular open source ESLint configs like eslint-config-airbnb as a starting point. Meta's internal ESLint config can be found at eslint-config-fbjs.
It is recommended to add ESLint rules around sorting imports, sorting object keys alphabetically, sorting React component props alphabetically, etc. This reduces the chances of merge conflicts when developers edit the same file. Christoph Nakazawa, ex-manager on Meta's JavaScript infrastructure and React Native team published @nkzw/eslint-config which has a high degree of overlap with Meta's ESLint configuration.
Coding style is another aspect that can be automated and benefits from consistency. Prettier is the de facto choice for formatting. In 2018, Christopher Chedeau ran a format-athon at Meta where he rallied around 20 engineers across the company to format the codebase with Prettier.
Linting should ideally be executed during development so that errors and warnings are reflected within the IDE instantly. The fast feedback loop increases productivity as the developer can fix the issues on-the-spot while the context is still fresh. Autofix lint issues and format the code on save by adding to VS Code's
settings.json:{"editor.formatOnSave": true,"editor.codeActionsOnSave": {"source.fixAll.eslint": true}}Runtime
A JavaScript runtime is an environment where JavaScript code is executed. JavaScript was originally designed to be run in the browser, but these days JavaScript can also be run on the server using Node.js, which is the most popular server-side JavaScript runtime built on Google Chrome's V8 engine.
Meta uses Hermes for server-side rendering of React, although Hermes was originally designed to run React Native apps on mobile platforms.
There isn't much of a choice to debate about here. In the wild, most companies use Node.js and it has gotten really good in recent years. Deno and Bun are rising stars in the JavaScript runtime space and both offer TypeScript support out-of-the-box. Deno has a high focus on security by restricting access to sensitive runtime APIs by default, while Bun is extremely fast and includes a package manager, bundler, and test runner.
Deno and Bun are still considered new so the risk is yours to bear if you decide to go with them.
Officially-endorsed/supported libraries
While the JavaScript language is rapidly evolving, in the last decade, there were huge gaps where the language left in terms of providing solutions to common product needs like functional utilities, datetime formatting and manipulation, etc. As a result, a rich ecosystem of utilities and libraries that cater to various development needs have emerged:
- State management: Redux, Zustand, Jotai
- Functional utilities: Lodash, Ramda, Underscore
- Datetime: Moment.js, date-fns, Day.js
- Internationalization: Format.js, i18next
- Reactive programming: RxJS
- Immutability: Immer, Immutable.js
- Classnames: classnames, clsx
Engineering leadership or a front end infrastructure team should make a decision on which libraries to use for various purposes. This prevents different libraries serving the same purpose being shipped in the same app and users end up paying the cost of downloading the JavaScript twice. Resources should also be committed to supporting internal developers facing issues with them and performing periodic codebase-wide upgrading of the library versions being used.
Package management
Finally, the last piece of JavaScript development to discuss is package management. Package management in JavaScript refers to the process of managing, distributing, and installing JavaScript libraries and tools within a project. A package manager is a tool that simplifies these tasks by automating the installation, versioning, and dependency resolution of external code packages.
Back in 2016, Meta created Yarn as an improvement over npm, it introduced the concepts of lockfiles, fast installs, global offline caches, workspaces, etc. A key feature of a scalable package manager is locking down the version dependencies and an offline mirror. You don't want to be blocked from deployment if the npm registry goes down. At Meta, node_modules are installed via Yarn v1, scanned for vulnerabilities, and checked into the monorepo.
These days, npm has mostly caught up with Yarn in terms of feature parity and Yarn has also undergone many changes since its initial launch. As of writing, Yarn is now v4, introduces Yarn Plug'n'Play, and is no longer maintained by Meta. Personally, my goto package manager these days is pnpm because it has the most features, has an amazing development experience, and is frequently updated.
Conclusion
TypeScript by Microsoft is now the de facto way to write type-safe web applications. Community support (learning resources, library type declarations) and developer tooling support (linters, IDE integration) for TypeScript is also extremely strong; new JavaScript runtimes like Deno and Bun also support TypeScript out-of-the-box. Even Google uses TypeScript as the primary language for Angular development, a UI framework created by them.
You will benefit from choosing TypeScript, even if the size of your codebase is small.
JavaScript scalability checklist
- Use modern language features, syntax, and APIs.
- Use a type-safe language like TypeScript.
- Leverage linting and formatting to enforce coding style and educate best practices.
- Officially-endorsed/supported libraries.
- Use features or modern package managers, check in your node_modules / use an offline mirror.
- Upgrade runtime and package versions periodically.
- Web Apps at Scale – IntroductionHow thousands of engineers at big tech companies build web apps.作者Yangshun Tay5 分钟阅读Dec 20, 2023
Meta (previously Facebook) is known for its social media platforms and used by a huge number of users and services. Meta's websites include facebook.com, instagram.com, messenger.com, whatsapp.com, threads.net, meta.com, and more and are used by billions of global users monthly.
Developing these websites consisting of thousands of pages by thousands of engineers is no simple feat. In this article, we will provide some insights of how big companies like Meta and Google handle front end development on such a large scale, the tools, methods, and strategies they use and how growing companies who face the same problems can adopt some of the approaches using alternatives in the open source ecosystem.
Aside from Meta's huge web user base, Meta is also an interesting company to look at because between 2015 to 2020, Meta was the forerunner of modern front end development with the creation of popular open source front end technologies like React, React Native, Flux, Jest, GraphQL, Docusaurus, Relay, Draft.js, Yarn, and more. It's fair to say that Meta had a significant impact on the modern front end ecosystem.
Disclaimer: I am no longer affiliated with Meta and this article does not represent Meta. Opinions and experiences are solely my own. I worked at Meta as a Front End Engineer from 2017 to early 2023 and things might have changed since then.
Who am I?
I am an ex-Meta Staff Engineer who led engineering teams to build meta.com and oculus.com. I was actively involved in the development of Meta's open source projects by creating Docusaurus 2, maintaining (and deprecating) Flux, and making small contributions to Lexical and Relay. Outside of front end development, I have also written multiple technical interview resources like Blind 75, Tech Interview Handbook, and Front End Interview Handbook, which have amassed over 100,000 GitHub stars.
Overview of Front End at scale
As a company grows, the number of features and number of engineers developing those features increase. Look at your company's front end code base and see:
- How many different JavaScript or CSS frameworks are being used?
- How many custom Button components have been built?
- How big is your utils folder and how many duplicate utilities are present?
- How many different React hook libraries are being used?
If there are too many to count, congratulations, you have just identified tech debt. These problems start to occur because:
- Existing solutions do not work for new problems.
- No recommended practices or standardized ways for doing the same thing.
- Different teams face similar problems.
As a result of the above, teams solve the problems for themselves, because it's much faster to solve their own problem than to solve it for everyone. What can also happen is that someone tries to solve it for everyone, but the solution isn't sufficient and the next person comes along to “improve” the solution for their own use case without understanding the use cases of others and ends up making things worse for everyone, often in subtle unnoticeable ways like performance degradations.
Duplicated code, different approaches to achieving a similar outcome, unusable existing solutions all contribute to tech debt. At scale and over a long period of time, tech debt that is seemingly small can compound and lead to disastrous business consequences like bugs, downtimes, and developer burn out. Thankfully, even small improvements will also lead to large benefits at scale when lots of products and people benefit from it.
Metrics to measure
Effective front end teams at scale score well on the following metrics:
- Lead time for feature development: The amount of time it takes to develop a feature, get it reviewed, and ship it to production.
- Deployment frequency: How often an organization successfully ships new releases to production.
- Change failure rate: Percentage of changes that cause a bug/failure in production.
- Product quality: Percentage of users having a good experience with the product. Does the website load fast enough? Does it mean the minimum accessibility standards? There are actually many ways to measure this, though they all have a varying level of subjectivity.
Caveats
It is important to know the nature of the organization you are in. Different types of organizations have different focuses and you should adapt your approach to the nature of the company and product. Tech debt and engineering scalability is not as important in certain companies for good reasons.
Be also aware of premature optimizations. Sometimes what you think is a problem might just be a minor inconvenience that is not actually a critical problem to solve right now. Without thorough understanding of the problem, solving a problem prematurely and having to revert it later costs more time overall.
As a Front End Engineer who mostly worked in product teams I'm not all that familiar with deployment infrastructure and the amazing product infrastructure work, so some parts will be glossed over.
- 5 Most Important User Interface Questions to Master for Front End InterviewsPractice these user interface questions if you are short on time to prepare for your front end interviews.作者Yangshun Tay7 分钟阅读Dec 19, 2023
A common frustration when preparing for front end interviews is the sheer volume of questions to practice. There are over 400 front end interview questions available on GreatFrontEnd. How do you choose the best questions to practice to get the highest return of investment on your time?
Front end interview questions often revolve around a combination of fundamental JavaScript concepts, problem solving skills, layout building skills, and data structures and algorithms. To maximize your efficiency, we recommend practicing the most commonly-asked questions, along with those that touch multiple skills, so that you get all-rounded practice.
In this list we will cover the most important User Interface questions to practice. Let's get started!
Todo List
Building a Todo list is a practical exercise that evaluates a front end engineer's ability to work with user interfaces, handle state, and perform basic CRUD (Create, Read, Update, Delete) operations. In the most basic form, candidates are asked to create a simple todo list where users can:
- Add new tasks to the list.
- Mark tasks as completed.
- Delete tasks from the list.
It is a common interview question because it reflects real-world scenarios in front end development, where developers often create user interfaces to add new entries to a list, manipulate the list, and remove entries from the list.
Building a well-implemented Todo list demonstrates proficiency in DOM manipulation, event handling, building accessible forms, event delegation, and state management. This is a question that can also have multiple potential follow-up questions:
- Fetch suggestions from an API and display the suggestions in a combobox pattern.
- Save the items to a persistent storage like localStorage or to a database and read from the storage.
- Add undo/redo functionality.
- Add reordering functionality.
The ease of successfully implementing the follow-up questions is highly dependent on the quality of the basic implementation, so it's important to get the basic implementation right.
Practice implementing a Todo List on GreatFrontEnd
Tabs
Tabs are a common UI pattern in web development, making this question practical and applicable to a front end engineer's daily tasks. Typically, candidates are asked to create a tabs UI component with the following requirements:
- Display three tabs: Tab 1, Tab 2, and Tab 3.
- When a tab is clicked, show the corresponding content for that tab and hide the content for other tabs.
- Apply a visual indication (e.g., styling change) to the active tab to show which tab is currently selected.
For such questions, candidates might be asked to implement without using any external libraries or frameworks. Building a well-implemented Tabs component demonstrates proficiency in DOM manipulation, event handling, accessibility, event delegation, state management, and designing component abstractions. This is a question that can also have multiple potential follow-up questions:
- Is the component well-encapsulated? Is it possible to have multiple Tabs components on the page each with its own state?
- Add full keyboard support as per the WAI-ARIA Tabs pattern.
- Add an API to dynamically add/remove tab items after the component has been initialized.
- Load tab contents over an API.
Practice implementing a Tabs component on GreatFrontEnd
Tic-tac-toe
A "Tic-tac-toe" front-end interview question typically involves creating a web-based version of the classic Tic-tac-toe game using HTML, CSS, and JavaScript. Typically, candidates are asked to create a tabs UI component with the following requirements:
- Display a 3 x 3 game board with cells that users can interact with.
- Allow two players to take turns placing their symbols (X and O) on the board.
- Determine and display the winner when a player forms a horizontal, vertical, or diagonal line of three of their symbols.
- Allow the option to reset the game for a new round.
Implementing Tic-tac-toe assesses a candidate's understanding of DOM manipulation, event handling, building a grid-based layout, implementing non-trivial game logic, data structures and algorithms, and state management. Potential follow-up questions include:
- Extending the game board to N x N with M consecutive symbols to win. A well-designed solution will make this easy.
- Implementing undo/redo functionality.
- Implementing an AI for a single-player mode.
Practice implementing a Tic-tac-toe component on GreatFrontEnd
Image Carousel
An "Image Carousel" front end interview question typically involves creating a web-based image carousel or slider. The goal is to implement a user interface that allows users to view a sequence of images, navigate between them. More specifically:
- Display a series of images in a carousel format.
- Allow users to navigate between images using previous and next buttons.
- Include indicators (e.g., dots) to show the current position in the sequence.
- Implement a responsive design that works well on various screen sizes.
For such questions, candidates might be asked to implement without using any external libraries or frameworks. Implementing an image carousel assesses a candidate's understanding of DOM manipulation, event handling, building a slider layout, CSS transitions, and more. There are many ways to implement an image carousel, each with its own pros and cons. Unsurprisingly, this question has tons of possible follow-up questions:
- Adding animations or transitions to enhance the user experience.
- Providing accessibility features like keyboard events, correct roles, states, and properties as per the WAI-ARIA Carousel pattern.
- Loading images dynamically or from an external source.
- Implementing additional features like autoplay, pause on hover, jumping to a specific image via an imperative API.
Image carousel interview question, along with its follow-ups, can even evolve into a front end system design question as there are multiple performance optimizations to talk about, with image optimizations being key. It's a great front end interview question to practice.
Read about how to design an Image Carousel on GreatFrontEnd
Autocomplete
An "Autocomplete" front end interview question typically involves creating an interactive autocomplete feature for a text input field. The goal is to implement a user interface that suggests and displays possible matches or completions as the user types into the input field.
Here's a simplified example of an Autocomplete front end interview question has the following requirements:
- As the user types into the input field, use the input text to fetch and display matching suggestions.
- Display the suggestions in a dropdown or similar UI element below the input field.
- Allow the user to select a suggestion from the dropdown, updating the input field accordingly.
- Fetch suggestions asynchronously from a server (simulated with a mock API or using actual HTTP requests).
Implementing an autocomplete assesses a candidate's understanding of DOM manipulation, event handling, asynchronous programming (fetching suggestions from a server), familiarity with CSS positioning, form handling, accessibility, performance, and the list goes on. It is the single most important question you can practice as it literally touches on every possible front end interview topic. Like the image carousel question, there are also many possible follow-up questions:
- Debounce the API search.
- Providing accessibility features like keyboard events, correct roles, states, and properties as per the WAI-ARIA Combobox pattern.
- Caching results and showing results from cache.
- Handling network race conditions.
- ... and many many more.
With the amount of things to talk about, this can also evolve into a front end system design question to have further discussions about what other APIs an autocomplete component can include, performance improvements, etc.
Read about how to design an Autocomplete on GreatFrontEnd
It goes without saying that there are more possible interview questions to practice, but many other interview questions build on top of the skills evaluated for the above questions. If you are short on time, practicing the above questions first will give your the highest return on investment and is highly recommended.
All the best for your interviews!
- 5 Most Important JavaScript Questions to Master for Front End InterviewsPractice these JavaScript questions if you are short on time to prepare for your front end interviews.作者Yangshun Tay7 分钟阅读Dec 18, 2023
A common frustration when preparing for front end interviews is the sheer volume of questions to practice. There are over 400 front end interview questions available on GreatFrontEnd. How do you choose the best questions to practice to get the highest return of investment on your time?
Front end interview questions often revolve around a combination of fundamental JavaScript concepts, problem solving skills, layout building skills, and data structures and algorithms. To maximize your efficiency, we recommend practicing the most commonly-asked questions, along with those that touch multiple skills, so that you get all-rounded practice.
In this list we will cover the most important JavaScript questions to practice. Let's go!
Debounce
Debouncing is a crucial technique used to manage repetitive or frequent events, particularly in the context of user input, such as keyboard typing or resizing a browser window. The primary goal of debouncing is to improve performance and efficiency by reducing the number of times a particular function or event handler is triggered; the handler is only triggered when the input has stopped changing.
import { debounce } from 'lodash';// Example usage for a search input fieldconst searchInput = document.getElementById('search-input');const debouncedSearch = debounce(() => {// Perform the search operation hereconsole.log('Searching for:', searchInput.value);}, 300);searchInput.addEventListener('input', debouncedSearch);In this example, the
debouncefunction creates a wrapper function that delays the execution of the provided callback until a certain amount of time has passed since the last input event. This helps optimize performance by preventing unnecessary computations or network requests during rapid user input. Adjust thedelayparameter based on the specific requirements of your application.Debounce is a frequently asked question in front end interviews, especially by big tech companies because it assesses the candidate's understanding of asynchronous programming, closures, and the
thiscallback. The basic version of debounce isn't too hard to implement, so you might be asked to implement additional functionality that's available on Lodash's_.debounce:- Leading version: Invoking the callback at the start of the timeout instead of at the end.
- Trailing version: Invoking the callback at the end of the timeout.
- Maximum delay: The maximum time the callback is allowed to be delayed before it is invoked.
Or you could also be asked to implement the Throttle function, which is the sister function of Debounce; it's important to understand the differences between them. Throttle is a common follow-up question to Debounce and vice versa.
Practice implementing a Debounce function on GreatFrontEnd
Promise.all()Promise.all()is an important feature in JavaScript for simplifying code needed to handle multiple asynchronous operations concurrently, especially if there are dependencies between them. It takes an array of promises and returns a new promise that resolves to an array of the results when all of the input promises have resolved, or rejects if any of the input promises reject.Proficiency with
Promise.all()is an indicator of a front end engineer's ability to handle complex asynchronous workflows efficiently and manage errors effectively, making it highly relevant to their daily tasks.const promise1 = fetch('https://api.example.com/data/1');const promise2 = fetch('https://api.example.com/data/2');const promise3 = fetch('https://api.example.com/data/3');Promise.all([promise1, promise2, promise3]).then((responses) => {// This callback is only ran when all promises in the input array are resolved.console.log('All responses:', responses);}).catch((error) => {// Handle any errors from any promiseconsole.error('Error:', error);});In this example,
Promise.all()is used to fetch data from three different URLs concurrently, and the.then()block is executed only when all three promises have resolved. If any of the promises rejects, the.catch()block is triggered.It is a good question to practice for front end interviews because candidates are often evaluated on their mastery of asynchronous programming and whether they know how to implement polyfills.
Promise.all()has many sister functions likePromise.race(),Promise.any(), which can also be asked in interviews, so you kill many birds with one stone by practicingPromise.all().Practice implementing
Promise.all()on GreatFrontEndDeep Clone
In JavaScript, a deep clone function is used to create a new object or array that is entirely independent of the original object/array. This means that not only the top-level structure is cloned, but all nested objects and arrays within the original structure are also duplicated. In other words, changes made to the cloned object do not affect the original, and vice versa.
// Original user.const user = {name: 'John',age: 42,};// Create a deep clone of the user.const clonedUser = deepClone(user);// Modify the cloned user without affecting the original.clonedUser.name = 'Jane';// Output the original and cloned user. The original is not affected.console.log('Original User Data:', user); // { name: 'John', age: 42 }console.log('Cloned User Data:', clonedUser); // { name: Jane', age: 42 }While not as frequently asked in interviews as some other questions, deep cloning showcases one's understanding of recursion and the various data types in JavaScript – how to recursively traverse an arbitrary object in JavaScript and process each encountered type.
Practice implementing the Deep Clone function on GreatFrontEnd
Event Emitter
An Event Emitter class in JavaScript is a mechanism that allows objects to subscribe to and listen for events, and to emit events when certain actions or conditions occur. It facilitates the implementation of the observer pattern, where an object (the event emitter) maintains a list of dependents (observers) that are notified of changes or events. In fact, EventEmitter is part of Node.js' API.
// Example usageconst eventEmitter = new EventEmitter();// Subscribe to an eventeventEmitter.on('customEvent', (data) => {console.log('Event emitted with data:', data);});// Emit the eventeventEmitter.emit('customEvent', { message: 'Hello, world!' });Implementing an
EventEmitterclass involves knowledge of object-oriented programming, closures,thiscallback, and data structures and algorithms fundamentals. Possible follow-up questions include an alternative unsubscribing API.Practice implementing an Event Emitter on GreatFrontEnd
Array.prototype.filter()
Array.prototype.filter()is a built-in method in JavaScript that allows you to create a new array containing elements that satisfy a certain condition. It iterates over each element in the array and applies a callback function to determine whether the element should be included in the filtered array.// Example: Filtering out even numbers from an arrayconst numbers = [1, 2, 3, 4, 5, 6, 7, 8, 9, 10];const oddNumbers = numbers.filter(function (number) {return number % 2 !== 0;});console.log(oddNumbers); // Output: [1, 3, 5, 7, 9]Array.prototype.filter()is commonly-asked questions in front end interviews by big tech companies, along with its sister functions,Array.prototype.map(),Array.prototype.reduce(), andArray.prototype.concat(). Modern front end development favors functional programming style APIs likeArray.prototype.filter()and it is also an opportunity for candidates to demonstrate their knowledge of prototypes and polyfills. It seems easy on the surface, but there's much more to it:- Are you aware of all the parameters accepted by the filter callback? Hint: there are 4!
- How does the filter callback handle sparse arrays?
- Does your implementation call the callback function with the right
thisvalue? - What if the array contents is mutated by the callback function mid-traversal?
Nailing these edge cases is paramount for acing front end interviews.
Practice implementing the
Array.prototype.filter()function on GreatFrontEndIf you're short on time, we recommend practicing these 5 questions, which takes around 3 hours.
What do you think of these questions? Do you think there are other important questions to cover?
- How to Evaluate Companies as a Front End EngineerLearn the key factors and essential questions that Front End Engineers should explore when evaluating companies.标签作者Yangshun Tay12 分钟阅读Dec 14, 2023
Front End Engineering is a nuanced field within Software Engineering and not all companies place equal emphasis on nor have the need for. Choosing the right company is a pivotal decision that can shape the trajectory of a Front End Engineer's career.
A careful evaluation of potential employers to ensure alignment with one's skills, aspirations, and work preferences. From the nature of business to technological stack to growth opportunities, the considerations are diverse and significant. In this post, we highlight key factors and essential questions that Front End Engineers should explore when evaluating companies. By delving into these factors, Front End Engineers can make informed decisions that not only resonate with their expertise but also contribute to a fulfilling and successful career.
Here are some of the factors you should be considering when joining a company as a Front End Engineer:
- Nature of business
- Technology stack / Engineering practices
- Organization structure
- Leadership
- Interview process
- Compensation
- Career progression
- Talent pool
- Open source & community contributions
- Focus on design
Let's dive into each factor.
Nature of business
How important is the front end web product to the success of the company? Is web the primary medium in which users consume the product or is web just used for internal dashboards?
If front end web is important to the company, the company will likely want to hire the best front end engineering talent and compensate them well. As a Front End Engineer, it's also important to join such companies because if/when recession strikes, the less important departments will be the first to be let go. Ideally, you'd want to be in the important departments, be it recession or not.
Web engineering is important to companies like Figma where the core product is within the browser or a native desktop app. On the other hand, web is not as important to a ridehailing company where users are using native mobile apps to book rides.
What are the primary revenue streams for the business? What is the breakdown of revenue per platform?
It goes without saying that companies will allocate more resources to revenue-generating platforms.
Other questions to ask:
- Are there specific metrics used to measure the success of front end initiatives?
- Describe the unique business challenges the front end team faces within your industry?
- What is your target market and how do you plan to expand it? What devices do these markets use to consume the application/services?
- How do you see the industry evolving in the next few years, and where do you see the company within that context?
Technology stack / Engineering practices
What technology stack is the company on? Does the company bother to keep up with modern front end technologies or are the company's products still on jQuery and Bootstrap 3 with no intention to migrate?
You don't want to be still working on legacy technologies and not improve your skills at your new job. A stack that includes modern front-end technologies can offer more relevant experience and contribute to your professional growth.
Good companies should strive to keep their technologies updated as it improves the product quality and helps their employees stay relevant with industry needs.
What are scalability and performance challenges the company has faced? Describe the technical challenges faced by the front end teams.
If the technical challenges/bottlenecks are mainly on the back end, then back end is likely more important to the company than front end in the long run. Consequently, there will be more seniority composition of engineers will bias towards the back end and limited growth for front end engineers due to lack of complex front end work available.
What is your approach to front end testing and quality assurance?
If front end products are not tested thoroughly, the company is either small, or the front end products are not as important.
Other questions to ask:
- Can you describe the current technology stack and why it was chosen?
- How does the technology stack support the company's goals and objectives?
- Are there any plans to adopt new technologies or tools in the near future?
- How do you handle technical debt and ensure the codebase remains maintainable?
- Can you discuss the deployment process and how frequently deployments occur?
Organization structure
How are engineering teams organized? Are there both front end engineers and back end engineers in the same team or are they in separate teams? How much back end engineering does a front end engineer have to do?
Both ways of team organization can work, but you'd want to avoid a situation where you are the only front end engineer on a large team primarily made up of back end engineers where there are few senior to learn front end from. You might also be a victim of "bait and switch", where after you join a team, there isn't that much front end work to do and you end up spending most of your time doing back end work. That's not what you're hired to do in the first place, some might like it, but most don't.
Is there a front end infrastructure team that takes care of common front end engineering needs across the company such as design system components, linting, build, performance, package upgrades, etc?
If a medium/large-sized company does not have a dedicated front end infrastructure team, there is a good chance that the company does not have too many front end products to warrant the need for a front end infrastructure team. Another reason is that front end engineering quality is not important to the company.
Other questions to ask:
- How are engineering teams organized within the company?
- Can you describe the reporting and collaboration structure for the front end team?
- What is the ratio of front end engineers to other engineering roles?
- How does the front end team collaborate with product managers and stakeholders?
- Are there cross-functional teams that include front end engineers, and how do they operate?
- What opportunities are there for front end engineers to lead projects or initiatives?
- How are front end tasks and projects prioritized within the organization?
Leadership
How much does leadership value front end engineering? How important is brand identity and design to the company?
The former can be hard to find out as an outsider but you can roughly tell from the quality and aesthetics of the products. This is an important question to find out because leadership decides where to allocate resources to and the more important departments have a higher priority.
What is the background of the leaders (especially the technical ones)?
Leaders that were more product and design focused will tend to prioritize front end engineering quality.
Other questions to ask:
- How involved is the leadership team in front end engineering decisions?
- What is the leadership's vision for the front end team's growth and development?
- How are successes and achievements within the front end team recognized by leadership?
- What qualities do you look for in leaders within the front end team?
Interview process
Is there a dedicated front end interview process or is the process the same as for general software engineers (back end heavy)?
A dedicated front end interview process allows companies to assess candidates more thoroughly and accurately for front end engineering roles. It ensures that the evaluation is aligned with the specific skills and challenges associated with front end development, contributing to effective hiring decisions and the overall success of the engineering team.
If there isn't a dedicated front end interview process, it could be a sign that leadership does not understand front end engineering well and there's no front end engineers in leadership roles. A front end interview process that does not test the right skills can result in non-optimal hires which brings down the company's quality of front end engineering.
Other questions to ask:
- Can you describe the typical interview process for a front end engineer role?
- What kind of front end coding challenges or technical assessments can I expect?
- How do you evaluate front end skills such as HTML, CSS, JavaScript, and frameworks?
- Who will I be meeting with during the front end interview stages?
Compensation
Does the company pay front end engineers the same as back end / full stack / generalist software engineers?
If a company pays different specializations of software engineering differently, it's an indication that some specializations are not as important as the rest, aka. Second class citizens. Many companies like Meta and Google pay Front End Engineers as much as Software Engineers. Don't settle for less.
Even if companies pay the same salary for Front End Engineers, the offer salary shouldn't be the only factor you should consider. You should also consider the longer term aspects such as career progression, how feasible it is possible to grow to senior, staff levels and beyond.
Career progression
How does the career ladder for a front end engineer differ from a back end engineer? How high is the career ceiling for a front end engineer at the company? What level can you attain by focusing on front end development? What is the composition of backgrounds of the high-level engineers at the company?
The career ladder for a front end engineer and a back end engineer can vary between companies, and the specific titles and levels may differ. The career ceiling for a front end engineer can be quite high in companies that have complex client products (e.g. Figma, Google Docs, VS Code, etc) or value the importance of user experience and interface design.
In many other companies, the career ceiling for front end engineers is much lower. For such companies, front end engineers have to look beyond front end work and contribute strategically to the organization's goals in order to rise up the ranks.
Companies which have high career ceilings for Front End Engineers (without them having to go into management) include Google, Meta, Microsoft, Airbnb, and Figma.
As mentioned earlier, look out for where the technical challenges lie as the company grows. Complex front end technical challenges will warrant the need for senior and beyond front end engineers which is good for a career in front end engineering.
Talent pool
How many other front end engineers are there at the company? Who are the other front end engineers at the company? Are they experienced and people I can learn from to level up my front end engineering skills? Are the other front end engineers also passionate about modern front end technologies and frequently share knowledge with each other?
Understanding the experience level of fellow front end engineers is crucial for evaluating potential learning and mentorship opportunities. Working alongside experienced peers facilitates skill development, as you can glean insights from their expertise and real-world projects.
It's also important to know if there's a culture for sharing about modern front end technologies; A team that actively shares knowledge and embraces modern technologies suggests a dynamic and forward-thinking environment.
Other questions to ask:
- How would you describe the current team of front end engineers at the company?
- What qualities do you look for when hiring new front end engineers?
- What is the seniority breakdown of front end engineers at the company?
Open source & community contributions.
Does the company have any open source projects? Does the company give back to open source by submitting upstream projects? Does the company have an engineering or design blog and their posts of high quality?
Having a community presence contributes to the positive brand image of the company and demonstrates a commitment to transparency, collaboration, and giving back to the community. An engineering blog fosters a culture of knowledge sharing within the company and contributes to the professional development of team members.
A company actively involved in open source contributions is likely to attract developers who are passionate about open source and community collaboration. It can be a deciding factor for top talent when choosing where to work.
Being able to contribute to open source (be it the company's open source projects or projects used by the company)as part of your work helps to build up personal brand and credibility which is useful to show future employers.
Other questions to ask:
- Does the company contribute to any open source projects related to front end development?
- Are software engineers encouraged to contribute to open source during work hours?
- Discuss any notable front end open source contributions made by the company or its employees?
- How does the company recognize and reward open source contributions from engineers?
Focus on design
Are the company's products visually appealing? Is there a cohesive brand identity and product interface? Do the products look like they are part of a design system?
While Front End Engineers don't necessarily have to design, they have to work closely with designers and implement what the designers come up with. A design system provides a structured approach to design and development, promoting consistency, efficiency, and collaboration across teams. It is an essential tool for creating and maintaining a unified and user-friendly interface in software products. Building products without a proper design system will lead to inefficiencies and inconsistencies down the road. A lack of a proper design system or design department could also be an indication that design and front end engineering is not valued by the company.
Other questions to ask:
- How is design and brand aligned across the products on the different platforms?
- Is there a brand / design system team in-charge of the company's brand and design system?
- Describe the relationship between the front end engineering and design teams?
- How does the company ensure a consistent design language across all front end projects?
- What design tools and methodologies do front end engineers use?
- How do the company measure the success of the front end design efforts?
Evaluating a company holistically, from its tech stack to its commitment to innovation and the quality of its team, empowers you to make informed choices that align with your professional aspirations.
By considering the factors outlined in this guide, you pave the way for a rewarding and fulfilling career, where your skills thrive, and your contributions leave a lasting impact on the digital experiences you help create.
You are not just choosing a workplace; you are selecting a path that leads to your own advancement, innovation, and success as a Front End Engineer.
- Best Medium-size Companies for a Fulfilling Front End CareerDiscover the best medium-sized tech companies for a great career as a Front End Engineer.标签作者Yangshun Tay9 分钟阅读Dec 12, 2023
This is part 2 of our top companies series where we gathered the top tech companies for a fulfilling career as a Front End Engineer. Companies are selected based on the following criteria:
- Nature and variety of web products
- Complexity and quality of front end engineering
- Contributions to open source ecosystem
This post covers the list of the top medium-sized tech companies for front end engineers. For each company, we give a rating out of 5 on the following areas:
- Projects: Diversity, complexity and uniqueness of the products.
- Talent: Quality of talent.
- Design: Emphasis the company places on design.
- Compensation: How well compensated the employees are.
- Outlook: The company's outlook.
Airbnb
Airbnb revolutionized the travel and hospitality industry with its online marketplace for lodging and experiences. The Airbnb platform is a prime example of good design meets good engineering with its user-friendly and aesthetically pleasing interface that is used globally and supports nearly 100 languages.
Airbnb has made significant contributions to the open source community. Some of their notable open source projects include:
- JavaScript Style Guide: A very popular style guide and ESLint config for JavaScript.
- Enzyme: JavaScript testing utilities for React. It is no longer recommended since it relies on testing component implementation and the community has moved towards using React Testing Library.
- Lottie: A library for rendering animations on the web and mobile.
- visx: A collection of expressive, low-level visualization primitives for React.
- Polyglot: A tiny i18n library.
- React Dates: A datepicker library for React.
- Hypernova: A service for server-side rendering your JavaScript views.
Between 2015 to 2020, Airbnb is one of the most innovative companies in the front end space. Airbnb was one of the earliest companies to implement isomorphic/universal rendering on the web with the invention of Rendr, a library to render Backbone.js apps on the server. They also use server-driven UIs to dynamically build pages for web and mobile. Airbnb's front end team also spoke at React Conf 2019 about the process behind their design system.
Noteworthy front end engineers from Airbnb include Harrison Shoff, known for his work on Airbnb's style guide and visx. Leland Richardson, Jordan Harband, Spike Brehm, Josh Perez, were previously from Airbnb and were instrumental in shaping Airbnb's strong front end engineering culture and establishing the company as a leader in the front end ecosystem.
On the design front, Airbnb's Design department has a beautifully-designed blog and frequently shares their knowledge and resources with the designer community.
Airbnb's front end interview process mostly focused on front end coding with just one round of algorithmic coding. However, Airbnb places a high emphasis on cultural fit as the full loop consists of two rounds of behavioral interviews where most companies only have one.
As of writing, Airbnb has scaled back on their community contributions, possibly due to the global movement towards cost cutting. We no longer see as much front end innovation coming from Airbnb as compared to before. Some of Airbnb's famous libraries like Enzyme and React Dates have been moved out of the Airbnb GitHub organization and don't look maintained. Airbnb's design blog has been paused since 2022 and Airbnb's engineering and design social media accounts have been closed.
It's important to note that at its core, the Airbnb platform is a CRUD application and the challenges lie in scaling the platform for new verticals; the products themselves are not technically sophisticated client applications like a collaborative editor or design tools. However, if you are a product engineer who enjoys translating beautiful designs into reality and bringing them into the hands of people globally, Airbnb is still a cool and great place to work.
Rating: Projects (3/5), Talent (4/5), Design (5/5), Compensation (4/5), Outlook (3.5/5)
Shopify
A Canadian powerhouse, Shopify empowers businesses with its e-commerce platform, providing business owners with tools to create online stores. As these websites allow a high degree of customization by users while optimizing for performance and SEO, the Shopify platform requires complex, top quality front end engineering.
Shopify is no stranger to open source and although most of their projects are targeting the Ruby ecosystem, there are a few notable front end projects from them:
- Remix: Remix is a full stack web framework by the creators of React Routers that was acquired by Shopify and integrated into their products.
- Polaris: Shopify's design system implemented in React.
- Hydrogen: A set of opinionated components, utilities, and tools to build custom e-commerce storefronts powered by Remix and Shopify platform.
- React Native Skia: High-performance React Native Graphics using Skia.
- Draggable: A lightweight, responsive, modern drag & drop library.
In recent years, Shopify hired many well-known developers from Google like Ilya Grigorik, Jason Miller (creator of Preact), Jake Archibald, and Surma. Ryan Florence and Michael Jackson of React Router fame ended up at Shopify thanks to the Remix acquisition.
Shopify is an attractive workplace for front end engineers due to its innovative and varied product range, which offers opportunities for diverse and challenging work. The company is pushing the boundaries of e-commerce web development which demands cutting-edge development to enhance user experiences, providing developers a platform to work on impactful and widely-used applications. Shopify's embrace of the latest technologies and commitment to continuous improvement in the field also contribute to a dynamic and growth-oriented work environment. This, combined with a supportive culture and opportunities for professional development, makes Shopify a rewarding place for front end engineers.
Rating: Projects (4/5), Talent (4/5), Design (4.5/5), Compensation (3.5/5), Outlook (4/5)
Figma
Figma has become a game-changer in the design software industry, offering a cloud-based interface design tool that enables collaborative work. Figma's apps (Figma and Figjam) are possibly some of the most complex applications to exist as it is extremely challenging to build a performant design tool in the browser that scales for large design files and also offers real-time collaboration.
While Figma's direct contributions to open source are limited, its impact on the design and development community is substantial. Figma has won over the design market and has begun to focus their efforts on improving the design-to-code workflow with the introduction of Dev Mode and Storybook integration, making the product easier to use for developers.
Figma’s focus on user interface and experience design aligns well with the core competencies of front end engineering. Furthermore, the company's innovative approach and commitment to cutting-edge technology provide a dynamic environment for professional growth and learning in the field of front end development. There's a good chance that engineers who work at Figma are passionate about design and creating great user experiences; it's always great to be surrounded by like-minded people.
Rating: Projects (4/5), Talent (4.5/5), Design (5/5), Compensation (4/5), Outlook (4/5)
Stripe
Stripe provides payment processing solutions for e-commerce, characterized by their user-friendly and secure interfaces. Their front end work mainly involves creating straightforward yet secure checkouts and payment SDKs, dashboards for businesses to manage their account, prebuilt UI elements for developers who want to create their own checkout flows, and developer platform, which is a world-class example of great developer documentation.
Stripe does not have too many contributions to open source but front end engineers at Stripe have been instrumental in advancing UI/UX in financial technology. Some of their projects include Markdoc, a powerful, flexible, Markdown-based authoring framework and Sorbet, a type checker for Ruby.
Stripe is a great company for front end engineers and designers mainly due to its reputation for building elegant, user-friendly products. The company is at the forefront of financial technology, offering developers the chance to work on innovative, high-impact projects that shape the way businesses handle online transactions. Stripe's emphasis on clean, efficient code and cutting-edge technology aligns with the interests of developers who are keen on pushing the boundaries of web development. Additionally, Stripe's collaborative work culture and focus on professional growth make it a great environment for a front end engineering career.
Rating: Projects (3.5/5), Talent (5/5), Design (5/5), Compensation (4.5/5), Outlook (4/5)
Vercel
Vercel is a cloud platform focused on enhancing the development and deployment experience for front end teams. Vercel's platform is designed to make building and deploying as straightforward as possible, emphasizing ease of use, universality, and accessibility. There's seamless integration with major JavaScript frameworks, like Next.js, Remix, Nuxt, etc so that deploying sites built using these frameworks becomes a breeze. On top of hosting, Vercel also provides logs, A/B testing, storage, analytics, performance tracking, and more.
It's particularly known for creating Next.js, an open source web framework based on React. Next.js is currently the most popular meta framework for building React applications and innovating at breakneck speed especially after members of the React core team left Meta to join Vercel. Besides Next.js, Vercel is also behind projects like SWR, Turborepo, Turbopack, and SWC.
The Vercel team can be said to be the Avengers of the web development ecosystem, a congregation of top front end engineering talents. Guillermo Rauch, CEO and founder of Vercel, is a well-known figure in the development community for his work on Next.js and Socket.io. Jared Palmer, a key figure in the JavaScript community joined Vercel after they acquired his startup Turborepo. Tobias Koppers, the creator of webpack, joined Vercel to work on the evolution of webpack, Turbopack. As mentioned above, some React core team members like Sebastian Markbåge, Andrew Clark, and Dominic Gannaway, joined Vercel to continue working on React and other projects. The list goes on.
Vercel has taken Meta's place of being the industry leader in pushing the boundaries of front end innovation. Besides front end hosting, Vercel is also investing in AI with the creation of the Vercel AI SDK and v0, a tool for generative UI design.
Rating: Projects (4.5/5), Talent (5/5), Design (4.5/5), Compensation (4.5/5), Outlook (4/5)
- Best Big Companies for a Fulfilling Front End CareerDiscover the best big tech companies for a great career as a Front End Engineer.标签作者Yangshun Tay11 分钟阅读Dec 11, 2023
When you're on the hunt for your next front end engineering role, it's not just about picking any company that'll have you. Companies differ in terms of domains, size, customers, etc. The importance of front end development to a company depends on the company's core offering. Naturally, a company that has a core product that is primarily used on the web will prioritize their front end engineering department, while for companies whose flagship products are mobile apps or hardware, front end development might take a backseat.
Whether it's working on cutting-edge technologies, being surrounded by inspiring colleagues, or contributing to projects you're passionate about, the right company can elevate your career from ordinary to extraordinary. Choosing the right company can make all the difference between leading a fulfilling career and hitting arbitrary career ceilings.
In this post, we have gathered the top tech companies for a fulfilling career as a Front End Engineer. Companies are selected based on the following criteria:
- Nature and variety of web products
- Complexity and quality of front end engineering
- Contributions to open source ecosystem
This post covers the list of the top big tech companies for front end engineers. For each company, we give a rating out of 5 on the following areas:
- Projects: Diversity, complexity and uniqueness of the products.
- Talent: Quality of talent.
- Design: Emphasis the company places on design.
- Compensation: How well compensated the employees are.
- Outlook: The company's outlook.
Meta (previously Facebook)
Let's get the obvious company out of the way. Meta (previously Facebook), is a major player in social networking, digital marketing, and has recently ventured into the realm of augmented and virtual reality. The complexity of their front end work is showcased in the Facebook and Instagram platforms, which are known for their visually rich interface and smooth user experience. Unbeknownst to most, the most complex (and possibly most important) web application at Meta is their Ads Manager application as it has to display and manage thousands of rows of ad campaigns and also allow advertisers to create ad creatives in various formats for different platforms. The ads manager and business suite surfaces are worked on by thousands of engineers across the company.
When the Facebook.com redesign was released in 2020, it was considered the gold standard for web applications as it popularized the concepts of SSR, lazy loading, prefetching on navigation, and data-driven dependencies. Today, most new applications at Meta are built using this JavaScript-centric tech stack.
If I were to name a company that has the most impact on the open source front end ecosystem, it has to be Meta. Meta revolutionized how UI was built with the invention of React and React Native, introduced new data fetching approaches with GraphQL, built Jest, a feature-rich test runner that displaced then-frontrunner Mocha, made building documentation websites easy with Docusaurus, and Yarn, a package manager that was a huge improvement over npm at the time of its release. Meta has open sourced technology in almost every aspect of front end development most of which achieved widespread adoption at one point in time, which speaks volumes about the standard of Meta's front end engineers and importance of front end development to the company. Because much of Meta's front end technologies are open source and widely-adopted, new developers who had prior experience with these technologies will have an easier time when onboarding.
Meta is continuing to lead innovation in the front end space with the development of React Server Components, Server actions, React forget, and cross-platform React components so that users can share components between web, mobile, and VR environments.
Notable figures in front end development from Meta includes Jordan Walke, the creator of React and Reason; Joe Savona, who is currently working on the React Forget compiler; Dan Abramov, Sebastian Markbåge, Lauren Tan, Andrew Clark, Dominic Gannaway, Brian Vaughn, Sophie Alpert, Rick Hanlon, who have worked / are still working on React, Christopher Chedeau of Prettier and CSS-in-JS fame; and Christoph Nakazawa, who worked on React Native, Jest, and Metro.
Meta's front end interview process is one that heavily favors Front End Engineers as it is focused on practical front end domain knowledge without excessive emphasis on algorithmic knowledge.
While Meta is a great place for Front End Engineers, it can be stressful working there. The company is known for its fast-paced and results-driven work environment that rewards high performers, which can contribute to tight deadlines and stress. Employees may also face public scrutiny due to the company's high-profile nature and history with privacy concerns and misinformation. The demanding nature of the work and high expectations, coupled with potential challenges to work-life balance, are factors individuals should consider. On the engineering side of things, Meta is stuck using Flow for writing type-safe JavaScript, which is almost no longer used outside of Meta. However, there are some similarities with TypeScript, so the learning curve should not be too huge.
Rating: Projects (4/5), Talent (5/5), Design (4/5), Compensation (4.5/5), Outlook (3/5)
Google
Google, a global technology leader, is best known for its search engine. However, the company's reach extends far into areas such as video streaming, cloud computing, AI, consumer hardware, and software solutions. Some of their products that showcase intricate front end development include YouTube, the world's top video streaming website; Google Maps, with its interactive maps and street views; Gmail, a widely-used email service featuring a sophisticated interface; and Google Docs, an online word processor offering real-time collaboration.
Google's commitment to the front end open source ecosystem is evident in projects like:
- Angular: One of the big three web application frameworks, popular among enterprise applications. The newly-released Angular 17 renews developers' confidence in the framework and that Google is still investing in it.
- Chromium: The browser that powers Google Chrome. Did you know that other major browsers like Microsoft Edge, Opera, and Arc are also powered by Chromium?
- Flutter: Google's approach of building cross-platform, natively compiled apps for mobile, web, and desktop from a single codebase. Dart is the primary language for developing Flutter apps.
- Dart: A programming language by Google that can be transpiled to JavaScript but can also be used to build server, desktop, and mobile applications. Within Google, Dart is primarily used for building ads products.
Google is home to many prominent figures in the front end community because they regularly create great guides and content for web development like web.dev and YouTube channels like Chrome for Developers. Paul Irish is known for his work on Chrome DevTools and other web development resources; Addy Osmani, Software Engineer on Google Chrome and author of numerous technical books; Minko Gechev, tech lead and manager for Angular.
Google's front end interview process has a good balance of algorithmic knowledge and domain knowledge. There are pure algorithmic rounds and front end coding questions will also require a good grasp of software design and good data structure choice.
Working at Google, while offering numerous benefits, comes with potential downsides. The large organizational structure of the company may pose challenges in communication and decision-making, and frequent reorganizations can create uncertainty for employees. Projects are often canceled and I have lost count of the number of instant messaging applications that were built, killed, and rebuilt. Despite these downsides, Google's cutting-edge projects, great salary, career growth opportunities, and focus on employee well-being continue to attract top talent.
Rating: Projects (4.5/5), Talent (4.5/5), Design (4/5), Compensation (4/5), Outlook (4/5)
Microsoft
Microsoft, a household name in software, offers a range of products from operating systems to cloud services and business solutions. Besides Bing and Edge, the Microsoft 365 suite brings traditional workplace offerings like Word, Excel, and PowerPoint to the web which are complex web applications that require a high level of front end to create.
For a long time, Microsoft was focused on desktop applications but in recent years, Microsoft has increased investment in developing the web ecosystem and have established themselves as one of the most important companies to the future of front end development with the following projects:
- TypeScript: A popular type-safe superset of JavaScript. TypeScript mastery is considered a core skill these days.
- Visual Studio Code: A free, highly customizable cross-platform code editor. It is one of the most popular IDE for web development and comes with out-of-the-box TypeScript integration.
- Playwright: A framework for Web Testing and Automation. It allows testing Chromium, Firefox and WebKit with a single API.
- npm: The de facto package manager for the JavaScript ecosystem is currently owned by GitHub, which is owned by Microsoft.
Moreover, Microsoft is heavily investing in AI. They're the largest investors in OpenAI and OpenAI utilizes Azure as its primary cloud provider to train and run its large-scale AI models. Microsoft has been integrating OpenAI's technologies into its products, like GitHub Copilot, Microsoft 365 products and Bing search engine, among others. The partnership with OpenAI gives it a competitive edge in the AI race, especially against other tech giants like Google and Amazon. By closely working with and funding one of the most advanced AI research labs, Microsoft positions itself at the forefront of AI innovation.
In a company as large as Microsoft, bureaucratic processes are often in place. This can mean slower decision making, more layers of management, and a need to navigate through a complex corporate structure to get things done. For some, this can feel restrictive and stifle creativity.
Rating: Projects (4/5), Talent (4/5), Design (3.5/5), Compensation (3.5/5), Outlook (4/5)
ByteDance/TikTok
The only Chinese technology company on the list, ByteDance is most famous for its social media app TikTok, which is a highly addictive platform that prioritizes mobile-first short-form videos. While TikTok content is primarily consumed on mobile platforms, ByteDance has a large suite of enterprise offerings for the web, like Lark and BytePlus.
ByteDance is actually pretty active in the open source community, though their projects are less known compared to those from Western big tech companies. One of ByteDance's most famous open source projects is rspack, a Rust port of webpack. Other notable projects include IconPark, a high quality, highly customizable icon set and Xigua player, a modern video player for the web.
ByteDance is home to many talented individuals like Zack Jackson (Creator of module federation) and Dexter Yang (Author of Spellbook of Modern Webdev). Anthony Fu, one of the most prolific open source leaders in recent years, used to work at ByteDance.
In terms of the hiring process, ByteDance's front end interview process is one of the toughest to crack due to their wide pool of questions that tests the candidates' breadth and depth in the domain. Candidates can expect to answer tough trivia questions about their favorite JavaScript framework and the front end domain. All of algorithms, JavaScript utilities, UI coding, and system design questions can also be asked.
ByteDance is very similar to Meta in many ways and I often tell people they're the Meta of China – their focus on social products, performance-driven culture that disproportionately rewards high performers, mindset which encourages moving fast and taking ownership, open sourcing innovative technologies, etc.
However, being a Chinese company, might have a corporate culture that differs significantly from Western norms. Engineers from different cultural backgrounds might find it challenging to adapt to these differences in work style, communication, and management practices. TikTok is constantly under scrutiny in the United States due to national security concerns related to its Chinese ownership and there's no knowing if or when the app will be banned in the US, which will hurt the business greatly.
Rating: Projects (4/5), Talent (4/5), Design (4/5), Compensation (4/5), Outlook (4/5)
Netflix
Netflix, the leading entertainment streaming service, is renowned for its personalized user interfaces and seamless streaming experience across devices. Netflix is one of the best places for front end engineers not because of Netflix.com; it is their suite of complex web-based studio technologies that makes working there exciting.
Netflix's primary contribution to the open source community is Falcor, a JavaScript library for efficient data fetching. Notable front end developers from Netflix include Jafar Husain, known for his work on reactive programming and JavaScript frameworks. Jafar has also worked at Meta on GraphQL.
Netflix's company culture, often compared to a professional sports team, is centered around performance, collaboration, and a high degree of freedom and responsibility. This culture is detailed in their "Netflix Culture: Seeking Excellence" document and is widely recognized in the business world for its unique approach. Netflix is known for paying top of the market salaries for Software Engineers and mostly in base salary. Employees at Netflix have the flexibility to decide how much of their compensation is in cash or stock options. On the other hand, the dream team culture can lead to workplace competitiveness and increased stress as employees may feel they must constantly prove their worth to remain with the company.
Rating: Projects (3.5/5), Talent (4/5), Design (4/5), Compensation (5/5), Outlook (4/5)
- How to Handle Large Datasets in Frontend ApplicationsExplore powerful techniques for handling large datasets in React application, including pagination, infinite scroll, and windowing作者Nitesh Seram8 分钟阅读Jun 17, 2023

Originally posted on https://niteshseram.in.
Handling large datasets is a common challenge in frontend applications. As the amount of data grows, it can lead to performance issues, such as slow loading times and unresponsive user interfaces. In this blog, we will explore different methods to effectively handle large datasets in React applications. We will discuss techniques like pagination, infinite scroll, and windowing. By implementing these strategies, we can ensure that our frontend application remains fast and efficient, even when dealing with large amounts of data.
Understanding the Performance Problems with Large Datasets
Before we dive into the different methods of handling large datasets, let's first understand the performance problems associated with them. When an application tries to render or manipulate a large amount of data in a list, it can cause significant performance issues. This is because rendering a large number of DOM elements can be time-consuming and resource-intensive.
To illustrate this, let's create a sample React application that renders a list of 10,000 records. By examining the performance of this sample application, we can better understand the challenges of handling large datasets.
To get started, create a new React application using the create-react-app command in your terminal:
npx create-react-app large-dataset-appOnce installed, open the
App.jsfile in thesrcdirectory and replace the existing code with the following:const data = new Array(10000).fill().map((_, index) => ({id: index,name: `Temp Name ${index}`,email: `Temp Email ${index}`,}));function App() {return (<div>{data.map((item) => (<div key={item.id}><h3>{item.name}</h3><p>{item.email}</p></div>))}</div>);}export default App;In this code, we generate an array of 10,000 objects, where each object represents a record in our dataset. We then use the
mapfunction to render each item in the array as a<div>element. Each<div>contains the name and email of the corresponding item.Now, start the React application by running the following command in your terminal:
npm startOpen your browser and navigate to http://localhost:3000. You will notice that it takes some time for the page to load, and scrolling through the list may also be slow. This is because rendering 10,000 DOM elements at once can cause performance issues.
Pagination: Rendering Data in Pages
One way to handle large datasets is by implementing pagination. Pagination allows you to render data in pages, rather than all at once. By controlling the amount of data shown on the page, you can reduce the stress on the DOM tree and improve performance.
There are several UI libraries in React that provide pagination components, such as react-paginate. However, if you prefer not to use a UI library, you can implement pagination manually.
To illustrate this, let's modify our sample application to include pagination. First, install the
react-paginatelibrary by running the following command:npm i react-paginateNext, open the
App.jsfile and replace the existing code with the following:import { useState } from 'react';import ReactPaginate from 'react-paginate';const data = new Array(10000).fill().map((_, index) => ({id: index,name: `Temp Name ${index}`,email: `Temp Email ${index}`,}));function App() {const [currentPage, setCurrentPage] = useState(0);const itemsPerPage = 10;const pageCount = Math.ceil(data.length / itemsPerPage);const offset = currentPage * itemsPerPage;const currentData = data.slice(offset, offset + itemsPerPage);const handlePageChange = (selectedPage) => {setCurrentPage(selectedPage.selected);};return (<div>{currentData.map((item) => (<div key={item.id}><h3>{item.name}</h3><p>{item.email}</p></div>))}<ReactPaginatepreviousLabel={'Previous'}nextLabel={'Next'}breakLabel={'...'}pageCount={pageCount}marginPagesDisplayed={2}pageRangeDisplayed={5}onPageChange={handlePageChange}containerClassName={'pagination'}activeClassName={'active'}/></div>);}export default App;In this code, we use the
useStatehook to manage the current page state. We calculate the number of pages based on the total number of records and the desired number of items per page. We then use theslicemethod to get the current data to be displayed on the page.The
ReactPaginatecomponent renders a pagination UI with previous and next buttons, as well as page numbers. TheonPageChangeevent handler updates the current page state when the user clicks on a page number.Now, when you run the application, you will see that the data is rendered in pages, with only a subset of records shown at a time. This helps to improve the performance of the application by reducing the number of rendered DOM elements.
Infinite Scroll: Loading Data on Demand
Another approach to handling large datasets is through the infinite scroll. Infinite scroll involves loading data incrementally as the user scrolls down the page. Initially, only a subset of data is loaded, and more data is appended as the user reaches the end of the list.
There are various ways to implement infinite scroll in React, and one popular library for this purpose is react-infinite-scroll-component. To use this library, install it by running the following command:
npm i react-infinite-scroll-componentNext, open the
App.jsfile and replace the existing code with the following:import { useState } from 'react';import InfiniteScroll from 'react-infinite-scroll-component';const data = new Array(10000).fill().map((_, index) => ({id: index,name: `Temp Name ${index}`,email: `Temp Email ${index}`,}));function App() {const [items, setItems] = useState(data.slice(0, 20));const fetchMoreData = () => {setTimeout(() => {setItems((prevItems) => [...prevItems,...data.slice(prevItems.length, prevItems.length + 20),]);}, 1500);};return (<InfiniteScrolldataLength={items.length}next={fetchMoreData}hasMore={items.length < data.length}loader={<h4>Loading...</h4>}>{items.map((item) => (<div key={item.id}><h3>{item.name}</h3><p>{item.email}</p></div>))}</InfiniteScroll>);}export default App;In this code, we use the
useStatehook to manage the item's state. Initially, we load the first 20 items from our dataset. ThefetchMoreDatafunction is called when the user scrolls to the end of the list. It appends the next 20 items to the existing items using the spread operator.The
InfiniteScrollcomponent fromreact-infinite-scroll-componentwraps the list of items. It takes the current length of the items as thedataLengthprop, thefetchMoreDatafunction as thenextprop, and a boolean value to indicate whether there is more data to be loaded.When you run the application, you will notice that the data is loaded incrementally as you scroll down the page. This approach improves the user experience by providing a seamless scrolling experience while efficiently loading and rendering the data.
Windowing: Efficiently Rendering Large Lists
Another technique for handling large datasets is windowing. Windowing involves rendering only the visible portion of a list to the screen, rather than rendering all the items at once. This helps to reduce the number of DOM elements and improves performance.
One popular library for windowing in React is react-window. It provides a set of components for efficiently rendering large lists. To use
react-window, install it by running the following command:npm i react-windowNext, open the
App.jsfile and replace the existing code with the following:import { FixedSizeList as List } from 'react-window';const data = new Array(10000).fill().map((_, index) => ({id: index,name: `Temp Name ${index}`,email: `Temp Email ${index}`,}));const Row = ({ index, style }) => (<div style={style}><h3>{data[index].name}</h3><p>{data[index].email}</p></div>);function App() {return (<List height={400} itemCount={data.length} itemSize={80} width={300}>{Row}</List>);}export default App;In this code, we define a
Rowcomponent that renders each item in the list. TheFixedSizeListcomponent fromreact-windowis used to render the list. It takes the height and width of the list, the total number of items, and the size of each item as props.When you run the application, you will see that only a portion of the list is rendered at a time, based on the height of the list. As you scroll through the list, the windowing technique efficiently renders only the visible items, resulting in improved performance.
You might be wondering what’s the difference between what the
react-infinite-scroll-componentandreact-windowdo. The difference is that inreact-infinite-scroll-componentload data incrementally as the user scrolls. It dynamically adds more items to the list as needed, creating an illusion of infinite content.react-window, on the other hand, renders only a subset of the list items that are currently visible in the viewport, reusing DOM elements as the user scrolls.Due to its simpler API and automatic handling of scrolling,
react-infinite-scroll-componentmay be easier to set up and use for basic infinite scrolling needs. However, it may not perform as well with extremely large data sets or complex list items since it keeps all rendered elements in the DOM. In contrast,react-window's windowing technique ensures that only the visible items are rendered, resulting in improved performance and reduced memory footprint for large lists.Conclusion
Handling large datasets in frontend applications can be challenging, but there are various techniques available to address this issue. By implementing pagination, infinite scroll, windowing, or using specialized libraries like
react-virtualizedorreact-window, you can effectively manage large amounts of data while maintaining optimal performance.In this blog, we explored different methods of handling large datasets in React applications. We discussed pagination as a way to render data in pages, infinite scroll for loading data on demand, windowing for efficiently rendering large lists, and libraries like
react-windowthat provide additional features for handling large datasets.Remember to consider the specific requirements and constraints of your application when choosing a method for handling large datasets. Each approach has its advantages and trade-offs, so it's important to evaluate which technique best suits your use case.
By implementing these strategies, you can ensure that your frontend applications remain fast, responsive, and user-friendly, even when dealing with large amounts of data.