JavaScript Interview Questions

190+ JavaScript interview questions and answers in quiz-style format, answered by ex-FAANG interviewers
Solved by ex-interviewers
Covers critical topics

Tired of scrolling through low-quality JavaScript interview questions? You’ve found the right place!

Our JavaScript interview questions are crafted by experienced ex-FAANG senior / staff engineers, not random unverified sources or AI.

With over 190+ questions covering everything from core JavaScript concepts to advanced JavaScript features (async / await, promises, etc.), you’ll be fully prepared.

Each quiz question comes with:

  • Concise answers (TL;DR): Clear and to-the-point solutions to help you respond confidently during interviews.
  • Comprehensive explanations: In-depth insights to ensure you fully understand the concepts and can elaborate when required. Don’t waste time elsewhere—start practicing with the best!
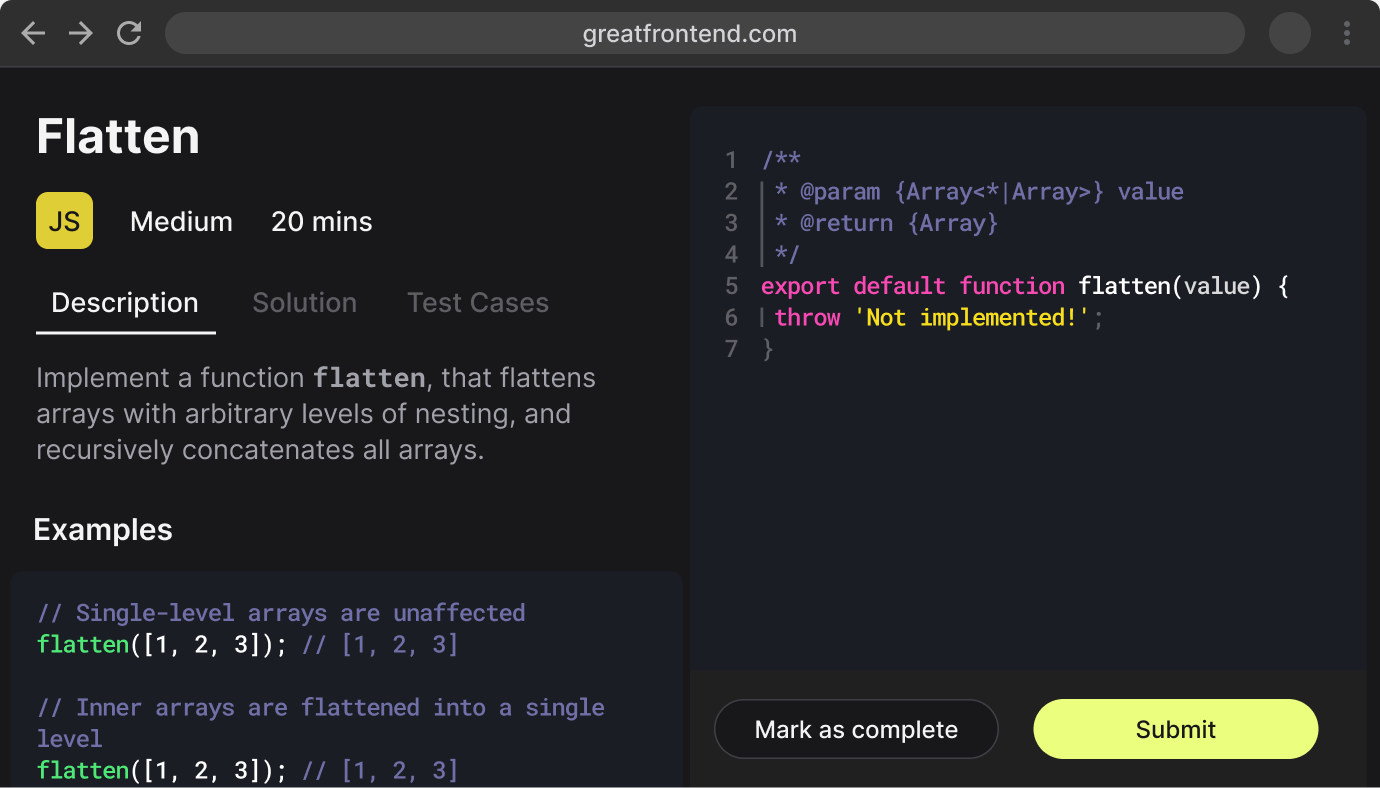
If you're looking for JavaScript coding questions -We've got you covered as well, with:
Javascript coding
  • 280+ JavaScript coding questions
  • In-browser coding workspace similar to real interview environment
  • Reference solutions from Big Tech Ex-interviewers
  • Automated test cases
  • Instantly preview your code for UI questions
Get Started
Join 50,000+ engineers

What is the difference between `==` and `===` in JavaScript?

Topics
JavaScript

TL;DR

== is the abstract equality operator while === is the strict equality operator. The == operator will compare for equality after doing any necessary type conversions. The === operator will not do type conversion, so if two values are not the same type === will simply return false.

Operator=====
Name(Loose) Equality operatorStrict equality operator
Type coercionYesNo
Compares value and typeNoYes

Equality operator (==)

The == operator checks for equality between two values but performs type coercion if the values are of different types. This means that JavaScript will attempt to convert the values to a common type before making the comparison.

console.log(42 == '42'); // true
console.log(0 == false); // true
console.log(null == undefined); // true
console.log([] == false); // true
console.log('' == false); // true

In these examples, JavaScript converts the operands to the same type before making the comparison. For example, 42 == '42' is true because the string '42' is converted to the number 42 before comparison.

However, when using ==, unintuitive results can happen:

console.log(1 == [1]); // true
console.log(0 == ''); // true
console.log(0 == '0'); // true
console.log('' == '0'); // false

As a general rule of thumb, never use the == operator, except for convenience when comparing against null or undefined, where a == null will return true if a is null or undefined.

var a = null;
console.log(a == null); // true
console.log(a == undefined); // true

Strict equality operator (===)

The === operator, also known as the strict equality operator, checks for equality between two values without performing type coercion. This means that both the value and the type must be the same for the comparison to return true.

console.log(42 === '42'); // false
console.log(0 === false); // false
console.log(null === undefined); // false
console.log([] === false); // false
console.log('' === false); // false

For these comparisons, no type conversion is performed, so the statement returns false if the types are different. For instance, 42 === '42' is false because the types (number and string) are different.

// Comparison with type coercion (==)
console.log(42 == '42'); // true
console.log(0 == false); // true
console.log(null == undefined); // true
// Strict comparison without type coercion (===)
console.log(42 === '42'); // false
console.log(0 === false); // false
console.log(null === undefined); // false

Bonus: Object.is()

There's one final value-comparison operation within JavaScript, that is the Object.is() static method. The only difference between Object.is() and === is how they treat of signed zeros and NaN values. The === operator (and the == operator) treats the number values -0 and +0 as equal, but treats NaN as not equal to each other.

Conclusion

  • Use == when you want to compare values with type coercion (and understand the implications of it). In practice, the only reasonable use case for the equality operator is to check for both null and undefined in a single comparison for convenience.
  • Use === when you want to ensure both the value and the type are the same, which is the safer and more predictable choice in most cases.

Notes

  • Using === (strict equality) is generally recommended to avoid the pitfalls of type coercion, which can lead to unexpected behavior and bugs in your code. It makes the intent of your comparisons clearer and ensures that you are comparing both the value and the type.
  • ESLint's eqeqeq rule enforces the use of strict equality operators === and !== and even provides an option to always enforce strict equality except when comparing with the null literal.

Further reading

What's the difference between a JavaScript variable that is: `null`, `undefined` or undeclared?

How would you go about checking for any of these states?
Topics
JavaScript

TL;DR

TraitnullundefinedUndeclared
MeaningExplicitly set by the developer to indicate that a variable has no valueVariable has been declared but not assigned a valueVariable has not been declared at all
Type (via typeof operator)'object''undefined''undefined'
Equality Comparisonnull == undefined is trueundefined == null is trueThrows a ReferenceError

Undeclared

Undeclared variables are created when you assign a value to an identifier that is not previously created using var, let or const. Undeclared variables will be defined globally, outside of the current scope. In strict mode, a ReferenceError will be thrown when you try to assign to an undeclared variable. Undeclared variables are bad in the same way that global variables are bad. Avoid them at all cost! To check for them, wrap its usage in a try/catch block.

function foo() {
x = 1; // Throws a ReferenceError in strict mode
}
foo();
console.log(x); // 1 (if not in strict mode)

Using the typeof operator on undeclared variables will give 'undefined'.

console.log(typeof y === 'undefined'); // true

undefined

A variable that is undefined is a variable that has been declared, but not assigned a value. It is of type undefined. If a function does not return a value, and its result is assigned to a variable, that variable will also have the value undefined. To check for it, compare using the strict equality (===) operator or typeof which will give the 'undefined' string. Note that you should not be using the loose equality operator (==) to check, as it will also return true if the value is null.

let foo;
console.log(foo); // undefined
console.log(foo === undefined); // true
console.log(typeof foo === 'undefined'); // true
console.log(foo == null); // true. Wrong, don't use this to check if a value is undefined!
function bar() {} // Returns undefined if there is nothing returned.
let baz = bar();
console.log(baz); // undefined

null

A variable that is null will have been explicitly assigned to the null value. It represents no value and is different from undefined in the sense that it has been explicitly assigned. To check for null, simply compare using the strict equality operator. Note that like the above, you should not be using the loose equality operator (==) to check, as it will also return true if the value is undefined.

const foo = null;
console.log(foo === null); // true
console.log(typeof foo === 'object'); // true
console.log(foo == undefined); // true. Wrong, don't use this to check if a value is null!

Notes

  • As a good habit, never leave your variables undeclared or unassigned. Explicitly assign null to them after declaring if you don't intend to use them yet.
  • Always explicitly declare variables before using them to prevent errors.
  • Using some static analysis tooling in your workflow (e.g. ESLint, TypeScript Compiler), will enable checks that you are not referencing undeclared variables.

Practice

Practice implementing type utilities that check for null and undefined on GreatFrontEnd.

Further Reading

What's the difference between `.call` and `.apply` in JavaScript?

Topics
JavaScript

TL;DR

.call and .apply are both used to invoke functions with a specific this context and arguments. The primary difference lies in how they accept arguments:

  • .call(thisArg, arg1, arg2, ...): Takes arguments individually.
  • .apply(thisArg, [argsArray]): Takes arguments as an array.

Assuming we have a function add, the function can be invoked using .call and .apply in the following manner:

function add(a, b) {
return a + b;
}
console.log(add.call(null, 1, 2)); // 3
console.log(add.apply(null, [1, 2])); // 3

Call vs Apply

Both .call and .apply are used to invoke functions and the first parameter will be used as the value of this within the function. However, .call takes in comma-separated arguments as the next arguments while .apply takes in an array of arguments as the next argument.

An easy way to remember this is C for call and comma-separated and A for apply and an array of arguments.

function add(a, b) {
return a + b;
}
console.log(add.call(null, 1, 2)); // 3
console.log(add.apply(null, [1, 2])); // 3

With ES6 syntax, we can invoke call using an array along with the spread operator for the arguments.

function add(a, b) {
return a + b;
}
console.log(add.call(null, ...[1, 2])); // 3

Use cases

Context management

.call and .apply can set the this context explicitly when invoking methods on different objects.

const person = {
name: 'John',
greet() {
console.log(`Hello, my name is ${this.name}`);
},
};
const anotherPerson = { name: 'Alice' };
person.greet.call(anotherPerson); // Hello, my name is Alice
person.greet.apply(anotherPerson); // Hello, my name is Alice

Function borrowing

Both .call and .apply allow borrowing methods from one object and using them in the context of another. This is useful when passing functions as arguments (callbacks) and the original this context is lost. .call and .apply allow the function to be invoked with the intended this value.

function greet() {
console.log(`Hello, my name is ${this.name}`);
}
const person1 = { name: 'John' };
const person2 = { name: 'Alice' };
greet.call(person1); // Hello, my name is John
greet.apply(person2); // Hello, my name is Alice

Alternative syntax to call methods on objects

.apply can be used with object methods by passing the object as the first argument followed by the usual parameters.

const arr1 = [1, 2, 3];
const arr2 = [4, 5, 6];
Array.prototype.push.apply(arr1, arr2); // Same as arr1.push(4, 5, 6)
console.log(arr1); // [1, 2, 3, 4, 5, 6]

Deconstructing the above:

  1. The first object, arr1 will be used as the this value.
  2. .push() is called on arr1 using arr2 as arguments as an array because it's using .apply().
  3. Array.prototype.push.apply(arr1, arr2) is equivalent to arr1.push(...arr2).

It may not be obvious, but Array.prototype.push.apply(arr1, arr2) causes modifications to arr1. It's clearer to call methods using the OOP-centric way instead where possible.

Follow-Up Questions

  • How do .call and .apply differ from Function.prototype.bind?

Practice

Practice implementing your own Function.prototype.call method and Function.prototype.apply method on GreatFrontEnd.

Further Reading

What is the difference between `mouseenter` and `mouseover` event in JavaScript and browsers?

Topics
Web APIsHTMLJavaScript

TL;DR

The main difference lies in the bubbling behavior of mouseenter and mouseover events. mouseenter does not bubble while mouseover bubbles.

mouseenter events do not bubble. The mouseenter event is triggered only when the mouse pointer enters the element itself, not its descendants. If a parent element has child elements, and the mouse pointer enters child elements, the mouseenter event will not be triggered on the parent element again, it's only triggered once upon entry of parent element without regard for its contents. If both parent and child have mouseenter listeners attached and the mouse pointer moves from the parent element to the child element, mouseenter will only fire for the child.

mouseover events bubble up the DOM tree. The mouseover event is triggered when the mouse pointer enters the element or one of its descendants. If a parent element has child elements, and the mouse pointer enters child elements, the mouseover event will be triggered on the parent element again as well. If the parent element has multiple child elements, this can result in multiple event callbacks fired. If there are child elements, and the mouse pointer moves from the parent element to the child element, mouseover will fire for both the parent and the child.

Propertymouseentermouseover
BubblingNoYes
TriggerOnly when entering itselfWhen entering itself and when entering descendants

mouseenter event:

  • Does not bubble: The mouseenter event does not bubble. It is only triggered when the mouse pointer enters the element to which the event listener is attached, not when it enters any child elements.
  • Triggered once: The mouseenter event is triggered only once when the mouse pointer enters the element, making it more predictable and easier to manage in certain scenarios.

A use case for mouseenter is when you want to detect the mouse entering an element without worrying about child elements triggering the event multiple times.

mouseover Event:

  • Bubbles up the DOM: The mouseover event bubbles up through the DOM. This means that if you have an event listener on a parent element, it will also trigger when the mouse pointer moves over any child elements.
  • Triggered multiple times: The mouseover event is triggered every time the mouse pointer moves over an element or any of its child elements. This can lead to multiple triggers if you have nested elements.

A use case for mouseover is when you want to detect when the mouse enters an element or any of its children and are okay with the events triggering multiple times.

Example

Here's an example demonstrating the difference between mouseover and mouseenter events:

<!doctype html>
<html lang="en">
<head>
<meta charset="UTF-8" />
<meta name="viewport" content="width=device-width, initial-scale=1.0" />
<title>Mouse Events Example</title>
<style>
.parent {
width: 200px;
height: 200px;
background-color: lightblue;
padding: 20px;
}
.child {
width: 100px;
height: 100px;
background-color: lightcoral;
}
</style>
</head>
<body>
<div class="parent">
Parent Element
<div class="child">Child Element</div>
</div>
<script>
const parent = document.querySelector('.parent');
const child = document.querySelector('.child');
// Mouseover event on parent.
parent.addEventListener('mouseover', () => {
console.log('Mouseover on parent');
});
// Mouseenter event on parent.
parent.addEventListener('mouseenter', () => {
console.log('Mouseenter on parent');
});
// Mouseover event on child.
child.addEventListener('mouseover', () => {
console.log('Mouseover on child');
});
// Mouseenter event on child.
child.addEventListener('mouseenter', () => {
console.log('Mouseenter on child');
});
</script>
</body>
</html>

Expected behavior

  • When the mouse enters the parent element:
    • The mouseover event on the parent will trigger.
    • The mouseenter event on the parent will trigger.
  • When the mouse enters the child element:
    • The mouseover event on the parent will trigger again because mouseover bubbles up from the child.
    • The mouseover event on the child will trigger.
    • The mouseenter event on the child will trigger.
    • The mouseenter event on the parent will not trigger again because mouseenter does not bubble.

Further reading

What are the various data types in JavaScript?

Topics
JavaScript

TL;DR

In JavaScript, data types can be categorized into primitive and non-primitive types:

Primitive data types

  • Number: Represents both integers and floating-point numbers.
  • String: Represents sequences of characters.
  • Boolean: Represents true or false values.
  • Undefined: A variable that has been declared but not assigned a value.
  • Null: Represents the intentional absence of any object value.
  • Symbol: A unique and immutable value used as object property keys. Read more in our deep dive on Symbols
  • BigInt: Represents integers with arbitrary precision.

Non-primitive (Reference) data types

  • Object: Used to store collections of data.
  • Array: An ordered collection of data.
  • Function: A callable object.
  • Date: Represents dates and times.
  • RegExp: Represents regular expressions.
  • Map: A collection of keyed data items.
  • Set: A collection of unique values.

The primitive types store a single value, while non-primitive types can store collections of data or complex entities.


Data types in JavaScript

JavaScript, like many programming languages, has a variety of data types to represent different kinds of data. The main data types in JavaScript can be divided into two categories: primitive and non-primitive (reference) types.

Primitive data types

  1. Number: Represents both integer and floating-point numbers. JavaScript only has one type of number.
let age = 25;
let price = 99.99;
console.log(price); // 99.99
  1. String: Represents sequences of characters. Strings can be enclosed in single quotes, double quotes, or backticks (for template literals).
let myName = 'John Doe';
let greeting = 'Hello, world!';
let message = `Welcome, ${myName}!`;
console.log(message); // "Welcome, John Doe!"
  1. Boolean: Represents logical entities and can have two values: true or false.
let isActive = true;
let isOver18 = false;
console.log(isOver18); // false
  1. Undefined: A variable that has been declared but not assigned a value is of type undefined.
let user;
console.log(user); // undefined
  1. Null: Represents the intentional absence of any object value. It is a primitive value and is treated as a falsy value.
let user = null;
console.log(user); // null
if (!user) {
console.log('user is a falsy value');
}
  1. Symbol: A unique and immutable primitive value, typically used as the key of an object property.
let sym1 = Symbol();
let sym2 = Symbol('description');
console.log(sym1); // Symbol()
console.log(sym2); // Symbol(description)
  1. BigInt: Used for representing integers with arbitrary precision, useful for working with very large numbers.
let bigNumber = BigInt(9007199254740991);
let anotherBigNumber = 1234567890123456789012345678901234567890n;
console.log(bigNumber); // 9007199254740991n
console.log(anotherBigNumber); // 1234567890123456789012345678901234567890n

Non-primitive (reference) data types

  1. Object: It is used to store collections of data and more complex entities. Objects are created using curly braces {}.
let person = {
name: 'Alice',
age: 30,
};
console.log(person); // {name: "Alice", age: 30}
  1. Array: A special type of object used for storing ordered collections of data. Arrays are created using square brackets [].
let numbers = [1, 2, 3, 4, 5];
console.log(numbers);
  1. Function: Functions in JavaScript are objects. They can be defined using function declarations or expressions.
function greet() {
console.log('Hello!');
}
let add = function (a, b) {
return a + b;
};
greet(); // "Hello!"
console.log(add(2, 3)); // 5
  1. Date: Represents dates and times. The Date object is used to work with dates.
let today = new Date().toLocaleTimeString();
console.log(today);
  1. RegExp: Represents regular expressions, which are patterns used to match character combinations in strings.
let pattern = /abc/;
let str = '123abc456';
console.log(pattern.test(str)); // true
  1. Map: A collection of keyed data items, similar to an object but allows keys of any type.
let map = new Map();
map.set('key1', 'value1');
console.log(map);
  1. Set: A collection of unique values.
let set = new Set();
set.add(1);
set.add(2);
console.log(set); // { 1, 2 }

Determining data types

JavaScript is a dynamically-typed language, which means variables can hold values of different data types over time. The typeof operator can be used to determine the data type of a value or variable.

console.log(typeof 42); // "number"
console.log(typeof 'hello'); // "string"
console.log(typeof true); // "boolean"
console.log(typeof undefined); // "undefined"
console.log(typeof null); // "object" (this is a historical bug in JavaScript)
console.log(typeof Symbol()); // "symbol"
console.log(typeof BigInt(123)); // "bigint"
console.log(typeof {}); // "object"
console.log(typeof []); // "object"
console.log(typeof function () {}); // "function"

Pitfalls

Type coercion

JavaScript often performs type coercion, converting values from one type to another, which can lead to unexpected results.

let result = '5' + 2;
console.log(result, typeof result); // "52 string" (string concatenation)
let difference = '5' - 2;
console.log(difference, typeof difference); // 3 "number" (numeric subtraction)

In the first example, since strings can be concatenated with the + operator, the number is converted into a string and the two strings are concatenated together. In the second example, strings cannot work with the minus operator (-), but two numbers can be minused, so the string is first converted into a number and the result is the difference.

Further reading

What is the difference between a `Map` object and a plain object in JavaScript?

Topics
JavaScript

TL;DR

Both Map objects and plain objects in JavaScript can store key-value pairs, but they have several key differences:

FeatureMapPlain object
Key typeAny data typeString (or Symbol)
Key orderMaintainedNot guaranteed
Size propertyYes (size)None
IterationforEach, keys(), values(), entries()for...in, Object.keys(), etc.
InheritanceNoYes
PerformanceGenerally better for larger datasets and frequent additions/deletionsFaster for small datasets and simple operations
SerializableNoYes

Map vs plain JavaScript objects

In JavaScript, Map objects and a plain object (also known as a "POJO" or "plain old JavaScript object") are both used to store key-value pairs, but they have different characteristics, use cases, and behaviors.

Plain JavaScript objects (POJO)

A plain object is a basic JavaScript object created using the {} syntax. It is a collection of key-value pairs, where each key is a string (or a symbol, in modern JavaScript) and each value can be any type of value, including strings, numbers, booleans, arrays, objects, and more.

const person = { name: 'John', age: 30, occupation: 'Developer' };
console.log(person);

Map objects

A Map object, introduced in ECMAScript 2015 (ES6), is a more advanced data structure that allows you to store key-value pairs with additional features. A Map is an iterable, which means you can use it with for...of loops, and it provides methods for common operations like get, set, has, and delete.

const person = new Map([
['name', 'John'],
['age', 30],
['occupation', 'Developer'],
]);
console.log(person);

Key differences

Here are the main differences between a Map object and a plain object:

  1. Key types: In a plain object, keys are always strings (or symbols). In a Map, keys can be any type of value, including objects, arrays, and even other Maps.
  2. Key ordering: In a plain object, the order of keys is not guaranteed. In a Map, the order of keys is preserved, and you can iterate over them in the order they were inserted.
  3. Iteration: A Map is iterable, which means you can use for...of loops to iterate over its key-value pairs. A plain object is not iterable by default, but you can use Object.keys() or Object.entries() to iterate over its properties.
  4. Performance: Map objects are generally faster and more efficient than plain objects, especially when dealing with large datasets.
  5. Methods: A Map object provides additional methods, such as get, set, has, and delete, which make it easier to work with key-value pairs.
  6. Serialization: When serializing a Map object to JSON, it will be converted to an object but the existing Map properties might be lost in the conversion. A plain object, on the other hand, is serialized to a JSON object with the same structure.

When to use which

Use a plain object (POJO) when:

  • You need a simple, lightweight object with string keys.
  • You're working with a small dataset.
  • You need to serialize the object to JSON (e.g. to send over the network).

Use a Map object when:

  • You need to store key-value pairs with non-string keys (e.g., objects, arrays).
  • You need to preserve the order of key-value pairs.
  • You need to iterate over the key-value pairs in a specific order.
  • You're working with a large dataset and need better performance.

In summary, while both plain objects and Map objects can be used to store key-value pairs, Map objects offer more advanced features, better performance, and additional methods, making them a better choice for more complex use cases.

Notes

Map objects cannot be serialized to be sent in HTTP requests, but libraries like superjson allowing them to be serialized and deserialized.

Further reading

What are proxies in JavaScript used for?

Topics
JavaScript

TL;DR

In JavaScript, a proxy is an object that acts as an intermediary between an object and the code. Proxies are used to intercept and customize the fundamental operations of JavaScript objects, such as property access, assignment, function invocation, and more.

Here's a basic example of using a Proxy to log every property access:

const myObject = {
name: 'John',
age: 42,
};
const handler = {
get: function (target, prop, receiver) {
console.log(`Someone accessed property "${prop}"`);
return target[prop];
},
};
const proxiedObject = new Proxy(myObject, handler);
console.log(proxiedObject.name);
// Someone accessed property "name"
// 'John'
console.log(proxiedObject.age);
// Someone accessed property "age"
// 42

Use cases include:

  • Property access interception: Intercept and customize property access on an object.
    • Property assignment validation: Validate property values before they are set on the target object.
    • Logging and debugging: Create wrappers for logging and debugging interactions with an object
    • Creating reactive systems: Trigger updates in other parts of your application when object properties change (data binding).
    • Data transformation: Transforming data being set or retrieved from an object.
    • Mocking and stubbing in tests: Create mock or stub objects for testing purposes, allowing you to isolate dependencies and focus on the unit under test
  • Function invocation interception: Used to cache and return the result of frequently accessed methods if they involve network calls or computationally intensive logic, improving performance
  • Dynamic property creation: Useful for defining properties on-the-fly with default values and avoid storing redundant data in objects.

JavaScript proxies

In JavaScript, a proxy is an object that allows you to customize the behavior of another object, often referred to as the target object. Proxies can intercept and redefine various operations for the target object, such as property access, assignment, enumeration, function invocation, and more. This makes proxies a powerful tool for a variety of use cases, including but not limited to validation, logging, performance monitoring, and implementing advanced data structures.

Here are some common use cases and examples of how proxies can be used in JavaScript:

Property access interception

Proxies can be used to intercept and customize property access on an object.

const target = {
message: 'Hello, world!',
};
const handler = {
get: function (target, property) {
if (property in target) {
return target[property];
}
return `Property ${property} does not exist.`;
},
};
const proxy = new Proxy(target, handler);
console.log(proxy.message); // Hello, world!
console.log(proxy.nonExistentProperty); // Property nonExistentProperty does not exist.
Creating wrappers for logging and debugging

This is useful for creating wrappers for logging and debugging interactions with an object.

const target = {
name: 'Alice',
age: 30,
};
const handler = {
get: function (target, property) {
console.log(`Getting property ${property}`);
return target[property];
},
set: function (target, property, value) {
console.log(`Setting property ${property} to ${value}`);
target[property] = value;
return true;
},
};
const proxy = new Proxy(target, handler);
console.log(proxy.name); // Output: Getting property name
// Alice
proxy.age = 31; // Output: Setting property age to 31
console.log(proxy.age); // Output: Getting property age
// 31
Property assignment validation

Proxies can be used to validate property values before they are set on the target object.

const target = {
age: 25,
};
const handler = {
set: function (target, property, value) {
if (property === 'age' && typeof value !== 'number') {
throw new TypeError('Age must be a number');
}
target[property] = value;
return true;
},
};
const proxy = new Proxy(target, handler);
proxy.age = 30; // Works fine
proxy.age = 'thirty'; // Throws TypeError: Age must be a number
Creating reactive systems

Proxies are often used to trigger updates in other parts of your application when object properties change (data binding).

A practical example is JavaScript frameworks like Vue.js, where proxies are used to create reactive systems that automatically update the UI when data changes.

const target = {
firstName: 'John',
lastName: 'Doe',
};
const handler = {
set: function (target, property, value) {
console.log(`Property ${property} set to ${value}`);
target[property] = value;
// Automatically update the UI or perform other actions
return true;
},
};
const proxy = new Proxy(target, handler);
proxy.firstName = 'Jane'; // Output: Property firstName set to Jane

Other use cases for access interception include:

  • Mocking and stubbing: Proxies can be used to create mock or stub objects for testing purposes, allowing you to isolate dependencies and focus on the unit under test.

Function invocation interception

Proxies can intercept and customize function calls.

const target = function (name) {
return `Hello, ${name}!`;
};
const handler = {
apply: function (target, thisArg, argumentsList) {
console.log(`Called with arguments: ${argumentsList}`);
return target.apply(thisArg, argumentsList);
},
};
const proxy = new Proxy(target, handler);
console.log(proxy('Alice')); // Called with arguments: Alice
// Hello, Alice!

This interception can be used to cache and return the result of frequently accessed methods if they involve network calls or computationally intensive logic, improving performance by reducing the number of requests/computations made.

Dynamic property creation

Proxies can be used to dynamically create properties or methods on an object. This is useful for defining properties on-the-fly with default values and avoid storing redundant data in objects.

const target = {};
const handler = {
get: function (target, property) {
if (!(property in target)) {
target[property] = `Dynamic property ${property}`;
}
return target[property];
},
};
const proxy = new Proxy(target, handler);
console.log(proxy.newProp); // Output: Dynamic property newProp
console.log(proxy.anotherProp); // Output: Dynamic property anotherProp

Implementing object relational mappers (ORMs)

Proxies can be used to create objects for database records by intercepting property access to lazily load data from the database. This provides a more object-oriented interface to interact with a database.

Real world use cases

Many popular libraries, especially state management solutions, are built on top of JavaScript proxies:

  • Vue.js: Vue.js is a progressive framework for building user interfaces. In Vue 3, proxies are used extensively to implement the reactivity system.
  • MobX: MobX uses proxies to make objects and arrays observable, allowing components to automatically react to state changes.
  • Immer: Immer is a library that allows you to work with immutable state in a more convenient way. It uses proxies to track changes and produce the next immutable state.

Summary

Proxies in JavaScript provide a powerful and flexible way to intercept and customize operations on objects. They are useful for a wide range of applications, including validation, logging, debugging, dynamic property creation, and implementing reactive systems. By using proxies, developers can create more robust, maintainable, and feature-rich applications.

Further reading

Explain the concept of a callback function in asynchronous operations

Topics
AsyncJavaScript

TL;DR

A callback function is a function passed as an argument to another function, which is then invoked inside the outer function to complete some kind of routine or action. In asynchronous operations, callbacks are used to handle tasks that take time to complete, such as network requests or file I/O, without blocking the execution of the rest of the code. For example:

function fetchData(callback) {
setTimeout(() => {
const data = { name: 'John', age: 30 };
callback(data);
}, 1000);
}
fetchData((data) => {
console.log(data);
});

What is a callback function?

A callback function is a function that is passed as an argument to another function and is executed after some operation has been completed. This is particularly useful in asynchronous programming, where operations like network requests, file I/O, or timers need to be handled without blocking the main execution thread.

Synchronous vs. asynchronous callbacks

  • Synchronous callbacks are executed immediately within the function they are passed to. They are blocking and the code execution waits for them to complete.
  • Asynchronous callbacks are executed after a certain event or operation has been completed. They are non-blocking and allow the code execution to continue while waiting for the operation to finish.

Example of a synchronous callback

function greet(name, callback) {
console.log('Hello ' + name);
callback();
}
function sayGoodbye() {
console.log('Goodbye!');
}
greet('Alice', sayGoodbye);
// Output:
// Hello Alice
// Goodbye!

Example of an asynchronous callback

function fetchData(callback) {
setTimeout(() => {
const data = { name: 'John', age: 30 };
callback(data);
}, 1000);
}
fetchData((data) => {
console.log(data);
});
// Output after 1 second:
// { name: 'John', age: 30 }

Common use cases

  • Network requests: Fetching data from an API
  • File I/O: Reading or writing files
  • Timers: Delaying execution using setTimeout or setInterval
  • Event handling: Responding to user actions like clicks or key presses

Handling errors in callbacks

When dealing with asynchronous operations, it's important to handle errors properly. A common pattern is to use the first argument of the callback function to pass an error object, if any.

function fetchData(callback) {
// assume asynchronous operation to fetch data
const { data, error } = { data: { name: 'John', age: 30 }, error: null };
callback(error, data);
}
fetchData((error, data) => {
if (error) {
console.error('An error occurred:', error);
} else {
console.log(data);
}
});

Further reading

Explain the concept of a microtask queue

Topics
AsyncJavaScript

TL;DR

The microtask queue is a queue of tasks that need to be executed after the currently executing script and before any other task. Microtasks are typically used for tasks that need to be executed immediately after the current operation, such as promise callbacks. The microtask queue is processed before the macrotask queue, ensuring that microtasks are executed as soon as possible.


The concept of a microtask queue

What is a microtask queue?

The microtask queue is a part of the JavaScript event loop mechanism. It is a queue that holds tasks that need to be executed immediately after the currently executing script and before any other task in the macrotask queue. Microtasks are typically used for operations that need to be executed as soon as possible, such as promise callbacks and MutationObserver callbacks.

How does the microtask queue work?

  1. Execution order: The microtask queue is processed after the currently executing script and before the macrotask queue. This means that microtasks are given higher priority over macrotasks.
  2. Event loop: During each iteration of the event loop, the JavaScript engine first processes all the microtasks in the microtask queue before moving on to the macrotask queue.
  3. Adding microtasks: Microtasks can be added to the microtask queue using methods like Promise.resolve().then() and queueMicrotask().

Example

Here is an example to illustrate how the microtask queue works:

console.log('Script start');
setTimeout(() => {
console.log('setTimeout');
}, 0);
Promise.resolve()
.then(() => {
console.log('Promise 1');
})
.then(() => {
console.log('Promise 2');
});
console.log('Script end');

Output:

Script start
Script end
Promise 1
Promise 2
setTimeout

In this example:

  • The synchronous code (console.log('Script start') and console.log('Script end')) is executed first.
  • The promise callbacks (Promise 1 and Promise 2) are added to the microtask queue and executed next.
  • The setTimeout callback is added to the macrotask queue and executed last.

Use cases

  1. Promise callbacks: Microtasks are commonly used for promise callbacks to ensure they are executed as soon as possible after the current operation.
  2. MutationObserver: The MutationObserver API uses microtasks to notify changes in the DOM.

Further reading

Explain the concept of caching and how it can be used to improve performance

Topics
JavaScriptPerformance

TL;DR

Caching is a technique used to store copies of files or data in a temporary storage location to reduce the time it takes to access them. It improves performance by reducing the need to fetch data from the original source repeatedly. In front end development, caching can be implemented using browser cache, service workers, and HTTP headers like Cache-Control.


The concept of caching and how it can be used to improve performance

What is caching?

Caching is a technique used to store copies of files or data in a temporary storage location, known as a cache, to reduce the time it takes to access them. The primary goal of caching is to improve performance by minimizing the need to fetch data from the original source repeatedly.

Types of caching

Browser cache

The browser cache stores copies of web pages, images, and other resources locally on the user's device. When a user revisits a website, the browser can load these resources from the cache instead of fetching them from the server, resulting in faster load times.

Service workers

Service workers are scripts that run in the background and can intercept network requests. They can cache resources and serve them from the cache, even when the user is offline. This can significantly improve performance and provide a better user experience.

HTTP caching

HTTP caching involves using HTTP headers to control how and when resources are cached. Common headers include Cache-Control, Expires, and ETag.

How caching improves performance

Reduced latency

By storing frequently accessed data closer to the user, caching reduces the time it takes to retrieve that data. This results in faster load times and a smoother user experience.

Reduced server load

Caching reduces the number of requests made to the server, which can help decrease server load and improve overall performance.

Offline access

With service workers, cached resources can be served even when the user is offline, providing a seamless experience.

Implementing caching

Browser cache example
<head>
<link rel="stylesheet" href="styles.css" />
<script src="app.js"></script>
</head>
Service worker example
self.addEventListener('install', (event) => {
event.waitUntil(
caches.open('v1').then((cache) => {
return cache.addAll(['/index.html', '/styles.css', '/app.js']);
}),
);
});
self.addEventListener('fetch', (event) => {
event.respondWith(
caches.match(event.request).then((response) => {
return response || fetch(event.request);
}),
);
});
HTTP caching example
Cache-Control: max-age=3600

Further reading

Explain the concept of code coverage and how it can be used to assess test quality

Topics
JavaScriptTesting

TL;DR

Code coverage is a metric that measures the percentage of code that is executed when the test suite runs. It helps in assessing the quality of tests by identifying untested parts of the codebase. Higher code coverage generally indicates more thorough testing, but it doesn't guarantee the absence of bugs. Tools like Istanbul or Jest can be used to measure code coverage.


What is code coverage?

Code coverage is a software testing metric that determines the amount of code that is executed during automated tests. It provides insights into which parts of the codebase are being tested and which are not.

Types of code coverage

  1. Statement coverage: Measures the number of statements in the code that have been executed.
  2. Branch coverage: Measures whether each branch (e.g., if and else blocks) has been executed.
  3. Function coverage: Measures whether each function in the code has been called.
  4. Line coverage: Measures the number of lines of code that have been executed.
  5. Condition coverage: Measures whether each boolean sub-expression has been evaluated to both true and false.

Example

Consider the following JavaScript function:

function isEven(num) {
if (num % 2 === 0) {
return true;
} else {
return false;
}
}

A test suite for this function might look like this:

test('isEven returns true for even numbers', () => {
expect(isEven(2)).toBe(true);
});
test('isEven returns false for odd numbers', () => {
expect(isEven(3)).toBe(false);
});

Running code coverage tools on this test suite would show 100% statement, branch, function, and line coverage because all parts of the code are executed.

How to measure code coverage

Tools

  1. Istanbul: A popular JavaScript code coverage tool.
  2. Jest: A testing framework that includes built-in code coverage reporting.
  3. Karma: A test runner that can be configured to use Istanbul for code coverage.

Example with Jest

To measure code coverage with Jest, you can add the --coverage flag when running your tests:

jest --coverage

This will generate a coverage report that shows the percentage of code covered by your tests.

Assessing test quality with code coverage

Benefits

  • Identifies untested code: Helps in finding parts of the codebase that are not covered by tests.
  • Improves test suite: Encourages writing more comprehensive tests.
  • Increases confidence: Higher coverage can increase confidence in the stability of the code.

Limitations

  • False sense of security: High coverage does not guarantee the absence of bugs.
  • Quality over quantity: 100% coverage does not mean the tests are of high quality. Tests should also check for edge cases and potential errors.

Further reading

Explain the concept of Content Security Policy (CSP) and how it enhances security

Topics
JavaScriptSecurity

TL;DR

Content Security Policy (CSP) is a security feature that helps prevent various types of attacks, such as Cross-Site Scripting (XSS) and data injection attacks, by specifying which content sources are trusted. It works by allowing developers to define a whitelist of trusted sources for content like scripts, styles, and images. This is done through HTTP headers or meta tags. For example, you can use the Content-Security-Policy header to specify that only scripts from your own domain should be executed:

Content-Security-Policy: script-src 'self'

What is Content Security Policy (CSP)?

Content Security Policy (CSP) is a security standard introduced to mitigate a range of attacks, including Cross-Site Scripting (XSS) and data injection attacks. CSP allows web developers to control the resources that a user agent is allowed to load for a given page. By specifying a whitelist of trusted content sources, CSP helps to prevent the execution of malicious content.

How CSP works

CSP works by allowing developers to define a set of rules that specify which sources of content are considered trustworthy. These rules are delivered to the browser via HTTP headers or meta tags. When the browser loads a page, it checks the CSP rules and blocks any content that does not match the specified sources.

Example of a CSP header

Here is an example of a simple CSP header that only allows scripts from the same origin:

Content-Security-Policy: script-src 'self'

This policy tells the browser to only execute scripts that are loaded from the same origin as the page itself.

Common directives

  • default-src: Serves as a fallback for other resource types when they are not explicitly defined.
  • script-src: Specifies valid sources for JavaScript.
  • style-src: Specifies valid sources for CSS.
  • img-src: Specifies valid sources for images.
  • connect-src: Specifies valid sources for AJAX, WebSocket, and EventSource connections.
  • font-src: Specifies valid sources for fonts.
  • object-src: Specifies valid sources for plugins like Flash.

Benefits of using CSP

  • Mitigates XSS attacks: By restricting the sources from which scripts can be loaded, CSP helps to prevent the execution of malicious scripts.
  • Prevents data injection attacks: CSP can block the loading of malicious resources that could be used to steal data or perform other harmful actions.
  • Improves security posture: Implementing CSP is a proactive measure that enhances the overall security of a web application.

Implementing CSP

CSP can be implemented using HTTP headers or meta tags. The HTTP header approach is generally preferred because it is more secure and cannot be easily overridden by attackers.

Using HTTP headers
Content-Security-Policy: default-src 'self'; script-src 'self' https://trusted.cdn.com
Using meta tags
<meta
http-equiv="Content-Security-Policy"
content="default-src 'self'; script-src 'self' https://trusted.cdn.com" />

Further reading

Explain the concept of Cross-Site Request Forgery (CSRF) and its mitigation techniques

Topics
JavaScriptNetworkingSecurity

TL;DR

Cross-Site Request Forgery (CSRF) is an attack where a malicious website tricks a user's browser into making an unwanted request to another site where the user is authenticated. This can lead to unauthorized actions being performed on behalf of the user. Mitigation techniques include using anti-CSRF tokens, SameSite cookies, and ensuring proper CORS configurations.


Cross-Site Request Forgery (CSRF) and its mitigation techniques

What is CSRF?

Cross-Site Request Forgery (CSRF) is a type of attack that occurs when a malicious website causes a user's browser to perform an unwanted action on a different site where the user is authenticated. This can lead to unauthorized actions such as changing account details, making purchases, or other actions that the user did not intend to perform.

How does CSRF work?

  1. User authentication: The user logs into a trusted website (e.g., a banking site) and receives an authentication cookie.
  2. Malicious site: The user visits a malicious website while still logged into the trusted site.
  3. Unwanted request: The malicious site contains code that makes a request to the trusted site, using the user's authentication cookie to perform actions on behalf of the user.

Mitigation techniques

Anti-CSRF tokens

One of the most effective ways to prevent CSRF attacks is by using anti-CSRF tokens. These tokens are unique and unpredictable values that are generated by the server and included in forms or requests. The server then validates the token to ensure the request is legitimate.

<form method="POST" action="/update-profile">
<input type="hidden" name="csrf_token" value="unique_token_value" />
<!-- other form fields -->
<button type="submit">Update Profile</button>
</form>

On the server side, the token is validated to ensure it matches the expected value.

SameSite cookies

The SameSite attribute on cookies can help mitigate CSRF attacks by restricting how cookies are sent with cross-site requests. The SameSite attribute can be set to Strict, Lax, or None.

Set-Cookie: sessionId=abc123; SameSite=Strict
  • Strict: Cookies are only sent in a first-party context and not with requests initiated by third-party websites.
  • Lax: Cookies are not sent on normal cross-site subrequests (e.g., loading images), but are sent when a user navigates to the URL from an external site (e.g., following a link).
  • None: Cookies are sent in all contexts, including cross-origin requests.
CORS (Cross-Origin Resource Sharing)

Properly configuring CORS can help prevent CSRF attacks by ensuring that only trusted origins can make requests to your server. This involves setting appropriate headers on the server to specify which origins are allowed to access resources.

Access-Control-Allow-Origin: https://trustedwebsite.com

Further reading

Explain the concept of debouncing and throttling

Topics
AsyncJavaScriptPerformance

TL;DR

Debouncing and throttling are techniques used to control the rate at which a function is executed. Debouncing ensures that a function is only called after a specified delay has passed since the last time it was invoked. Throttling ensures that a function is called at most once in a specified time interval.

Debouncing delays the execution of a function until a certain amount of time has passed since it was last called. This is useful for scenarios like search input fields where you want to wait until the user has stopped typing before making an API call.

function debounce(func, delay) {
let timeoutId;
return function (...args) {
clearTimeout(timeoutId);
timeoutId = setTimeout(() => func.apply(this, args), delay);
};
}
const debouncedHello = debounce(() => console.log('Hello world!'), 2000);
debouncedHello(); // Prints 'Hello world!' after 2 seconds

Throttling ensures that a function is called at most once in a specified time interval. This is useful for scenarios like window resizing or scrolling where you want to limit the number of times a function is called.

function throttle(func, limit) {
let inThrottle;
return function (...args) {
if (!inThrottle) {
func.apply(this, args);
inThrottle = true;
setTimeout(() => (inThrottle = false), limit);
}
};
}
const handleResize = throttle(() => {
// Update element positions
console.log('Window resized at', new Date().toLocaleTimeString());
}, 2000);
// Simulate rapid calls to handleResize every 100ms
let intervalId = setInterval(() => {
handleResize();
}, 100);
// 'Window resized' is outputted only every 2 seconds due to throttling

Debouncing and throttling

Debouncing

Debouncing is a technique used to ensure that a function is only executed after a certain amount of time has passed since it was last invoked. This is particularly useful in scenarios where you want to limit the number of times a function is called, such as when handling user input events like keypresses or mouse movements.

Example use case

Imagine you have a search input field and you want to make an API call to fetch search results. Without debouncing, an API call would be made every time the user types a character, which could lead to a large number of unnecessary calls. Debouncing ensures that the API call is only made after the user has stopped typing for a specified amount of time.

Code example
function debounce(func, delay) {
let timeoutId;
return function (...args) {
clearTimeout(timeoutId);
timeoutId = setTimeout(() => func.apply(this, args), delay);
};
}
// Usage
const handleSearch = debounce((query) => {
// Make API call
console.log('API call with query:', query);
}, 300);
document.getElementById('searchInput').addEventListener('input', (event) => {
handleSearch(event.target.value);
});

Throttling

Throttling is a technique used to ensure that a function is called at most once in a specified time interval. This is useful in scenarios where you want to limit the number of times a function is called, such as when handling events like window resizing or scrolling.

Example use case

Imagine you have a function that updates the position of elements on the screen based on the window size. Without throttling, this function could be called many times per second as the user resizes the window, leading to performance issues. Throttling ensures that the function is only called at most once in a specified time interval.

Code example
function throttle(func, limit) {
let inThrottle;
return function (...args) {
if (!inThrottle) {
func.apply(this, args);
inThrottle = true;
setTimeout(() => (inThrottle = false), limit);
}
};
}
// Usage
const handleResize = throttle(() => {
// Update element positions
console.log('Window resized');
}, 100);
window.addEventListener('resize', handleResize);

Further reading

Explain the concept of destructuring assignment for objects and arrays

Topics
JavaScript

TL;DR

Destructuring assignment is a syntax in JavaScript that allows you to unpack values from arrays or properties from objects into distinct variables. For arrays, you use square brackets, and for objects, you use curly braces. For example:

// Array destructuring
const [a, b] = [1, 2];
// Object destructuring
const { name, age } = { name: 'John', age: 30 };

Destructuring assignment for objects and arrays

Destructuring assignment is a convenient way to extract values from arrays and objects into separate variables. This can make your code more readable and concise.

Array destructuring

Array destructuring allows you to unpack values from arrays into distinct variables using square brackets.

Basic example
const numbers = [1, 2, 3];
const [first, second, third] = numbers;
console.log(first); // 1
console.log(second); // 2
console.log(third); // 3
Skipping values

You can skip values in the array by leaving an empty space between commas.

const numbers = [1, 2, 3];
const [first, , third] = numbers;
console.log(first); // 1
console.log(third); // 3
Default values

You can assign default values in case the array does not have enough elements.

const numbers = [1];
const [first, second = 2] = numbers;
console.log(first); // 1
console.log(second); // 2

Object destructuring

Object destructuring allows you to unpack properties from objects into distinct variables using curly braces.

Basic example
const person = { name: 'John', age: 30 };
const { name, age } = person;
console.log(name); // John
console.log(age); // 30
Renaming variables

You can rename the variables while destructuring.

const person = { name: 'John', age: 30 };
const { name: personName, age: personAge } = person;
console.log(personName); // John
console.log(personAge); // 30
Default values

You can assign default values in case the property does not exist in the object.

const person = { name: 'John' };
const { name, age = 25 } = person;
console.log(name); // John
console.log(age); // 25
Nested objects

You can destructure nested objects as well.

const person = { name: 'John', address: { city: 'New York', zip: '10001' } };
const {
name,
address: { city, zip },
} = person;
console.log(name); // John
console.log(city); // New York
console.log(zip); // 10001

Further reading

Explain the concept of error propagation in JavaScript

Topics
JavaScript

TL;DR

Error propagation in JavaScript refers to how errors are passed through the call stack. When an error occurs in a function, it can be caught and handled using try...catch blocks. If not caught, the error propagates up the call stack until it is either caught or causes the program to terminate. For example:

function a() {
throw new Error('An error occurred');
}
function b() {
a();
}
try {
b();
} catch (e) {
console.error(e.message); // Outputs: An error occurred
}

Error propagation in JavaScript

Error propagation in JavaScript is a mechanism that allows errors to be passed up the call stack until they are caught and handled. This is crucial for debugging and ensuring that errors do not cause the entire application to crash unexpectedly.

How errors propagate

When an error occurs in a function, it can either be caught and handled within that function or propagate up the call stack to the calling function. If the calling function does not handle the error, it continues to propagate up the stack until it reaches the global scope, potentially causing the program to terminate.

Using try...catch blocks

To handle errors and prevent them from propagating further, you can use try...catch blocks. Here is an example:

function a() {
throw new Error('An error occurred');
}
function b() {
a();
}
try {
b();
} catch (e) {
console.error(e.message); // Outputs: An error occurred
}

In this example, the error thrown in function a propagates to function b, and then to the try...catch block where it is finally caught and handled.

Propagation with asynchronous code

Error propagation works differently with asynchronous code, such as promises and async/await. For promises, you can use .catch() to handle errors:

function a() {
return Promise.reject(new Error('An error occurred'));
}
function b() {
return a();
}
b().catch((e) => {
console.error(e.message); // Outputs: An error occurred
});

For async/await, you can use try...catch blocks:

async function a() {
throw new Error('An error occurred');
}
async function b() {
await a();
}
(async () => {
try {
await b();
} catch (e) {
console.error(e.message); // Outputs: An error occurred
}
})();

Best practices

  • Always handle errors at the appropriate level to prevent them from propagating unnecessarily.
  • Use try...catch blocks for synchronous code and .catch() or try...catch with async/await for asynchronous code.
  • Log errors to help with debugging and provide meaningful error messages to users.

Further reading

Explain the concept of hoisting with regards to functions

Topics
JavaScript

TL;DR

Hoisting in JavaScript is a behavior where function declarations are moved to the top of their containing scope during the compile phase. This means you can call a function before it is defined in the code. However, this does not apply to function expressions or arrow functions, which are not hoisted in the same way.

// Function declaration
hoistedFunction(); // Works fine
function hoistedFunction() {
console.log('This function is hoisted');
}
// Function expression
nonHoistedFunction(); // Throws an error
var nonHoistedFunction = function () {
console.log('This function is not hoisted');
};

What is hoisting?

Hoisting is a JavaScript mechanism where variables and function declarations are moved to the top of their containing scope during the compile phase. This allows functions to be called before they are defined in the code.

Function declarations

Function declarations are fully hoisted. This means you can call a function before its declaration in the code.

hoistedFunction(); // Works fine
function hoistedFunction() {
console.log('This function is hoisted');
}

Function expressions

Function expressions, including arrow functions, are not hoisted in the same way. They are treated as variable assignments and are only hoisted as undefined.

nonHoistedFunction(); // Throws an error: TypeError: nonHoistedFunction is not a function
var nonHoistedFunction = function () {
console.log('This function is not hoisted');
};

Arrow functions

Arrow functions behave similarly to function expressions in terms of hoisting.

arrowFunction(); // Throws an error: TypeError: arrowFunction is not a function
var arrowFunction = () => {
console.log('This arrow function is not hoisted');
};

Further reading

Explain the concept of inheritance in ES2015 classes

Topics
JavaScriptOOP

TL;DR

Inheritance in ES2015 classes allows one class to extend another, enabling the child class to inherit properties and methods from the parent class. This is done using the extends keyword. The super keyword is used to call the constructor and methods of the parent class. Here's a quick example:

class Animal {
constructor(name) {
this.name = name;
}
speak() {
console.log(`${this.name} makes a noise.`);
}
}
class Dog extends Animal {
constructor(name, breed) {
super(name);
this.breed = breed;
}
speak() {
console.log(`${this.name} barks.`);
}
}
const dog = new Dog('Rex', 'German Shepherd');
dog.speak(); // Rex barks.

Inheritance in ES2015 classes

Basic concept

Inheritance in ES2015 classes allows a class (child class) to inherit properties and methods from another class (parent class). This promotes code reuse and a hierarchical class structure.

Using the extends keyword

The extends keyword is used to create a class that is a child of another class. The child class inherits all the properties and methods of the parent class.

class ParentClass {
constructor() {
this.parentProperty = 'I am a parent property';
}
parentMethod() {
console.log('This is a parent method');
}
}
class ChildClass extends ParentClass {
constructor() {
super(); // Calls the parent class constructor
this.childProperty = 'I am a child property';
}
childMethod() {
console.log('This is a child method');
}
}
const child = new ChildClass();
console.log(child.parentProperty); // I am a parent property
child.parentMethod(); // This is a parent method

Using the super keyword

The super keyword is used to call the constructor of the parent class and to access its methods. This is necessary when you want to initialize the parent class properties in the child class.

class Animal {
constructor(name) {
this.name = name;
}
speak() {
console.log(`${this.name} makes a noise.`);
}
}
class Dog extends Animal {
constructor(name, breed) {
super(name); // Calls the parent class constructor
this.breed = breed;
}
speak() {
super.speak(); // Calls the parent class method
console.log(`${this.name} barks.`);
}
}
const dog = new Dog('Rex', 'German Shepherd');
dog.speak();
// Rex makes a noise.
// Rex barks.

Method overriding

Child classes can override methods from the parent class. This allows the child class to provide a specific implementation of a method that is already defined in the parent class.

class Animal {
speak() {
console.log('Animal makes a noise.');
}
}
class Dog extends Animal {
speak() {
console.log('Dog barks.');
}
}
const dog = new Dog();
dog.speak(); // Dog barks.

Further reading

Explain the concept of input validation and its importance in security

Topics
JavaScriptSecurity

TL;DR

Input validation is the process of ensuring that user input is correct, safe, and meets the application's requirements. It is crucial for security because it helps prevent attacks like SQL injection, cross-site scripting (XSS), and other forms of data manipulation. By validating input, you ensure that only properly formatted data enters your system, reducing the risk of malicious data causing harm.


Input validation and its importance in security

What is input validation?

Input validation is the process of verifying that the data provided by a user or other external sources meets the expected format, type, and constraints before it is processed by the application. This can include checking for:

  • Correct data type (e.g., string, number)
  • Proper format (e.g., email addresses, phone numbers)
  • Acceptable value ranges (e.g., age between 0 and 120)
  • Required fields being filled

Types of input validation

  1. Client-side validation: This occurs in the user's browser before the data is sent to the server. It provides immediate feedback to the user and can improve the user experience. However, it should not be solely relied upon for security purposes, as it can be easily bypassed.

    <form>
    <input type="text" id="username" required pattern="[A-Za-z0-9]{5,}" />
    <input type="submit" />
    </form>
  2. Server-side validation: This occurs on the server after the data has been submitted. It is essential for security because it ensures that all data is validated regardless of the client's behavior.

    const express = require('express');
    const app = express();
    app.post('/submit', (req, res) => {
    const username = req.body.username;
    if (!/^[A-Za-z0-9]{5,}$/.test(username)) {
    return res.status(400).send('Invalid username');
    }
    // Proceed with processing the valid input
    });

Importance of input validation in security

  1. Preventing SQL injection: By validating and sanitizing input, you can prevent attackers from injecting malicious SQL code into your database queries.

    const username = req.body.username;
    const query = 'SELECT * FROM users WHERE username = ?';
    db.query(query, [username], (err, results) => {
    // Handle results
    });
  2. Preventing cross-site scripting (XSS): Input validation helps ensure that user input does not contain malicious scripts that could be executed in the browser.

    const sanitizeHtml = require('sanitize-html');
    const userInput = req.body.comment;
    const sanitizedInput = sanitizeHtml(userInput);
  3. Preventing buffer overflow attacks: By validating the length of input data, you can prevent attackers from sending excessively large inputs that could cause buffer overflows and crash your application.

  4. Ensuring data integrity: Input validation helps maintain the integrity of your data by ensuring that only properly formatted and expected data is processed and stored.

Best practices for input validation

  • Always validate input on the server side, even if you also validate on the client side
  • Use built-in validation functions and libraries where possible
  • Sanitize input to remove or escape potentially harmful characters
  • Implement whitelisting (allowing only known good input) rather than blacklisting (blocking known bad input)
  • Regularly update and review your validation rules to address new security threats

Further reading

Explain the concept of lazy loading and how it can improve performance

Topics
JavaScriptPerformance

TL;DR

Lazy loading is a design pattern that delays the loading of resources until they are actually needed. This can significantly improve performance by reducing initial load times and conserving bandwidth. For example, images on a webpage can be lazy-loaded so that they only load when they come into the viewport. This can be achieved using the loading="lazy" attribute in HTML or by using JavaScript libraries.

<img src="image.jpg" loading="lazy" alt="Lazy loaded image" />

The concept of lazy loading and how it can improve performance

What is lazy loading?

Lazy loading is a design pattern used to defer the initialization of an object until the point at which it is needed. This can be applied to various types of resources such as images, videos, scripts, and even data fetched from APIs.

How does lazy loading work?

Lazy loading works by delaying the loading of resources until they are actually needed. For example, images on a webpage can be lazy-loaded so that they only load when they come into the viewport. This can be achieved using the loading="lazy" attribute in HTML or by using JavaScript libraries.

Benefits of lazy loading

  • Improved performance: By loading only the necessary resources initially, the page load time is reduced, leading to a faster and more responsive user experience.
  • Reduced bandwidth usage: Lazy loading helps in conserving bandwidth by loading resources only when they are needed.
  • Better user experience: Users can start interacting with the content faster as the initial load time is reduced.

Implementing lazy loading

Using the loading attribute in HTML

The simplest way to implement lazy loading for images is by using the loading attribute in HTML.

<img src="image.jpg" loading="lazy" alt="Lazy loaded image" />
Using JavaScript

For more complex scenarios, you can use JavaScript to implement lazy loading. Here is an example using the Intersection Observer API:

document.addEventListener('DOMContentLoaded', function () {
const lazyImages = document.querySelectorAll('img.lazy');
const imageObserver = new IntersectionObserver((entries, observer) => {
entries.forEach((entry) => {
if (entry.isIntersecting) {
const img = entry.target;
img.src = img.dataset.src;
img.classList.remove('lazy');
observer.unobserve(img);
}
});
});
lazyImages.forEach((image) => {
imageObserver.observe(image);
});
});

In this example, images with the class lazy will only load when they come into the viewport.

Further reading

Explain the concept of lexical scoping

Topics
JavaScript

TL;DR

Lexical scoping means that the scope of a variable is determined by its location within the source code, and nested functions have access to variables declared in their outer scope. For example:

function outerFunction() {
let outerVariable = 'I am outside!';
function innerFunction() {
console.log(outerVariable); // 'I am outside!'
}
innerFunction();
}
outerFunction();

In this example, innerFunction can access outerVariable because of lexical scoping.


Lexical scoping

Lexical scoping is a fundamental concept in JavaScript and many other programming languages. It determines how variable names are resolved in nested functions. The scope of a variable is defined by its position in the source code, and nested functions have access to variables declared in their outer scope.

How lexical scoping works

When a function is defined, it captures the scope in which it was created. This means that the function has access to variables in its own scope as well as variables in any containing (outer) scopes.

Example

Consider the following example:

function outerFunction() {
let outerVariable = 'I am outside!';
function innerFunction() {
console.log(outerVariable); // 'I am outside!'
}
innerFunction();
}
outerFunction();

In this example:

  • outerFunction declares a variable outerVariable.
  • innerFunction is nested inside outerFunction and logs outerVariable to the console.
  • When innerFunction is called, it has access to outerVariable because of lexical scoping.

Nested functions and closures

Lexical scoping is closely related to closures. A closure is created when a function retains access to its lexical scope, even when the function is executed outside that scope.

function outerFunction() {
let outerVariable = 'I am outside!';
function innerFunction() {
console.log(outerVariable);
}
return innerFunction;
}
const myInnerFunction = outerFunction();
myInnerFunction(); // 'I am outside!'

In this example:

  • outerFunction returns innerFunction.
  • myInnerFunction is assigned the returned innerFunction.
  • When myInnerFunction is called, it still has access to outerVariable because of the closure created by lexical scoping.

Further reading

Explain the concept of partial application

Topics
ClosureJavaScript

TL;DR

Partial application is a technique in functional programming where a function is applied to some of its arguments, producing a new function that takes the remaining arguments. This allows you to create more specific functions from general ones. For example, if you have a function add(a, b), you can partially apply it to create a new function add5 that always adds 5 to its argument.

function add(a, b) {
return a + b;
}
const add5 = add.bind(null, 5);
console.log(add5(10)); // Outputs 15

Partial application

Partial application is a functional programming technique where a function is applied to some of its arguments, producing a new function that takes the remaining arguments. This can be useful for creating more specific functions from general ones, improving code reusability and readability.

Example

Consider a simple add function that takes two arguments:

function add(a, b) {
return a + b;
}

Using partial application, you can create a new function add5 that always adds 5 to its argument:

const add5 = add.bind(null, 5);
console.log(add5(10)); // Outputs 15

How it works

In the example above, add.bind(null, 5) creates a new function where the first argument (a) is fixed to 5. The null value is used as the this context, which is not relevant in this case.

Benefits

  • Code reusability: You can create more specific functions from general ones, making your code more modular and reusable.
  • Readability: Partially applied functions can make your code easier to read and understand by reducing the number of arguments you need to pass around.

Real-world example

Partial application is often used in libraries like Lodash. For example, Lodash's _.partial function allows you to create partially applied functions easily:

const _ = require('lodash');
function greet(greeting, name) {
return `${greeting}, ${name}!`;
}
const sayHelloTo = _.partial(greet, 'Hello');
console.log(sayHelloTo('John')); // Outputs "Hello, John!"

Further reading

Explain the concept of scope in JavaScript

Topics
JavaScript

TL;DR

In JavaScript, scope determines the accessibility of variables and functions at different parts of the code. There are three main types of scope: global scope, function scope, and block scope. Global scope means the variable is accessible everywhere in the code. Function scope means the variable is accessible only within the function it is declared. Block scope, introduced with ES6, means the variable is accessible only within the block (e.g., within curly braces {}) it is declared.

var globalVar = 'I am a global var';
function myFunction() {
var functionVar = 'I am a function-scoped var';
if (true) {
let blockVar = 'I am a block-scoped var';
console.log('Inside block:');
console.log(globalVar); // Accessible
console.log(functionVar); // Accessible
console.log(blockVar); // Accessible
}
console.log('Inside function:');
console.log(globalVar); // Accessible
console.log(functionVar); // Accessible
// console.log(blockVar); // Uncaught ReferenceError
}
myFunction();
console.log('In global scope:');
console.log(globalVar); // Accessible
// console.log(functionVar); // Uncaught ReferenceError
// console.log(blockVar); // Uncaught ReferenceError

Scope in JavaScript

Global scope

Variables declared outside any function or block have global scope. They are accessible from anywhere in the code.

var globalVar = 'I am global';
function myFunction() {
console.log(globalVar); // Accessible here
}
myFunction();
console.log(globalVar); // Accessible here

Function scope

Variables declared within a function are in function scope. They are accessible only within that function.

function myFunction() {
var functionVar = 'I am in a function';
console.log(functionVar); // Accessible here
}
myFunction();
console.log(functionVar); // Uncaught ReferenceError: functionVar is not defined

Block scope

Variables declared with let or const within a block (e.g., within curly braces {}) have block scope. They are accessible only within that block.

if (true) {
let blockVar = 'I am in a block';
console.log(blockVar); // Accessible here
}
console.log(blockVar); // Uncaught ReferenceError: blockVar is not defined

Lexical scope

JavaScript uses lexical scoping, meaning that the scope of a variable is determined by its location within the source code. Nested functions have access to variables declared in their outer scope.

function outerFunction() {
var outerVar = 'I am outside';
function innerFunction() {
console.log(outerVar); // Accessible here
}
innerFunction();
}
outerFunction();

Further reading

Explain the concept of tagged templates

Topics
JavaScript

TL;DR

Tagged templates in JavaScript allow you to parse template literals with a function. The function receives the literal strings and the values as arguments, enabling custom processing of the template. For example:

function tag(strings, ...values) {
return strings[0] + values[0] + strings[1] + values[1] + strings[2];
}
const result = tag`Hello ${'world'}! How are ${'you'}?`;
console.log(result); // "Hello world! How are you?"

Tagged templates

What are tagged templates?

Tagged templates are a feature in JavaScript that allows you to call a function (the "tag") with a template literal. The tag function can then process the template literal's parts (both the literal strings and the interpolated values) in a custom way.

Syntax

The syntax for tagged templates involves placing a function name before a template literal:

function tag(strings, ...values) {
// Custom processing
}
tag`template literal with ${values}`;

How it works

When a tagged template is invoked, the tag function receives:

  1. An array of literal strings (the parts of the template that are not interpolated)
  2. The interpolated values as additional arguments

For example:

function tag(strings, ...values) {
console.log(strings); // ["Hello ", "! How are ", "?"]
console.log(values); // ["world", "you"]
}
tag`Hello ${'world'}! How are ${'you'}?`;

Use cases

Tagged templates can be used for various purposes, such as:

  • String escaping: Preventing XSS attacks by escaping user input
  • Localization: Translating template literals into different languages
  • Custom formatting: Applying custom formatting to the interpolated values

Example

Here is a simple example of a tagged template that escapes HTML:

function escapeHTML(strings, ...values) {
return strings.reduce((result, string, i) => {
const value = values[i - 1];
return (
result +
(value
? String(value)
.replace(/&/g, '&amp;')
.replace(/</g, '&lt;')
.replace(/>/g, '&gt;')
: '') +
string
);
});
}
const userInput = '<script>alert("XSS")</script>';
const result = escapeHTML`User input: ${userInput}`;
console.log(result); // "User input: &lt;script&gt;alert(&quot;XSS&quot;)&lt;/script&gt;"

Further reading

Explain the concept of test-driven development (TDD)

Topics
JavaScriptTesting

TL;DR

Test-driven development (TDD) is a software development approach where you write tests before writing the actual code. The process involves writing a failing test, writing the minimum code to pass the test, and then refactoring the code while keeping the tests passing. This ensures that the code is always tested and helps in maintaining high code quality.


What is test-driven development (TDD)?

Test-driven development (TDD) is a software development methodology that emphasizes writing tests before writing the actual code. The primary goal of TDD is to ensure that the code is thoroughly tested and meets the specified requirements. The TDD process can be broken down into three main steps: Red, Green, and Refactor.

Red: Write a failing test

  1. Write a test for a new feature or functionality.
  2. Run the test to ensure it fails, confirming that the feature is not yet implemented.
// Example using Jest
test('adds 1 + 2 to equal 3', () => {
expect(add(1, 2)).toBe(3);
});

Green: Write the minimum code to pass the test

  1. Write the simplest code possible to make the test pass.
  2. Run the test to ensure it passes.
function add(a, b) {
return a + b;
}

Refactor: Improve the code

  1. Refactor the code to improve its structure and readability without changing its behavior.
  2. Ensure that all tests still pass after refactoring.
// Refactored code (if needed)
function add(a, b) {
return a + b; // In this simple example, no refactoring is needed
}

Benefits of TDD

Improved code quality

TDD ensures that the code is thoroughly tested, which helps in identifying and fixing bugs early in the development process.

Better design

Writing tests first forces developers to think about the design and requirements of the code, leading to better-structured and more maintainable code.

Faster debugging

Since tests are written for each piece of functionality, it becomes easier to identify the source of a bug when a test fails.

Documentation

Tests serve as documentation for the code, making it easier for other developers to understand the functionality and purpose of the code.

Challenges of TDD

Initial learning curve

Developers new to TDD may find it challenging to adopt this methodology initially.

Time-consuming

Writing tests before writing the actual code can be time-consuming, especially for complex features.

Overhead

Maintaining a large number of tests can become an overhead, especially when the codebase changes frequently.

Further reading

Explain the concept of the Prototype pattern

Topics
JavaScriptOOP

TL;DR

The Prototype pattern is a creational design pattern used to create new objects by copying an existing object, known as the prototype. This pattern is useful when the cost of creating a new object is more expensive than cloning an existing one. In JavaScript, this can be achieved using the Object.create method or by using the prototype property of a constructor function.

const prototypeObject = {
greet() {
console.log('Hello, world!');
},
};
const newObject = Object.create(prototypeObject);
newObject.greet(); // Outputs: Hello, world!

The Prototype pattern

The Prototype pattern is a creational design pattern that allows you to create new objects by copying an existing object, known as the prototype. This pattern is particularly useful when the cost of creating a new object is more expensive than cloning an existing one.

How it works

In the Prototype pattern, an object is used as a blueprint for creating new objects. This blueprint object is called the prototype. New objects are created by copying the prototype, which can be done in various ways depending on the programming language.

Implementation in JavaScript

In JavaScript, the Prototype pattern can be implemented using the Object.create method or by using the prototype property of a constructor function.

Using Object.create

The Object.create method creates a new object with the specified prototype object and properties.

const prototypeObject = {
greet() {
console.log('Hello, world!');
},
};
const newObject = Object.create(prototypeObject);
newObject.greet(); // Outputs: Hello, world!

In this example, newObject is created with prototypeObject as its prototype. This means that newObject inherits the greet method from prototypeObject.

Using constructor functions and the prototype property

Another way to implement the Prototype pattern in JavaScript is by using constructor functions and the prototype property.

function Person(name) {
this.name = name;
}
Person.prototype.greet = function () {
console.log(`Hello, my name is ${this.name}`);
};
const person1 = new Person('Alice');
const person2 = new Person('Bob');
person1.greet(); // Outputs: Hello, my name is Alice
person2.greet(); // Outputs: Hello, my name is Bob

In this example, the Person constructor function is used to create new Person objects. The greet method is added to the Person.prototype, so all instances of Person inherit this method.

Advantages

  • Reduces the cost of creating new objects by cloning existing ones
  • Simplifies the creation of complex objects
  • Promotes code reuse and reduces redundancy

Disadvantages

  • Cloning objects can be less efficient than creating new ones in some cases
  • Can lead to issues with deep cloning if the prototype object contains nested objects

Further reading

Explain the concept of the Singleton pattern

Topics
JavaScript

TL;DR

The Singleton pattern ensures that a class has only one instance and provides a global point of access to that instance. This is useful when exactly one object is needed to coordinate actions across the system. In JavaScript, this can be implemented using closures or ES6 classes.

class Singleton {
constructor() {
if (!Singleton.instance) {
Singleton.instance = this;
}
return Singleton.instance;
}
}
const instance1 = new Singleton();
const instance2 = new Singleton();
console.log(instance1 === instance2); // true

Singleton pattern

The Singleton pattern is a design pattern that restricts the instantiation of a class to one single instance. This is particularly useful when exactly one object is needed to coordinate actions across the system.

Key characteristics

  • Single instance: Ensures that a class has only one instance.
  • Global access: Provides a global point of access to the instance.
  • Lazy initialization: The instance is created only when it is needed.

Implementation in JavaScript

There are several ways to implement the Singleton pattern in JavaScript. Here are two common methods:

Using closures
const Singleton = (function () {
let instance;
function createInstance() {
const object = new Object('I am the instance');
return object;
}
return {
getInstance: function () {
if (!instance) {
instance = createInstance();
}
return instance;
},
};
})();
const instance1 = Singleton.getInstance();
const instance2 = Singleton.getInstance();
console.log(instance1 === instance2); // true
Using ES6 classes
class Singleton {
constructor() {
if (!Singleton.instance) {
Singleton.instance = this;
}
return Singleton.instance;
}
}
const instance1 = new Singleton();
const instance2 = new Singleton();
console.log(instance1 === instance2); // true

Use cases

  • Configuration objects: When you need a single configuration object shared across the application.
  • Logging: A single logging instance to manage log entries.
  • Database connections: Ensuring only one connection is made to the database.

Further reading

Explain the concept of the spread operator and its uses

Topics
JavaScript

TL;DR

The spread operator (...) in JavaScript allows you to expand elements of an iterable (like an array or object) into individual elements. It is commonly used for copying arrays or objects, merging arrays or objects, and passing elements of an array as arguments to a function.

// Copying an array
const arr1 = [1, 2, 3];
const arr2 = [...arr1];
console.log(arr2); // Output: [1, 2, 3]
// Merging arrays
const arr3 = [4, 5, 6];
const mergedArray = [...arr1, ...arr3];
console.log(mergedArray); // Output: [1, 2, 3, 4, 5, 6]
// Copying an object
const obj1 = { a: 1, b: 2 };
const obj2 = { ...obj1 };
console.log(obj2); // Output: { a: 1, b: 2 }
// Merging objects
const obj3 = { c: 3, d: 4 };
const mergedObject = { ...obj1, ...obj3 };
console.log(mergedObject); // Output: { a: 1, b: 2, c: 3, d: 4 }
// Passing array elements as function arguments
const sum = (x, y, z) => x + y + z;
const numbers = [1, 2, 3];
console.log(sum(...numbers)); // Output: 6

The spread operator and its uses

Copying arrays

The spread operator can be used to create a shallow copy of an array. This is useful when you want to duplicate an array without affecting the original array.

const arr1 = [1, 2, 3];
const arr2 = [...arr1];
console.log(arr2); // Output: [1, 2, 3]

Merging arrays

You can use the spread operator to merge multiple arrays into one. This is a concise and readable way to combine arrays.

const arr1 = [1, 2, 3];
const arr3 = [4, 5, 6];
const mergedArray = [...arr1, ...arr3];
console.log(mergedArray); // Output: [1, 2, 3, 4, 5, 6]

Copying objects

Similar to arrays, the spread operator can be used to create a shallow copy of an object. This is useful for duplicating objects without affecting the original object.

const obj1 = { a: 1, b: 2 };
const obj2 = { ...obj1 };
console.log(obj2); // Output: { a: 1, b: 2 }

Merging objects

The spread operator can also be used to merge multiple objects into one. This is particularly useful for combining properties from different objects.

const obj1 = { a: 1, b: 2 };
const obj3 = { c: 3, d: 4 };
const mergedObject = { ...obj1, ...obj3 };
console.log(mergedObject); // Output: { a: 1, b: 2, c: 3, d: 4 }

Passing array elements as function arguments

The spread operator allows you to pass elements of an array as individual arguments to a function. This is useful for functions that accept multiple arguments.

const sum = (x, y, z) => x + y + z;
const numbers = [1, 2, 3];
console.log(sum(...numbers)); // Output: 6

Further reading

Explain the concept of the Strategy pattern

Topics
JavaScript

TL;DR

The Strategy pattern is a behavioral design pattern that allows you to define a family of algorithms, encapsulate each one as a separate class, and make them interchangeable. This pattern lets the algorithm vary independently from the clients that use it. For example, if you have different sorting algorithms, you can define each one as a strategy and switch between them without changing the client code.

class Context {
constructor(strategy) {
this.strategy = strategy;
}
executeStrategy(data) {
return this.strategy.doAlgorithm(data);
}
}
class ConcreteStrategyA {
doAlgorithm(data) {
// Implementation of algorithm A
return 'Algorithm A was run on ' + data;
}
}
class ConcreteStrategyB {
doAlgorithm(data) {
// Implementation of algorithm B
return 'Algorithm B was run on ' + data;
}
}
// Usage
const context = new Context(new ConcreteStrategyA());
context.executeStrategy('someData'); // Output: Algorithm A was run on someData

The Strategy pattern

Definition

The Strategy pattern is a behavioral design pattern that enables selecting an algorithm's behavior at runtime. It defines a family of algorithms, encapsulates each one, and makes them interchangeable. This pattern allows the algorithm to vary independently from the clients that use it.

Components

  1. Context: Maintains a reference to a Strategy object and is configured with a ConcreteStrategy object.
  2. Strategy: An interface common to all supported algorithms. The Context uses this interface to call the algorithm defined by a ConcreteStrategy.
  3. ConcreteStrategy: Implements the Strategy interface to provide a specific algorithm.

Example

Consider a scenario where you have different sorting algorithms and you want to switch between them without changing the client code.

// Strategy interface
class Strategy {
doAlgorithm(data) {
throw new Error('This method should be overridden!');
}
}
// ConcreteStrategyA
class ConcreteStrategyA extends Strategy {
doAlgorithm(data) {
return data.sort((a, b) => a - b); // Example: ascending sort
}
}
// ConcreteStrategyB
class ConcreteStrategyB extends Strategy {
doAlgorithm(data) {
return data.sort((a, b) => b - a); // Example: descending sort
}
}
// Context
class Context {
constructor(strategy) {
this.strategy = strategy;
}
setStrategy(strategy) {
this.strategy = strategy;
}
executeStrategy(data) {
return this.strategy.doAlgorithm(data);
}
}
// Usage
const data = [3, 1, 4, 1, 5, 9];
const context = new Context(new ConcreteStrategyA());
console.log(context.executeStrategy([...data])); // Output: [1, 1, 3, 4, 5, 9]
context.setStrategy(new ConcreteStrategyB());
console.log(context.executeStrategy([...data])); // Output: [9, 5, 4, 3, 1, 1]

Benefits

  • Flexibility: You can change the algorithm at runtime.
  • Maintainability: Adding new strategies does not affect existing code.
  • Encapsulation: Each algorithm is encapsulated in its own class.

Drawbacks

  • Overhead: Increased number of classes and objects.
  • Complexity: Can make the system more complex if not used judiciously.

Further reading

Explain the concept of the Web Socket API

Topics
JavaScriptNetworking

TL;DR

The WebSocket API provides a way to open a persistent connection between a client and a server, allowing for real-time, two-way communication. Unlike HTTP, which is request-response based, WebSocket enables full-duplex communication, meaning both the client and server can send and receive messages independently. This is particularly useful for applications like chat apps, live updates, and online gaming.

The following example uses Postman's WebSocket echo service to demonstrate how web sockets work.

// Postman's echo server that will echo back messages you send
const socket = new WebSocket('wss://ws.postman-echo.com/raw');
// Event listener for when the connection is open
socket.addEventListener('open', function (event) {
socket.send('Hello Server!'); // Sends the message to the Postman WebSocket server
});
// Event listener for when a message is received from the server
socket.addEventListener('message', function (event) {
console.log('Message from server ', event.data);
});

What is the WebSocket API?

The WebSocket API is a technology that provides a way to establish a persistent, low-latency, full-duplex communication channel between a client (usually a web browser) and a server. This is different from the traditional HTTP request-response model, which is stateless and requires a new connection for each request.

Key features

  • Full-duplex communication: Both the client and server can send and receive messages independently.
  • Low latency: The persistent connection reduces the overhead of establishing a new connection for each message.
  • Real-time updates: Ideal for applications that require real-time data, such as chat applications, live sports updates, and online gaming.

How it works

  1. Connection establishment: The client initiates a WebSocket connection by sending a handshake request to the server.
  2. Handshake response: The server responds with a handshake response, and if successful, the connection is established.
  3. Data exchange: Both the client and server can now send and receive messages independently over the established connection.
  4. Connection closure: Either the client or server can close the connection when it is no longer needed.

Example usage

Here is a basic example of how to use the WebSocket API in JavaScript, using Postman's WebSocket Echo Service.

// Postman's echo server that will echo back messages you send
const socket = new WebSocket('wss://ws.postman-echo.com/raw');
// Event listener for when the connection is open
socket.addEventListener('open', function (event) {
console.log('Connection opened');
socket.send('Hello Server!'); // Sends the message to the Postman WebSocket server
});
// Event listener for when a message is received from the server
socket.addEventListener('message', function (event) {
console.log('Message from server ', event.data);
});
// Event listener for when the connection is closed
socket.addEventListener('close', function (event) {
console.log('Connection closed');
});
// Event listener for when an error occurs
socket.addEventListener('error', function (event) {
console.error('WebSocket error: ', event);
});

Use cases

  • Chat applications: Real-time messaging between users.
  • Live updates: Stock prices, sports scores, or news updates.
  • Online gaming: Real-time interaction between players.
  • Collaborative tools: Real-time document editing or whiteboarding.

Further reading

Explain the concept of `this` binding in event handlers

Topics
ClosureWeb APIsJavaScript

TL;DR

In JavaScript, the this keyword refers to the object that is currently executing the code. In event handlers, this typically refers to the element that triggered the event. However, the value of this can change depending on how the event handler is defined and called. To ensure this refers to the desired object, you can use methods like bind(), arrow functions, or assign the context explicitly.


The concept of this binding in event handlers

Understanding this in JavaScript

In JavaScript, the this keyword is a reference to the object that is currently executing the code. The value of this is determined by how a function is called, not where it is defined. This can lead to different values of this in different contexts.

this in event handlers

In the context of event handlers, this usually refers to the DOM element that triggered the event. For example:

// Create a button element and append it to the DOM
const button = document.createElement('button');
button.id = 'myButton';
document.body.appendChild(button);
document.getElementById('myButton').addEventListener('click', function () {
console.log(this); // `this` refers to the 'myButton' element
});
button.click(); // Logs the button element

In this example, this inside the event handler refers to the button element that was clicked.

Changing the value of this

There are several ways to change the value of this in event handlers:

Using bind()

The bind() method creates a new function that, when called, has its this keyword set to the provided value:

// Create a button element and append it to the DOM
const button = document.createElement('button');
button.id = 'myButton';
document.body.appendChild(button);
function handleClick() {
console.log(this); // Logs the object passed to bind()
}
const obj = { name: 'MyObject' };
document
.getElementById('myButton')
.addEventListener('click', handleClick.bind(obj));
button.click(); // Logs obj because handleClick was bound to obj using bind()

In this example, this inside handleClick refers to obj.

Using arrow functions

Arrow functions do not have their own this context; they inherit this from the surrounding lexical context:

// Create a button element and append it to the DOM
const button = document.createElement('button');
button.id = 'myButton';
document.body.appendChild(button);
const obj = {
name: 'MyObject',
handleClick: function () {
document.getElementById('myButton').addEventListener('click', () => {
console.log(this); // Logs obj
});
},
};
obj.handleClick();
button.click(); // This will log obj

In this example, this inside the arrow function refers to obj.

Assigning the context explicitly

You can also assign the context explicitly by using a variable:

// Create a button element and append it to the DOM
const button = document.createElement('button');
button.id = 'myButton';
document.body.appendChild(button);
const obj = {
name: 'MyObject',
handleClick: function () {
const self = this;
document.getElementById('myButton').addEventListener('click', function () {
console.log(self); // Logs obj
});
},
};
obj.handleClick();
button.click(); // This will log obj

In this example, self is used to capture the value of this from the outer function.

Further reading

Explain the concept of tree shaking in module bundling

Topics
JavaScript

TL;DR

Tree shaking is a technique used in module bundling to eliminate dead code, which is code that is never used or executed. This helps to reduce the final bundle size and improve application performance. It works by analyzing the dependency graph of the code and removing any unused exports. Tools like Webpack and Rollup support tree shaking when using ES6 module syntax (import and export).


The concept of tree shaking in module bundling

Tree shaking is a term commonly used in the context of JavaScript module bundlers like Webpack and Rollup. It refers to the process of eliminating dead code from the final bundle, which helps in reducing the bundle size and improving the performance of the application.

How tree shaking works

Tree shaking works by analyzing the dependency graph of the code. It looks at the import and export statements to determine which parts of the code are actually used and which are not. The unused code, also known as dead code, is then removed from the final bundle.

Example

Consider the following example:

// utils.js
export function add(a, b) {
return a + b;
}
export function subtract(a, b) {
return a - b;
}
// main.js
import { add } from './utils';
console.log(add(2, 3));

In this example, the subtract function is never used in main.js. A tree-shaking-enabled bundler will recognize this and exclude the subtract function from the final bundle.

Requirements for tree shaking

  1. ES6 module syntax: Tree shaking relies on the static structure of ES6 module syntax (import and export). CommonJS modules (require and module.exports) are not statically analyzable and thus not suitable for tree shaking.
  2. Bundler support: The bundler you are using must support tree shaking. Both Webpack and Rollup have built-in support for tree shaking.

Tools that support tree shaking

  • Webpack: Webpack supports tree shaking out of the box when using ES6 modules. You can enable it by setting the mode to production in your Webpack configuration.
  • Rollup: Rollup is designed with tree shaking in mind and provides excellent support for it.

Benefits of tree shaking

  • Reduced bundle size: By removing unused code, the final bundle size is reduced, leading to faster load times.
  • Improved performance: Smaller bundles mean less code to parse and execute, which can improve the performance of your application.

Further reading

Explain the difference between classical inheritance and prototypal inheritance

Topics
JavaScriptOOP

TL;DR

Classical inheritance is a model where classes inherit from other classes, typically seen in languages like Java and C++. Prototypal inheritance, used in JavaScript, involves objects inheriting directly from other objects. In classical inheritance, you define a class and create instances from it. In prototypal inheritance, you create an object and use it as a prototype for other objects.


Difference between classical inheritance and prototypal inheritance

Classical inheritance

Classical inheritance is a pattern used in many object-oriented programming languages like Java, C++, and Python. It involves creating a class hierarchy where classes inherit properties and methods from other classes.

  • Class definition: You define a class with properties and methods.
  • Instantiation: You create instances (objects) of the class.
  • Inheritance: A class can inherit from another class, forming a parent-child relationship.

Example in Java:

class Animal {
void eat() {
System.out.println("This animal eats food.");
}
}
class Dog extends Animal {
void bark() {
System.out.println("The dog barks.");
}
}
public class Main {
public static void main(String[] args) {
Dog dog = new Dog();
dog.eat(); // Inherited method
dog.bark(); // Own method
}
}

Prototypal inheritance

Prototypal inheritance is a feature of JavaScript where objects inherit directly from other objects. There are no classes; instead, objects serve as prototypes for other objects.

  • Object creation: You create an object directly.
  • Prototype chain: Objects can inherit properties and methods from other objects through the prototype chain.
  • Flexibility: You can dynamically add or modify properties and methods.

Example in JavaScript:

const animal = {
eat() {
console.log('This animal eats food.');
},
};
const dog = Object.create(animal);
dog.bark = function () {
console.log('The dog barks.');
};
dog.eat(); // Inherited method (Output: The animal eats food.)
dog.bark(); // Own method (Output: The dog barks.)

Key differences

  • Class-based vs. prototype-based: Classical inheritance uses classes, while prototypal inheritance uses objects.
  • Inheritance model: Classical inheritance forms a class hierarchy, whereas prototypal inheritance forms a prototype chain.
  • Flexibility: Prototypal inheritance is more flexible and dynamic, allowing for changes at runtime.

Further reading

Explain the difference between `document.querySelector()` and `document.getElementById()`

Topics
Web APIsJavaScriptHTML

TL;DR

document.querySelector() and document.getElementById() are both methods used to select elements from the DOM, but they have key differences. document.querySelector() can select any element using a CSS selector and returns the first match, while document.getElementById() selects an element by its ID and returns the element with that specific ID.

// Using document.querySelector()
const element = document.querySelector('.my-class');
// Using document.getElementById()
const elementById = document.getElementById('my-id');

Difference between document.querySelector() and document.getElementById()

document.querySelector()

  • Can select elements using any valid CSS selector, including class, ID, tag, attribute, and pseudo-classes
  • Returns the first element that matches the specified selector
  • More versatile but slightly slower due to the flexibility of CSS selectors
// Select the first element with the class 'my-class'
const element = document.querySelector('.my-class');
// Select the first <div> element
const divElement = document.querySelector('div');
// Select the first element with the attribute data-role='button'
const buttonElement = document.querySelector('[data-role="button"]');

document.getElementById()

  • Selects an element by its ID attribute
  • Returns the element with the specified ID
  • Faster and more efficient for selecting elements by ID, but less versatile
// Select the element with the ID 'my-id'
const elementById = document.getElementById('my-id');

Key differences

  • Selector type: document.querySelector() uses CSS selectors, while document.getElementById() uses only the ID attribute.
  • Return value: document.querySelector() returns the first matching element, whereas document.getElementById() returns the element with the specified ID.
  • Performance: document.getElementById() is generally faster because it directly accesses the element by ID, while document.querySelector() has to parse the CSS selector.

Further reading

Explain the difference between dot notation and bracket notation for accessing object properties

Topics
JavaScript

TL;DR

Dot notation and bracket notation are two ways to access properties of an object in JavaScript. Dot notation is more concise and readable but can only be used with valid JavaScript identifiers. Bracket notation is more flexible and can be used with property names that are not valid identifiers, such as those containing spaces or special characters.

const obj = { name: 'Alice', 'favorite color': 'blue' };
// Dot notation
console.log(obj.name); // Alice
// Bracket notation
console.log(obj['favorite color']); // blue

Dot notation vs. bracket notation

Dot notation

Dot notation is the most common and straightforward way to access object properties. It is concise and easy to read but has some limitations.

Syntax
object.property;
Example
const person = {
name: 'Alice',
age: 30,
};
console.log(person.name); // Alice
console.log(person.age); // 30
Limitations
  • Property names must be valid JavaScript identifiers (e.g., no spaces, special characters, or starting with a number)
  • Property names cannot be dynamic (i.e., they must be hardcoded)

Bracket notation

Bracket notation is more flexible and can be used in situations where dot notation cannot.

Syntax
object['property'];
Example
const person = {
name: 'Alice',
'favorite color': 'blue',
1: 'one',
};
console.log(person['name']); // Alice
console.log(person['favorite color']); // blue
console.log(person[1]); // one
Advantages
  • Can access properties with names that are not valid JavaScript identifiers
  • Can use variables or expressions to dynamically determine the property name
Example with dynamic property names
const person = {
name: 'Alice',
age: 30,
};
const property = 'name';
console.log(person[property]); // Alice

Further reading

Explain the difference between global scope, function scope, and block scope

Topics
JavaScript

TL;DR

Global scope means variables are accessible from anywhere in the code. Function scope means variables are accessible only within the function they are declared in. Block scope means variables are accessible only within the block (e.g., within {}) they are declared in.

var globalVar = "I'm global"; // Global scope
function myFunction() {
var functionVar = "I'm in a function"; // Function scope
if (true) {
let blockVar = "I'm in a block"; // Block scope
console.log(blockVar); // Accessible here
}
// console.log(blockVar); // Uncaught ReferenceError: blockVar is not defined
}
// console.log(functionVar); // Uncaught ReferenceError: functionVar is not defined
myFunction();

Global scope, function scope, and block scope

Global scope

Variables declared in the global scope are accessible from anywhere in the code. In a browser environment, these variables become properties of the window object.

var globalVar = "I'm global";
function checkGlobal() {
console.log(globalVar); // Accessible here
}
checkGlobal(); // Output: "I'm global"
console.log(globalVar); // Output: "I'm global"

Function scope

Variables declared within a function are only accessible within that function. This is true for variables declared using var, let, or const.

function myFunction() {
var functionVar = "I'm in a function";
console.log(functionVar); // Accessible here
}
myFunction(); // Output: "I'm in a function"
console.log(functionVar); // Uncaught ReferenceError: functionVar is not defined

Block scope

Variables declared with let or const within a block (e.g., within {}) are only accessible within that block. This is not true for var, which is function-scoped.

if (true) {
let blockVar = "I'm in a block";
console.log(blockVar); // Accessible here
}
// console.log(blockVar); // Uncaught ReferenceError: blockVar is not defined
if (true) {
var blockVarVar = "I'm in a block but declared with var";
console.log(blockVarVar); // Accessible here
}
console.log(blockVarVar); // Output: "I'm in a block but declared with var"

Further reading

Explain the difference between shallow copy and deep copy

Topics
JavaScript

TL;DR

A shallow copy duplicates the top-level properties of an object, but nested objects are still referenced. A deep copy duplicates all levels of an object, creating entirely new instances of nested objects. For example, using Object.assign() creates a shallow copy, while using libraries like Lodash or structuredClone() in modern JavaScript can create deep copies.

// Shallow copy example
let obj1 = { a: 1, b: { c: 2 } };
let shallowCopy = Object.assign({}, obj1);
shallowCopy.b.c = 3;
console.log(shallowCopy.b.c); // Output: 3
console.log(obj1.b.c); // Output: 3 (original nested object changed too!)
// Deep copy example
let obj2 = { a: 1, b: { c: 2 } };
let deepCopy = JSON.parse(JSON.stringify(obj2));
deepCopy.b.c = 4;
console.log(deepCopy.b.c); // Output: 4
console.log(obj2.b.c); // Output: 2 (original nested object remains unchanged)

Difference between shallow copy and deep copy

Shallow copy

A shallow copy creates a new object and copies the values of the original object's top-level properties into the new object. However, if any of these properties are references to other objects, only the reference is copied, not the actual object. This means that changes to nested objects in the copied object will affect the original object.

Example
let obj1 = { a: 1, b: { c: 2 } };
let shallowCopy = Object.assign({}, obj1);
shallowCopy.b.c = 3;
console.log(shallowCopy.b.c); // Output: 3
console.log(obj1.b.c); // Output: 3 (original nested object changed too!)

In this example, shallowCopy is a shallow copy of obj1. Changing shallowCopy.b.c also changes obj1.b.c because b is a reference to the same object in both obj1 and shallowCopy.

Deep copy

A deep copy creates a new object and recursively copies all properties and nested objects from the original object. This means that the new object is completely independent of the original object, and changes to nested objects in the copied object do not affect the original object.

Example
let obj1 = { a: 1, b: { c: 2 } };
let deepCopy = JSON.parse(JSON.stringify(obj1));
deepCopy.b.c = 4;
console.log(deepCopy.b.c); // Output: 4
console.log(obj1.b.c); // Output: 2 (original nested object remains unchanged)

In this example, deepCopy is a deep copy of obj1. Changing deepCopy.b.c does not affect obj1.b.c because b is a completely new object in deepCopy.

Methods to create shallow and deep copies

Shallow copy methods
  • Object.assign()
  • Spread operator (...)
Deep copy methods
  • JSON.parse(JSON.stringify())
  • structuredClone() (modern JavaScript)
  • Libraries like Lodash (_.cloneDeep)

Further reading

Explain the difference between unit testing, integration testing, and end-to-end testing

Topics
JavaScriptTesting

TL;DR

Unit testing focuses on testing individual components or functions in isolation to ensure they work as expected. Integration testing checks how different modules or services work together. End-to-end testing simulates real user scenarios to verify the entire application flow from start to finish.


Difference between unit testing, integration testing, and end-to-end testing

Unit testing

Unit testing involves testing individual components or functions in isolation. The goal is to ensure that each part of the code works correctly on its own. These tests are usually written by developers and are the first line of defense against bugs.

  • Scope: Single function or component
  • Tools: Jest, Mocha, Jasmine
  • Example: Testing a function that adds two numbers
function add(a, b) {
return a + b;
}
test('adds 1 + 2 to equal 3', () => {
expect(add(1, 2)).toBe(3);
});

Integration testing

Integration testing focuses on verifying the interactions between different modules or services. The goal is to ensure that combined parts of the application work together as expected. These tests are usually more complex than unit tests and may involve multiple components.

  • Scope: Multiple components or services
  • Tools: Jest, Mocha, Jasmine, Postman (for API testing)
  • Example: Testing a function that fetches data from an API and processes it
async function fetchData(apiUrl) {
const response = await fetch(apiUrl);
const data = await response.json();
return processData(data);
}
test('fetches and processes data correctly', async () => {
const apiUrl = 'https://api.example.com/data';
const data = await fetchData(apiUrl);
expect(data).toEqual(expectedProcessedData);
});

End-to-end testing

End-to-end (E2E) testing simulates real user scenarios to verify the entire application flow from start to finish. The goal is to ensure that the application works as a whole, including the user interface, backend, and any external services.

  • Scope: Entire application
  • Tools: Cypress, Selenium, Puppeteer
  • Example: Testing a user login flow
describe('User Login Flow', () => {
it('should allow a user to log in', () => {
cy.visit('https://example.com/login');
cy.get('input[name="username"]').type('testuser');
cy.get('input[name="password"]').type('password123');
cy.get('button[type="submit"]').click();
cy.url().should('include', '/dashboard');
});
});

Further reading

Explain the difference in hoisting between `var`, `let`, and `const`

Topics
JavaScript

TL;DR

var declarations are hoisted to the top of their scope and initialized with undefined, allowing them to be used before their declaration. let and const declarations are also hoisted but are not initialized, resulting in a ReferenceError if accessed before their declaration. const additionally requires an initial value at the time of declaration.


Hoisting differences between var, let, and const

var hoisting

var declarations are hoisted to the top of their containing function or global scope. This means the variable is available throughout the entire function or script, even before the line where it is declared. However, the variable is initialized with undefined until the actual declaration is encountered.

console.log(a); // Output: undefined
var a = 10;
console.log(a); // Output: 10

let hoisting

let declarations are also hoisted to the top of their block scope, but they are not initialized. This creates a "temporal dead zone" (TDZ) from the start of the block until the declaration is encountered. Accessing the variable in the TDZ results in a ReferenceError.

console.log(b); // ReferenceError: Cannot access 'b' before initialization
let b = 20;
console.log(b); // Output: 20

const hoisting

const declarations behave similarly to let in terms of hoisting. They are hoisted to the top of their block scope but are not initialized, resulting in a TDZ. Additionally, const requires an initial value at the time of declaration and cannot be reassigned.

console.log(c); // ReferenceError: Cannot access 'c' before initialization
const c = 30;
console.log(c); // Output: 30

Further reading

Explain the different states of a Promise

Topics
AsyncJavaScript

TL;DR

A Promise in JavaScript can be in one of three states: pending, fulfilled, or rejected. When a Promise is created, it starts in the pending state. If the operation completes successfully, the Promise transitions to the fulfilled state, and if it fails, it transitions to the rejected state. Here's a quick example:

let promise = new Promise((resolve, reject) => {
// some asynchronous operation
if (success) {
resolve('Success!');
} else {
reject('Error!');
}
});

Different states of a Promise

Pending

When a Promise is first created, it is in the pending state. This means that the asynchronous operation has not yet completed.

let promise = new Promise((resolve, reject) => {
// asynchronous operation
});

Fulfilled

A Promise transitions to the fulfilled state when the asynchronous operation completes successfully. The resolve function is called to indicate this.

let promise = new Promise((resolve, reject) => {
resolve('Success!');
});

Rejected

A Promise transitions to the rejected state when the asynchronous operation fails. The reject function is called to indicate this.

let promise = new Promise((resolve, reject) => {
reject('Error!');
});

Further reading

Explain the different ways the `this` keyword can be bound

Topics
ClosureJavaScript

TL;DR

The this keyword in JavaScript can be bound in several ways:

  • Default binding: In non-strict mode, this refers to the global object (window in browsers). In strict mode, this is undefined.
  • Implicit binding: When a function is called as a method of an object, this refers to the object.
  • Explicit binding: Using call, apply, or bind methods to explicitly set this.
  • New binding: When a function is used as a constructor with the new keyword, this refers to the newly created object.
  • Arrow functions: Arrow functions do not have their own this and inherit this from the surrounding lexical context.

Default binding

In non-strict mode, if a function is called without any context, this refers to the global object (window in browsers). In strict mode, this is undefined.

function showThis() {
console.log(this);
}
showThis(); // In non-strict mode: window, in strict mode: undefined

Implicit binding

When a function is called as a method of an object, this refers to the object.

const obj = {
name: 'Alice',
greet: function () {
console.log(this.name);
},
};
obj.greet(); // 'Alice'

Explicit binding

Using call, apply, or bind methods, you can explicitly set this.

Using call

function greet() {
console.log(this.name);
}
const person = { name: 'Bob' };
greet.call(person); // 'Bob'

Using apply

function greet(greeting) {
console.log(greeting + ', ' + this.name);
}
const person = { name: 'Charlie' };
greet.apply(person, ['Hello']); // 'Hello, Charlie'

Using bind

function greet() {
console.log(this.name);
}
const person = { name: 'Dave' };
const boundGreet = greet.bind(person);
boundGreet(); // 'Dave'

New binding

When a function is used as a constructor with the new keyword, this refers to the newly created object.

function Person(name) {
this.name = name;
}
const person = new Person('Eve');
console.log(person.name); // 'Eve'

Arrow functions

Arrow functions do not have their own this and inherit this from the surrounding lexical context.

const obj = {
firstName: 'Frank',
greet: () => {
console.log(this.firstName);
},
};
obj.greet(); // undefined, because `this` is inherited from the global scope

Further reading

Explain the event phases in a browser

Topics
BrowserJavaScript

TL;DR

In a browser, events go through three phases: capturing, target, and bubbling. During the capturing phase, the event travels from the root to the target element. In the target phase, the event reaches the target element. Finally, in the bubbling phase, the event travels back up from the target element to the root. You can control event handling using addEventListener with the capture option.


Event phases in a browser

Capturing phase

The capturing phase, also known as the trickling phase, is the first phase of event propagation. During this phase, the event starts from the root of the DOM tree and travels down to the target element. Event listeners registered for this phase will be triggered in the order from the outermost ancestor to the target element.

element.addEventListener('click', handler, true); // true indicates capturing phase

Target phase

The target phase is the second phase of event propagation. In this phase, the event has reached the target element itself. Event listeners registered directly on the target element will be triggered during this phase.

element.addEventListener('click', handler); // default is target phase

Bubbling phase

The bubbling phase is the final phase of event propagation. During this phase, the event travels back up from the target element to the root of the DOM tree. Event listeners registered for this phase will be triggered in the order from the target element to the outermost ancestor.

element.addEventListener('click', handler, false); // false indicates bubbling phase

Controlling event propagation

You can control event propagation using methods like stopPropagation and stopImmediatePropagation. These methods can be called within an event handler to stop the event from propagating further.

element.addEventListener('click', function (event) {
event.stopPropagation(); // Stops the event from propagating further
});

Further reading

Explain the Observer pattern and its use cases

Topics
JavaScript

TL;DR

The Observer pattern is a design pattern where an object, known as the subject, maintains a list of its dependents, called observers, and notifies them of any state changes. This pattern is useful for implementing distributed event-handling systems, such as updating the user interface in response to data changes or implementing event-driven architectures.


What is the Observer pattern?

The Observer pattern is a behavioral design pattern that defines a one-to-many dependency between objects. When the state of the subject (the one) changes, all its observers (the many) are notified and updated automatically. This pattern is particularly useful for scenarios where changes in one object need to be reflected in multiple other objects without tightly coupling them.

Key components

  1. Subject: The object that holds the state and sends notifications to observers.
  2. Observer: The objects that need to be notified of changes in the subject.
  3. ConcreteSubject: A specific implementation of the subject.
  4. ConcreteObserver: A specific implementation of the observer.

Example

Here is a simple example in JavaScript:

class Subject {
constructor() {
this.observers = [];
}
addObserver(observer) {
this.observers.push(observer);
}
removeObserver(observer) {
this.observers = this.observers.filter((obs) => obs !== observer);
}
notifyObservers() {
this.observers.forEach((observer) => observer.update());
}
}
class Observer {
update() {
console.log('Observer updated');
}
}
// Usage
const subject = new Subject();
const observer1 = new Observer();
const observer2 = new Observer();
subject.addObserver(observer1);
subject.addObserver(observer2);
subject.notifyObservers(); // Both observers will be updated

Use cases

User interface updates

In front end development, the Observer pattern is commonly used to update the user interface in response to changes in data. For example, in a Model-View-Controller (MVC) architecture, the view can observe the model and update itself whenever the model's state changes.

Event handling

The Observer pattern is useful for implementing event-driven systems. For instance, in JavaScript, the addEventListener method allows you to register multiple event handlers (observers) for a single event (subject).

Real-time data feeds

Applications that require real-time updates, such as stock tickers or chat applications, can benefit from the Observer pattern. Observers can subscribe to data feeds and get notified whenever new data is available.

Dependency management

In complex applications, managing dependencies between different modules can be challenging. The Observer pattern helps decouple these modules, making the system more modular and easier to maintain.

Further reading

How can closures be used to create private variables?

Topics
ClosureJavaScript

TL;DR

Closures in JavaScript can be used to create private variables by defining a function within another function. The inner function has access to the outer function's variables, but those variables are not accessible from outside the outer function. This allows you to encapsulate and protect the variables from being accessed or modified directly.

function createCounter() {
let count = 0; // private variable
return {
increment: function () {
count++;
return count;
},
decrement: function () {
count--;
return count;
},
getCount: function () {
return count;
},
};
}
const counter = createCounter();
console.log(counter.increment()); // 1
console.log(counter.getCount()); // 1
console.log(counter.count); // undefined

How can closures be used to create private variables?

Understanding closures

A closure is a feature in JavaScript where an inner function has access to the outer (enclosing) function's variables. This includes:

  • Variables declared within the outer function's scope
  • Parameters of the outer function
  • Variables from the global scope

Creating private variables

To create private variables using closures, you can define a function that returns an object containing methods. These methods can access and modify the private variables, but the variables themselves are not accessible from outside the function.

Example

Here's a detailed example to illustrate how closures can be used to create private variables:

function createCounter() {
let count = 0; // private variable
return {
increment: function () {
count++;
return count;
},
decrement: function () {
count--;
return count;
},
getCount: function () {
return count;
},
};
}
const counter = createCounter();
console.log(counter.increment()); // 1
console.log(counter.increment()); // 2
console.log(counter.decrement()); // 1
console.log(counter.getCount()); // 1
console.log(counter.count); // undefined

Explanation

  1. Outer function: createCounter is the outer function that defines a private variable count.
  2. Inner functions: The object returned by createCounter contains methods (increment, decrement, and getCount) that form closures. These methods have access to the count variable.
  3. Encapsulation: The count variable is not accessible directly from outside the createCounter function. It can only be accessed and modified through the methods provided.

Benefits

  • Encapsulation: Private variables help in encapsulating the state and behavior of an object, preventing unintended interference.
  • Data integrity: By restricting direct access to variables, you can ensure that they are modified only through controlled methods.

Further reading

What is the difference between `==` and `===` in JavaScript?